Documents & Attachments
Attachment/File Configurations
Important
Information and features vary according to the roles to which you belong and the permissions associated with those roles. For more information, contact your module manager or your campus support team.
Use this page to define attachment/file types and the file extensions that are allowed in the system. Attachment/file types can be associated with various module processes, and the allowable file extensions restrict which attachments can be added to the system.
Attachment/file configurations are used throughout the system wherever attachments or documents can be added to records, including Document Storage Setup in Desktop and form question settings in Campus Portal FormFlow.
To manage attachment/file configurations, you must belong to a role with Can manage attachment/file configurations enabled. Jenzabar provides this permission with the Core, Documents and Attachments role, but your school may have created a customized version of this role.
You can create various attachment types that are specific to module processes. Jenzabar recommends creating multiple attachment types to distinguish them from each other. For example, if your school collects multiple essays from candidates, you might create one type for a personal essay and another type for a writing prompt essay. Both essays will be tied to the candidate's record, and the attachment type distinguishes the two essays.
Note
Jenzabar provides several default attachment types associated with module processes. These types cannot be edited or removed and are identified by a lock icon.
Desktop Location
Attachment type definitions can also be managed in the Desktop Attachment Type Definition window. Changes made in J1 Web are saved in Desktop and vice versa.
Database Location
Definitions are stored in the ATTACHMENT_TYPE_DEF table.
Fields
All fields are required.
Type Code allows up to 10 characters and must be unique.
Description allows up to 60 characters.
The Use Code associates the attachment type with a specific module or process. The same Use Code can be associated with multiple attachment types. For example, both the personal essay and writing prompt attachment types can be associated with the AD_CANDCY Use Code.
Use Codes are included with default data and cannot be updated in Desktop or J1 Web.
These definitions identify which file extensions can be added to the system (e.g., DOCX or PDF).
Desktop Location
Allowable file extensions can also be managed in the Desktop Define Allowed File Extensions window. Changes made in J1 Web are saved in Desktop and vice versa.
Database Location
Definitions are stored in the ATTACHMENT_FORMAT_DEF table.
Fields
All fields are required.
File Extension allows up to 10 characters and must be unique. Do not include the dot for file extension definitions (i.e., "PDF", not ".PDF").
Description allows up to 255 characters.
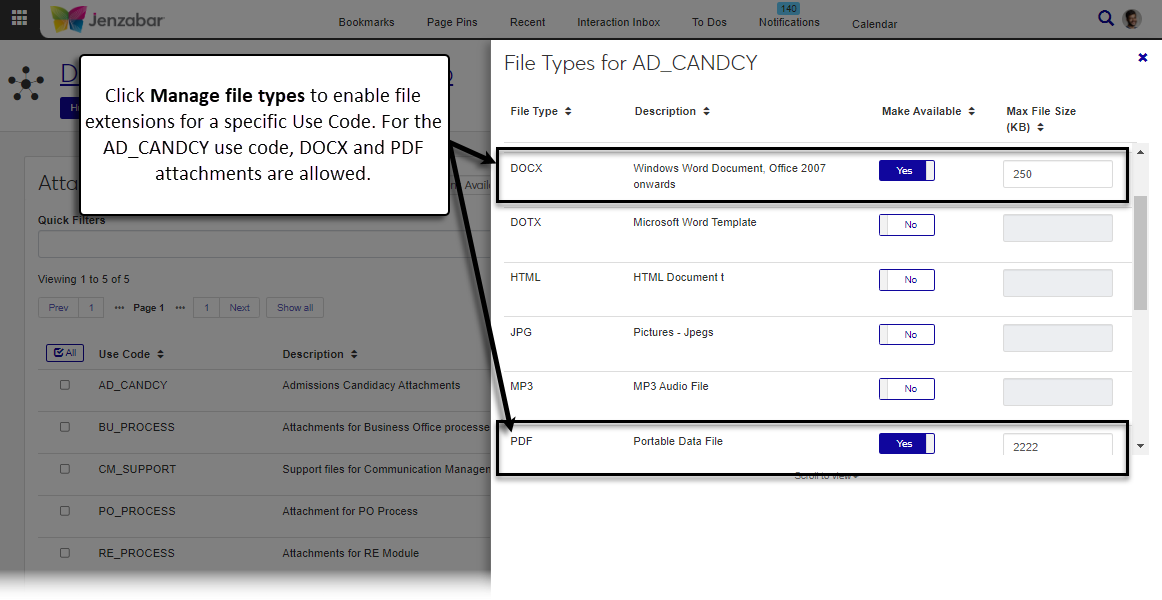
This page lets you manage the file extensions allowed for each use code and set the the max file size for the available file extensions. When file extensions are associated with a use code, those file types are available throughout that module. For example, to allow candidates to submit essays as a PDF or a DOCX, both file extensions must be enabled for the AD_CANDCY use code.
If a file extension is not listed, you can navigate back to the File Extensions Definition page to add it.
Desktop Location
You can also manage where file extensions are available in the Desktop Make File Extensions Available window.
Database Location
Updates to available file extensions for each use code are saved to the ATTACHMENT_FORMAT_USE table.
From the Documents and Attachments hub, select Attachment/File Configurations from the Hub options.
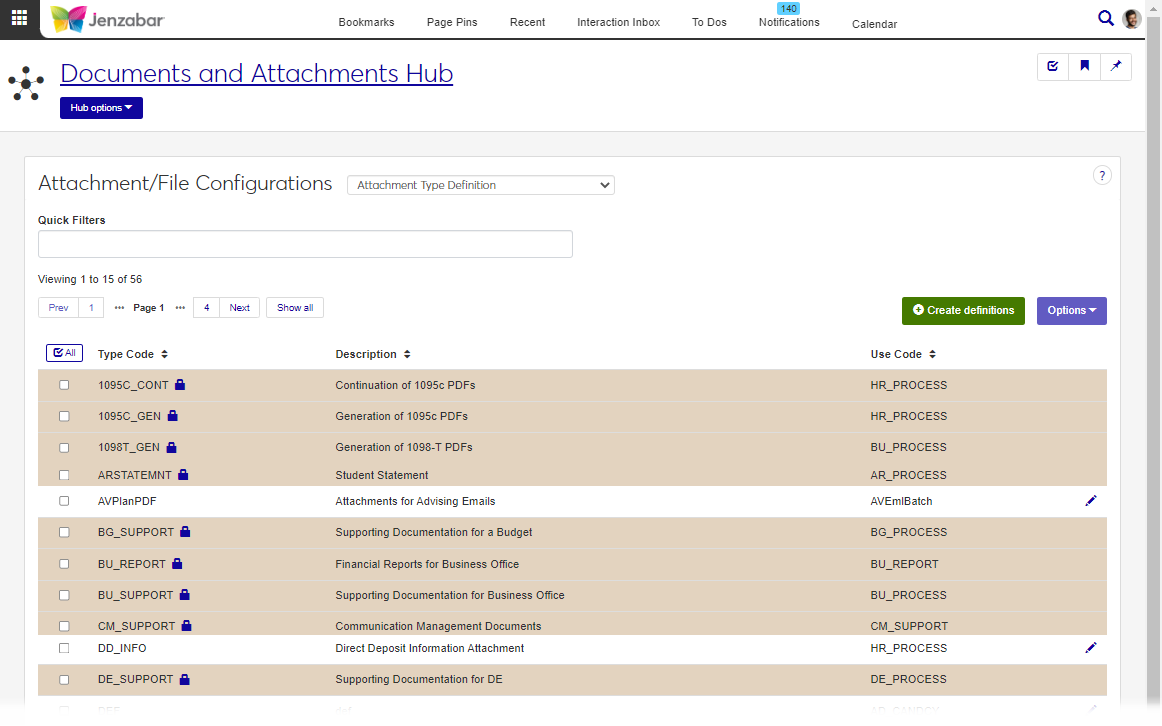
Select Attachment Type Definition from the drop-down.
Enter a keyword in the Quick Filters, or use the column sort to organize the definitions.
From the Documents and Attachments hub, select Attachment/File Configurations from the Hub options.
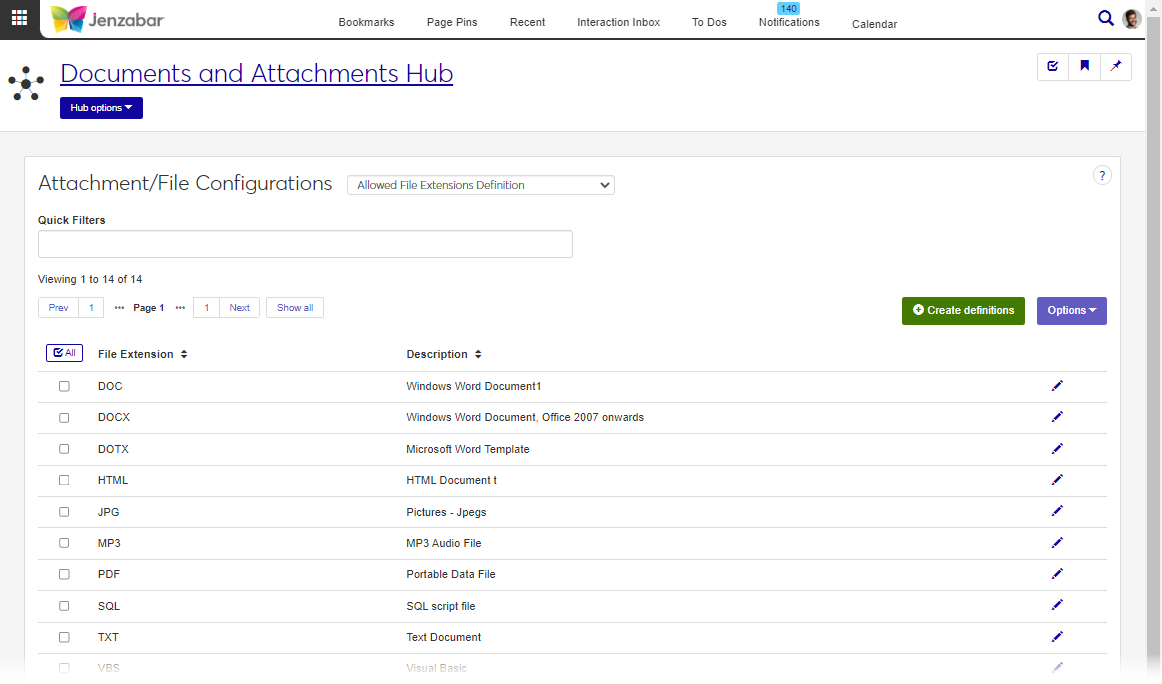
Select Allowed File Extensions Definition from the drop-down.
Enter a keyword in the Quick Filters, or use the column sort to organize the definitions.
From the Documents and Attachments hub, select Attachment/File Configurations from the Hub options.
Select Make File Extensions Available for Attachment from the drop-down.
Enter a keyword in the Quick Filters, or use the column sort to organize the Use Codes.
Click the Manage file types button to see the file extensions available for that use code.
From the Documents and Attachments hub, select Attachment/File Configurations from the Hub options.
Select Attachment Type Definition from the drop-down.
Click Create definitions.
On the Create Attachment Type pop-up:
Enter a unique Type Code, up to 10 characters.
Enter a Description, up to 60 characters.
Select a Use Code from the drop-down.
Click Save and create another or Create and close.
From the Documents and Attachments hub, select Attachment/File Configurations from the Hub options.
Select Allowed File Extensions Definition from the drop-down.
Note
You can also access the Allowed File Extensions Definition page from the Create file extension link on the Make File Extensions Available for Attachment page.
Click Create definitions.
On the Create File Extension pop-up:
Enter a unique File Extension, up to 10 characters. Do not include the dot for the file extension (i.e., "PDF", not ".PDF").
Enter a Description, up to 255 characters.
Click Save and create another or Create and close.
Jenzabar-provided attachment types cannot be edited or deleted and are identified with a lock icon.
From the Documents and Attachments hub, select Attachment/File Configurations from the Hub options.
Select Attachment Type Definition from the drop-down.
Click the Edit icon for a definition row.
On the Edit Attachment Type pop-up, make updates to the Description and/or Use Code. The Type Code cannot be updated.
Click Update.
From the Documents and Attachments hub, select Attachment/File Configurations from the Hub options.
Select Allowed File Extensions Definition from the drop-down.
Click the Edit icon for a definition row.
On the Edit File Extension pop-up, make updates to the Description. The File Extension cannot be updated.
Click Update.
From the Documents and Attachments hub, select Attachment/File Configurations from the Hub options.
Select Make File Extensions Available for Attachment from the drop-down.
Click the Manage file types button for a use code.
On the File Types for [Use Code] pop-up, click the option in the Make Available column to Yes or No. When set to Yes, attachments with that file type can be added to the system.
Enter a Max File Size (KB) when Make Available is set to Yes. Minimum value is 1.
Repeat Steps 4 and 5 for each file type you want to make available.
Click Save.
From the Documents and Attachments hub, select Attachment/File Configurations from the Hub options.
Select Allowed File Extensions Definition or Attachment Type Definition from the drop-down.
Select the checkbox next to each definition you want to delete.
Select Delete from the Options drop-down. The Delete Definitions? pop-up opens.
The Delete Definitions? pop-up lists the selected definitions in two categories:
Ready to Delete (for definitions that can be deleted)
Unable to Delete (for definitions that can't be deleted, either because they're in use or are protected by the system)
If you decide not to delete one or more of the definitions listed under Ready to Delete, click the Remove icon to remove them from the list.
When you're sure you want to delete all the rows listed under Ready to Delete, click Yes, delete.
Select the checkboxes next to the rows you want to export.
From the Options drop-down, select Download to Excel. The Download to Excel pop-up opens.
Select options for the Excel format and data columns.
Click Download. Your .xlsx or .zip file is saved in the file location that you have set in your browser settings.
An attachment type code can only be associated with one Use Code. However, you can create multiple type codes with similar descriptions that are tied to different use codes. For example, if you need to collect resumes from graduate candidates and also for your HR department, you might create attachments types like this.
Type Code | Description | Use Code |
|---|---|---|
RES_CAND | Resume for MBA candidates | AD_CANDCY |
RES_HR | Resume for new employees | HR_PROCESS |
Contact your campus support team for additional information about which use codes are appropriate for the attachment types you create.