Invoices
Important
Information and features vary according to the roles to which you belong and the permissions associated with those roles. For more information, contact your module manager or your campus support team.
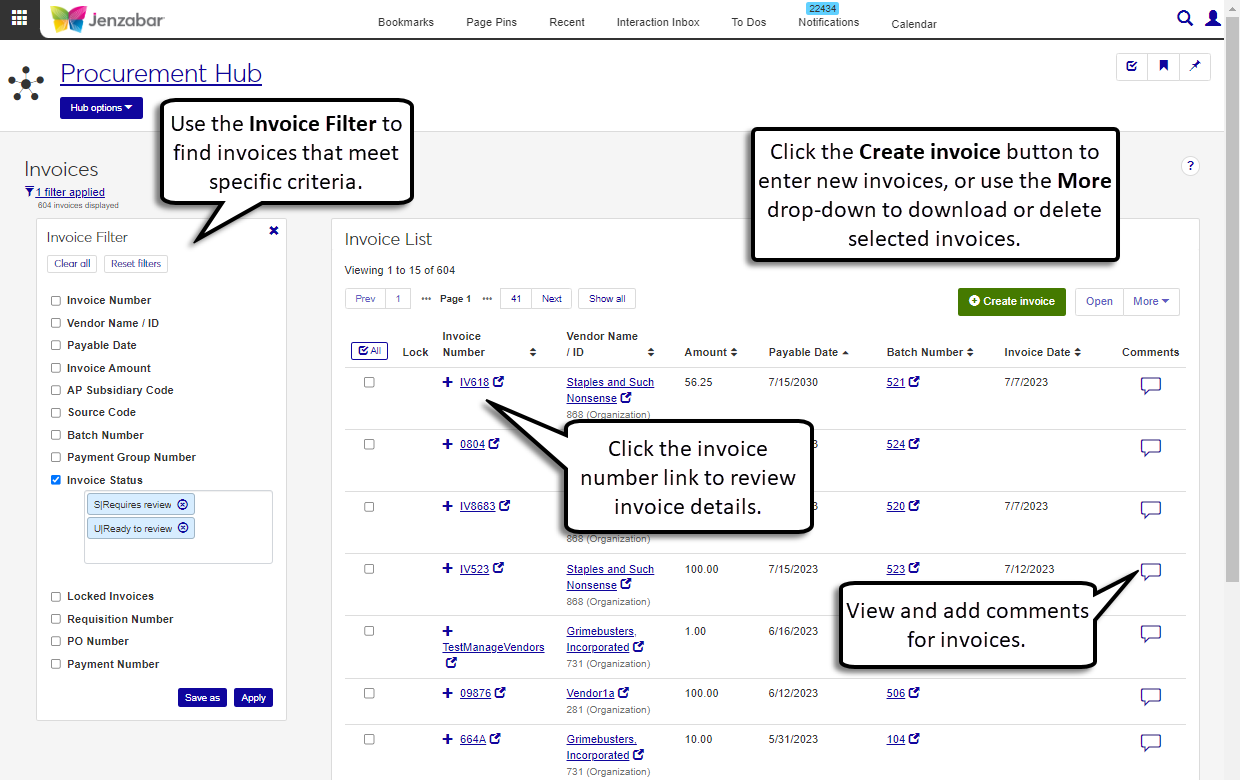
The Invoices page lists the invoices in your system. Use the advanced filter to review invoices based on specific criteria such as invoice number, status, or vendor name. You can also create, download, or delete invoices from this page.
Permissions Required
To access the Invoice List page, you must be in a Procurement - Accounts Payable role with "Can view invoices" permissions. To view invoice batches, you must also be in a General Ledger Accounting Accounts Payable Batches role with Associations enabled for invoice source codes (IV, IM, MN, or RF).
For more information about permissions to work with invoices, see Roles and Permissions to Work with Vendors and Invoices.
Desktop Location
You can work with unposted and suspended invoices from Desktop's Create Vendor Invoices window.
Invoice Commenting
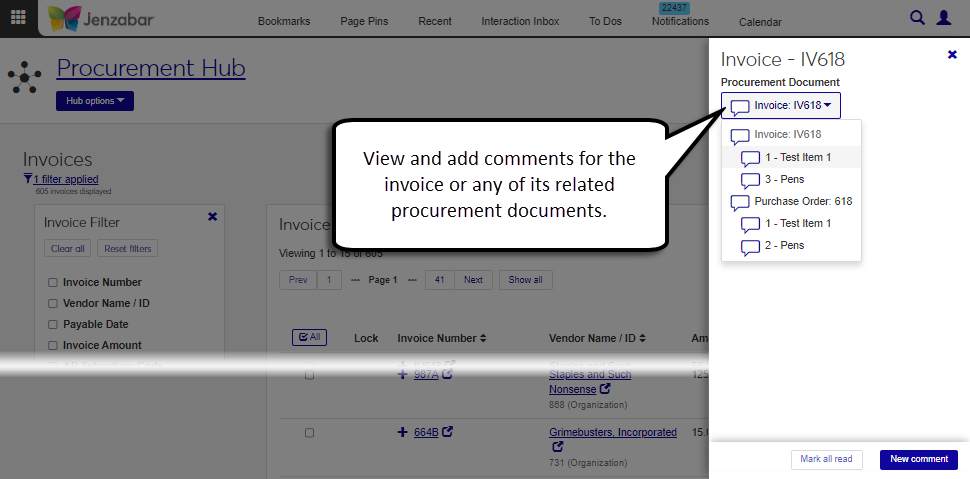
The comments column lets you read and add comments to an invoice, a single line item within the invoice, and to any procurement documents related to the invoice. For example, if a requisition was turned into a purchase order (PO) and the PO was invoiced, both the PO and requisition are available for comments from the invoice's Procurement Document drop-down. When you click the Comment icon, the Procurement Document drop-down can be expanded to view comments for invoice line items or associated procurement documents.
Note
The invoice comment count is the total number of comments for the invoice header and its line items. For example, if there are 2 comments for the header and 3 comments for the invoice line items, the comment count would display 5.
Locked Invoices
An invoice batch is automatically created when a new invoice is entered, and multiple invoices can be included in the same batch. When an invoice batch is locked by another user, all the invoices in that batch are locked (identified by the Lock icon  ) and cannot be edited, regardless of their status. If you have unlock permissions for invoices, you can unlock the invoice from the Invoice List page and make edits on the invoice details page as needed.
From the Finance Procurement Hub options, click Invoices. The Invoice List page opens.
Enter or select criteria in the Invoice Filter to view specific invoices.
Click the Expand icon
 to view additional details about an invoice.
Click the Invoice Number link to open the invoice details page in another tab.
To view details for multiple invoices, select the checkboxes for each invoice and click Open. The invoice details page opens in another tab. A drop-down field at the top of the page lets you switch views between the selected invoices.
From the Invoice List page, click the Create invoice button. The Create Invoice page opens.
Select a Source Code from the following options. The invoice header appears with the appropriate fields for the selected code.
IM (immediate check invoice)
IV (regular check invoice)
MN (manual check invoice)
RF (refunds from vendors)
Enter header information and click Expand details to view or update additional details. Visible header fields vary based on the selected source code, and the required fields are below. See the Header Fields section above for more information about each field.
Vendor Name / ID
Tip
The system updates the ID Number / Name field when you enter a full ID number and press Tab to move to the next field.
AP Subsidiary Code
Transaction Date
Invoice Number
Invoice Amount
Invoice Date
Payable Date
Payment Prefix (for IM and MN source codes)
Payment Number (for IM and MN source codes)
To add comments to the invoice header, click the Comment icon next to the Create Invoice title. The Comments pop-up opens.
Click New comment.
Enter your comment text.
Click the Attach button if you want to add an attachment.
Click Add.
To add invoice transactions from an existing PO:
Note
When invoice transactions are added from a PO, you cannot add other transaction lines to the invoice detail spreadsheet.
Select a PO from the PO Number field. POs with a remaining balance for the selected vendor are included in the list.
In the PO Transactions to Include drop-down, select All or Select.
When All is selected, the transaction details spreadsheet is autofilled with all the line items from the selected PO.
When Select is selected, the Select Transactions button is enabled. Click to open the "Select PO Transactions to Include" pop-up and select one or more transactions to add to the invoice.
Update the Supporting Document Status for selected transactions, if needed.
Click Continue. The transaction details spreadsheet is autofilled with the line items from the selected PO.
To enter invoice transactions manually, enter and select information in the details spreadsheet. The following columns are required. See the Line Item Detail Columns section above for more information about each column.
Transaction Amount
GL Account Number
Transaction Description
To add comments to line items, click the Comment icon for the row. The Comments pop-up opens.
Click New comment.
Enter your comment text.
Click the Attach button if you want to add an attachment.
Click Add.
Use the spreadsheet toolbar buttons to undo, redo, cut, and copy row information. You can also insert or remove rows with the right-click options.
Click Create invoice. The Invoice Created pop-up opens.
The Create another invoice under the same batch checkbox is selected by default. Deselect it if you don't want to create another invoice in the same batch.
Click Continue to open the invoice details page or the Create Invoice page, depending on the checkbox selection. An alert on the bottom of the page links to the invoice batch that was created.
From the Invoice List page, click the Comments icon
 .
.View existing comments for the invoice in the comments pop-up.
To add comments to the invoice:
Click New comment.
Enter your comment text.
Click the Attach button to add an attachment.
Click Add.
To view or add a comments for an invoice line item or for an associated procurement document:
Click the Procurement Document drop-down.
Click the comment icon for an invoice line item or other procurement document.
Click New comment.
Enter your comment text.
Click the
 Attach button to add an attachment.
Click Add.
Warning
Unlocking an invoice batch discards any unsaved changes and prevents updates made by other users on the invoice details page.
On the Invoice List page, select an invoice with the Lock icon
.Click the More button and select Unlock. The Unlock Batches? pop-up opens.
Review the invoices in the Ready to Unlock and Unable to Unlock sections.
Click Yes, unlock.
On the Invoice List page, select the rows you want to export to enable the More button.
From the More drop-down menu, select Download to Excel.
Select options for the Excel format and data columns.
Click Download. Your .xlsx or .zip file is saved in the file location that you have set in your browser settings.
On the Invoice List page, select one or more invoices.
From the More drop-down, select Delete. The Delete Invoices? pop-up opens.
Review the selected invoices, which are separated into two categories.
Ready to Delete (for invoices that can be deleted)
Unable to Delete (for invoices that can't be deleted, either because they are in use or are protected by the system)
Click Yes, delete.
Yes. Use the Invoice Filter and select "C|Posted to GL" in the Invoice Status field to view posted invoices.
Void (VD) invoices are created to reverse the original invoice when a check payment is voided. The VD source code cannot be selected from the Create Invoice page because invoices with that source code are automatically generated by the system during the void check payment process.
If you see a "You don't have permission to view all transaction rows" message in the Unable to Delete section, you may be in a role with restricted access to project codes or GL accounts. When an invoice transaction is associated with a project code or GL account that you don't have access to, you cannot delete the invoice. Contact your campus support team if you need additional information.