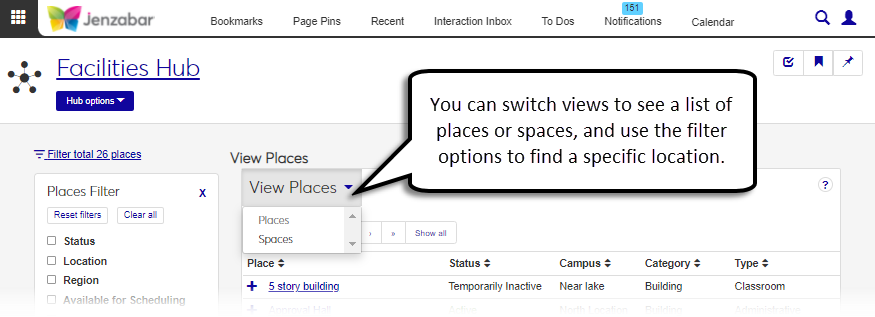
View Places
Use the View Places page to view a full list of all the places available at your school. You can quickly see the campus a place is located in, if the place is active, and the place category (e.g. Building or Natural Area).
Places marked as available for scheduling can be used to schedule events and meetings as long as they are in an Active, Temporarily Inactive, or a Planning/Construction status.
The Places Filter allows you to easily sort and search for particular places, and you can also switch views to see a list of spaces.
Navigate to the View Places page.
If the filter is not currently displaying, click the Filter icon. The Places Filter appears.
Select the checkbox for the search criteria you want to filter by. A field appears below.
Click the field below the checkbox.
If a drop-down list appears, add a selection to the filter by clicking the selection. The selection appears in the criteria field. To remove a selection from the filter, click the X next to the selection.
If the field is a typeahead drop-down, such as for the Region option, begin typing your search criteria into the field and select an option from the drop-down list that appears or scroll through the drop-down and select an option from the list.
You can filter places using the following criteria:
Status - Filters places/spaces by their status (e.g., Active, Temporarily Inactive, or Decommissioned/Demolished).
Location - Filters places/spaces by the campus and place. Once a campus is selected, the places within that campus will appear in the Place drop-down list. Multiple campuses and places can be selected. However, if specific places are selected from the drop-down, only those places will display once the filter is applied.
Region - Filters by the region the place is located in. If no regions are defined, this filter option will not display.
Available for Scheduling - Filters by whether or not a place/space is available for scheduling.
Abbr. Name - Filters by the place/space's abbreviated name.
Category - Filters by the category of the place/space (e.g., an Athletic/Recreation Facility or a Natural Area).
Promoted - Filters by whether or not the place/space is promoted on your school's Campus Portal.
Type - Filters by the place/space type (e.g., a Dining Facility or a Residence/Housing Facility).
Visible in Event Request Feature - Filters by whether or not the place/space is available to be scheduled for event requests via your school's Campus Portal.
To return the filter to the default state, click Reset filters.
To clear the filter, select Clear all.
Click Apply to apply the filter to the page.
Locate the appropriate place.
Click on the name of the place. The place's page appears where you can view general, scheduling, and contact information.
Locate the appropriate place.
Click on the name of the place. The place's page appears where you can view general, scheduling, and contact information.
From the Place options drop-down, select Review place details. The Review Place Details page appears.
Click the Edit details button. The fields become editable.
Click the Edit icon next to a field to edit its value.
Click Save.
Repeat steps 5-6 for all fields you wish to edit.
Click Done editing.
There could be a couple of reasons a region is not appearing.
Your school may not be using regions to group places.
Not all places are associated with regions when they are created.
For more information, contact campus support or your module manager.
Click the Expand icon  next to the place name to see additional details like scheduling availability and capacity.
You may not have Can view spaces permissions. Contact your module manager for access.