Configuration Status Block
The Configuration Status block shows the status of Communications settings. It identifies issues and links to troubleshooting information for system settings, SendGrid and Twilio settings, and data sets.
To use this feature, users must belong to a Communication Base role with the Can view Configuration Status block block permission enabled.
System Settings Issues
Verify your network firewall configuration allows J1 Web to accept HTTPS requests. This is required for J1 Web to communicate with third-party tools SendGrid and Twilio.
Note
Requests coming from SendGrid and Twilio may originate from one of thousands of dynamic IP addresses which means whitelisting is not an option.
If there are concerns about making J1 Web public, JICS or another preferred site can be used as a proxy.
JICS can be used as a proxy to J1 Web; however, this introduces request delays. It also means recipients cannot unsubscribe from email communications.
Caution
Before JICS can be used as a proxy, the following must be completed:
JICS URL entered and successfully verified on the J1 Web, System Administration, Product Installs and Sign Page. Help topic for more information: Product Installs
J1 Web API root entered in the JICS, Site Manager, ERP Settings, J1 API Root field. Help topic for more information: Connect the Campus Portal to J1 Web
Verify J1 the latest Web Application Services has been installed on the JICS server. For related documentation and installers, access the Application Downloads page on MyJenzabar.
To set up JICS as a proxy:
Access the JICS server.
Access the C:\Program Files\Jenzabar\J1 2023\Web\UIWeb directory.
Locate and open the appsettings.config file.
Add the following line:
“UsePortalAsCommunicationProxy”: “true”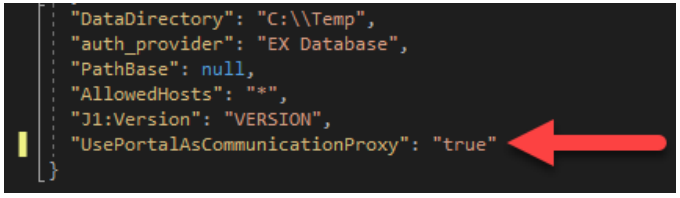
Save the file.
Perform an IISRESET.
Note
If J1 Web is originally a public access site and your school later puts it behind the JICS proxy firewall, you’ll need to reassign users to the appropriate phone numbers in J1 Web (Communication Management hub, Settings page).
Verify an SSL certificate has been installed on the J1 Web server.
Verify the firewall rules allow public traffic make it back in over port 443.
Verify your SendGrid CNAME entries are entered correctly in your DNS provider.
SendGrid Settings Issues
Verify the domain being authenticated matches the inbound subdomain entered in the System Administration, Communications, Email Provider Settings option. This domain name must match exactly. Precise case and punctuation are required.
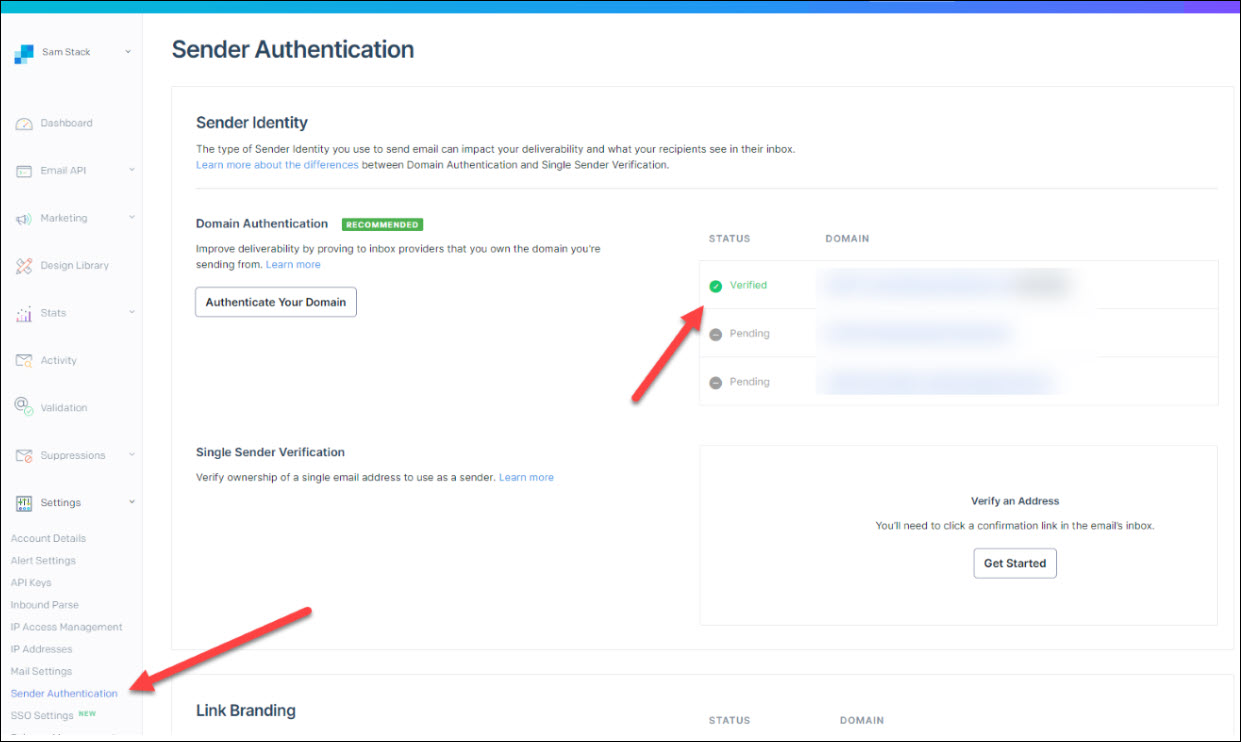
Verify your domain has been authenticated:
Log in to SendGrid.
From the left-hand menu, select Settings and Sender Authentication. The Sender Authentication page appears where you can verify your domain is authenticated.
If your domain isn't authenticated, click the Authenticate Your Domain button. Detailed steps for authenticating your domain are available in the Create and Configure a SendGrid Account help topic linked below.
Verify the CNAME entries provided by SendGrid have been entered in your DNS provider correctly:
Log in to SendGrid.
From the left-hand menu, select Settings and Sender Authentication. The Sender Authentication page appears.
Click on your domain.
Verify the CNAME entries listed appear correctly in your DNS provider. If not, update them.
Select the I've added these records checkbox and click Verify. An email is sent to your designated testing recipient. The email includes a link that verifies your domain.
Note
Do not click the link more than once because the values will change.
Be sure you enter the authentication information exactly as it appears in the email. Periods and spaces in the wrong place can invalidate your credentials.
If SendGrid does not return a successful verification, adjust your DNS until it properly verifies. If you need assistance with Sender Verification, log a ticket with SendGrid Customer Support (https://sendgrid.com/docs/ui/account-and-settings/support/).
SendGrid article on domain authentication: https://docs.sendgrid.com/api-reference/domain-authentication/list-all-authenticated-domains
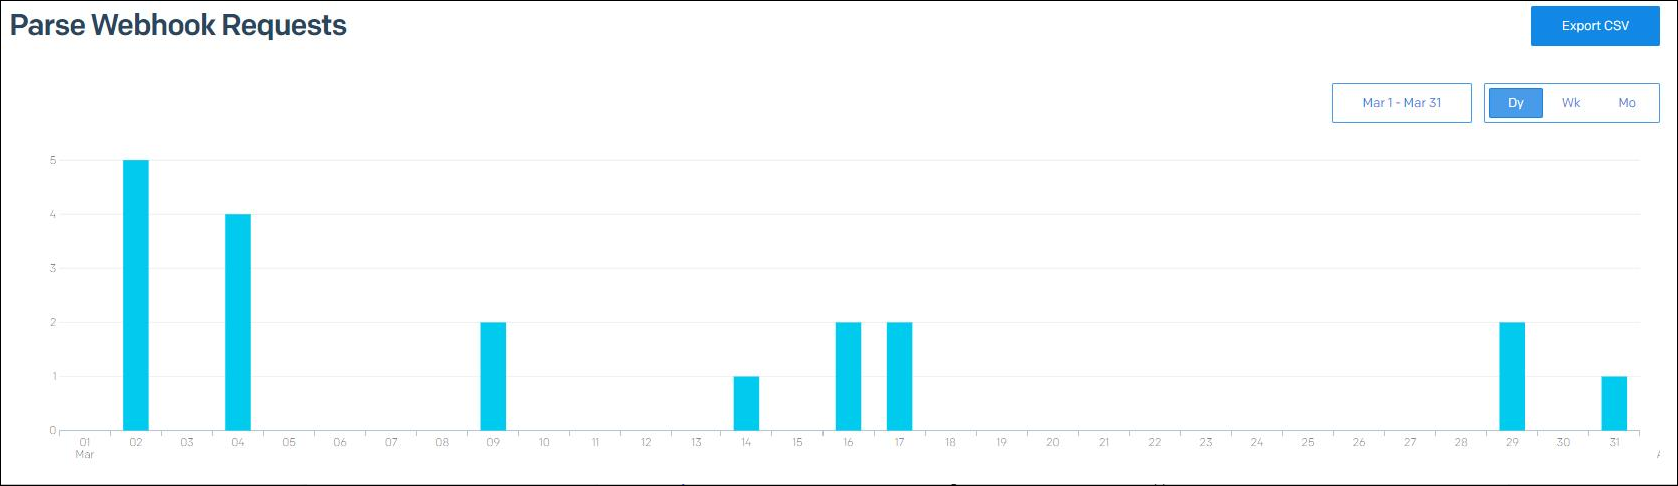
One way to confirm your MX record is to look at the SendGrid Inbound Parse logs. From SendGrid, access Stats & Parse Webhook and a test attempt chart appears. If you see attempts were made, your MX record is properly configured and you need to log a call with SendGrid to troubleshoot. Sample chart shown below:
If you do not see attempts were made, configure your DNS for your inbound subdomain using these steps:
Access SendGrid.
Access Sender Authentication to view your DNS records.
In a separate tab or application, access the application, tool, or service your school uses to manage your public DNS configurations.
Find the DNS entries provided by SendGrid.
Add the following additional record to support inbound emails:
MX 10 yourinboundsubdomain mx.sendgrid.netSave your changes.
Rerun the Configuration Status check to verify the changes were successful.
Note
DNS changes require between 24 and 48 hours to replicate.