Student Health Codes
Important
Information and features vary according to the roles to which you belong and the permissions associated with those roles. For more information, contact your module manager or your campus support team.
You might have a list of health-related requirements that a student must satisfy in order to register, or a set of students with special health needs or information that you want to track. You can create Health Groups to identify students with common health-related requirements.
In order to create a new health group, you must first create a Health Code. In J1 Desktop, the health code is limited to eight characters; in J1 Web, it can be up to 60 characters.
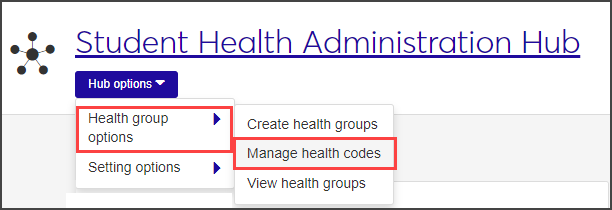
You can access the Manage Health Codes page by clicking the Hub options drop-down menu on the Student Health Administration Hub and selecting Health group options > Manage health codes.
There are multiple ways to view, filter, and sort the health codes list:
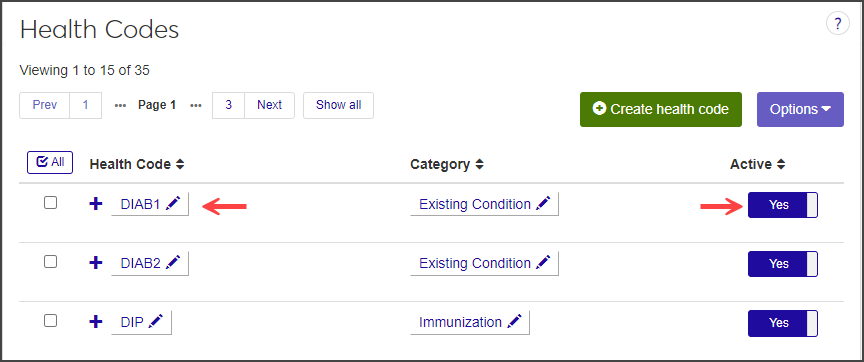
The list displays 15 codes at a time by default. Click the Show all button to view all codes on one screen.
Sort codes by clicking on the header of the column you would like to sort by.
Filter the roster using the Health Code Filter.

On the Student Health Administration Hub, click the Hub options drop-down menu and select Health group options > Manage health codes.
The Manage Health Codes page opens.
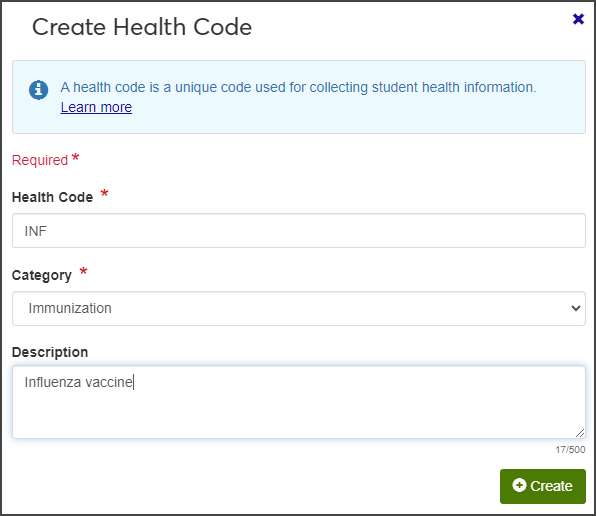
Click the Create health code button. The Create Health Code pop-up opens.
Enter the required information. When you are done, click Create.
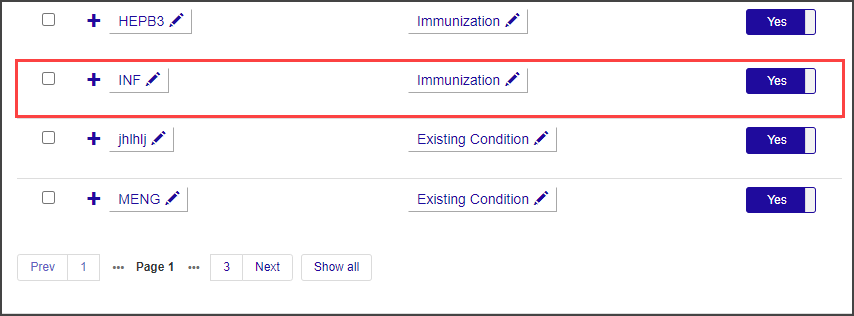
The new health code now appears in the Health Codes list.
To edit a Health Code, click the pencil icon next to the item you want to edit. You can edit the following fields:
Health Code (name)
Category
Description
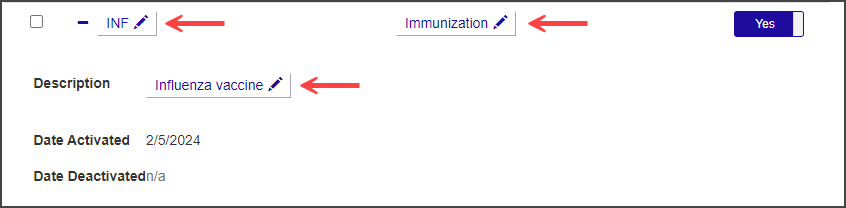
You cannot delete a health code, but if you do not want it to be available for use, you can set it to inactive by clicking the button in the Active column to change it to No. This will prevent it from showing up as an available option for health groups. Another option is to edit the name and category, essentially replacing it with a new health code.
Select the checkboxes next to the rows you want to export.
From the Options drop-down, select Download to Excel. The Download to Excel pop-up opens.
Select options for the Excel format and data columns.
Click Download. Your .xlsx or .zip file is saved in the file location that you have set in your browser settings.
To associate a health code with a student, that student must be in a health group associated with that health code. It's easiest to do this when you create a new health group—a step-by-step wizard allows you to add multiple students at once based on a variety of criteria.
If your health group has already been created and you need to add a student, you can do this by manually adding the student.
Important
You can only add students to the roster if the health group's status is "Upcoming." You cannot add students if the group has already started.
In the Health Groups block on the Student Health Administration Hub page, click the name of the health group you want to add students to.
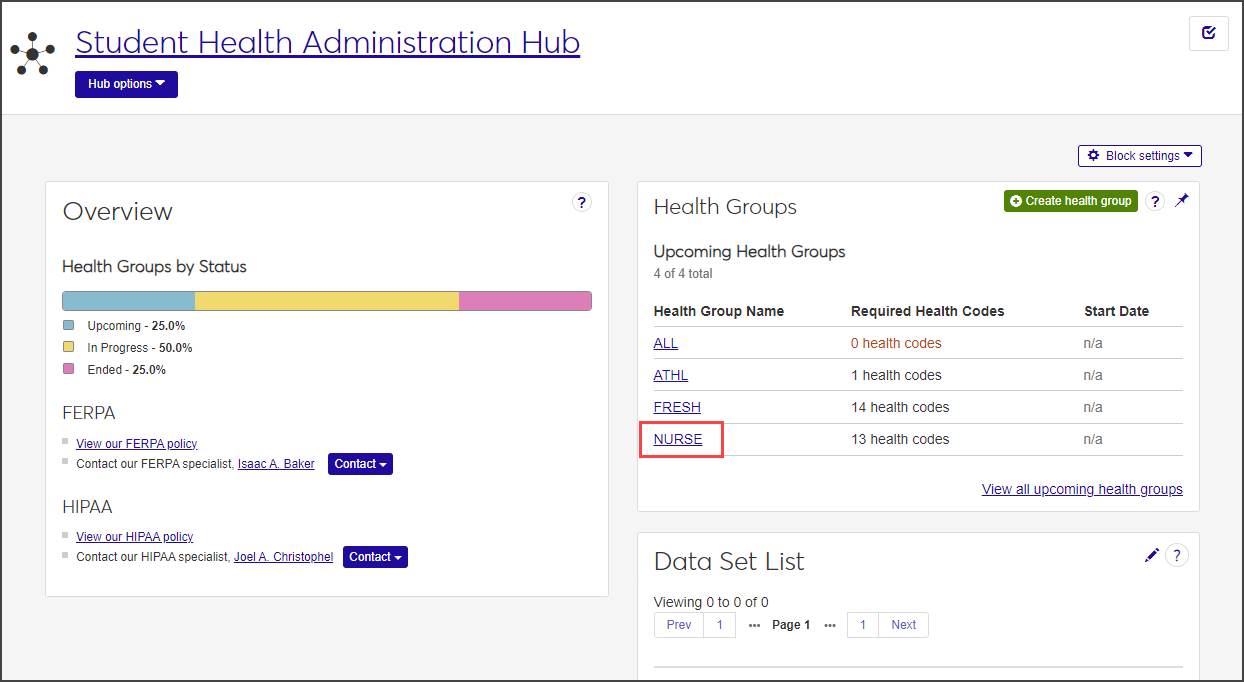
The group's summary page opens.
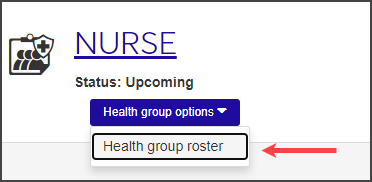
From the Health group options drop-down menu, select Health Group Roster.
On the Health Group Roster page, click in the Add students field and begin typing the name of the student you want to add. Select the correct student when the name appears on the list and click Add students.

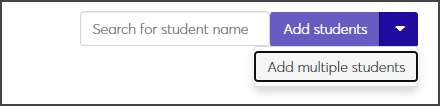
To add more than one student to the roster, use the Add multiple students option:.
Hover your mouse over the arrow on the Add students button and select Add multiple students.
The Add Multiple Students page opens.
Use the radio buttons at the top of the page to choose how to select the students you want to add to the health group roster.
Add by name: Add several students by typing their names in the Name field.
Filter from all students: Choose students based on their major or year classification.
Query: Use an existing query to add multiple students to the health group roster.
Note
Jenzabar provides the default query (q_select_health_roster); you can customize this query as needed. Custom queries must start with the default "q_" filename and must be stored in the Jenzabar Reports directory. This directory is set up as a part of the upgrade\installation process that defaults to C:\Jenzabar\Reports\. Contact your campus support team for more information on customizing default queries or creating queries.
Note
You cannot access InfoMaker directly from J1 Web to edit your queries. See the InfoMaker Resource Center on MyJenzabar.net, or contact your campus support team to learn more about customizing queries.
When you have found the students you want to add to the roster, click Add to roster. The students are added to the health group roster.
From the Student Health Administration Hub, click the Hub options drop-down menu and select Health group options > Create health groups.
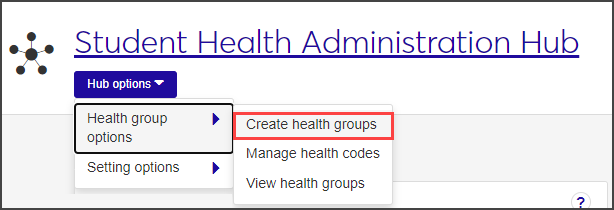
You can also click the Create health group button on the Health Groups block.
The Create Health Group wizard opens. Enter a unique Group Name, a description of the group, and start and end dates. The Group Name and Start Date fields are required.
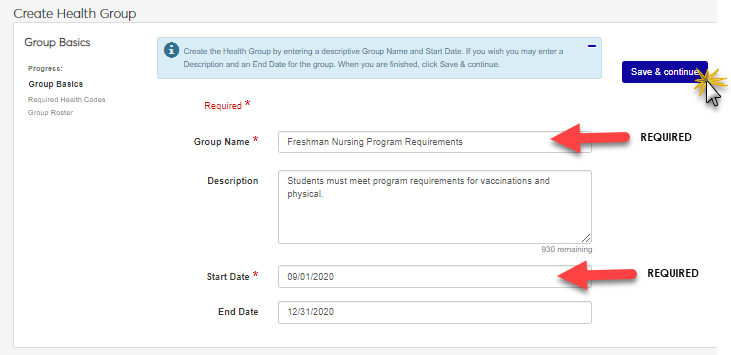
When you are finished, click Save & continue.
Select a health code category, then click in the field and select the appropriate Health Codes for this group. To add more health codes, click Add another and repeat this step.
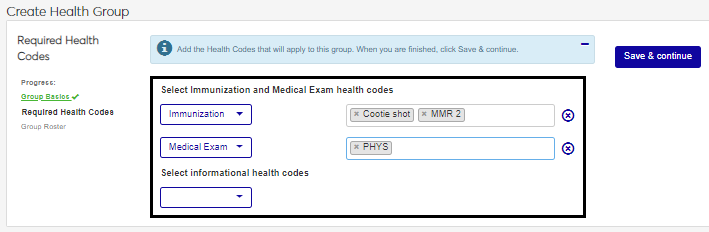
When you are finished, click Save & continue to move to the next step.
Now that your health group has been set up and health codes associated with it, you need to build the roster for this group. You have three options for adding students; you can use a mix of these options to add names to the roster:
Add by name: Manually add students individually. Begin typing student name, and select from list. You can add multiple names to this field before adding to roster.
Filter from all students: Add a batch of students at one time. Filter by program major or classification, and add as a group.
Query: If you have an existing query that has been created, you can use that and those students as a group.When you have selected the students you wish to add, click Add to roster. The selected names will appear on the roster below.
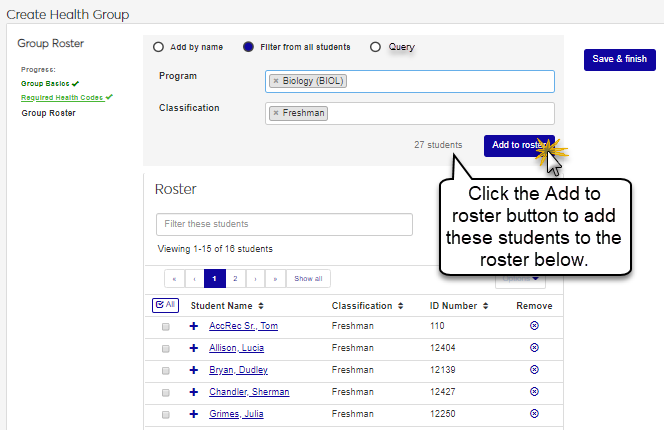
When your roster is complete, click Save & finish.
Important
You can only add students to the roster if the health group's status is "Upcoming." You cannot add students if the group has already started.
In the Health Groups block on the Student Health Administration Hub page, click the name of the health group you want to add students to.
The group's summary page opens.
From the Health group options drop-down menu, select Health Group Roster.
On the Health Group Roster page, click in the Add students field and begin typing the name of the student you want to add. Select the correct student when the name appears on the list and click Add students.
To add more than one student to the roster, use the Add multiple students option:.
Hover your mouse over the arrow on the Add students button and select Add multiple students.
The Add Multiple Students page opens.
Use the radio buttons at the top of the page to choose how to select the students you want to add to the health group roster.
Add by name: Add several students by typing their names in the Name field.
Filter from all students: Choose students based on their major or year classification.
Query: Use an existing query to add multiple students to the health group roster.
Note
Jenzabar provides the default query (q_select_health_roster); you can customize this query as needed. Custom queries must start with the default "q_" filename and must be stored in the Jenzabar Reports directory. This directory is set up as a part of the upgrade\installation process that defaults to C:\Jenzabar\Reports\. Contact your campus support team for more information on customizing default queries or creating queries.
Note
You cannot access InfoMaker directly from J1 Web to edit your queries. See the InfoMaker Resource Center on MyJenzabar.net, or contact your campus support team to learn more about customizing queries.
When you have found the students you want to add to the roster, click Add to roster. The students are added to the health group roster.
There are several ways to access the health information for a student:
On the Student summary page, if the student is assigned to a health group, it will be listed in the Health Groups block. Click the Update button to make changes.
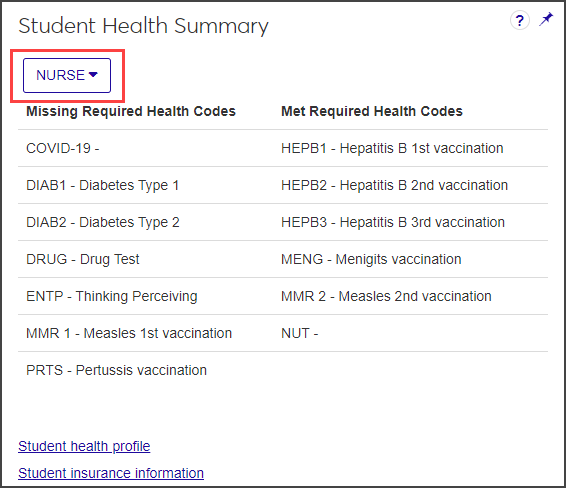
If the student belongs to more than one health group, hover over the health group name and select another group from the list. This allows you to see the required health codes for that group and which codes the student has met and which are missing.
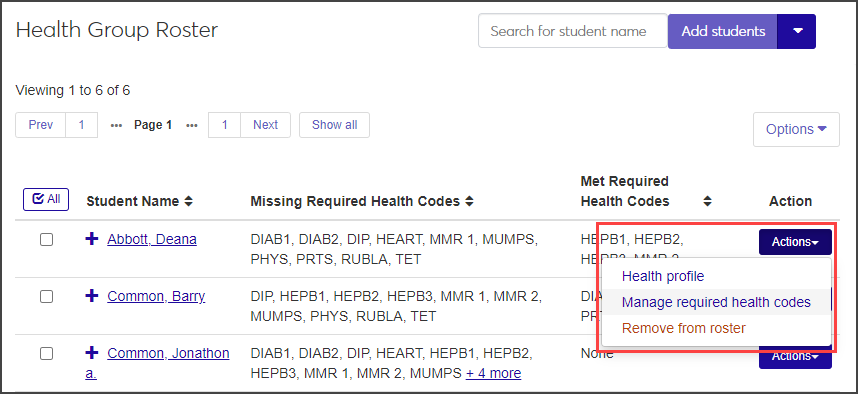
On the Health Group Roster page, find the student row you want to update, click the Actions button, and select Manage required health codes.
On the Manage Required Student Health Codes popup, you can update details such as whether this student has met the requirement, and add notes.
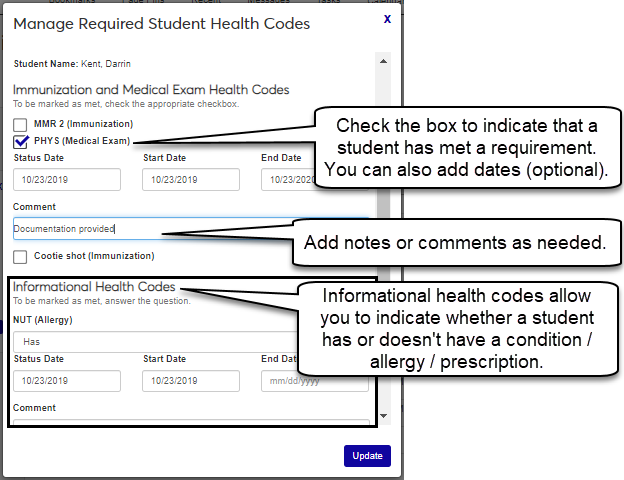
Select the checkbox next to a requirement to indicate that the student has met it.
Status Date: When the status of this health code was updated.
Start and End Dates: If there is a time period for which this item is valid, you can enter it here. For example, a tetanus shot is good for 10 years.
Comment: Add notes or comments (optional).
You may not be in a role with the appropriate permissions to see that block, or your institution may not have that feature enabled. Contact your system administrator or module manager for more information.