Microsoft Exchange Online Account Settings
Important
Information and features vary according to the roles to which you belong and the permissions associated with those roles. For more information, contact your module manager or your campus support team.
Calendar synchronization allows users to view their Outlook calendar meetings and events on their J1 Web Home page calendars. This is a one-way synchronization process. Users can see their Outlook items in Jenzabar One, but must access Outlook to update, add, or remove events on their Outlook calendars. Outlook items shown in Jenzabar One have an “Edit in Microsoft Outlook” link that accesses the Outlook Web Application website where they can make changes.
Exchange Online means your school uses a Microsoft-hosted service version of Exchange accessed via a URL (eg., mx.com or ms.com). Microsoft manages the installation on their server and applies the needed updates.
Setting up synchronization is a four-step process:
Step 1: Grant the Exchange Account Access to the Calendars
Step 2: Enter Microsoft Exchange Online Information in J1 Web
Step 3: Update the Exchange Service User Name in the Desktop
Step 4: Activate Calendar Syncing in J1 Web
Detailed information for each step is available in the How To section below.
For Step 1, you'll enter the Directory (tenant) ID , Application (client) ID , and Secret ID information into Jenzabar One, System Administration in Step 2. Jenzabar recommends copying and pasting them in Notepad or Word until they are needed.
Note
Screenshots included in the following steps are a part of the Microsoft Azure Active Directory interface and accurate with the J1 Web 2022.1.0.3 release; however, they may change without Jenzabar’s immediate knowledge.
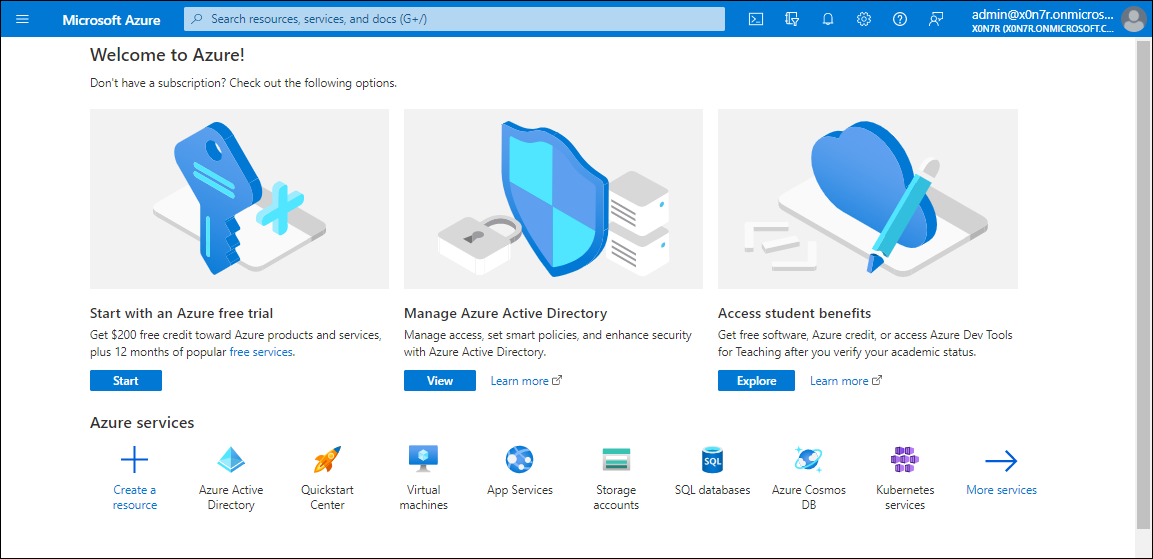
Log in to Microsoft Azure Active Directory with an administrative account. The Welcome to Azure page appears.
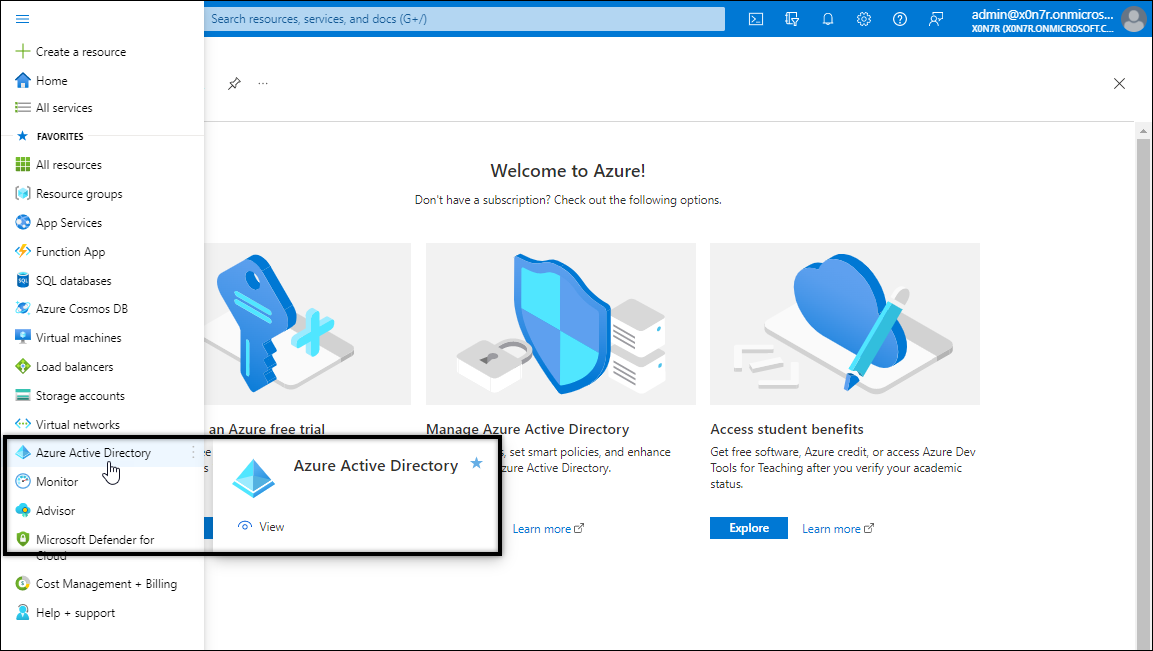
From the upper left-hand corner, click on the menu icon and select Azure Active Directory.
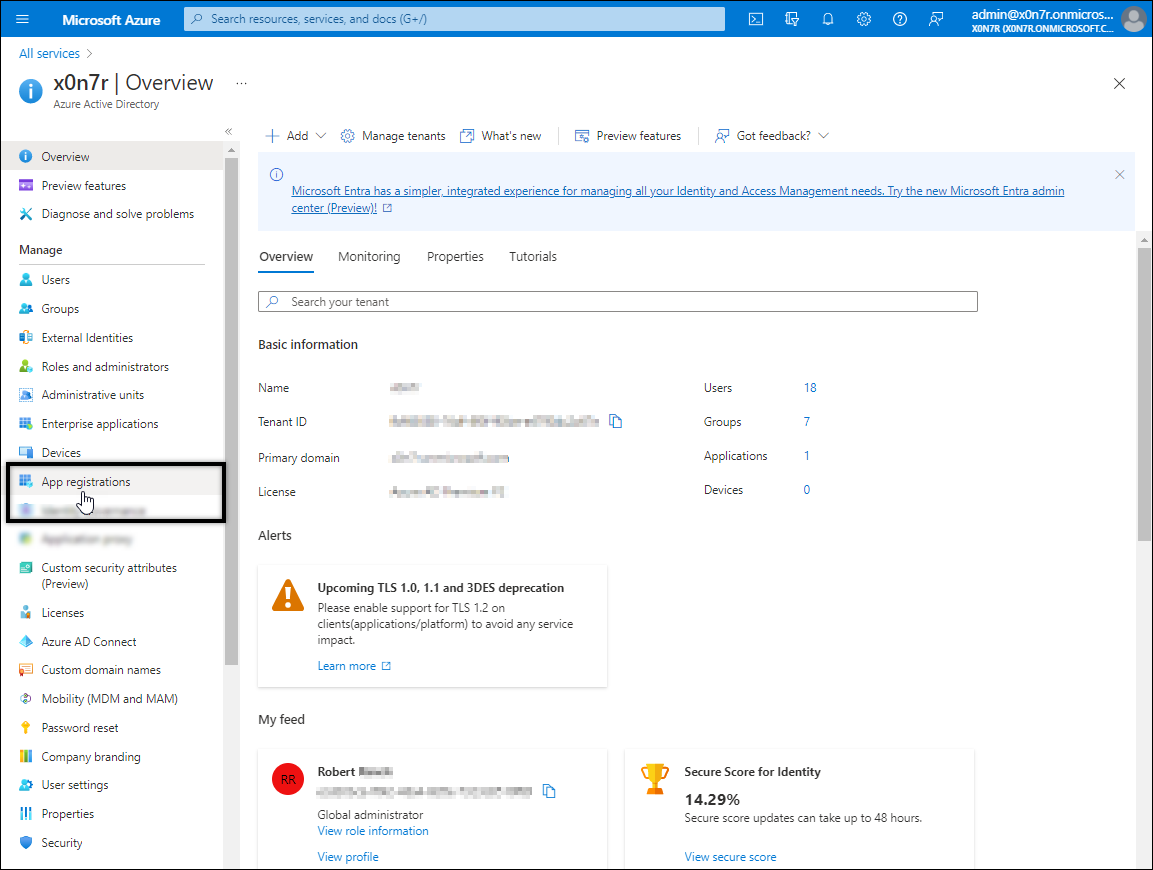
From the left-hand menu options, select App Registrations.
Click on the All Applications tab.
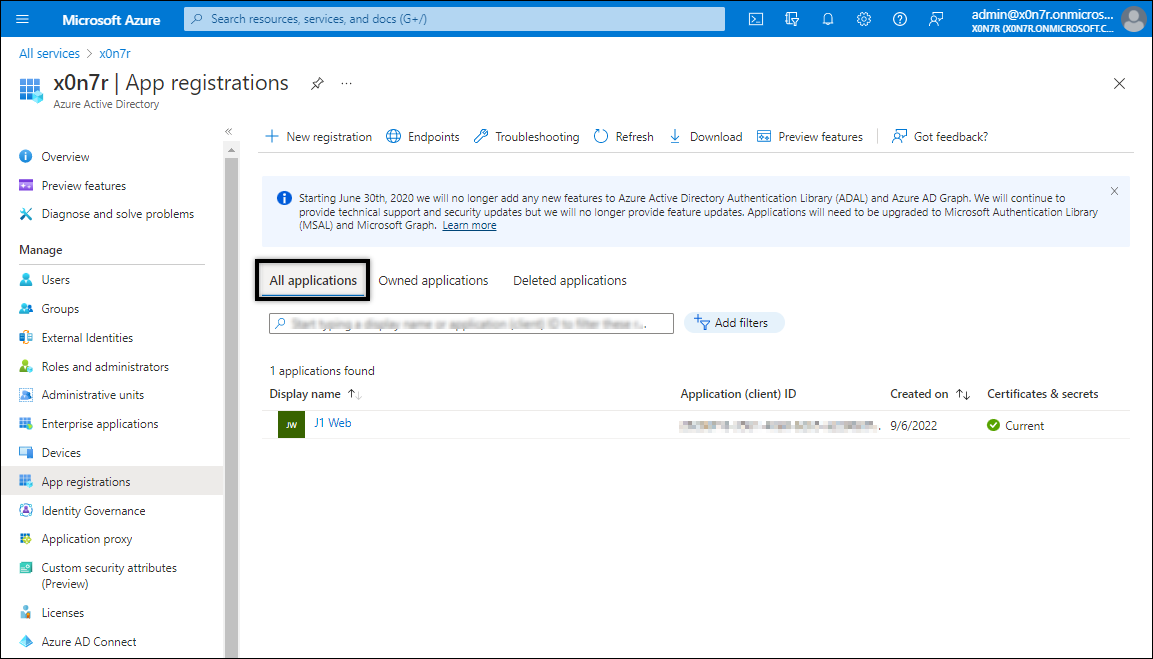
If your Jenzabar One site appears in the list of registered applications, click on the application name to open it and proceed to Step 6. If you are already using Azure Single Sign-On (SSO) with Jenzabar One, your site should be listed as registered.
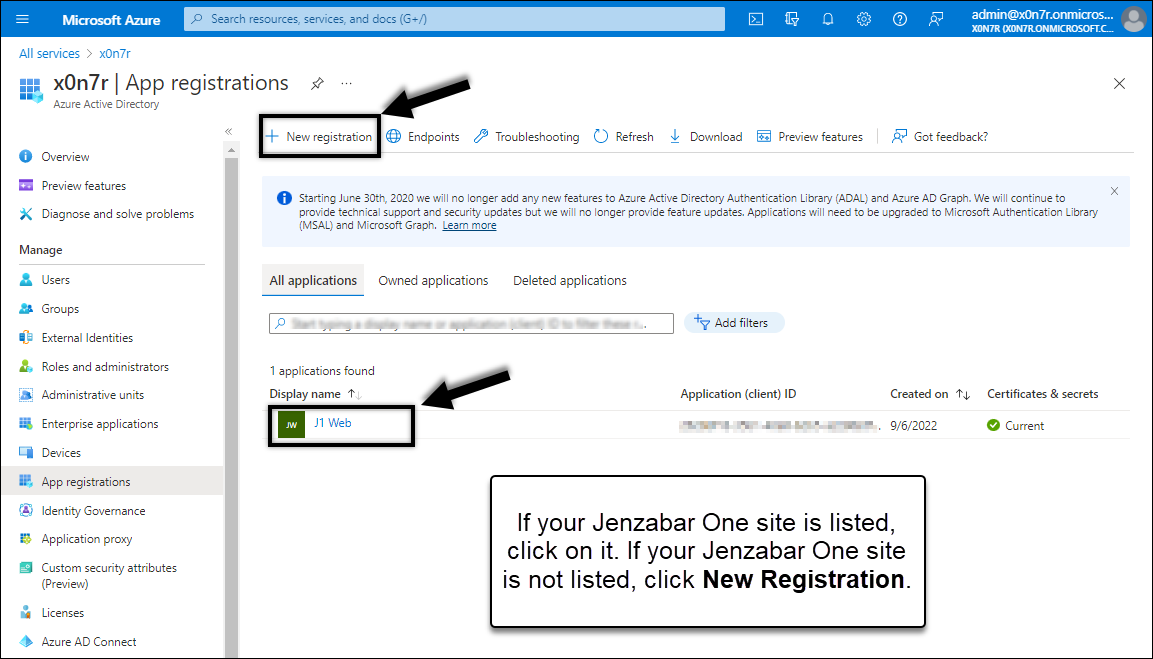
If your Jenzabar One site did not appear in the list:
Click New Registration. The Register an application page appears.
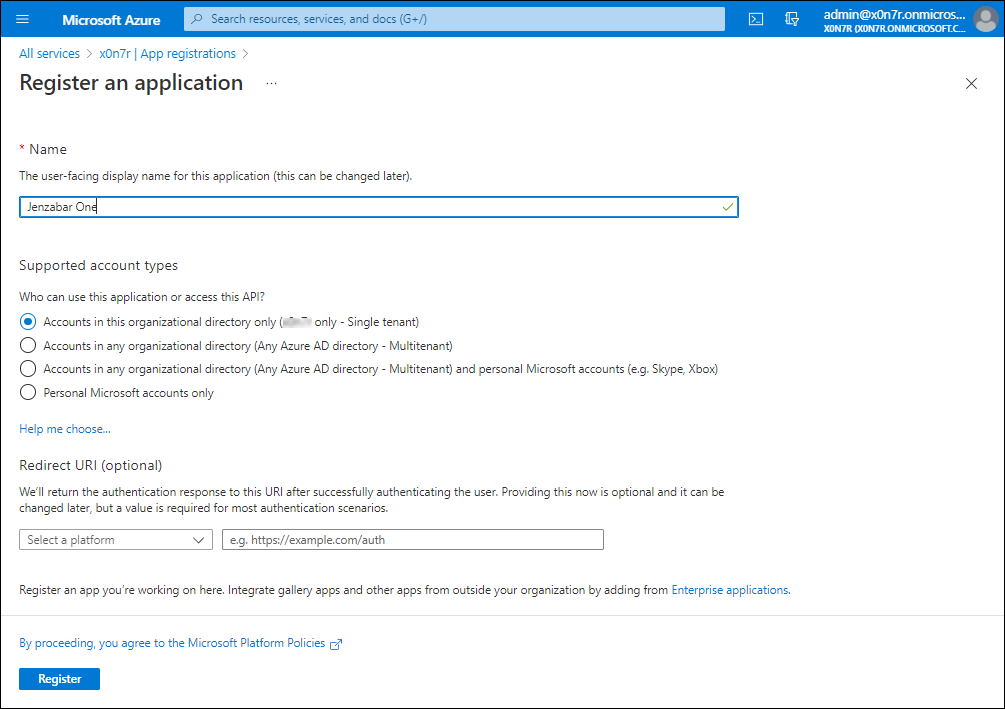
In the Name field, enter a display name to represent your Jenzabar One site.
Verify the following Supported account types option is selected: “Accounts in this organizational directory only ([your organization] only - Single tenant)”.
Do not complete the Redirect URI setting. This is not required for calendar integration.
If you are using Azure Single Sign On (SSO), the J1 Web System Administration SSO Implementation Guide steps through providing an appropriate Redirect URI.
Click Register. The Register an application page closes and the Overview page for your registered Jenzabar One application appears.
From the site Overview page, copy the Directory (tenant) ID and Application (client) ID values and store them to enter in Jenzabar One.
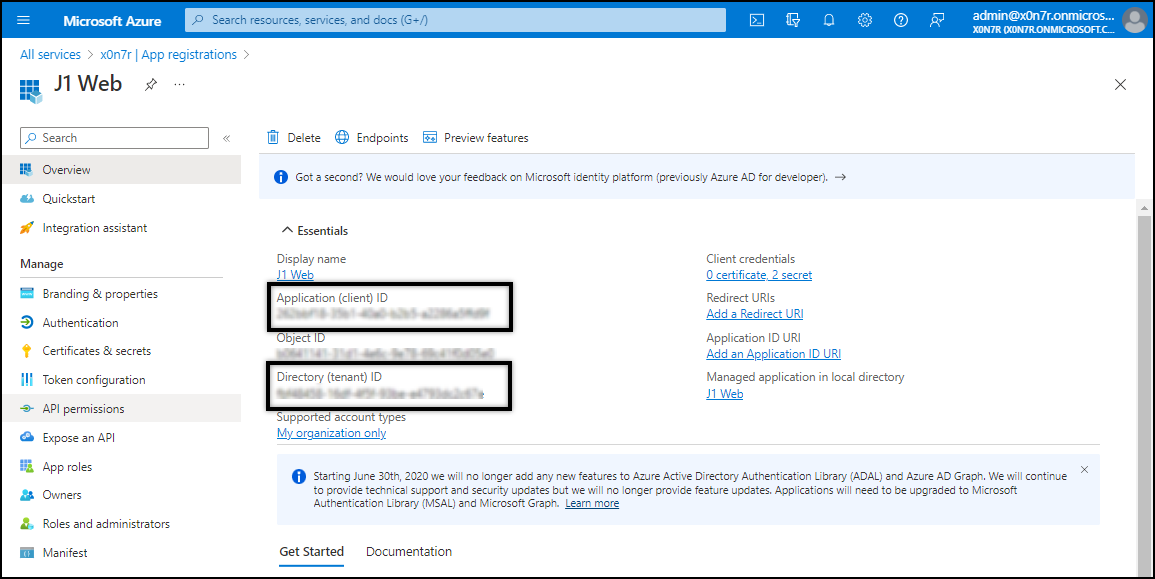
Click the link under Client credentials. The Certificates & secrets page appears.
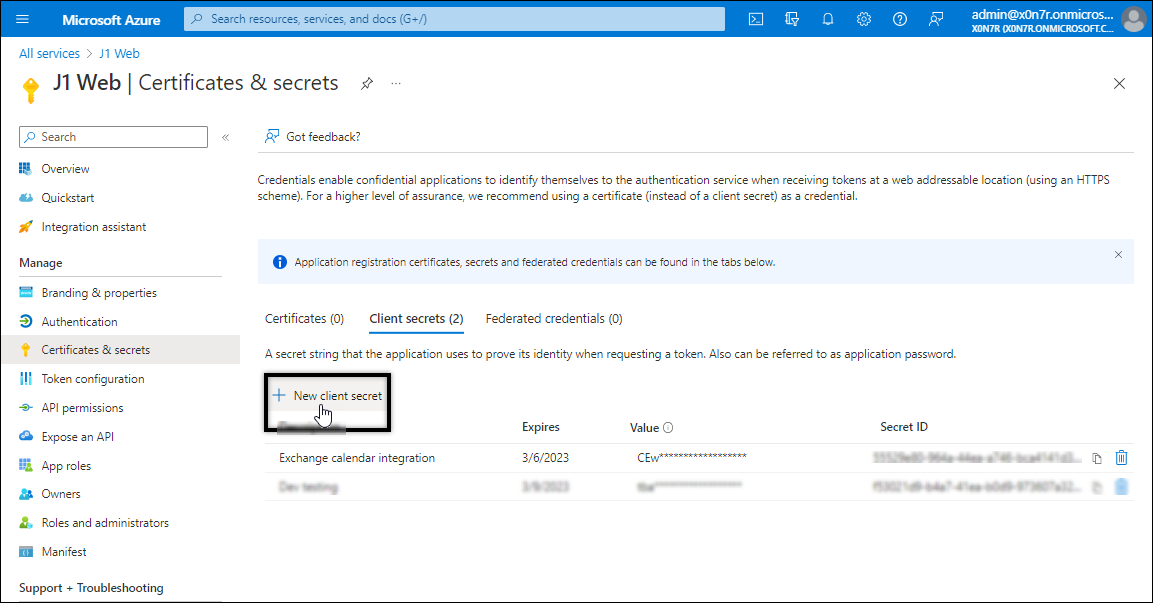
Click New client secret. The Add a client secret window appears.

Enter a Description. For example, “Jenzabar One” or “Exchange Calendar Authentication."
Select an expiration time frame.
Important
When the secret expires, you will need to replicate steps 8-12 of this process and then add it to J1 Web. Steps for adding the Client Secret ID are outlined in Step 2: Enter Microsoft Exchange Online Information in J1 Web.
Click Add. The Add a client secret window closes and the Certificates & secrets page reappears.

Copy the Value for the newly created secret and store it to enter in Jenzabar One. Keep this ID secure. It serves as a password that provides access to all of your users' Exchange calendars, and potentially other data integrated from Microsoft cloud products into Jenzabar One in the future.
Caution
If you navigate away from this page, you will no longer be able to access the Secret ID. If you lose track of it, delete it and create a new one.
From the left-hand menu options, click API Permissions. The API permissions page appears.
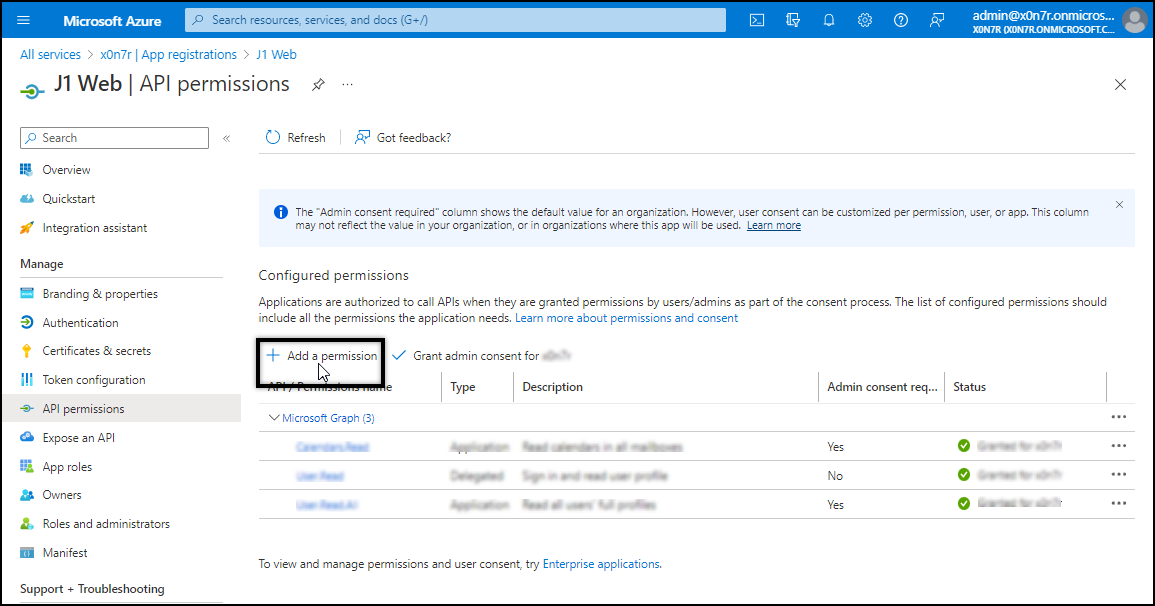
Click Add a permission. The Request API permissions page appears.
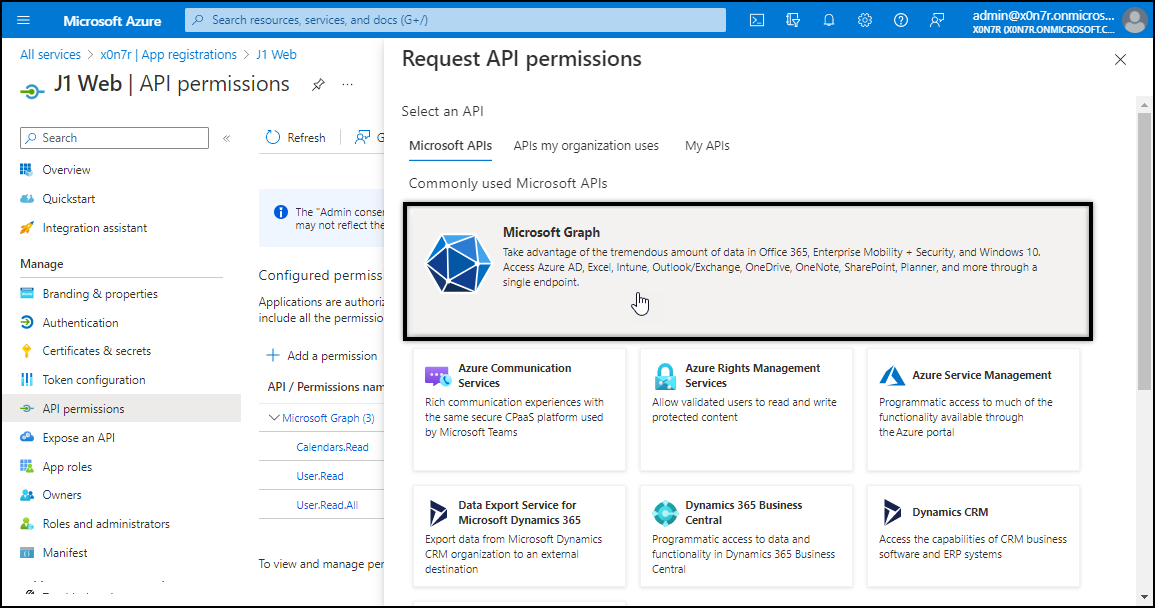
Click Microsoft Graph. The Microsoft Graph page appears.

Click Application permissions. The Request API permissions page appears.
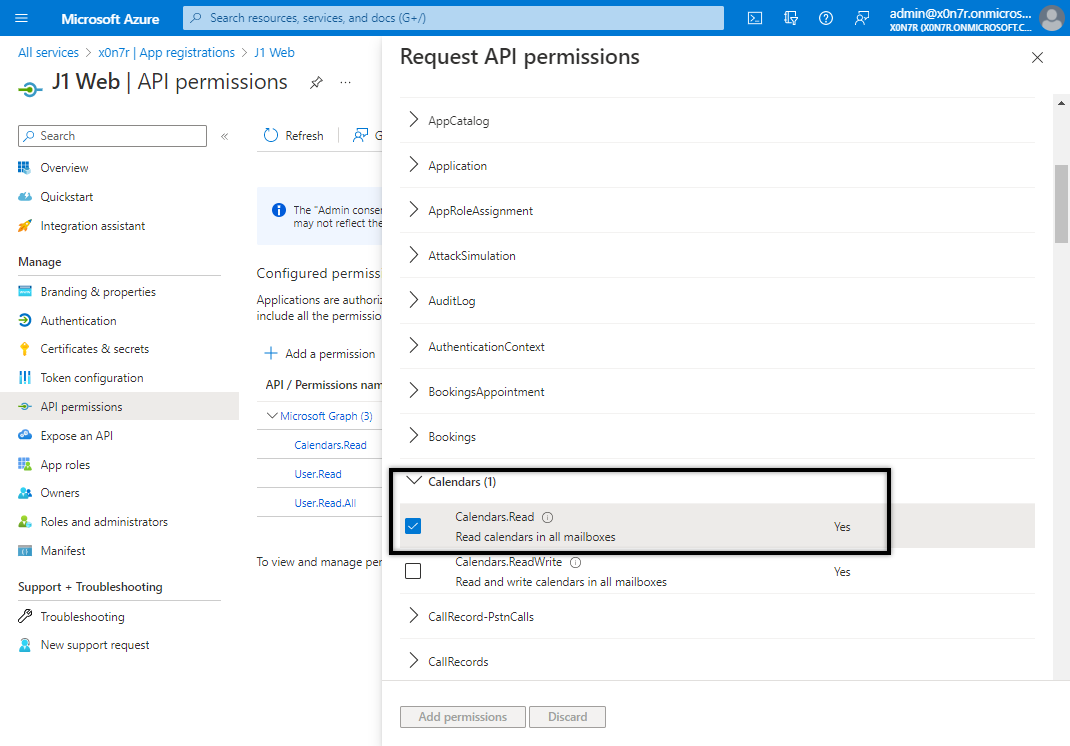
Locate and select Calendars. The Calendars options appear.
Select the Calendars. Read checkbox.
Click the Add permissions button. The Calendars. A read pop-up window appears.
Click Grant admin consent for (your domain). The confirm window appears.
Click Yes.
For Step 2, enter your school’s Directory (tenant) ID , Application (client) ID , and Secret ID information into J1 Web, System Administration. This information is used to log in to Exchange and retrieve your users’ calendars.
From the System Administration hub, select System Settings, Calendar.
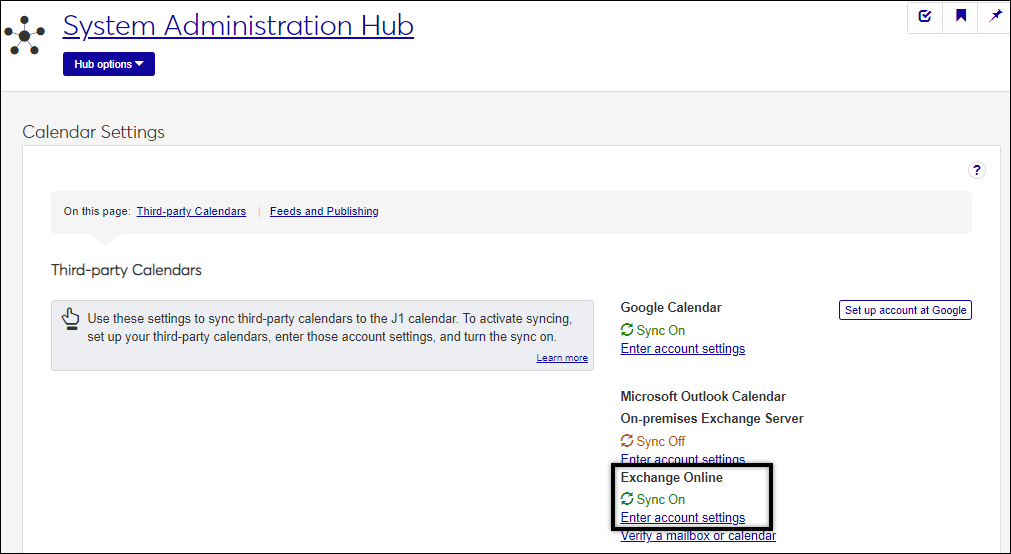
From the Third-party Calendars section, Microsoft Outlook Calendar, Exchange Online settings, click the Enter account settings link. The Exchange Online Account Settings page appears.
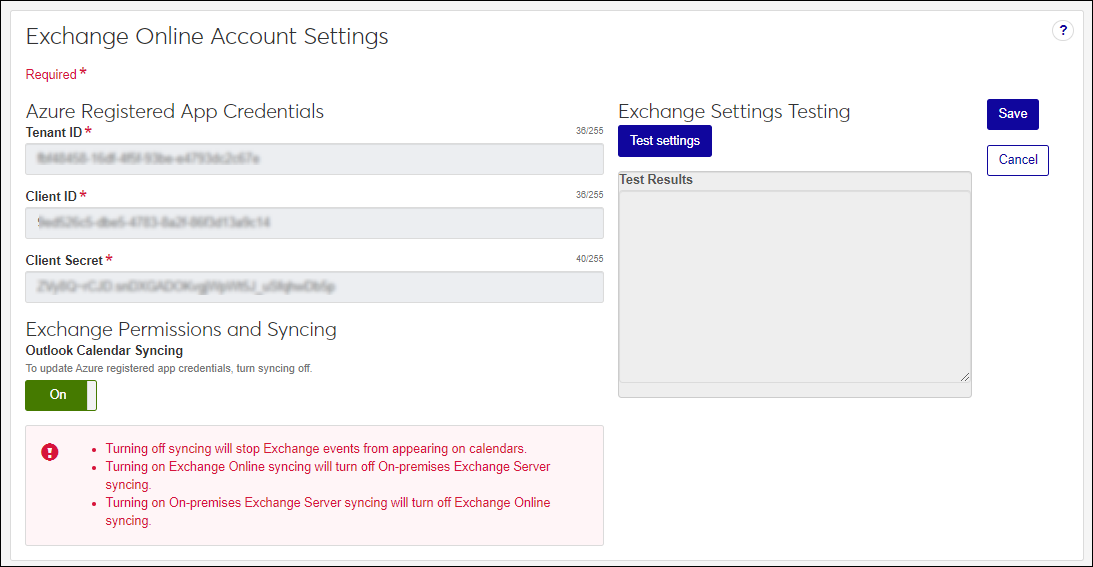
In the Azure Register App Credentials fields:
Copy and paste the Directory (tenant) ID collected during Step 1 in the Tenant ID field.
Copy and paste the Application (client) ID collected during Step 1 in the Client ID field.
Copy and paste the Client Secret ID created during Step 1 in the Client Secret.
Click Test settings. The system verifies the connection between Exchange and J1 Web. Errors are displayed in the Test Results.
Click Save.
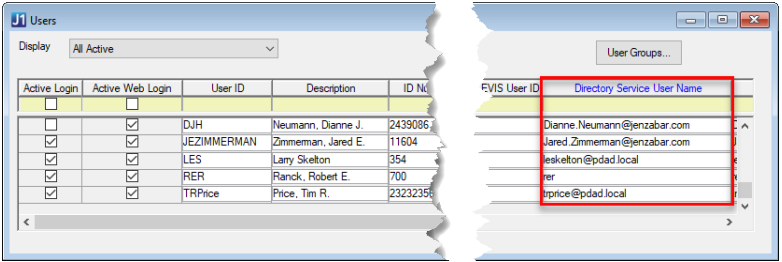
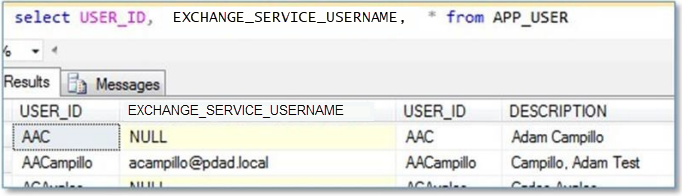
For Step 3, “link” your users to their Outlook calendar. To create this link, you must update the APP_USER.EXCHANGE_SERVICE_USERNAME column to their User Principal Name (UPN). Generally the UPN is in this format: username@domain. For example, hsimpson@springfield.net. The UPN should be the same as their network domain account UPN.
Tip
You may want to only do this for a few users and test the feature before doing it for all users.
There are two ways to update the user’s exchange service user name:
Using the J1 Desktop Users window, Exchange Service User Name column:
Using the following update statement (you can also create your own):
UPDATE APP_USER SET EXCHANGE_SERVICE_USERNAME = ‘’ WHERE USER_ID = ‘’
In Step 4, enable the Outlook sync in J1 Web System Administration. Once syncing is enabled, end users will have the option to sync their Outlook calendars with J1 Web from the Accounts and Preferences page, Calendar options.
From the System Administration hub, select System Settings, Calendar.
From the Microsoft Outlook Calendar, Exchange Online settings options, click Enter account settings. The Exchange Online Account Settings page appears.
Slide the Exchange Permissions and Syncing option to ON.
Click Save. The Exchange Online Account Settings window closes and Outlook calendar syncing will be available to users from the Account and Preferences page.
Run the Exchange Settings Test. Exchange Settings Testing errors come from Microsoft and typically provide enough information to troubleshoot the issue.
If the Exchange Settings Test succeeded, run the 'Verify a Mailbox or Calendar' test for a user with J1 Web and Exchange Online access.
To verify their account:
From the Exchange Online Account Settings page, click the Save button. The Calendar Settings page appears.
From the Third-party Calendars, Microsoft Outlook Calendar, Exchange Online options, click the Verify a mailbox or calendar link.
Enter their username and calendar ID information.
Click Test settings.
Ensure your school uses Azure Active Directory (cloud-based) rather than an on-premises Active Directory to perform the AD steps.
Ensure the J1 Web application has access to Exchange Online (verify you completed each action in Step 1: Grant Exchange Account Access to the Calendars correctly).
Ensure you entered the Azure Active Directory Tenant ID, Client ID, and Client Secret Value correctly in J1 Web.
J1 Web relies on these values to connect with Exchange and they must be entered correctly for the sync to work.
Verify your Client Secret hasn't expired.
When you create your client secret, you select a time frame that specifies how long it will be valid. When the secret expires, you need to replicate steps 8-12 of the Step 1: Grant Exchange Account Access process and then add it to J1 Web. Steps for adding the Client Secret ID are outlined in Step 2: Enter Microsoft Exchange Online Information in J1 Web.