Step 4: Confirm & Finish
The final step of the process confirms whether the checks and electronic payment files were generated correctly. If at least some of the files were generated correctly, click the Create payment button to finish the process and generate the Disbursement (DB) Batch report. If none of the payment files were generated correctly, click the Restart payment button to start the process again.
Note
To view DB batches in J1 Web, you must be in a General Ledger Accounting Disbursement Batches role with the "Can view batches" permission.
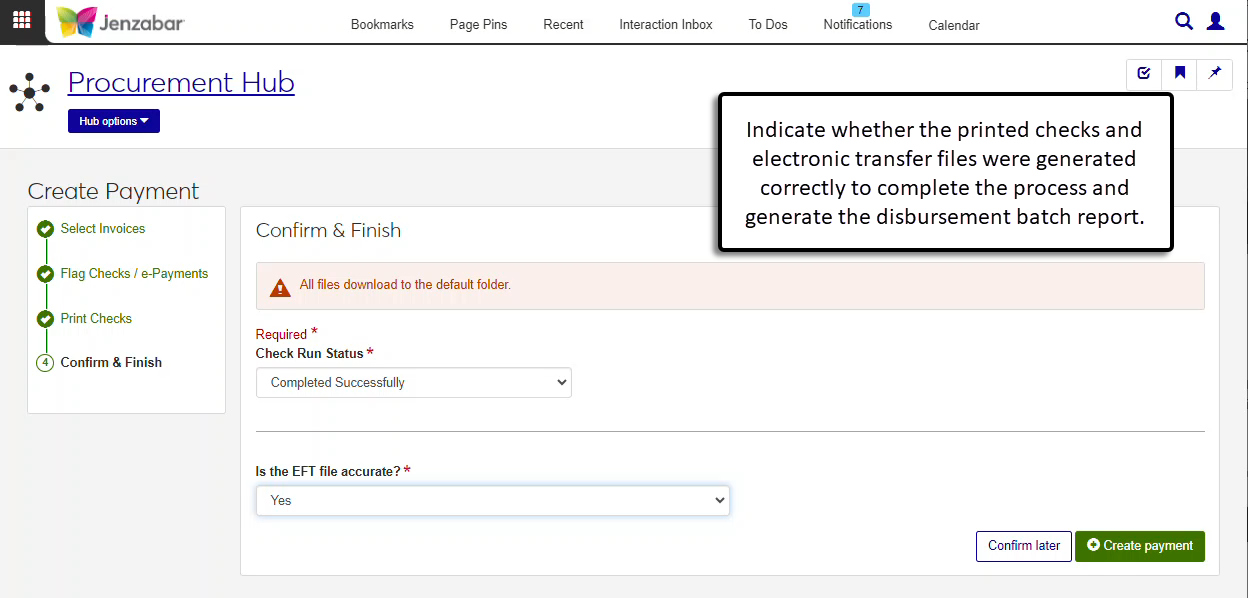
If all the checks and e-Payment files were printed/generated correctly:
In Check Run Status, select Completed Successfully. Required.
In Is the EFT file accurate?, select Yes.
Click Create payment to generate the Disbursement Batch reports and open the payment details page.
If some, but not all, of the checks and e-Payment files were printed/generated correctly:
In Check Run Status, select Partially Successful.
From the Did any checks generate successfully? drop-down, select Yes or No. Required.
If Yes is selected, type the check number in the Enter the last check number that generated correctly field. Required when Yes is selected; disabled when No is selected.
In Is the EFT file accurate?, select Yes. Required.
When either "Did any check generate successfully?" or "Is the EFT file accurate?" is set to Yes, the Create payment button is enabled.
Click Create payment to generate the Disbursement Batch reports. The payment details page for the last check number that was generated correctly opens.
If none of the payment files were printed/generated successfully:
In Check Run Status, select None Successful. Required.
In Is the EFT file accurate?, select No. Required.
Click the Restart payment button to return to Step 1. Before restarting the process, make the appropriate updates to the invoices, vendor, and/or student records.