Manage Housing Application and Assignments
Important
Information and features vary according to the roles to which you belong and the permissions associated with those roles. For more information, contact your module manager or your campus support team.
The housing application and assignments page contains several tabs that let you easily check the details for many features of student housing. All of the features available on this page are specific to the applicant group they are associated with.
To access this page, go to the Applicant Group summary page and select Manage housing application and assignment from the Applicant group options drop-down menu.
Tabs on this Page
Housing Process Definition Tab
Student Housing Lottery Number Assignment
On the Housing Process Definition tab of the applicant group's Manage housing application and assignment page, click the pencil icon beside the feature you want to turn on.
Add appropriate details for the feature. Note that all required fields must be completed in order to turn the feature on.
Click Update.
Students will submit this form to be included in the housing process. You will use FormFlow - Forms to modify an existing housing application template.
Note
Note that you will need to create a separate housing application for every applicant group in a session. Each housing application is linked to a specific applicant group.
Log in to Campus Portal as an Administrator.
If you want, add a page and/or tab where Student Housing portlets will be located.
Using the Global Portlet Operations site setting, ensure that appropriate settings are set to allow students to access FormFlow - Forms.
Use the page options to Add a new feature to this page.
Under General Purpose features, add FormFlow - Forms.
Return to the default page where the FormFlow portlet has now been added and click Manage Forms.
Click the link to Add form.
Select housing application as the template for the new form.
Click Create.
Next, you will customize the application for your school, assign it to the appropriate group of applicants, and ensure that payment information is set up. Be sure to review the form carefully and remove admin instructional sections that you do not want to students to see.
Note
Note that you will need to create a separate form for each Applicant Group.
Warning
Before publishing, be sure to add the Applicant Group ID and, if you want to accept payments with the application, set up the Payment Profile information, as well.
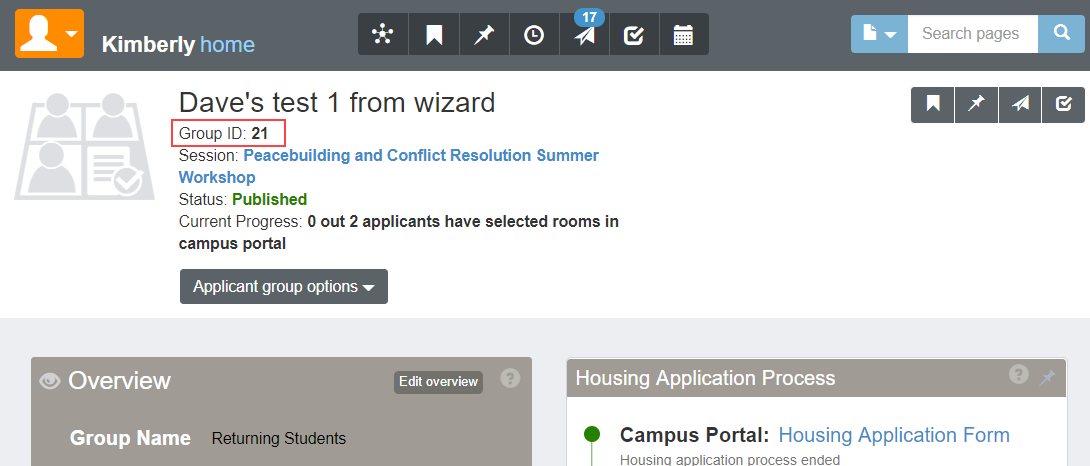
Set the Applicant Group ID
You will find the Group ID number on the Applicant Group summary page in J1 Web.
On the first page of the Housing Application, on the bottom left, right-click on the bottom of the Instruction page on your form and select Properties.
Go to the Settings tab.
In the Default Value field, replace default text with the Applicant Group ID.
Click Save Changes.
Set Start and End Dates for this Form
Within the Application form, click Form Settings.
Click the Settings tab.
In the Display on field, enter the time and date that you first want this form to be available to students.
Warning
The Display on date must be later than today's date. This will be validated in J1 Web, and you will not be able to publish the form if it is not later than today's date.
In the End on field, enter the time and date when you want this form to no longer be available to students.
Click Save settings.
Set Payment Profile (optional)
Tip
You only need to set the payment profile if you would like to collect an application fee or deposit at the time of form submission. Either way, you will need to edit the text of the form to change the application fee amount, or remove the reference to the fee.
Open the Housing Application form and click on the Tools drop-down.
Select Payment Profiles.
Click the Edit icon.
Complete the fields:
The Description can be changed to anything you would like the fee to be called.
The transaction code comes from your business department to ensure that the transaction is coded correctly.
The default fee is the amount that will be collected.
The email address should belong to the person who will contact the student when a payment does not go through, usually the housing manager or other staff member.
Click Save Profile.
Click Done.
Edit the Housing Application Fee
Go to the last page of the Housing Application form, Application Fee & Finish.
Edit or remove the form text to accurately reflect the fee associated with this application.
Right-click on the text and select properties.
Edit the text in the text field, if necessary.
Click Save changes.
Set Access Control for This Form
Tip
Setting access control for the form ensures that only students in a particular applicant group for this session will be able to access this form. This step is not required but is considered best practice to avoid allowing students to apply for housing (and possibly pay application fees) for sessions they are not a part of.
Create the Access Control List for the group that should have access to the form.
From the housing application form portlet, select Manage Forms and then click the Site Administrators link.
Click Data Sources.
Click the plus icon to add a new query.
Tip
Note that this process shows you how to create a query from scratch, but for future queries, it will be easier to copy and paste the Datasource query text from an existing Data source and just modify the group ID.
Type a name for your Access Control List in the Name field. Make sure it will let you know which applicant group ID it applies to. Example: Housing Applicant Group 80
Select the appropriate database in the Use Database field (in our example, it is EX).
Make sure Is Access Control List is checked.
Type (or paste) the following into the DataSource Query field:
select distinct nm.ID_NUM from SAApplicantGroupStudent ags
join Person p on (ags.StudentPartyAppID = p.AppID)
join NAME_MASTER nm on (p.NameMasterAppID = nm.APPID) where ags.saapplicantgroupappid = 80
Edit the last two characters, the applicant group ID, and change to the applicant group ID for the group that should have access to this form.
Next, you need to limit access to the form to only the Access Control List that you just created:
Open the housing application form and click Form Settings on the blue toolbar at the top of the form.
Select the Access/Security tab.
In the Limit access to field, find and select the new access control list that you created in the step above.
Click Save settings.
Customize the Form Fields as Needed
Review the form carefully, beginning on the first page, and remove any "admin instructions" that you don't want students to see.
Add or edit any form questions, and map fields appropriately. Instructions on using FormFlow can be found in the Help.
Copy Form URL into J1 Web
Copy the URL for the published form and paste into the Housing Process Definition tab for this Applicant Group in J1 Web.
Tip
If you have updated the form start/end date and time, the changes will automatically populate in J1 Web after you update the form link.
On the Manage housing application and assignments page, click the Lottery Number Assignment tab.
Click the Actions button for the student whose application you want to submit and select Submit application. The Submit Application pop-up window opens.
Complete all required information. Required fields are indicated by a red asterisk.
Click Submit.
Lottery numbers are automatically assigned when a housing application is submitted for a student, either by the student in Campus Portal or by an administrator on the Lottery Number Assignment tab.
From the Applicant Group summary page, click the Applicant group options drop-down menu and select Manage housing application and assignment.
Click the Lottery Number Assignment tab.
Select the checkbox for the applicants you want to reorder and select Reassign lottery numbers from the Options drop-down menu. The Reassign Lottery Numbers pop-up window opens.
In the Reassign Lottery Numbers pop-up window, you can:
Move the selected group of applicants to the top or bottom of the list. Just select the option you want from the Move Group of Selected Applicants to drop-down menu.
Select a sort option from the Re-sort the Selected Applicants drop-down menu. You can re-sort the selected applicants based on:
First come first serve: Sorts in the order that applicants were added to the roster.
Classification: Sorts based on seniority—fourth-year students first, then third-year, etc. Applicants with the same classification are sorted by highest GPA. Applicants with the same GPA are sorted alphabetically.
Athletics: Sorts based on participation in athletic program first. Applicants with the same classification are sorted by highest GPA. Applicants with the same GPA are sorted alphabetically.
GPA: Sorts based on applicant's GPA, highest first. Applicants with the same GPA are sorted beginning with your school’s fourth year classification. Applicants with the same classification are sorted alphabetically.
Query: Allows you to use a customized query to sort applicants and reassign lottery numbers. Jenzabar provides the default query (q_select_reassign_lottery_num); you can customize it as needed. Contact your campus support team for more information on customizing default queries.
Note
Custom queries must start with the default "q_" filename and must be stored in the Jenzabar Reports directory. This directory is set up as a part of the upgrade\installation process that defaults to C:\Jenzabar\Reports\.
Note
You cannot access InfoMaker directly from J1 Web to edit your queries. See the InfoMaker Resource Center on MyJenzabar.net, or contact your campus support team to learn more about customizing queries.
Do not re-sort: Does not change the order of the selected applicants, only moves them to top or bottom.
After you make your selection, click Update. Whichever sort option you chose, the other lottery numbers in the list are adjusted accordingly.
Change the lottery number for a single student
To change the lottery number for one student:
Click the Actions button on that student's row and select Reassign lottery number. The Reassign Lottery Number pop-up window opens.
In the Reassign Lottery Number window, you can:
Move the selected student to the top of the list.
Move the selected student to the bottom of the list.
Assign the selected student a specific lottery number.
After you make your selection, click Update. Whichever one you choose, the other lottery numbers in the list will be adjusted accordingly.
Change the lottery number for multiple students:
You can also change the lottery number for selected students.
Select the checkbox for all the students you want to reassign.
Select Reassign lottery numbers from the Options drop-down menu. The Reassign Lottery Numbers pop-up window opens.
In the Reassign Lottery Numbers window, you can:
Move the selected students to the top or bottom of the list.
Resort the list based on specific criteria, such as classification, athletic participation, or GPA.
After you make your selection, click Update. Whichever sort option you chose, the other lottery numbers in the list are adjusted accordingly.
The housing application feature allows you to create and customize a FormFlow form for students to apply for housing. This form has powerful customization capabilities. It can be set up to collect any information you need from students, allow students to acknowledge policies and rules, and even collect application fees. The housing application is specific to one applicant group, but you can create a copy of it to be used with other applicant groups.If you decide not to use the housing application, you will need to manually submit an application for each student in the applicant group, providing some basic information about each one. This can be done on the Lottery Number Assignment tab, on the Manage Housing Application and Assignments page.
The roommate request feature allows students to request other students to join roommate groups. When one person in the roommate group selects (or is assigned) a room, all of the students in that roommate group are assigned to that room.If you decide not to use the roommate request feature, roommates will be determined by whoever selects or is assigned to the same room.
The Room Selection feature allows students to choose a room assignment from the available rooms in the Campus Portal. If you decide not to use the room selection feature, you will need to manually update each student's room assignment..
A session is a period of time decided on by you. It may refer to a semester, but it can also exist outside the parameters of semester dates. For example, a session for student residents moving onto campus may start one week before the semester begins, and end one week later. Or there may be special sessions for short-term workshops or activities. Using a session provides a structure for assigning staff, reserving spaces, billing students, and other key functionality.
Applicant groups are a convenient way to assign priority to certain groups for housing selection. You might want to separate applicants into groups by year (first/second/third, etc.), by program (athletics), or other criteria. You may create separate groups for resident students and commuters, or you may have both in the same group. Using applicant groups allows you to create an application form specific to this group, assign them time slots to select rooms separate from other groups, and even designate which residence bedrooms are available for them to select.
Ensure that residence spaces have been added to the session. Applicant groups can only be created after there are residence spaces associated with the session.
Yes! This is simple but requires some extra setup.
On the Session summary page, click the Residence Spaces link on the Housing Application block to open the Manage Residence Spaces page. From here you can set the applicant group for the group you want to make this space available for.
If you are only going to change a small number of spaces, you can click on the plus sign beside the row to expand the details for that space and click the pencil icon next to Applicant Group to make it editable. Select a new Applicant Group and click Save.
If you have a larger number of spaces to change:
Select the checkbox beside each row you want to include.
Select Edit space details from the Options drop-down. The Edit Space Details pop-up opens.
Select Applicant Group Restriction from the Select a Detail to Update drop-down.
Click in the adjacent field and select the applicant group you want the spaces to be limited to. Now only applicants in the group you chose will be able to select these spaces.
Note that you can add multiple applicant groups. For example, if rooms are only available for juniors and seniors, enter those two applicant groups in the residence space details.
Keep in mind that adding the applicant group for certain spaces limits those spaces, but not others. For example, if you have a group of rooms where you want freshmen to be assigned, you will need to assign those spaces to the freshman applicant group (only freshmen can select them), AND assign any other spaces that freshmen are eligible to choose.