Attendance Reporting Settings
Attendance reporting helps your school manage retention by tracking when students aren't attending classes. You can set up several kinds of reports and have faculty automatically receive tasks to complete the reports.
Background Information About Attendance Reporting
There are two categories of attendance reporting, Checkpoint and Census Date. You can turn on either or both, or you can leave them both turned off. You can edit the display names for both the Checkpoint and Census Date categories.
Instructors submit their attendance reporting in the Faculty hub on the Attendance page for each of their courses. Registrars then process the reports on the Reported Attendance page in the Registration hub, dropping or withdrawing students from courses as needed.
Checkpoint Reports
Checkpoint reports allow faculty to report who is present for specified class meetings, such as the 1st meeting or the 5th. Registrars can create as many checkpoint reports as you need.
Census Date Reports
The Census Date category tells who is attending as of the census date. One type reports those who have never attended, and another type who is no longer attending.
Excluding Individual Courses and Sections from Attendance Reporting
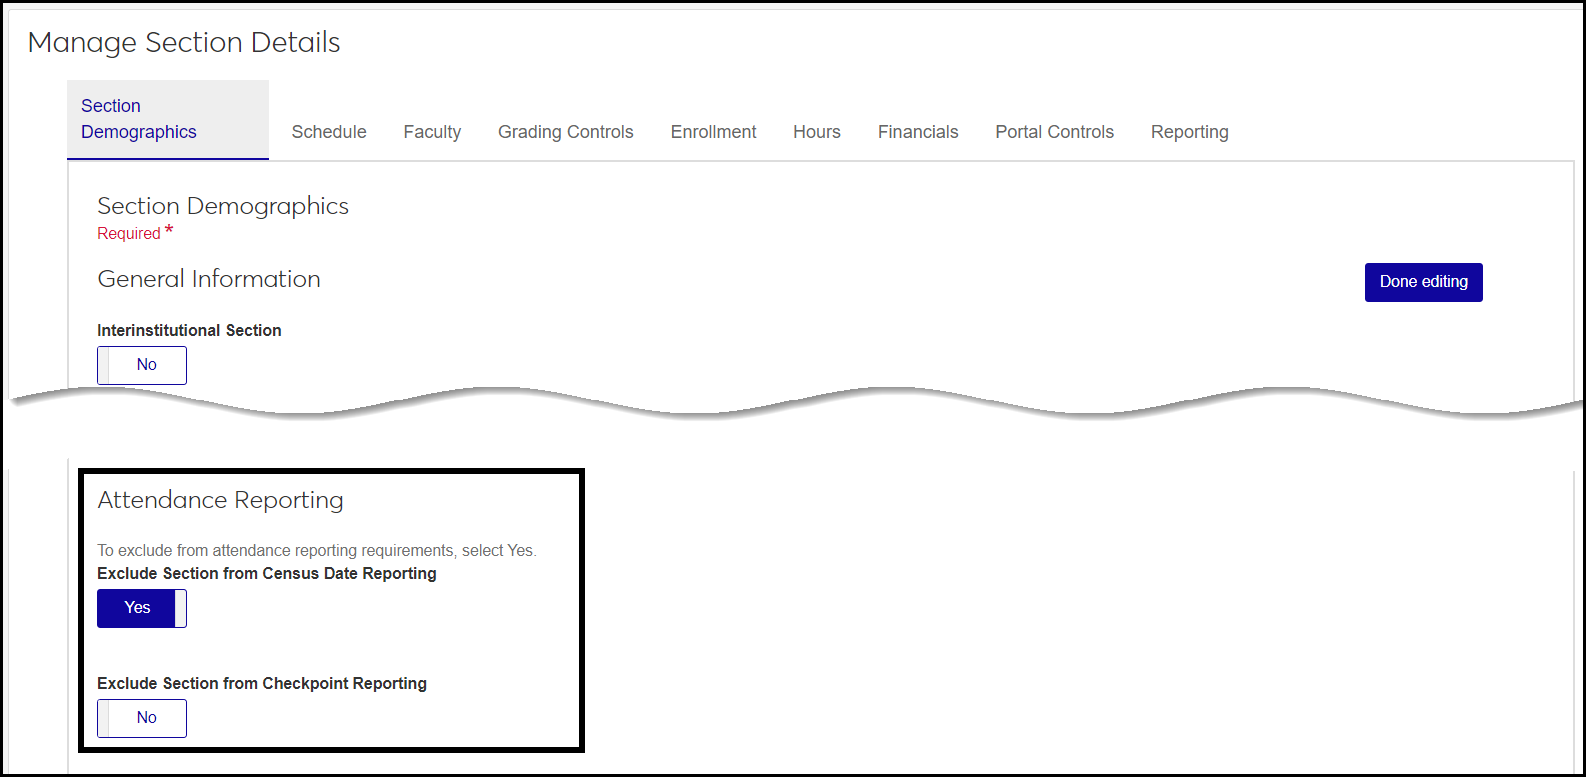
When someone creates a catalog course, it honors these settings. But even if you have attendance reporting turned on here, you can still exclude individual catalog courses or course sections from Census Date reporting, Checkpoint reporting, or both. You can do that when you're creating a course or section, or you can edit an existing one on the Manage Course Details page or Manage Section Details page.
Note
By default, each section you create from a catalog course has the same setting as its catalog course, but you can change the setting in each section. Thus, a course could be excluded but some of its sections included, or the course could be included but some of its sections excluded.
From the Registration Administration Hub options drop-down, select Settings and then General settings. The General Settings page appears.
Scroll down to the Attendance Reporting section, and click the Edit this section button.
Turn on the categories you want to use (Checkpoint and Census Date) by clicking the ON or OFF toggles.
Edit the Display Name of the Checkpoint and Census Date categories if you wish.
Enter instructions for faculty for Checkpoint and Census Date attendance reporting.
For each of the Census Date Report types (Never Attended and No Longer Attending), set up Drop and Withdrawal.
Set Drop to ON if you wish.
Select a Default Drop Date.
Set Withdrawal to ON if you wish.
Make selections for each of these:
Click Save this section.
To exclude specific courses from attendance reporting
From the Hub options, select Manage catalog courses.
In the Course Demographics view, select one or more courses.
In the Options drop-down, select Edit selected.
In the Select a detail to update drop-down, select either Exclude from Census Date Reporting or Exclude from Checkpoint Reporting. (Click Add another detail to select both.)
In the next drop-down, select Yes.
Click Update.
To exclude individual sections from attendance reporting
From the Hub options, select Manage sections.
In the Course Demographics view, select one or more sections.
In the Options drop-down, select Edit selected.
In the Select a detail to update drop-down, select either Exclude from Census Date Reporting or Exclude from Checkpoint Reporting. (Click Add another detail to select both.)
In the next drop-down, select Yes.
Click Update.