Case Summary: Conduct History Tab
Important
Information and features vary according to the roles to which you belong and the permissions associated with those roles. For more information, contact your module manager or your campus support team.
The Conduct History tab displays a read-only list of all violations associated with cases in which the student is an involved party, not just the violations associated with a specific case. A case may be associated with more than one violation.
The information displayed on the Conduct History tab is read-only, but if a case has been assigned to an administrator, the case number is linked to the summary page for that case.
You can download the list to an Excel file or generate a PDF file of the list.
To view conduct history, you must be in the Student Conduct - Assistant Director Access by Department or Student Conduct - Director Access by Department role with the "Can view conduct history" permission enabled.
Note
Depending on your permissions, some of the information on the Conduct History tab might be hidden.
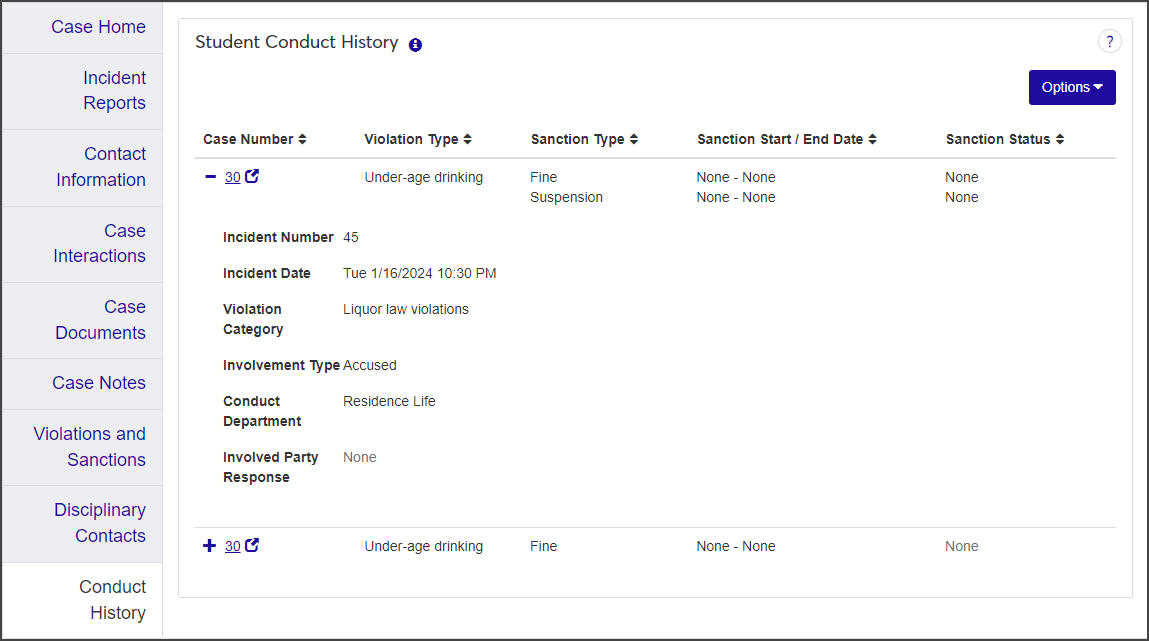
Click the plus icon next to a violation to expand the row and view all columns. For each violation, the tab displays the following information:
Column | Description |
|---|---|
Case Number | If a case has been assigned to an administrator and you have the necessary permissions to view the case, you can click the case number to open the Case summary page. |
Violation Type | A description of the violation type. |
Sanction Type | Each sanction type associated with the violation, if any. There can be more than one. |
Sanction Start / End Date | The start and end dates for each sanction, if applicable. |
Sanction Status | The status of each sanction (e.g., In Progress, Complete, Paid, etc.). |
Incident Number | The number assigned to the incident report associated with the case. |
Incident Date | The date the incident occurred. |
Violation Category | The violation category, if one has been associated to the violation. |
Involvement Type | How the student is involved in the incident (e.g., Accused or Witness). |
Conduct Department | The Conduct Department the incident has been assigned to (e.g., Residence Life or Title IX), if applicable. |
Involved Party Response | The involved party's response to the incident (e.g., Innocent or Guilty), if applicable. |
To generate a PDF file of the student's conduct history, open the Conduct History tab and select Generate PDF from the Options drop-down.
On the Conduct History tab, select Download to Excel from the Options drop-down.
Select options for the Excel format and data columns.
Download to Excel Options
Workbook Creation Options: This option lets you choose how you want the data to be organized when it's exported. If you are exporting a large number of rows, you may want to separate the data into different worksheets or even workbooks. Once you select this option, the Separate (Sheets or Workbooks) By drop-down becomes available so you can choose the groupings for each worksheet or workbook.
Separate (Sheets or Workbooks) By: This field becomes available when you choose to organize your export into multiple worksheets or workbooks. In general, you'll have the option to separate the data based on the columns. You will only see options for the visible columns.
Note
For example, if you are exporting a set of definitions, you might choose to organize the data into two workbooks: one for active definitions, and one for inactive definitions. Do this by selecting the Active column in this drop-down. All of your rows designated as active will be in one workbook, and the inactive ones in a separate workbook.
Workbook Format: This section lets you set some Excel display options for your data. For more information about each of these features, consult Microsoft Excel help.
Autofit columns: Fits column width to the data so that fields are not truncated.
Turn on filtering: Turns on the AutoFilter feature, which allows you to show only rows that meet your selected criteria.
Freeze Top Row: Your worksheet displays the column title in the first row by default. Selecting this option keeps the top row at the top so that as you scroll down through your data, the column headings remain displayed.
Show totals for numeric columns: If selected, this option includes the sum of a column of numbers at the bottom of that column.
Columns to Include: These options are specific to the page you are viewing, so they will vary. You will only see options for columns that you can see on the page. All of the columns are selected by default, but you can deselect any of the columns you don't want to include.
Click Download. Your .xlsx or .zip file is saved in the file location that you have set in your browser settings.