Payment Details
Important
Information and features vary according to the roles to which you belong and the permissions associated with those roles. For more information, contact your module manager or your campus support team.
The Payment Details page provides information about invoices and transactions that have been paid. There are two variations of the payment details page.
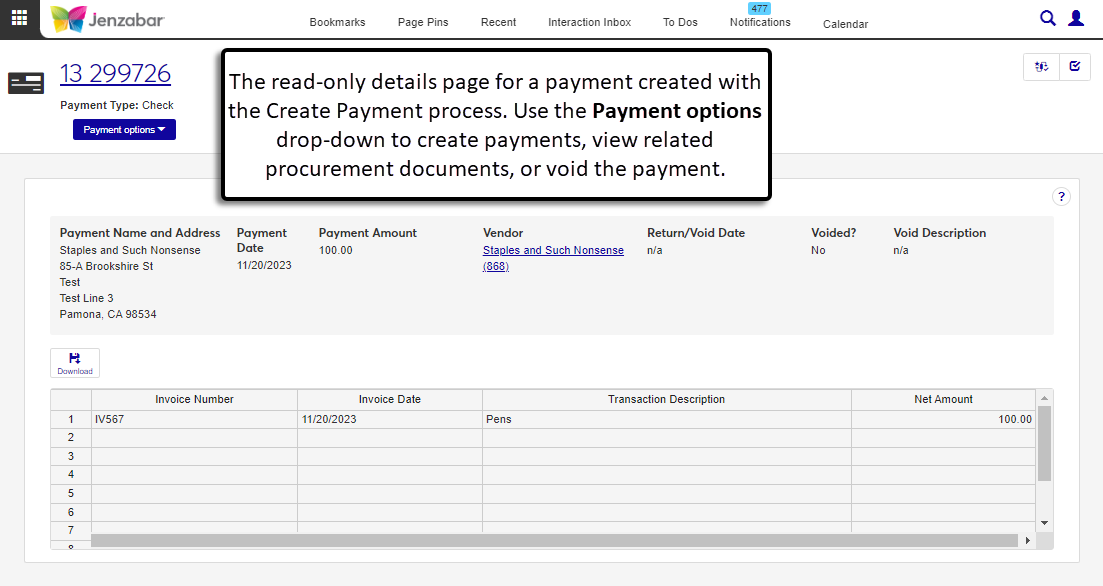
Payment Details for Payments Made in J1
If the payment was created with the J1 Create Payment process, the top of the page displays general information, including payment name, date, amount, and whether the payment was voided. The bottom of the page is a read-only spreadsheet with invoice and transaction information. Payment details cannot be edited, but you can download transaction details.
Payment options let you create new payments, view related procurement documents, and void the payment.
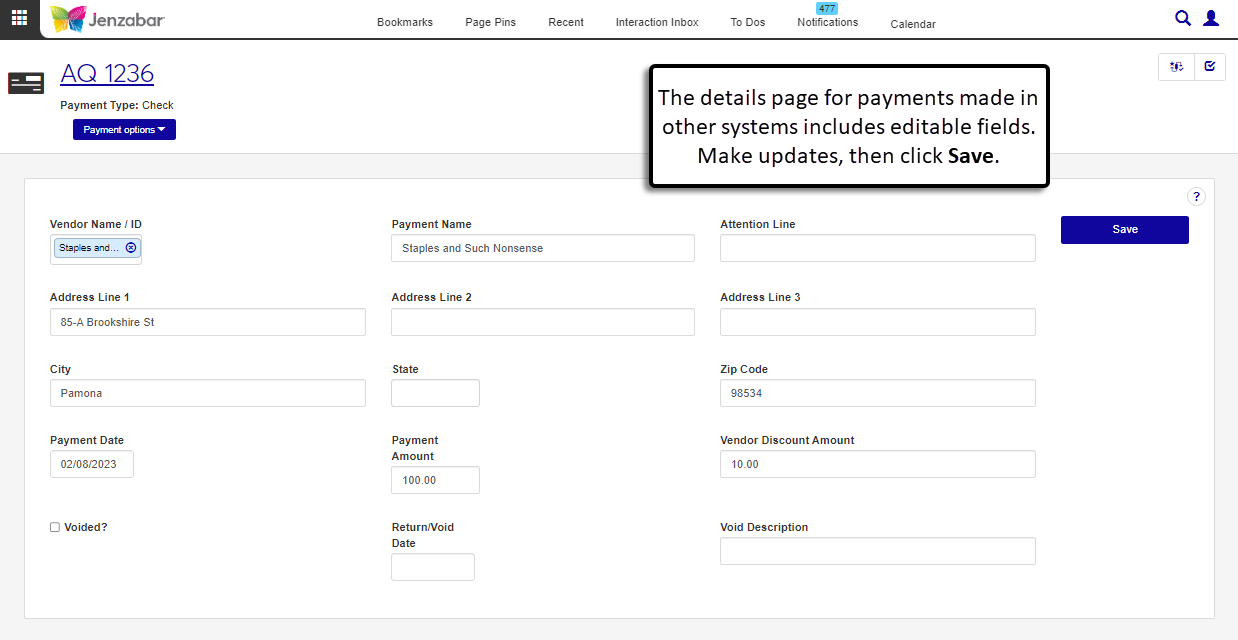
Payment Details for Payments Made in Another System
If the payment was made with the Create from previous system payment option, the details page includes several editable fields, including vendor name, address information, and payment amount. Payment options let you create new payments or view related documents.
Desktop Location
Payment details can also be viewed in the Desktop Display A/P Check/EPayment window.
Permissions Required
To access payment details, you must be in a Procurement - Accounts Payable role with the "Can view payments" permission. Additional permissions are needed to view related documents and void the payment. For more information about permissions, see Roles and Permissions for Creating Payments.
From the Finance, Procurement Hub options, select Payments. The Payment List page opens.
Click the Payment Number link to open the payment details in a new tab, or select one or more payments and click Open.
Note
This option is available for payments created via the J1 Create Payment process.
Navigate to the payment details page.
Click the Payment options and select Void. The Void Payment? pop-up opens.
The Void Date is today's date by default and can be changed if needed. Required.
Enter an optional Void Description.
The default File Format is PDF, and you can add or remove others as needed. Required.
Click Yes, void. The pop-up closes, the Voided? column in the payment header updates to "Yes", and a void (VD) batch is created to reverse the associated invoice transactions. The alert at the bottom of the page has links to the VD batch and the Check Register report with the void payment details.
Navigate to the payment details page.
Click the Download button. The Download to Excel pop-up opens.
Select options for the Excel format and data columns.
Click Download. Your .xlsx or .zip file is saved in the file location that you have set in your browser settings.
Payments entered from a previous system must have a Prefix and Payment Number. To associate the payment with an invoice in the system, create an invoice and enter the same prefix and payment number used when the payment was created.
For more details about creating invoices, see Create Invoices.