Step 3: Print Checks
After invoices are flagged for payment and the Checks/e-Payments to be Issued reports have been reviewed, Step 3 designates both the AP subsidiary group associated with the payments and the check/e-Payment register layout. When Print and continue is clicked, the registers, checks, and e-Payment files are generated and downloaded.
If changes need to be made to the list of invoices selected for payment, click the Reselect invoices button at the top of the page to clear the current invoice selections, remove the payment flags, and return to Step 1.
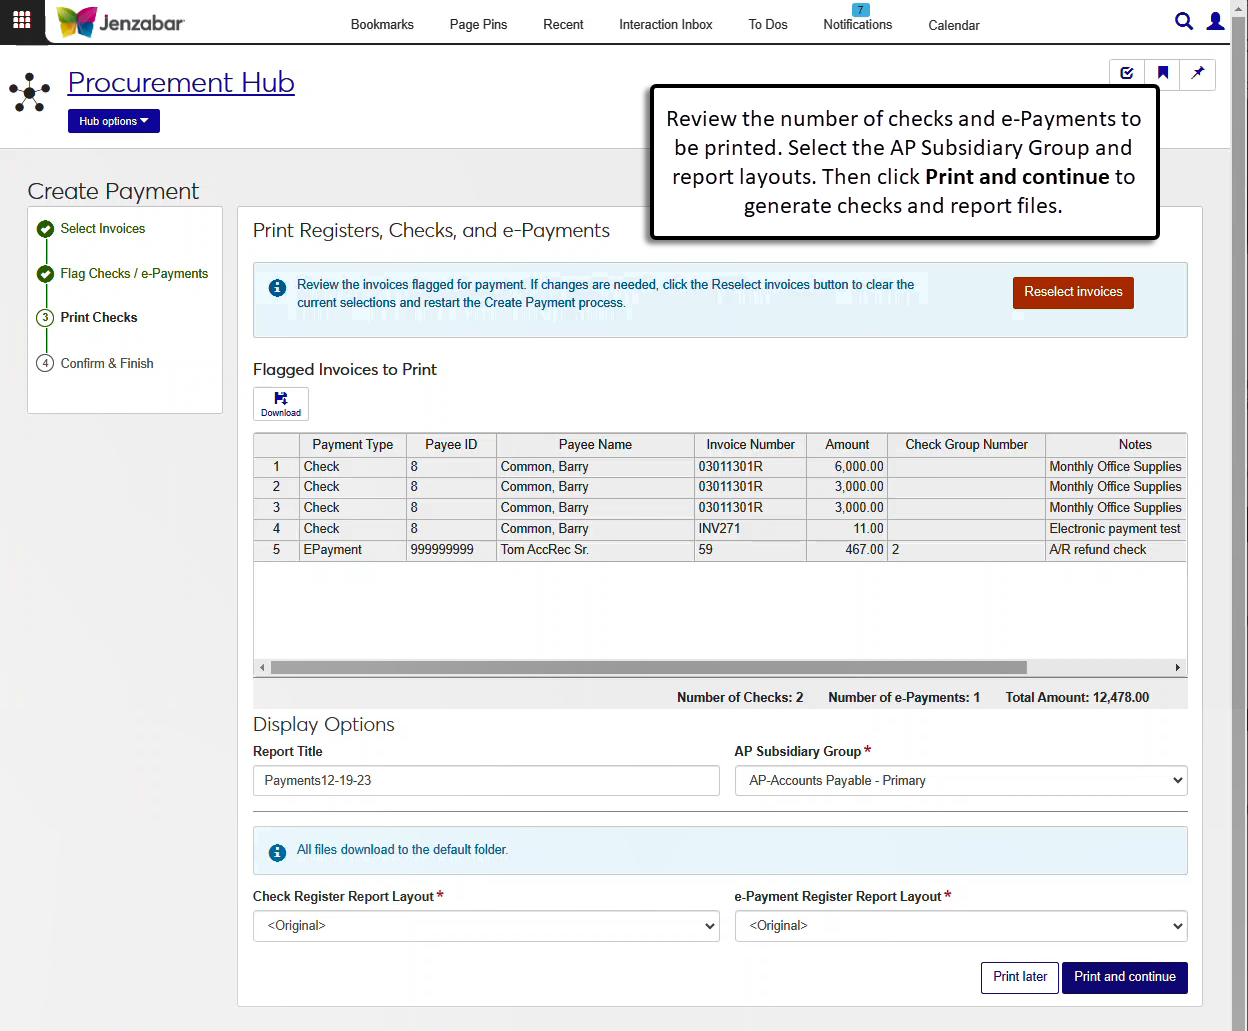
Review the Flagged Invoice to Print section. If there are issues with the selected invoices or invoices that you no longer want selected for payment, click the Reselect invoices button to clear the current invoice selections, remove the payment flags, and return to Step 1.
In the Display Options section, enter an optional Report Title.
Enter optional Header and Footer descriptions for the electronic payment file (up to 94 characters). These fields are only visible when the "Allow Electronic Header Footer" checkbox is selected on the Desktop Electronic Payment Configuration window.
Select the AP Subsidiary Group. Required.
Select from the following report layout options. Required. The Jenzabar-provided report is the default, and customized versions are available for selection.
Check Report Layout
Check Register Report Layout
e-Payment Report Layout
e-Payment Register Report Layout
Note
The Check Register report must be customized from the J1 Web version; the customizations to the Desktop version will not work. Customizations made to the Desktop version of the e-Payment Report can be used in J1 Web.
Click a Print button.
Print later pauses the process and returns to the Payment List page.
Print and continue generates and downloads the following reports for review and progresses to Step 4.
Check/e-Payment Register
Check report
Electronic Payment report
Electronic payment file
For the customized versions of the report created in Desktop to appear as choices in the Report Layout field drop-down, your campus support team needed to complete certain steps as part of the installation process. Customizations to the Desktop version of the e-Payment Register report can be used in J1 Web. However, the Check Register report was modified to work in J1 Web, so customizations made to the Desktop version will not work in J1 Web. You'll need to recustomize the J1 Web version of the report for additional options to be available from the drop-down.
Tip
Only custom versions of the report created in Desktop before J1 Web installation will appear as choices in the Report Layout field drop-down. Reports customized in Desktop after you've installed J1 Web are not available in the drop-down unless they have been copied over to the appropriate location on the J1 Web server.
All the reports for the Create Payment process are in the APWebReport.pbl. The Check Register report is named "d_print_check_register_checks", and the e-Payment Register report is named "d_print_epay_register_epays". Reports can be customized in InfoMaker. For instructions on customizing reports for J1 Web, see Customize Reports for J1 Web.
To view bank account numbers, you must be in a role associated with the data mask set to view the full bank account number. Data display access is managed by administrators from the User Management hub, Data Display page. For more information, contact your campus support team or see Data Display.