Create Vendor: Name / ID Details
Important
Information and features vary according to the roles to which you belong and the permissions associated with those roles. For more information, contact your module manager or your campus support team.
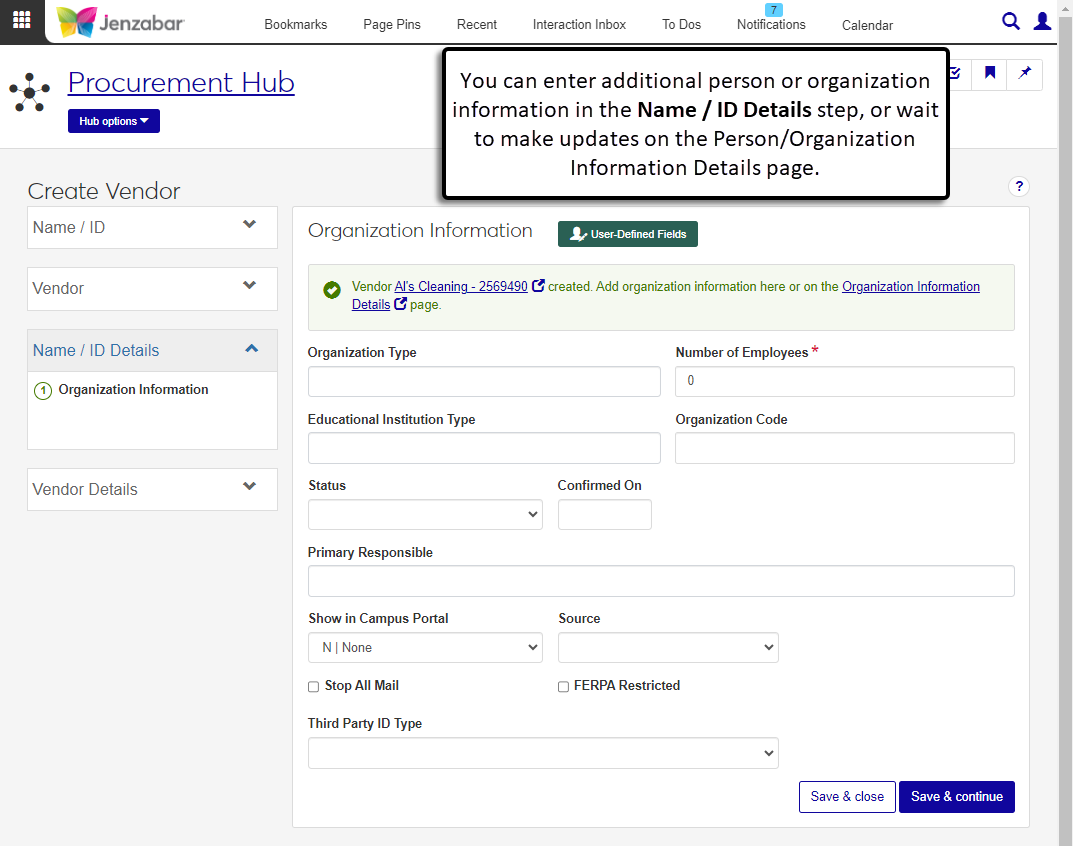
The Name / ID Details section of the process lets you add additional information about the person or organization. It's optional, so you can choose to enter information during this step or save the vendor record and update these details later from the person/organization information details page.
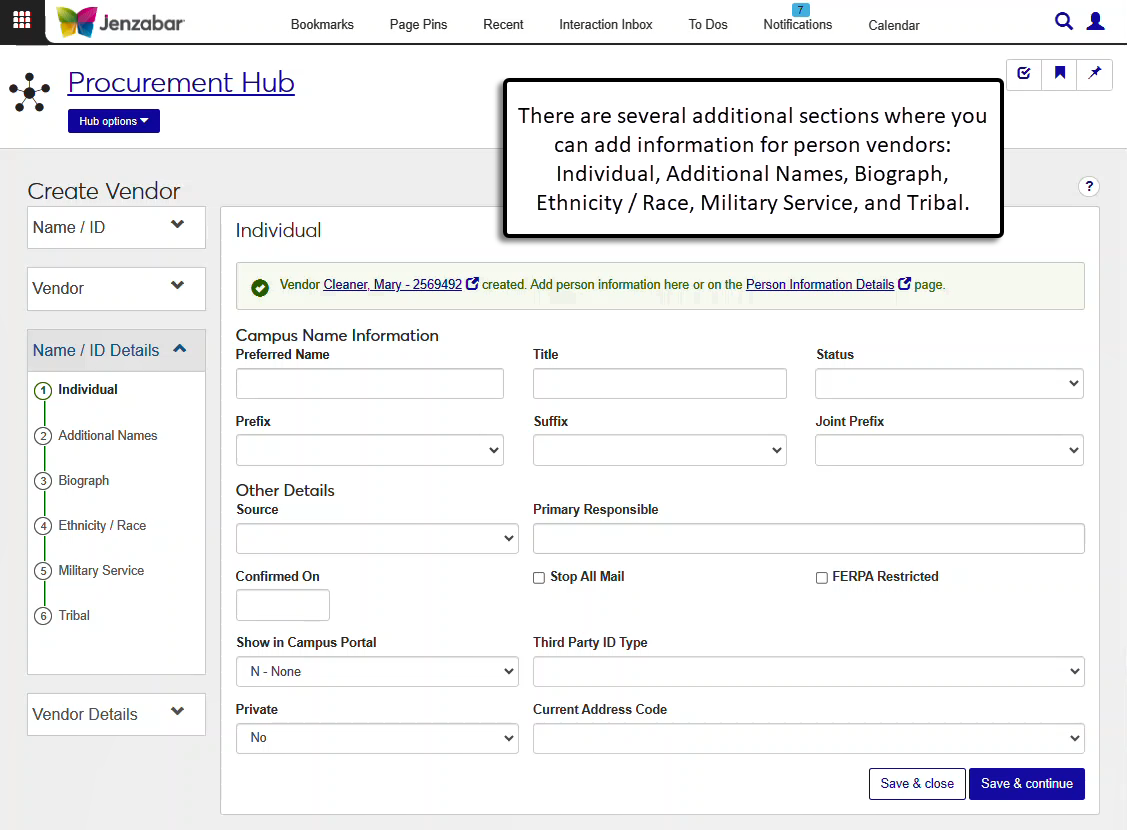
Several optional sections appear when person vendors are created. For additional information about the fields in each section, see the "Fields" section for each of the tabs listed on the Person Information Details page.
User-Defined Fields
You can capture additional information about organizations with user-defined fields. User-defined fields are managed by your System Administrator and can be useful for internal reporting. Click the User-Defined Fields button to review or add more details to an organization's record. This button is visible when you are in a role with permission to view, edit, or configure UDEF data.
Note
The Organization Information page displays for new organization vendors. For more details about the fields, see Organization Information Details, Organization tab.
Select an Organization Type.
Enter the Number of Employees. Required.
Select an Educational Institution Type if the organization is an educational institution.
If applicable, enter an Organization Code. This is typically only used when the organization is an educational institution.
Select the organization Status. Options are typically Current and Out-of-date.
Enter an optional Confirmed On date. Default is today's date.
Select the Primary Responsible person for the organization. This is the person responsible for maintaining the record.
The default for Show in Campus Portal is N|None, which means the organization is not visible in the Campus Portal. Select E|Web to make the organization visible to students and faculty in the Campus Portal.
Select an optional Source to indicate how the organization information was added to the system. This is primarily used for student information that is added during the internet submission process.
Select the Stop All Mail checkbox if the organization has requested not to receive any mail.
Select a Third Party ID Type if a third-party is responsible for paying certain fees.
Review your selections, and click Save & continue to proceed to the Vendor Details section.
On the Organization Information section, click the User-Defined Fields button to open the User-Defined Fields pop-up.
Review and update the available fields as needed.
Click Save.
In the Campus Name Information section, enter or select the following optional information:
Preferred Name
Title
Status
Prefix
Suffix
Joint Prefix (typically not used for vendor records)
In the Other Details section, enter or select the following optional information:
Source (typically not used for vendors)
Primary Responsible
Confirmed On
Stop All Mail
FERPA Restricted (typically not used for vendors)
Show in Campus Portal
Third Party ID Type
Private
Current Address Code (this is the default address used for mailings)
Click Save & continue to proceed to the Additional Names section.
On the Additional Names section, the first name record is read-only. Click Create another additional name record to enter information for another record.
In the new record section, enter or select the following information:
Name Type (required)
First Name (required)
Middle Name
Last Name (required)
Prefix
Suffix
Joint Prefix
Start Date (required, and Additional Names of the same name type cannot have overlapping Start Dates)
Click Create another additional name record to add more records, or click the Remove icon to delete records.
Click Save & continue to process to the Biograph section.
On the Biograph section, enter or select information in the Personal Information section.
Sex at Birth
Legal Sex
Gender Identity
Pronouns
Birth Date
Birth City
Birth State
Birth Country
Citizenship Status (required)
Citizen of
Visa Type
Religion
Marital Status
Permanent Resident Status Date
Permanent Resident Registration
Individual is Deceased
Enter or select information in the SSN section.
Note
SSN information is only visible and editable with permission.
SSN
SSN Private (select the checkbox if the SSN should not be shared)
SSN Verified (select the checkbox if the SSN has been verified according to your institution's policies)
SSN Verified Date (visible when SSN Verified is selected)
Enter or select information in the Employment Information section.
Employer
Type (indicates the type of employee)
Spouse Employer
Employee of College
Spouse Employee of College
Enter or select information in the Other Information section.
Entrance Code (typically used to indicate a student's entrance status)
Highest Degree
Disability Status
Bar Code ID
Financial Aid Request
Library Patron
Block Loan Patron
Previously Enrolled for Credit
Previously Enrolled for CEU
Click Save & continue to proceed to the Ethnicity / Race section.
On the Ethnicity / Race section, the Date, Time, and Type are autofilled and can be updated as needed.
If applicable, select the Eligible Non-citizen checkbox.
Select from the Ethnicity drop-down.
If an Ethnicity is selected, select an option from the Additional Ethnicity Information drop-down.
Select a Race option from the drop-down.
Enter Comments if needed.
Click Create another ethnicity / race record to add another record, or click the Remove icon to remove existing records.
Click Save & continue to process to the Military Service section.
On the Military Service section, select or enter information in the Military Service Basics section.
Veteran
Veteran of Branch
Active Duty
Active Duty Branch
National Guard
National Guard State
Reserves
ROTC
Service Begin and End Date
Exit Status
NSC Veteran Status
Veteran/Active Duty or Spouse / Dependent of a Veteran/Active Duty who has suffered service related injury/illness
Spouse or Dependent of Veteran who is deceased
Spouse or Dependent of Veteran / Active Duty
Select or enter information in the Benefits Programs section.
Receiving Veterans Benefits
VA (benefits received from the U.S. Department of Veterans Affairs)
DOD (benefits received from the Department of Defense)
State (benefits received from the state)
Select or enter information in the Selective Service section.
Selective Service Registration Status
Selective Service Registration Date
Click Save & continue to process to the Tribal section.
On the Tribal section, click Create tribal record and enter information in the appropriate fields.
Tribal Affiliation (required)
Enrollment Number
Current Flag (selected by default)
Verified
Enrollment Begin and End Date
Parental Line
Generation
Blood Percentage
Tribal Agency
Tribal Chapter
Click Create another tribal record to add another record, or click the Remove icon to delete existing records.
Click Save & continue to proceed to the Vendor Details section.
You may not be in a role with permission to view user-defined fields (UDEF). Permissions to work with UDEFs are granted on the User-Defined Fields tab of any of the roles you are in. For the button to be visible, you must have one of the following permissions for Organization User-defined fields:
Can view UDEF data
Can edit UDEF data