Identifier Types Definitions
Important
Information and features vary according to the roles to which you belong and the permissions associated with those roles. For more information, contact your module manager or your campus support team.
The Identifier Types page is used to maintain alternate identifier categories that can be associated with an individual/organization when alternate identifiers are created for them. For example, they can identify individuals as J1 Advancement, Recruitment (JRM) and Financial Aid (JFA) users.
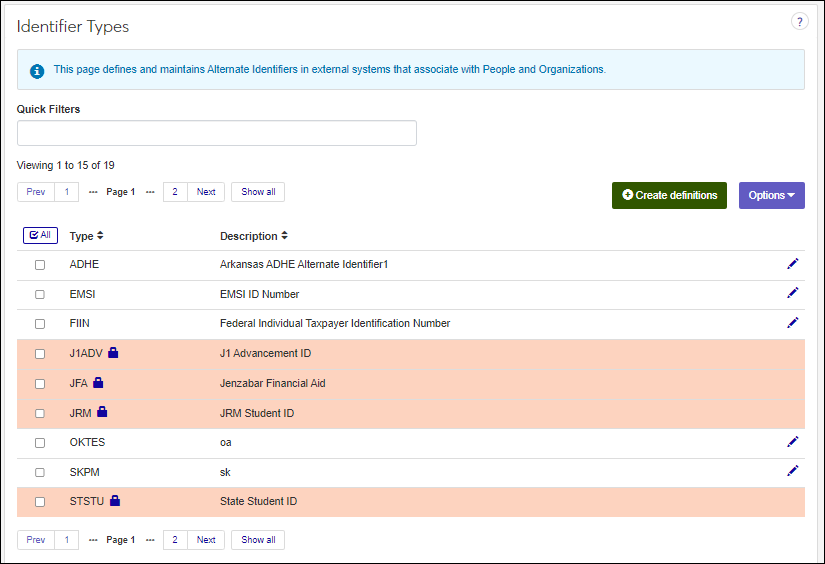
Jenzabar provides several identifier types for specific J1 Desktop processes. You can see these identifier types and edit the description, but you cannot edit or delete them.
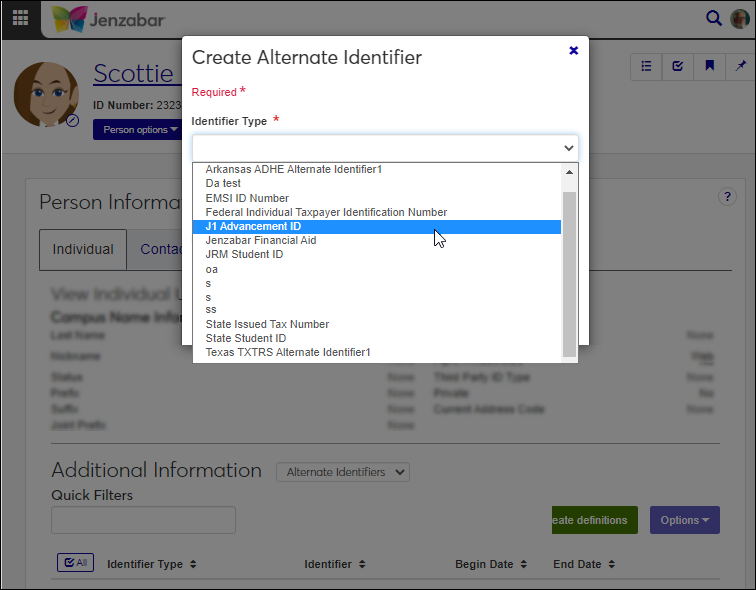
J1 Advancement ID (J1ADV)
Jenzabar Financial Aid (JFA)
JRM Student ID (JRM) allows you to process internet submissions created from imported Jenzabar Recruitment Manager (JRM) data.
State Student ID (STSTU) may be reported to National Student Clearinghouse or provided to the National Student Clearinghouse Core Service to get a student's State Student ID. Some states have their own State ID for students which can be added. State student IDs are associated with students on the Student Information window.
Identifier type definitions appear as options that can be selected from the Create Alternate Identifier window (Person Information Details page, Individual tab, Additional Information section).
To manage identifier types, you must belong to a role with Can manage identifier types enabled. Jenzabar provides this permission with the Campus-wide Definitions role, but your school may have created a customized version of it.
Identifier types can also be managed using the Desktop's Identifier Types window. Changes made in J1 Web are saved in Desktop, and vice versa.
Identifier types are stored in the IDENTIFIER_TYPE_DEF table.
Access the Identifier Types page.
Click the Create definitions button. The Create Identifier Type window appears.
In the Type Name field, enter a recognizable name. Enter up to 5 characters.
In the Description field, enter a brief description to help others determine which type should be used when selecting it in the system. Enter up to 60 characters.
To create another type, click the Save and create another button and repeat steps 3 - 4. If you're finished creating definitions, click the Create and close button.
Note
Jenzabar-provided identifier types are identified with a lock icon and cannot be updated.
Access the Identifier Types page.
Use the filter and sort options to find the identifier type you want to update.
Click the Edit icon. The Edit window appears.
Update the Description field. Enter up to 60 characters.
Click the Update button.
Note
Jenzabar-provided identifier types are identified with a lock icon and cannot be deleted.
Access the Identifier Types page.
Use the filter and sort options to find the identifier type you want to delete.
From the Options drop-down menu, select Delete. The Delete pop-up window appears.
Click the OK button.
Select the checkboxes next to the rows you want to export.
From the Options drop-down, select Download to Excel. The Download to Excel pop-up opens.
Select options for the Excel format and data columns.
Click Download. Your .xlsx or .zip file is saved in the file location that you have set in your browser settings.