Individual Tab
Important
Information and features vary according to the roles to which you belong and the permissions associated with those roles. For more information, contact your module manager or your campus support team.
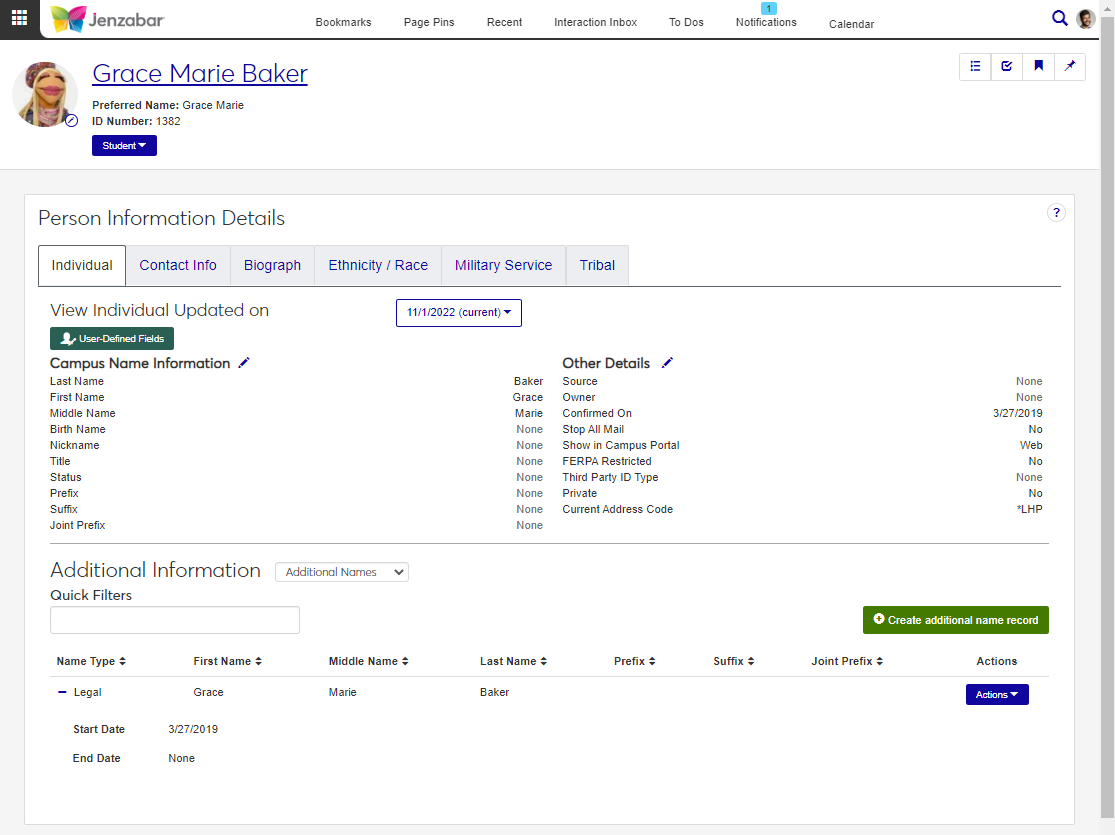
The Individual tab on the Person Information Details page includes details about the person's name, including Campus Name and any additional names or alternate identifiers. From this page, you can:
View current and historical name information
Update name information and other details, including visibility in the Campus Portal, FERPA restrictions, and current address code
Note
A historical name record is created whenever name information is updated.
View, create, and update additional names and alternate identifiers
View and update user-defined fields
You can capture additional information about individuals with user-defined fields. User-defined fields are managed by your System Administrator and can be useful for internal reporting. Click the User-Defined Fields button to review or add more details to an individual's record.
Jenzabar One users can have multiple names associated with their ID number (e.g., married name, legal name, etc.). These additional names can be displayed on reports, in the Campus Portal, and throughout Jenzabar One.
Schools that use external systems in addition to Jenzabar One (e.g., PowerFAIDS) can use Alternate Identifiers to note how the user is identified in the other system.
Most of the information available on the this tab is also available in Desktop's Name Entity window, on the Individual tab.
Name information is maintained in the NameMaster table. When name information is updated, historical name records are saved in the NAME_HISTORY table.
Most name information is added to the system via the internet submission process. The following fields can be edited to maintain accurate records.
To view and work with name information, you must be in a Person Management role (or a copy of it) with the appropriate permissions. For additional information about permissions, see Person Management Permissions.
To view and edit user-defined fields, you must have "Can edit UDEF data" permission for the appropriate fields on the User-Defined Fields tab.
Use the global search to access the person's summary page.
From the Person options drop-down, select Person information details. The Person Information Details page opens.
The Individual tab is the default view. Use the View Individual Updated on drop-down to view historical name records.
In the Additional Information section, select "Additional Names" or "Alternate Identifiers" from the drop-down to view those records.
Click the Expand icon to see more information.
Caution
Updates to name information may impact reports or processes in Jenzabar One and connected systems.
On the Person Information Details page, Individual tab, click the Edit icon next to Campus Name Information.
Make the needed updates to one or more fields. For additional information, see Fields.
Click Update. After updates are made, the previous information is saved as a historical name record with today's date.
On the Person Information Details page, Individual tab, click the Edit icon next to Other Details.
Make updates to any of the available fields. For additional information, see Fields.
Click Update.
Access the Person Information Details page. User-defined fields are used on the Individual, Contact Info, and Biograph tabs.
Click the User-Defined Fields button.
On the User-Defined Fields Edit Data pop-up, edit the fields as needed.
Click Save.
On the Person Information Details page, Individual tab, select Additional Names in the Additional Information section.
Click Create additional name record. The Create Additional Name Record pop-up opens.
Click in the Name Type field and select an option from the drop-down. Required. Available options are the Additional Name Types defined in the Campus-wide Definitions hub.
Enter a First Name (up to 30 characters). Required.
Enter a Middle Name (up to 30 characters).
Enter a Last Name (up to 60 characters). Required.
Select a Prefix.
Select a Suffix.
Select a Joint Prefix.
Enter a Start Date. Required. The default is today's date.
Note
The End Date is disabled. It is updated when an Additional Name of the same type with an earlier Start Date is added to the system.
Click Create.
On the Person Information Details page, Individual tab, select Additional Names in the Additional Information section.
Use Quick Filters and column sorting to find a name record.
Click the Actions button and select Copy. The Copy Additional Name Record pop-up opens.
To change the Name Type, click the Remove icon
 for the existing selection and select another option from the drop-down.
Make updates to the following fields as needed.
First Name (required)
Middle Name
Last Name (required)
Prefix
Suffix
Joint Prefix
Start Date (required)
Click Create.
On the Person Information Details page, Individual tab, select Additional Names in the Additional Information section.
Use Quick Filters and column sorting to find a name record.
Click the Actions button and select Edit. The Edit Additional Name Record pop-up opens.
To change the Name Type, click the Remove icon
for the existing selection and select another option from the drop-down.Make updates to the following fields as needed.
First Name (required)
Middle Name
Last Name (required)
Prefix
Suffix
Joint Prefix
Start Date (required)
Click Update.
On the Person Information Details page, Individual tab, select Additional Names in the Additional Information section.
Use Quick Filters and column sorting to find a name record.
Click the Actions button and select Delete.
In the Delete Definitions? pop-up, click Yes, delete.
On the Person Information Details page, Individual tab, select Alternate Identifiers in the Additional Information section.
Use Quick Filters and column sorting to find a name record.
Click Create definitions. The Create Alternate Identifier pop-up opens.
Select an Identifier Type. Required; cannot be changed after saving.
Enter a unique Identifier (up to 255 characters). Required; cannot be edited after saving.
Enter a Begin Date. Required. The default is today's date.
If needed, enter an End Date.
Click Save and create another or Create and close.
On the Person Information Details page, Individual tab, select Alternate Identifiers in the Additional Information section.
Use Quick Filters and column sorting to find a name record.
Click the Edit icon for a record. The Edit Alternate Identifier pop-up opens.
Make updates to the Begin Date or End Date. The Identifier Type and Identifier cannot be updated.
Click Update.
On the Person Information Details page, Individual tab, select Alternate Identifiers in the Additional Information section
Select the checkboxes next to the rows you want to export.
From the Options drop-down, select Download to Excel. The Download to Excel pop-up opens.
Select options for the Excel format and data columns.
Click Download. Your .xlsx or .zip file is saved in the file location that you have set in your browser settings.
Access to view and edit user-defined fields is based on permissions granted by your organization. Contact your campus support team for more information.
You may not have the right permissions. Contact your campus support team for more information about your access.
Additional name and identifier types are defined in the Campus-wide Definitions hub. See the help for each page for additional information.
Students may prefer to use a name that isn't their legal name throughout Campus Portal. Additional name records allow students to see the name they prefer to use in the system, although their legal name is used for reporting purposes.