WebAdmit Integration
Overview
WebAdmit is a web-based admissions application, designed to allow medical schools to receive and review applications online. Once these applications have been processed through WebAdmit, they can be imported to SONIS as an Excel file. The imported users will be created as Prospects.
The following fields are imported:
Import File Value | SONIS Location |
|---|---|
[WebAdmit] ID | Biographic - Other PID |
first_name | Biographic - First Name |
last_name | Biographic - Last Name |
date_of_birth | Biographic - Date of Birth |
Preferred Address - Email 1 | |
current_street_address | Preferred Address - Street Address 1 |
current_street_address_2 | Preferred Address - Street Address 2 |
current_city | Preferred Address - City |
current_state | Preferred Address - State |
current_postal_code | Preferred Address - Zip Code |
preferred_phone | Preferred Address - Phone Number |
gender | Biographic - Gender |
Note that the disposition for each users is set on import is based on default disposition set in the system. Checklist activities for each user are added based on the default disposition as well. See Dispositions for Applicants for more details.
Click here to download a sample file.
Dispositions for Applicants
In addition to the other functionality it provides, the Dispositions for Applicants utility allows administrators to set an import default, which is then automatically added to applicant records when they're imported. It's suggested that institutions use this function in conjunction as part of their WebAdmit integration to make the process smoother and more seamless.
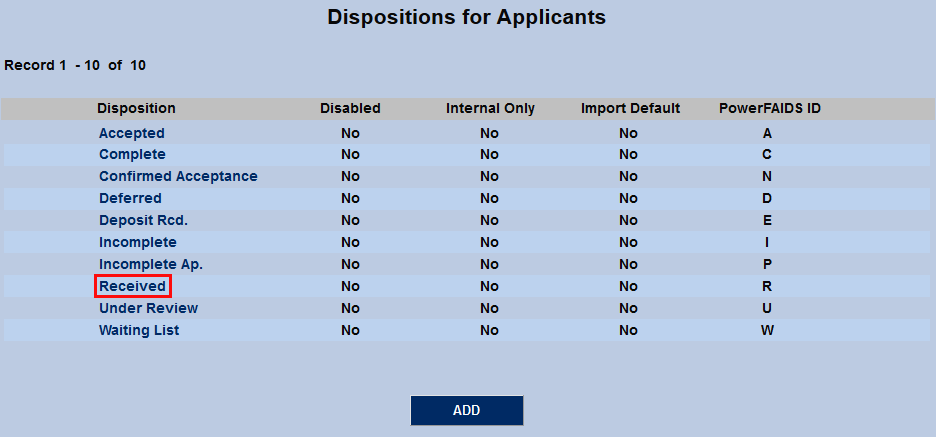
To set the import default, navigate to the Dispositions for Applicants page under the Systems menu. Click Add to create a new disposition or click on the name of an existing disposition to edit it.
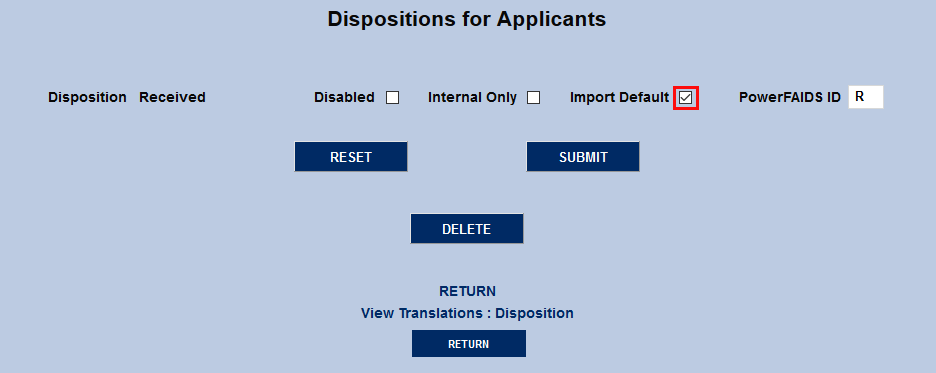
Check the Import Default box and click Submit to save the change. Note that only one disposition can be set as the default.
Disposition/Checklist Activities
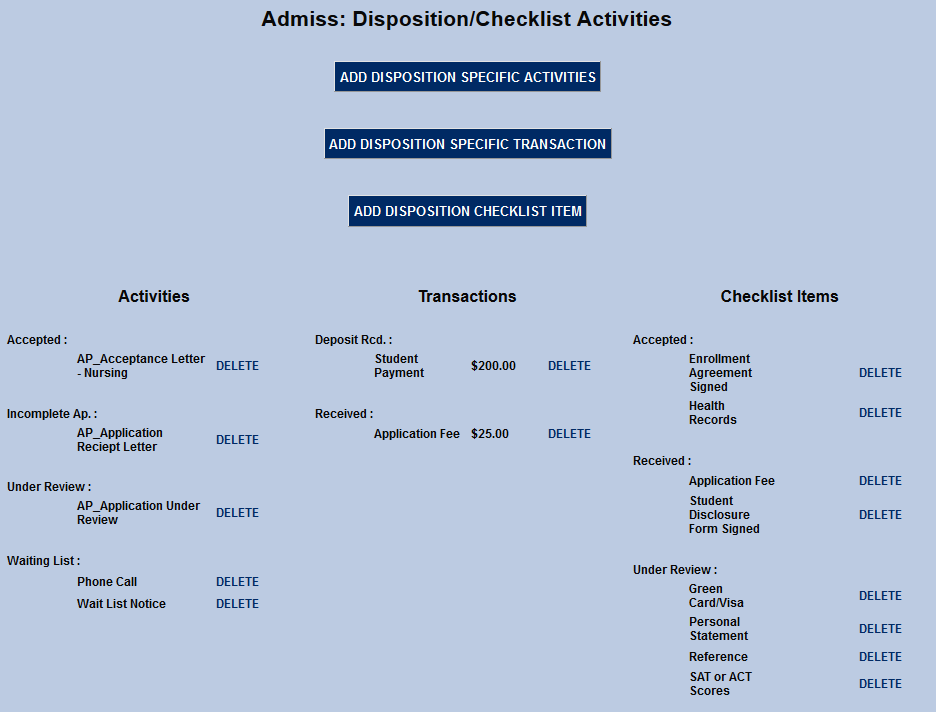
In conjunction with the disposition import default, activities, transactions, and checklist items can also be set up to be added to the applicant records during the import process. These activities, transactions, and checklist items are created through the Disposition/Checklist Activities utility in the Systems hub.
Import
Once an Excel file has been created by using WebAdmit, it can be imported to SONIS. Navigate to the WebAdmit Applicant Import Utility in the Systems hub. Click the Browse button and locate and select the file. Once the correct file has been selected, click Submit to begin the import.


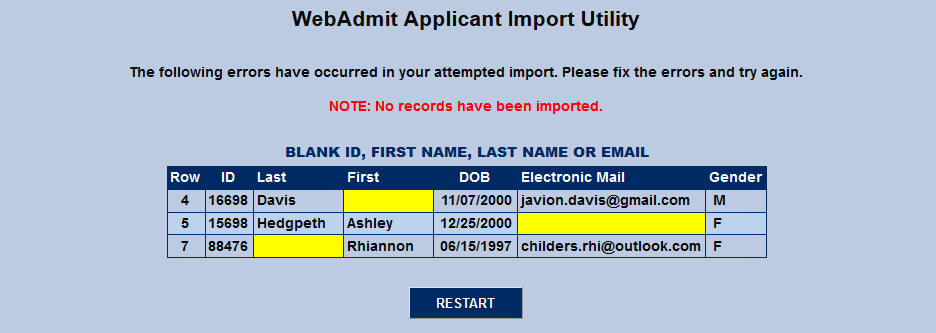
If the import file is determined to be in the proper format, the process will begin by checking to ensure that each record includes the required ID, First Name, Last Name, and Email. If records with blanks in these fields are identified, the process will stop and advise the user of the records that must be corrected before the process can continue.
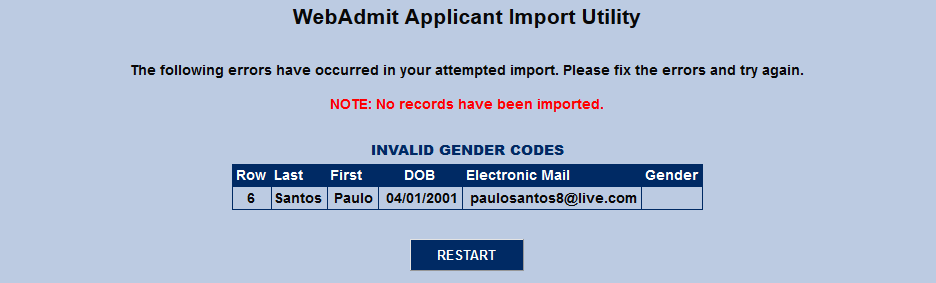
Next, the utility checks for a valid Gender code and alerts administrators if one is missing.
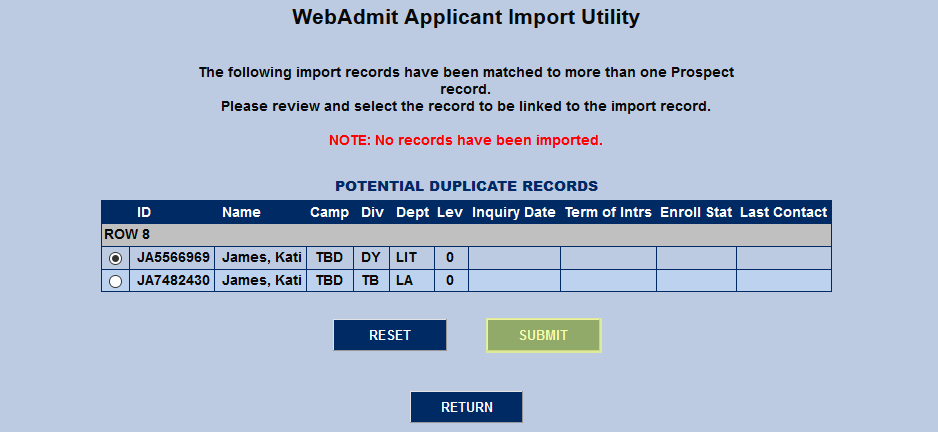
If an applicant being imported matches an existing prospect record in SONIS, the new data will replace their old data. However, in some cases, the applicant may have more than one prospect record for various reasons. When an applicant has the same first name, last name, and email address as more than one existing prospect, the utility will list all existing records that match the new data. Choose an existing record to merge the new applicant data with and click Submit to continue.
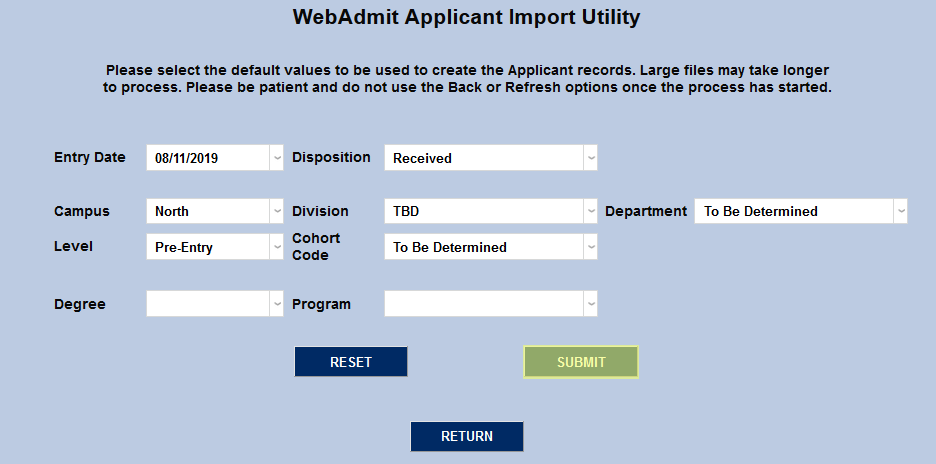
If no errors are found, users will be asked to choose an Entry Date, Campus, Level, Degree, Disposition, Division, Cohort Code, Program, and Department for the records being imported. If default values have been set, they will be selected on this page and can be left. Though users, of course, have the option to select unique values at this point as well. Once these values have been selected, click Submit to continue the import process.

Once the data has been imported, the number of records will be listed on the front page of the utility. Click the link to view the files as an Excel spreadsheet. Any disposition activities, checklist items, and/or transactions that have been put into place will be added to each applicant record created.