EDExpress Integration
Overview
EDExpress software is a PC application that processes, packages, and manages Title IV student financial aid records. Award reports generated by EDExpress can be imported to SONIS through the Financial Aid Award Import utility. Awards disbursement reports are imported through the EDExpress Direct Import and EDExpress Pell Import utilities.
To access Federal Student Aid training on using EDExpress, visit the FSA Training Center.
SONIS Setup
Import Filter
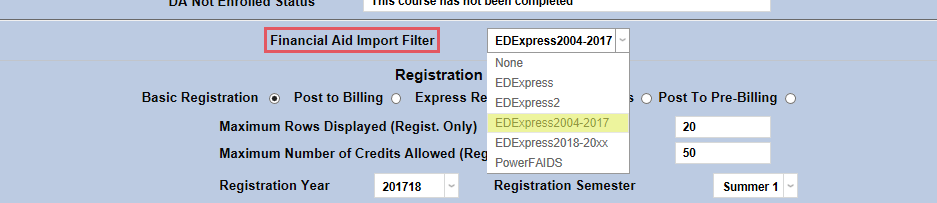
Before importing an EDExpress file, administrators must ensure that their system is set up with the correct filter. Navigate to the Web Options utility and select the version of EDExpress being used from the Financial Aid Import Filter dropdown menu. The Financial Aid Import Filter should be set to EDExpress2018-20xx.
Import T-Codes
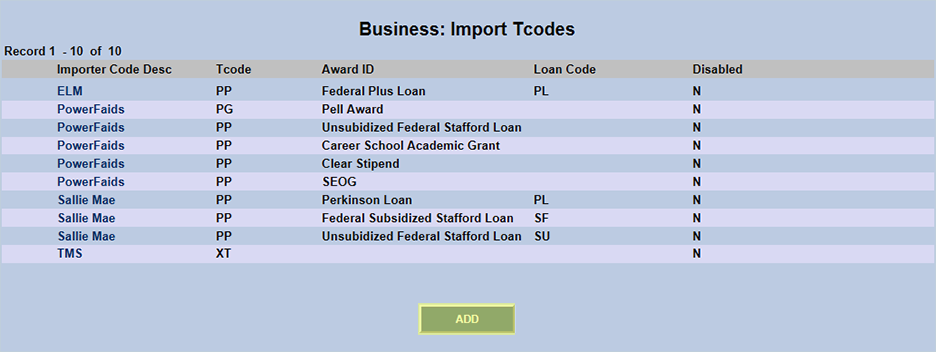
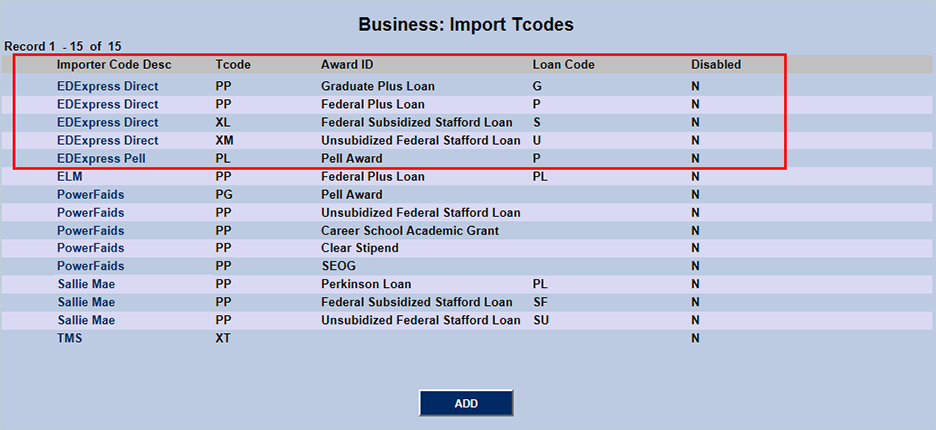
Administrators will also need to set up Import T-Codes for use with the EDExpress system. These import T-codes allow Jenzabar SONIS to identify which standard transaction code to use for the import of each disbursement type. Each import results in SONIS transactions just as if the user had entered the data manually. Navigate to Business: Import T-Codes under the Systems tab and click Add to begin creating the codes.
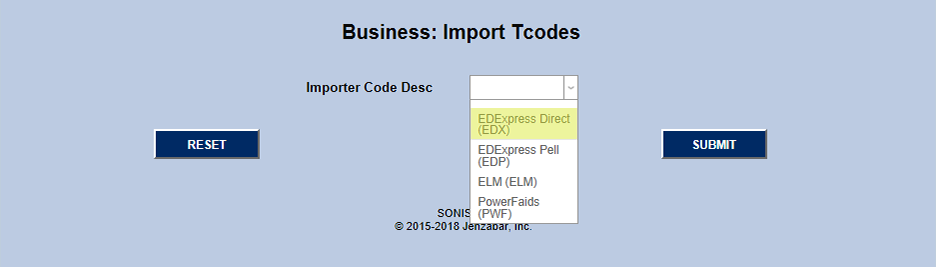
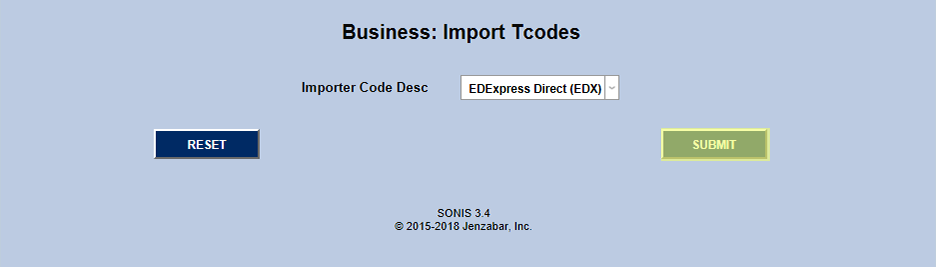
Select EDExpress Direct or EDExpress Pell from the Importer Code Desc dropdown menu and click the Submit button.
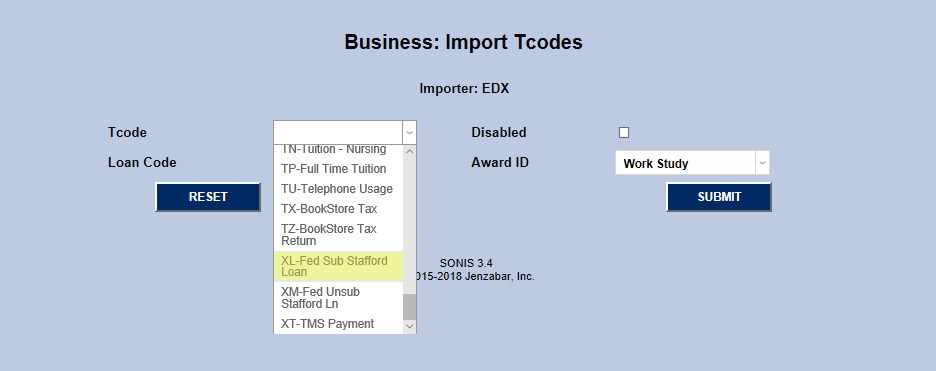
On the following page, select the appropriate T-code from the T-Code dropdown menu. T-codes can be added or deleted through the Transaction Codes utility under the Systems tab.
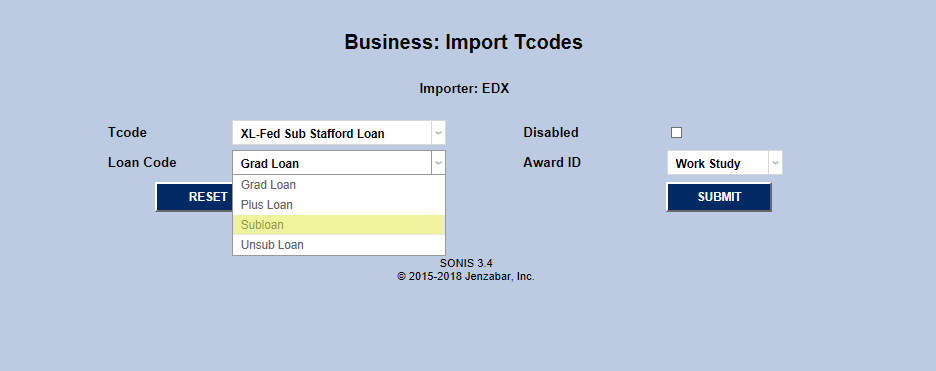
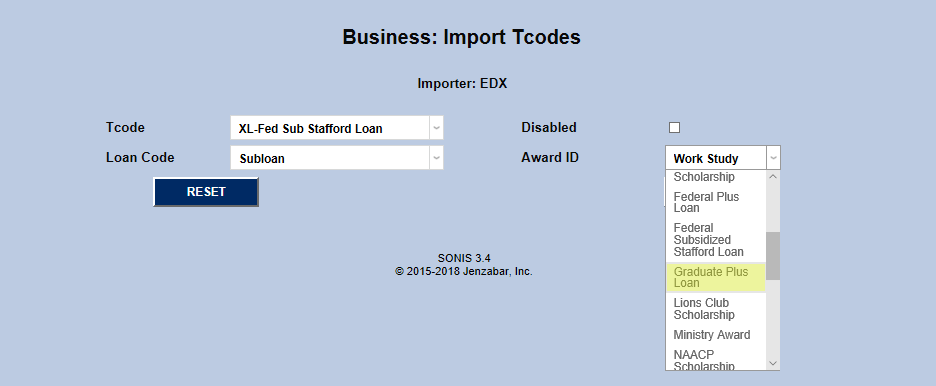
Next, Select a loan code from the Loan Code dropdown menu. There are four loan codes that can be imported through the EDExpress Direct Import utility: Subsidized Federal Stafford Loans , Unsubsidized Federal Stafford Loans , Graduate Loans , Parent Plus Loans, and Graduate Plus Loans. The EDExpress Pell Import utility is for Pell loans only. Select the appropriate Award ID that corresponds to the selected Loan Code and click the Submit button.
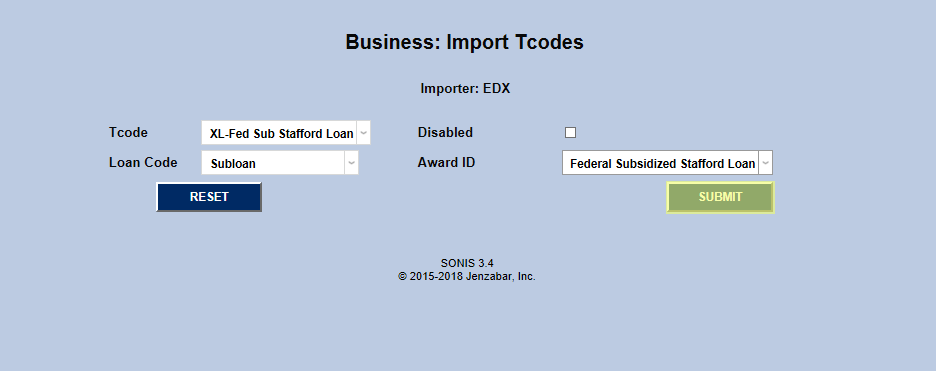
Repeat the process with each Award ID until all five types are set up.
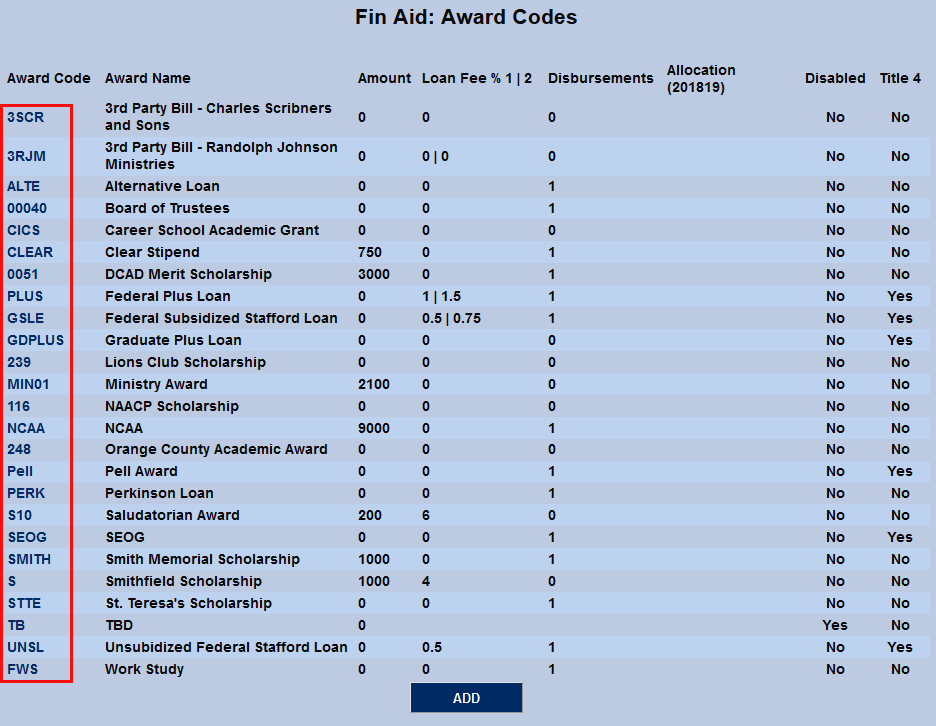
Award Codes
Award codes are created and edited using the Award Codes utility located in the Systems hub. In order for the EDExpress integration to function properly, these award codes must match the code used by EDExpress. Keep in mind that once the code has been created, the name and other attributes can be edited but the code itself can not be changed.
Creating Import File
Award File
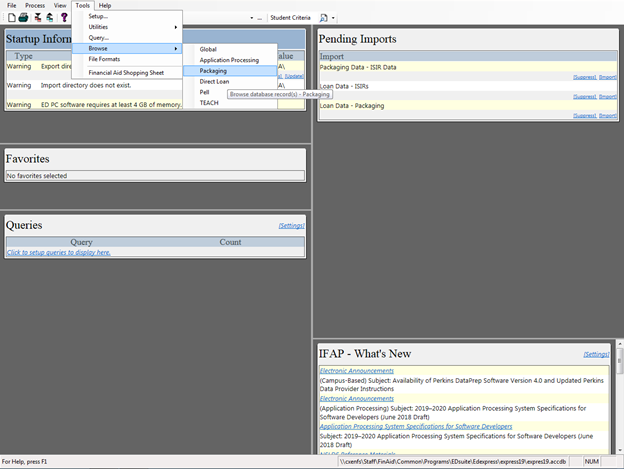
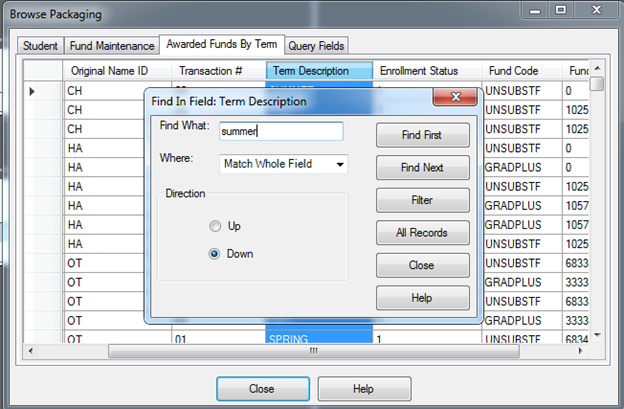
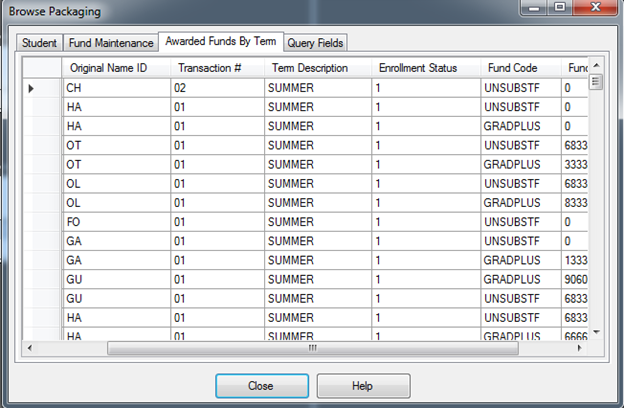
To create an EDExpress award file, click Browse from the top menu and then Packaging under the Tools subsection. A new window will open displaying the packaging. Click on the Awarded Funds By Term tab at the top of the window.
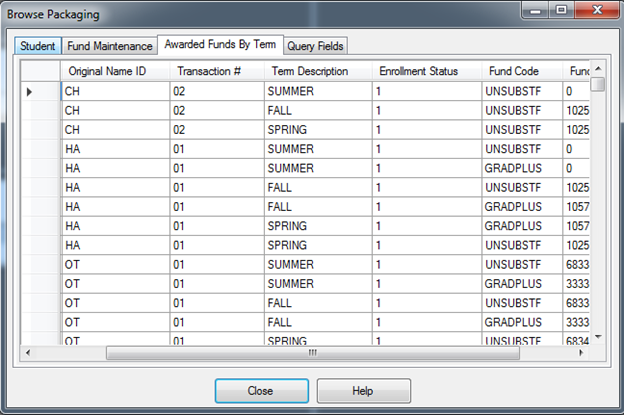
Next, right-click on the Term Description column. Type of the name of the field type that's being exported in the Find What box. Click Filter to display only these field types and then Close to close the window.
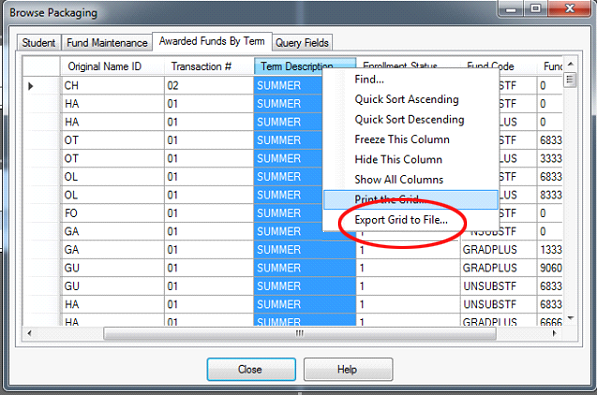
To continue the process, right-click on Term Description column again and select Export Grid to File.
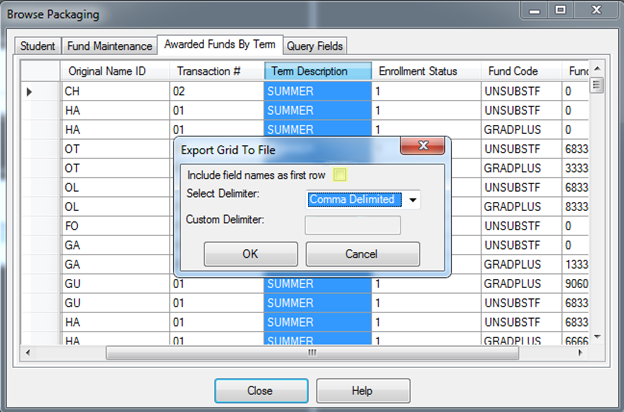
A window will open allowing the user to specify the format of the file. Uncheck the box marked include field names as first row and chose Comma Delimiter from the Select Delimiter dropdown menu. Click Okay to proceed.
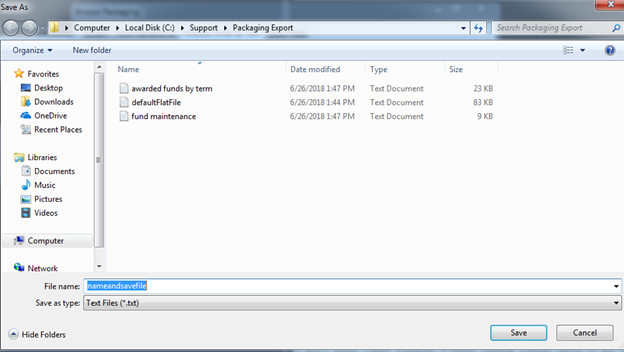
Choose a place to save the export file and provide it with a name that will allow it to be easily identified.
Disbursement File
To create an EDExpress disbursement file, click on Browse under the Tools menu and then select either Direct Loan or Pell depending on the type of disbursements being processed.
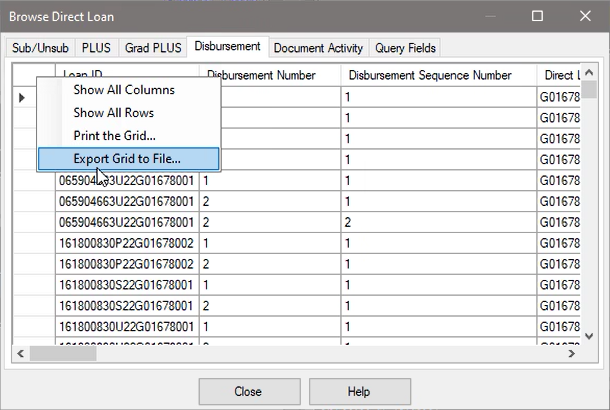
A new window will pop up titled Browse Direct Loan . Select the Disbursement tab and then right-click on the blank box in the top left. Choose Export Grid to File from the right-click menu.
Select Comma Delimited as the delimiter and click OK to save the file.
Importing to SONIS
Financial Aid Award Import
The Financial Aid Award Import utility is for importing lists of loans and scholarships that have not yet been accepted by the student. The utility is located under the Financials tab.
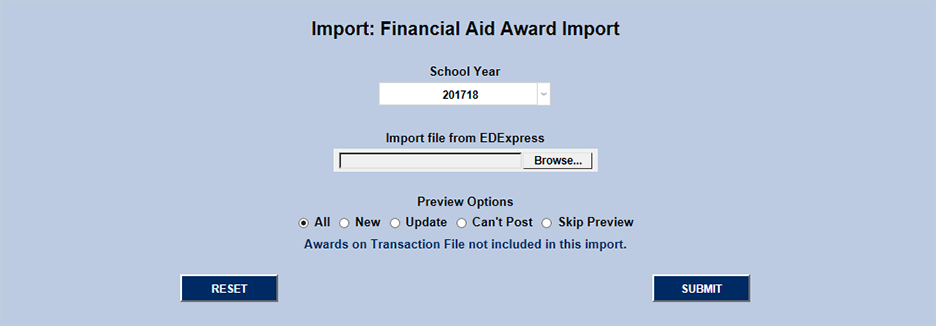
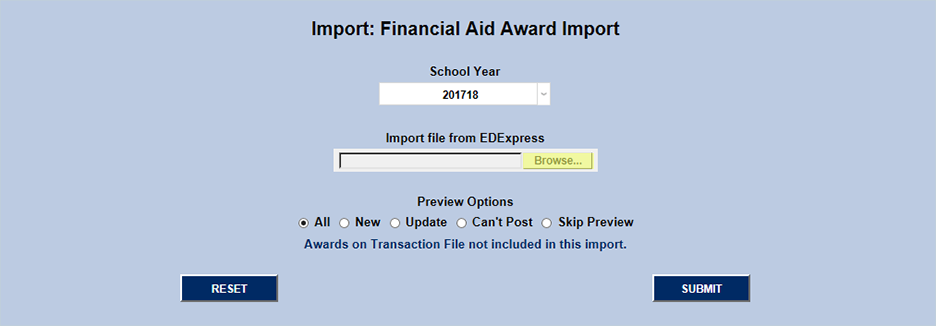
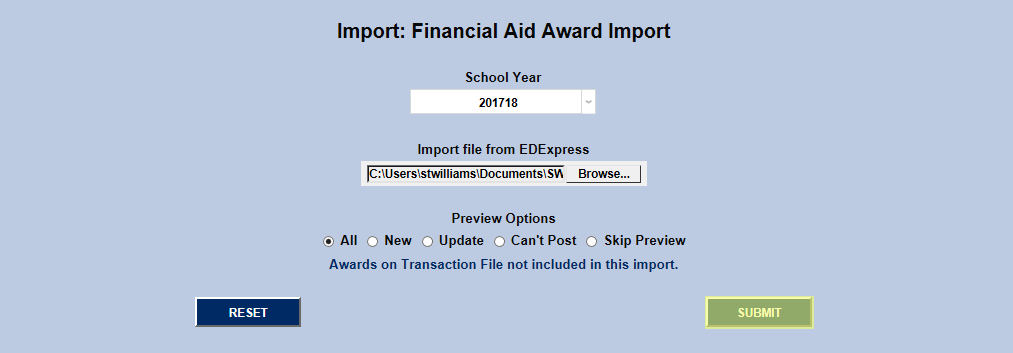
Click the Browse button, locate the file be imported, and click on it twice to select it.

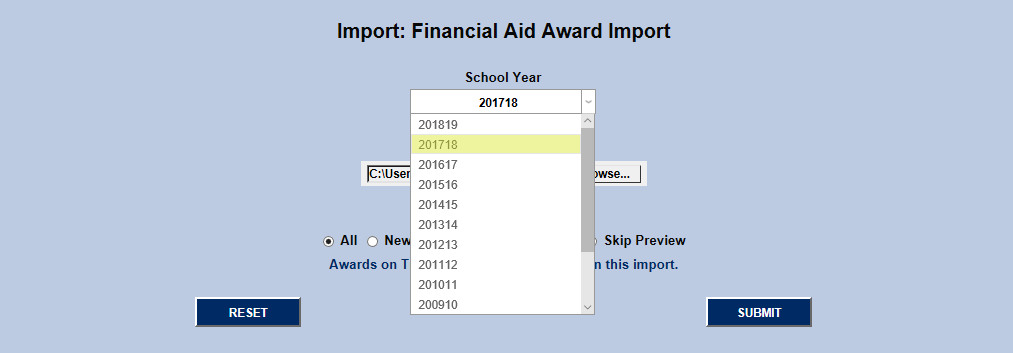
Select the correct year from the School Year dropdown menu.
The utility also includes options for what kind of preview should be viewed once the file has been submitted. Users can choose to view the results of the entire import file by selecting All , only the new items by selecting New , only the updated items by selecting Update , only the items with errors that are preventing them from posting to SONIS by selecting Can't Post , or no preview at all by selecting Skip Preview .
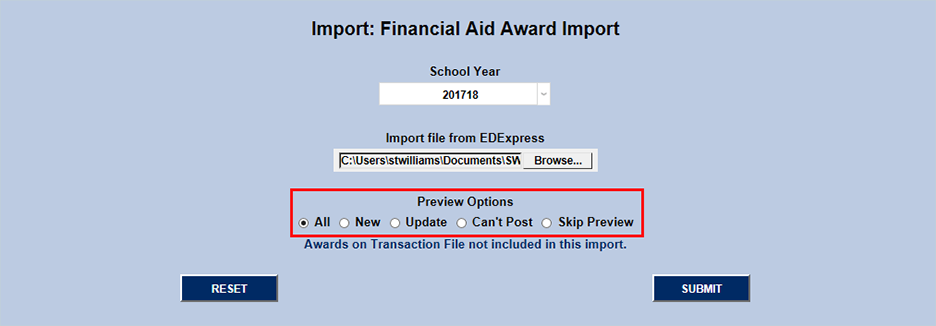
Users also have the option to view a list of the awards that are not included in the import by clicking on the corresponding blue link. This link will take the user to a new page. User the back button on the web browser to return.
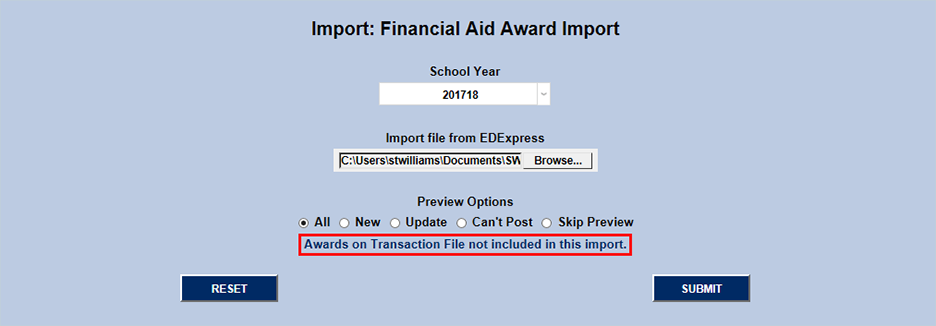
Once the correct file, year, and preview option have been selected, click the Submit button to proceed.
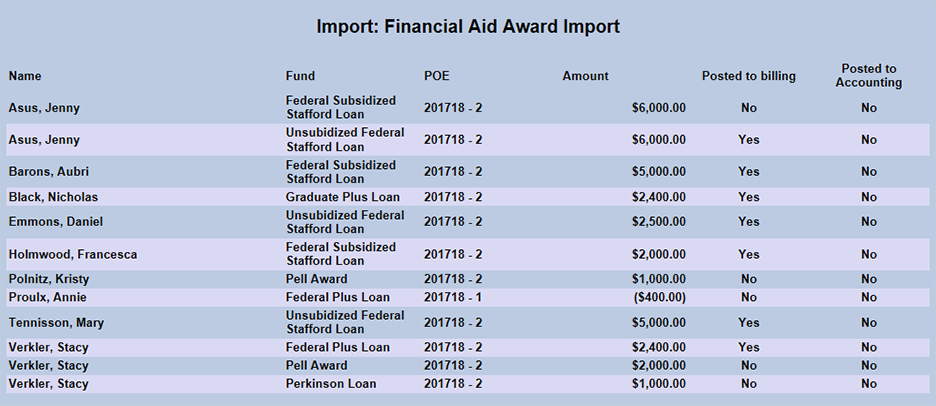
The preview page lists the Name of each student in the file, the Fund providing the award, the number of the Disbursement , the Period of Enrollment when the award was given, the Amount of the award, and the Previous Amounts awarded to this student from this fund if applicable. The far left-hand column includes checkboxes that allow the administrator to disinclude any record they wish to leave out of the import. These boxes are all checked by default unless the award has already been given in Jenzabar SONIS, in which case they're greyed out. The top box of the column can be used to check or uncheck all the boxes.
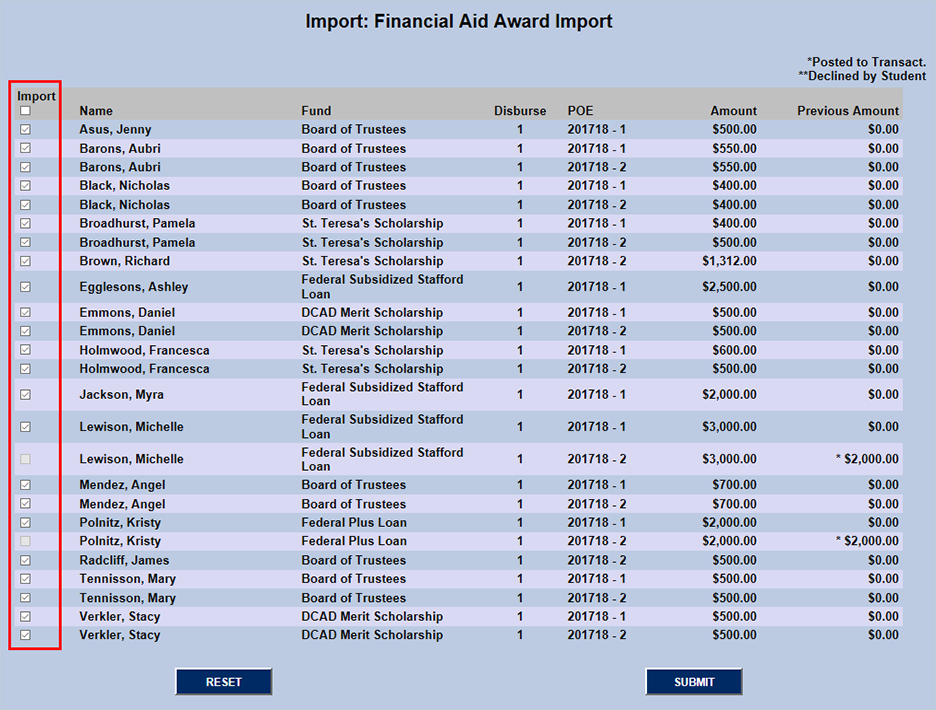
Once the proper boxes have been checked and/or unchecked, click "Submit" to finish the import process. A summary page will appear showing files that are added, not added, and unchanged.
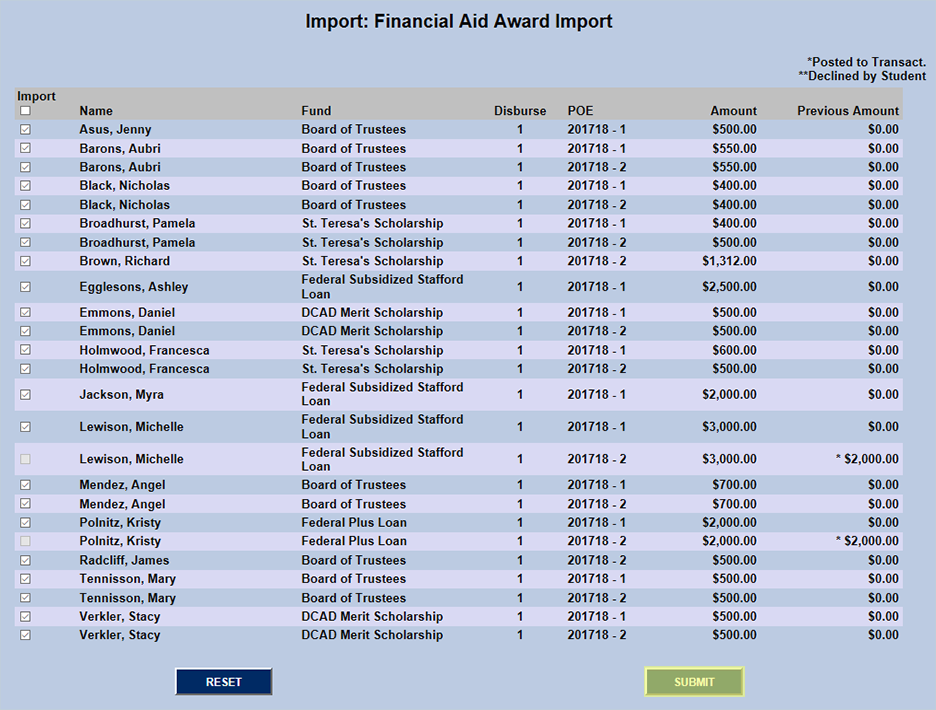
Voids
Awards can be voided by importing the same award again for the same student but with a $0.00 amount. Only awards that have not been posted to transactions will be voided. Awards to be voided are marked with two red + symbols on the preview page.

EDExpress Disbursement File
In prior versions of Jenzabar SONIS, the EDExpress disbursement export file had to be modified significantly before it could be imported to SONIS. Only the three fields that SONIS imports could be displayed while the rest had to be hidden or deleted from the file. However, beginning with Jenzabar SONIS version 3.6 and carrying forward, the SONIS system can accept the EDX disbursement file with no additional manipulation required. SONIS now simply ignores the columns that are not needed and recognizes the columns that are imported.
Both the Direct Loan and Pell Grant Disbursement processes include the Disbursement Sequence Number (DSN), and the Direct Loan Disbursement import process includes the Net Adjustment Amount. The Pell Grant Disbursement import process does not include a Net Adjustment Amount. Instead, it uses the Accepted Amount to determine adjustments, even if it differs from the Submitted Amount that may have been previously imported for an award record.
Direct Loan & Pell Disbursement Imports
Navigate to the Import EDExpress Direct Import or Import EDExpress Pell Import utility in the Financials hub in Jenzabar SONIS. The process for importing files is essentially the same using either utility.
Note
The EDExpress disbursement process does not adhere to the No Post To Billing nor Post Transactions on or before date setting in System Variables.
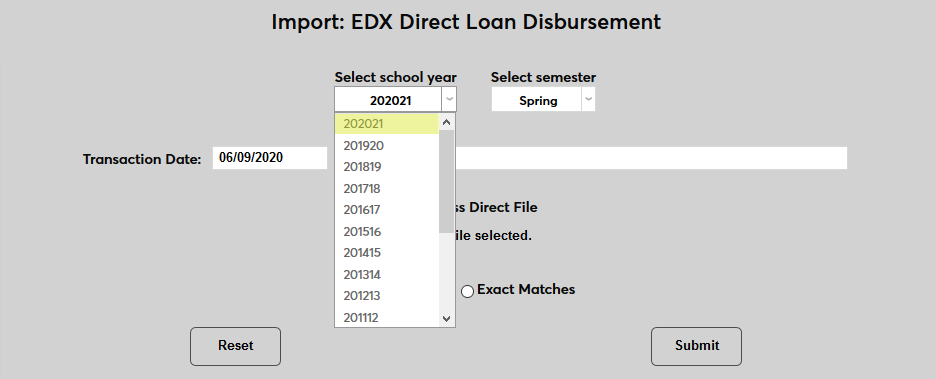
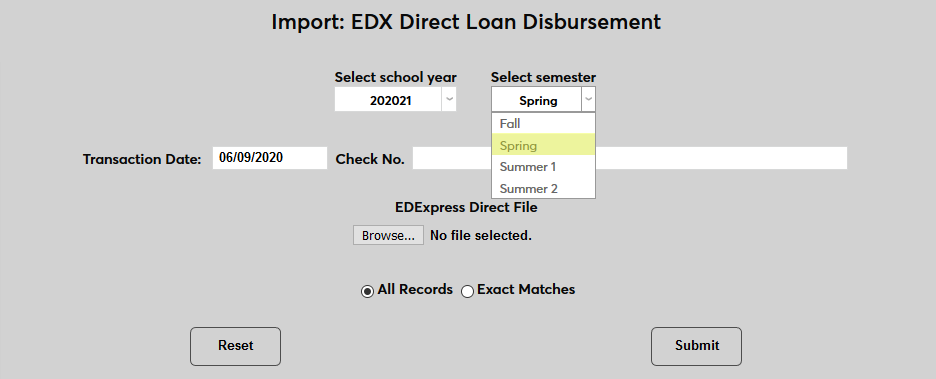
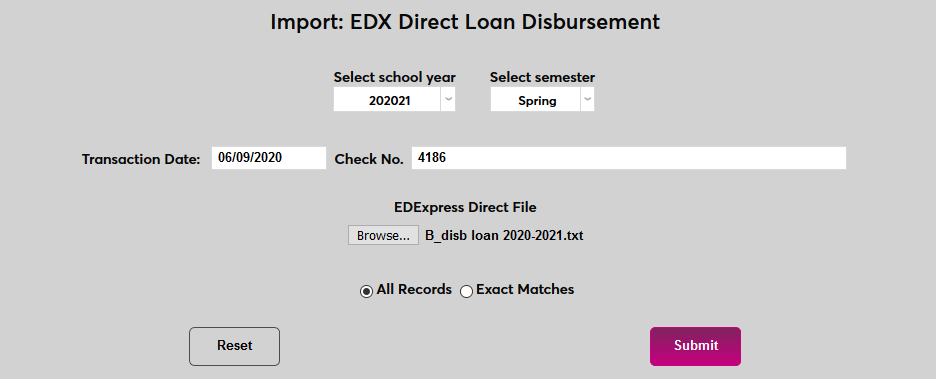
To begin, select a School Year and a Semester.
Set the Transaction Date . The Check No. box can be used for any notes about the file that need to be added or left blank.
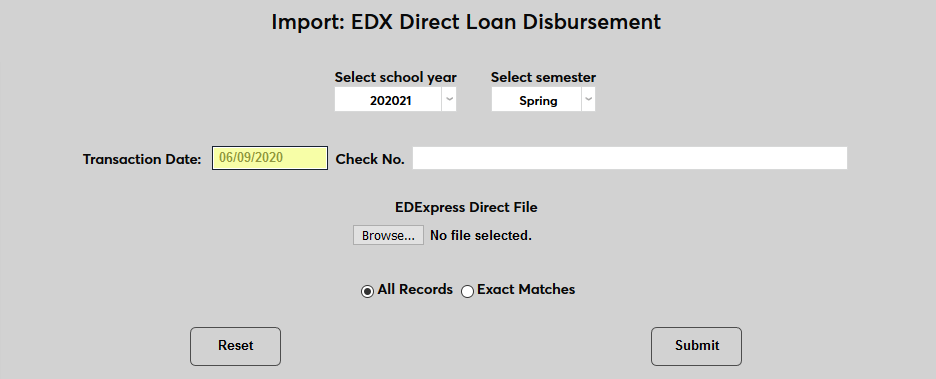
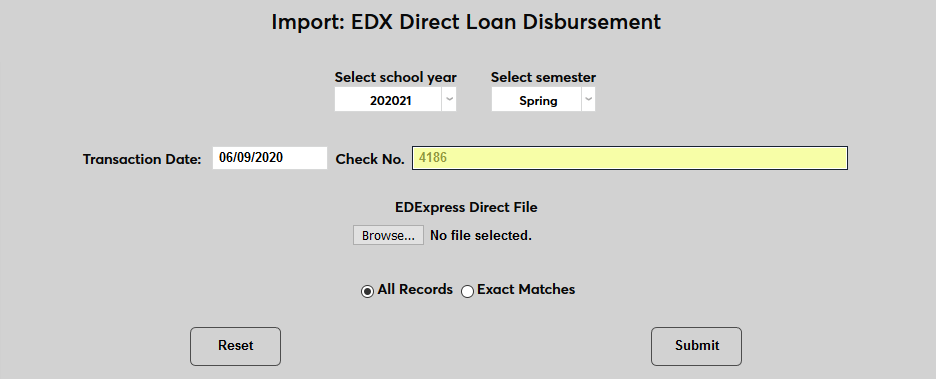
Click the Browse button and select the file be imported.
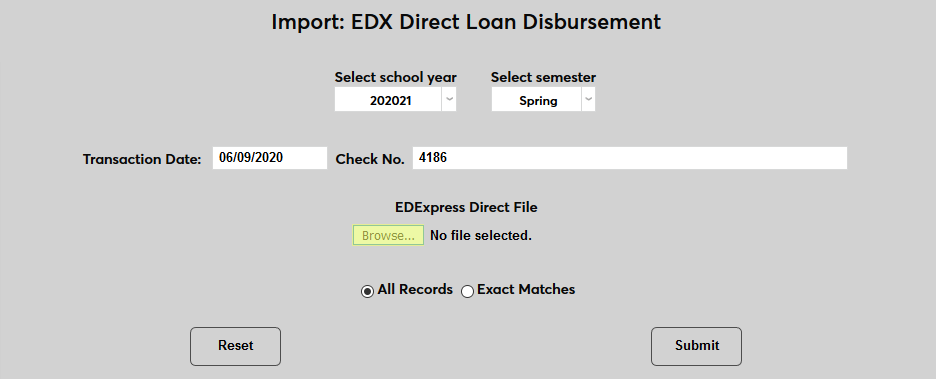
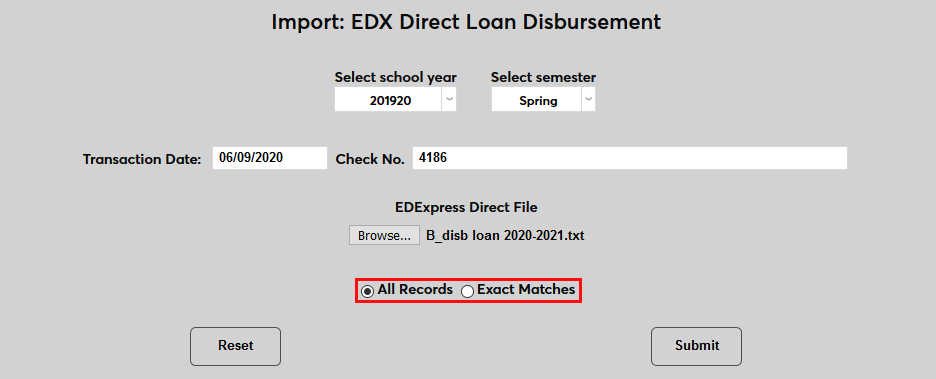
Choose All Records to pull in every field in the file or Exact Matches to pull in only items that match previous financial awards records. Click Submit to import the file.
If the import file contains more than one distribution date, the following screen will prompt the user to Select a Distribution Date from the dropdown menu. Select the date that will be applied and click the Submit button.


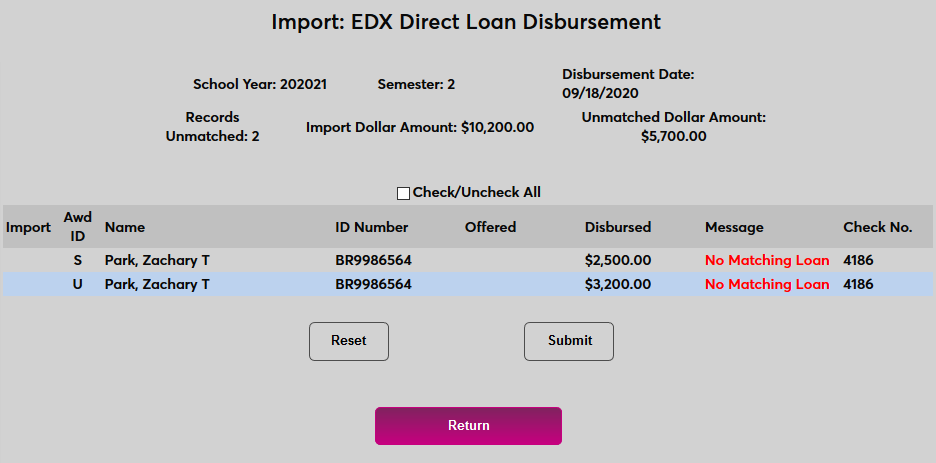
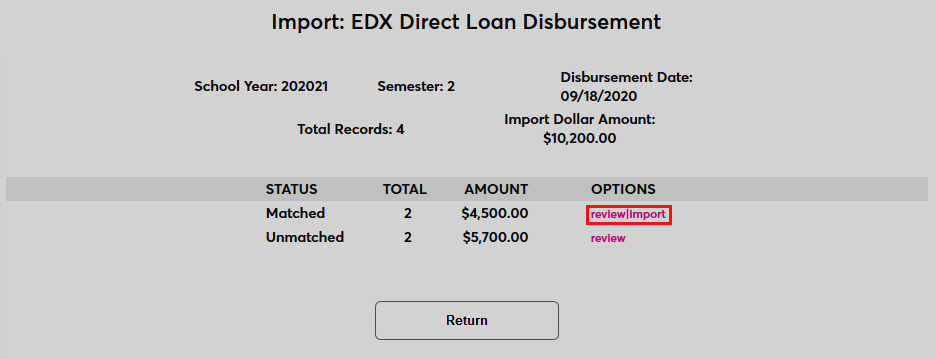
Once the file has been imported, if All Records was chosen, SONIS will display the number of disbursements that match loans already in the system and the number of loans that do not match any existing loans. Click the Review button in the Unmatched row to view these records.
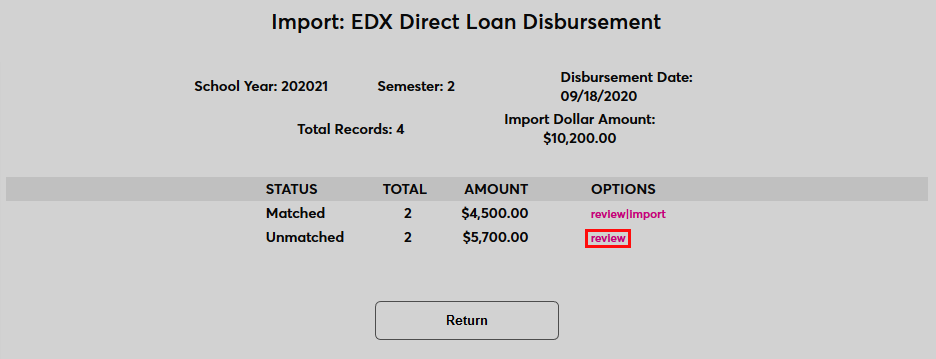
Unmatched records cannot be imported. Click Return to either import the matched records or import another file.
Note
The EDExpress disbursement file is delivered with a P for both Grad Plus and Parent Plus loans. To prevent the Jenzabar SONIS system from misinterpreting the code, the system checks whether the student is a graduate student or not and if so, the process will use the Import T-Codes Graduate Plus Loan award identifier to match and disburse against an existing award. If there is a Grad Plus award in the user’s records that has not been disbursed, but the student is not marked as a grad student, an error message will appear saying, Possible Grad Student . Administrators receiving this error should ensure that the student’s active Education record has been marked as a graduate student record. If the student is marked correctly as a graduate student, but they have not been awarded a graduate loan, a No Matching Loan message will display.
Click the review|Import link in the Matched row to view and import the matched records.
On the Matched page, a Check/Uncheck All box is included for quick changes to large lists.
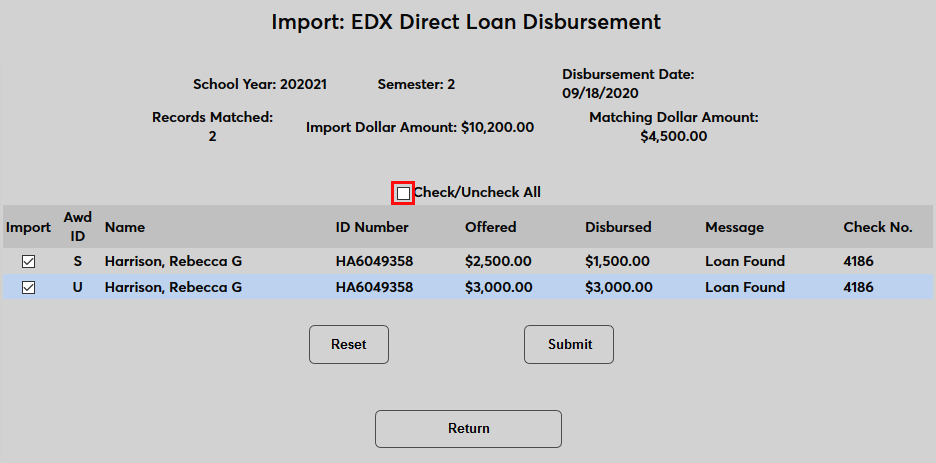
Check the boxes for the disbursements that should be imported and click Submit .
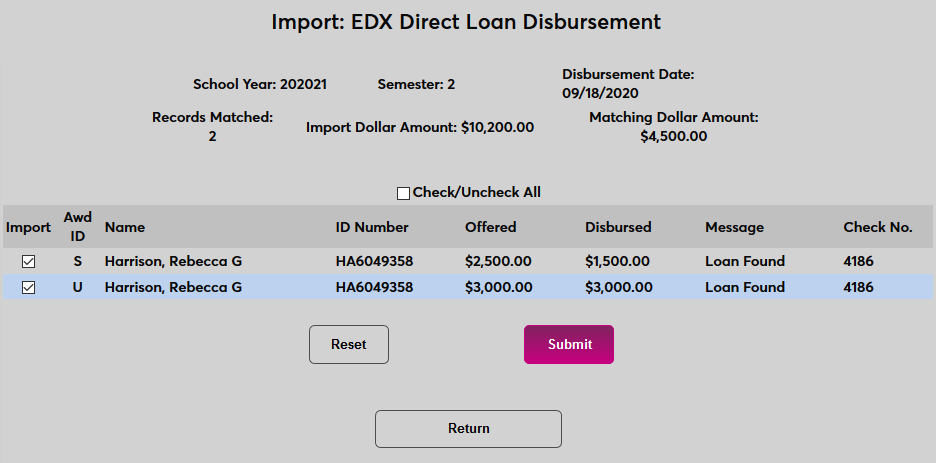
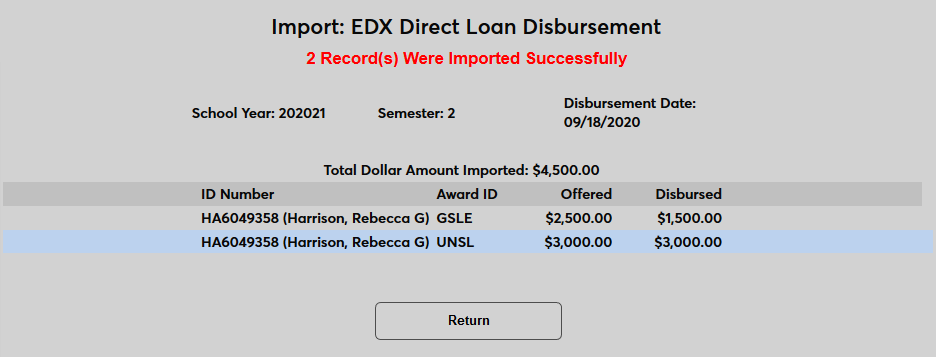
Once the records have been imported, the results of the import are displayed.
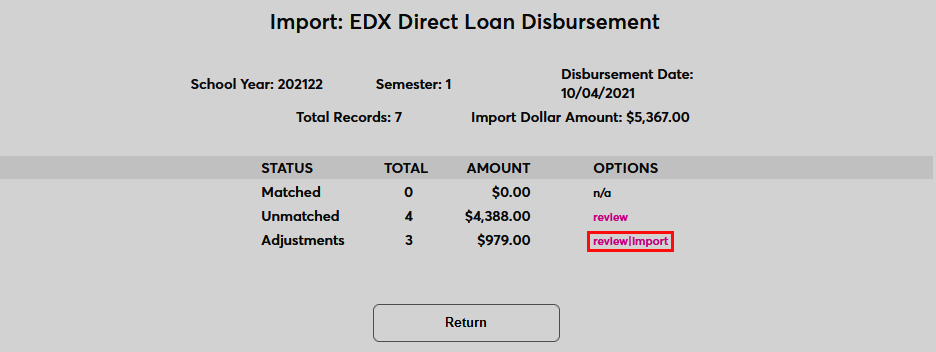
Adjustments
EDExpress can also be used to create adjustment files for Direct Loan Disbursements. These files can also be imported to SONIS to adjust the disbursement data for students. If the file being exported contains adjustments, they will be listed on the summary page. Click Review|Import to continue.
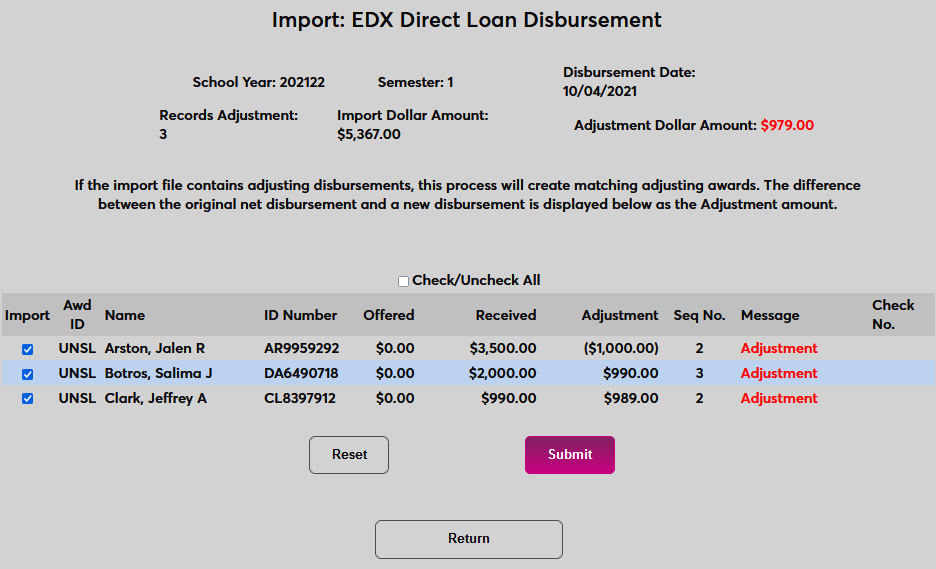
The following page lists the adjustment amounts both individually and as a total. Check the records to be imported and click Submit to complete the process.
Note
The import process lists the sequence number for the disbursement. The Pell disbursement process displays this number as well, but there is no EDX Pell adjustment file, so adjustments must be performed manually.