Canvas Integration
Overview
Instructure Canvas is a third-party Learning Management System (LMS) that can be set up to share data with SONIS.
Jenzabar SONIS creates an XML export file to Instructure Canvas specifications. The XML or CSV file can optionally automatically transfer the file to Canvas. It can be transferred manually as well.
The XML or CSV files contain:
● faculty and student records for the selected school year, semester and campus(es)
● course records for the selected school year, semester and campus(es)
● faculty and student course enrollment records for the selected school year, semester and campus(es)
● students who have withdrawn from courses (i.e. enrollment code = 'WD') for the selected school year, semester and campus(es)
XML and CSV file creation and optional file transfer can be run manually or automated by setting up a SONIS timed task.
The SONIS Canvas LMS setup includes an option, "transfer on export," to transfer the XML export file to Canvas upon creation.
A SONIS notifier can be setup to inform members of a group that an export file has been created and optionally transferred. The status of those processes will be included in the reminder, email message, etc. sent to the members of the assigned group.
Note
All courses should be created in SONIS first and then exported to Canvas. When courses are created in Canvas first, they do not have ID numbers and will not sync with SONIS
Canvas Setup
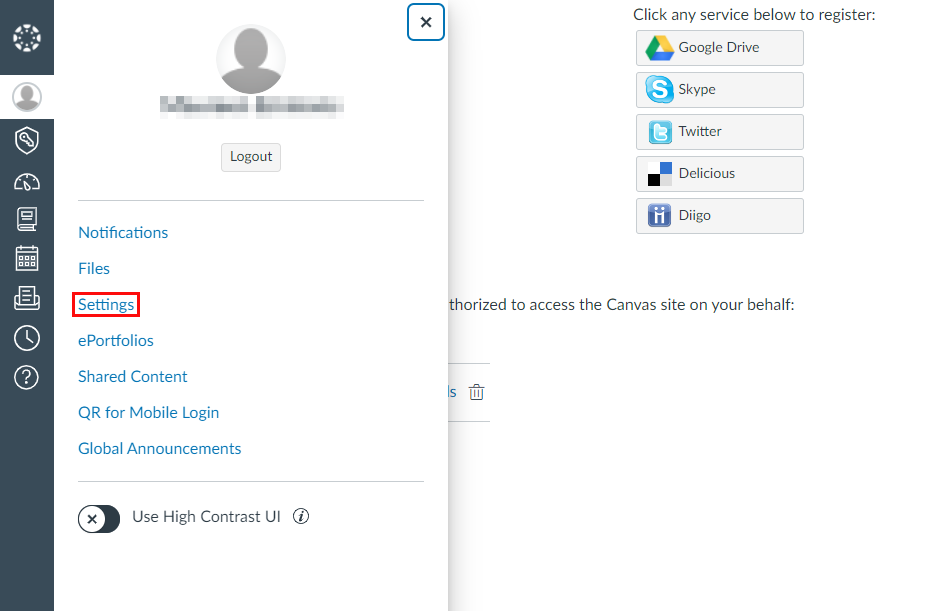
An API token is needed to connect SONIS and Canvas. To create this token, log in to Canvas with an administrator account and navigate to the Account tab in the left-nav menu. Click the Settings link to proceed.
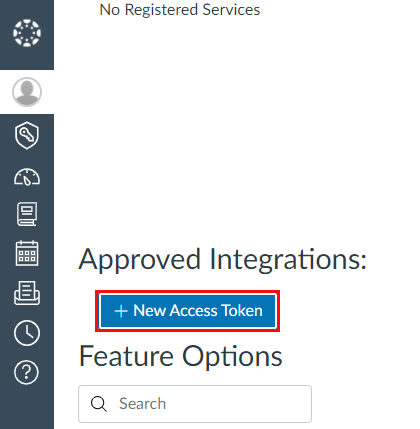
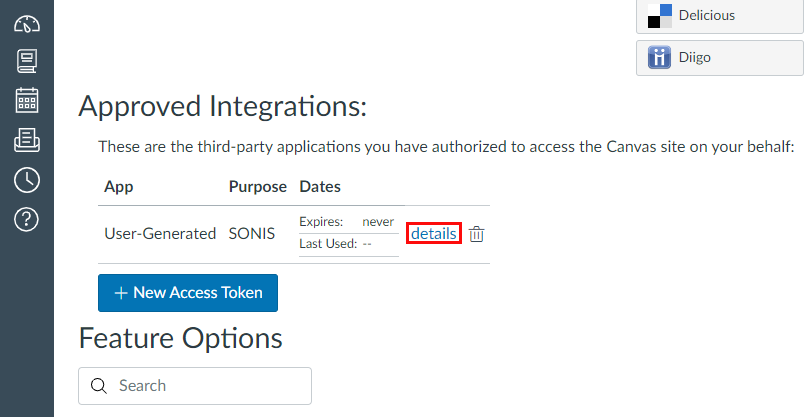
Scroll down to the Approved Integrations section of the page and click New Access Token to proceed.
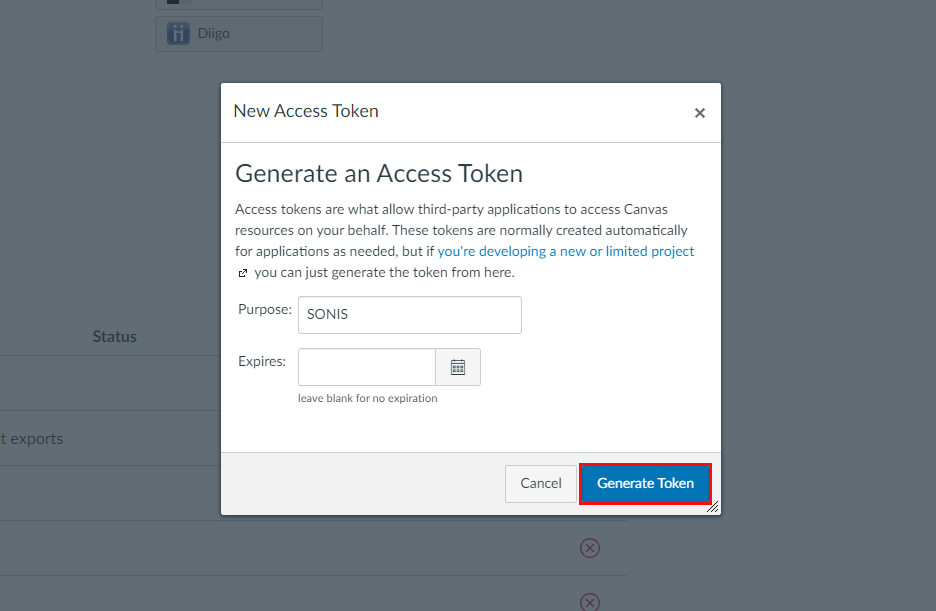
Give the token a name that will differentiate it from other tokens that may be created using the Purpose field.
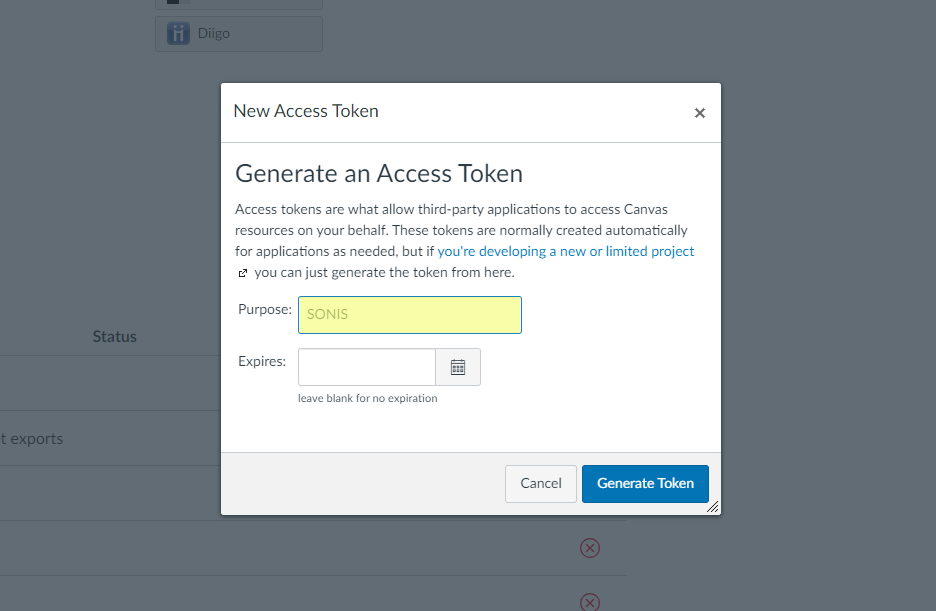
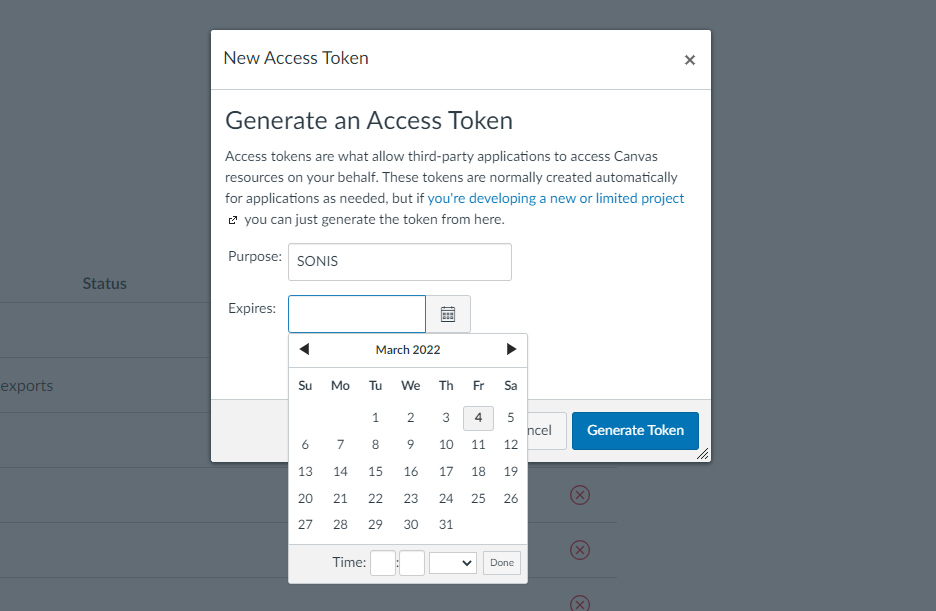
Set an expiration date for the token using the Expires field or leave it blank for no expiration. Whether the token is set to expire or not, clients may need to create a new token at some point in the future to ensure a continued connection. This can be done at a predetermined date and time or as needed based on the connection going down.
Click Generate Token to create the token.
Click the details link to access the token information.
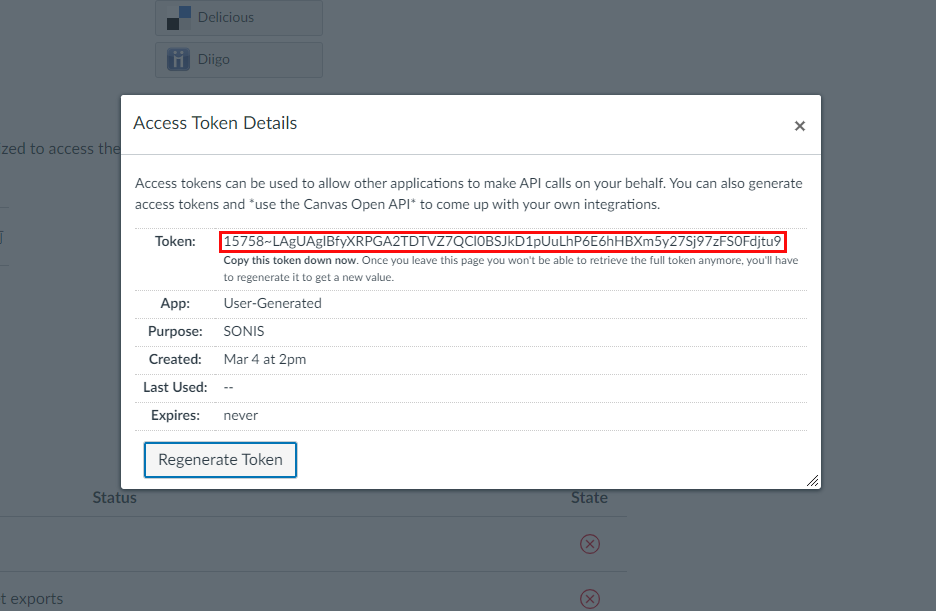
The Access Token Details window will display the basic information about the token, including the Token value itself. Copy this value down as it will be used later in the process. Note that the token value cannot be accessed again once the administrator navigates away from this page. If the token value is lost, start the process over and create a new token.
SONIS Setup
File Transfer Table
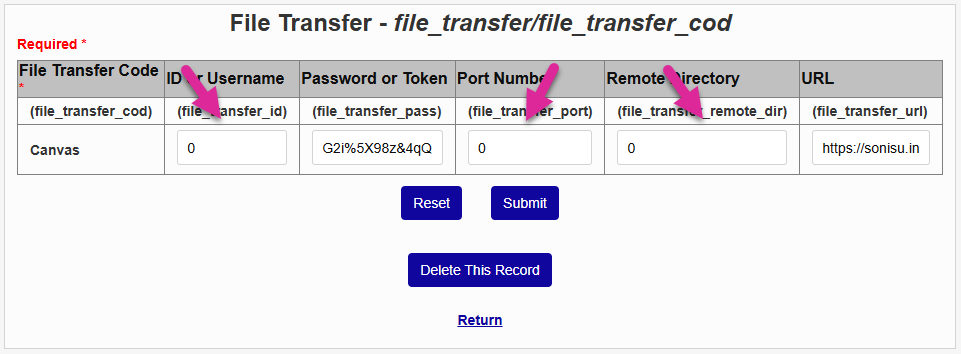
Some LMS systems, including Canvas, require institution-specific values that are used to initiate the transfer from SONIS to the LMS. To enter this information, navigate to Table Maintenance under the Systems menu and select File Transfer.
On the following page, click on the Canvas table to continue. If no Canvas table has been created in your system, click Add New Record and name the code using the File Transfer Code field.
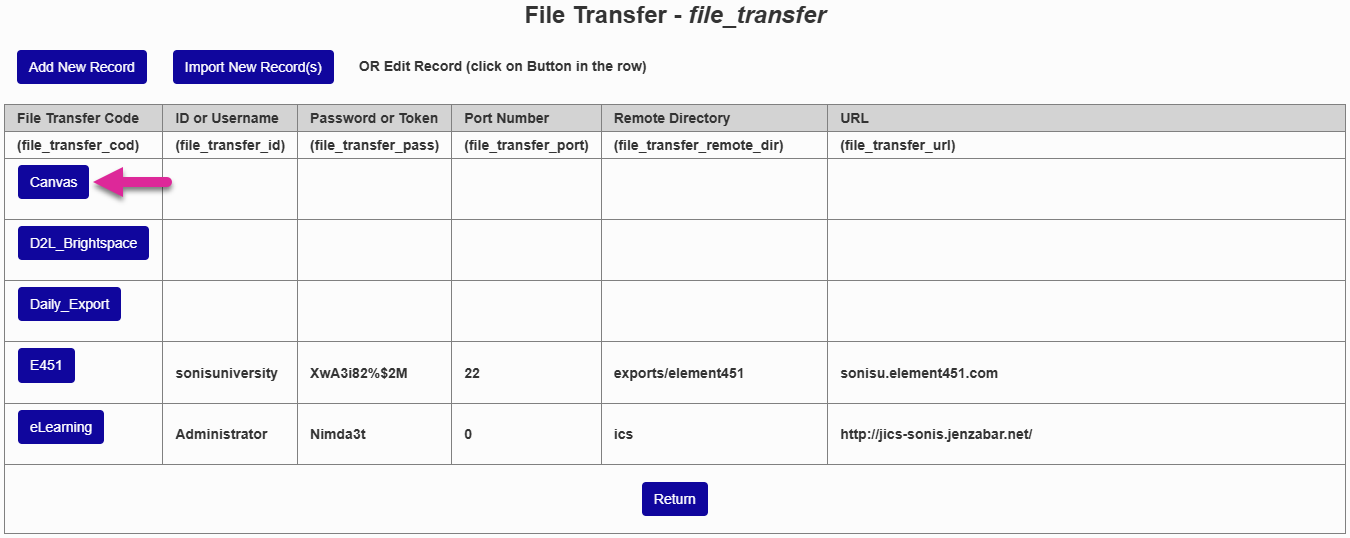
The ID or Username, Port Number, and Remote Directory fields are not used in the Canvas transfer, but cannot be empty. It's suggested that clients insert a 0 in each field of these fields as a placeholder. This will allow the page to be saved successfully without adding any dummy data that may be confusing to the next person who accesses the page.
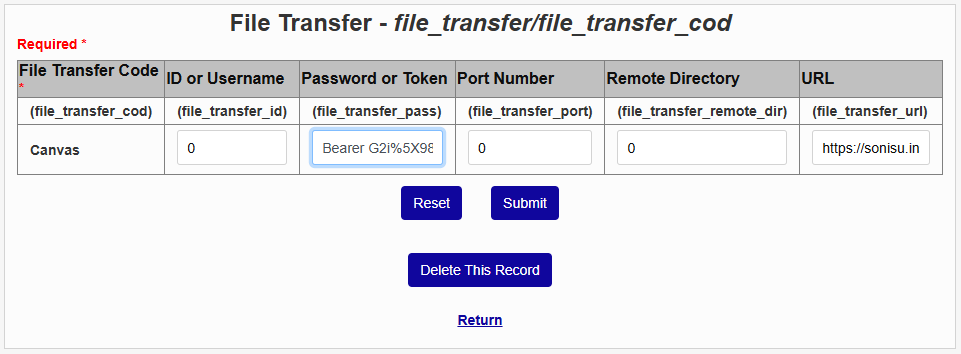
The Password of Token field must contain the word Bearer followed by a space and the institution's Canvas authentication token. Click here for a guide from Canvas on how to create and access tokens.
The value for the URL field will vary slightly depending on whether the institution is using the XML export option or the CSV export option.
• CSV - https://[institution].instructure.com/api/v1/accounts/[number]/sis_imports.json?import_type=instructure_csv
• XML - https://[institution].instructure.com/api/v1/accounts/[number]/sis_imports.json?import_type=ims_xml
In either setup, the [institution] should be replaced by the institution portion of the client's Instructure-provided domain name and the [number] portion of the URL should be replaced by the client's Canvas account number. The URL must be in all lowercase or an error will occur.
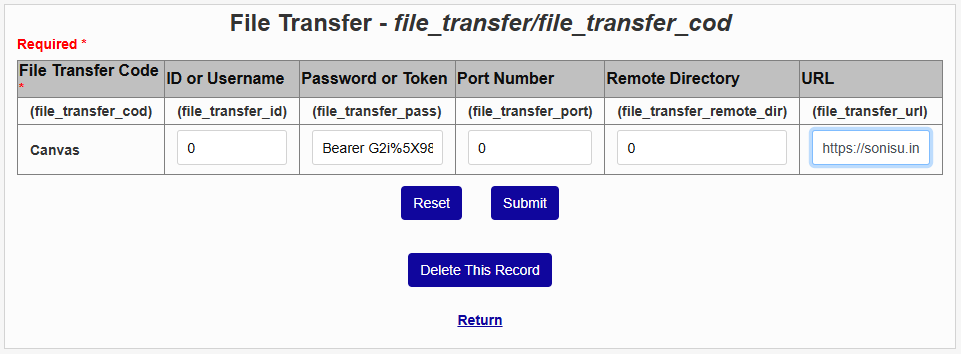
Once all the required information is in place, click Submit to save the changes and continue the setup process.
LMS Setup
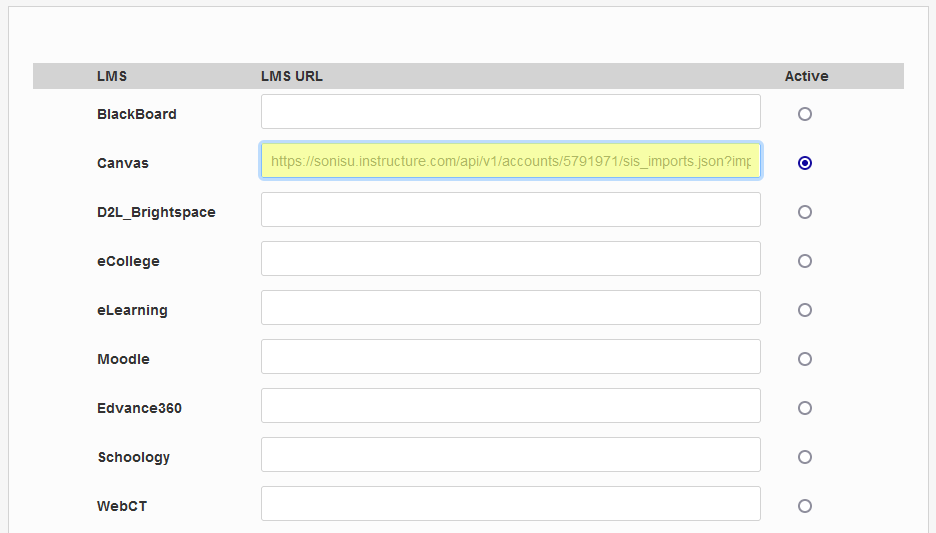
Next, Canvas must be set up as the institution's learning management system. This setup is found on the Learning Management Systems Setup page under the Systems menu. Click the Active button in the Canvas row and paste in the referral URL provided by Canvas. This URL must be in all lowercase or an error will occur.
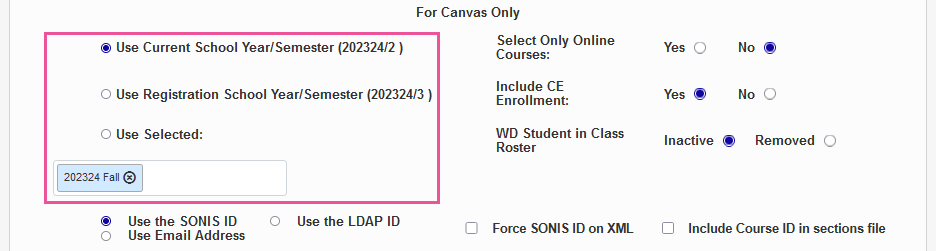
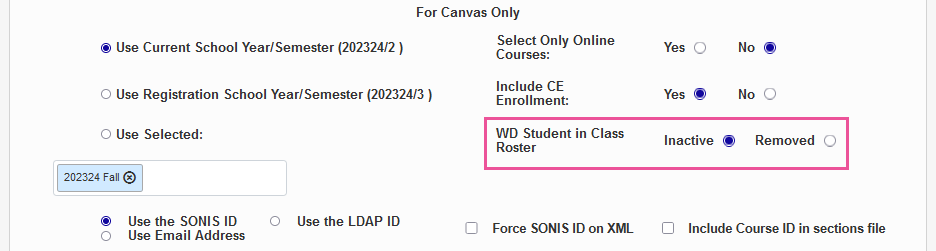
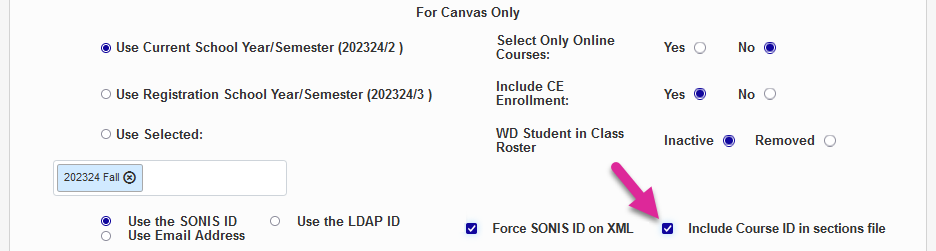
After activating Canvas, scroll down to the For Canvas Only section of the page. These controls allow schools to manage how their Canvas integration will function. First, choose whether to use the Current School Year/Semester or the Registration School Year/Semester if different. Alternately, select a school year/semester that is neither of those. All school semester that have been created in the SONIS system are listed in this menu.
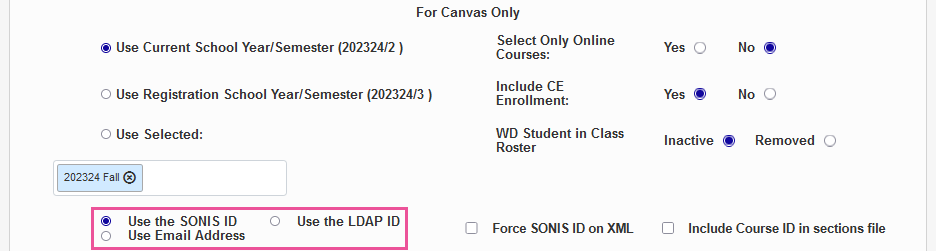
Next, choose whether students and faculty should log in with their SONIS ID, their Email Address, or their LDAP ID, if applicable.
Note
If Use Email Address is selected, the user's email address will be sent to Canvas in the export file as the User ID only. If a user does not have an email address in their Address record, the user's SONIS ID will be sent instead.
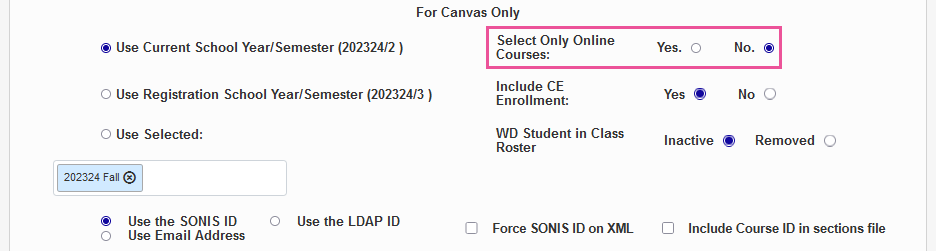
If the Select Online Courses option is set to Yes, only course sections with the On-Line box checked will be included in the export to Canvas. If No is selected, all courses with a valid course type will be exported.
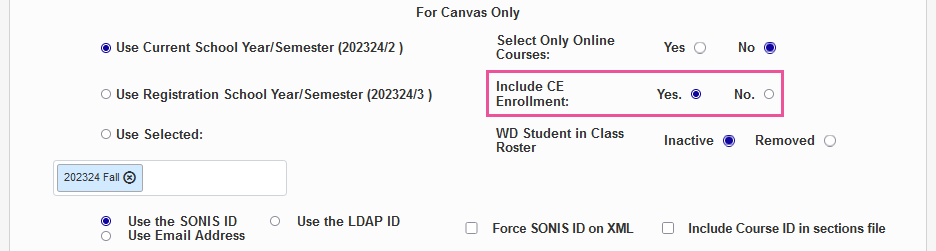
Administrators can choose whether to include Continuing Education courses in Canvas or not by selecting Yes or No.
The update file can treat withdrawn students two different ways, depending on institutional preference. Choose the Inactive option to make withdrawn students on a Canvas roster inactive but leave them on the roster. Or choose Removed to remove these students entirely so the roster only includes active students.
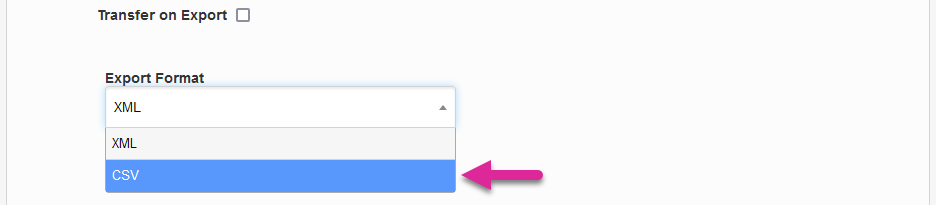
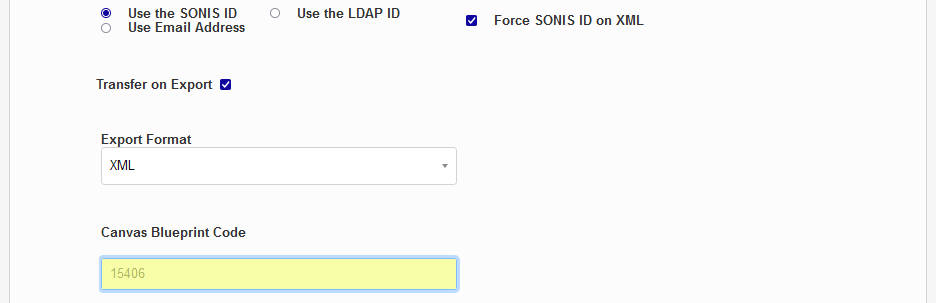
If the Transfer on Export box is checked, each newly created export file will be transferred automatically to Canvas using the URL saved in the LMS Transfer table settings.
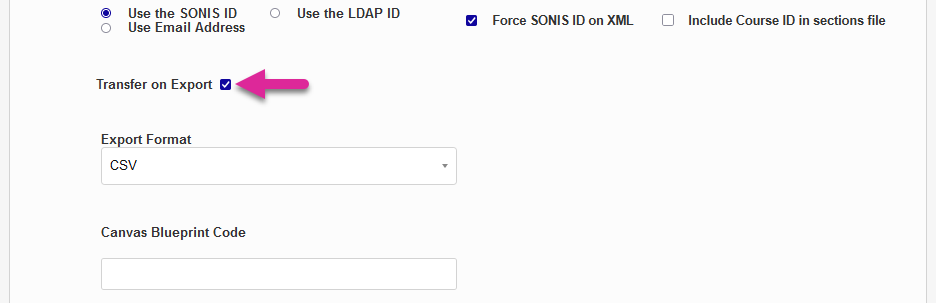
Previously, clients could choose to export a CSV or an XML file, but the XML option is no longer supported by Canvas.
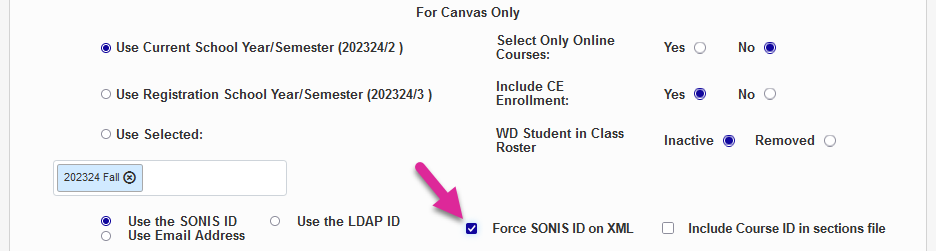
The Force SONIS ID on XML option was used to ensure that the XML export file would use the SONIS ID as the login even when users logged in to Jenzabar SONIS using their email address. Since the XML option is no longer supported, this checkbox is no longer needed.
The sections file that's exported from SONIS to Canvas typically uses the section ID to identify both sections and courses. You can replace the second usage of the section ID with the course ID by checking the Include Course ID in sections file box.
Warning
If this option is checked, you should only upload the sections file as part of the full zip file. If you upload it separately and in the wrong order, the course IDs in the file may overwrite the existing section IDs and cause an error.
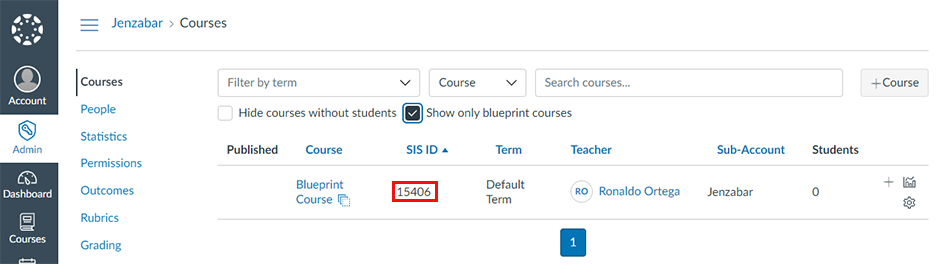
The blueprint code is optional. Canvas allows the creation of Blueprint Courses, which can be used as a template for other courses. Once a blueprint course has been created, the content can be pushed to other associated courses. To locate existing blueprint courses in Canvas, navigate to Courses under the Admin menu and check the Show only blueprint courses box. Copy the SIS ID of the blueprint course into the Canvas Blueprint Code field. This value will be exported to Canvas as the Blueprint Course ID. Courses imported from SONIS will follow this blueprint.
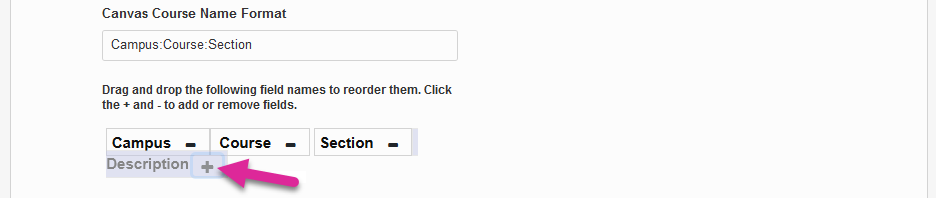
The Canvas Course Name Format field controls how course names are displayed in Canvas when exported from SONIS. This setting is used to generate the Long Name field in the Courses export file and the Name field in the Sections files. By default, the Course, Section, Campus, and Description will be displayed separated by colons. To rearrange the order, click on one of the field names and drag them to a new location.
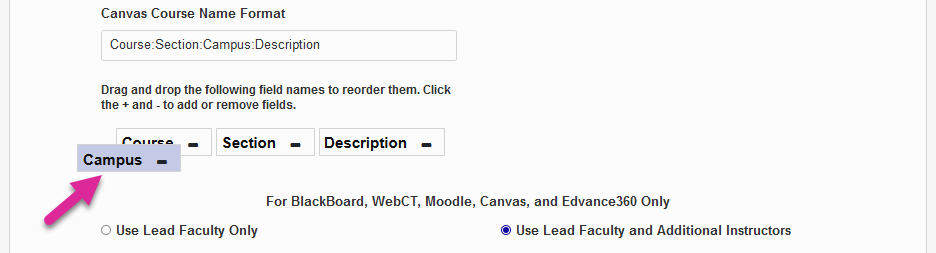
To remove one of the fields altogether and no longer use it in the course name in Canvas, click the -. To add back a field that has previously been removed, click the +.
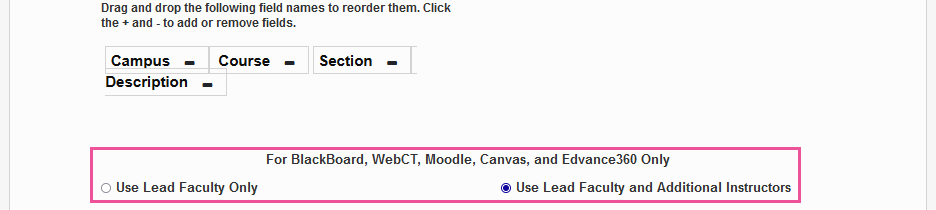
Finally, scroll down to the section labeled For Blackboard, WebCT, Moodle, Canvas, and Edvance360 Only. Choose whether each course in Canvas will Use Lead Faculty or Use Lead Faculty and Additional Instructors. Additional instructors are added on the Section: Edit page.
Click Submit at the bottom of the page to save the changes and activate Canvas.
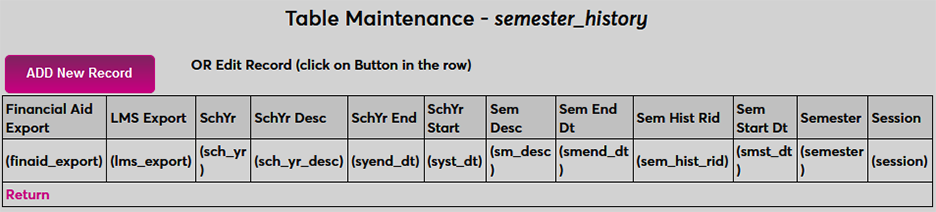
Semester History Table
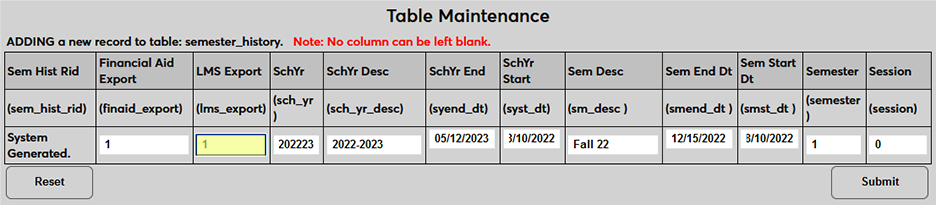
Prior to exporting, the Semester History table must be up-to-date. A school year/semester record should exist for any semester that is being exported to Canvas. To add a semester, click Add New Record and fill out the required fields. For Canvas export, the LMS Export field must be turned on with a 1. Also note that the Session field cannot be completely blank even if it's not being used. Institutions that do not use sessions should enter a blank space or some other placeholder text before submitting.

Course Setup
Caution
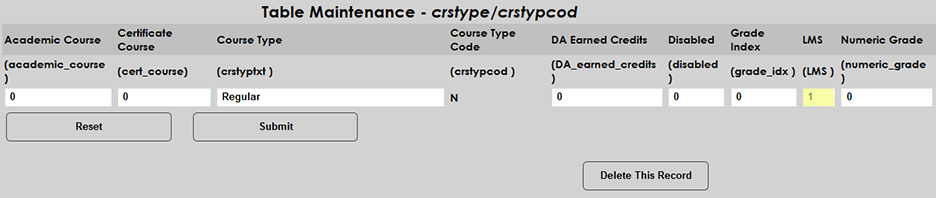
Before setting up the Canvas integration, schools should ensure that their courses are properly configured to pass data to LMS systems. Navigate to the Course Type table in Table Maintenance in the Systems hub and ensure that any course types that may use Canvas or another LMS have a 1 in the LMS field.
Additionally, the On-Line box on the Course Section page can be used to differentiate between courses that will use Canvas and those that will not. If the Select Online Courses option on the Learning Management System Setup page is set to Yes, then only courses with the On-Line box checked will be included in the export file.
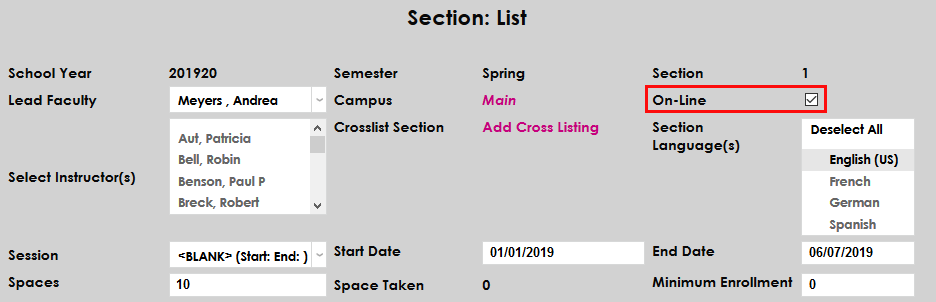
By default, the Canvas system can only be accessed between the start date and end date of each course. Some schools may wish to provide their Canvas users with access outside of these dates for setup or other purposes. When Canvas is set as the active LMS on the Learning Management System Setup page, each Section edit page includes a Canvas Start Date field and a Canvas End Date field. Administrators can enter dates in this field to replace the course start and end dates that are exported to Canvas and extend the access window. If one field is used and the other is left empty, the entered replacement date will be used and the default date will be used for the other value.

Note
These fields only apply to the CSV export from Jenzabar SONIS to Canvas. The XML export does not include the start or end dates, so these fields do not alter it in any way.
Export
Manual Export
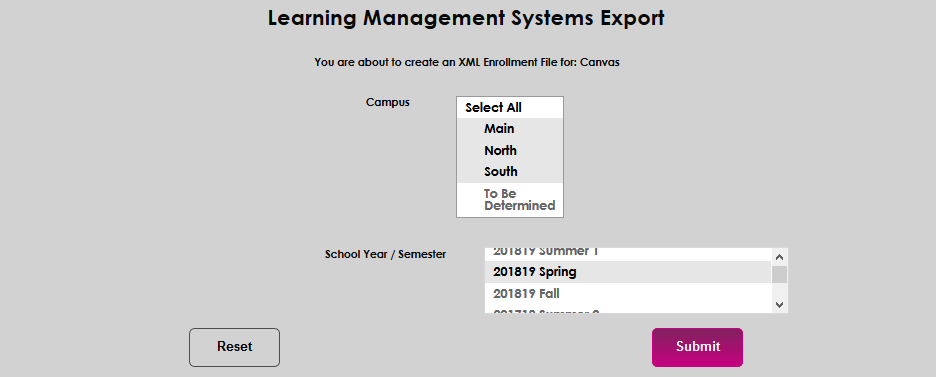
To export data to Canvas manually, navigate to the Learning Management Export utility in the Systems hub. The type and structure of the file will be automatically in place based on the previous settings. Select a Campus and a School Year/Semester. The School Year/Semester set on the Learning Management System Setup page will be selected by default. Click Submit to create the file.
Timed Export
Note
It is strongly recommended that the manual export described above first be setup and run successfully before setting up the Timed Task.
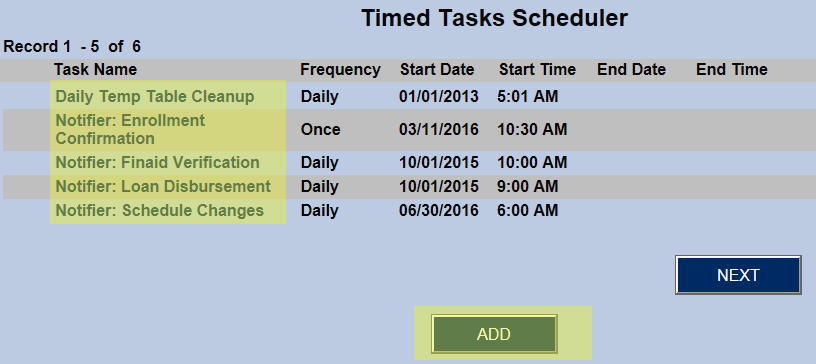
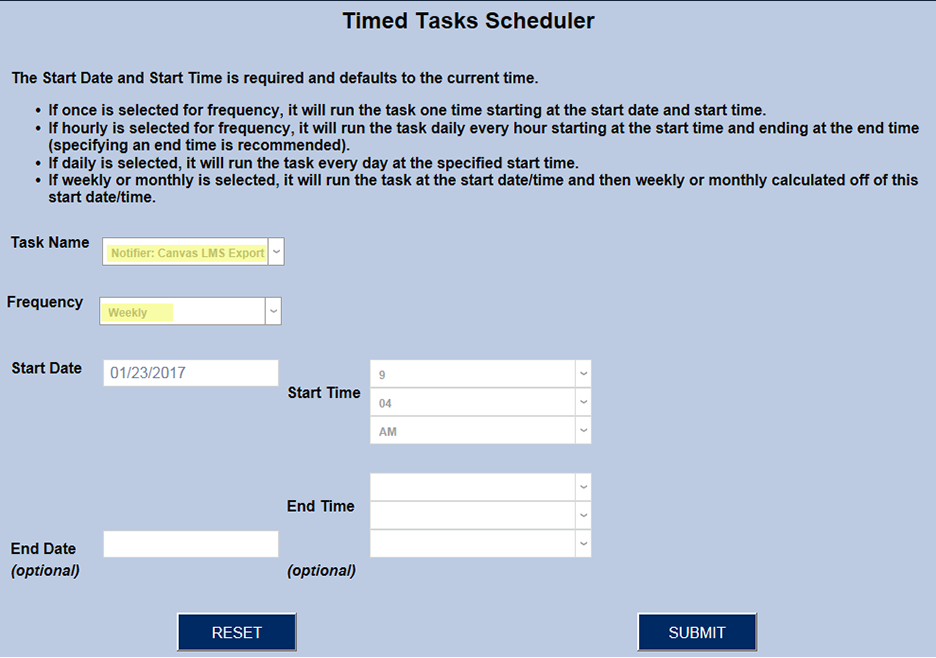
The second way to create the Canvas XML export file is to set up a timed task using Timed Task Scheduler. If Notifier: Canvas LMS Export does not appear in the list of activated tasks, it should be added. When clicked, the Add button will bring up a list of inactive tasks. Notifier: Canvas LMS Export should be selected from that list and submitted.
Notifier: Canvas LMS Export must be selected from the Task Name list. The rest of the page is the standard timed task setup page.
Tip
The school year and semester used in the Timed Task is set in Learning Management System Setup. All campuses are used in the Timed Task.
Automatic Notifier
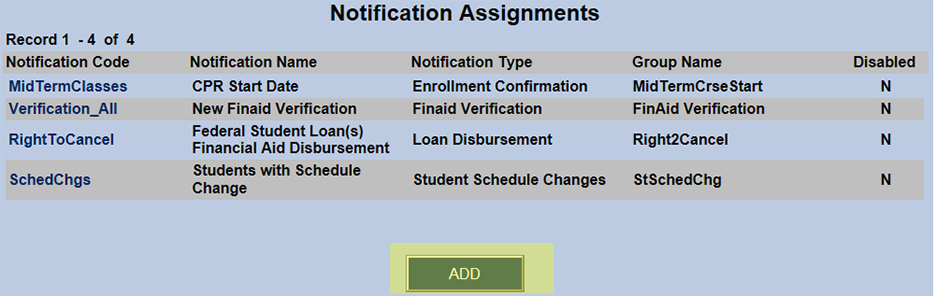
There is a notifier available for when a group should be contacted whenever a Canvas XML export file is created.
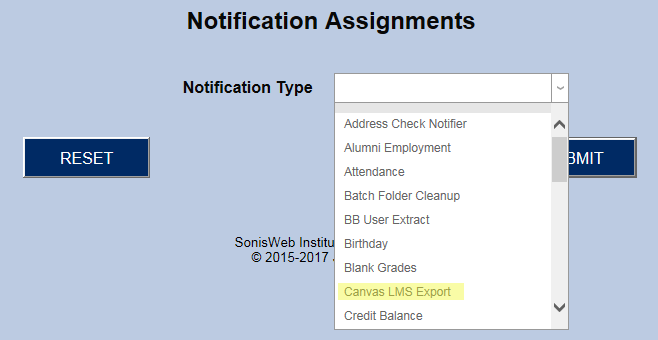
If Canvas LMS Export does not appear in the list of Notification Codes, it must be added via the Add button.
Highlight Canvas LMS Export by clicking on it and click the Submit button.
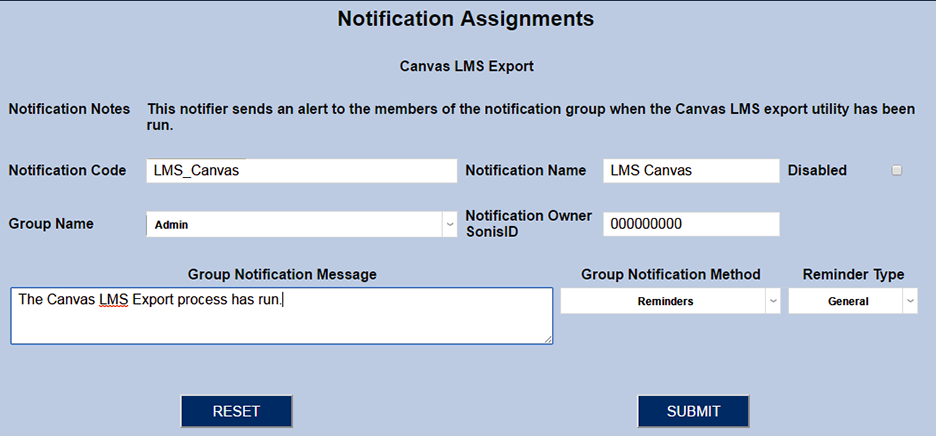
The notifier for Canvas LMS Export must have a brief, descriptive, and unique Notification Code.
The Notification Name is a longer description and should be easily identifiable with the code.
The individuals to receive these notifications must be assigned to the group selected for Group Name. They can be assigned a group by pulling their name record up and going to Groups.
The Notification Owner SONIS ID is the PID of the administrator creating the notification assignment.
Group Notification Message is the text/body of the email/reminder those in the group will receive.
There are four choices for Group Notification Method: None, Email, Reminder, and Email and Reminder.
Examples of Reminder Type would be Call Back, Schedule Meeting, etc. These can be created using Reminders Type. They are used primarily for the purpose of displaying/reporting on all reminders of a certain type.
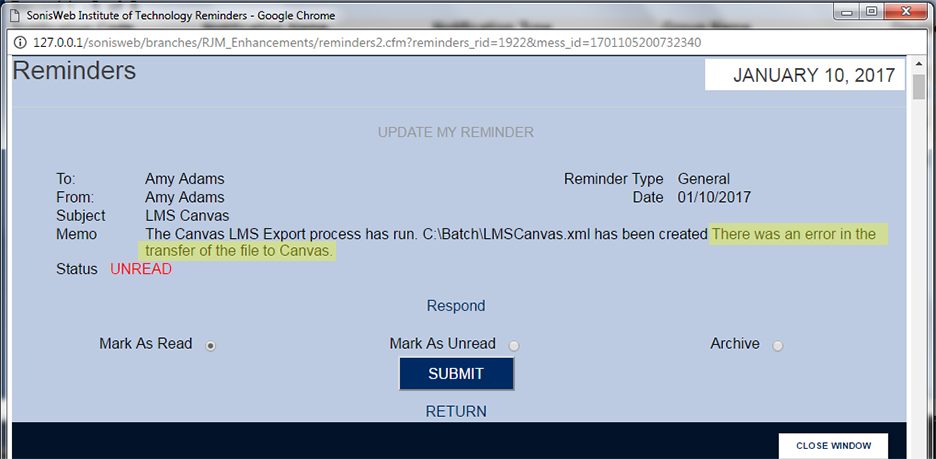
Below is an example of a reminder the members of the group will receive upon the successful transfer of an XML export file. The email is similar in appearance.

Below is an example of a reminder the members of the group will receive upon the unsuccessful transfer of an XML export file. The email is similar in appearance.
Note
If Transfer On Export is not set, whether the XML export file was created manually or by a timed task, the successfully created XML export file will be saved to the batch Folder. The administrator then runs Systems/Batch Folder File Downloader in order to email the file to themselves. The administrator must then download the XML export file from their email to their local machine. The file can then be chosen in SIS Import.
Manual Transfer
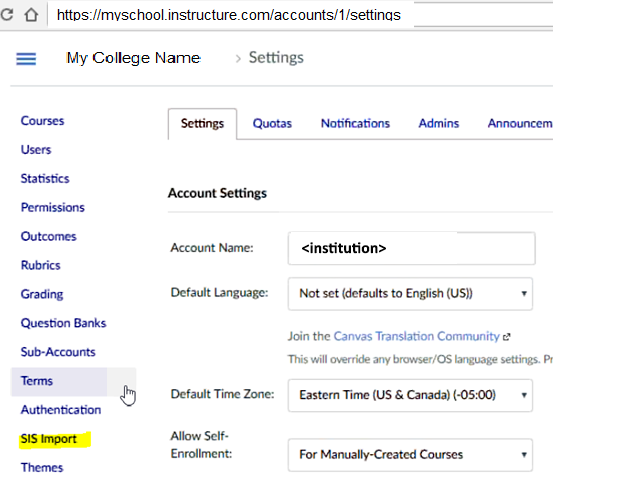
Go to the institution's Canvas account settings (i.e. https://<institution>.instructure.com/accounts.<institution's account number>/settings).
Click SIS Import.
Scroll down the Import Type list, highlight IMS Enterprise Specification XML zip, and click the Process Data button.
