Gradebook
Overview
The Faculty Gradebook page allows faculty and instructors to manage grading for their course(s) within the Faculty portal. From this utility, instructors can add assignments, enter grades, and access previously created gradebooks.
Note
The Gradebook functions do not integrate with the Grade Sheet function.
Gradebook Functions
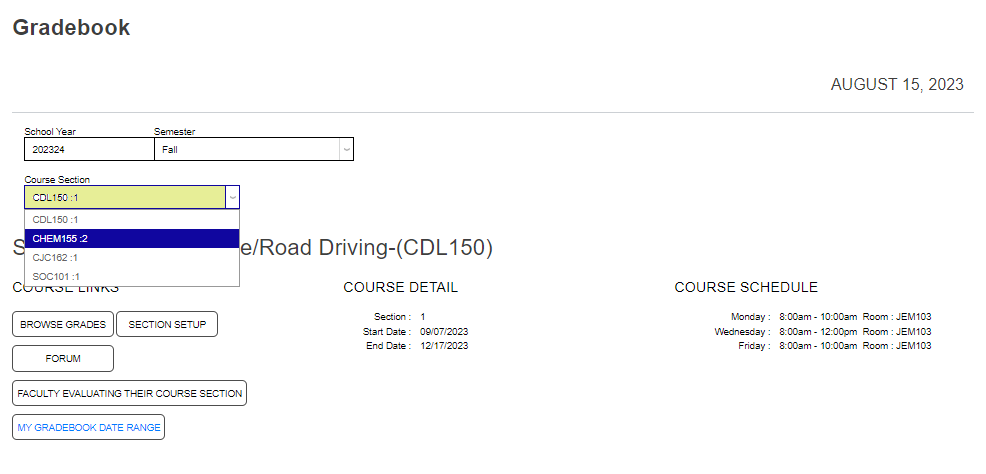
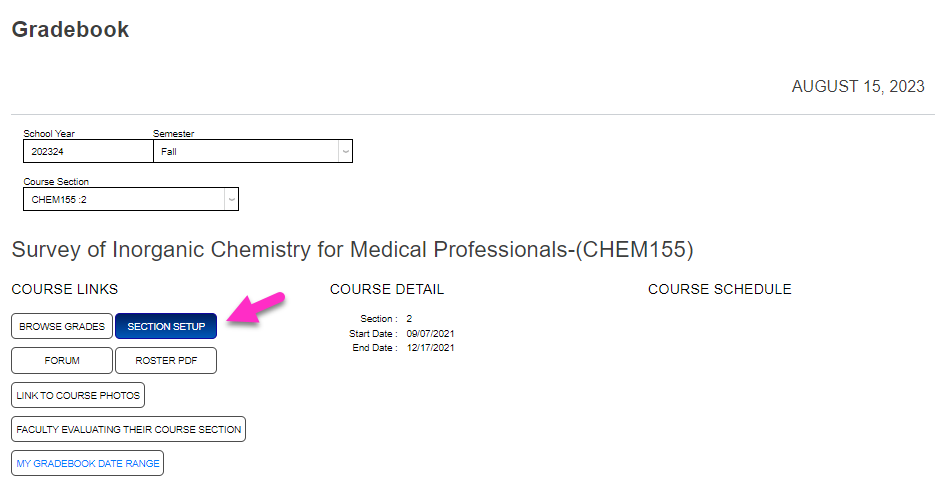
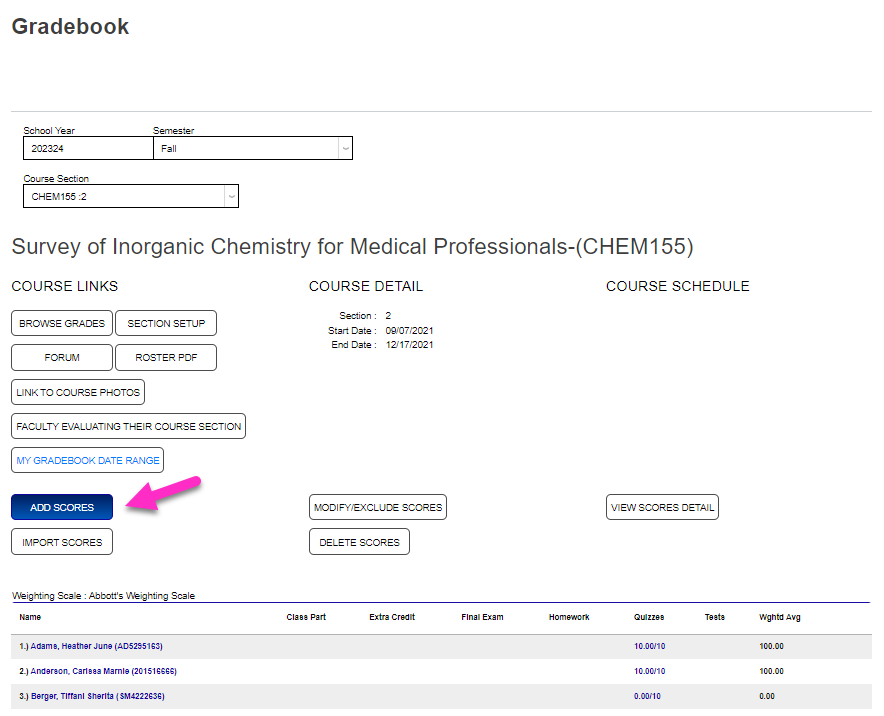
After selecting Gradebook from the Course Management menu, menus are provided to select the School Year and Semester needed. These are pre-populated with the active year and term. The school year and/or semester can be changed simply by clicking in the menu field and selecting the desired value.
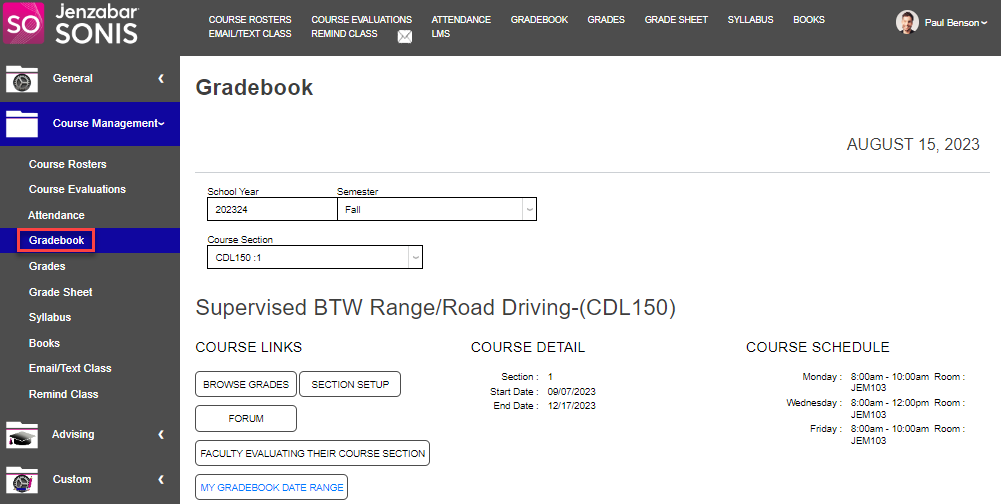
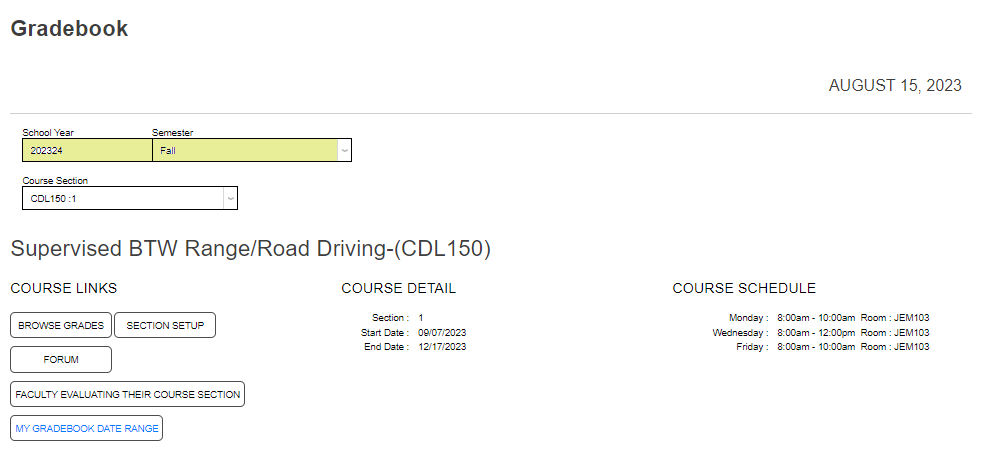
The logged in faculty member's teaching schedule for the term is displayed in the Course Section menu. Select the desired course by clicking on it. The page refreshes after selecting a different course; displaying a new header of the course title, start and end dates, the weighting scale if one was previously selected, and the roster of current enrollees.
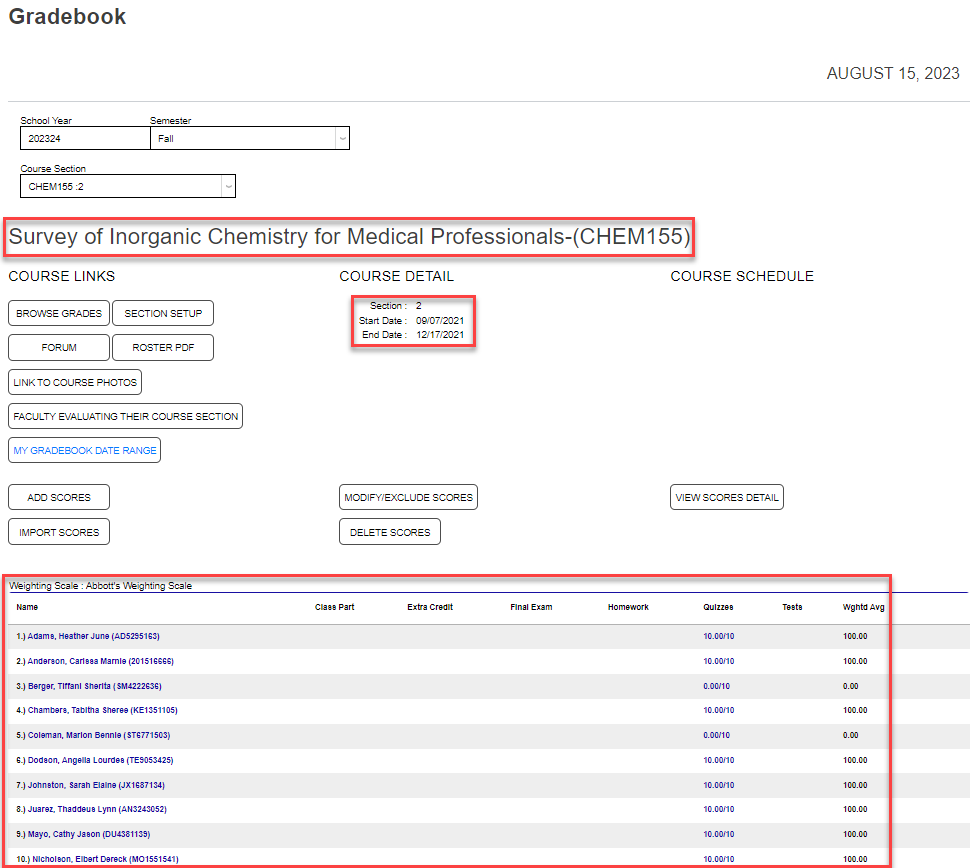
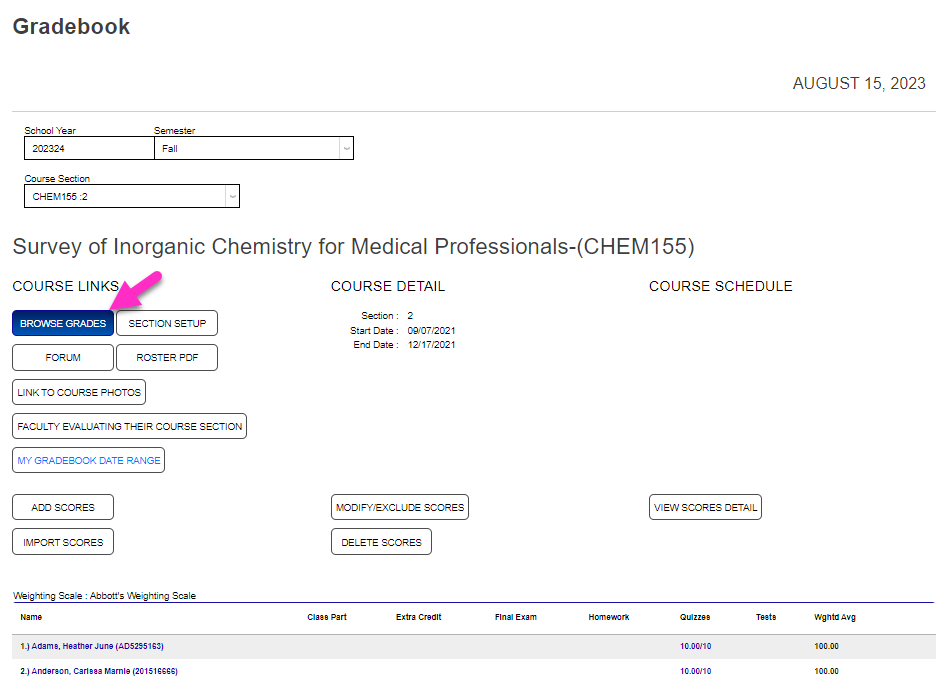
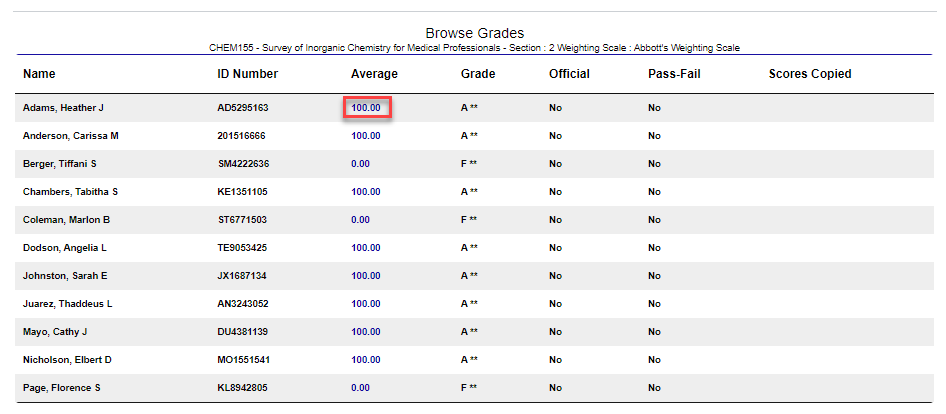
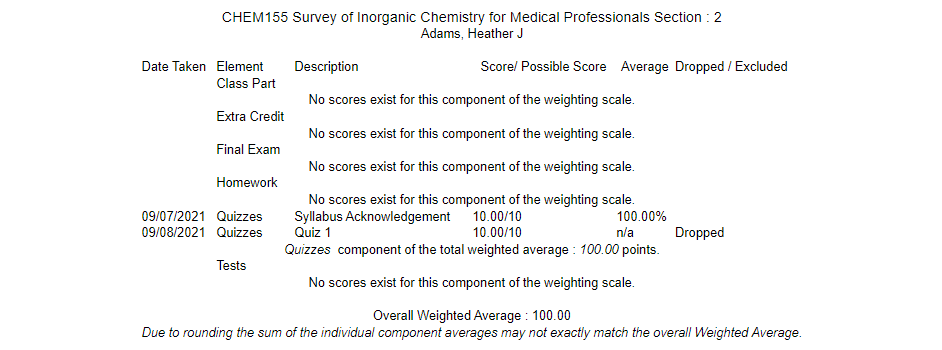
Clicking Browse Grades opens a new window with the course roster and any previously entered grades. Clicking the value below Average opens a new window with the details of the displayed average score.
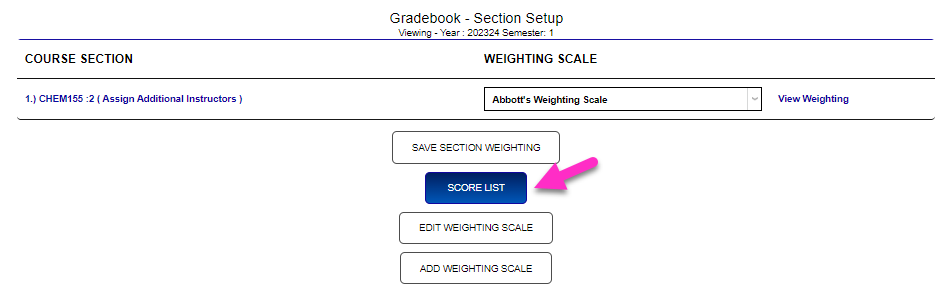
Section Setup
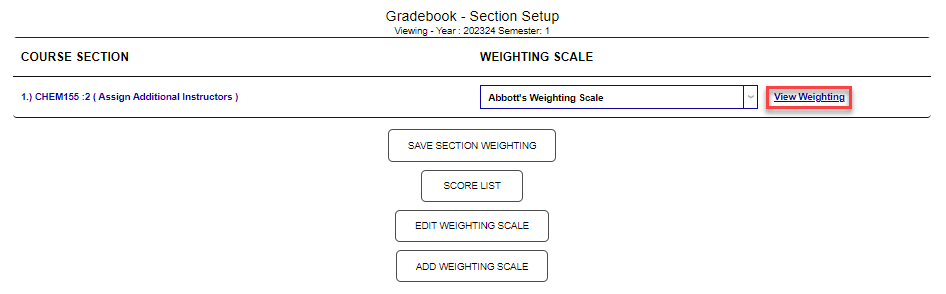
If the gradebook for this course section has not been setup, or needs to be edited, click Section Setup. A window opens with setup options. Click the course name to add additional instructors to the section.
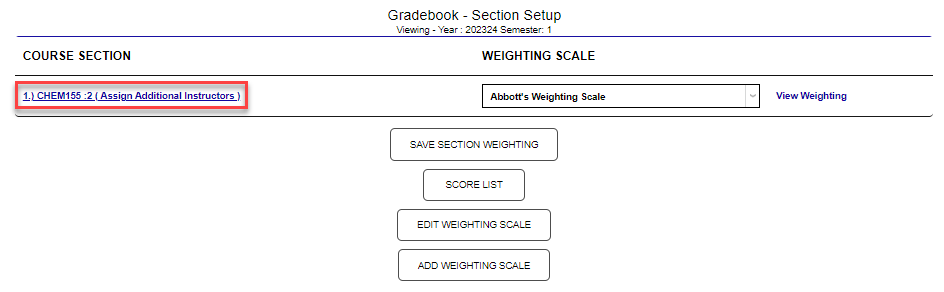
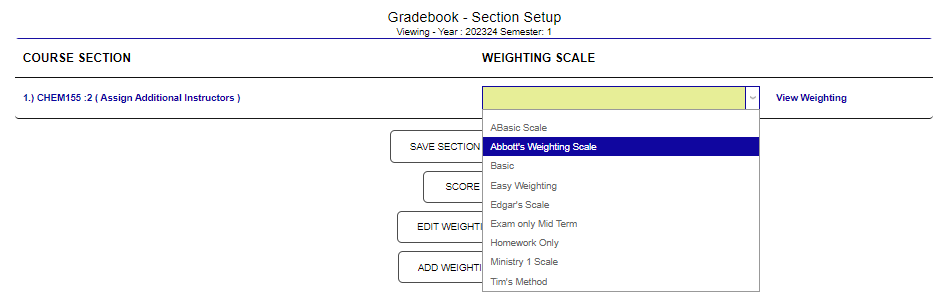
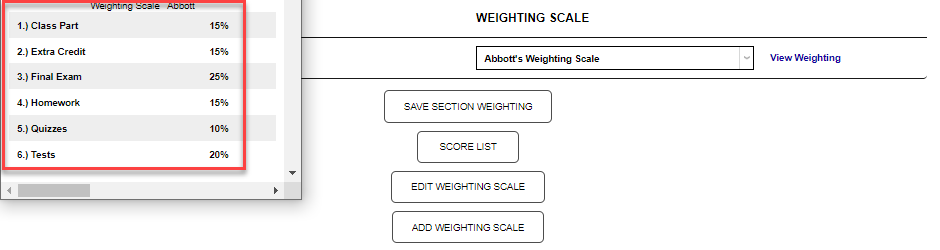
By default, no Weighting Scale is set for the course. Assign one by clicking in the dropdown menu and clicking the desired scale name. Click View Weighting to see how the chosen weighting will distribute percentages across course activity type.
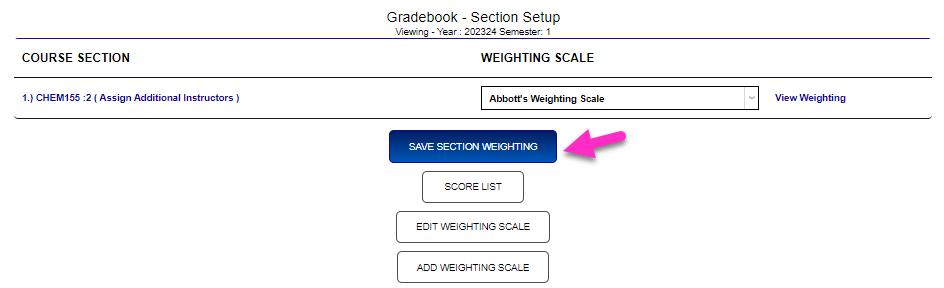
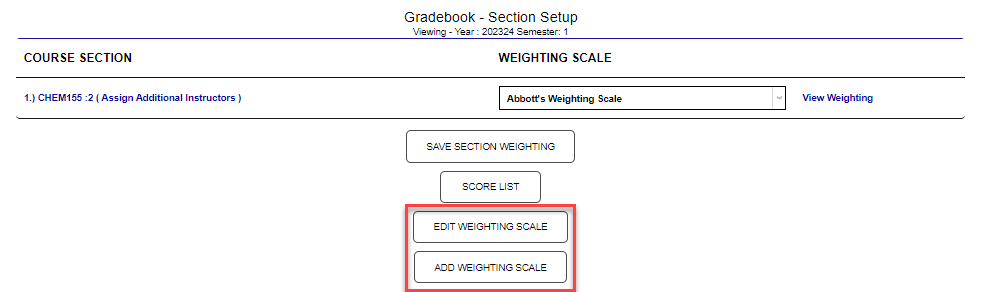
Click Save Section Weighting to save the chosen weighting and apply it to the section. To edit the weighting scale, or add another, click the corresponding buttons.
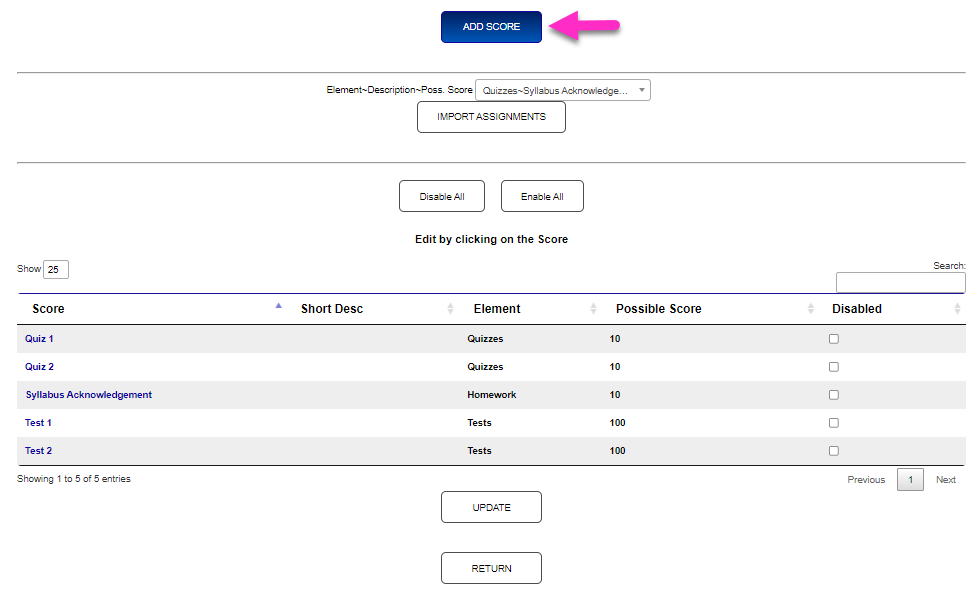
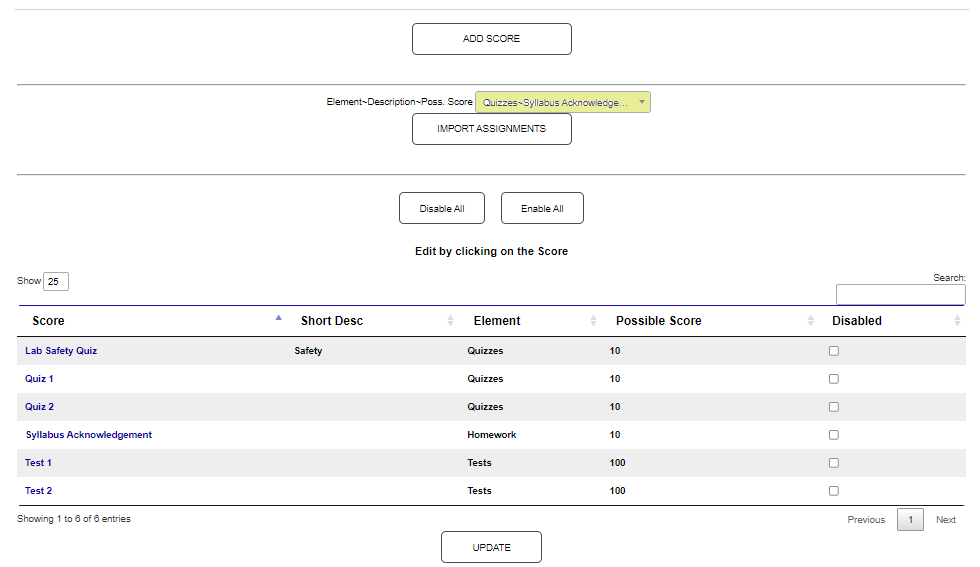
Click Score List to view and/or edit the course activities that are associated with the course. To edit existing scores, click the score name.
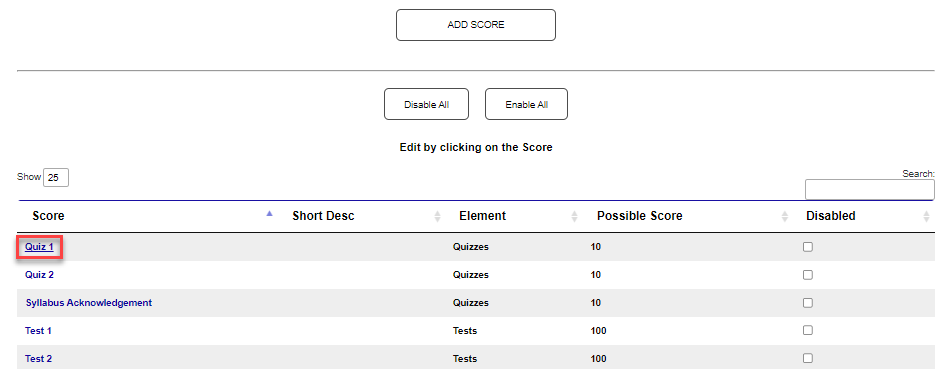
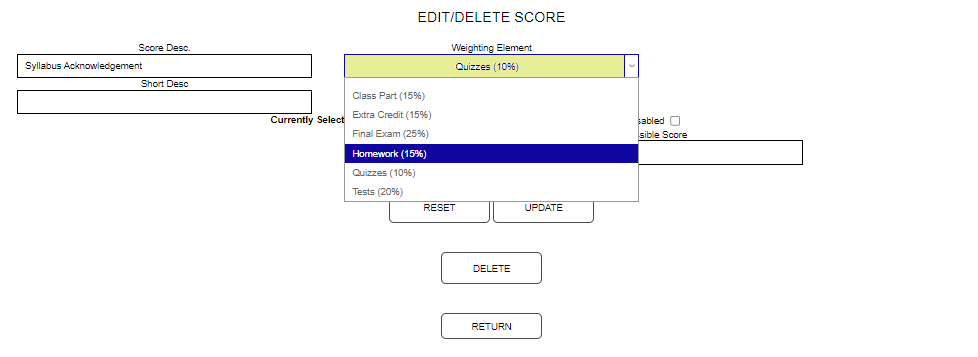
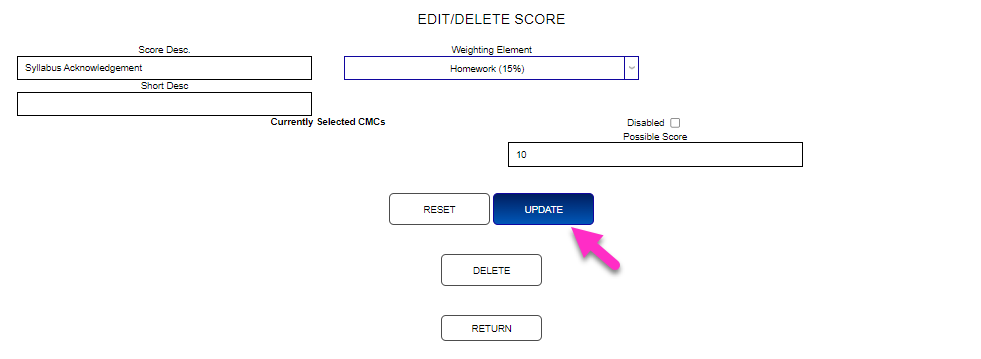
Each of the elements displayed can be edited. In this example, the Weighting Element is being corrected. After making any desired edits, click Update to save the changed information.
To create a new course activity, click Add Score. Enter the name of the activity in the Score Desc. field. This field accepts up to 75 alphanumeric characters and/or digits.
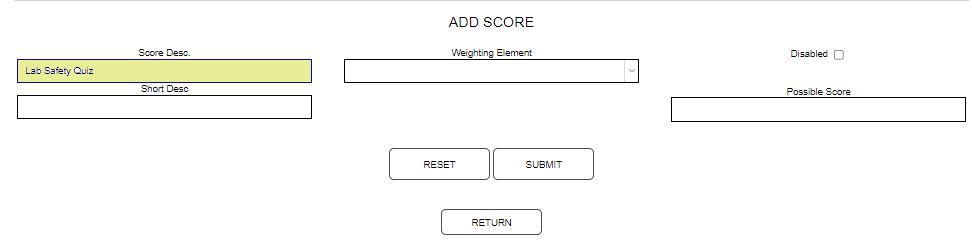
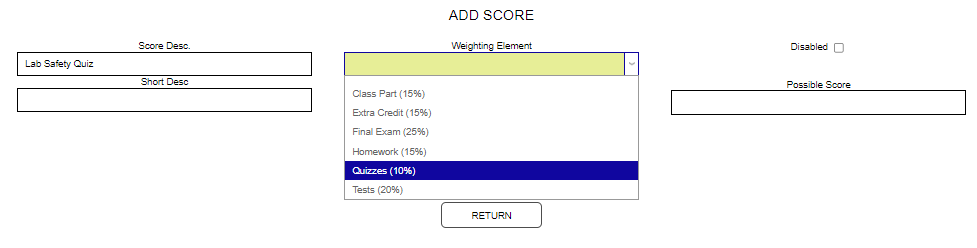
Select the type of course activity from the Weighting Element drop. Enter a brief description of the activity in the Short Desc field, if desired.
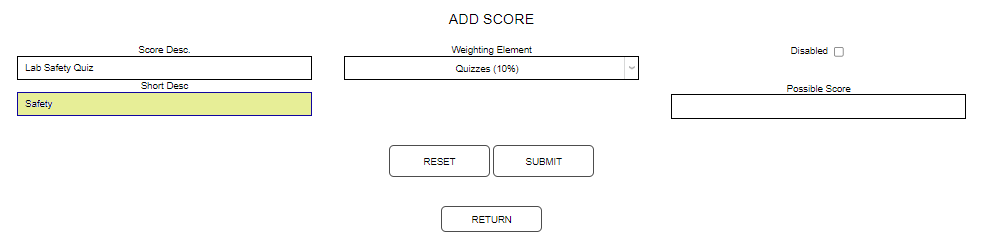
Enter the maximum score or number of points the activity is worth in the Possible Score box. Click Submit to save the entry.


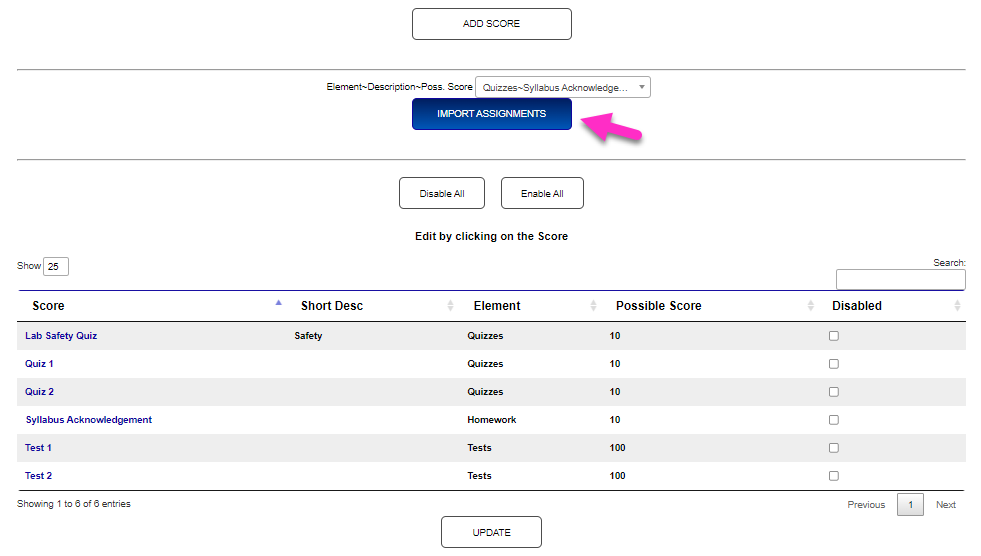
Course activities that have been added to the instructor's other courses can be added to the current section by selecting the desired item(s) from the Element-Description-Poss Score drop down and clicking Import Assignments. Note that only activities that have not already been imported to the current course will display in the menu.
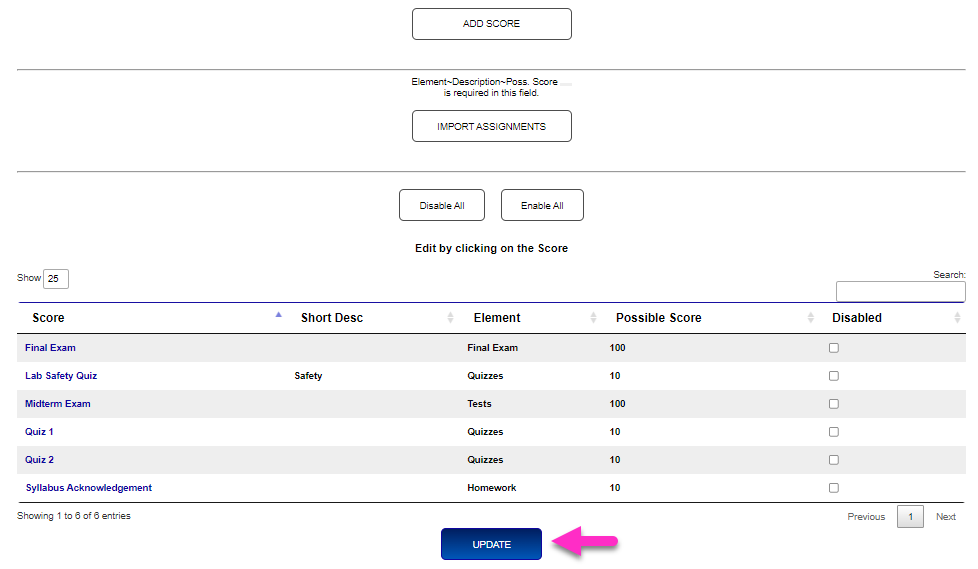
After all updates are complete, click Update to finalize the changes.
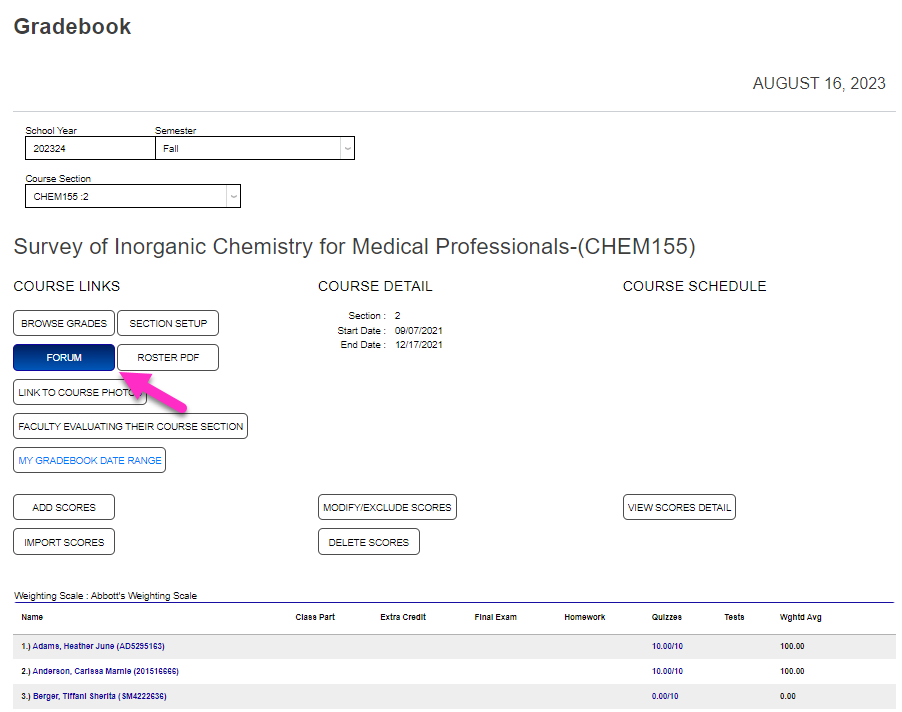
Forum
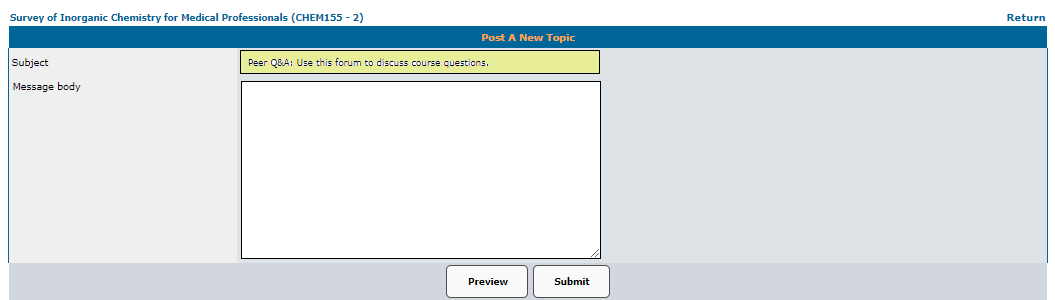
The Forum link allows takes the faculty member to a discussion forum utility. Topics for discussion amongst students can be added by clicking the Add New Topic button.

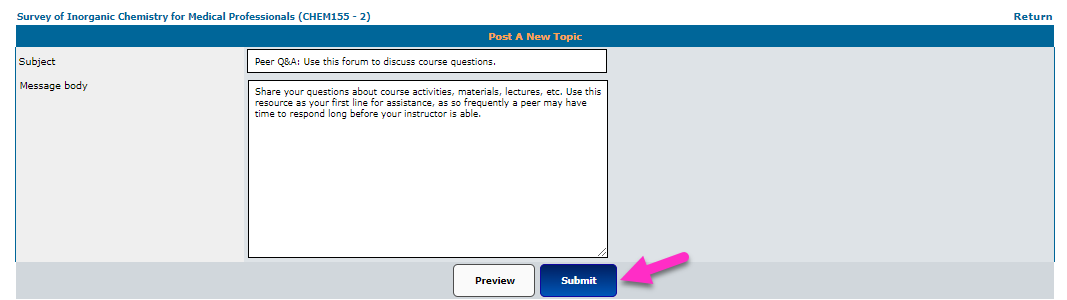
Enter a Subject that will become the discussion topic title. This field accepts up to 60 alphanumeric characters and/or digits. Enter relevant information about the subject in the Message Body.
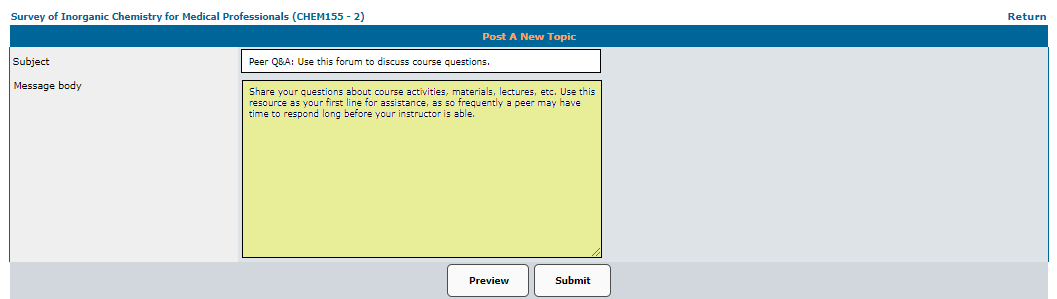
Click Submit to finalize the forum topic creation. After the topic is created, it can be hidden or deleted, as needed.

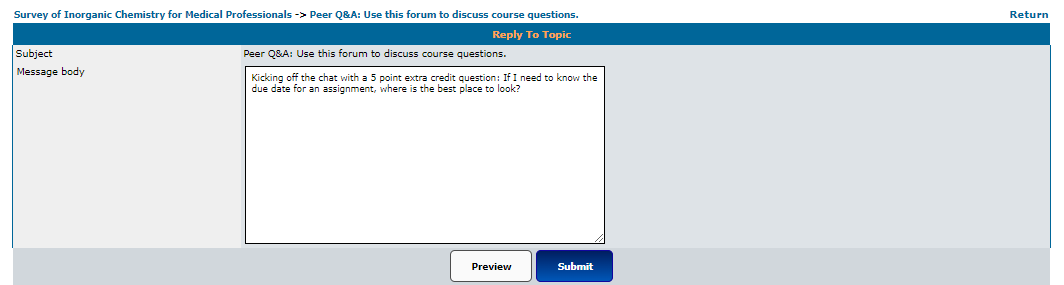
The topic can be replied to by clicking Reply to Topic, entering the reply in the chat box, and clicking Submit to post the reply.

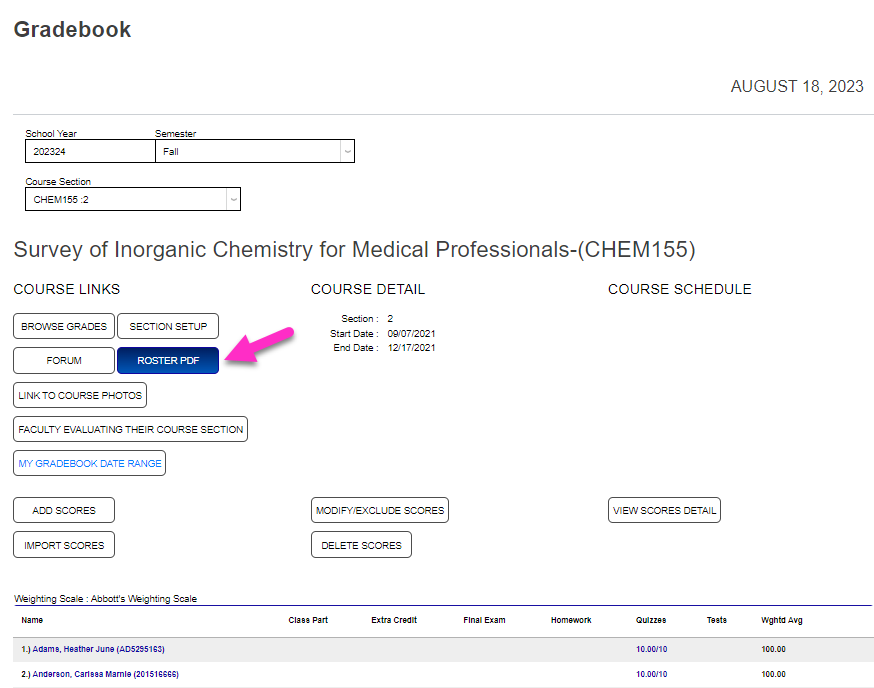
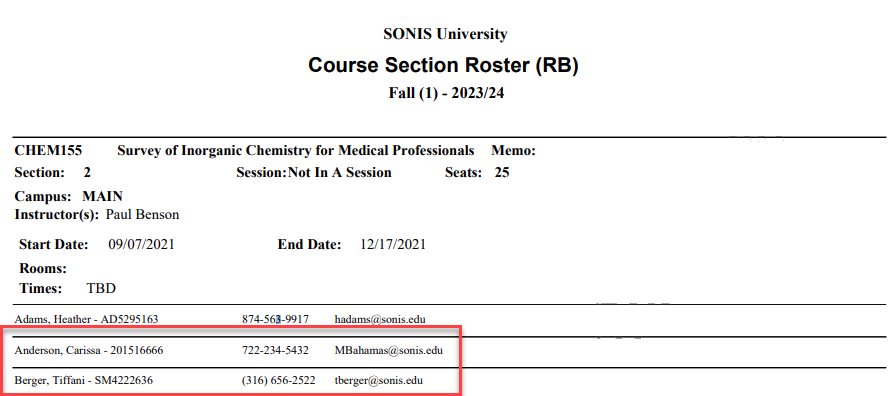
Roster PDF
The Roster PDF button opens a PDF in a new window. It can be printed or saved. The roster includes contact information for each enrollee.
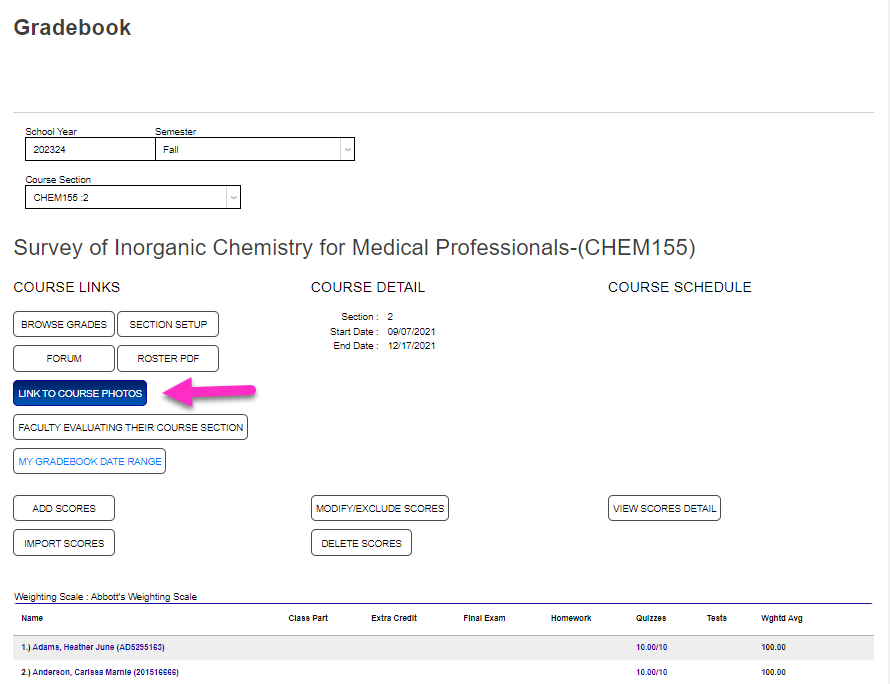
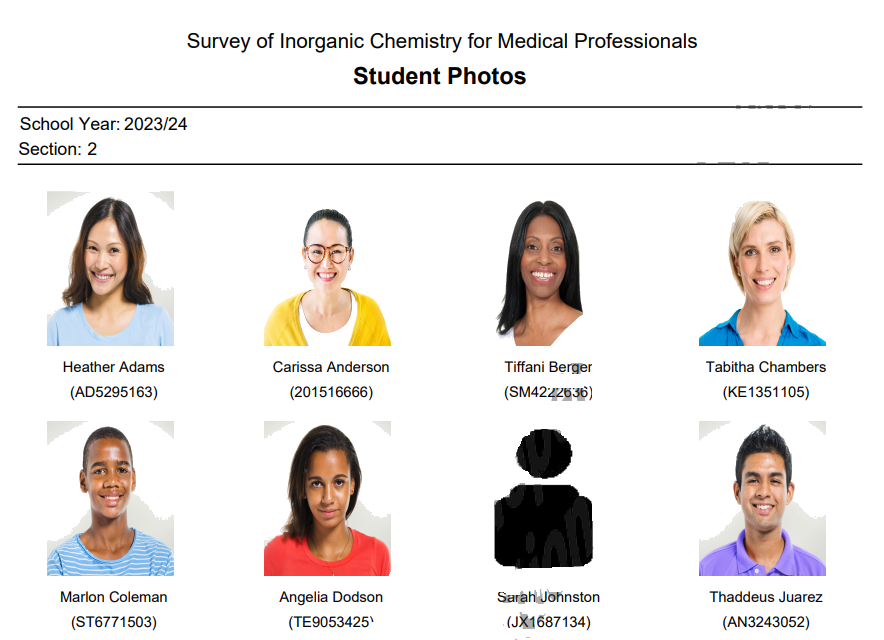
Course Photos
Click on the Link to Course Photos button to view a photo of each student enrolled in the class, if available.
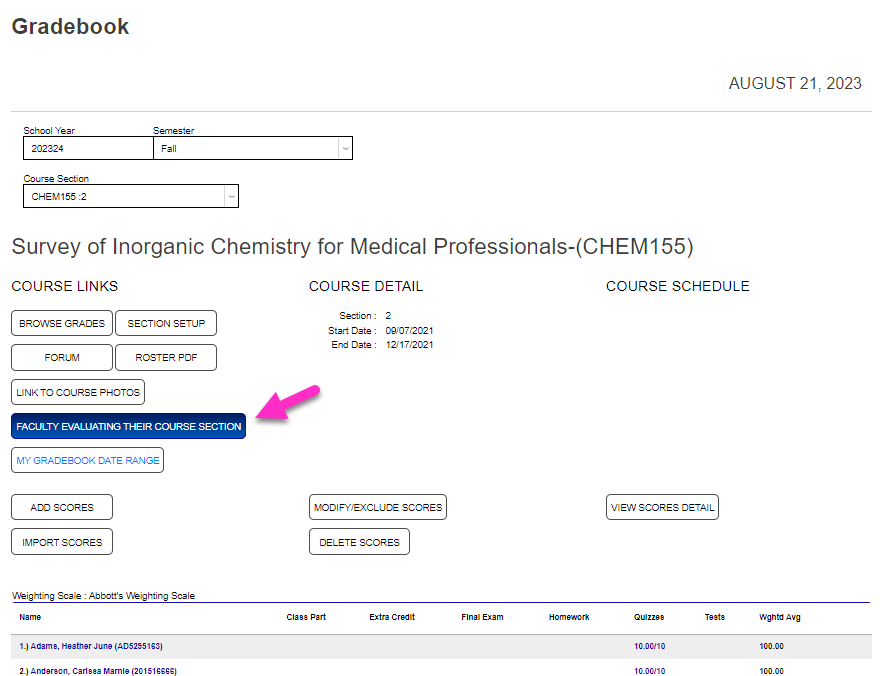
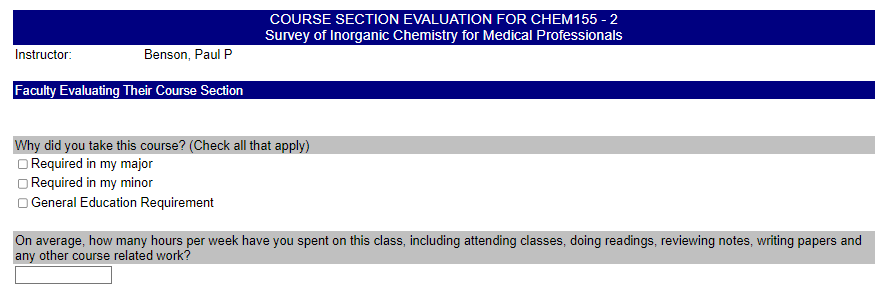
Evaluations
If an evaluation has been requested for the course, clicking the Faculty Evaluating Their Course Section button displays the evaluation.
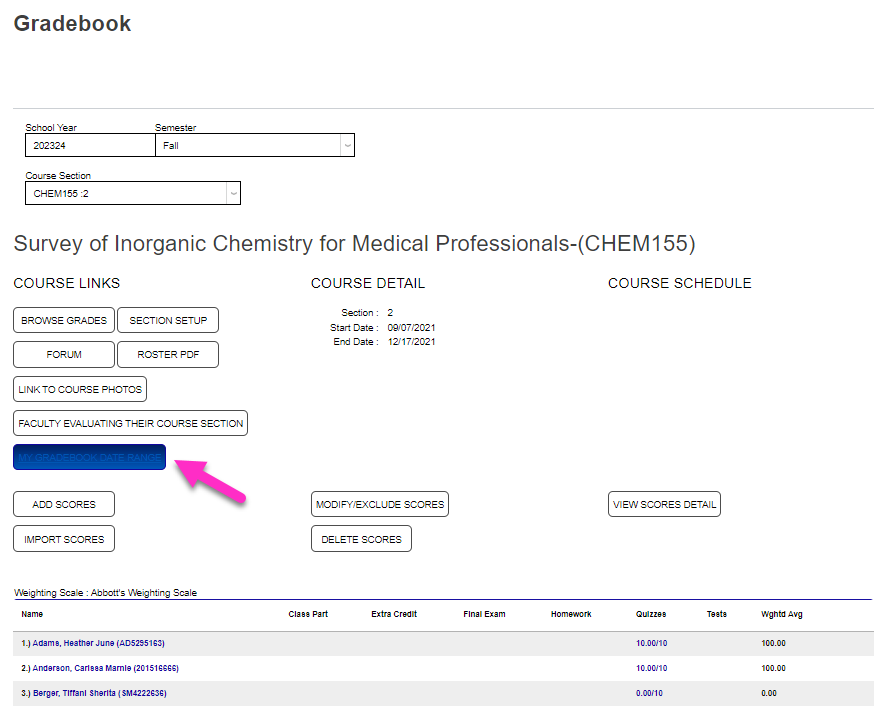
Gradebook Date Range
The My Gradebook Date Range utility provides the ability to filter the displayed scores by a date range that considers the date a score was first recorded. This allows instructors to define their personal My Date Range values and control the scores that display in the Modify/Exclude Scores, Delete Scores, and View Score Details functions.
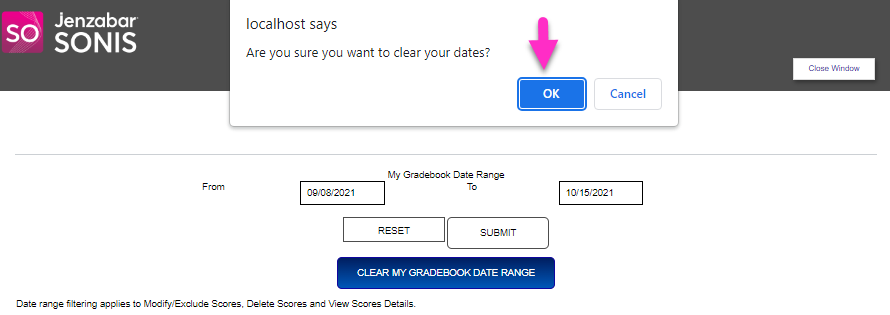
To enter dates, click the My Gradebook Date Range button and enter the date range begin date in the From field.

Enter the end date in the To field. Click Submit to finalize the action and set the filters.


To quickly clear the entered date range, click Clear My Gradebook Date Range and confirm the action.

Add Scores
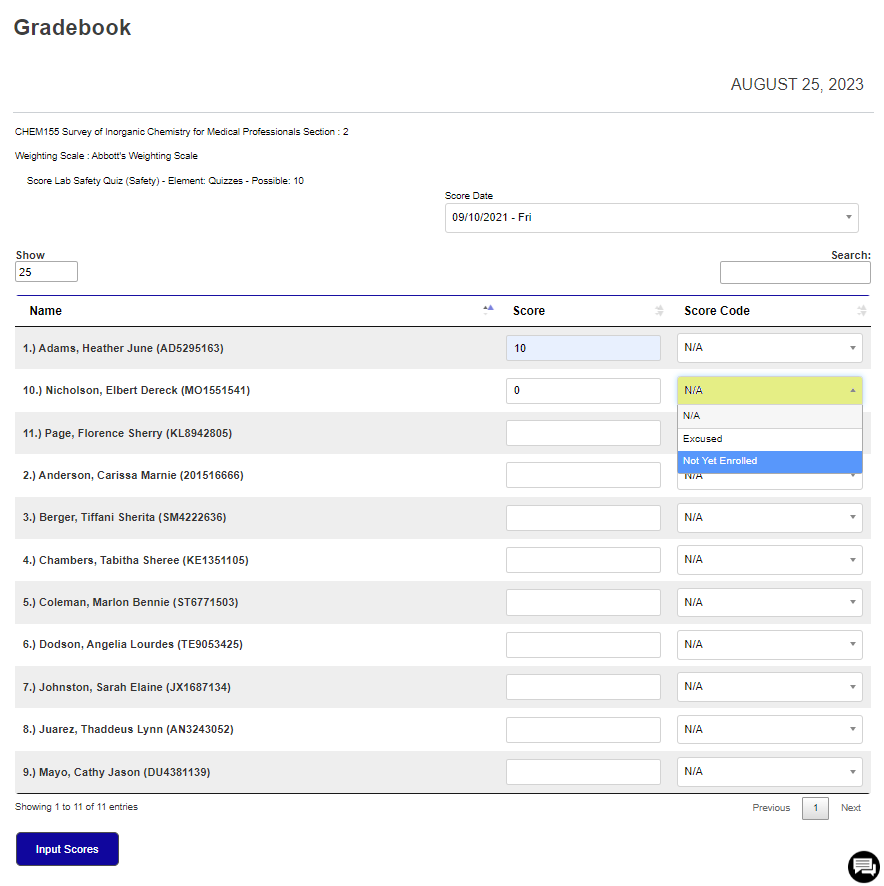
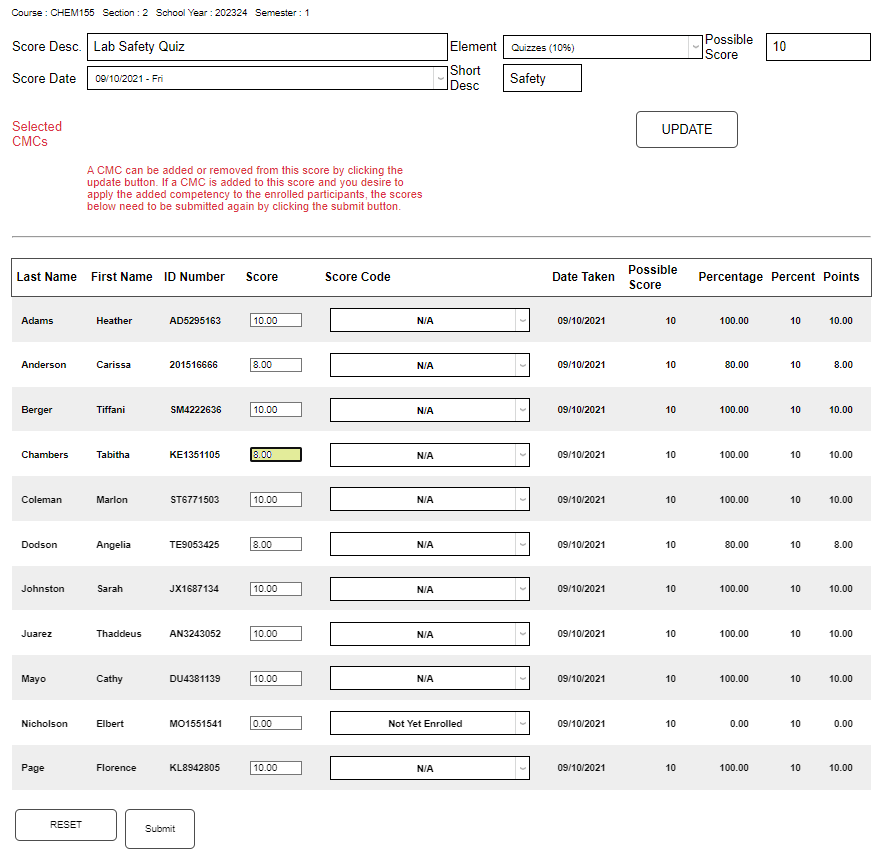
To add a score for a course activity, click Add Scores. Select the activity being scored from the Score dropdown menu.
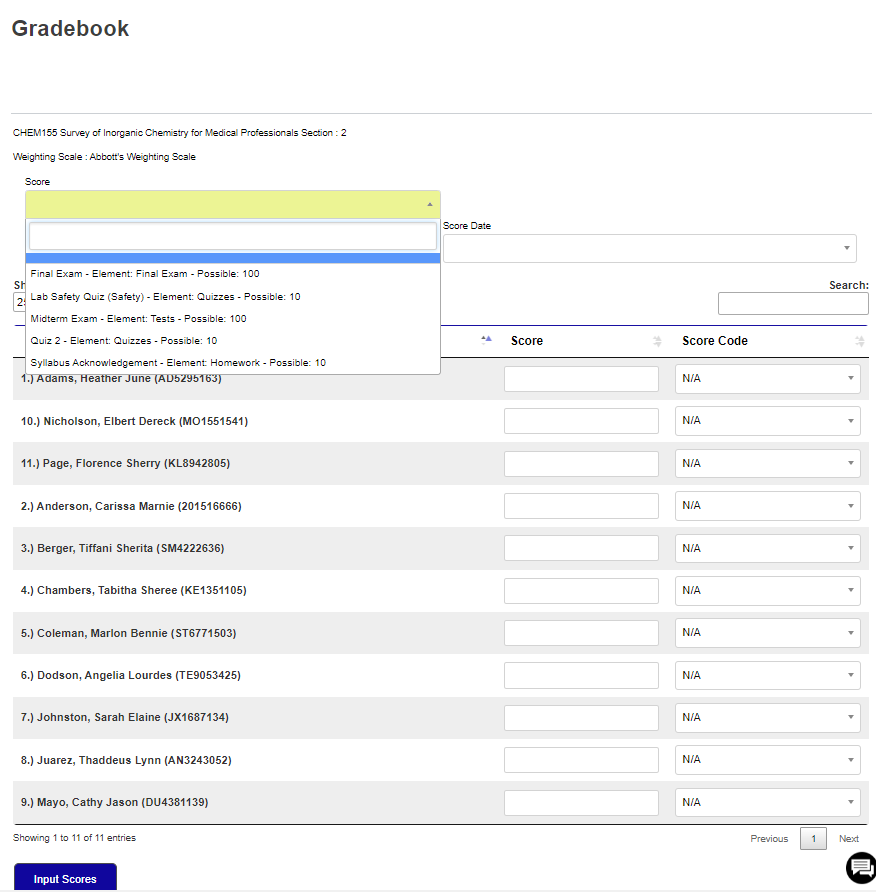
Select the course meeting date the activity was due or completed from the Score Date dropdown menu. Record the numeric value of the score achieved by each of the students in the Score box.
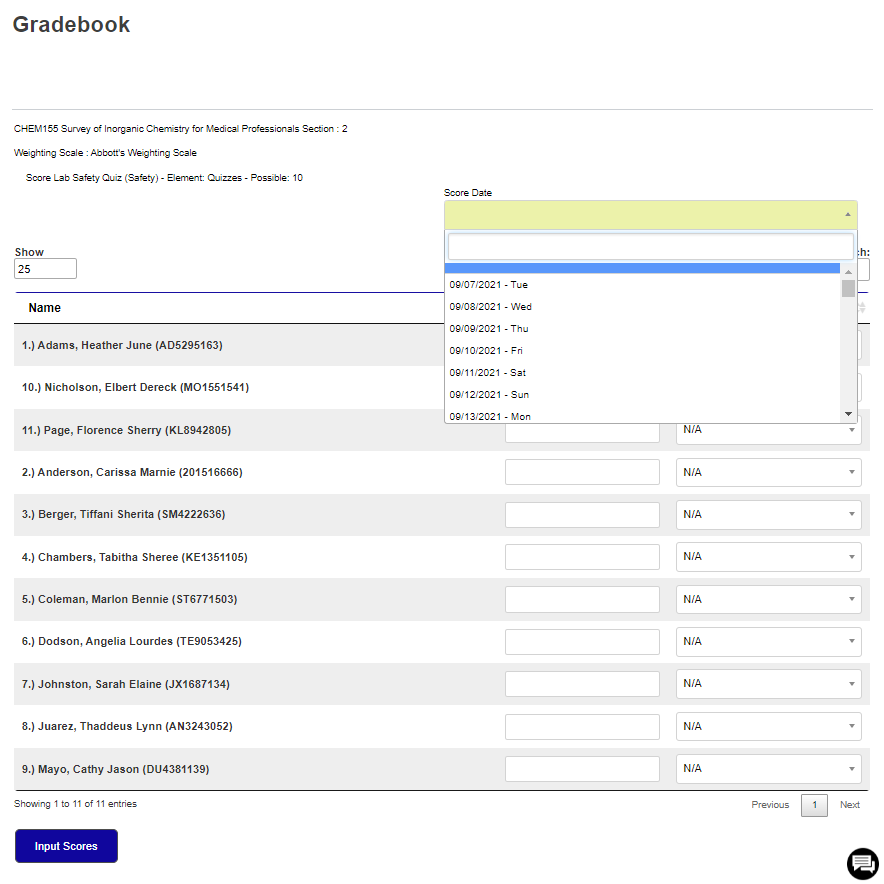
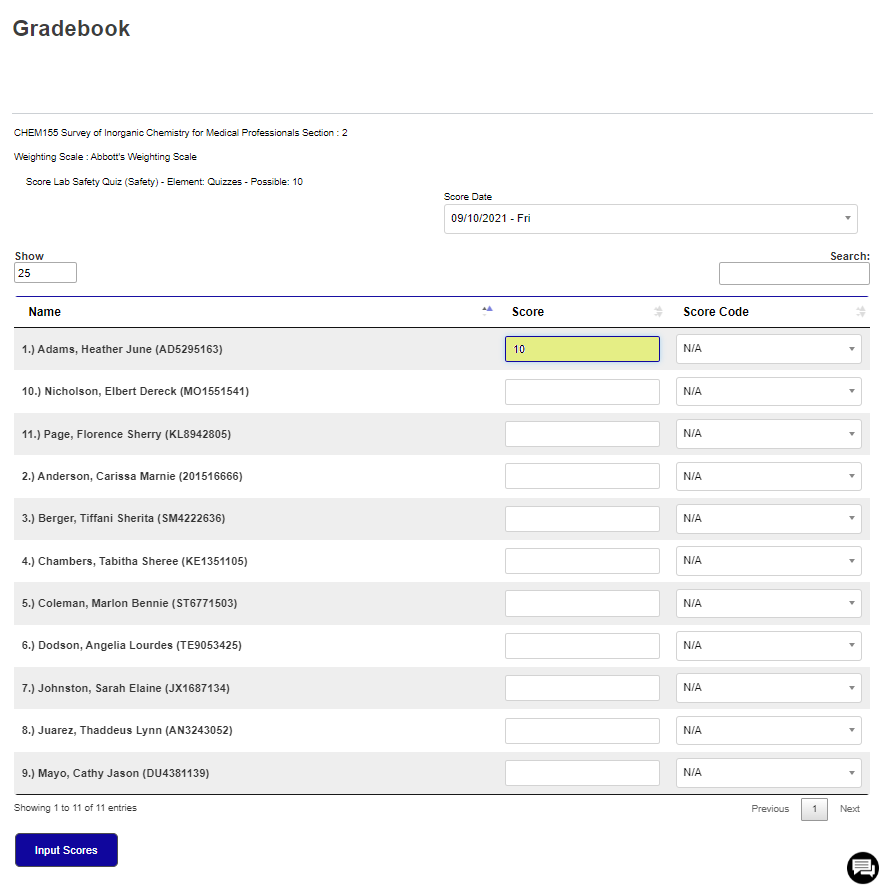
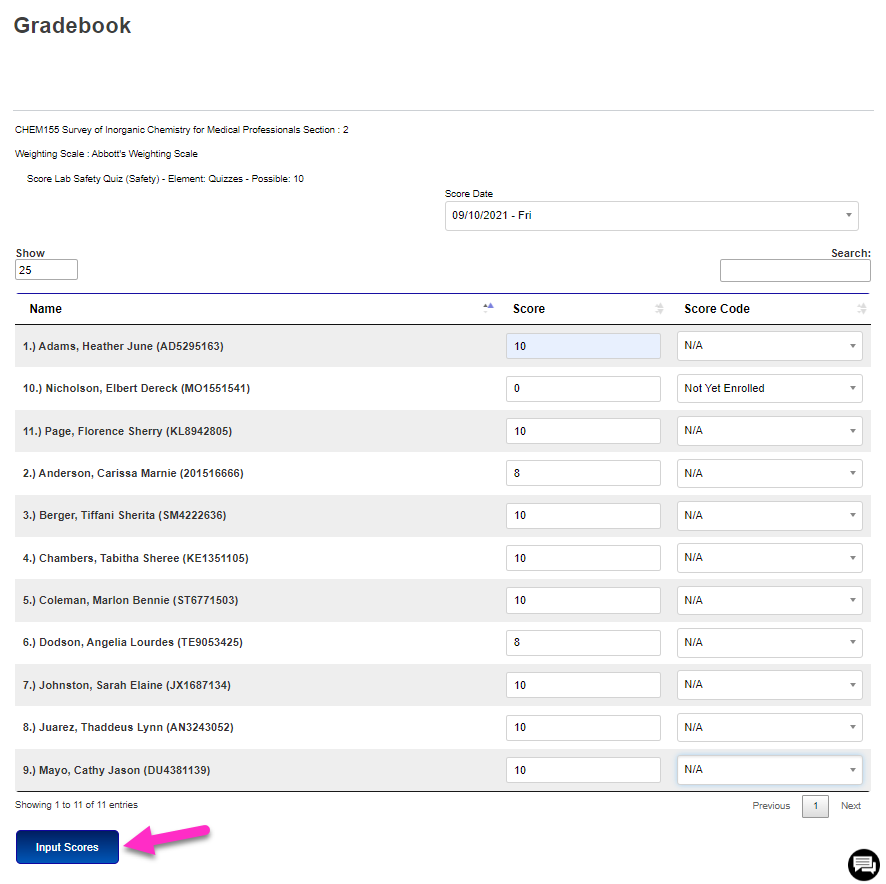
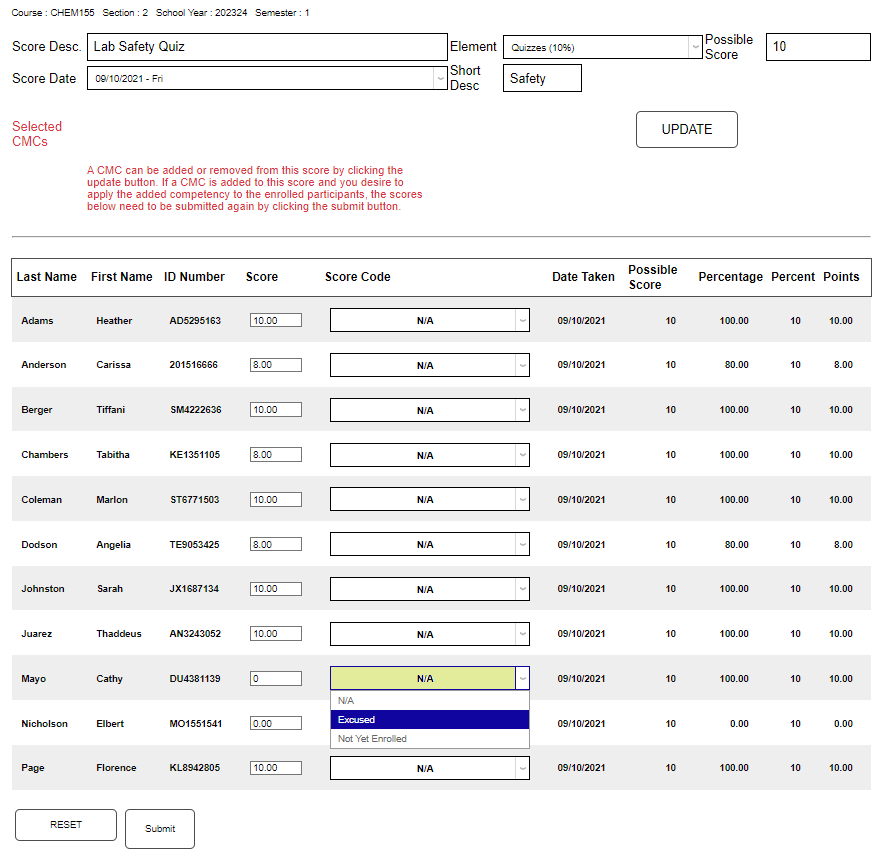
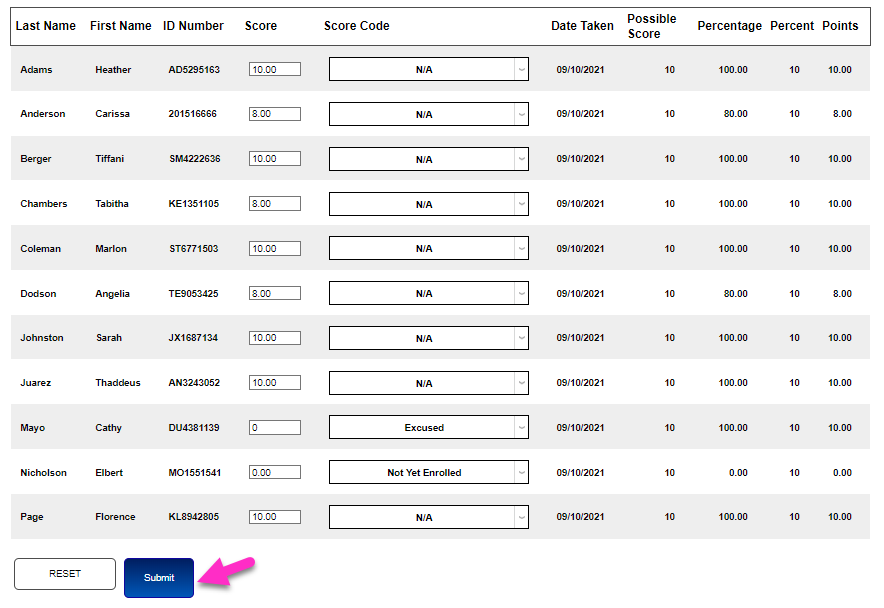
If no score applies and a Score Code schema is being used at the institution, select the appropriate code from the Score Code dropdown menu to indicate why the student was not scored for the activity. After entering all scores and/or score codes, click Input Scores to save the entries and finalize their entry in the gradebook.
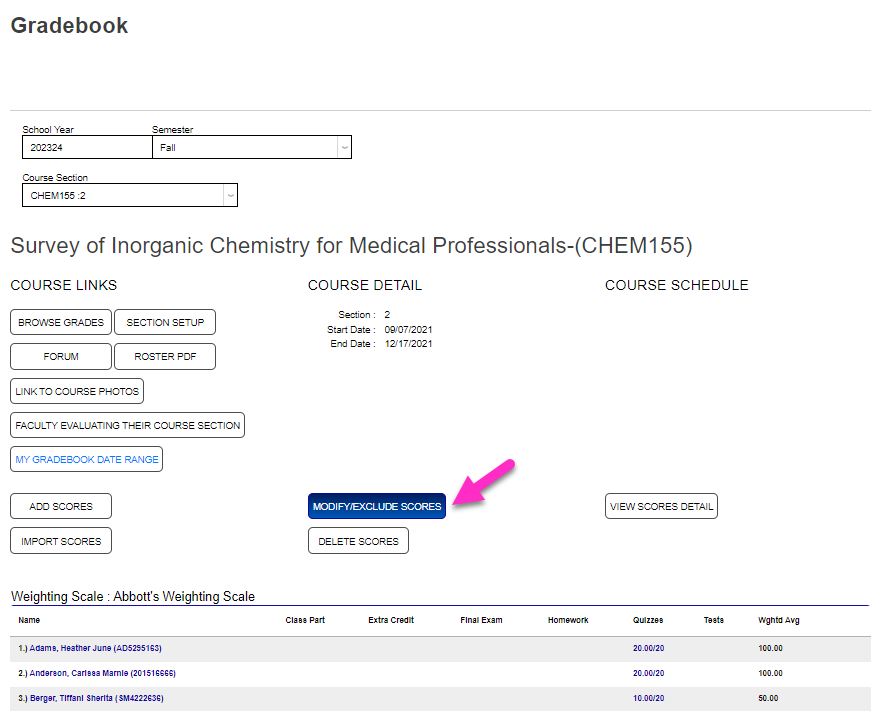
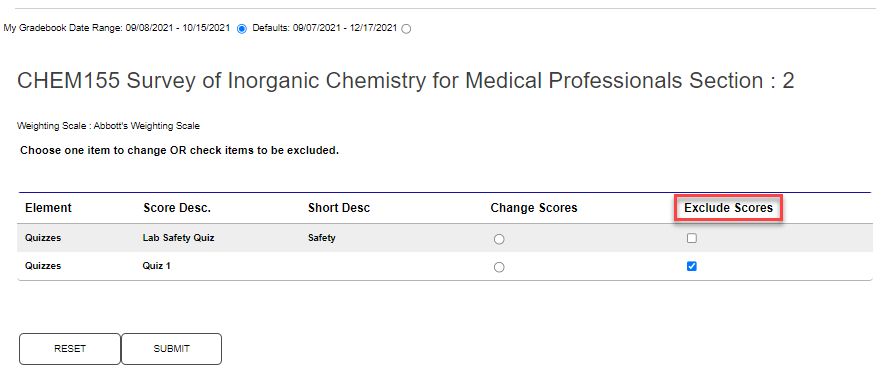
Modify/Exclude Scores
The Modify/Exclude Scores button allows the user to modify scores that were previously input. After clicking, the activities that have been scored during the gradebook date range are displayed. To change scores, click the Change Scores radio button and Submit.
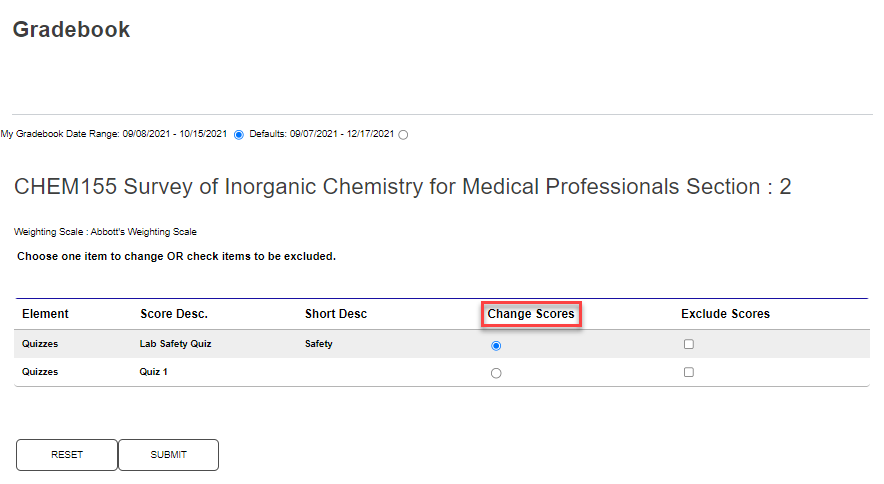
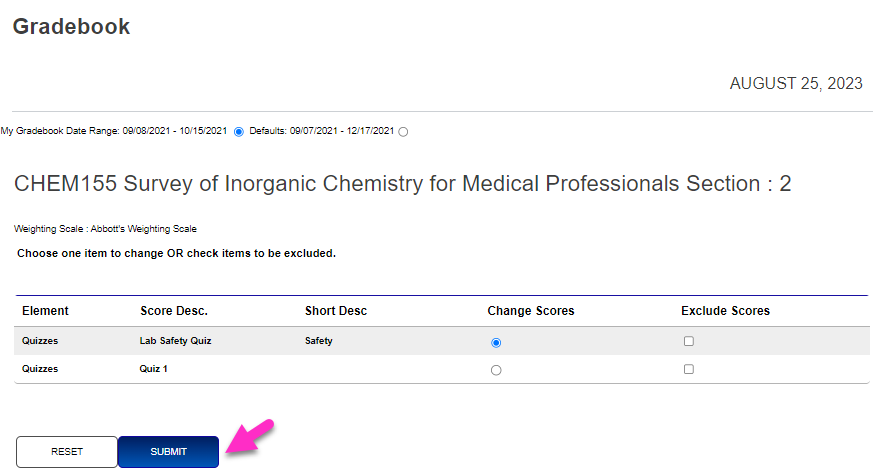
Click in the score box and edit the score, or click the dropdown menu and select the desired option, then click Submit to save the update(s).
To exclude a course activity completely, check the Exclude Scores box and click Submit.
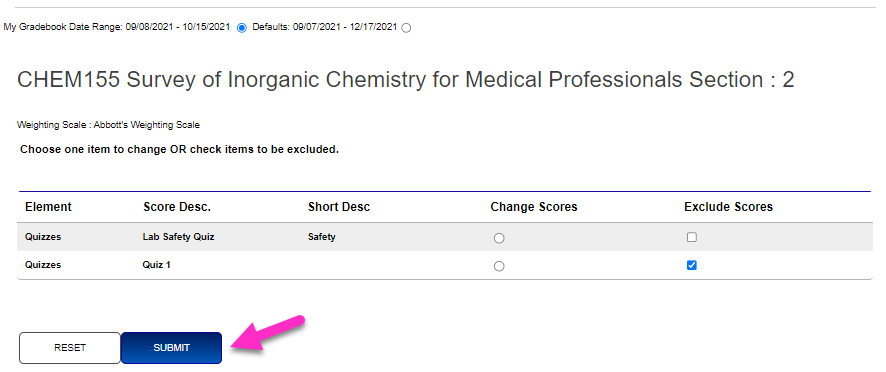
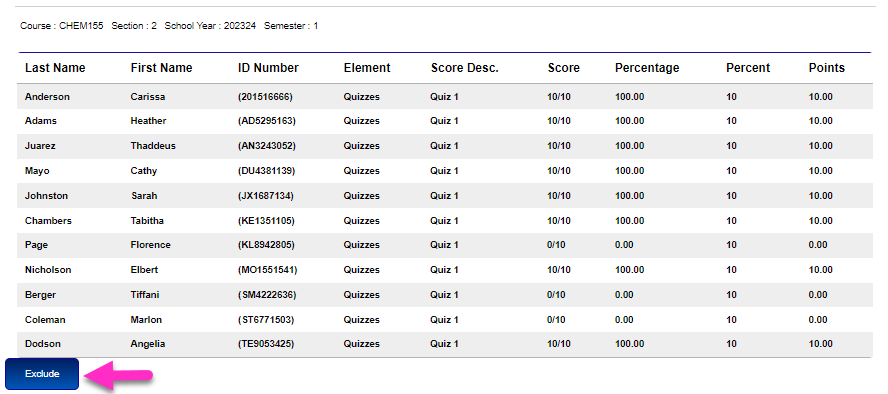
Click the Exclude button. No active confirmation of the action is required. After the exclusion has been completed, the user is returned to the Gradebook page and the exclusion can be confirmed by looking at the scores listed.
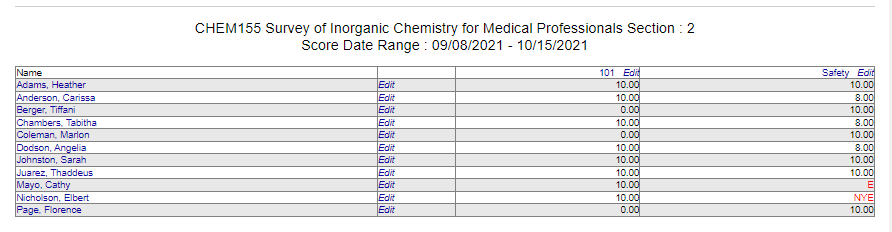
View Scores Detail
Click View Scores Detail to view a course roster with the details of the scores in a new window. Confirm the date range to be displayed, whether the My Gradebook Date Range or Defaults, which is the full date range for the course. Click the radio button that applies to the desired date range, if necessary.
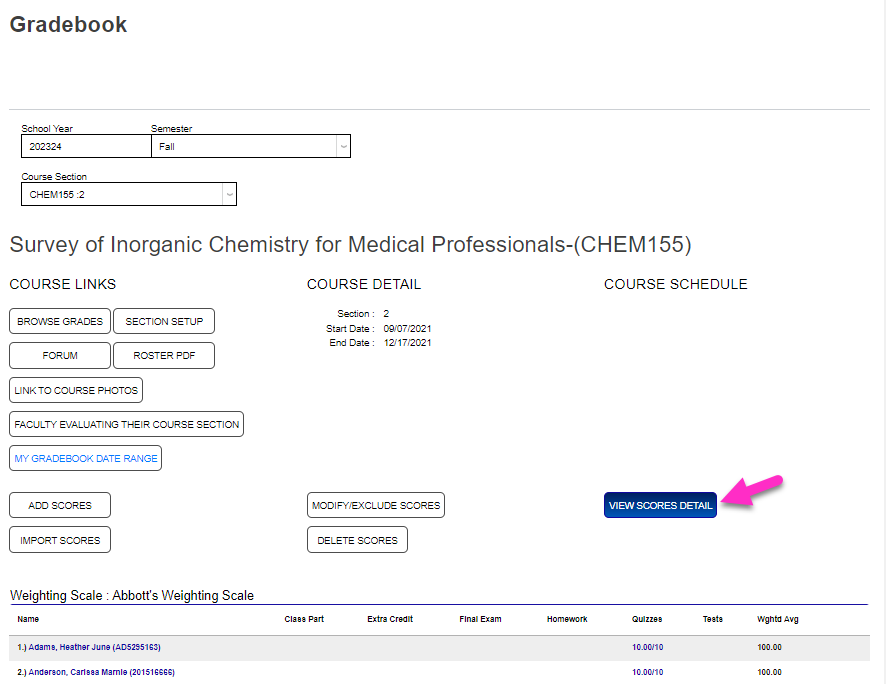

Click View Scores to view the scores for the selected date range in a new window.

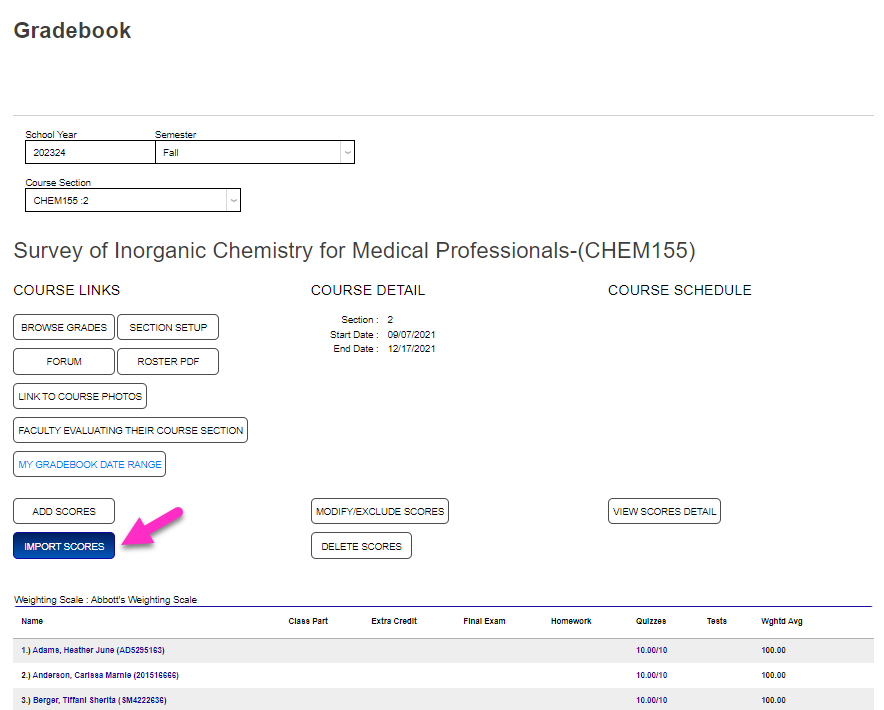
Import Scores
To utilize the Import Scores function, an administrator must enable the feature in System Variables. Information and requirements on creating the file to be imported are provided by the test scoring system provider and Jenzabar SONIS Support.
Once the file has been received by the institution, and made available to the faculty member via local server folder, importing to the faculty gradebook can begin. The Import Scores button will not display for courses that do not have a Weighting Scale assigned.
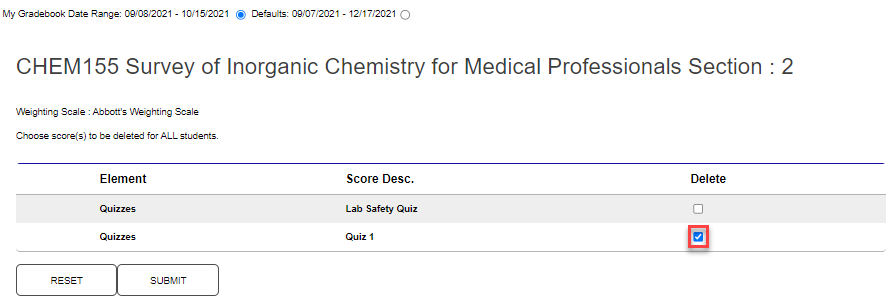
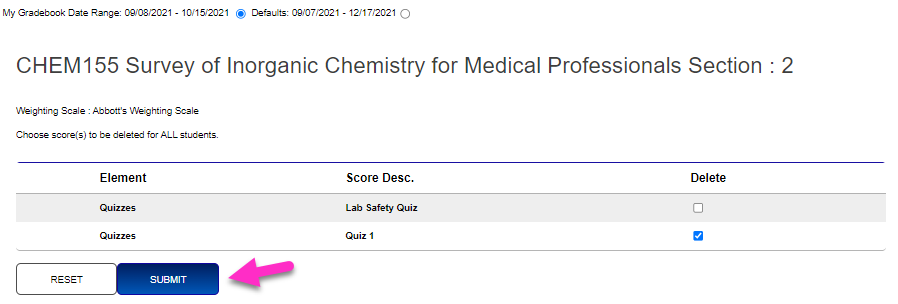
Delete Scores
The Delete Scores button provides the ability to quickly remove a course activity from the gradebook. Click Delete Scores to begin removing the unwanted activity(ies). The date range displayed can be toggled between My Gradebook Date Range and the Default course dates. Select the score(s) to be removed by clicking the associated checkbox(es).
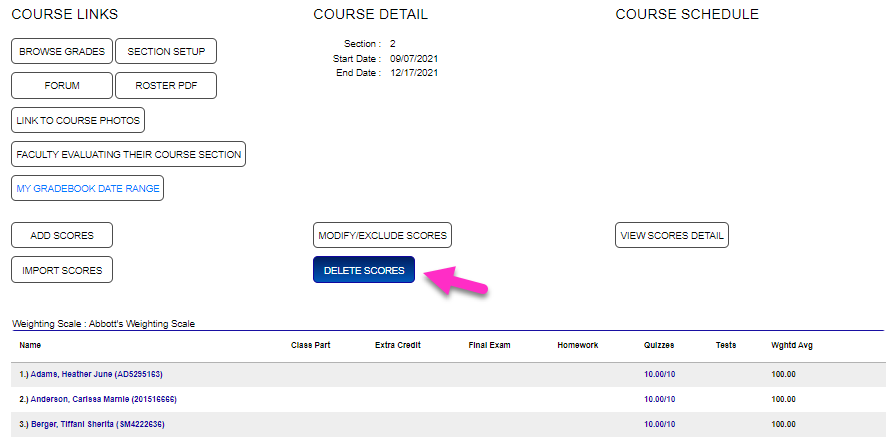
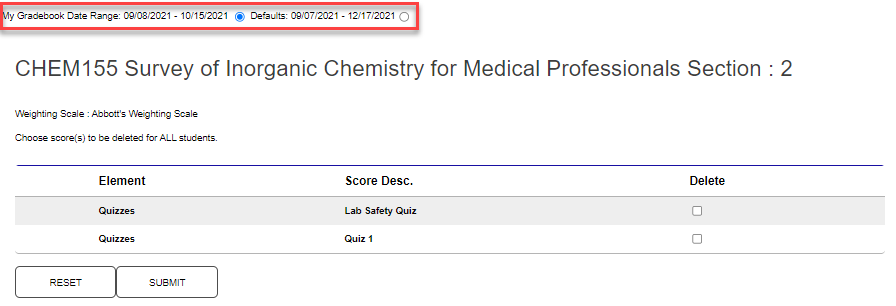
Select the score(s) to be removed by clicking the associated checkbox(es). Click Submit to finalize the removal.