Registration
Overview
The Registration page in the student portal provides current students in good standing with an easy, fast way to register themselves for upcoming courses. This page may be restricted or made inactive by school administrators for a variety of reasons and is often only made available during certain periods of the school calendar. It may also be unavailable due to unresolved registration holds. To clear holds, or inquire as to why registration is unavailable, contact school administration.
If Express Registration is turned on, the student will be taken directly to this page after logging in. Students can view course offerings without logging in if the Courses by Semester function is enabled.
Note
If you're a Continuing Education student, your registration page will look and function a bit differently. See the CE Registration section below for more details.
Registering for Courses
Selecting a Term
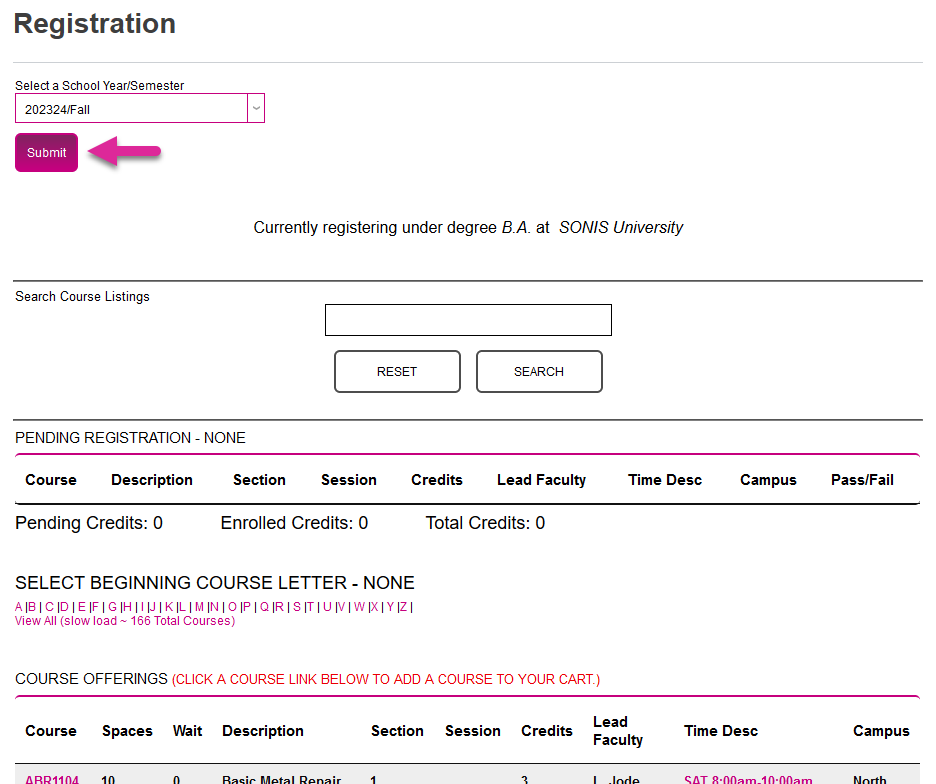
To begin, select a School Year/Semester from the dropdown menu and click Submit. Keep in mind that the terms listed may be limited based on institutional settings.
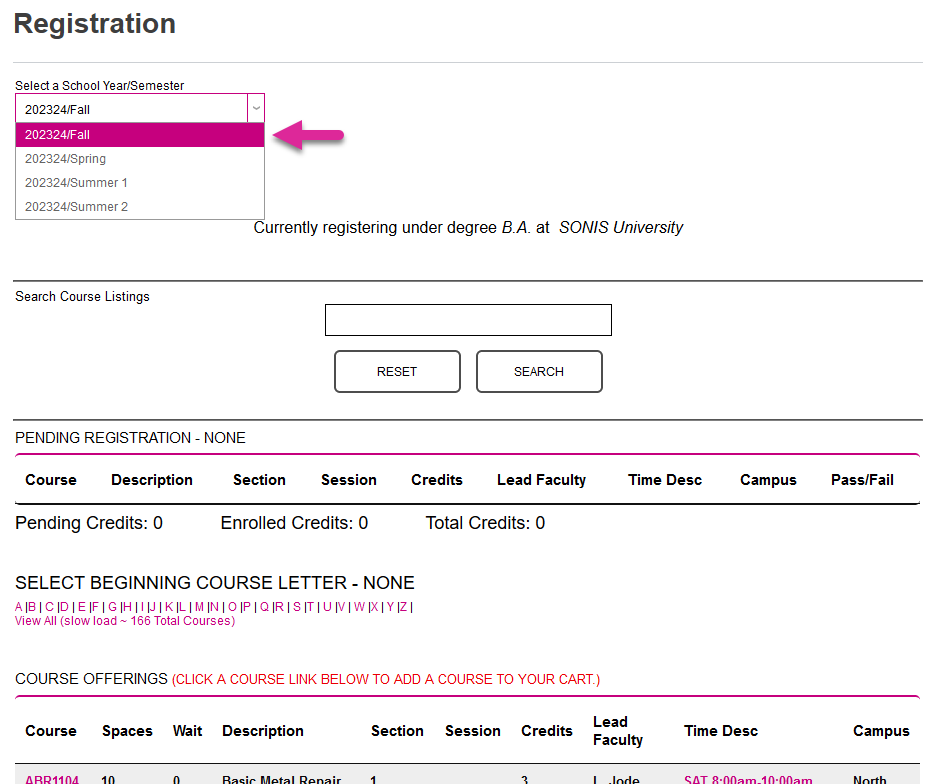
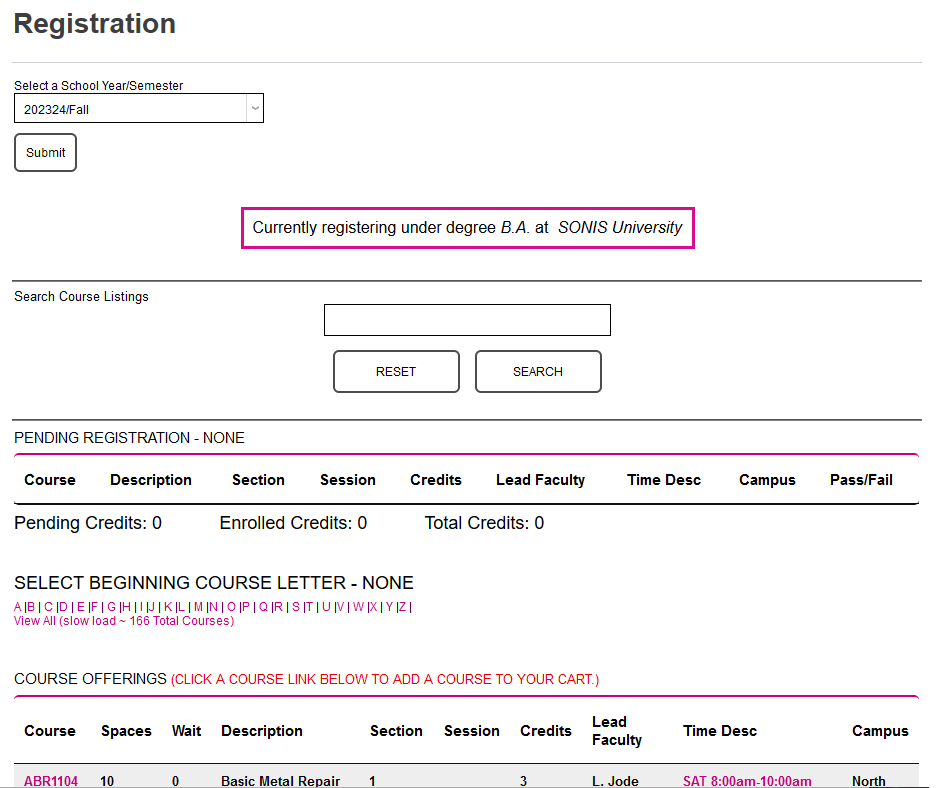
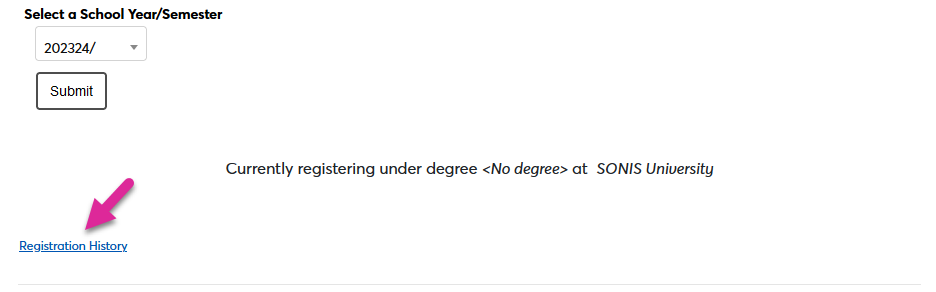
Each student's active degree type is displayed above the search box. If this information is incorrect, contact school administration to have it corrected.
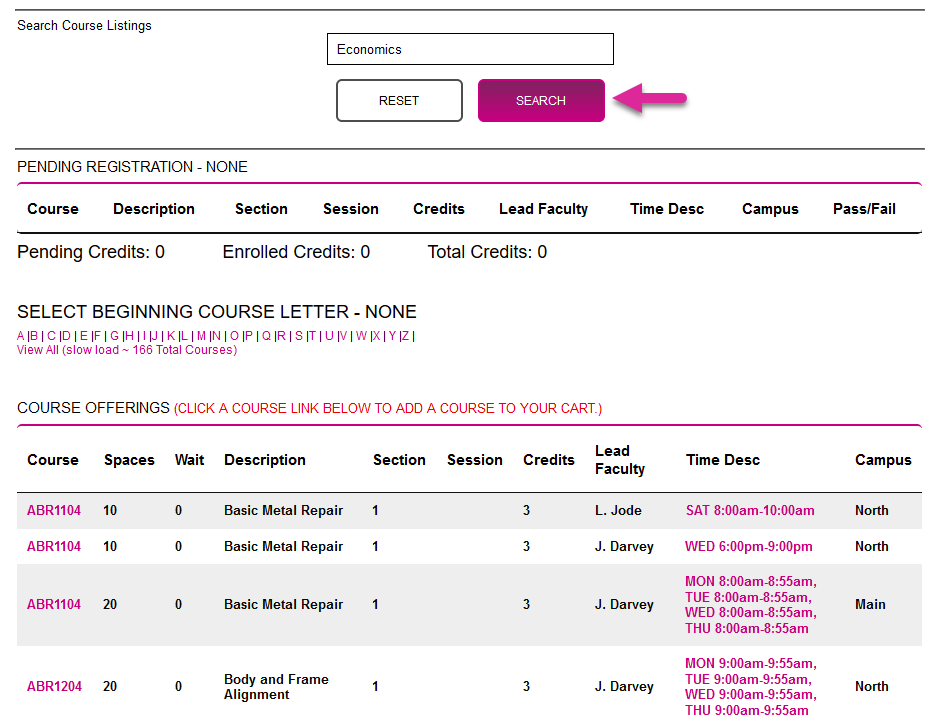
Searching Course Listings
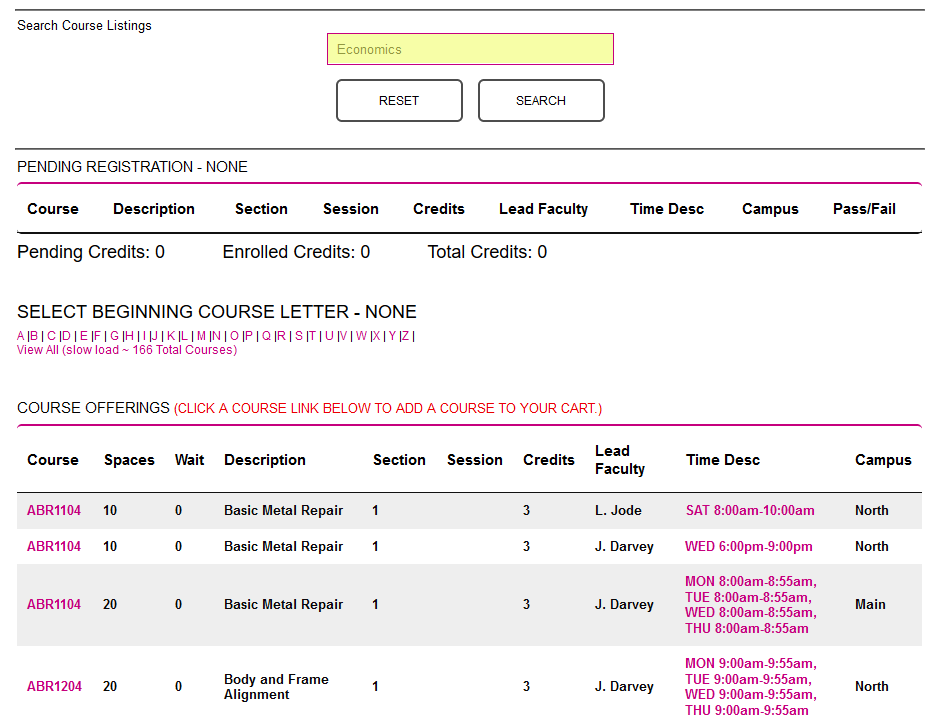
To search for a specific course or courses, type a search term into the Search Course Listings field and click Search. Note that this search includes the course name, the course description, the lead faculty, the campus, the section number, and the course memo, but it does not correct for spelling errors.
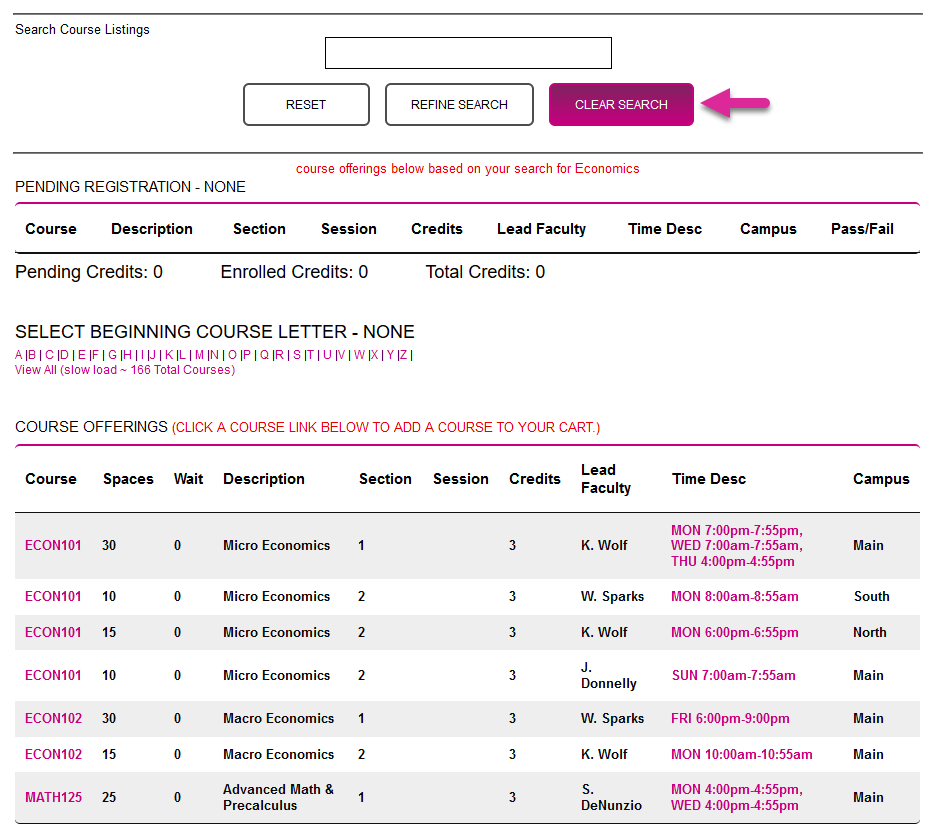
To further narrow down what's displayed, add another search term to the box and click Refine Search. Or click Clear Search to clear the results and start over.
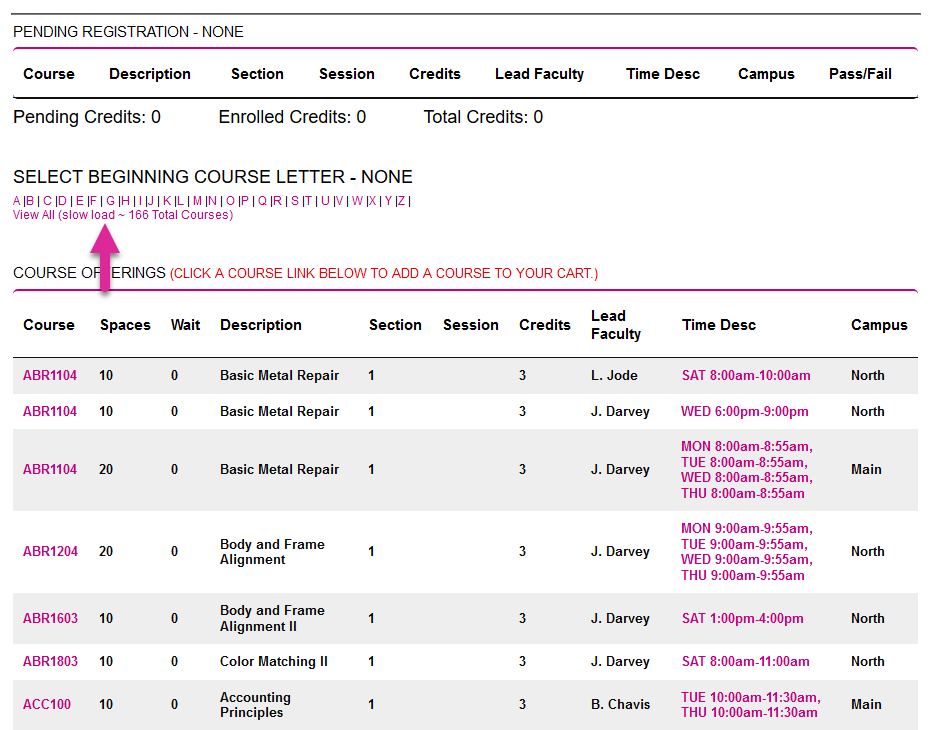
What's displayed can also be narrowed down by clicking on one of the alphabet links to display only courses beginning with that letter.

Alternately, students can click View All to load every course that is currently being offered. Note that this may take more time than expected if there is a large list of courses.
Selecting a Course
To register for a displayed course, click on the name of the course to add it to the registration cart. At this point, a space in the course is reserved temporarily, but the registration is not complete.

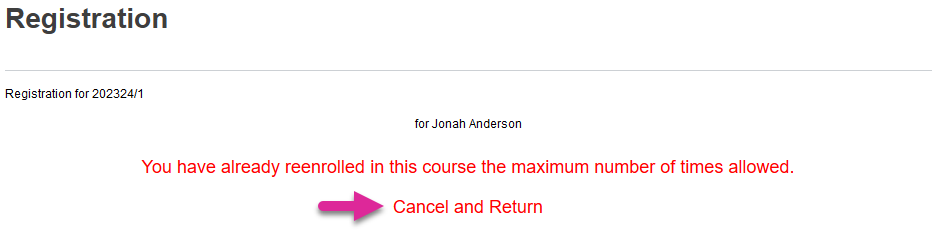
Repeat Error
Many institutions limit the number of time that a course can be repeated for credit. If completing the chosen course would violate this limit, an error message will appear. Click Cancel and Return to back out and select another course.
Prerequisite Error
Additionally, some courses have a prerequisite course or courses that must have been passed before they can be taken. Attempting to register for a course with a prerequisite without having taken and passed the required course will also result in an error. Click Cancel and Return to remove the course from the registration cart.

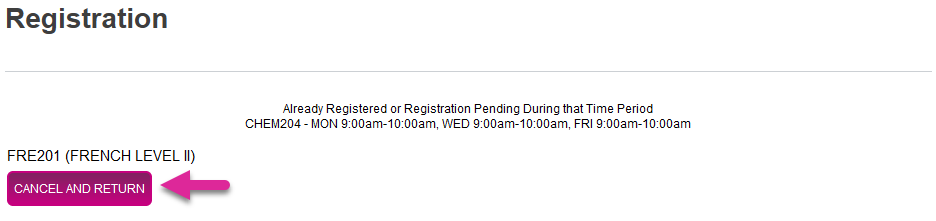
Scheduling Error
The system will prevent students from registering for two courses that cannot both be taken due to time/date conflicts. Click Cancel and Return to try again.
Removing a Course
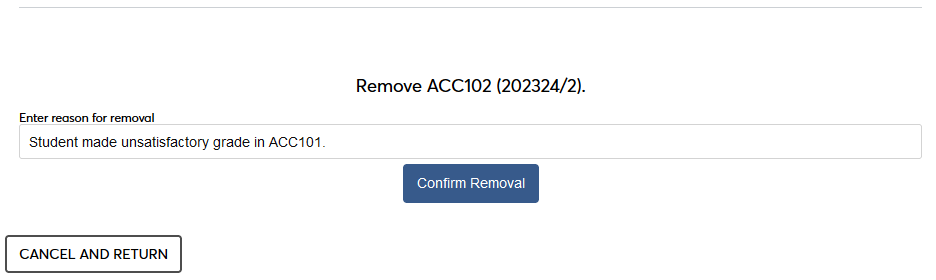
To remove a course that has been placed in the cart, simply click on the course name. On the following page, click the Confirm Removal button to complete the process.


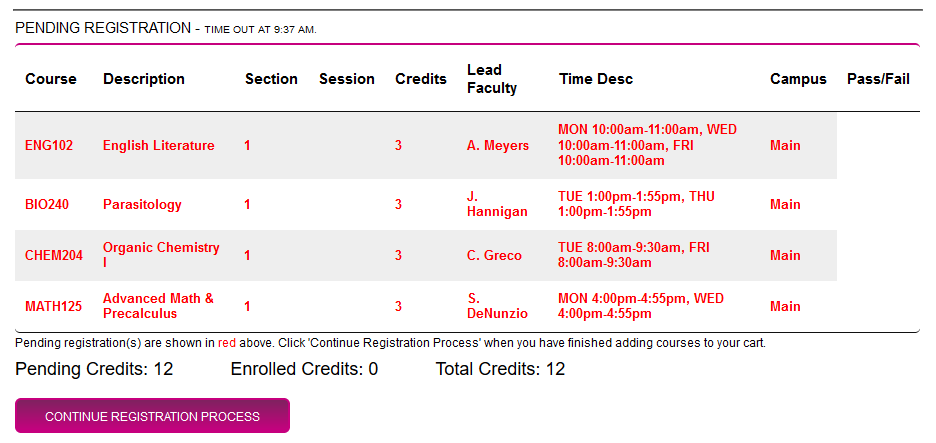
Finalizing Registration
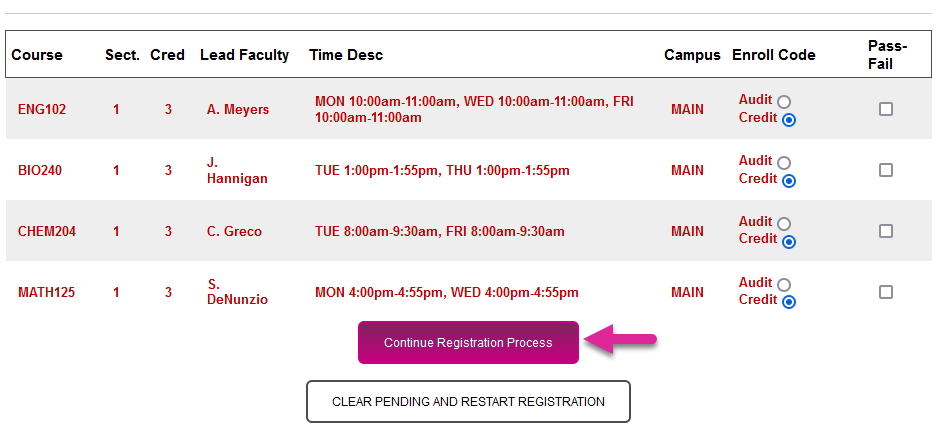
Once the desired courses have been added to the cart, click Continue Registration Process to continue.
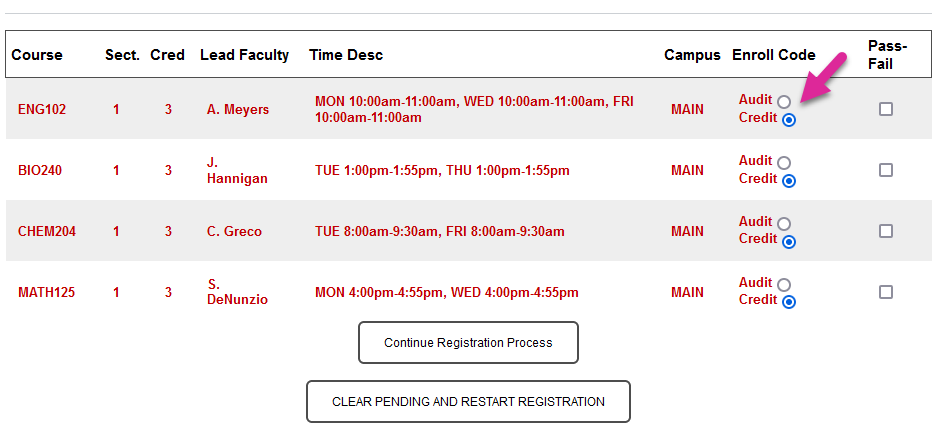
Audit & Pass/Fail Settings
Some schools may allow their students to audit classes rather than taking them for credit. If this option is available, select the Audit button to audit any of the selected courses.
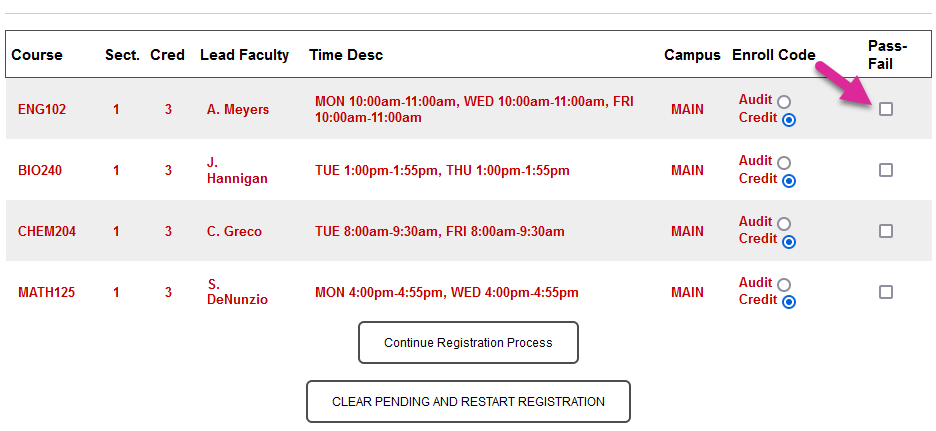
Additionally, some schools may allow students to take a course on a pass/fail basis rather than for a letter grade. If this option is available, check the Pass-Fail box to take a course as pass/fail. If you're unsure about the implications of these choices, please contact school administration before making any changes.
Once any necessary audit and pass/fail changes are in place, click Continue Registration Process again to move on to the next page.
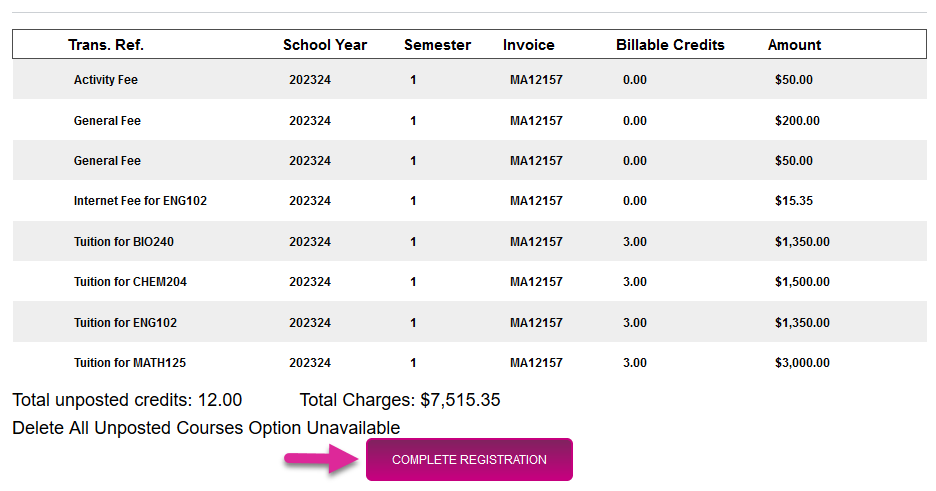
On the following page, any fees associated with the registration are listed in addition to the courses. Some schools may choose not to display the monetary amounts being charged at this time. Click Complete Registration to finalize the registration process.
CE Registration
The CE Registration process is very similar to the registration process for traditional students, but it differs in a few ways. Your version of this page may also differ slightly depending on your school's settings, but the basic functionality should remain the same.
Note
Administrators with the proper permissions can change the layout and function of this page using the CE Registration Utility under the Systems hub.
When you arrive on the CE Registration page, any courses that you're currently taking will be listed in the In Progress Courses table.
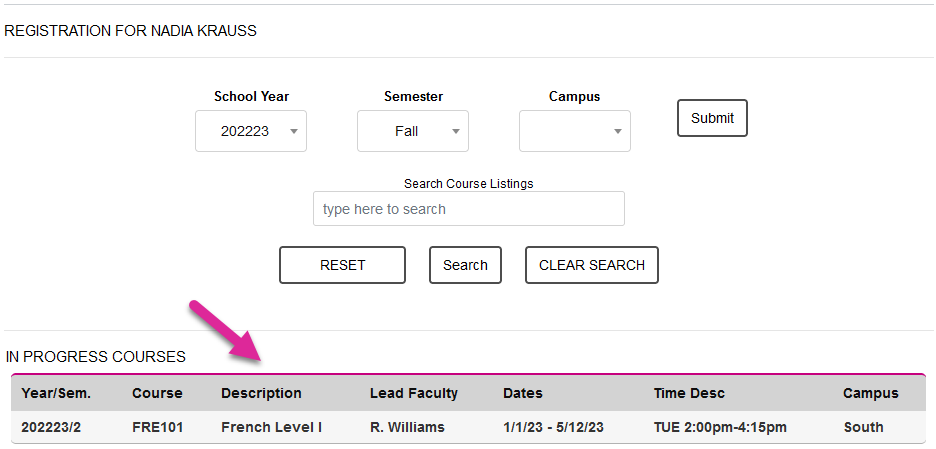
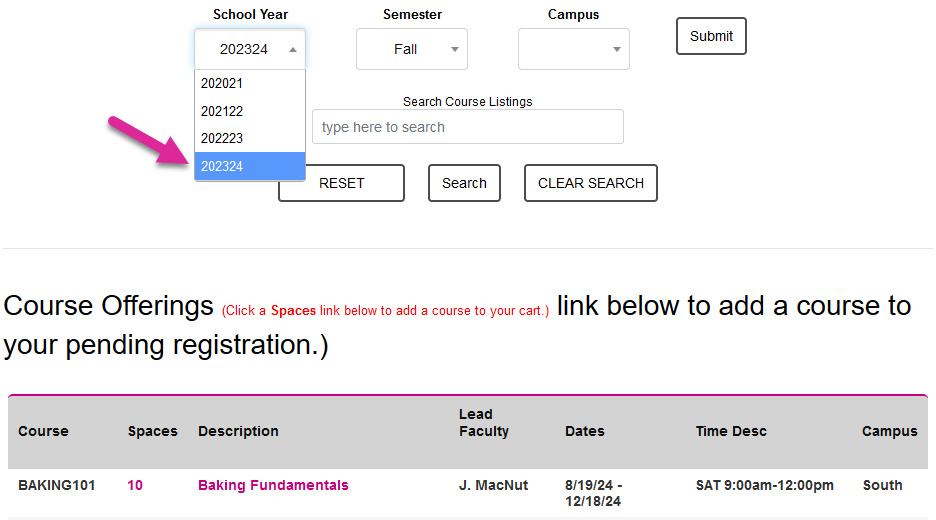
You can change the time period being displayed by selecting a new value from the School Year and/or Semester dropdown menus and clicking Submit.
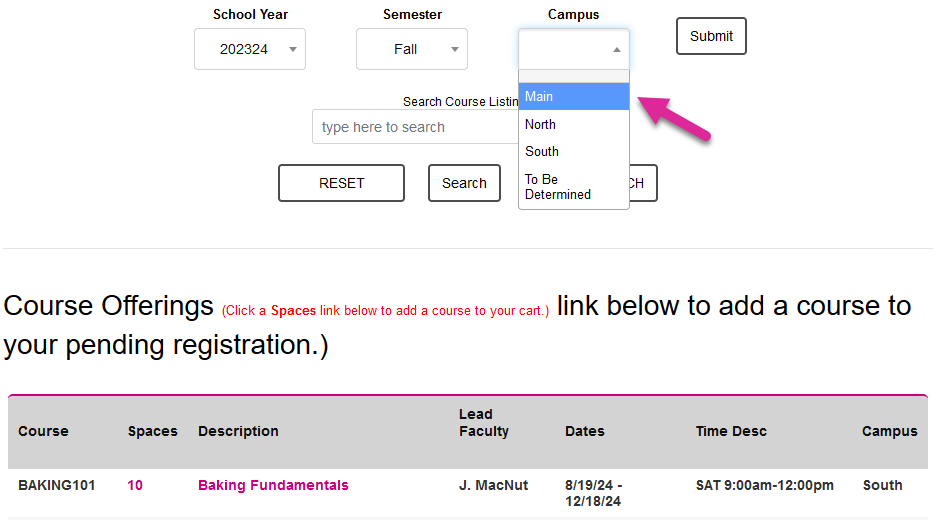
If your school has more than one campus, you can filter the list of courses to only show one of the campuses, by selecting a value from the Campus menu and clicking Submit. By default, all courses, regardless of campus, will display.
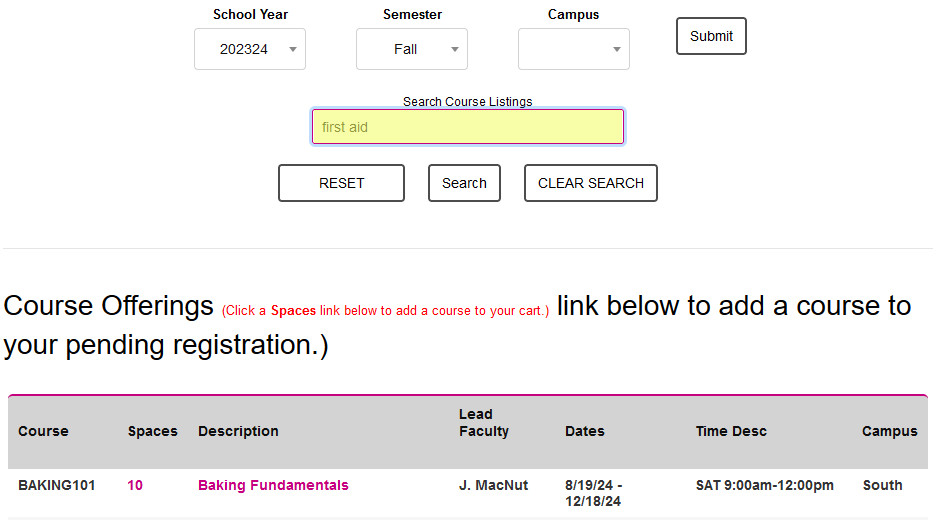
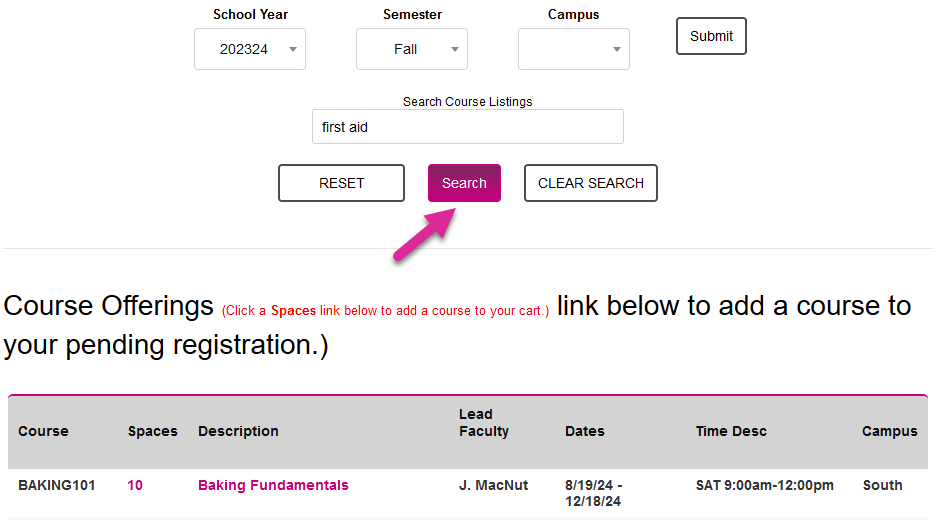
The page also contains a search box, which allows you to filter the results by your search time. Type any relevant value into the Search Course Listings box and click Search.
Note
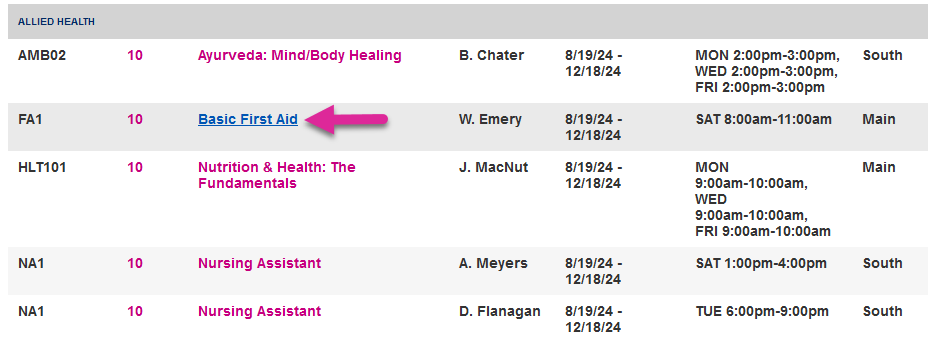
The search will filter by data in any of the columns you see below—Course, Spaces, Description, Lead Faculty, Dates, Time, and Campus. It will also filter based on any word that appears in the expanded course description, as seen below. So, for example, if you search for the word "cooking" and the Baking Fundamental course includes that word in the long description, the course will appear in the search results.
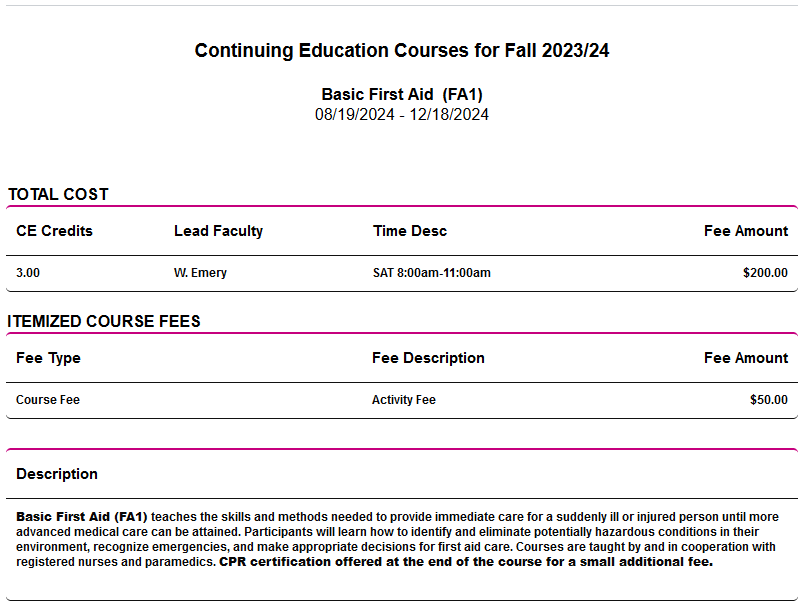
Once you've located a course that interests you, click on the course description to see more details, including the long description. Be attentive to any prerequisites listed. If you do not meet the prerequisite, you will not be able to register for the course. A new window will open, saving your search results and filters in your initial browser tab.
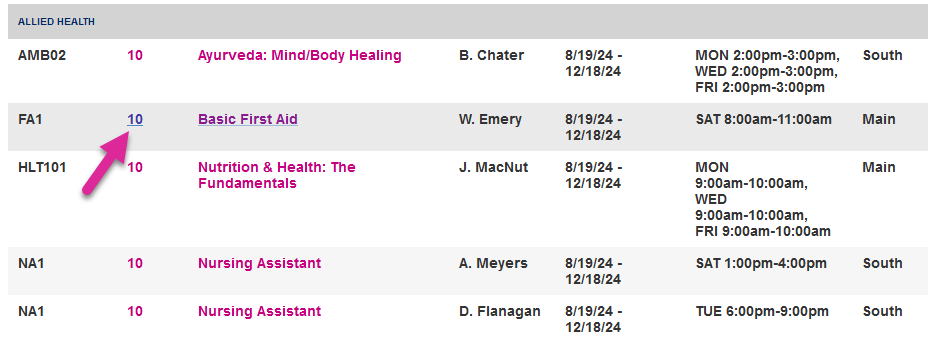
When you're ready to register, click on the number in the Spaces column. If there are no spaces available, this number will not be a link. If the course has prerequisites that you have not met, an error message will display, listing the missing prerequisite(s). Click the Cancel and Return button to return to the course selection page.

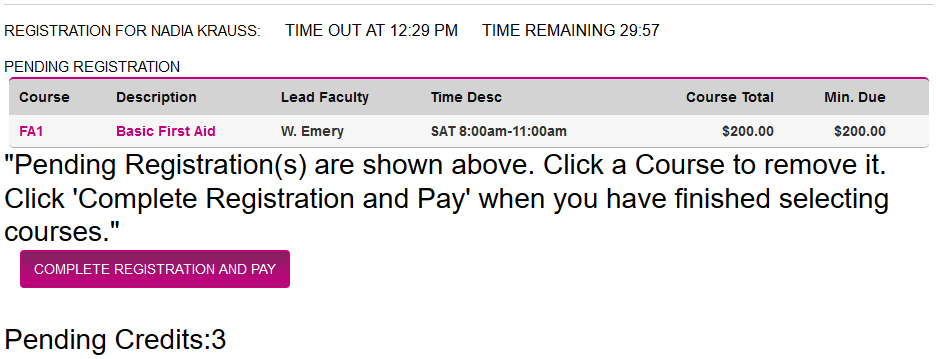
The selected course will be added to your cart at the top of the page. You can repeat the process until you've selected multiple courses, but be sure to pay attention to the Time Remaining notation to avoid timing out and potentially losing your spot in the selected course(s). When you're ready, click Complete Registration and Pay.
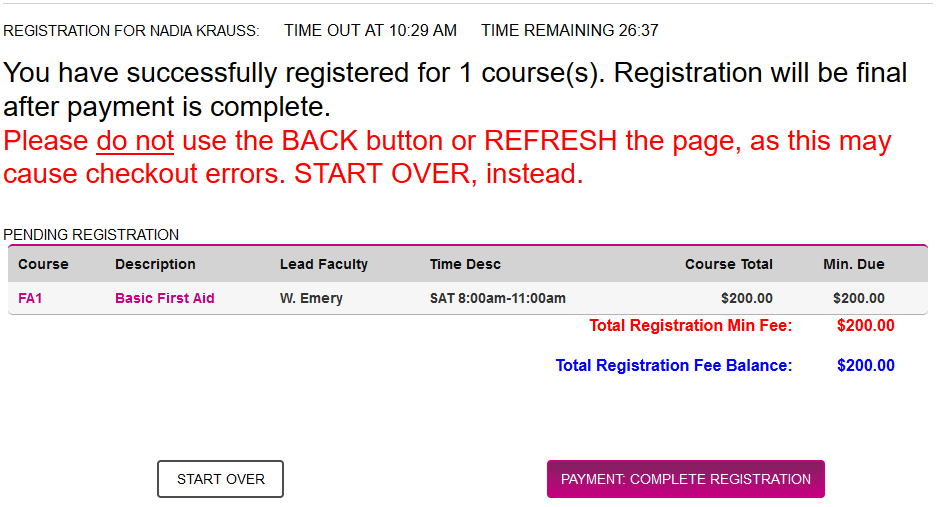
The following page provides a summary of all the selected courses along with the costs associated with each one and the total charges. Click Payment: Complete Registration to finish registering. You we be taken to the school's payment gateway to pay for the courses.
Warning
As the summary page notes, do not click your browser or mobile device's back button or refresh the page to avoid errors. Instead, click the Start Over button if you need to make changes to the selected courses.
Course Removal Explanation & Registration History Options
Some schools may require students to explain why they deleted a course from their list of registered courses. If this option is active, you must enter text in the Enter reason for removal field before clicking the Confirm Removal button.
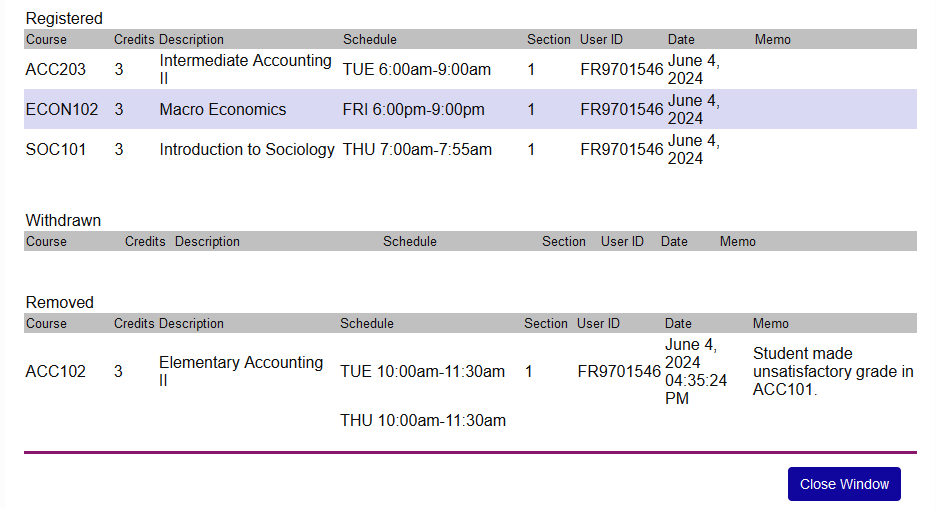
The page may also include a Registration History link. Click this link to view the courses that you have been registered for in the selected semester, including deleted and withdrawn courses. The link will open in a new window.
Note
Administrators, these functions are turned on using the System Variables utility.