CRA-T2202A/T4A/TL11A
Overview
The T2202A, also called a Tuition and Enrolment Certificate, is an official statement prepared by Canadian secondary schools and given to their students for income tax purposes. The statement is issued to all students who paid qualifying tuition and fees that are eligible to be claimed on their income tax return. The T4A Statement of Pension, Retirement, Annuity, and Other Income is another important Canadian tax document. For Jenzabar SONIS clients, the statement is used to provide students with an official report of their scholarships, grants, and other awards. The TL11A form is a tuition and enrolment certificate for institutions outside of Canada. All three documents can be built through SONIS using the CRA-T2202A/T4A utility.
Before beginning the SONIS T2202A setup, please download and read the Canada Revenue Agency's Guide for Designated Educational Institutions – Filing the T2202, Tuition and Enrolment Certificate and Summary 2019. This document explains the 2019 changes, including the requirement to file an informational return online with the CRA and the need to have a valid Business Number (BN) and an RZ, a 15-character program account number.
For clients building TL11A forms, the CRA offers this Information for Educational Institutions Outside Canada.
T2202A/T4A
Country Table
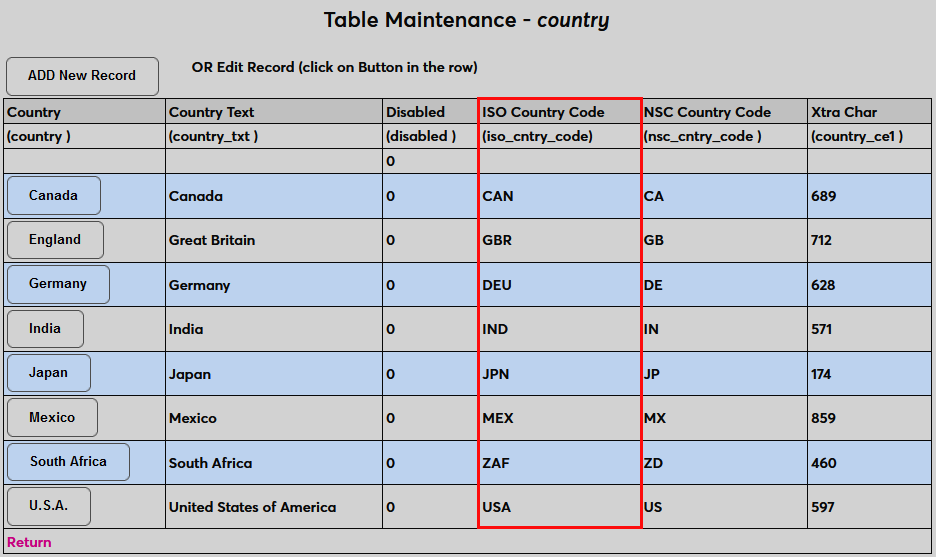
The Canada Revenue Agency requires schools to use ISO-3166 Alpha-3 country codes when sending student data. To accommodate this, the Country table under Table Maintenance contains an ISO Country Code field. Ensure that the home country of each international student who will receive a T4A has an ISO code as this is the code that will be sent to the CRA. The ISO code for Canada must be in place as well.
CRA Setup
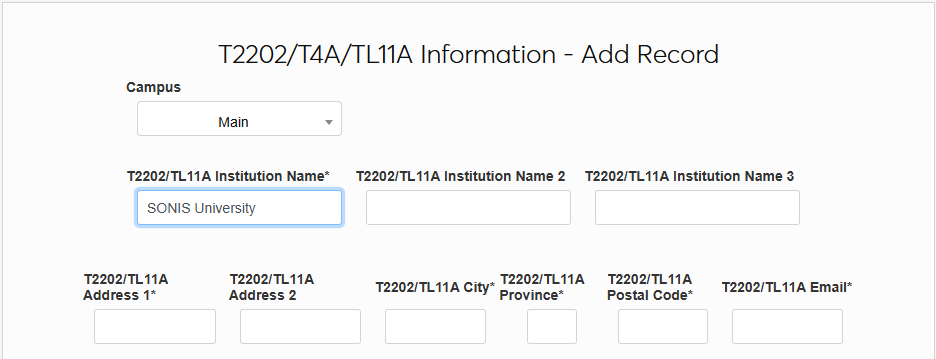
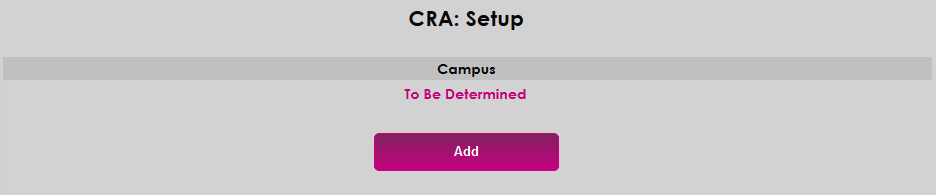
Before processing student reports, each school must enter their specific Canadian Revenue Agency account information. To enter this information, navigate to the CRA:Setup page in the Systems hub. The fields marked with an asterisk are required.
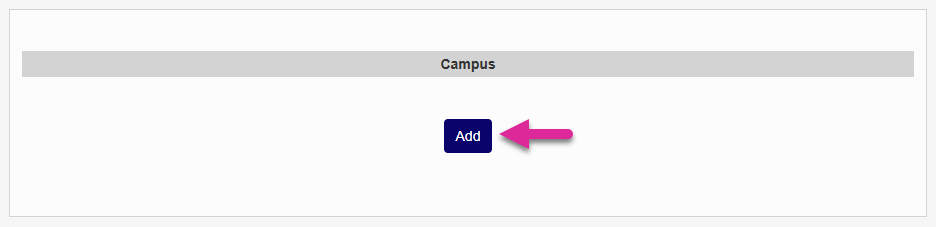
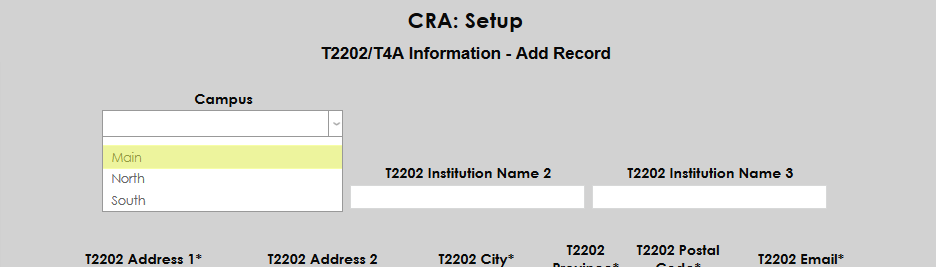
Based on CRA formatting, each campus must be set up separately. Click Add to set up a new campus.
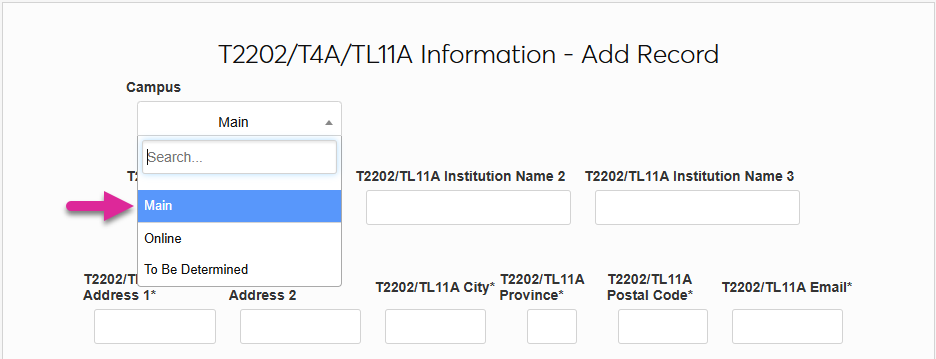
On the next page, select a Campus from the dropdown menu at the top of the page.
T2202
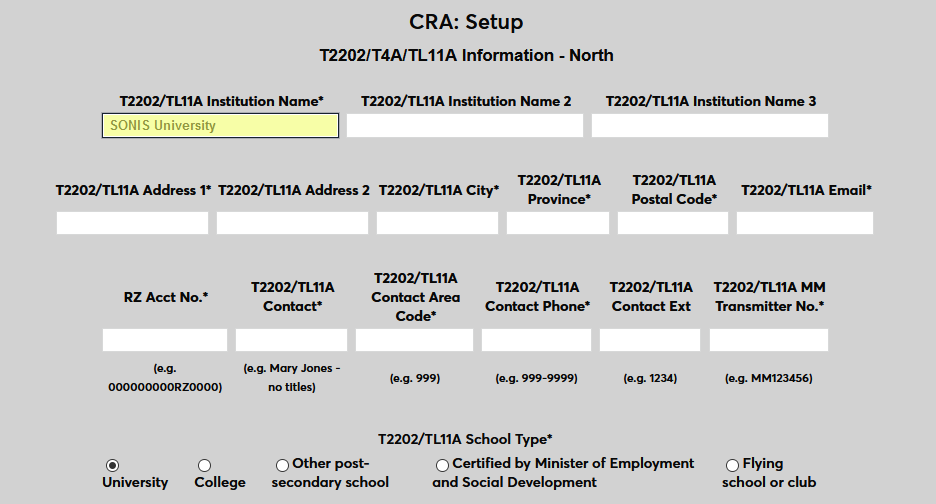
The T2202 setup is at the top of the page. First, enter your school's name.
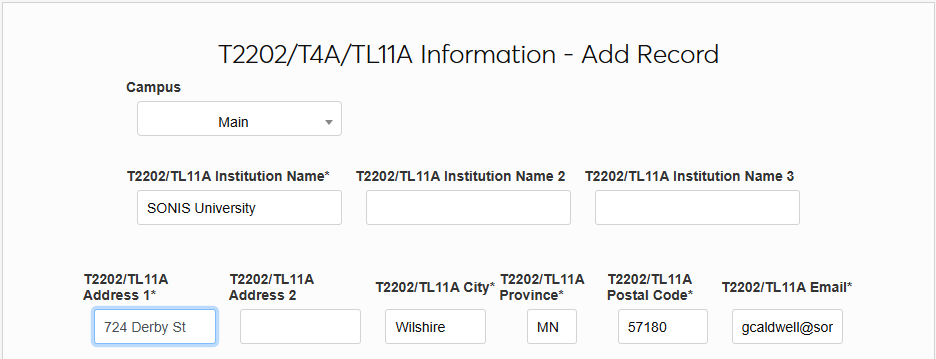
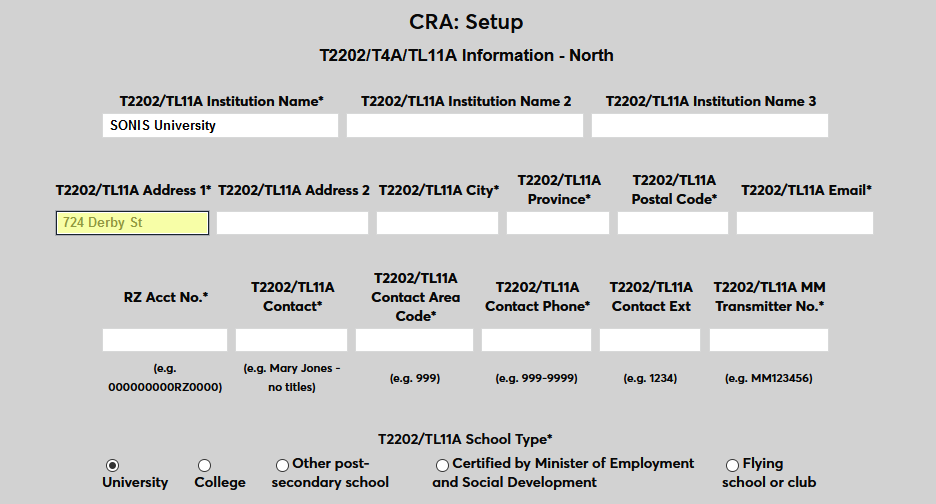
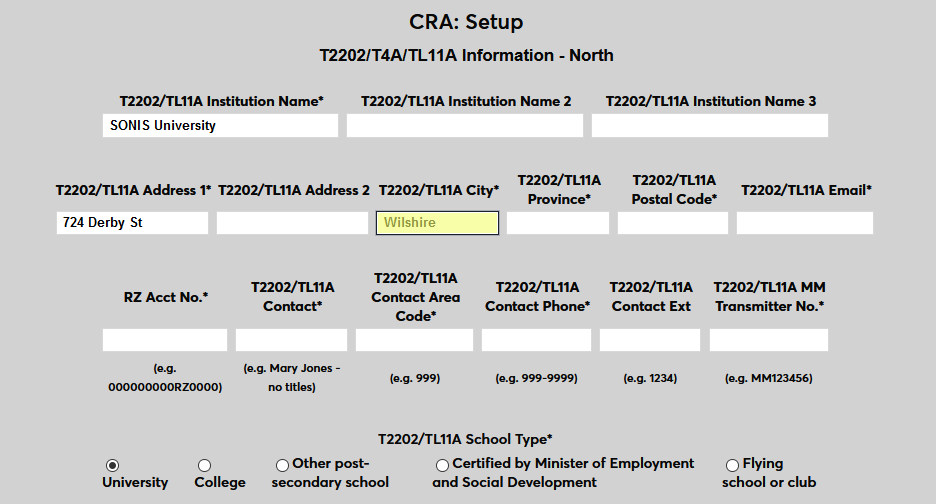
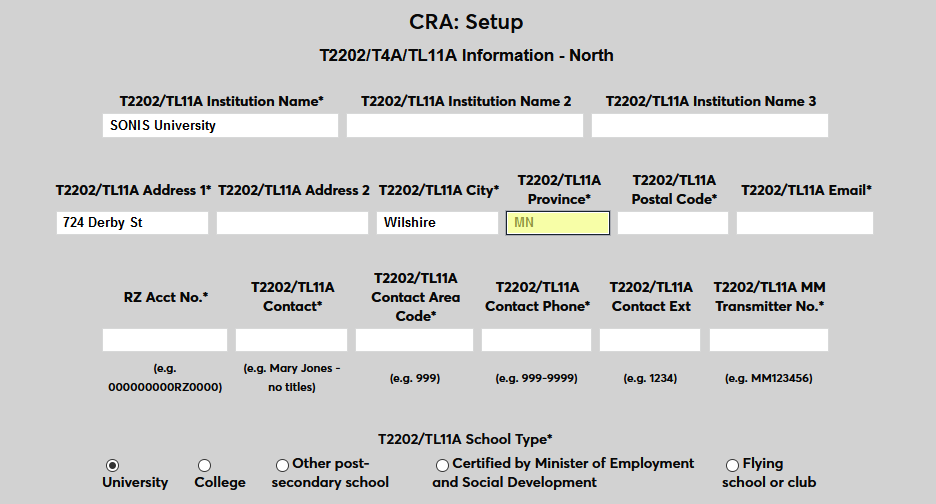
Enter your school's address, including the city, province, and postal code. An email address for the primary point of contact is also required.
Note
T2202/TL11A Institution Name 2 and T2202/TL11A Institution Name 3 are optional and will not be used by most schools.
Note
The Address 2 field is optional and should only be used if your school's address is too long to fit into just the Address 1 field.
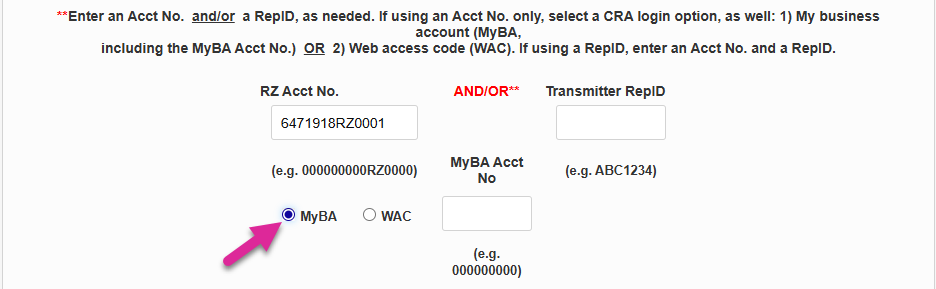
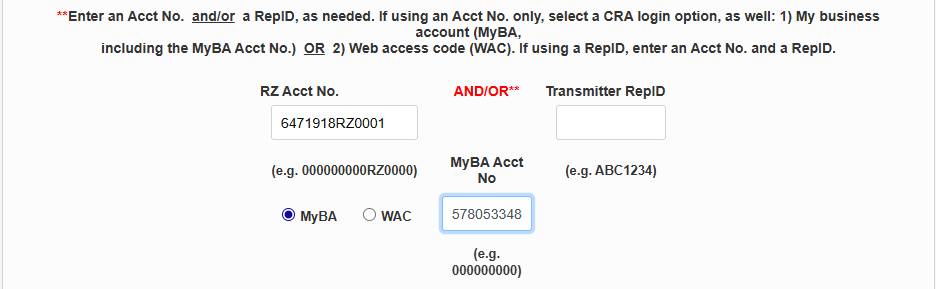
Next, enter your CRA login information. If you're preparing your own taxes internally, enter your account number in the RZ Acct No. field. If your taxes are being prepared by a third party, enter that third party's Transmitter Rep ID.
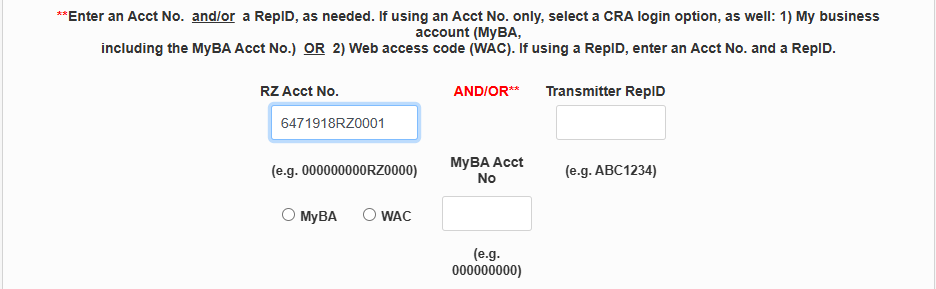
If you entered an RZ account number, choose whether you will log in using your My Business Account ID or via a Web Access Code. If you entered a Transmitter Rep ID, you can skip this step.
Next, enter the name and phone number for the person who will be the school's primary CRA contact. The Extension field is optional.
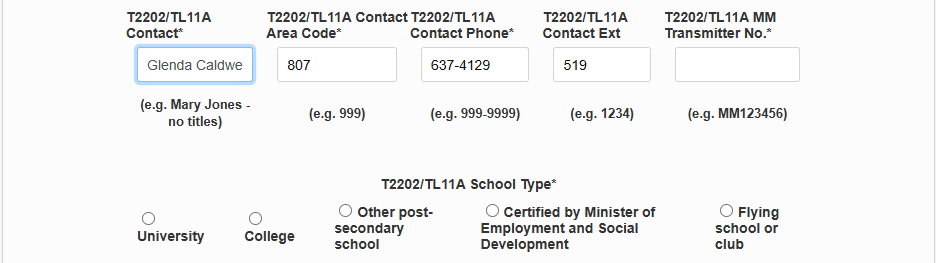
Enter the school's Transmitter Number.
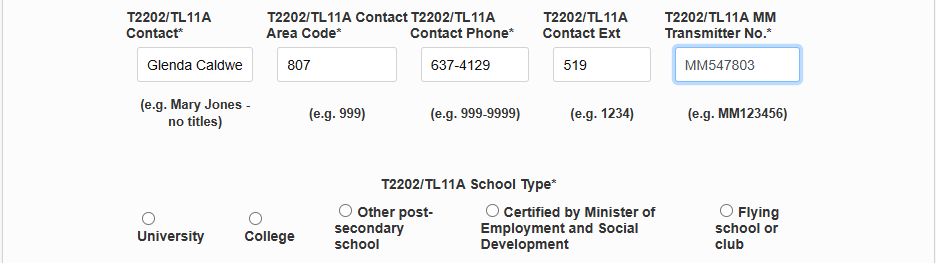
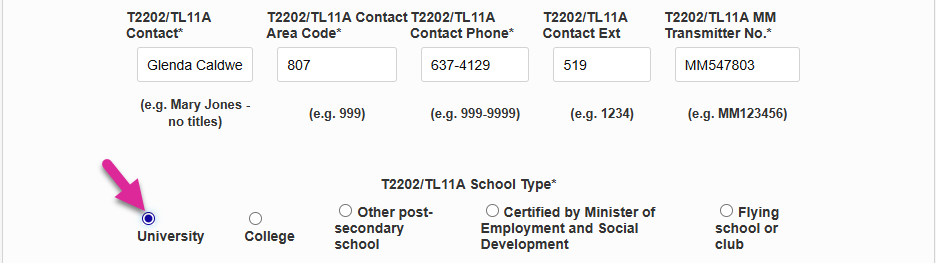
Select the appropriate T2202 School Type.
T4A
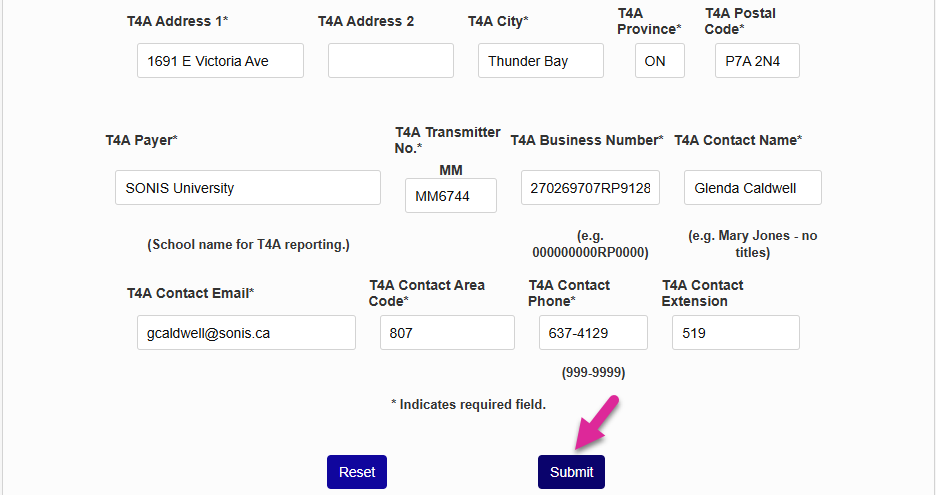
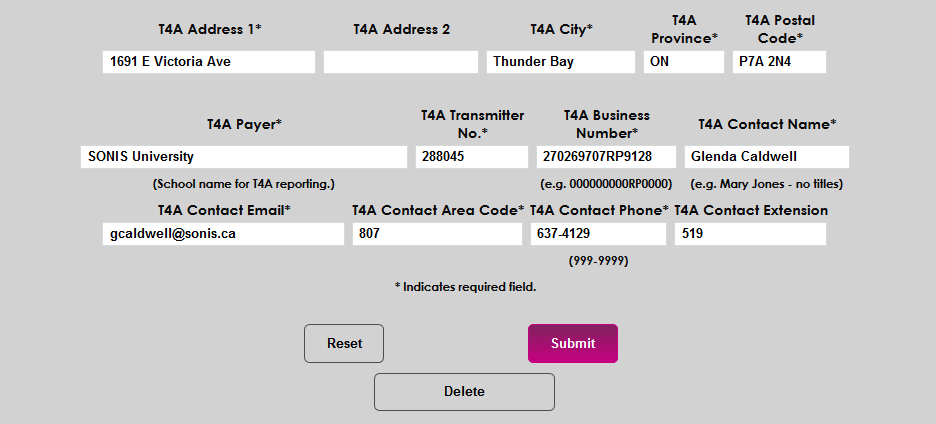
T4A data is set up separately and must also be filled in to ensure both forms are created. Begin by filling in the school's name under the T4A Payer field along with the school's mailing address.
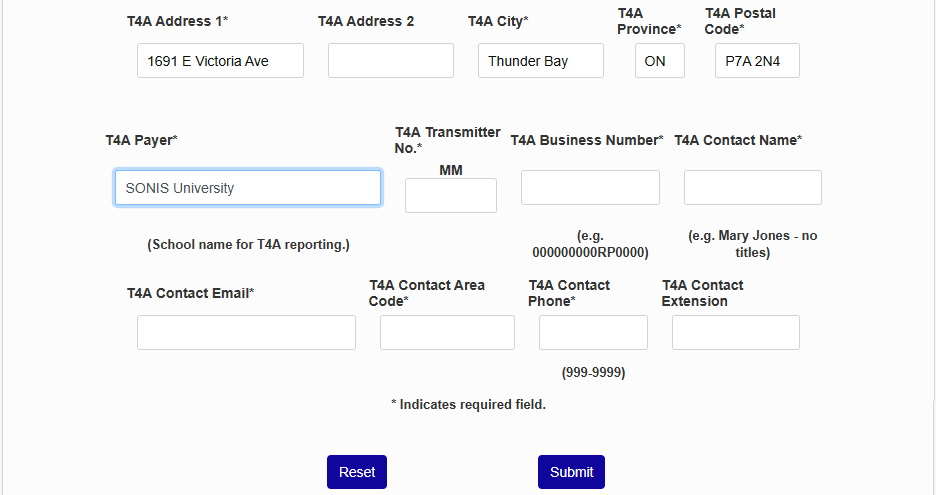
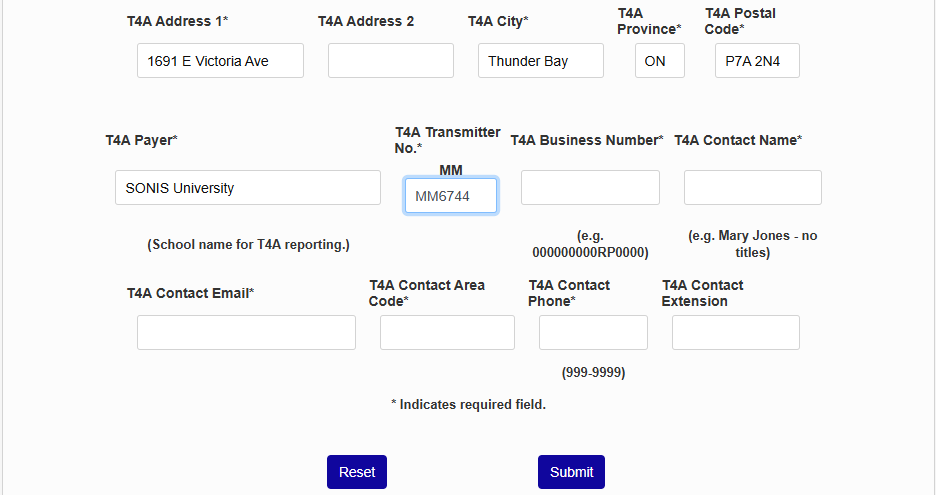
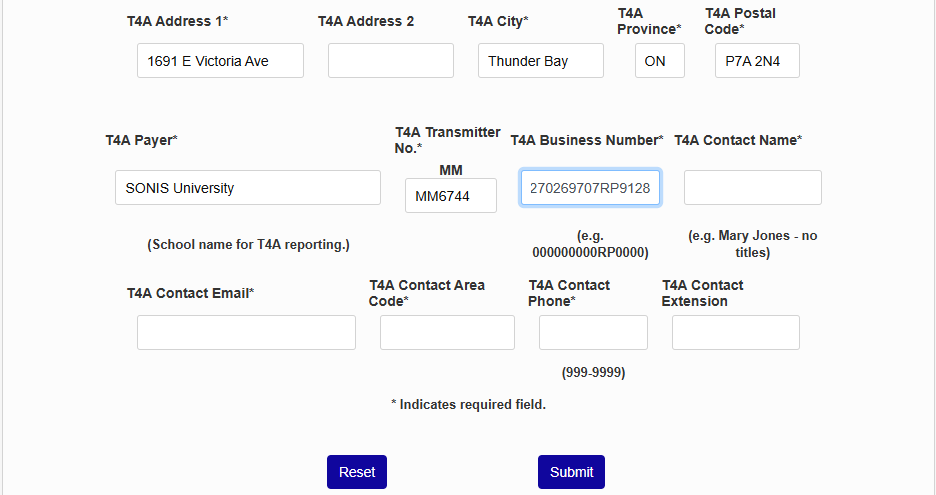
Enter your school's T4A Transmitter Number and T4A Business Number.
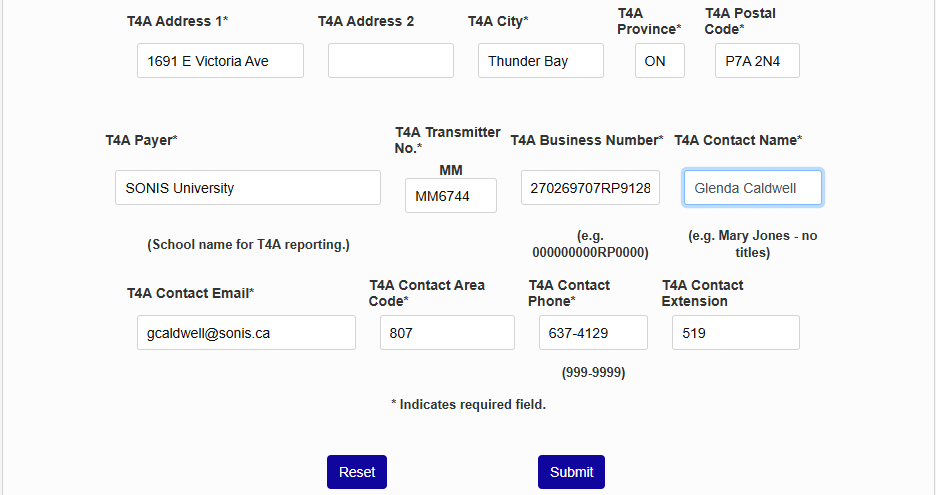
As with the T2202 setup, enter the name of the school's CRA contact along with that person's email and phone number. The Extension field is optional.
Once every required field has been filled out, click Submit to save the page.
Copy Records
If at least one campus has been set up, the fields can be copied to an additional campus to save time. Click Add to create a new campus.
Scroll down past the T2202 fields and the T4A fields to the copy section. Select a New Campus to set up and a Source Campus to copy.
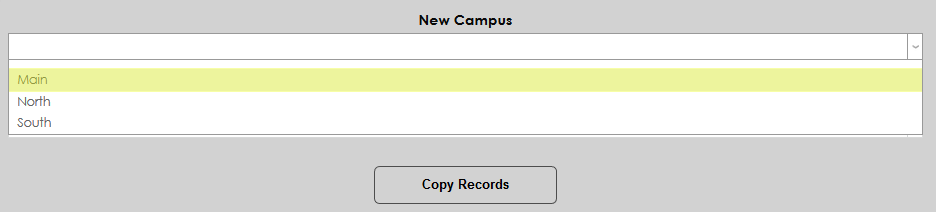
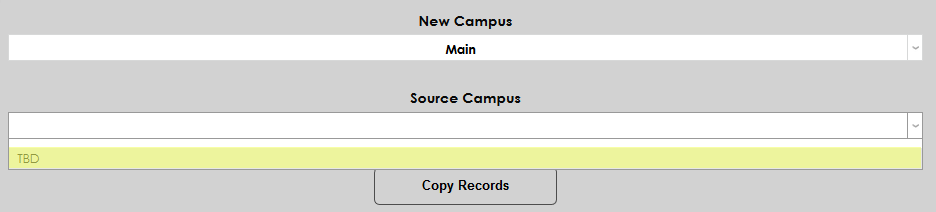
Click Copy Records to create the new campus.
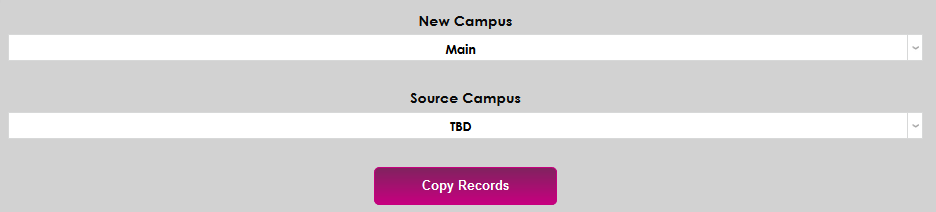
Once the page has reloaded with the fields copied, change any fields that need to be altered and click Submit to save the page.
Year/Semester
In addition to the other setup information, schools must transmit their calendar setup to the CRA as well. This information should match the information in the Years table, the Semesters table, and the Calendar Year table. To create these records, navigate to the bottom of a campus setup page and click Year/Semester setup.

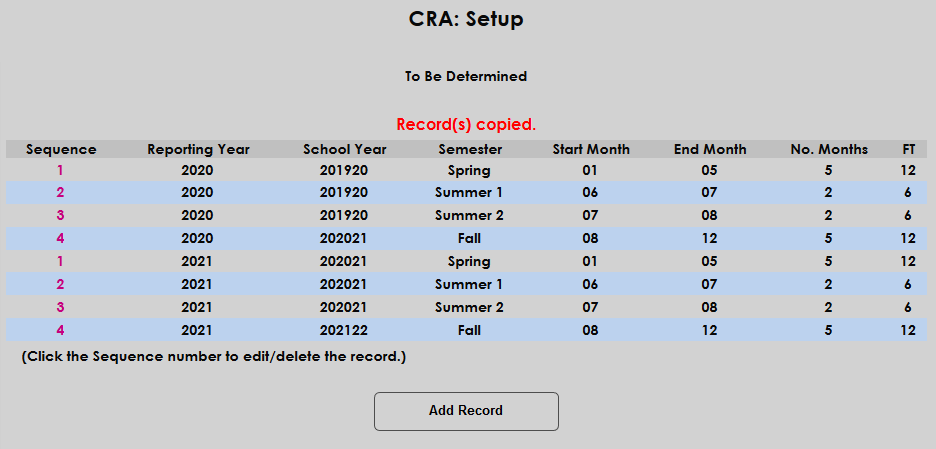
On the following page, click Add Record to begin creating the school year and semester dates.

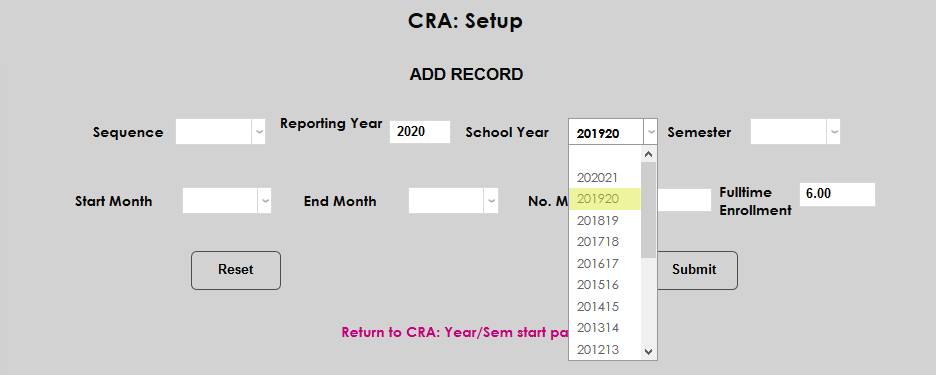
To add an individual record, first enter the Reporting Year, the calendar year of the record being added.
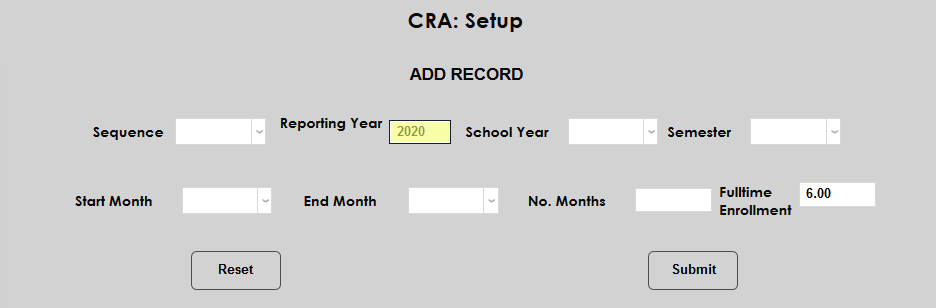
Next, choose a School Year and a Semester from the dropdown menus. Both fields are populated based on the values created by each client.
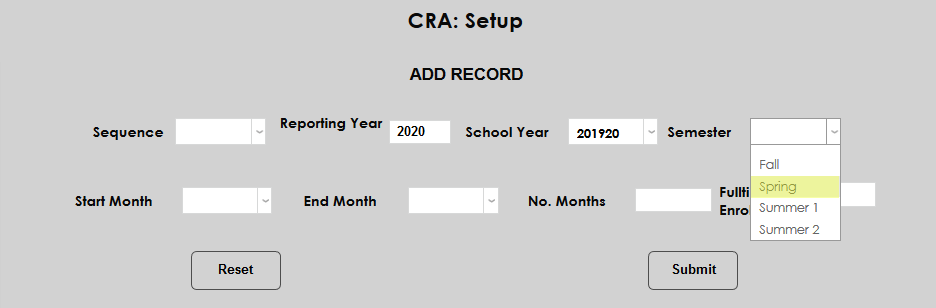
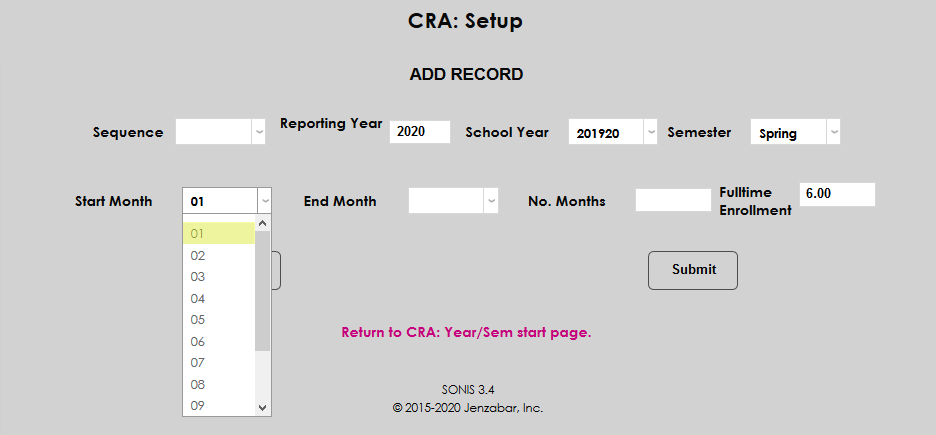
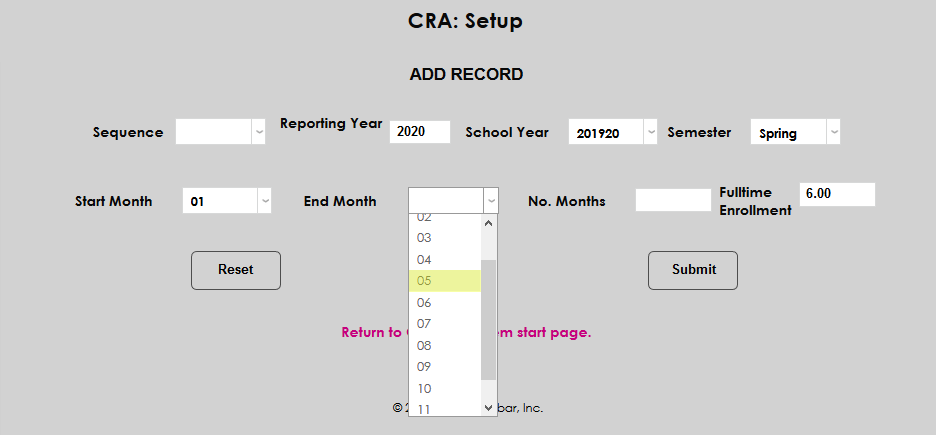
Select a Start Month and an End Month for the semester along with the Number of Months that are included in the semester.
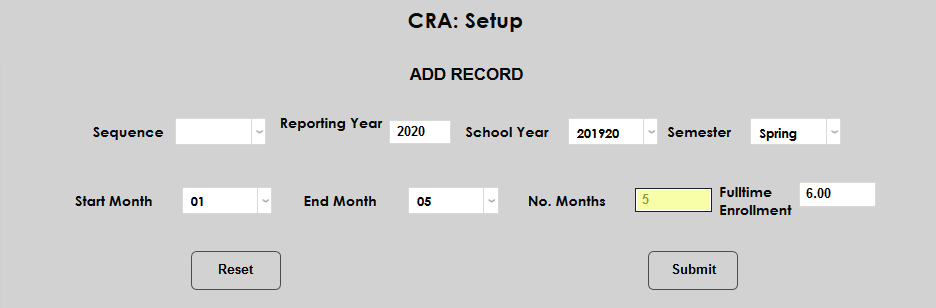
Enter the number of enrollment hours that are considered Fulltime Enrollment for this semester.
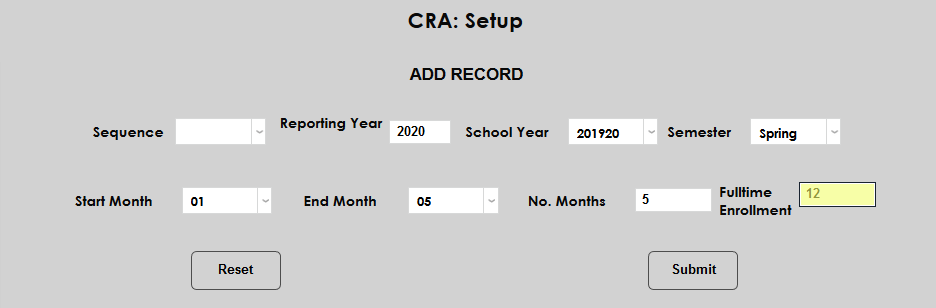
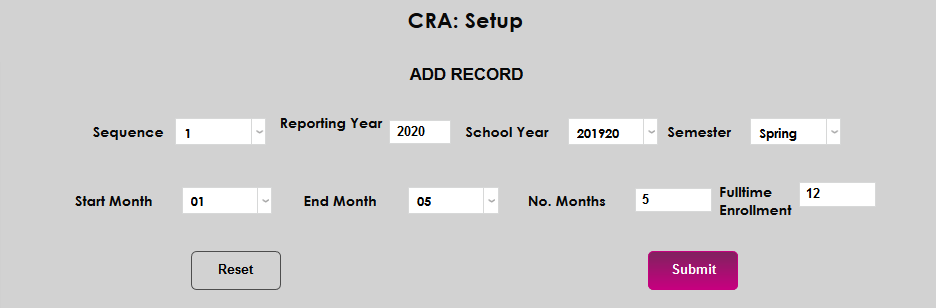
Finally, select a Sequence for the semester, designating the point it takes place in the calendar year. For most schools, Spring will be their first semester in sequence followed by Summer 1, Summer 2 and Fall.

Note that only four numbers are available. If a school were to have more than four semesters or terms, two or more terms would have to share the same sequence number. For example, if a school has a January term that occurs in that month only, the January term and the Spring would share 1 as their sequence number with the Spring term being set up first and taking precedence.
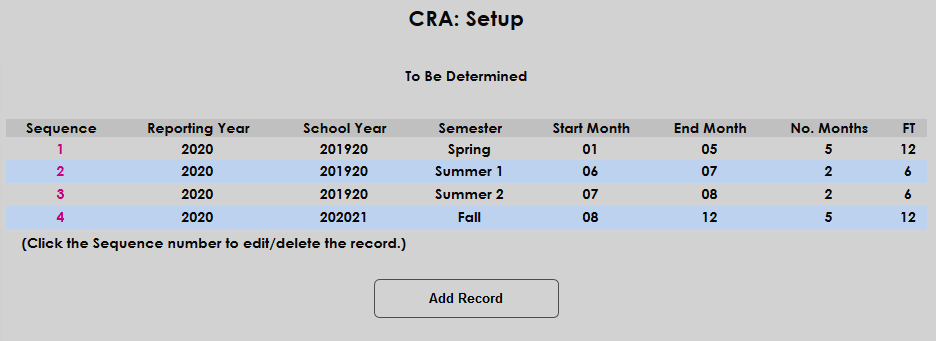
Click Submit to save the record. Repeat this process until all semesters that will take place in the specified calendar year are set up.
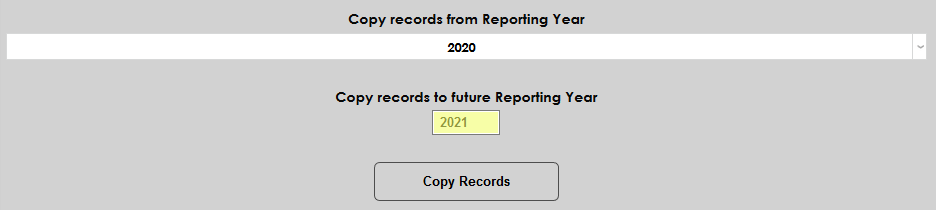
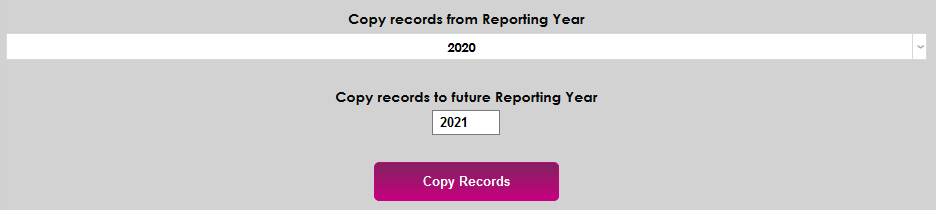
Copy Records
The Year/Semester setup page also offers a copy function to make setting up new records easier. Simply select a Reporting Year, enter a Future Reporting Year, and click Copy Records.
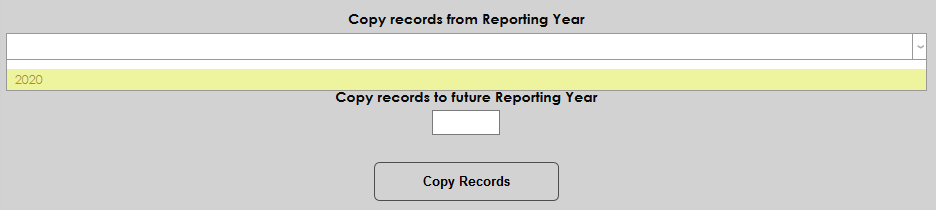
When a new Reporting Year is created, a new School Year is automatically created with the data mirroring the year being copied.
Delete Records
Once a reporting year has finished and the school can be sure that no more T2202 or T4A forms need to be produced, the reporting year data can be deleted. Semester records can be deleted individually or the entire year can be deleted using the Delete Records feature. Select the year to be deleted and click the Delete Records button.


Creating Reports
To create T2202 and T4A reports, navigate to CRA-T2202A/T4A/TL11A under the Systems menu.
Build
Click the Build button to create the initial report.

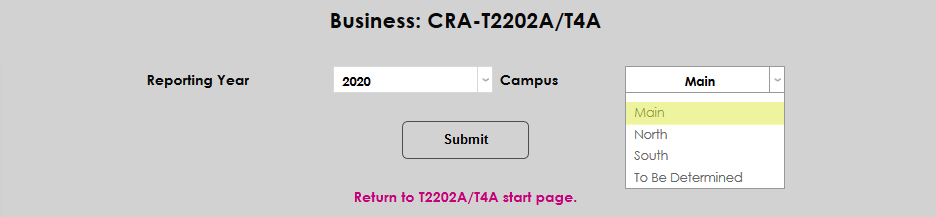
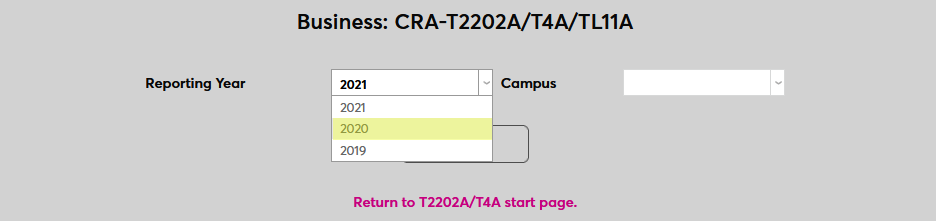
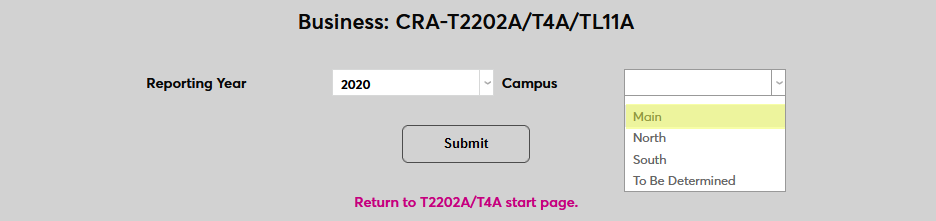
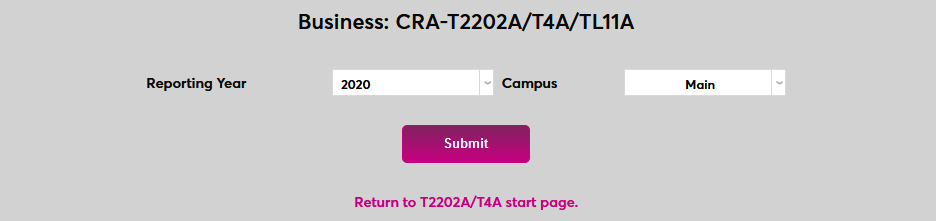
On the next page, select a Reporting Year and a Campus from the list of years and campuses created during the setup process. Click Submit to continue.


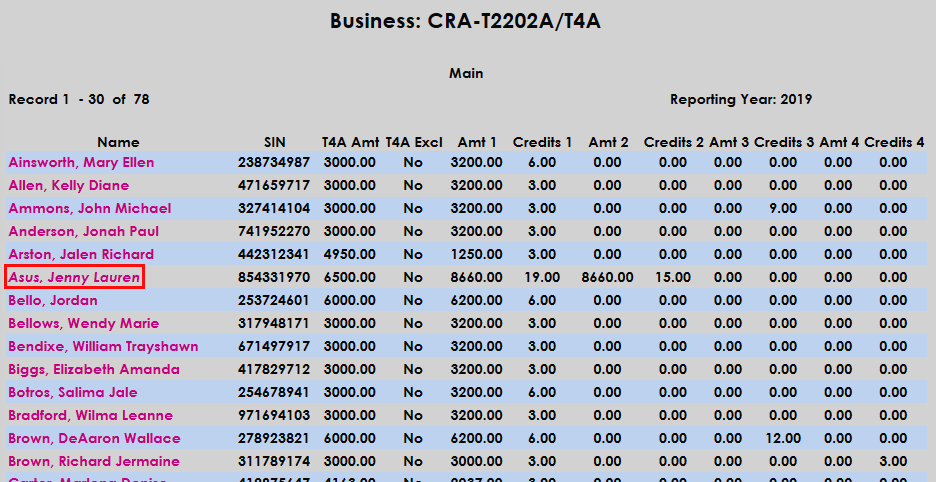
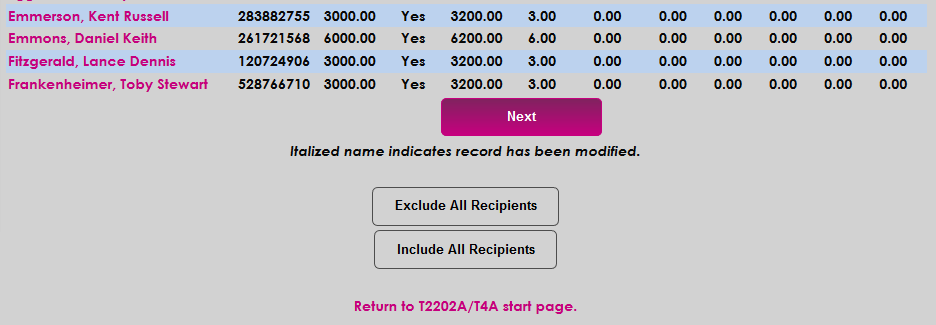
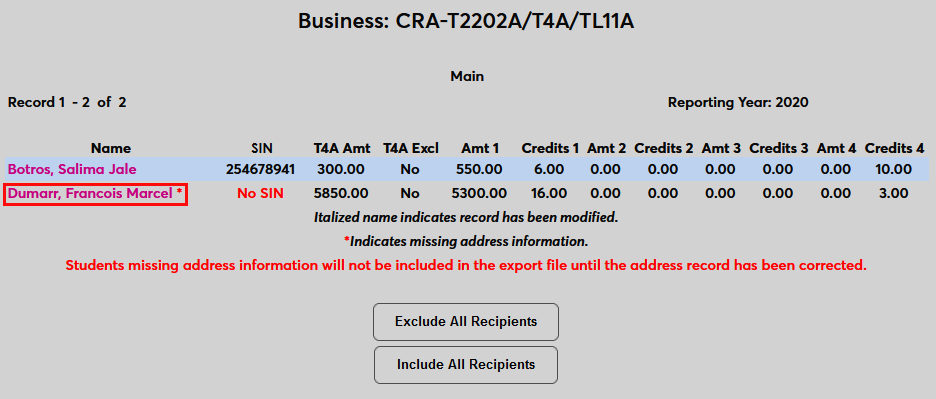
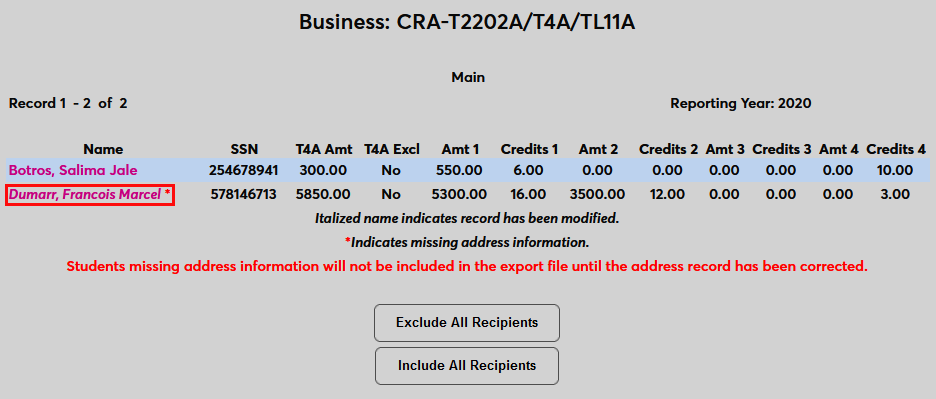
The following page lists every student included in the build along with a summary of their information. Students who do not have proper address information on file will have an asterisk by their name. These students will not be included in the file unless their address information is updated.
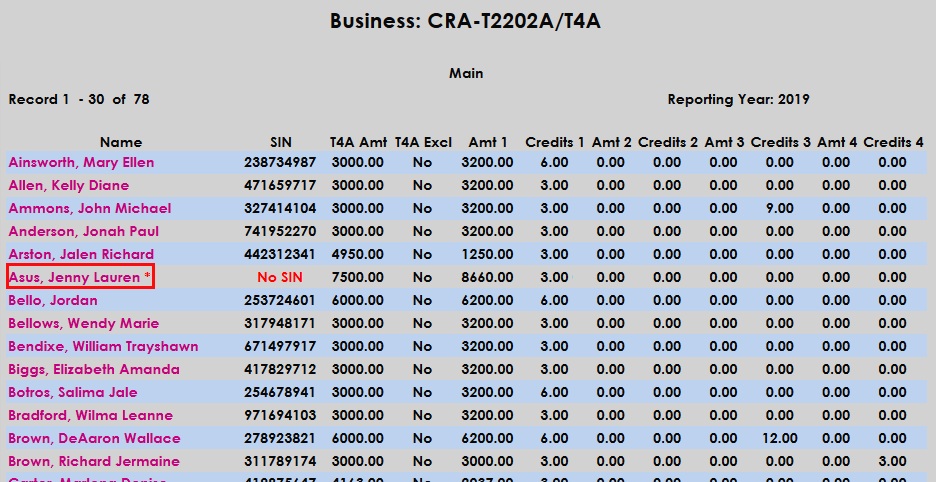
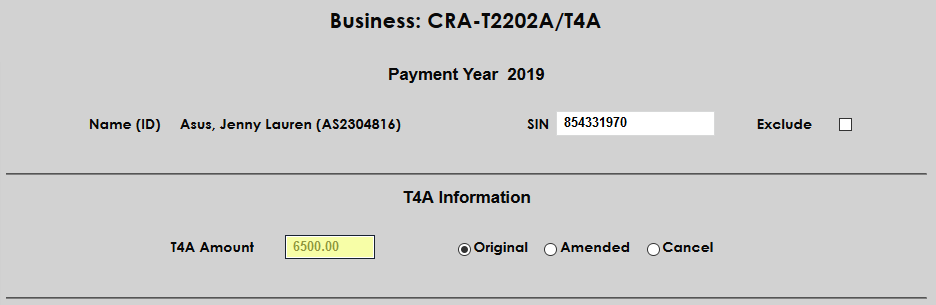
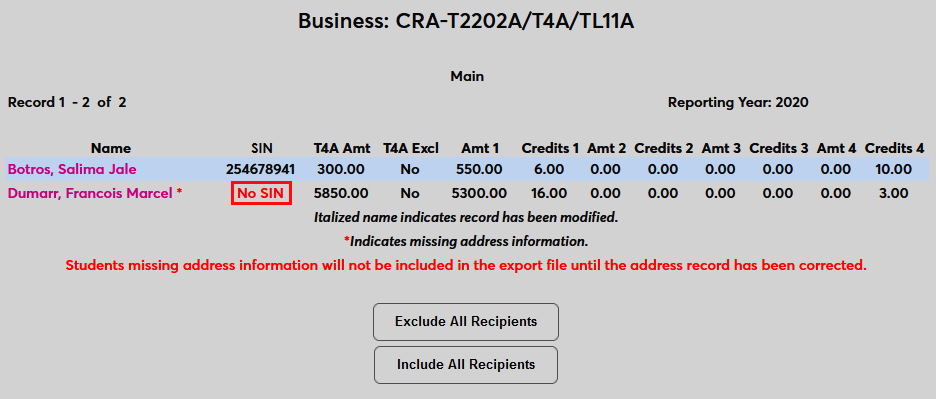
Additionally, each student must have a Social Insurance Number to be included in the file. Students without an SIN in their records have No SIN in red in their SIN column.
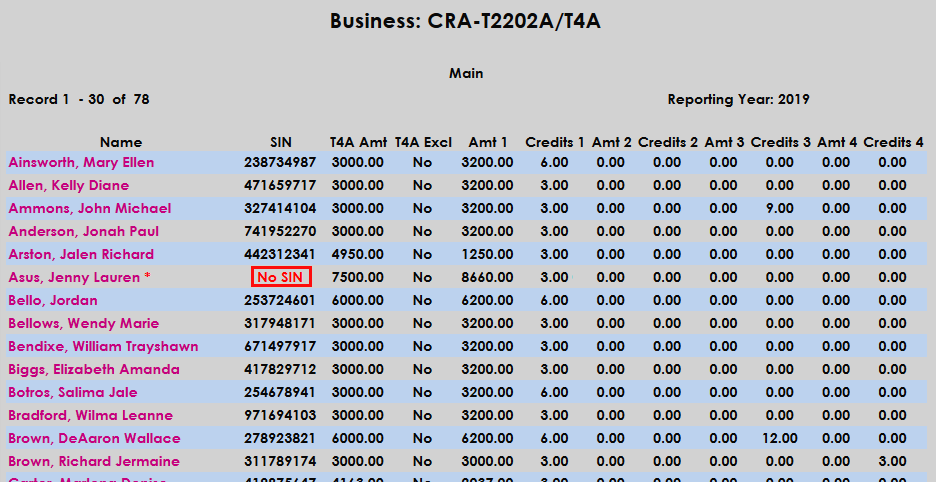
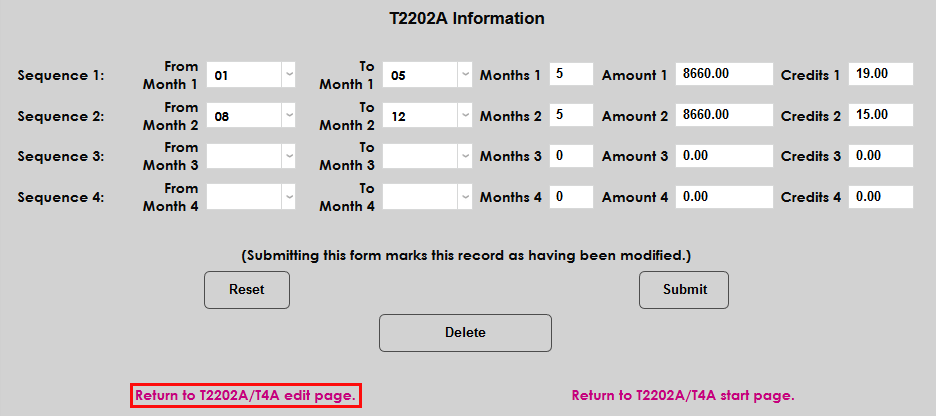
To edit a student's information, click on the student's name.
On the individual student's page, the SIN can be edited or added.
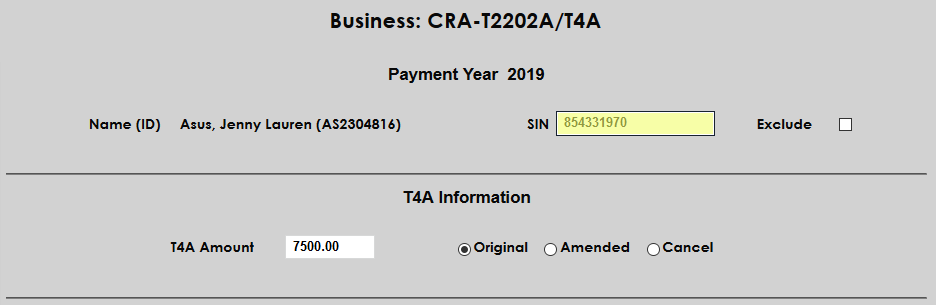
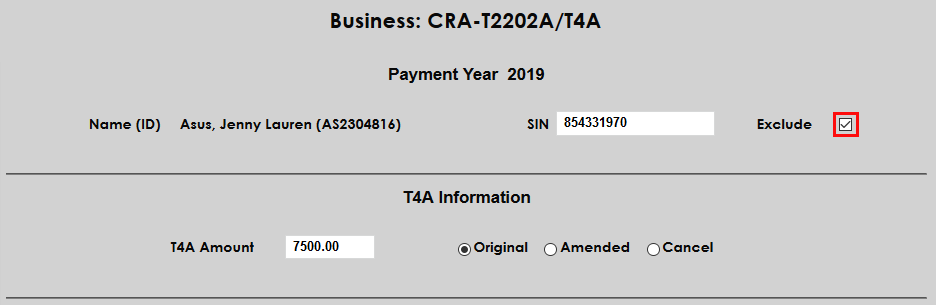
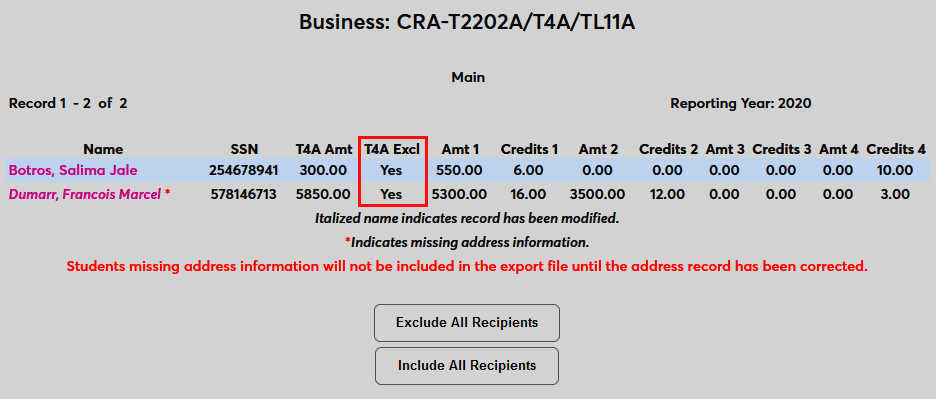
Check the Exclude box to remove the student from the report or leave it unchecked to include them.
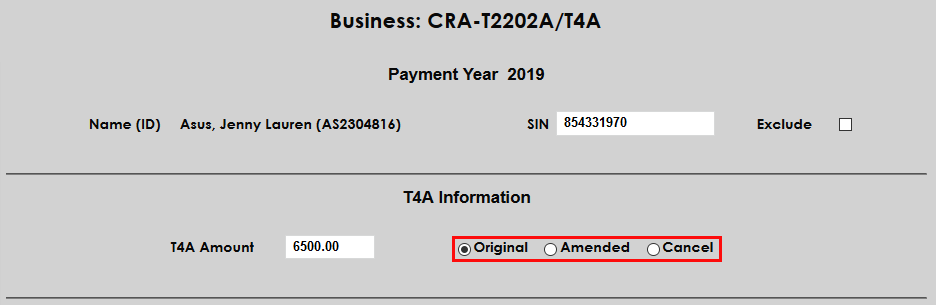
The total amount reported in the T4A report can be edited using the T4A Amount field. By default, this will be listed at the Original amount after the edit, but it can also be set as an Amended total or to Cancel.
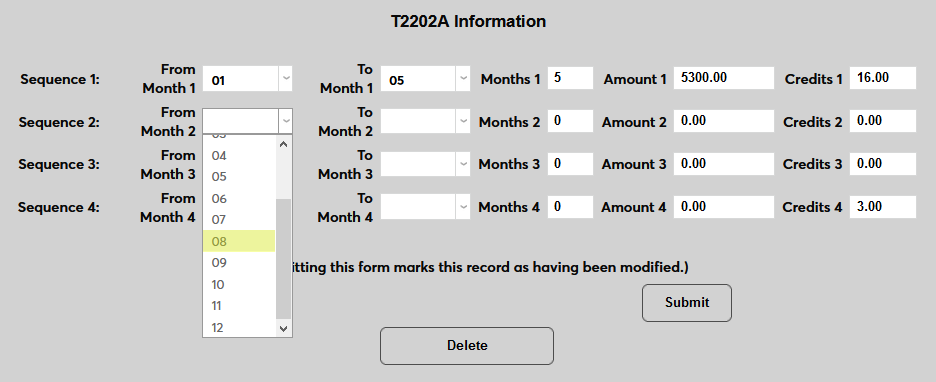
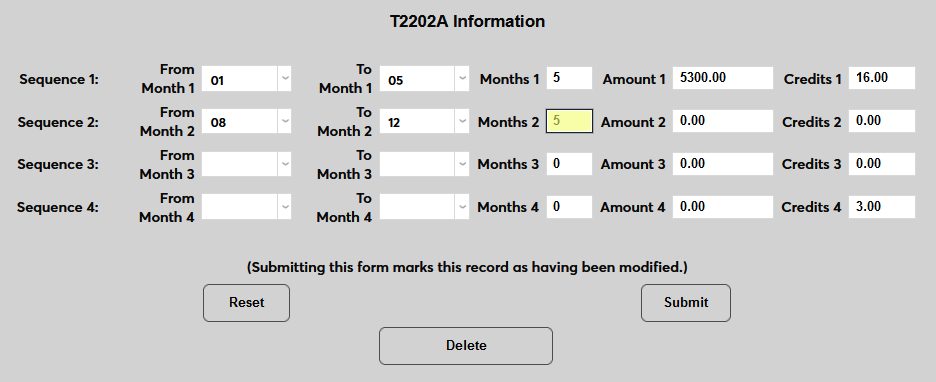
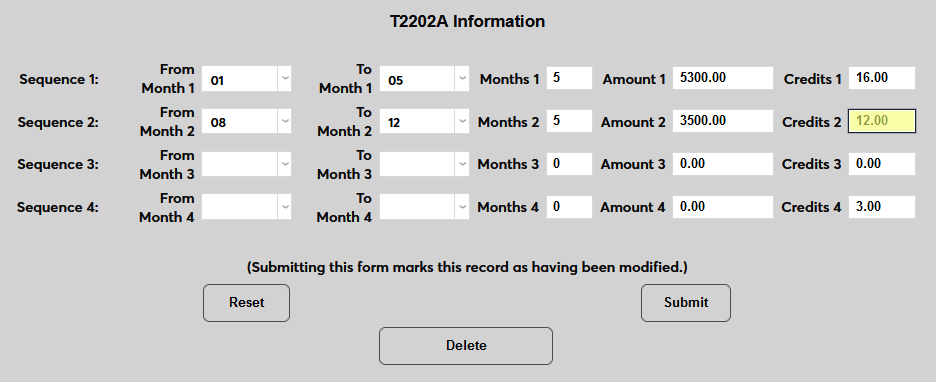
The lower section of the page allows edit to the student's records for each semester. The From Month and To Month fields designate the calendar months that the semester included and should mirror the same data in the Year/Semester setup. The Months field notes the total number of months included in the semester.
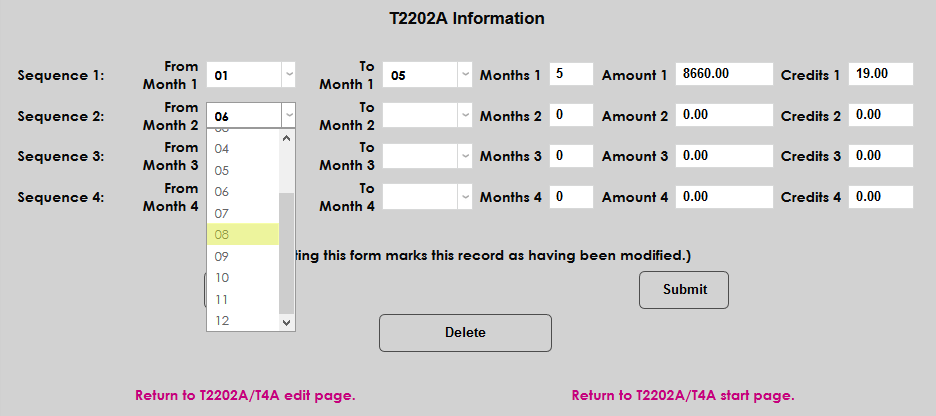
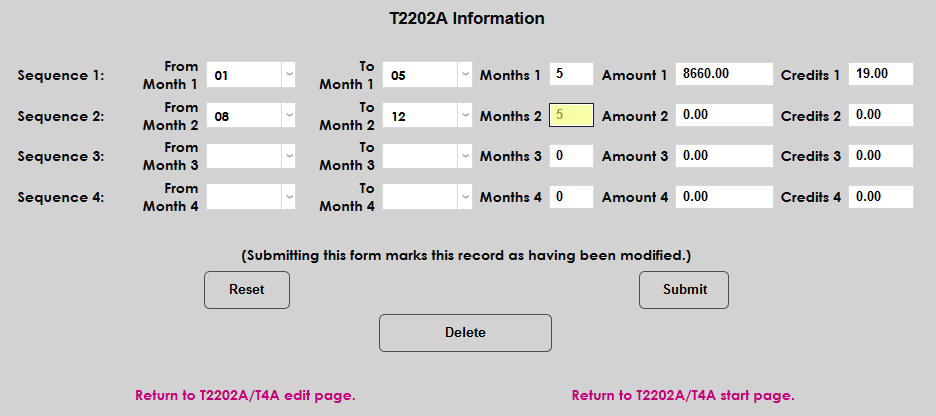
The Amount field can be altered, as well as the number of Credits taken during the semester.
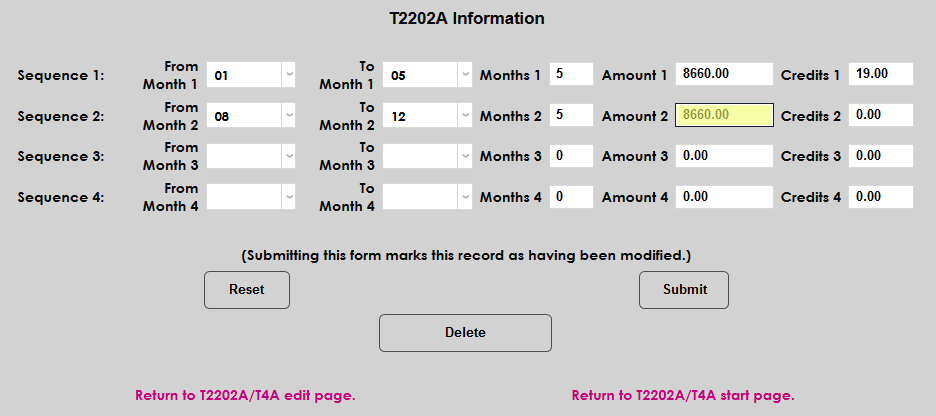
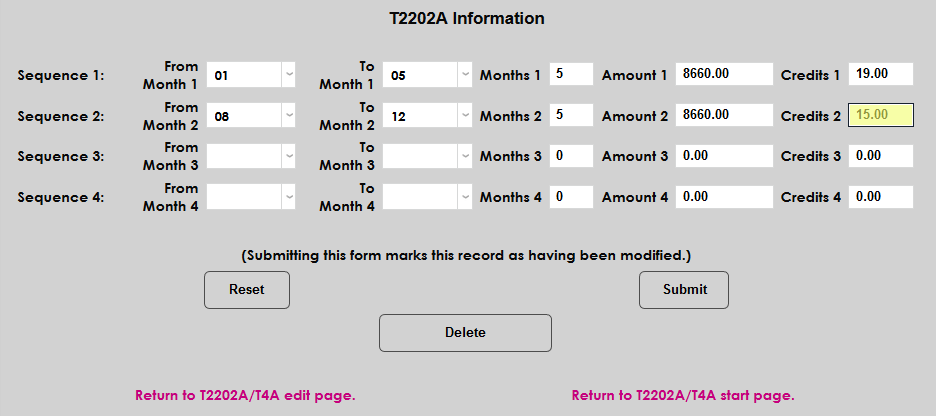
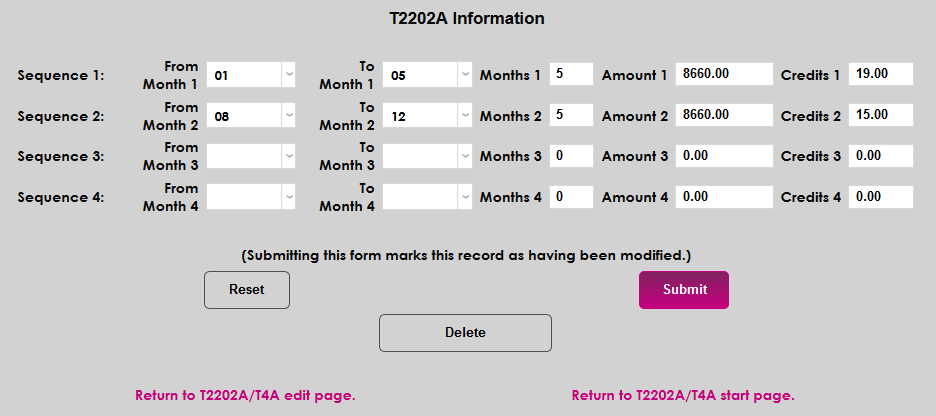
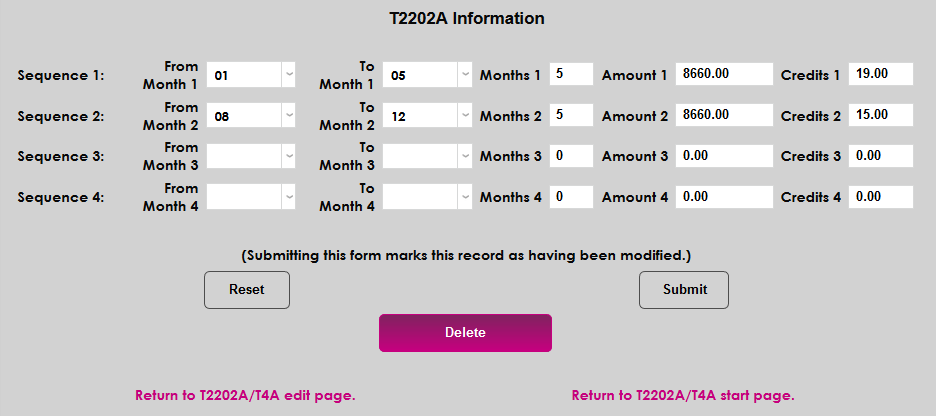
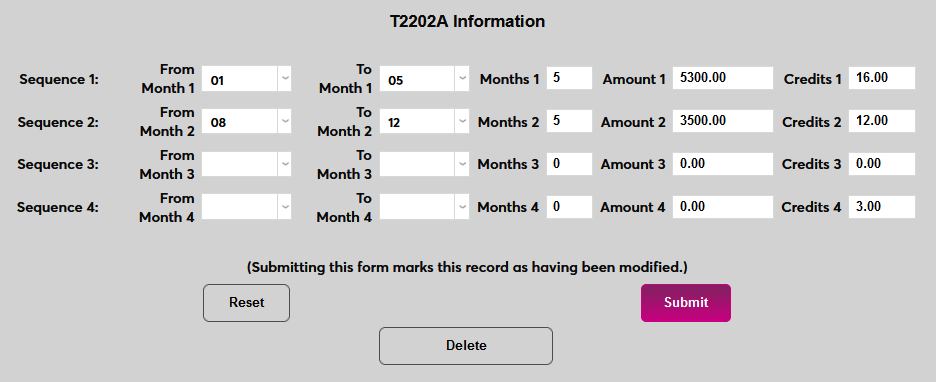
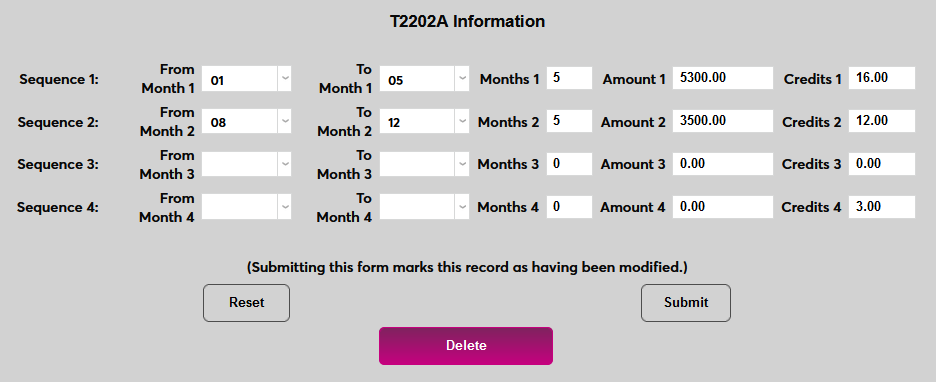
Click the Submit button to save any changes. The record can also be Deleted.
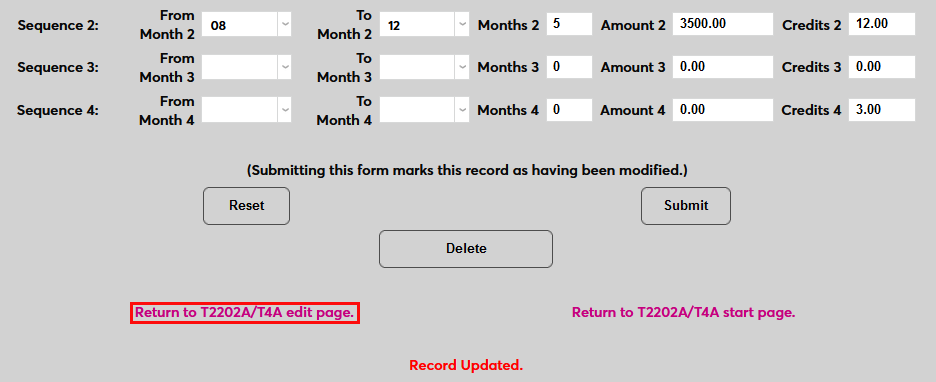
Once the page has been submitted, click the link to Return to T2202A edit page.
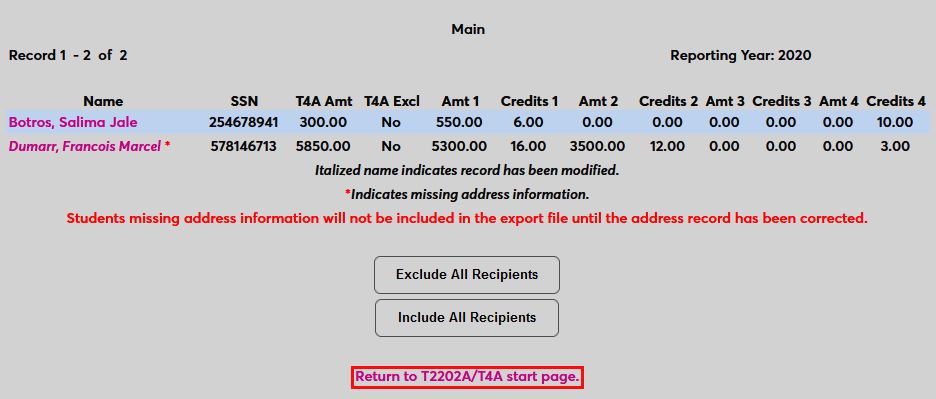
Once a record has been edited, the student's name appears in italics.
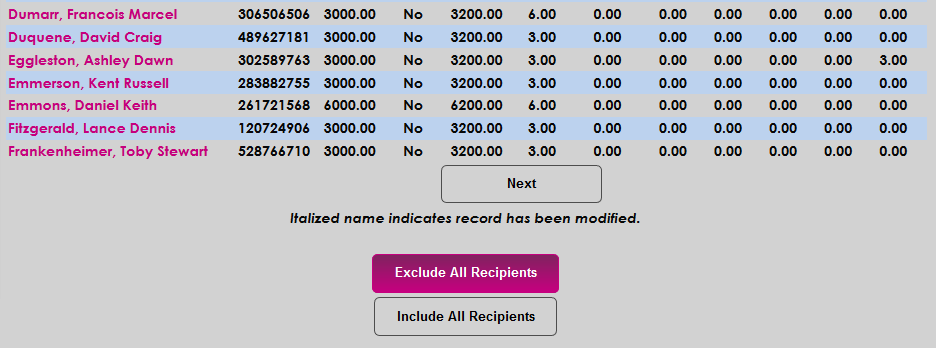
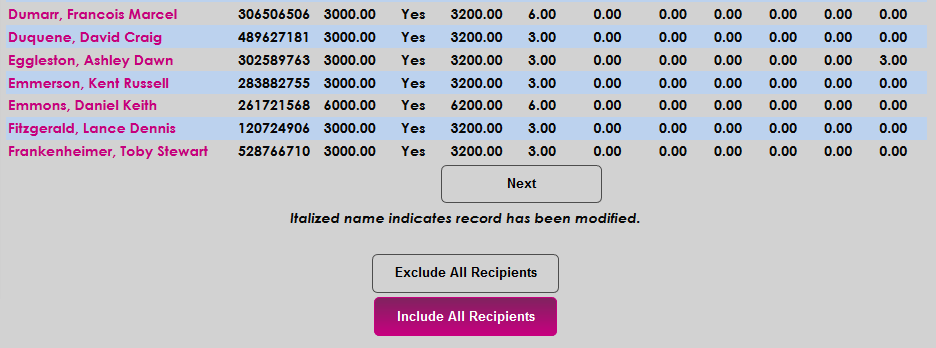
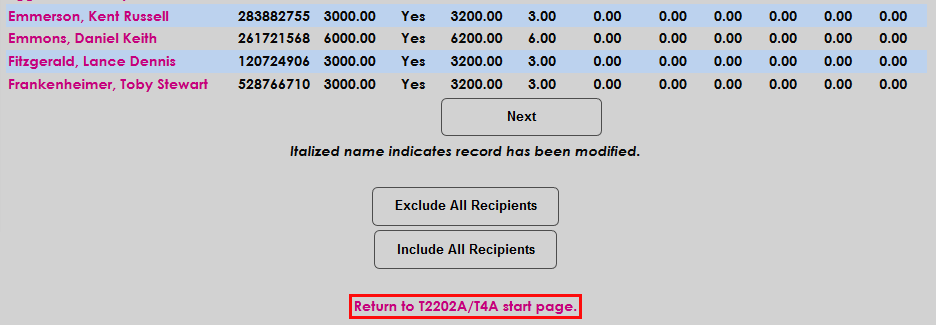
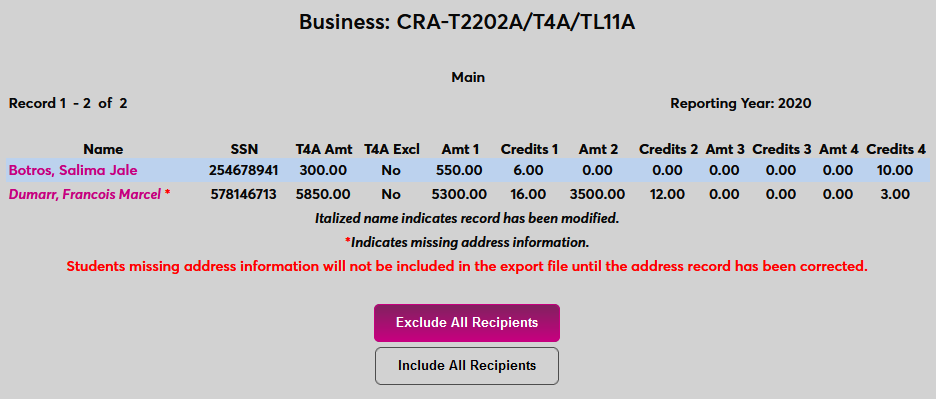
At the bottom of the page, buttons are provided to Exclude All Recipients and Include All Recipients. These can be useful when the goal is to run a report for a single student or a few students. Click the Exclude All Recipients button to update the list. As previously noted, individual students can be included once again by editing their record and unchecking the Exclude box. Click the Include All Recipients to undo this change.

A Next button is included if the list of students takes up more than one page.
Once the necessary edits have been performed, click Return to T2202A/T4A start page.
Edit
Once a report has been built, click Edit and select the appropriate Campus to return to the list of records and make further changes.


Export
Once all necessary edits have been completed, click Export to create the final reports.

The next page displays links to the various ways the data is reported. Each link opens in a new window.
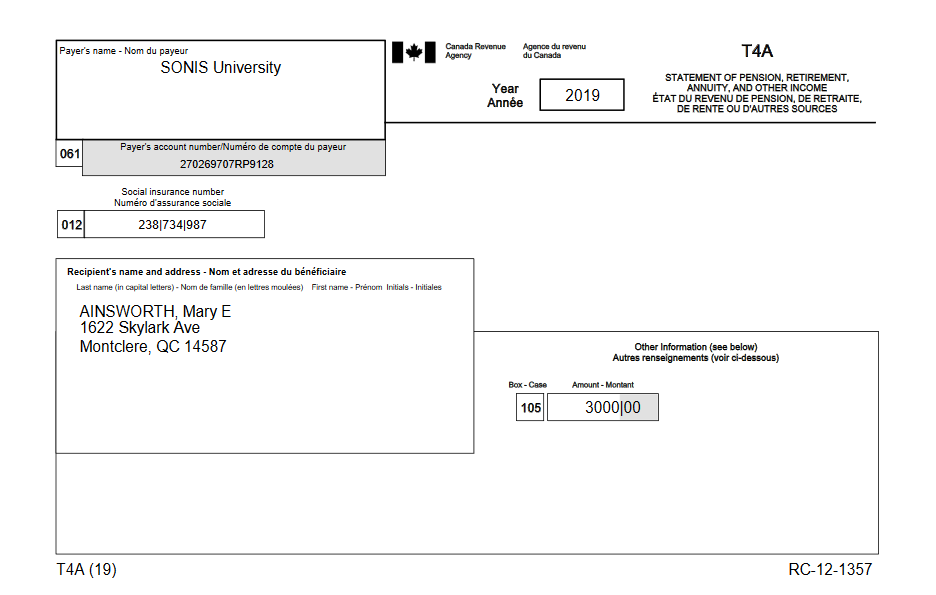
Student/Institution T4A:
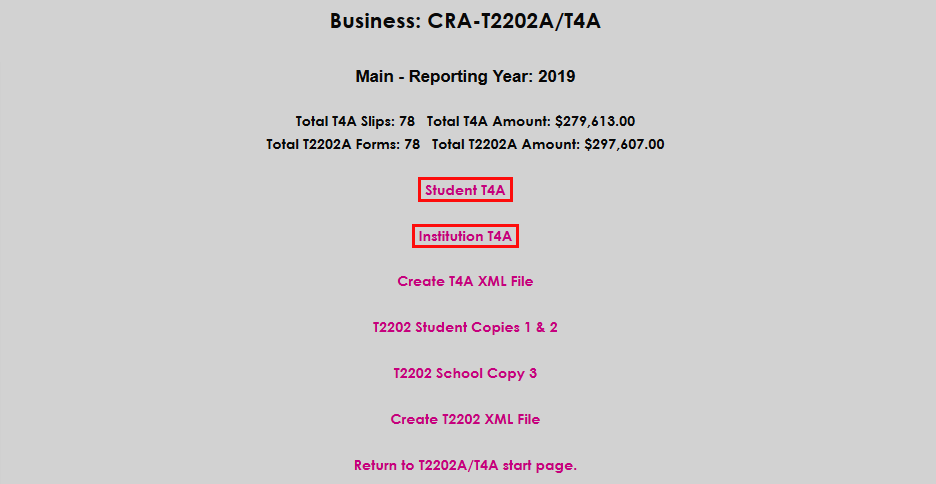
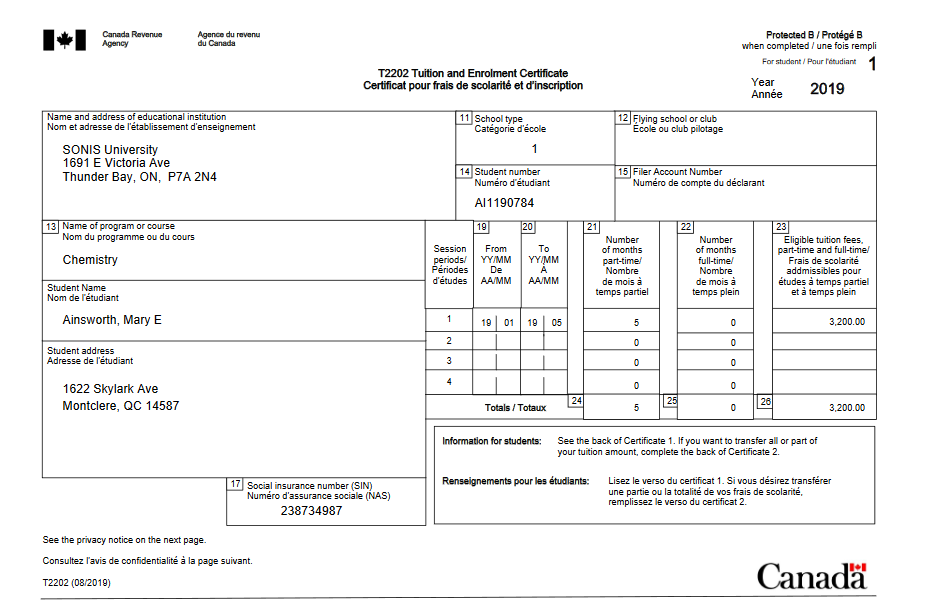
Student/Institution T2022:
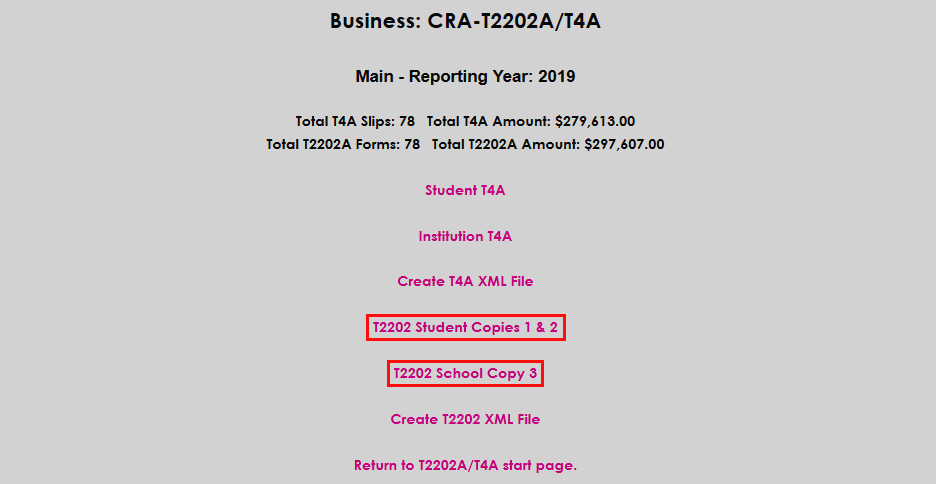
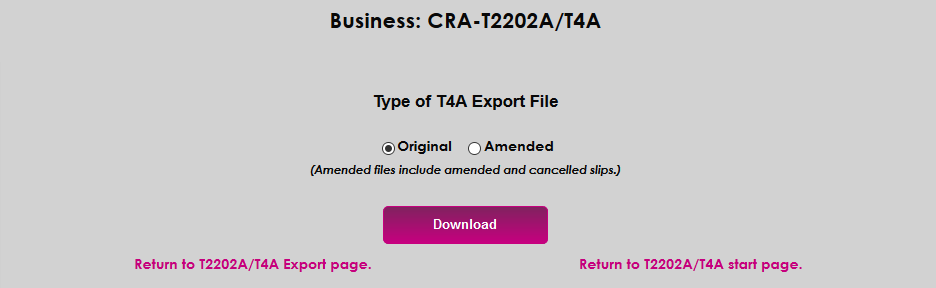
The other links on the page provide the option of creating an XML file for transfer to the CRA.
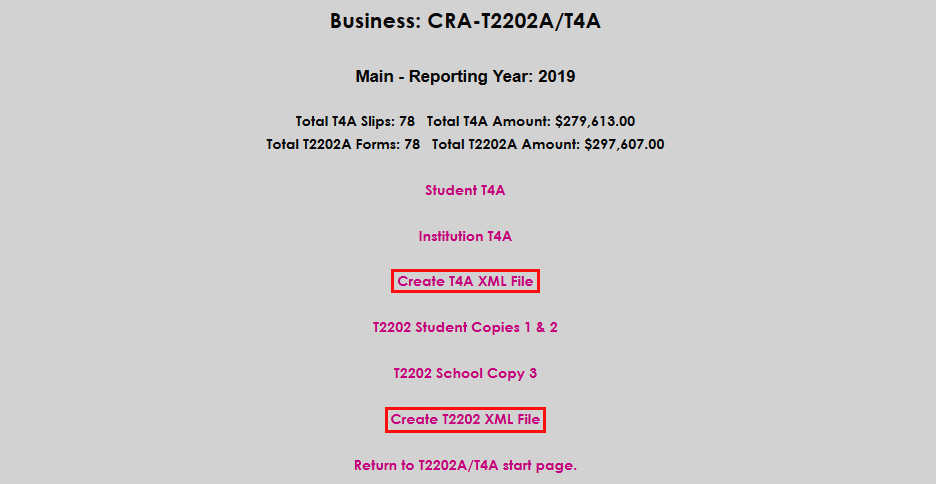
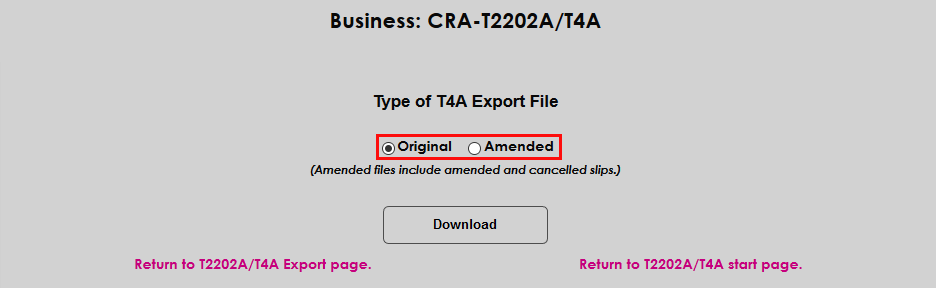
Choose whether the file should be sent as an Original or Amended copy and click Download. The file will be saved to the batch location set in Web Options.
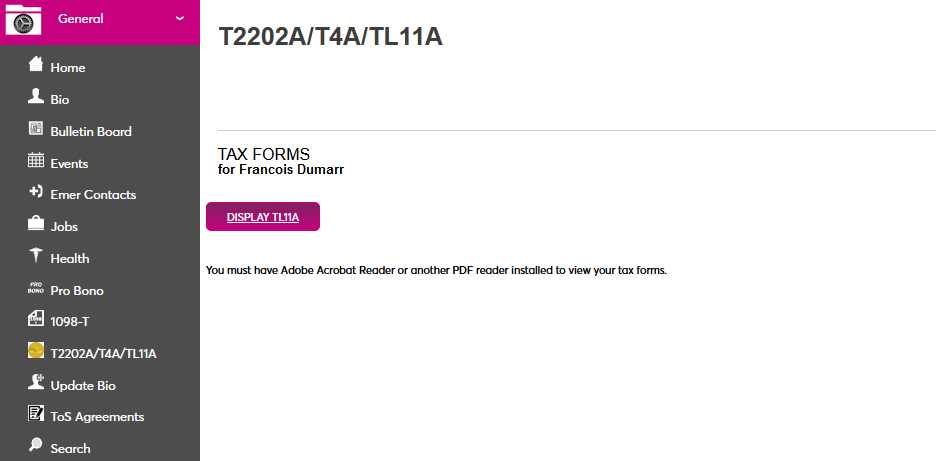
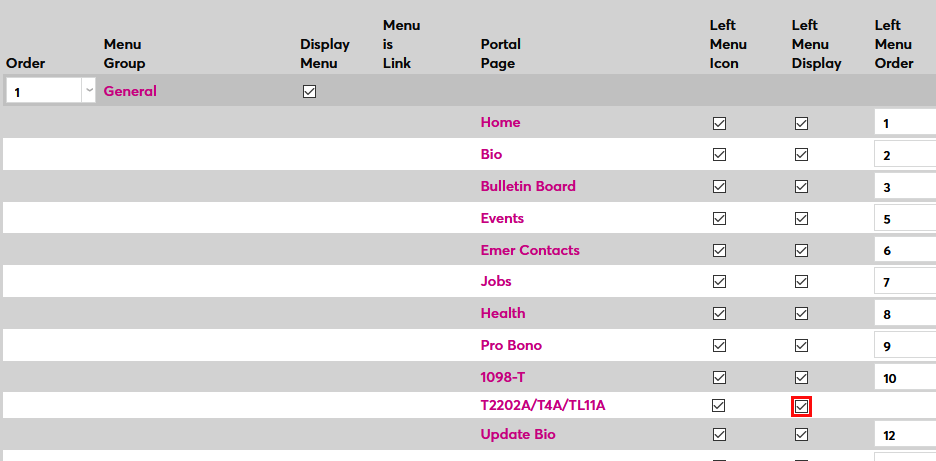
Student Access
To allow students to access a copy of the T2202A and T4A files, navigate to the Portal Menu Utility under the Systems menu and select the Student portal. Scroll down to the T2202A/T4A/TL11A page and check the Left Menu Display box. Click Submit to save the page.
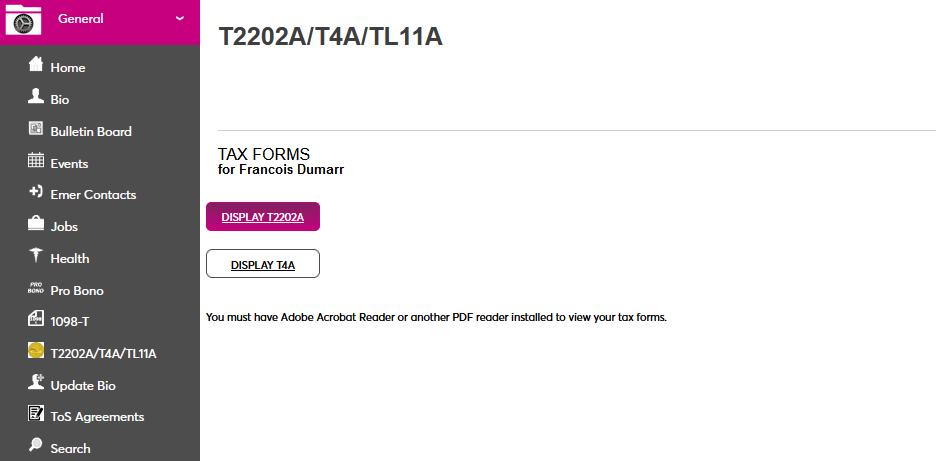
Once the page has been activated, students will be able to view their T2202A document by clicking the Display T2202A button.
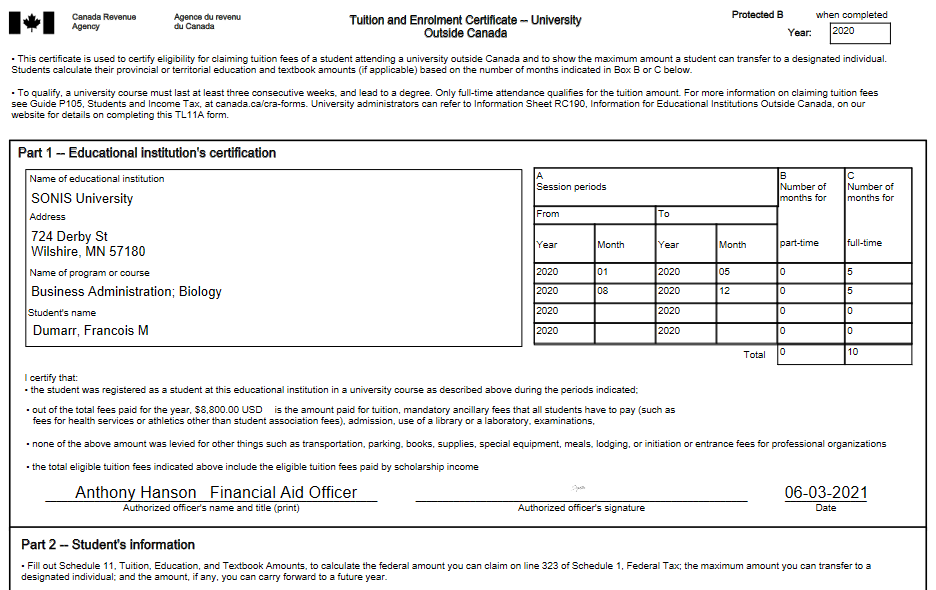
TL11A
Setup
Activation
Before TL11A forms can be created, the TL11A feature must be turned on in the client's database. Contact SONIS Support to turn on this feature. Since TL11A forms are only used by schools outside of Canada, toggling this feature on will replace T2202 and T4A forms. Additionally, since only Canadian students require these forms, a bit must be flipped in each student's Name table to designate them as a student to include in the build process. Once these settings have been activated, the TL11A process is identical to the T2202 process outlined below.
Institutional Information
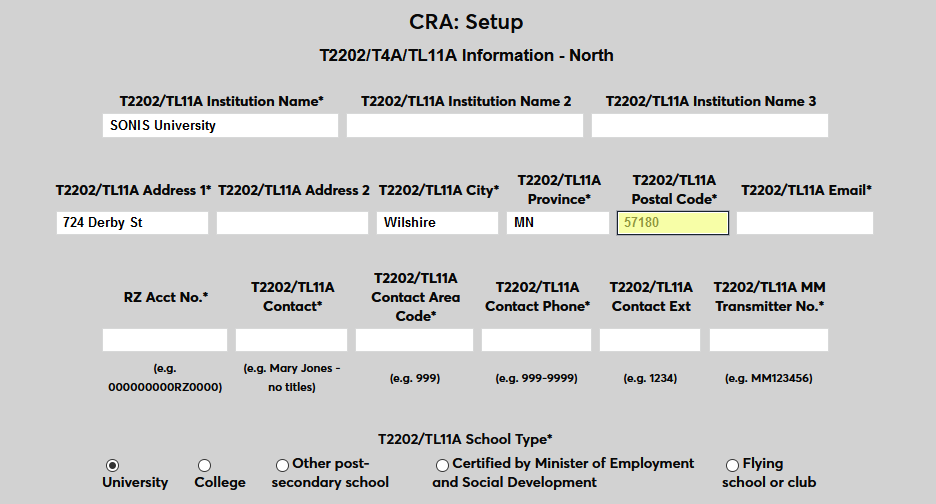
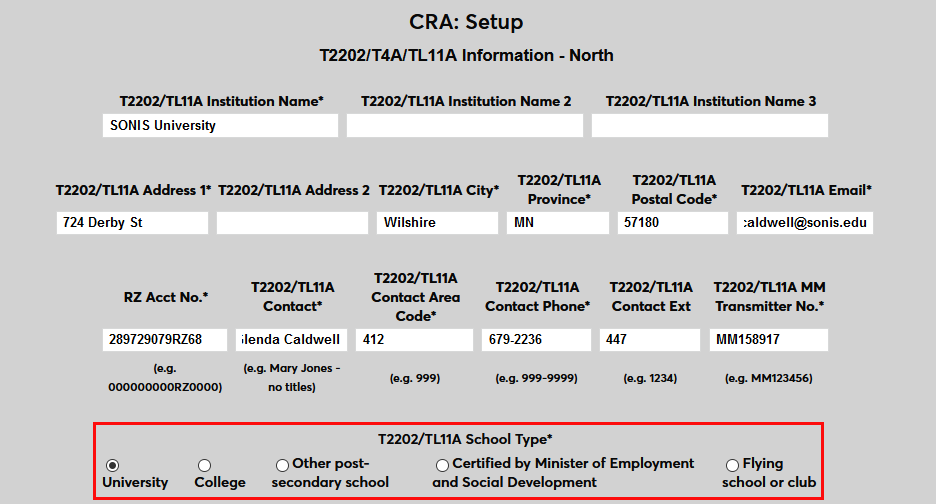
Before processing student reports, each school must enter their specific Canadian Revenue Agency account information. To enter this information, navigate to the CRA Setup page in the Systems hub. The fields marked with an asterisk are required.
Based on CRA formatting, each campus must be set up separately. Click Add to set up a new campus.

On the next page, select a Campus from the dropdown menu at the top of the page.
The TL11A setup is at the top of the page. First, enter the school's name and address.
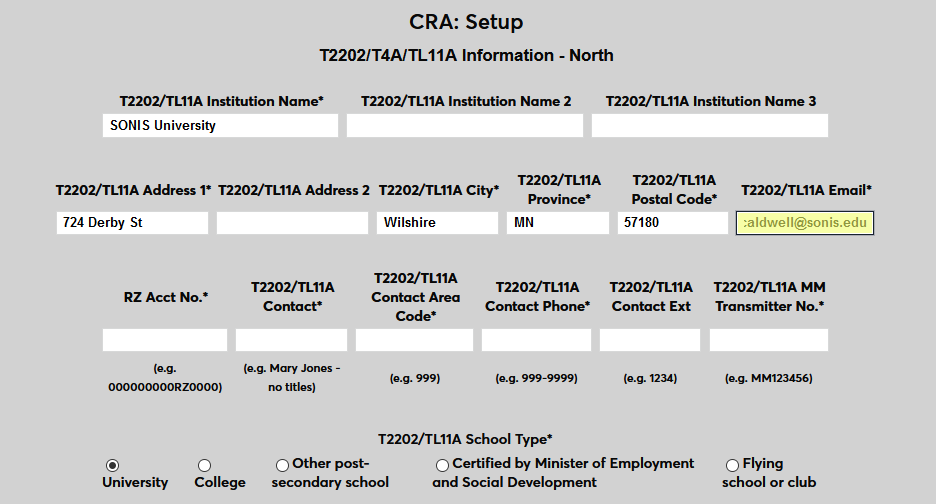
Next, enter the email address for the person who will be the school's primary CRA contact.
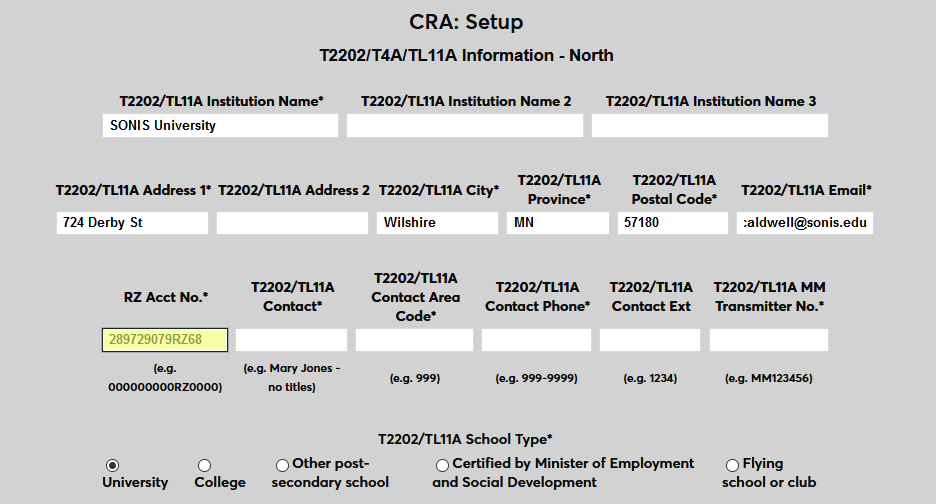
Enter the school's RZ Account Number.
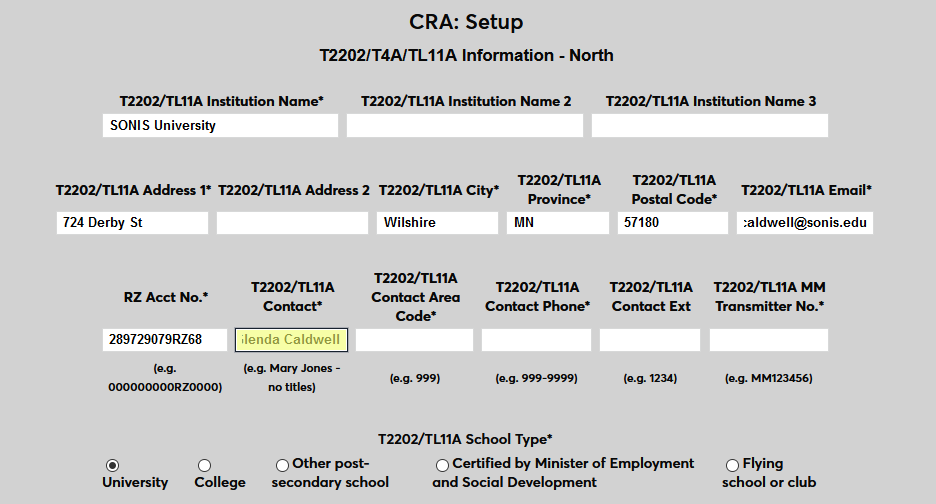
Enter the name for the person who will be the school's primary CRA contact.
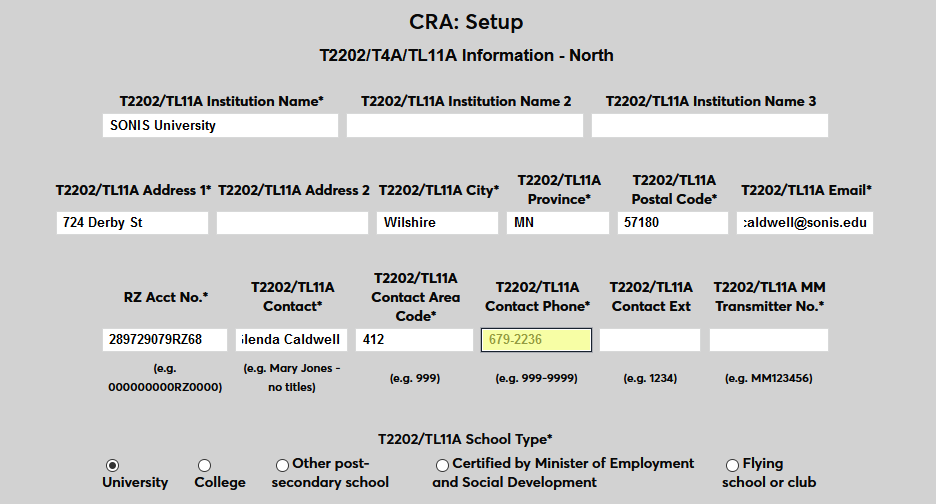
Enter the phone number for the person who will be the school's primary CRA contact.
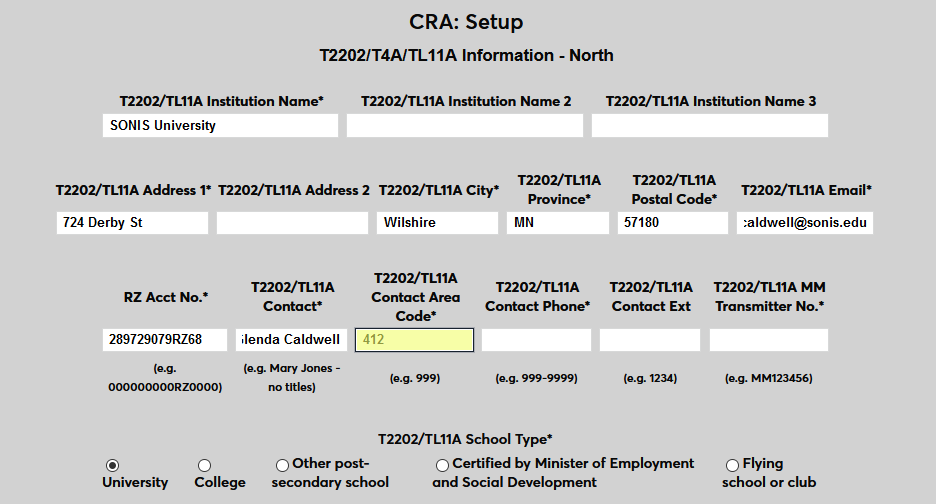
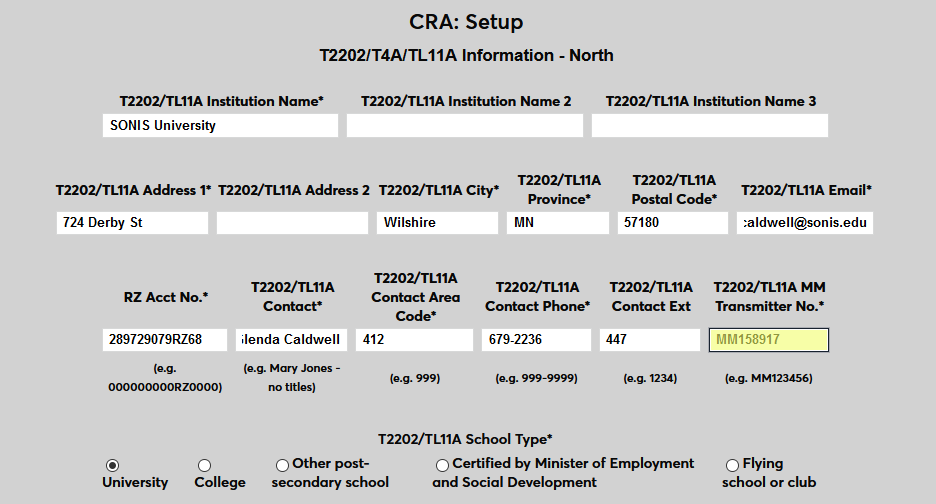
Enter the school's MM Transmitter Number.
Select the appropriate TL11A School Type.
Click Submit to save the changes.

Copy Records
If at least one campus has been set up, the fields can be copied to an additional campus to save time. Click Add to create a new campus.
Scroll down past the T2202/TL11A fields and the T4A fields to the copy section. Select a New Campus to set up and a Source Campus to copy.
Click Copy Records to create the new campus.
Once the page has reloaded with the fields copied, change any fields that need to be altered and click Submit to save the page.
Year/Semester
In addition to the other setup information, schools must transmit their calendar setup to the CRA as well. This information should match the information in the Years table, the Semesters table, and the Calendar Year table. To create these records, navigate to the bottom of a campus setup page and click Year/Semester setup.
On the following page, click Add Record to begin creating the school year and semester dates.
To add an individual record, first enter the Reporting Year, the calendar year of the record being added.
Next, choose a School Year and a Semester from the dropdown menus. Both fields are populated based on the values created by each client.
Select a Start Month and an End Month for the semester along with the Number of Months that are included in the semester.
Enter the number of hours considered Fulltime Enrollment for this semester.
Finally, select a Sequence for the semester, designating the point it takes place in the calendar year. For most schools, Spring will be their first semester in the sequence, followed by Summer 1, Summer 2, and Fall.
Note that only four numbers are available. If a school were to have more than four semesters or terms, two or more terms would have to share the same sequence number. For example, if a school has a January term that occurs in that month only, the January term and the Spring would share 1 as their sequence number with the Spring term being set up first and taking precedence.
Click Submit to save the record. Repeat this process until all semesters that will take place in the specified calendar year are set up.
Copy Records
The Year/Semester setup page also offers a copy function to make setting up new records easier. Simply select a Reporting Year, enter a Future Reporting Year, and click Copy Records.
When a new Reporting Year is created, a new School Year is automatically created with the rest of the data mirroring the year being copied.
Delete Records
Once a reporting year has finished and the school can be sure that no more TL11A forms need to be produced, the reporting year data can be deleted. Semester records can be deleted individually or the entire year can be deleted using the Delete Records feature. Select the year to be deleted and click the Delete Records button.
Creating Reports
To create TL11A reports, navigate to CRA-T2202A/T4A/TL11A in the Systems hub.
Build
Click the Build button to create the initial report.

On the next page, select a Reporting Year and a Campus from the list of years and campuses created during the setup process. Click Submit to continue.
The following page lists every student included in the build along with a summary of their information. Students who do not have proper address information on file will have an asterisk by their name. These students will not be included in the file unless their address information is updated.
Additionally, each student must have a Social Insurance Number to be included in the file. Students without an SIN in their records have No SIN in red in their SIN column.
To edit a student's information, click on the student's name.
On the individual student's page, the SIN can be edited or added.

Check the Exclude box to remove the student from the report or leave it unchecked to include them.

The T4A section of the page can be ignored since these reports are not used by institutions outside of Canada.
The T2202A Information section of the page allows edit to the student's records for each semester and applies to TL11A forms as well. The From Month and To Month fields designate the calendar months that the semester included and should mirror the same data in the Year/Semester setup. The Months field notes the total number of months included in the semester.
The Amount field can be altered along with the number of Credits taken during the semester.

Click the Submit button to save the changes. The record can also be Deleted.
Once the page has been submitted, click the link to Return to T2202A edit page.
Once a record has been edited, the student's name appears in italics.
At the bottom of the page, buttons are provided to Exclude All Recipients and Include All Recipients. These can be useful when the goal is to run a report for a single student or a few students. Click the Exclude All Recipients button to update the list. As previously noted, individual students can be included once again by editing their record and unchecking the Exclude box. Click the Include All Recipients to undo this change.

A Next button is included when the list of students is more than one page.
Once the necessary edits have been performed, click Return to T2202A/T4A start page.
Edit
Once a report has been built, click Edit and select the appropriate Campus to return to the list of records and make further changes.


Export
Once all necessary edits have been completed, click Export to create the final reports.

The next page displays the total number of forms and the dollar amount being reported. Click the TL11A link to open the TL11A file as a PDF.

Student Access
To allow students to access a copy of the TL11A file, navigate to the Portal Menu Utility in the Systems hub and select the Student portal. Scroll down to the T2202A/T4A/TL11A page and check the Left Menu Display box. Click Submit to save the page.
Once the page has been activated, students will be able to view their TL11A document by clicking the Display TL11A button.