Billing
Overview
The Billing utility is used to create a report of charges and credits in the form of a bill that can be used either internally or externally. Before charges are available in the Billing report, they must be sent to billing either by using Post to Billing or through an automated process such as the post to billing registration option. Once a bill has been created, it can be mailed to the user who accrued it using the included address labels.
Creating Bills
To create bills, first navigate to the Billing utility under the Financials menu. Bills can be created for a single user or multiple users.
Single User
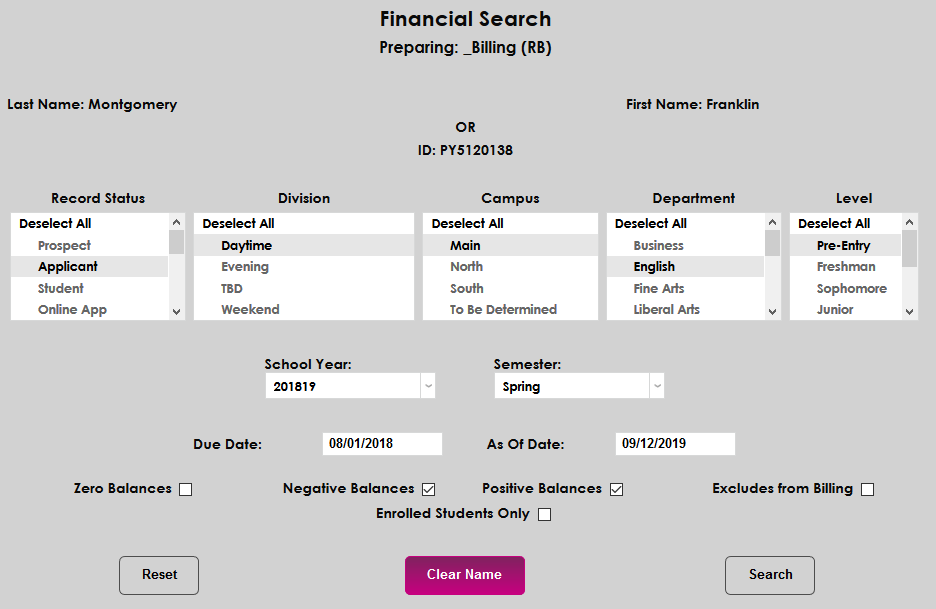
If a user has already been selected using the Name Search function, that user's information will be displayed at the top of the page. Click Search to post a transaction for this user or Clear Name to remove this selection and select another user or users.
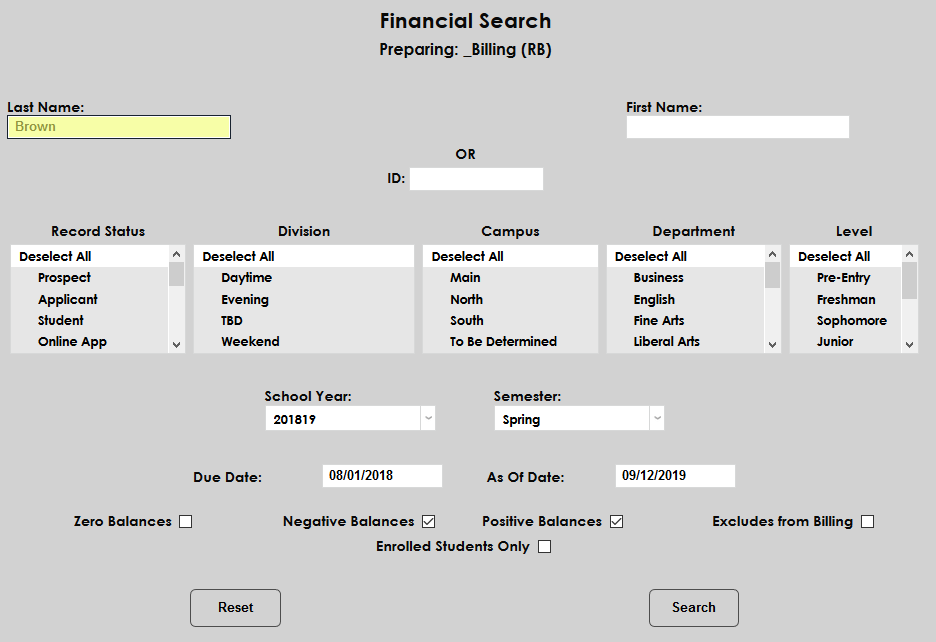
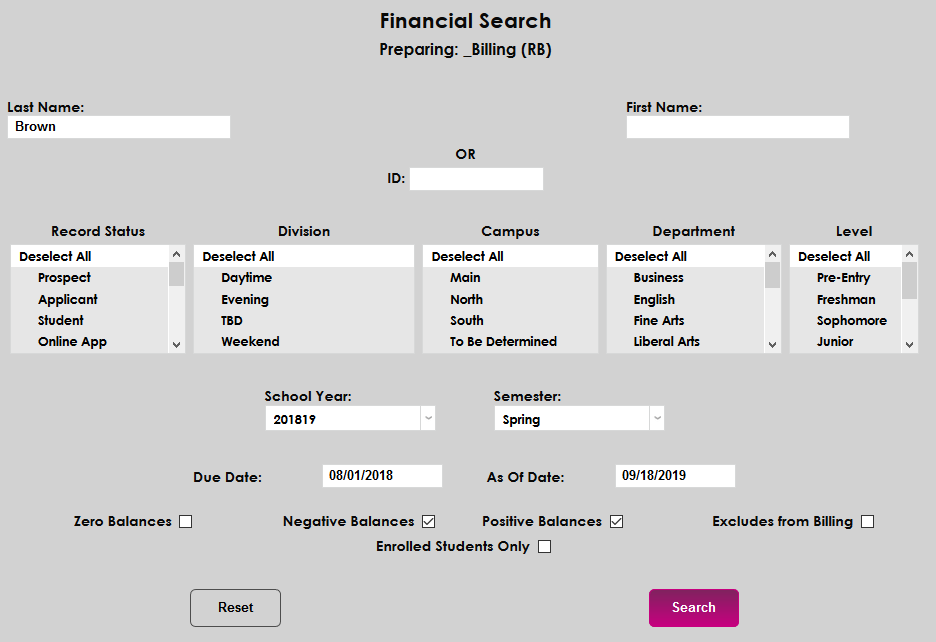
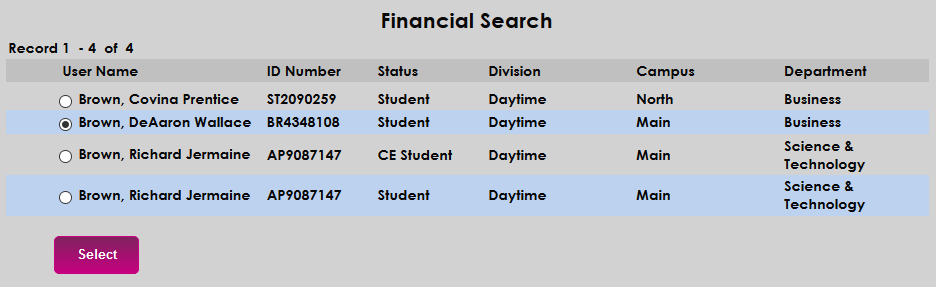
To search for a new user, fill out the Last Name, First Name, and/or SONIS IDfields and click Search.
The results of the search will be displayed and the administrator will be asked to Select one of the users.
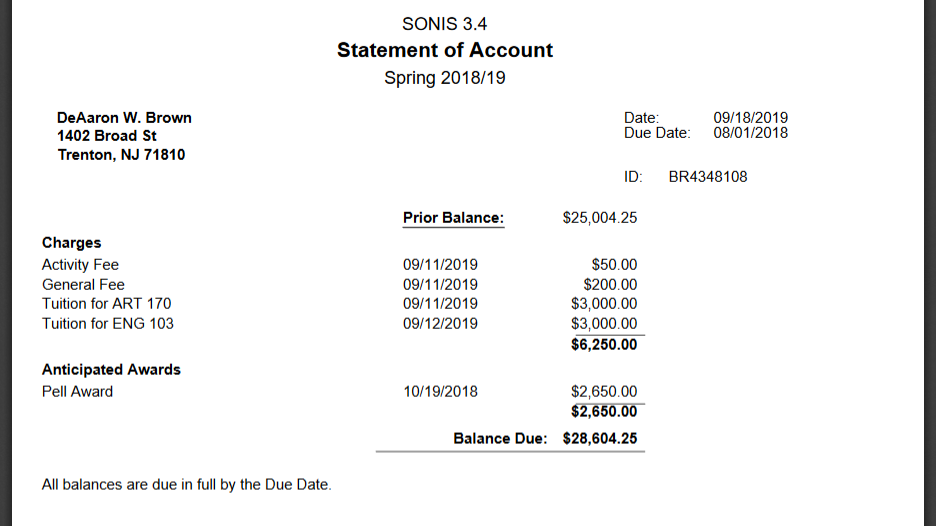
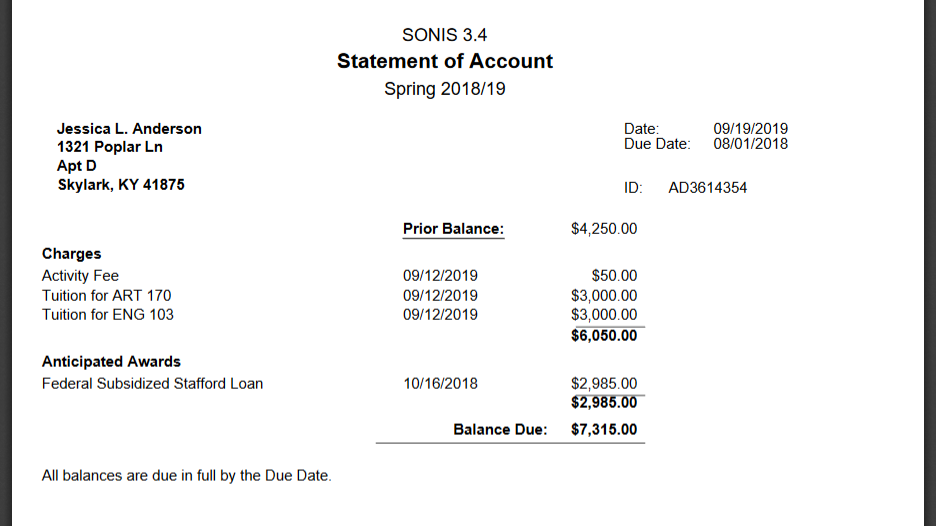
The following page offers two links. The first option is Click Here to preview the report. Selecting this option will open a bill for the chosen student in a new window.

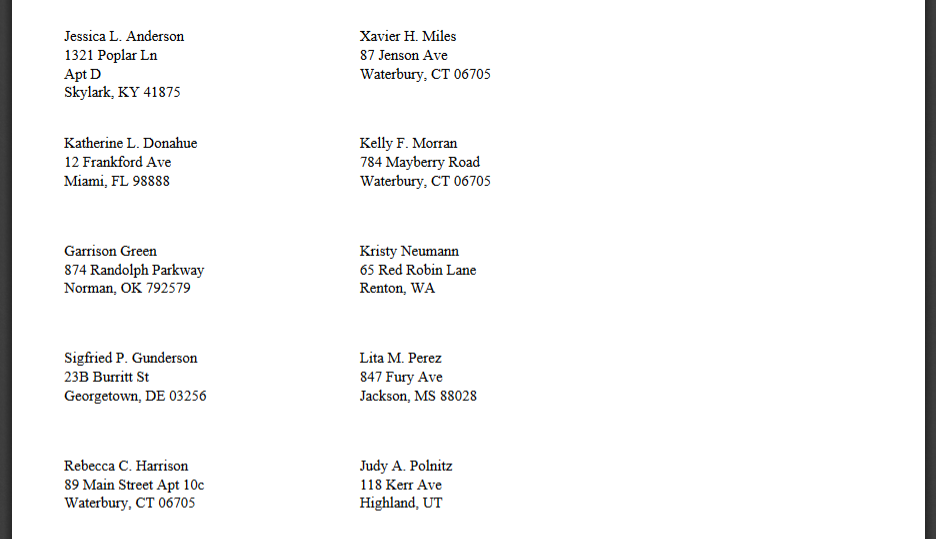
Additionally, administrators can view a printable mailing label for the student by clicking the Click Here to preview the labels. link.

Multiple Users
To create bills for multiple users, use some or all of the Record Status, Division, Campus, Department, Level, Cohort and Enroll Status fields in conjunction with the School Year and Semester dropdowns to narrow down the results.
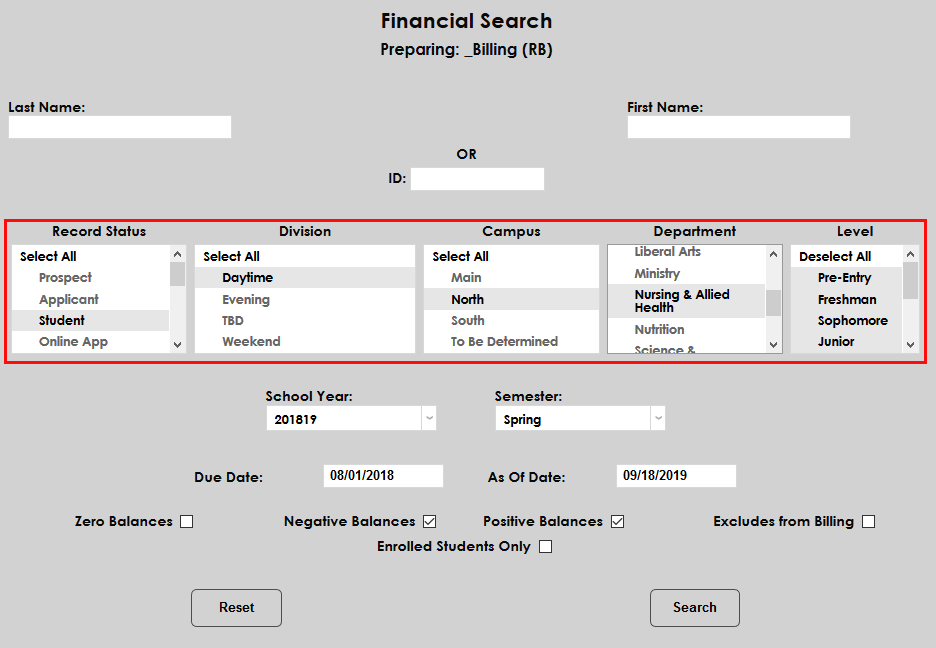
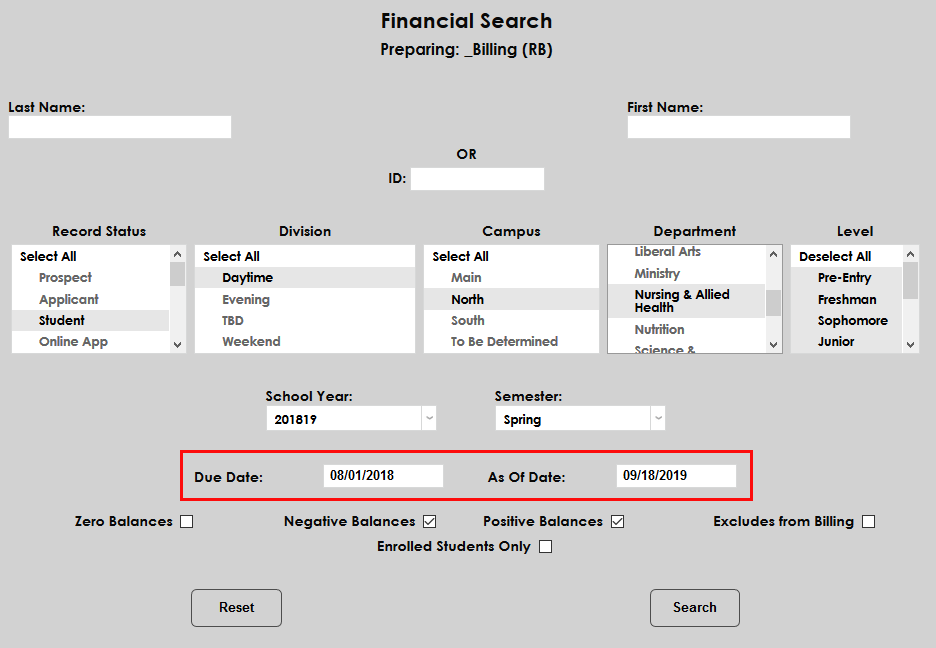
Administrators can also set a Due Date and an As of Date for the search. Only transactions within this time frame will be listed on the bills.
Administrators can narrow down the bills that will be shown further by checking or unchecking the Zero Balances, Negative Balances, and Positive Balances boxes. If the Excludes from Billing box is checked, the Exclude from Billing options on other pages will be overridden and transactions that were excluded from billing elsewhere in the system will be included. This box should be left unchecked in most cases. Check the Enrolled Students Only to narrow the list down to only students that are currently enrolled at the time of the report.
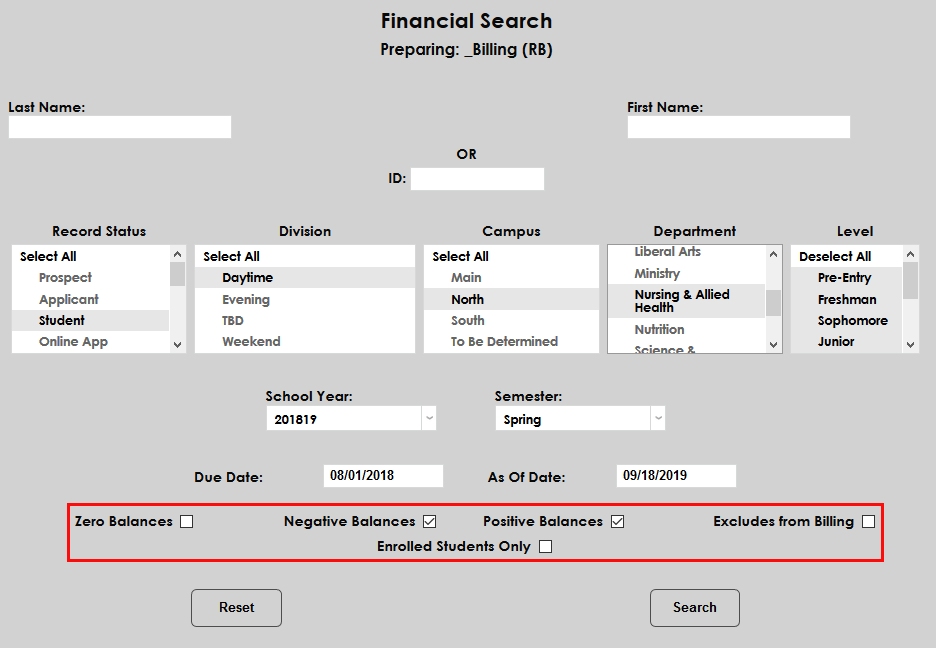
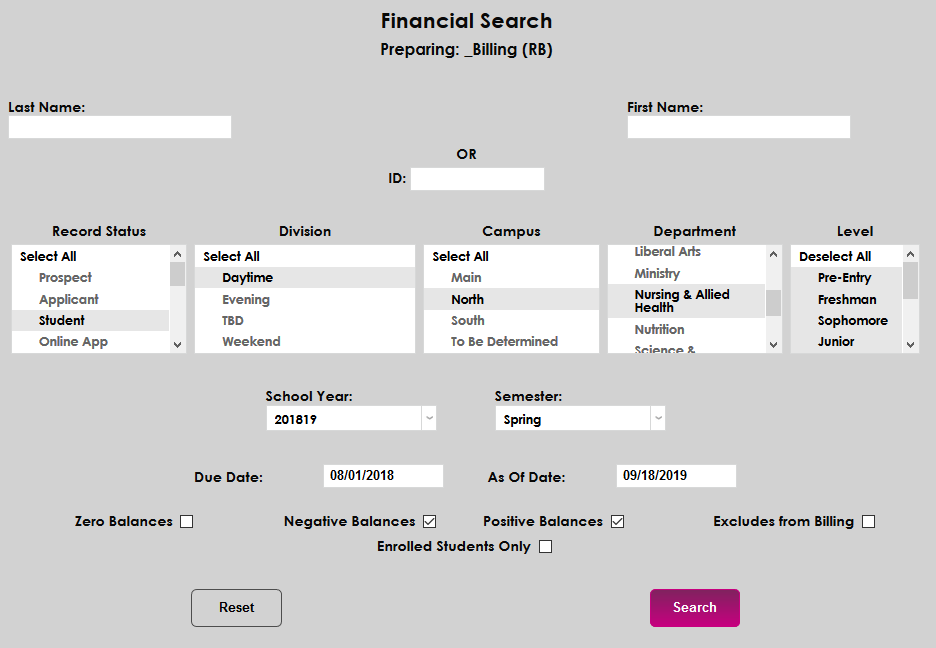
Click the Search button to create the report.
The following page offers two links. The first option is Click Here to preview the report. Selecting this option will open a bill for the chosen students in a new window.
Additionally, administrators can view printable mailing labels for the students by clicking the Click Here to preview the labels. link.