Element451 Utility
Overview
Element451 is a popular customer relations management software that can be used by colleges to manage prospect and applicant interfaces. Once applicants and their applications have been created in the Element451 system, schools can use the software to decide on those applications. Applicants and subsequent decisions on whether or not to accept them can be imported to Jenzabar SONIS through the Element451 Utility. SONIS offers both a manual import and an automatic timed import of this data via the Element451 API. With the API there is an enhanced integration of data types, and customization of the import process.
API Import and Export
Setup Within the Element451 Portal
The information below specifically explains the API between SONIS and Element451. Slugs are also used in the manual and SFTP import processes. See the chart in the SFTP process section for details on data points.
It is necessary to have an application created within Element451 before the API can be used with SONIS and to ensure that the data fields within SONIS correspond as needed to the information being gathered by the application. As such, any fields created as part of the Element451 application creation must be mapped within SONIS. Before proceeding with this confirmation within SONIS, it's important to understand some terms specific to Element451:
Segments are defined by the client and are used to separate applicants into like groups. Segments are dynamic, and after being associated with a set of parameters, Element451 will put any applicant who meets the defined parameters into that segment. For example, a segment called Athletes could be created and defined, and if the Athletics section of the application is complete, applicants will automatically be added to it.
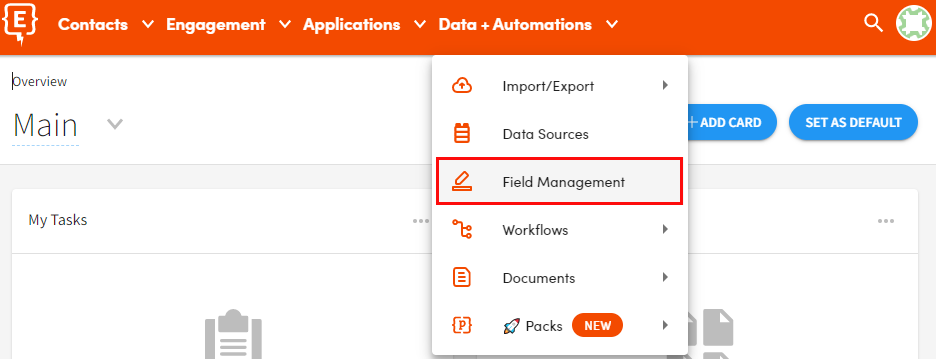
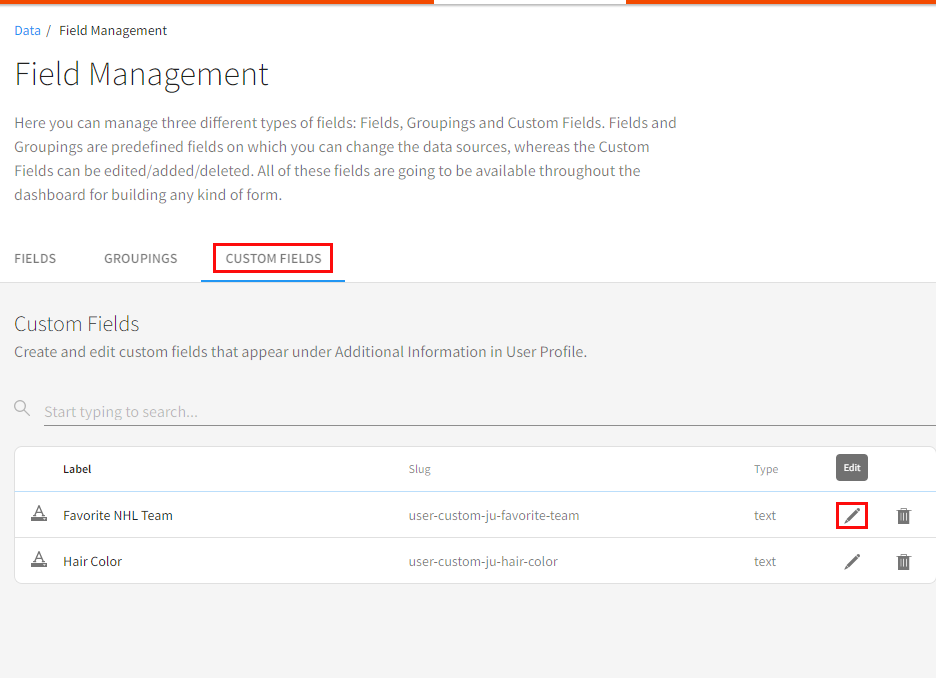
Element451 maps data fields using Slugs. A slug is basically a unique identifier for a field or data point. The data fields in Element451 have slugs associated with them. From the Data + Automations tab at the top of the Element451 landing page, select Field Management to view a list of field names and associated slugs. This list is not comprehensive. Element451 is always being enhanced, and this list could change anytime.
The API Integration is delivered with a default set of SONIS fields that will automatically map with Element451 slugs. To review data that may be collected within Element451 and sent to SONIS, or to add custom slugs in Element451 that will be mapped to SONIS data fields, enter Field Management from the Data + Automations tab at the top of the Element451 landing page.
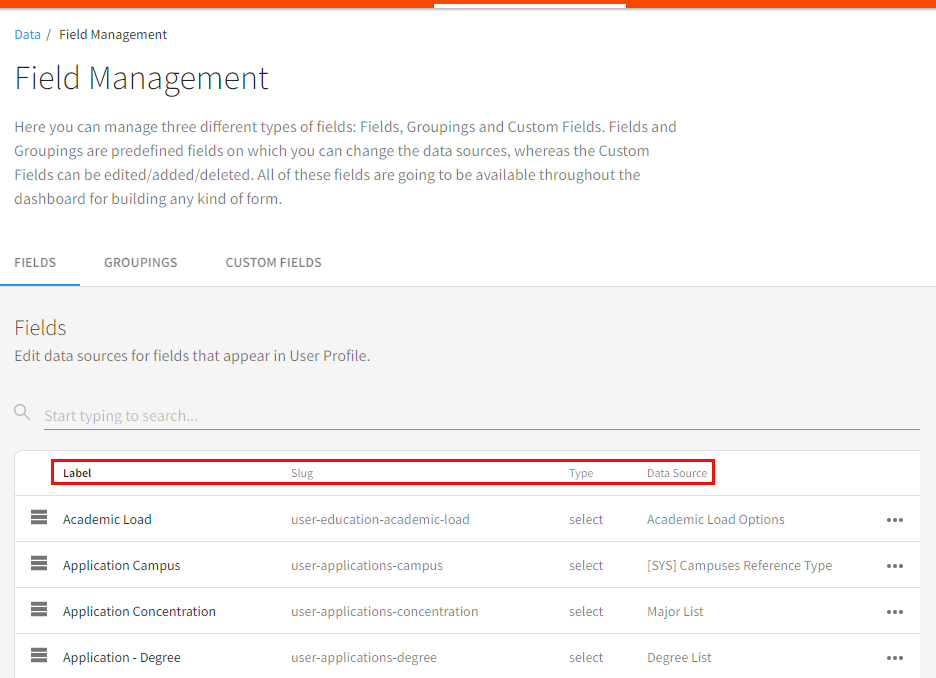
In Field Management a user can manage field types and groupings. Data Sources are automatically associated with the field Labels by default but can be edited if necessary.
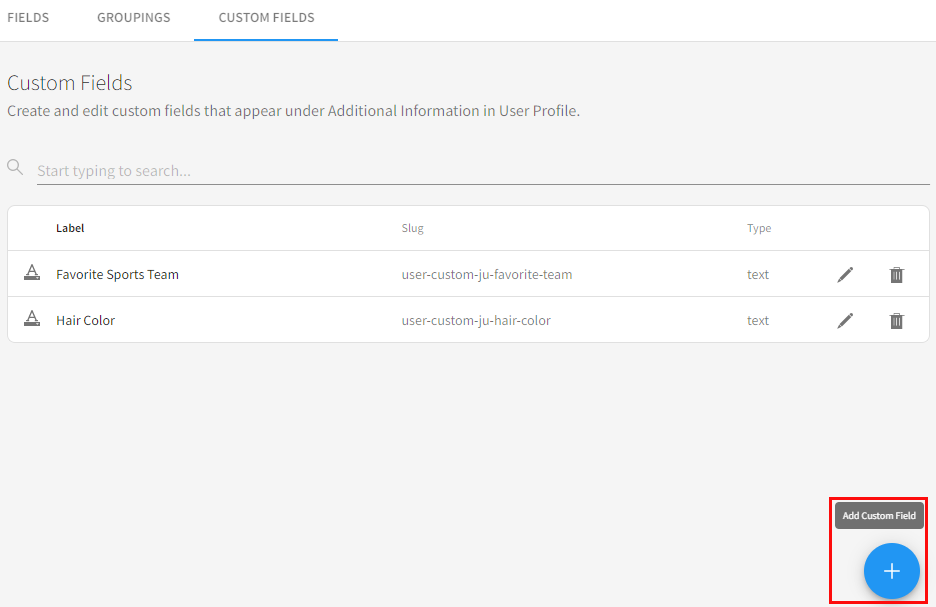
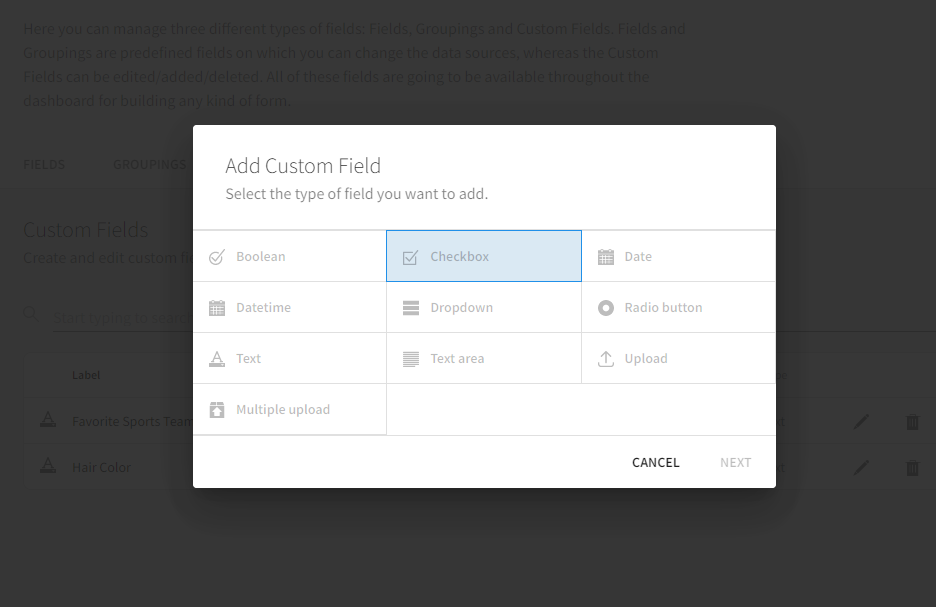
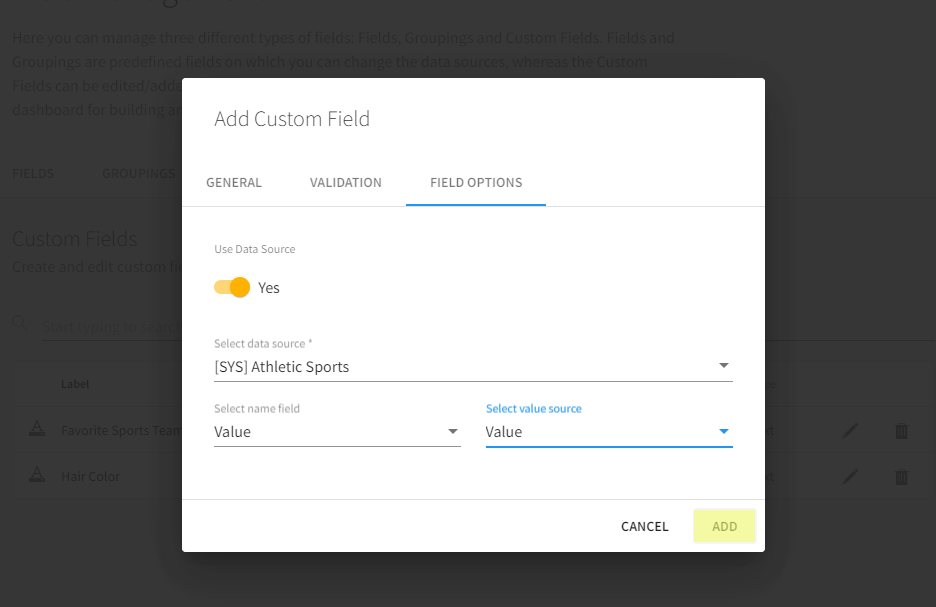
The Custom Fields tab is used to create and manage additional data fields or slugs. To create a custom field, enter the Custom Fields tab and click the blue plus icon. The Add Custom Field message displays when the cursor is on the plus icon. Select the type of field to be created by clicking on it. The definitions of the field types are available from the Element451 support group.
Create the Slug name by clicking in the space after the final hyphen and entering the desired naming information. It is best practice to create a slug name that references the data that will be collected.
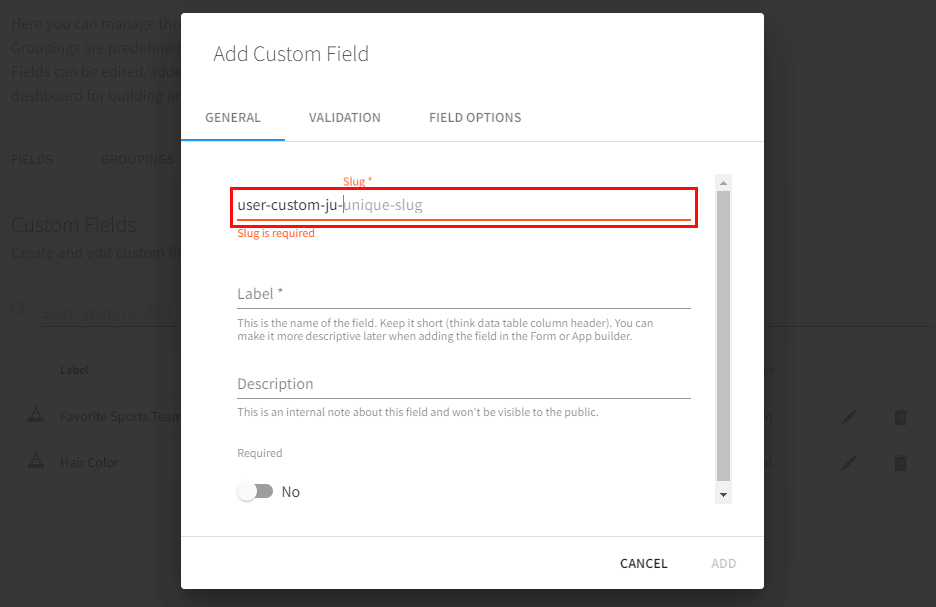
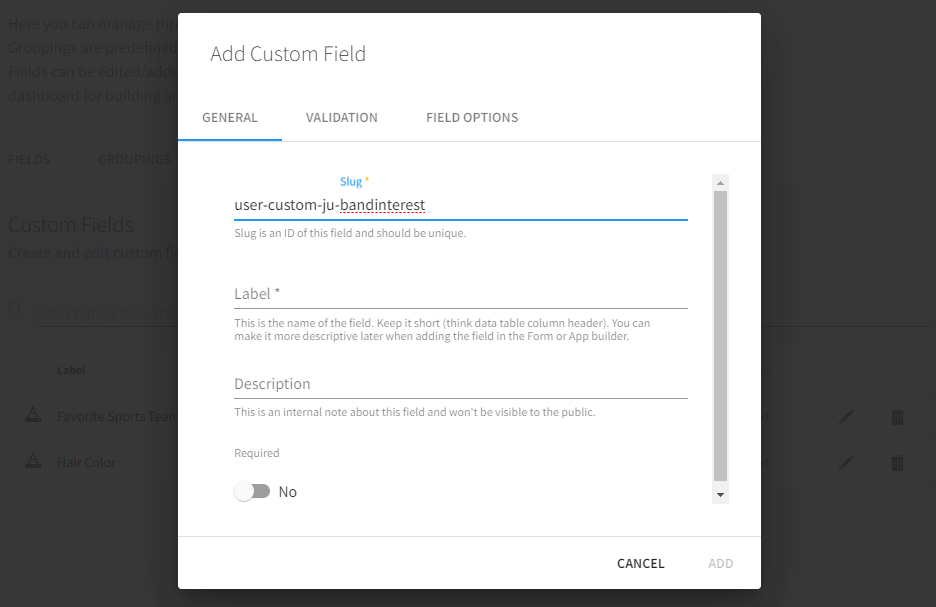
Enter the Label name. This is an internal label name and should be a short descriptor. It will not be displayed to applicants. Enter some details about the Label or purpose of the field in the Description field. This is an internal note only.
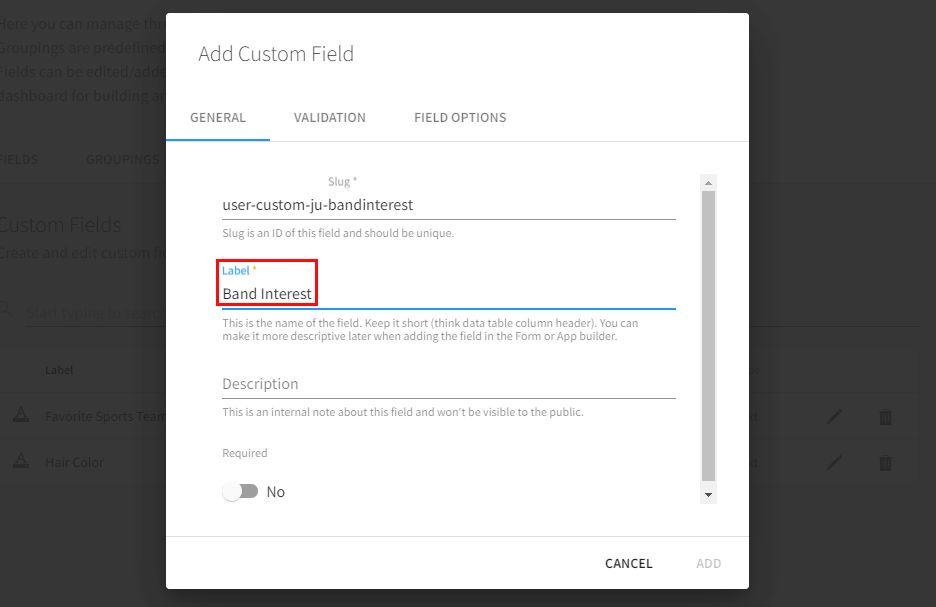
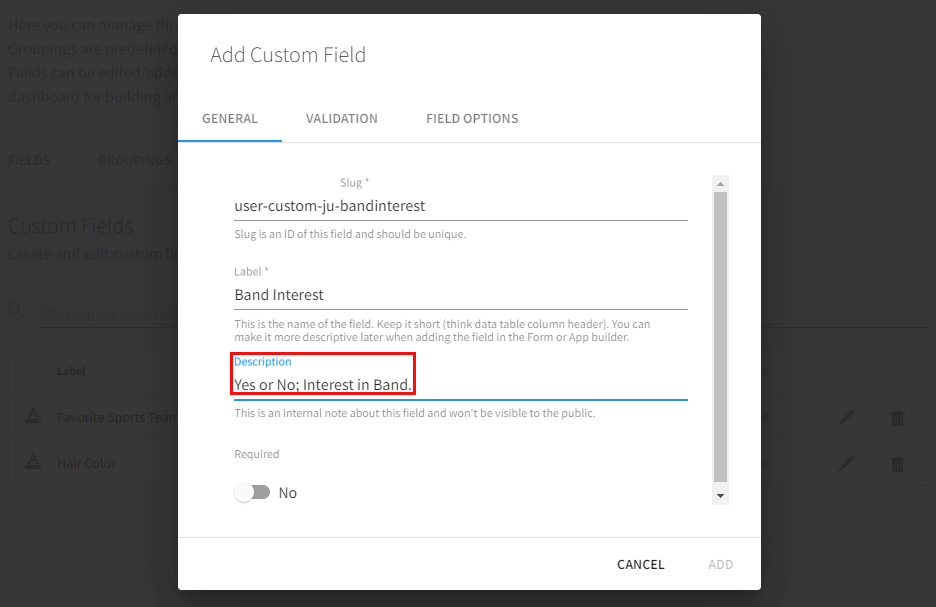
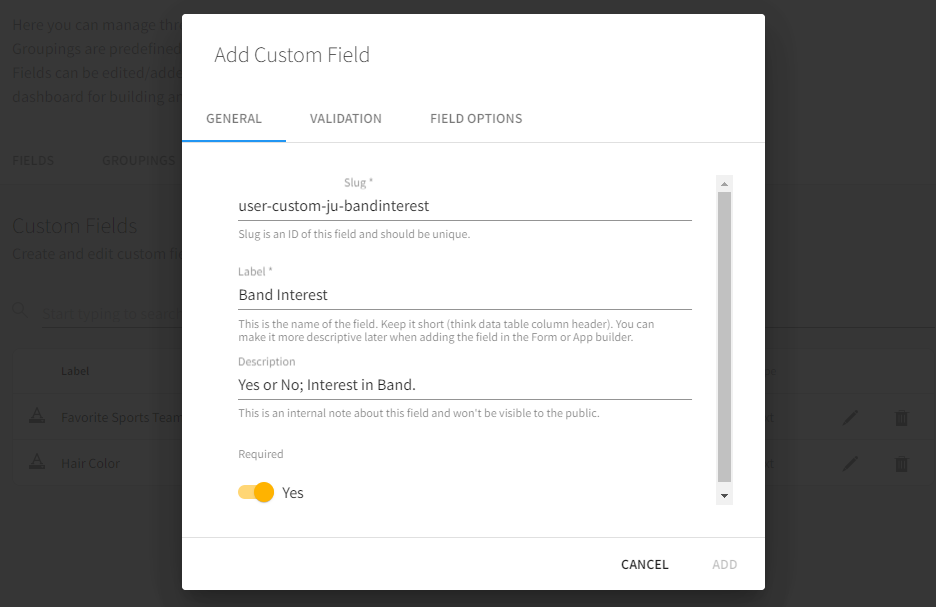
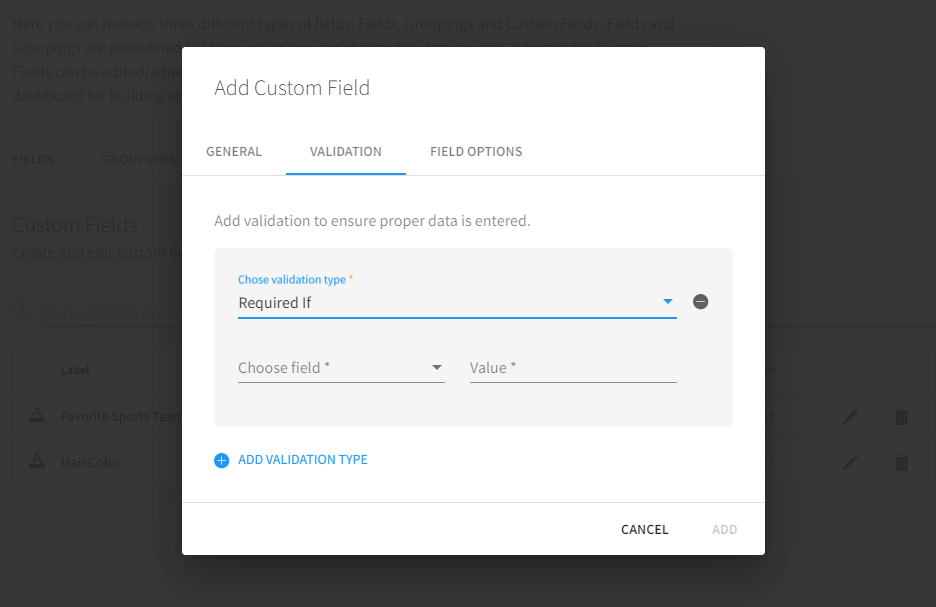
Use the Required toggle to select whether or not the question must be responded to or may be skipped. Clicking the button toggles between No and Yes. Click on the Validation tab to continue.
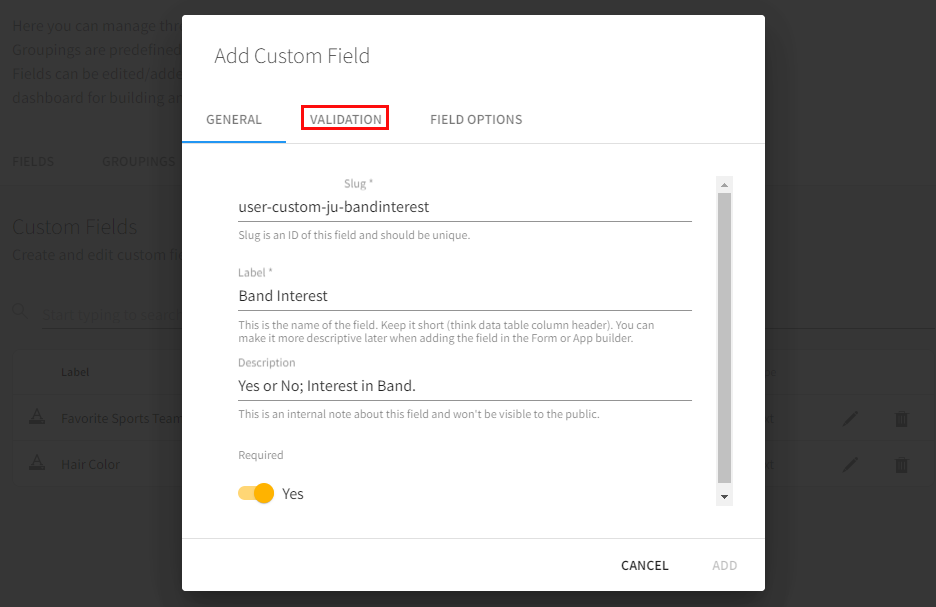
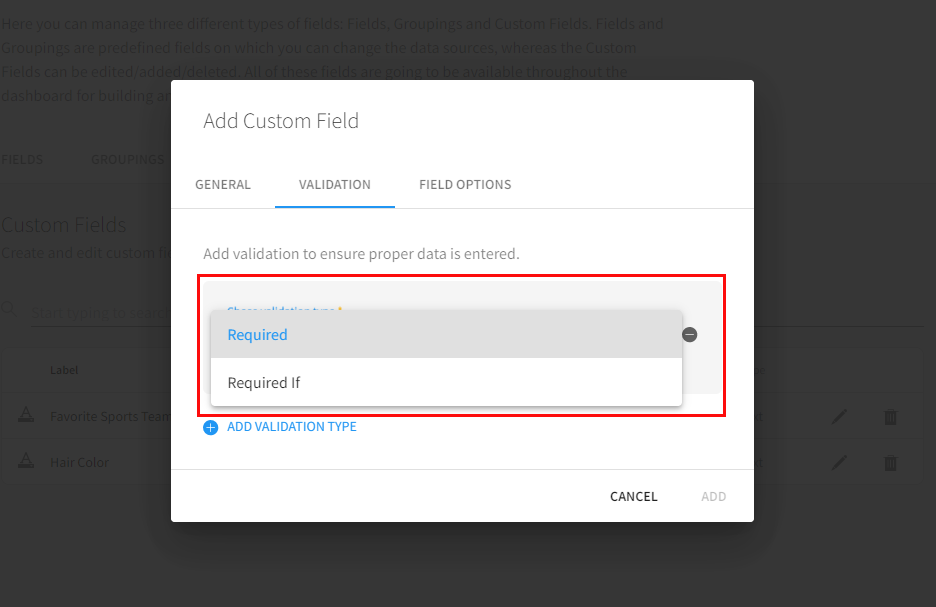
On the Validation tab, Required will be displayed if the field has been set as required. There is an additional option to set the validation to Required If and enter circumstances that would determine the required entry. If it has not been set to required, validation is optional.
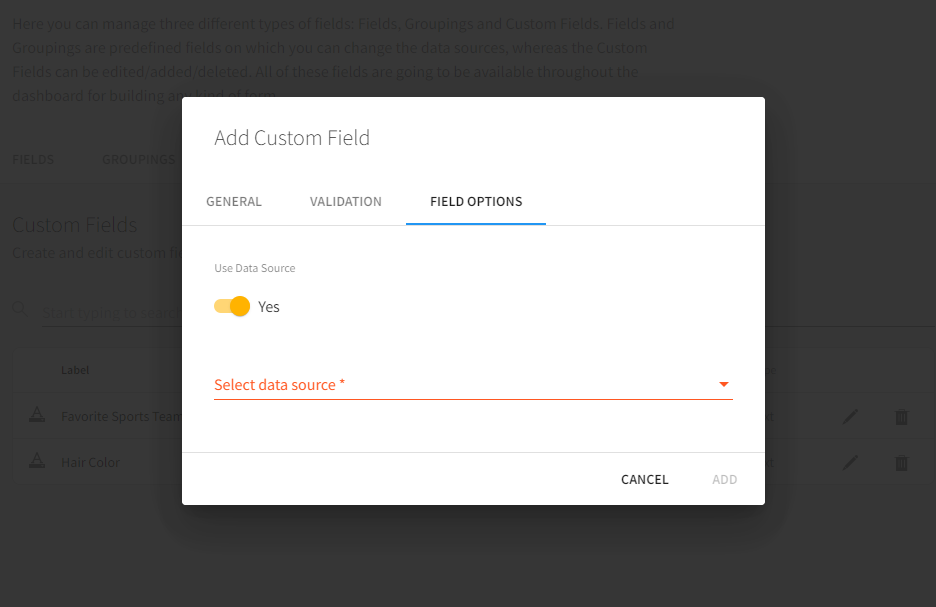
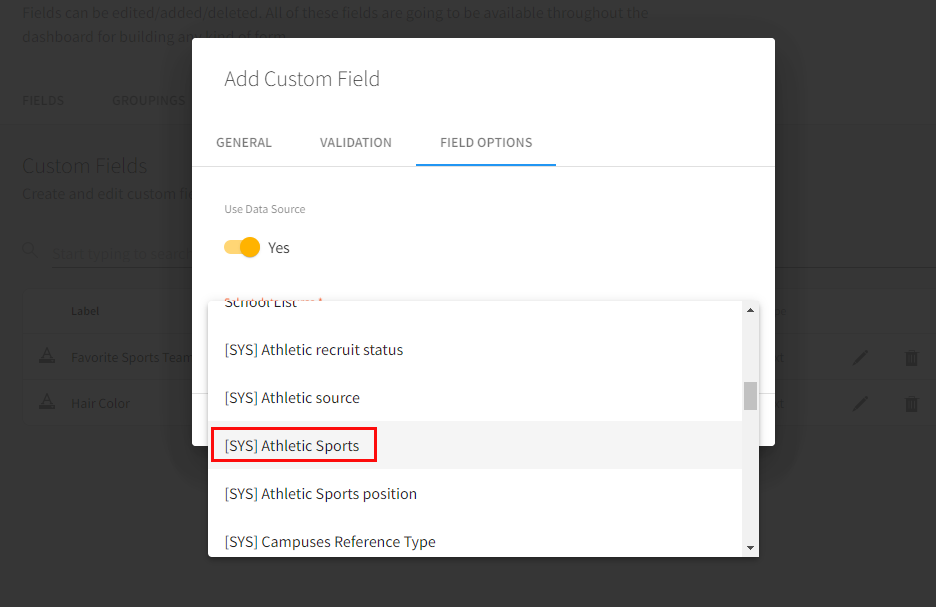
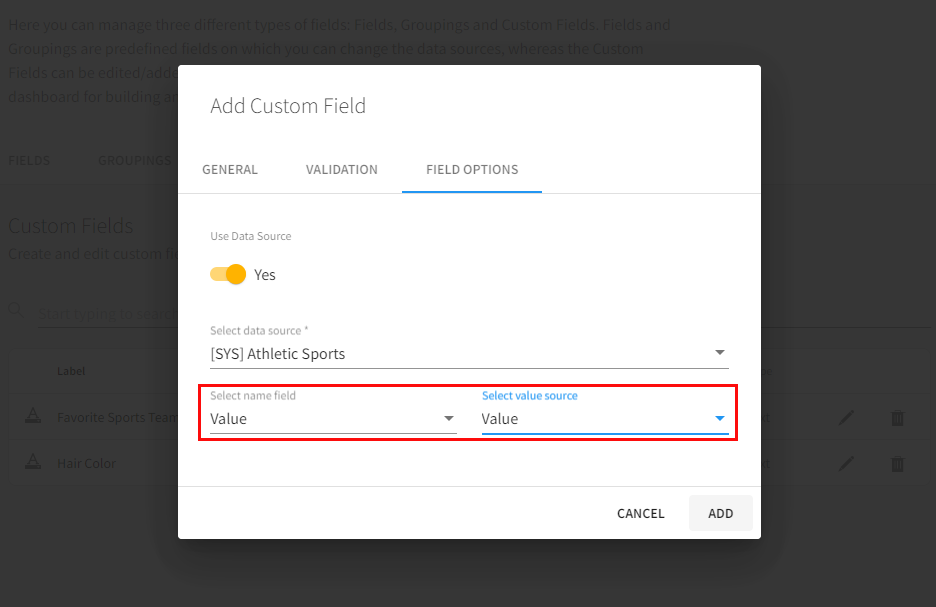
After setting validation options, click the Field Options tab. By default, a Data Source is required. Select the appropriate data source from the Select Data Source dropdown.
Select the Field Name and Value from the corresponding dropdowns. Click Add to create the custom field.
To modify an existing custom field, enter the Custom Fields tab and click the Edit/Pencil image in the row of the field that should be modified. On the General tab of the pop-up, Label, Description, Required toggle, and the Default Value can be edited.
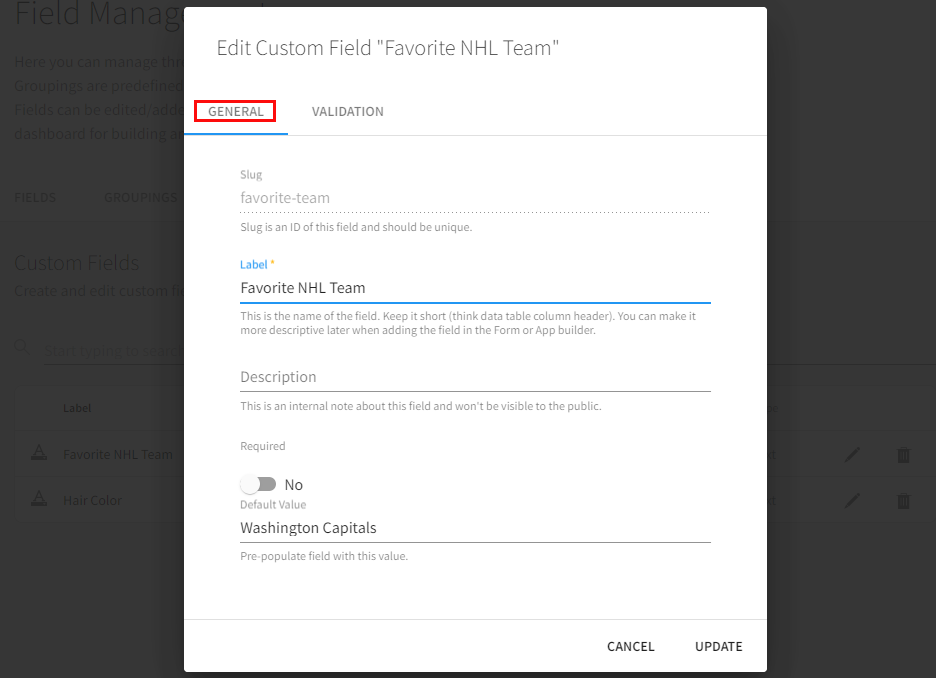
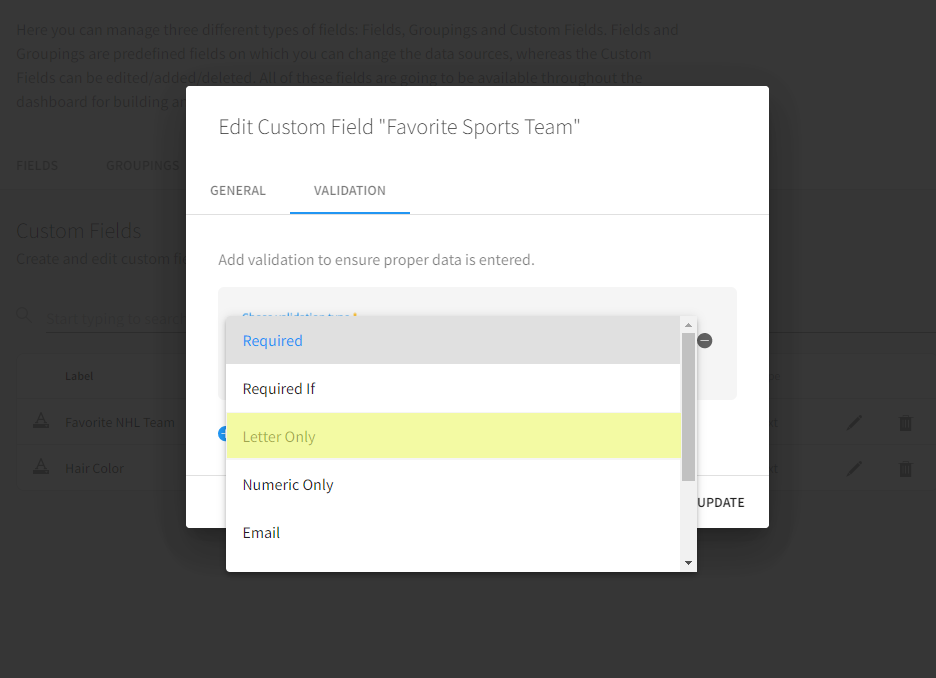
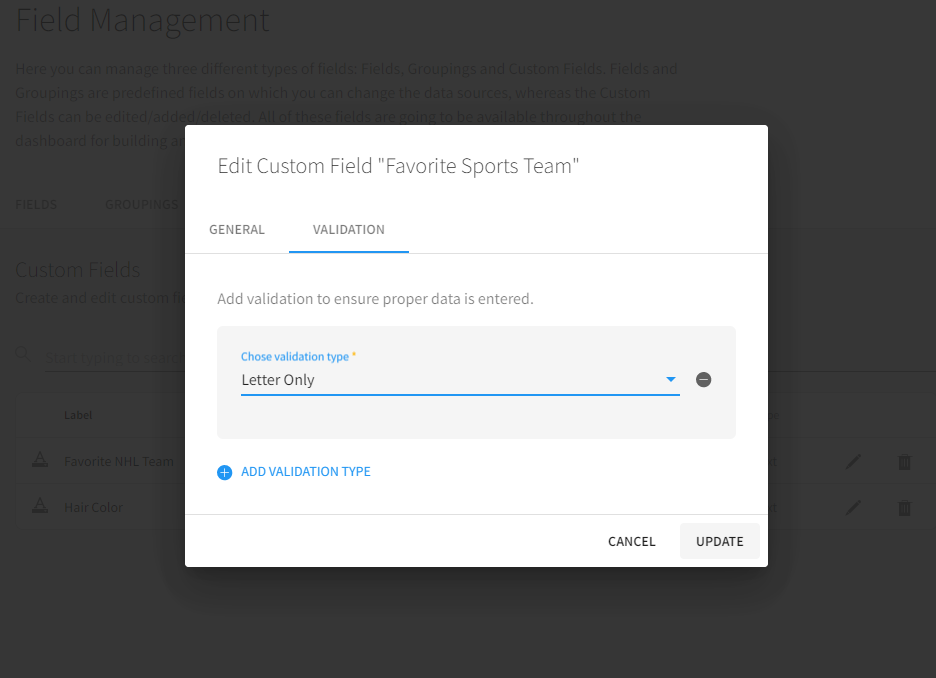
In this example, the Label and Default Value are being updated and the response will now be Required. Additionally, an internal Description is being added. If the applicant's response to this question should be validated, click the Validation tab.

Select the desired validation type by selecting it from the menu. The validation chosen in this example will check that only alphabetic characters are entered. When all edits are complete, click Update.
API Configuration
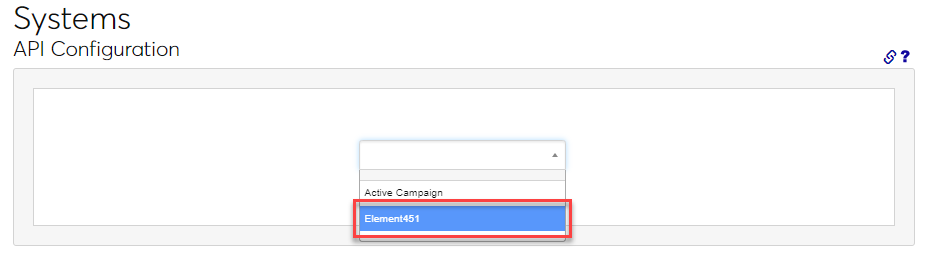
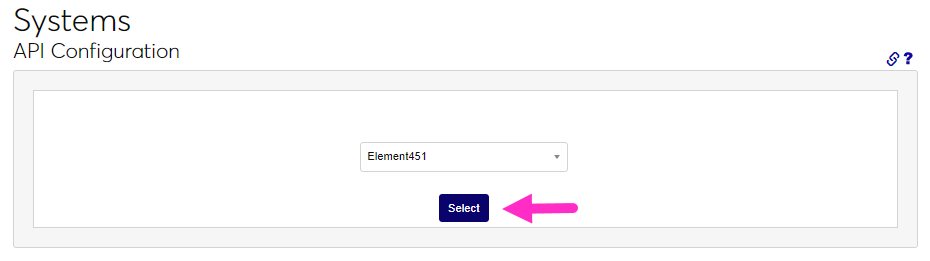
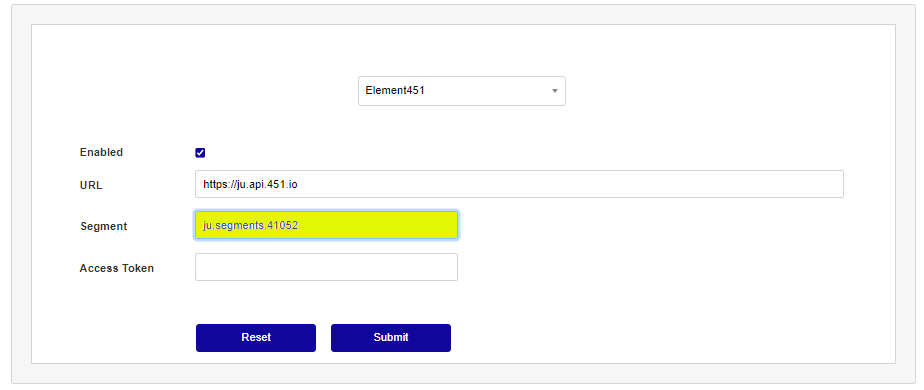
For member institutions on SONIS Version 3.8: when upgrading to SONIS Version 3.8, Element451 is added to the API Configuration dropdown. Enter the API Configuration utility from the Systems menu, choose Element451 from the dropdown, and click Select.
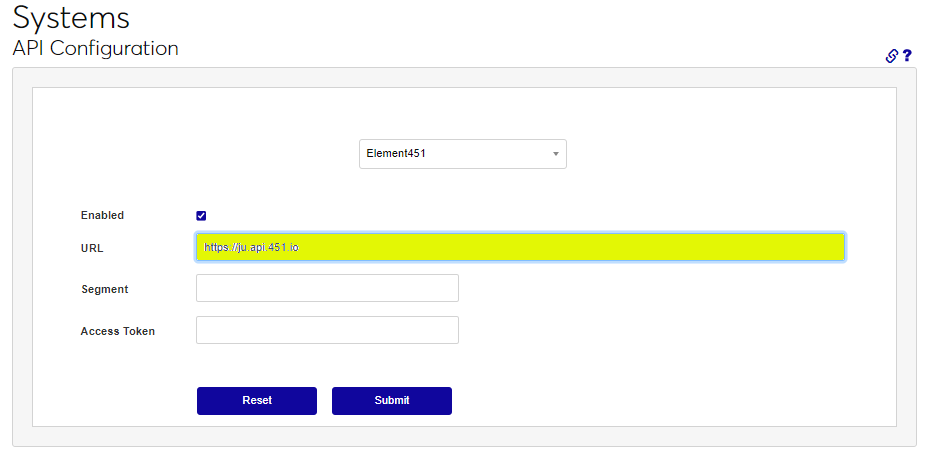
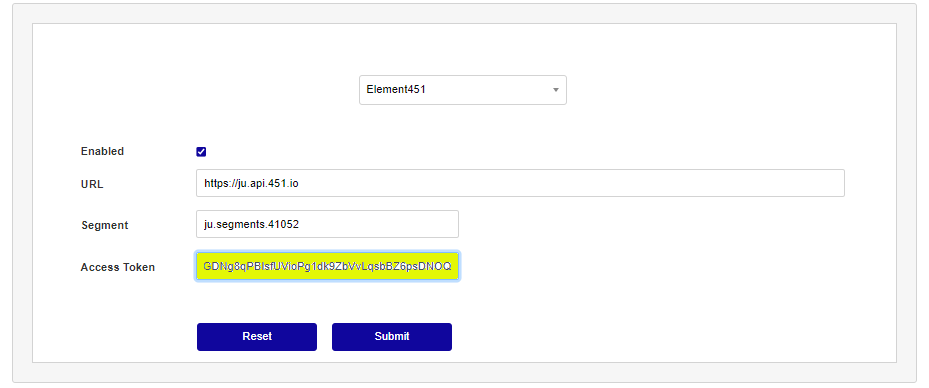
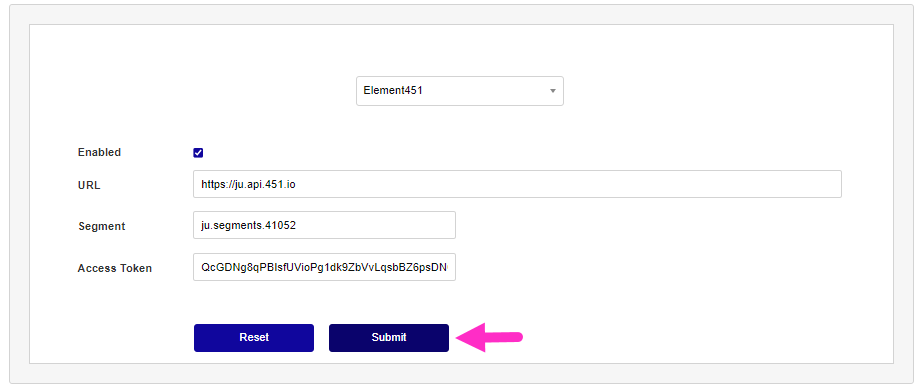
The connection information needed for SONIS to communicate with Element451 is entered on the following screen. Example data is entered for the purposes of this article. Each SONIS member institution will have unique values created by the institution or assigned by the Element451 support team, as indicated. Both Client ID and Access Token can be found on the institution's Element451 account settings page.
• The URL field has the following format, where "Client ID" is replaced with the Client ID from Element451: https://Client ID.api.451.io
•The Segment ID is unique to the institution and must be retrieved by emailing support@Element451.com or contacting the Element451 account representative to get the Segment ID. Example Segment ID: ju.segments.41052.
•The Access Token is unique to the institution and can be found similarly to the Segment DI. Example Access Token: QcGDNg8qPBIsfUVioPg1dk9ZbVvLqsbBZ6psDNOQ.
Click Submit to save the entries.
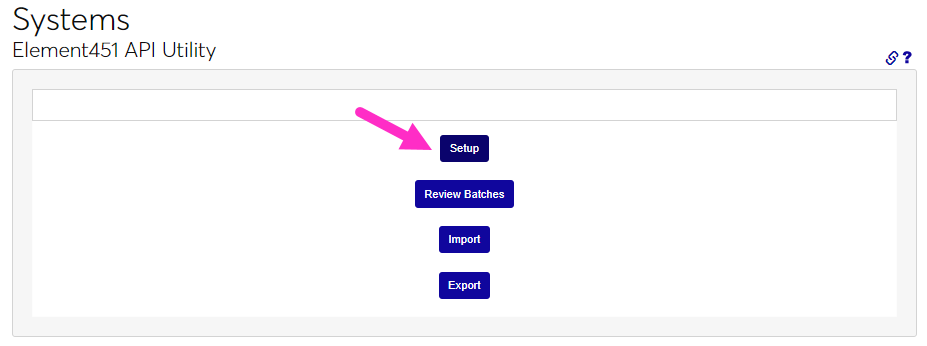
Element451 API Utility Setup
After entering the connection information, navigate to the Element451 API Utility from the Systems menu and click Setup.
The next screen displays a chart of the field Names from Element451, the associated SONIS Table and Column, and the Default Slug name. This is the Mappings page. Any custom slugs that were created will need to be associated with a data location on this mapping page. For example, if a custom or created field on the Element451 application asks about band interest, and should be saved to an otherwise unused field within SONIS, the slug associated with band interest can be added to this page. In this example, the sports interest slug from Element451 will be associated with the Home Address - Street 3 SONIS field. To add the Custom Slug click in the Custom Slug field associated with the field Name to be repurposed.
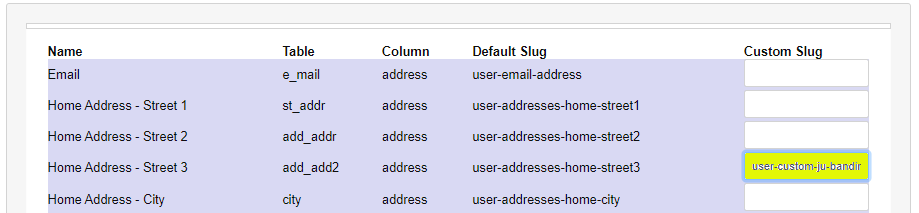
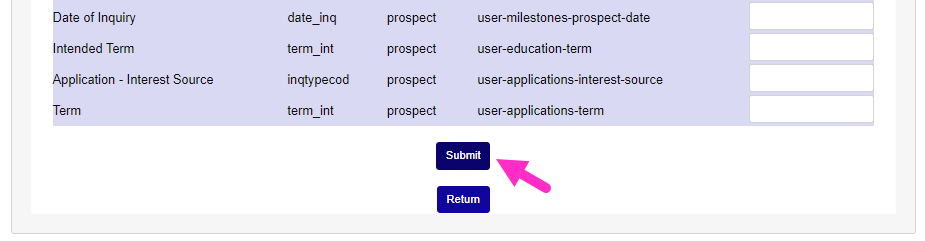
After confirming the appropriate mappings, click Submit to save any edits.
Managing Imports
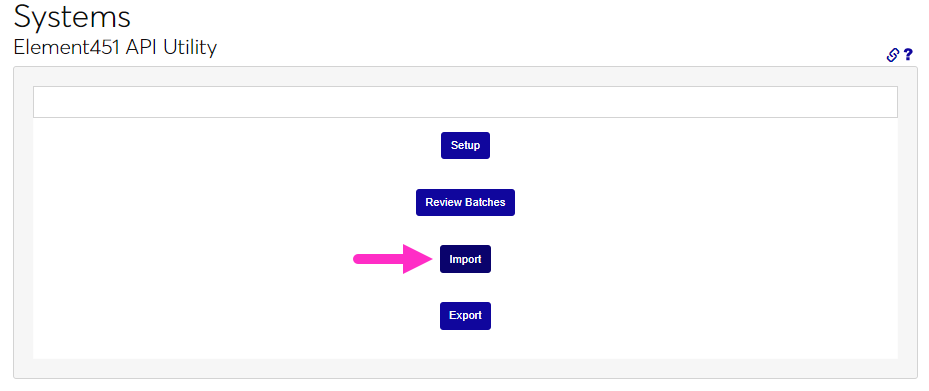
After set up is complete and any custom slugs have been defined in Element451, the Systems menu page Element451 API Utility is used to run an import on demand and view any errors in data that prevented users from being imported from Element451. Click Import to manually import the file. Some data issues that are encountered display as an error. Errors must be corrected in the Element451 portal to proceed with the import.
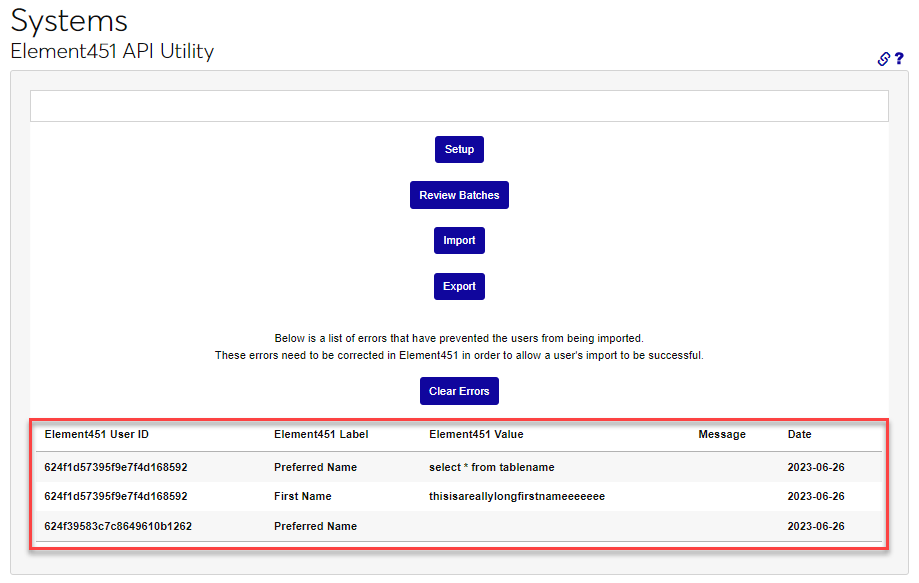
After resolving the errors in the Element451 portal, click Clear Errors to remove the error notifications. If the same errors display again after the process runs, they must be resolved differently. Contact Element451 support for assistance.
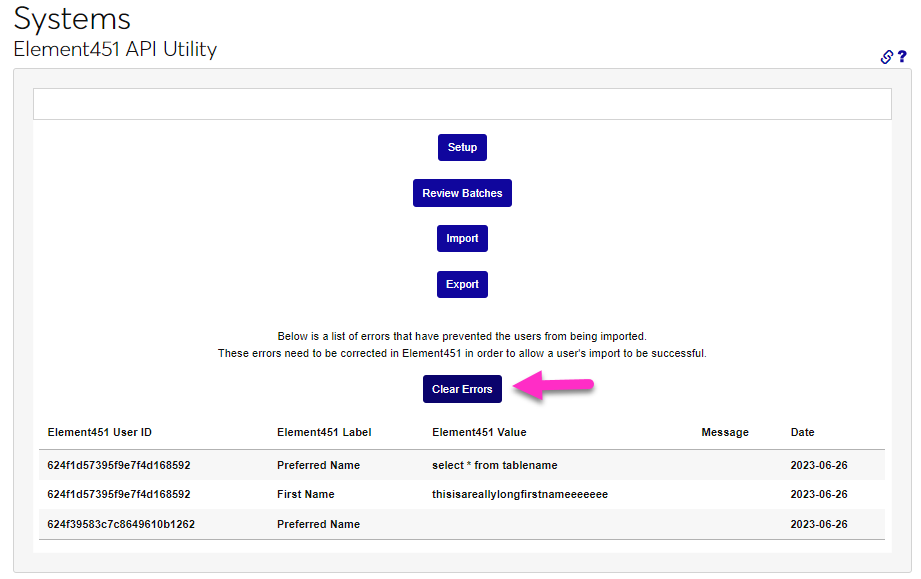
The Errors button provides the ability to review any errors within the received data that do not prevent the data from being accepted but do have a challenge associated with it, such as a blank required field or a campus that was defined in Element451 and does not exist within SONIS. If any rows in the file are correct, the import can proceed. These errors may also need resolution within Element451.
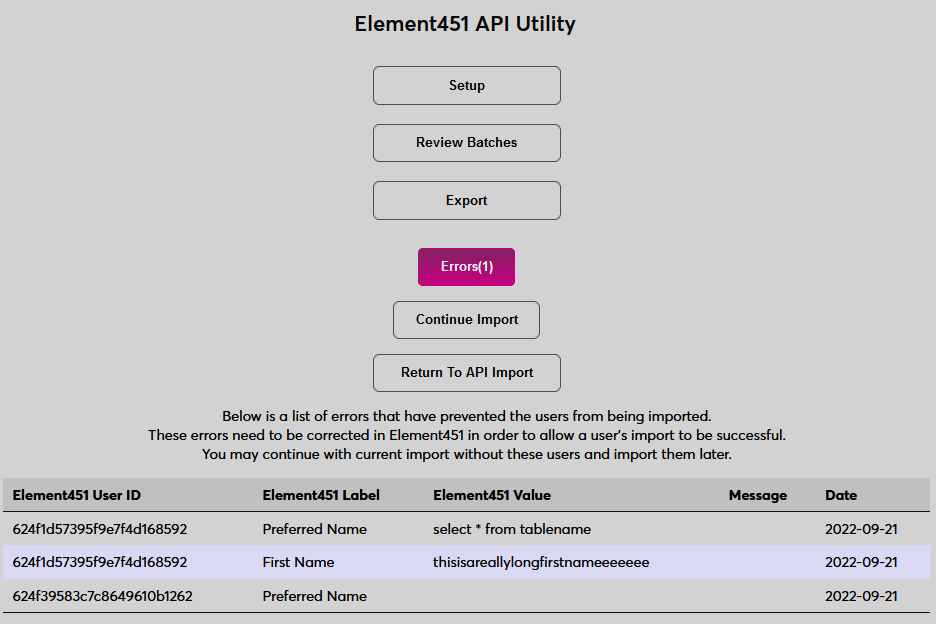
The errors will display in a pop-up window. After errors are resolved, or to proceed without resolving the errors, click Import to continue to the following import step.


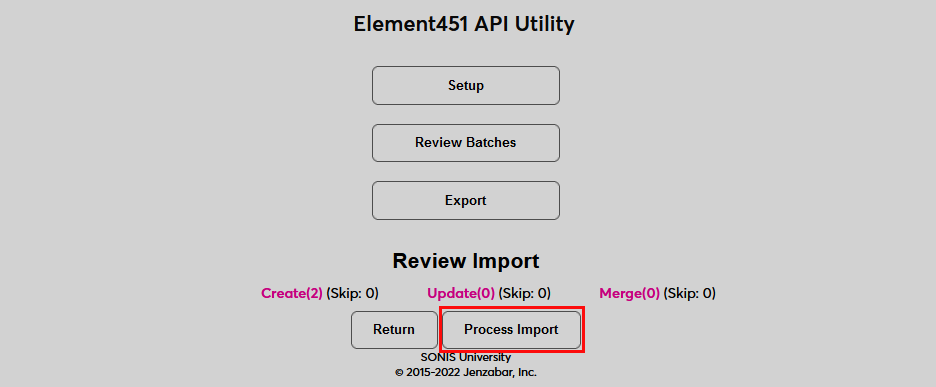
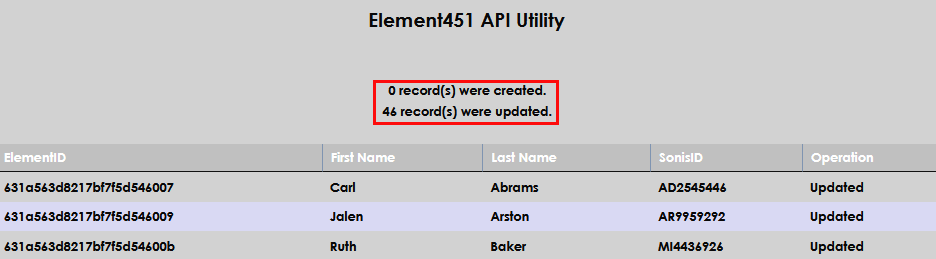
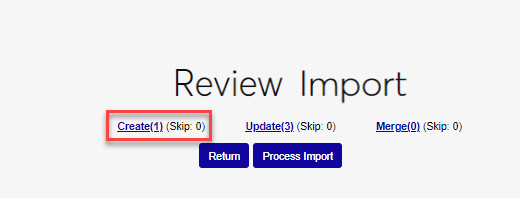
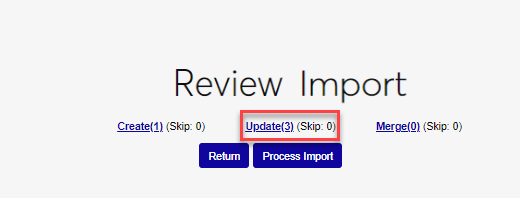
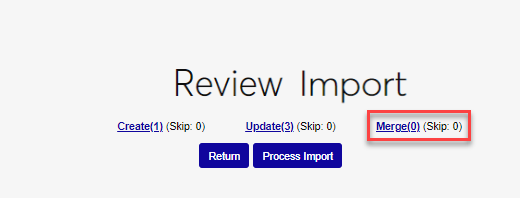
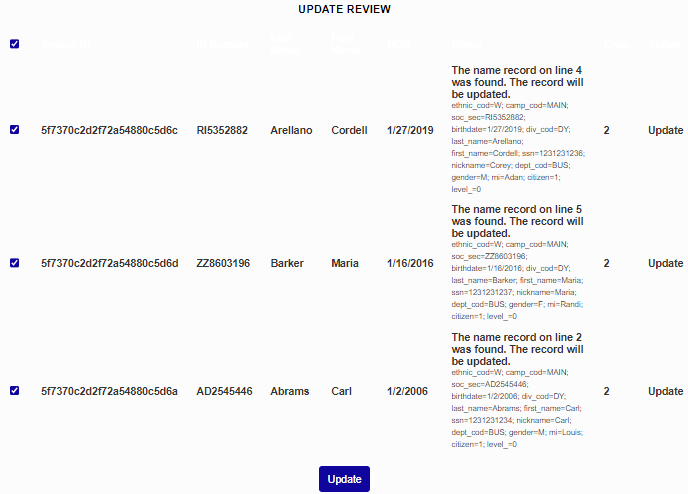
The following screen displays all users being imported as a sum of the Create, Update, and Merge links. Clicking on each link provides the breakdown of the users in that category. Within that breakdown, the individual user's data and values that will be created, updated, or merged are displayed as appropriate to the category link that was clicked on. A pop-up window opens, and the details of what values are being created, updated, or merged are displayed. Specific users can be unchecked if to exclude them from being processed.
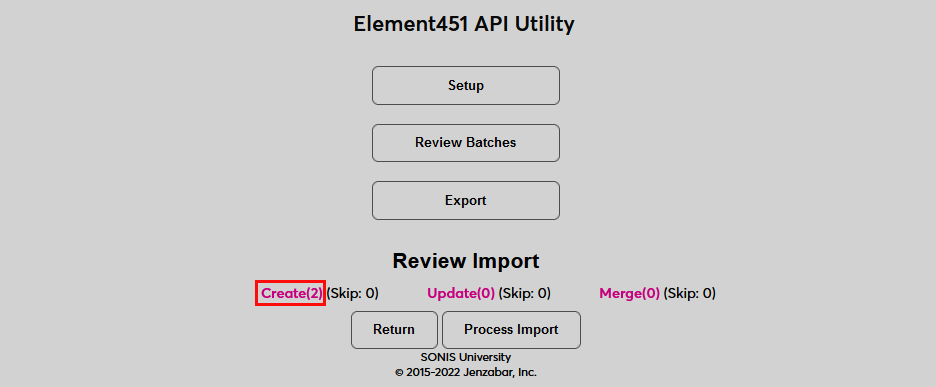
After all of the data has been reviewed as desired, click Process Import to complete the import process.
Exports
To create an Export and send it through the API integration to Element451, click on the Export button. The exported data will be the basic information that is needed to create a prospect record. If the user already exists in Element451 (uniquely identified by their email), any of the different basic data will be updated within Element451. If the user does not exist, Element451 will create them in the portal. A page will display detailing which records were exported and whether or not the record within Element451 was created or updated, with a summary of all actions at the top of the page.

API Batch Review
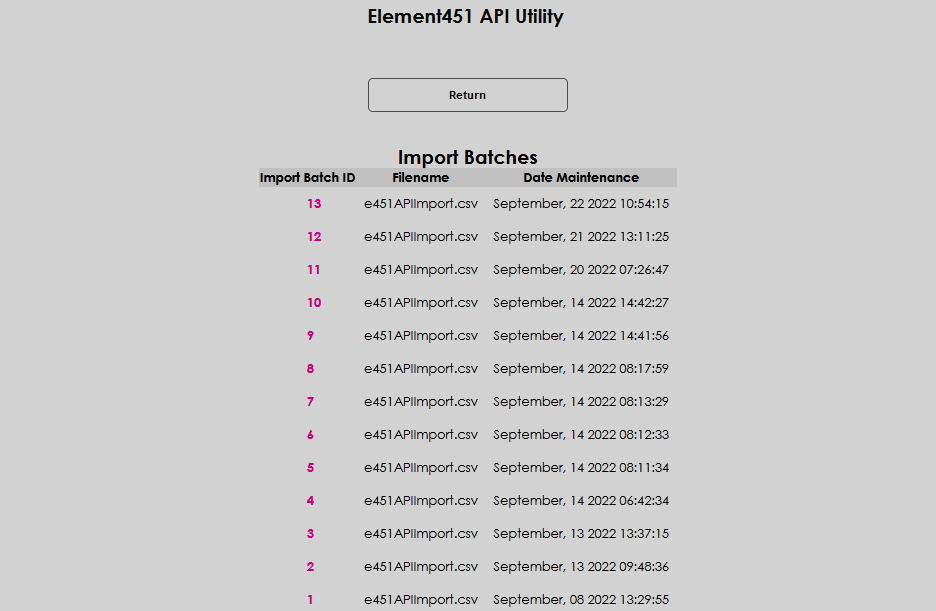
The data associated with an import or an export can be reviewed at any time. Enter the Element451 API Utility page from the Systems menu and click Review Batches. Buttons will display the options to review import and export batches and a button to return to the previous screen.


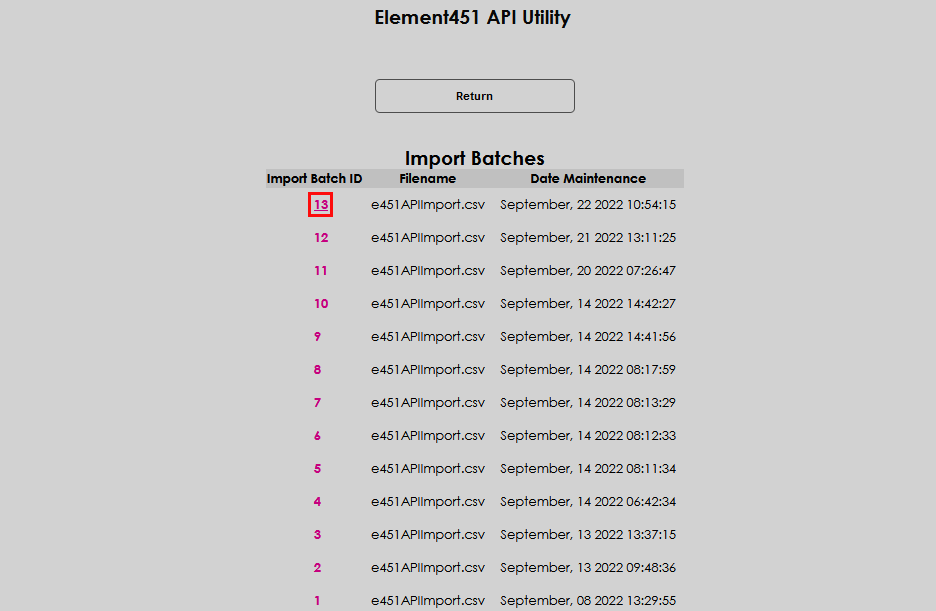
After clicking the desired review button a list of all associated batches will display, from most recent to eldest. The details of a batch can be reviewed by clicking the Import Batch ID.
Manual Import
Users
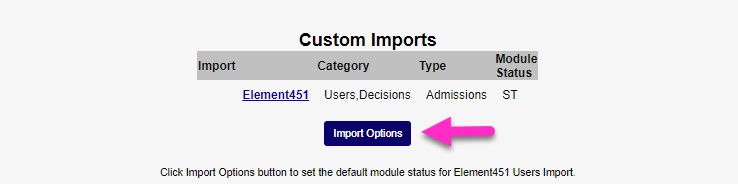
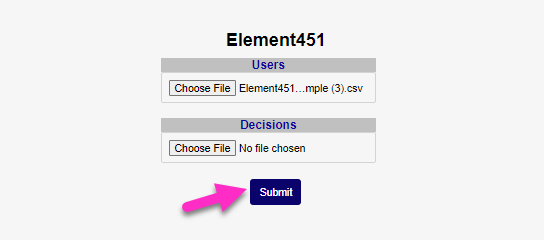
To manually import a file from Element451 to SONIS, navigate to the Element451 Utility in the Systems hub. Click Import Options to define the module status that will be assigned to the individuals included in the batch. Click Submit to save the entry.


Click the Element451 link.
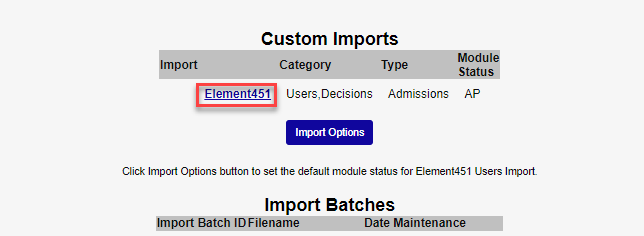
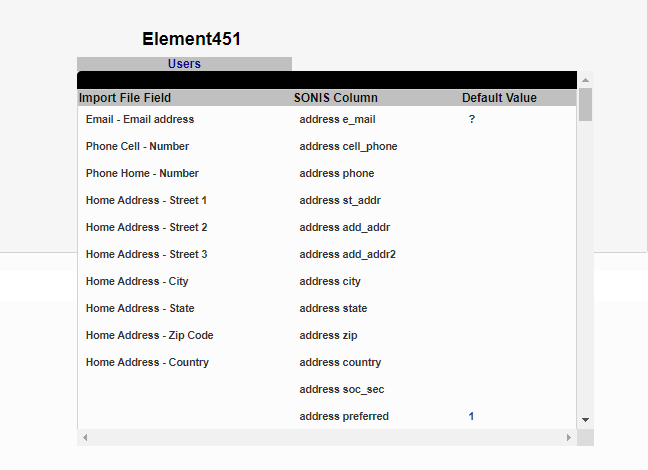
Two types of files can be imported: a Users file, which would be an initial import of user data and/or a Decisions file, which would include users who have previously been imported in a Users file and contains the decisions made on those users. On the following page, administrators can mouse over the Users and/or Decisions text to see the fields that are included in the import.

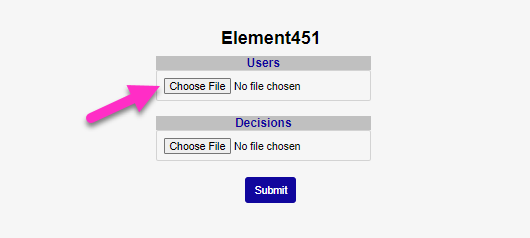
Click Choose File in the appropriate file area to locate and select the Element451 import file on the local system. In this example, a Users file will be imported. Once the file has been selected, click Submit to continue.
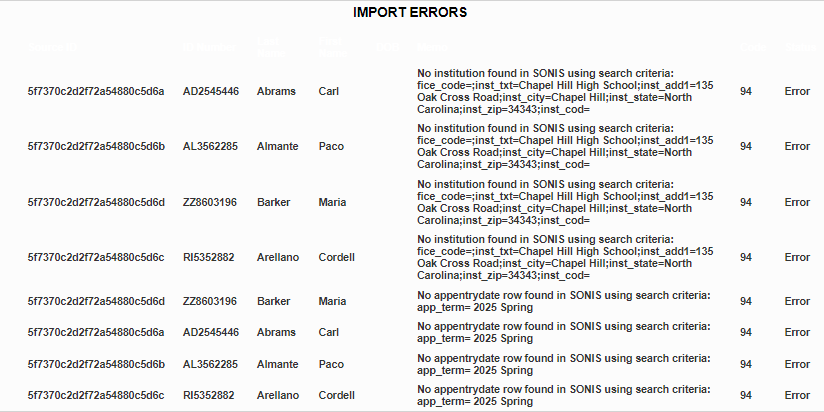
On the following page, Validate Import, buttons for Continue Import and Errors(x) display. The Errors button displays the number of errors found in the file between the parentheses, if any. Click the button to review the errors. The errors will display in a new window. Correct the errors within the import file, Element451 and/or within SONIS, as appropriate for the error.
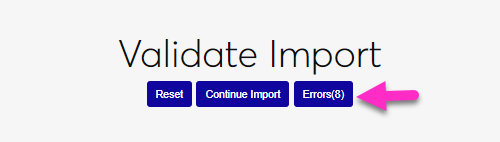
Once the errors have been corrected, click Continue Import to continue.
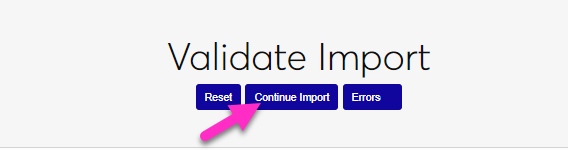
The administrator will be taken to another page where they can see the data that will be imported broken down into three distinct categories.
Create: This displays users from the import file who do not exist yet in the SONIS database and will be created when the import is completed.
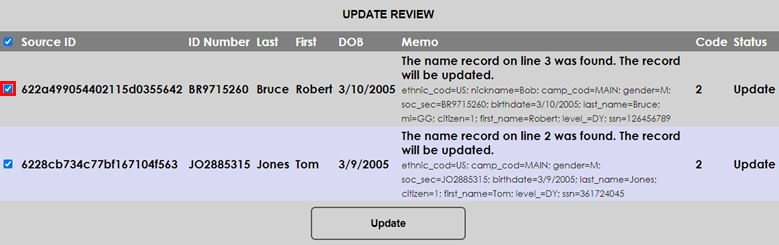
Update: This displays people from the import file who do exist in the SONIS database and will be updated based on the new data in the file when the import is completed.
Merge: This displays people from the import file who matched the last name and birthdate but not a person's first name in the SONIS database. The import will create new records in the SONIS database for these people. After the import is complete, administrators can review their data and optionally merge it through the Import Functions process.
To view the imported data, click on one of the three labels.
The user record will open in a new window. In the view window, individual records can be removed by unchecking the box and clicking Update. If records are unchecked, the Skip number will update. Click Process Import to continue.

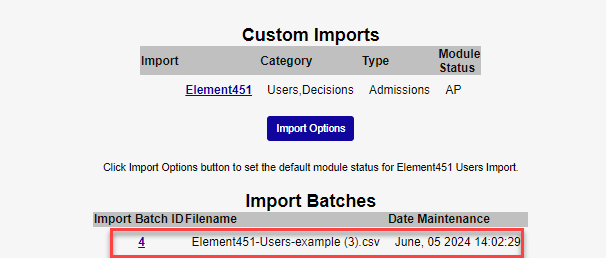
Once the import process has finished, the batch will be listed in the Import Batches table on the summary page. Click the Import Batch ID to view the imported individual fields.

Notification Assignment/Timed Task
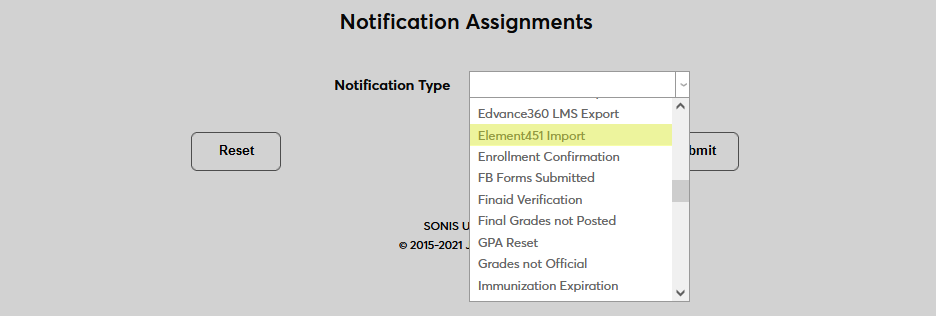
To begin setting up timed imports, navigate to Notification Assignments under the Systems menu and click Add.
Select Element451 Import from the Notification Type dropdown menu and click Submit.

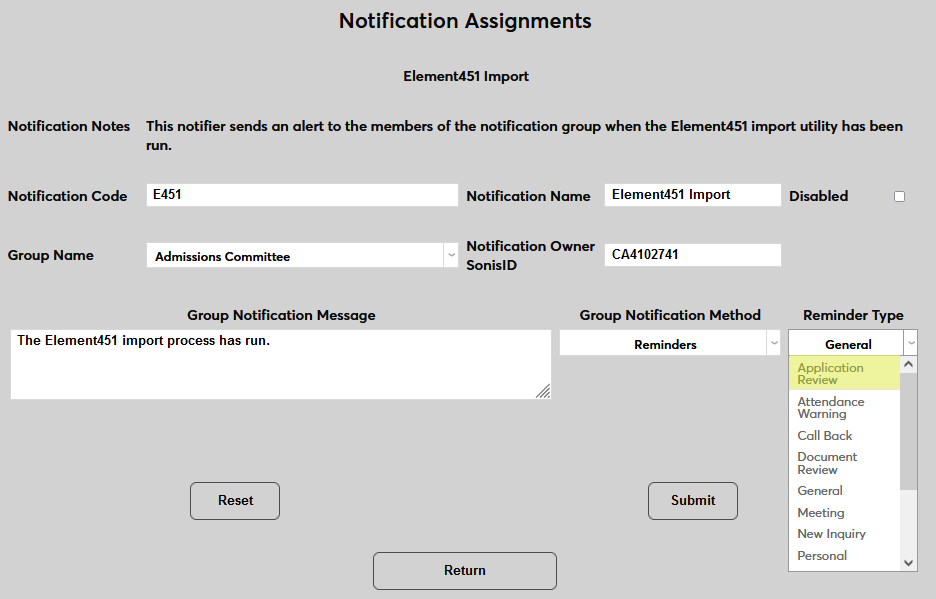
Next, create a Notification Name, a descriptor of the notifier's purpose with a 50-character limit, and a Notification Code, a shorter version of this name with a 20-character limit that the SONIS system will use internally to identify the notifier.
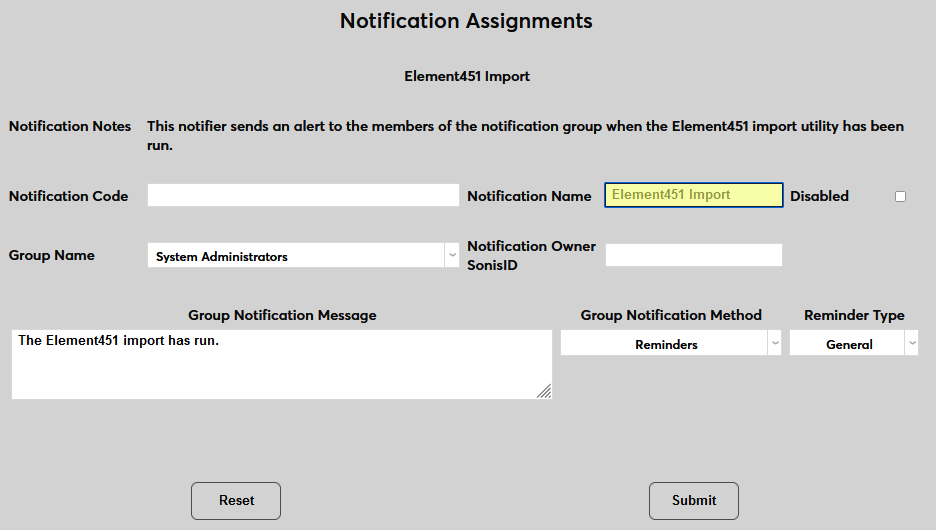
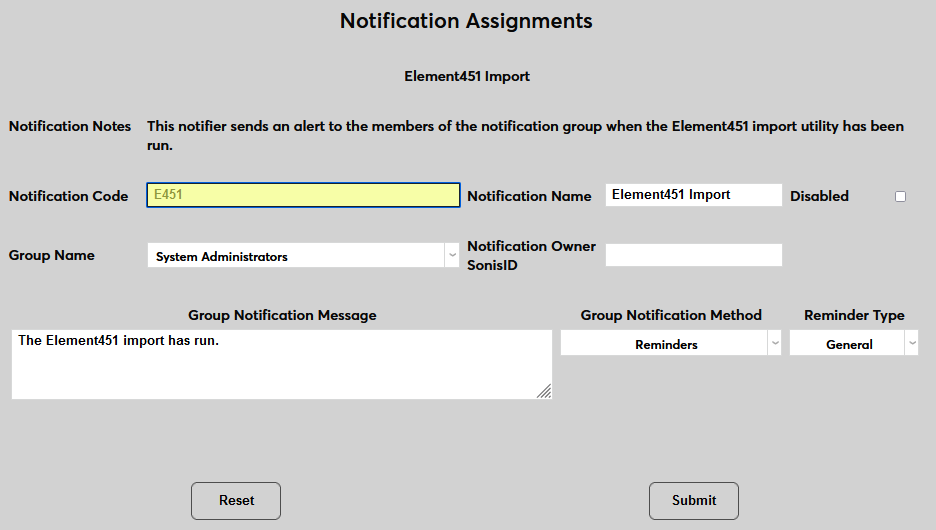
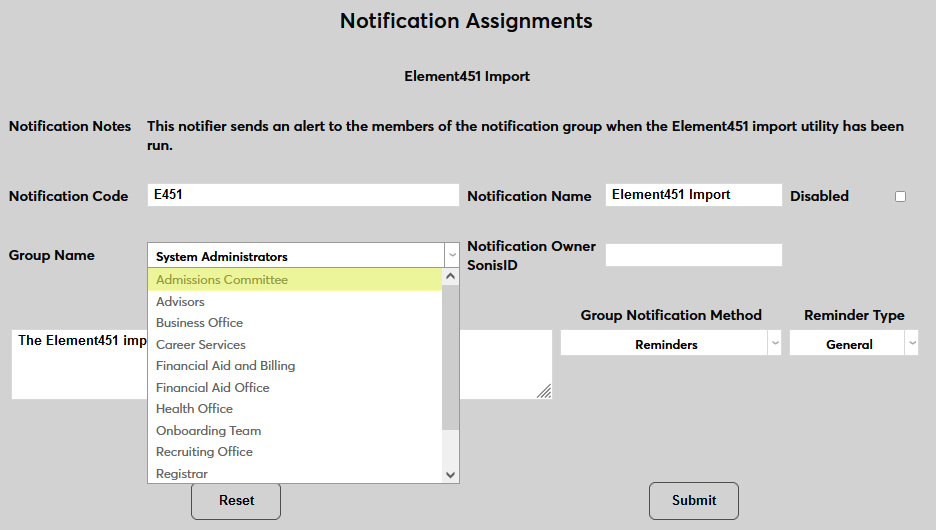
Select a group of staff members to receive the notification from the Group Name dropdown menu. Groups can be added and edited through the Table Maintenance utility.
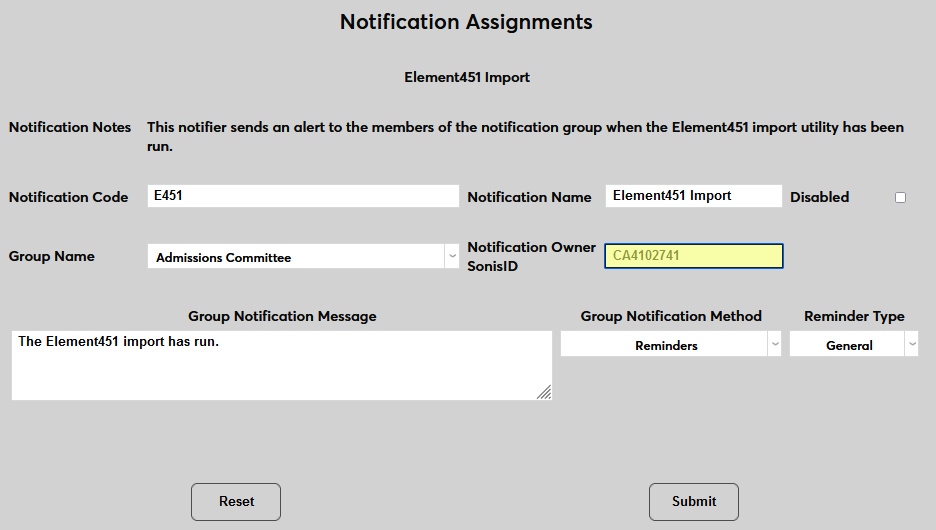
Enter the ID of the faculty or staff member managing this notification's ID in the Notification Owner SonisID field.
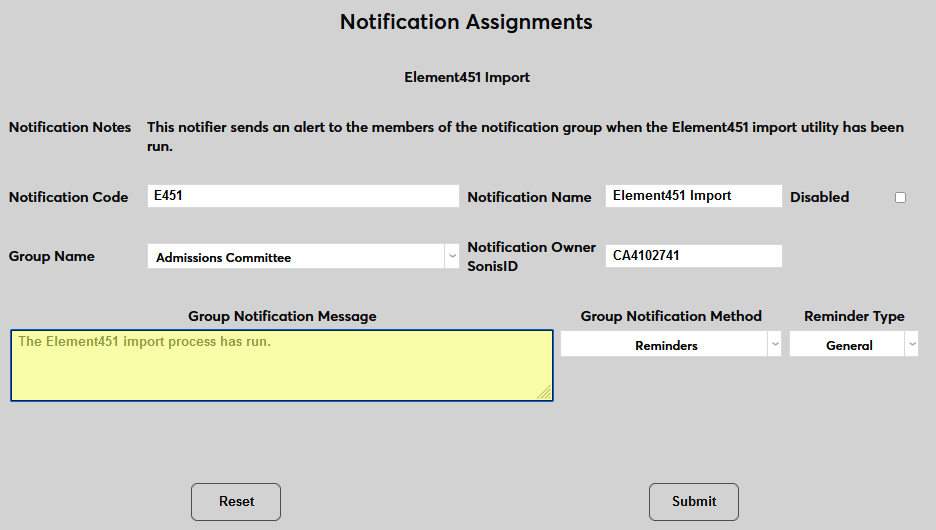
Create a Group Notification Message that will be sent to the group members when the task occurs.
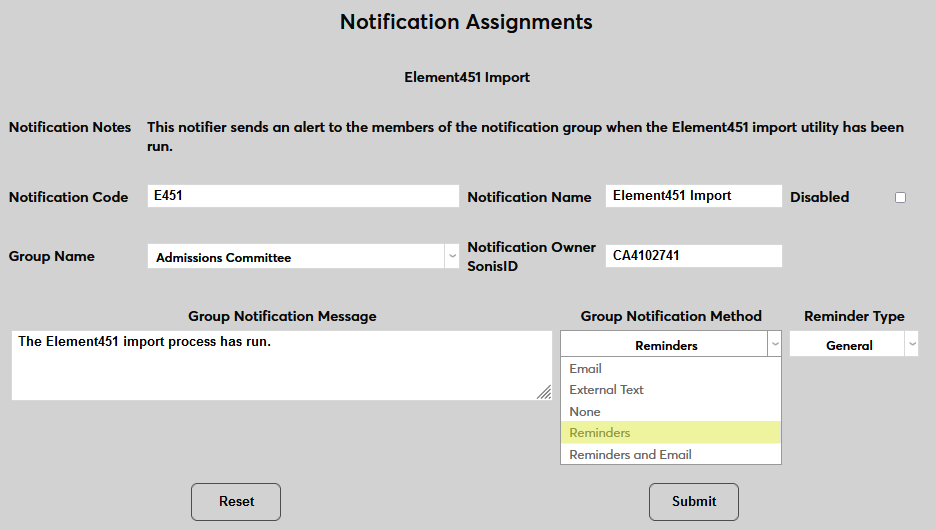
The Group Notification Method dropdown menu designates whether the group and individual users will receive an in-system reminder, an email, a text, or no notification when the process is triggered. The Reminder Type dropdown can change how the in-system reminder displays. This list can be created and edited via the Table Maintenance utility.
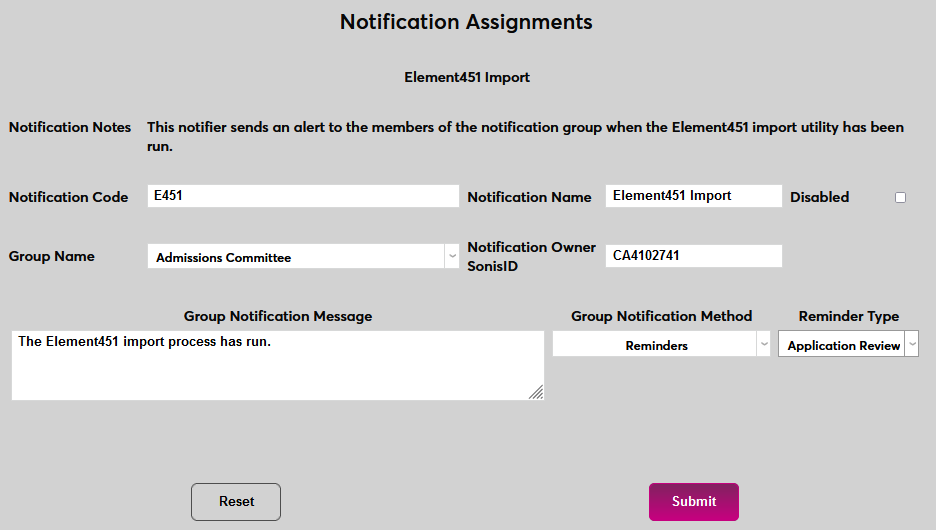
Click Submit to save the changes and create the notifier.
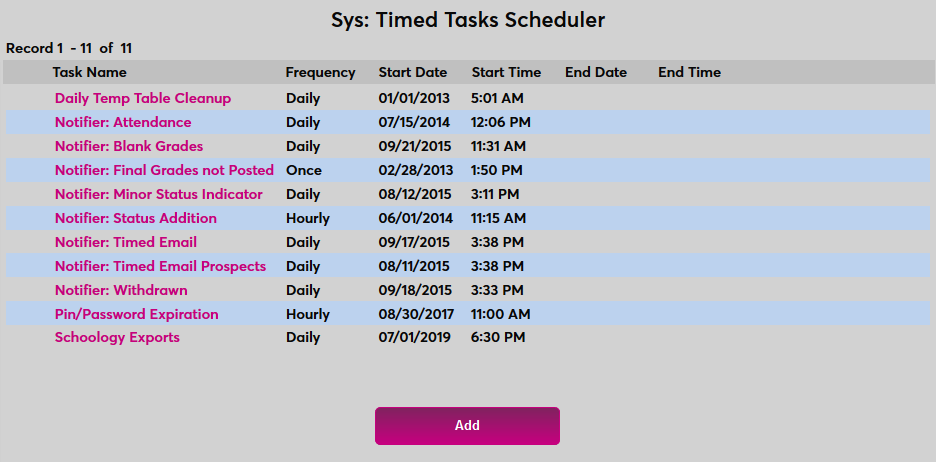
For the notifier to run, a timed task must be set up. Navigate to the Timed Task Scheduler under the Systems menu and click Add to create a new task.
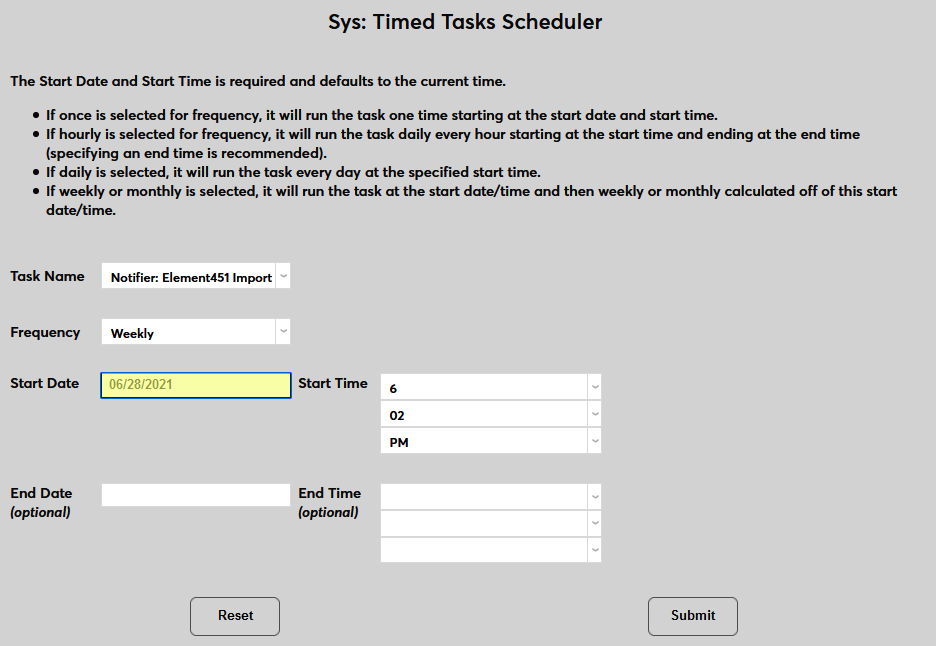
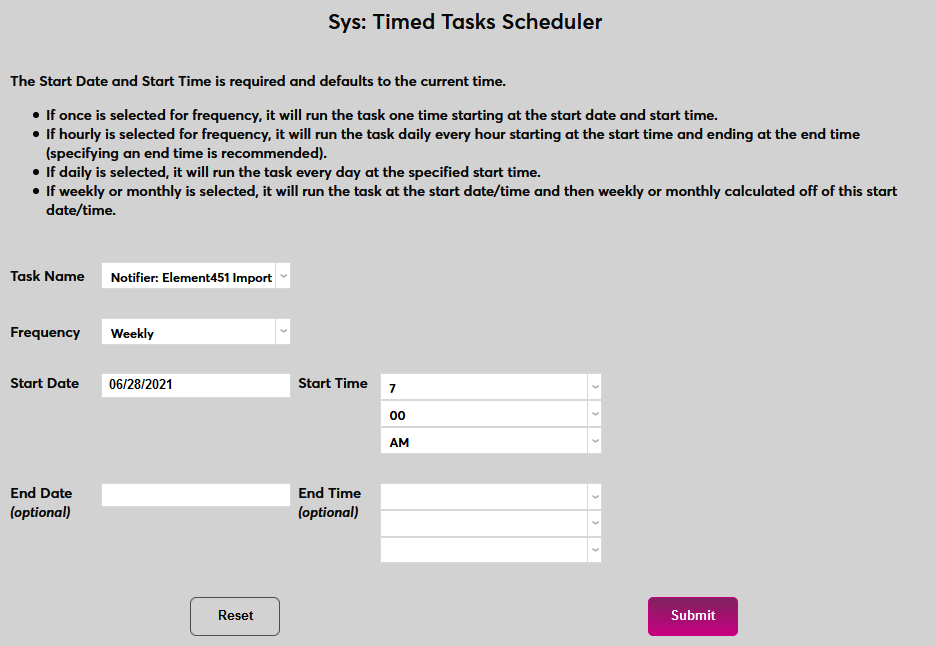
Select Notifier: Element451 Import from the Task Name dropdown menu.
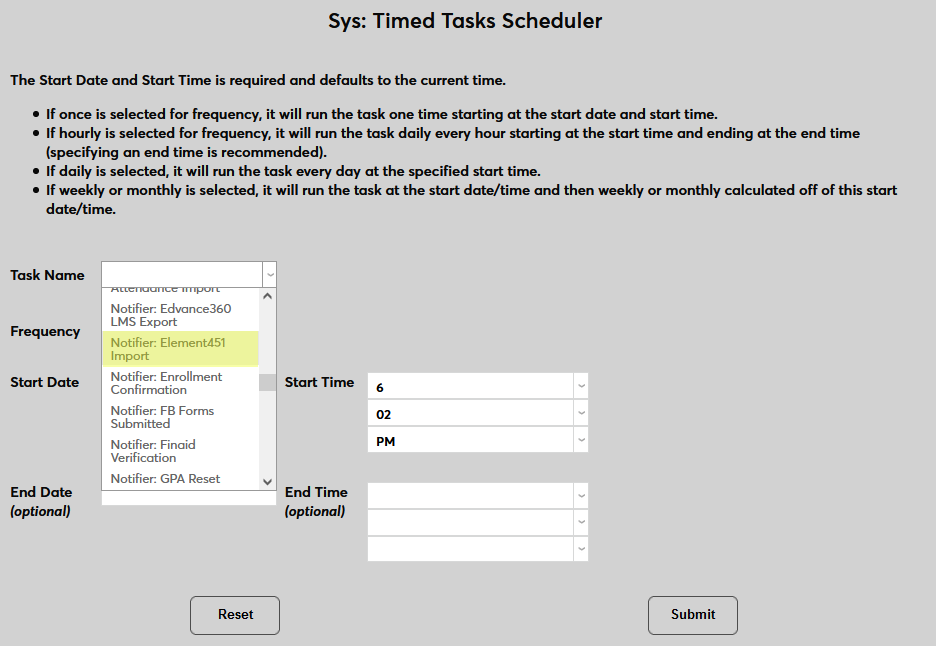
Select how often the task should occur with the Frequency dropdown.
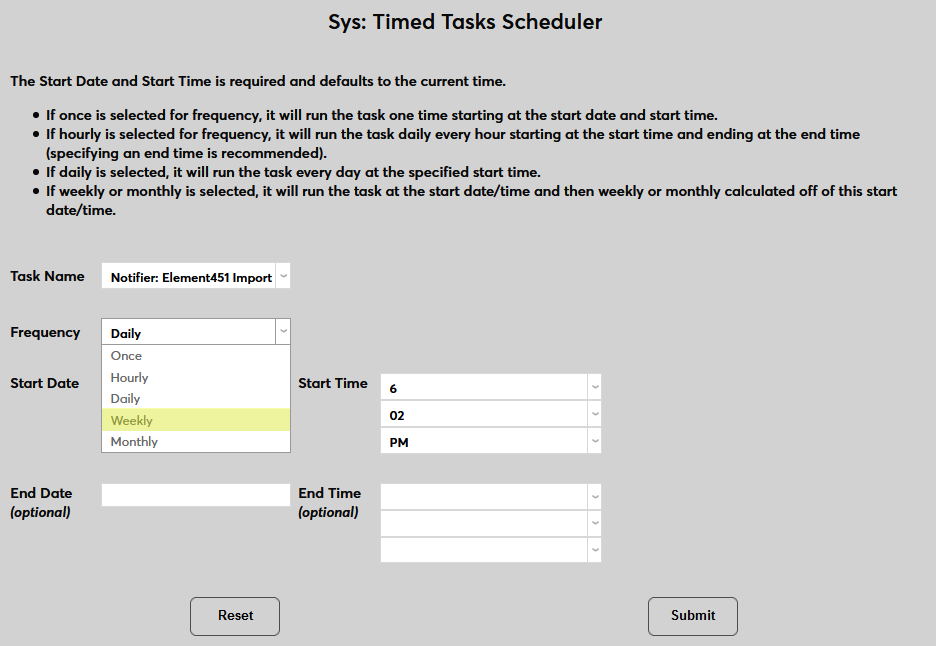
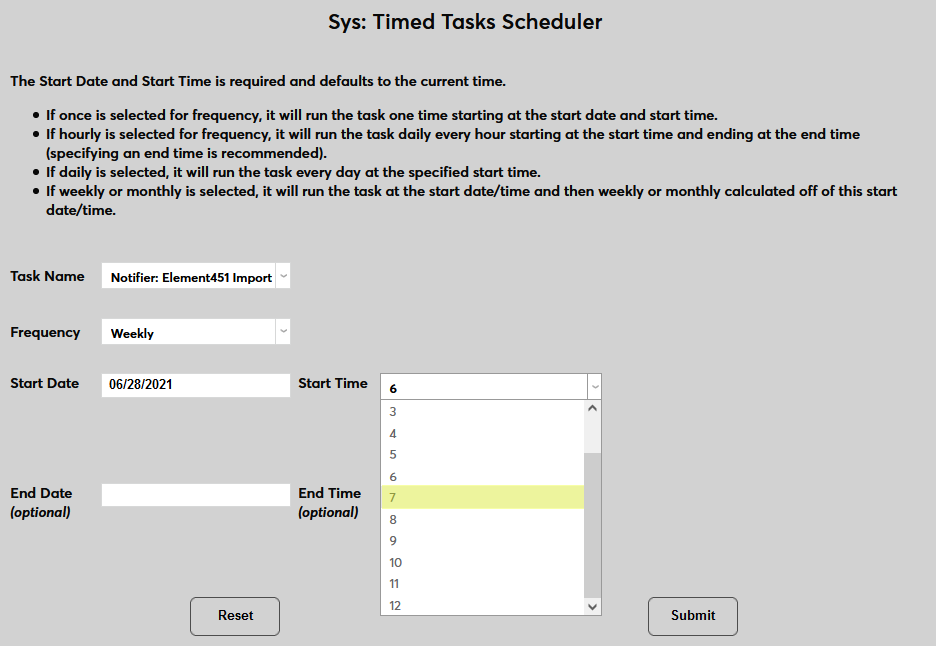
The Start Date and Start Time will automatically be set to the current date and time but can be changed to suit individual preferences. The End Date and End Time are optional.
Click Submit to save the changes and activate the timed task.
File management
The automatic process will look for the oldest file of each type (Users and Decisions) that has not yet been imported and import those files. Once files have been transferred to SONIS, they will be renamed on the SFTP server with a .imported extension, preventing them from being imported more than once. The files are then transferred to the SONIS Batch Folder, which can be downloaded in case they need to be edited and manually re-imported.

Merging Data
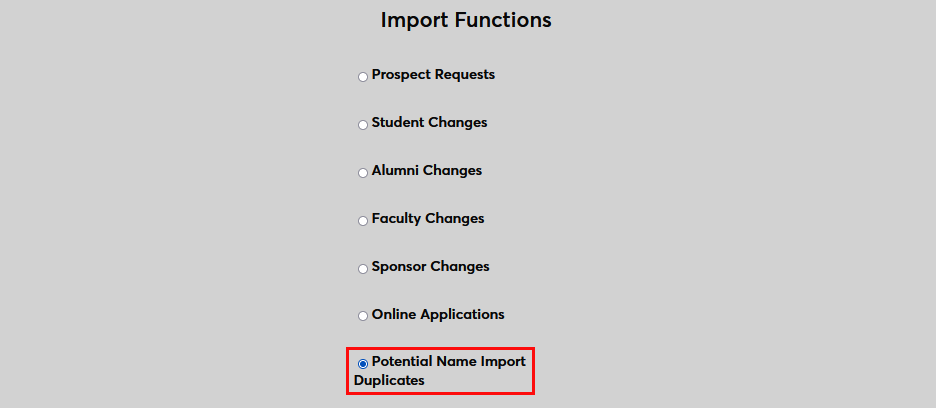
Once data has been processed as a Merge, either automatically or manually, that data must be merged using the Import Functions utility under the Systems menu. A merge occurs when the last name and birthdate match, but the first name does not match, and the Element ID is not found. When potential merges are outstanding, an option labeled Potential Name Import Duplicates will appear on the Import Functions page. Select this option to continue.
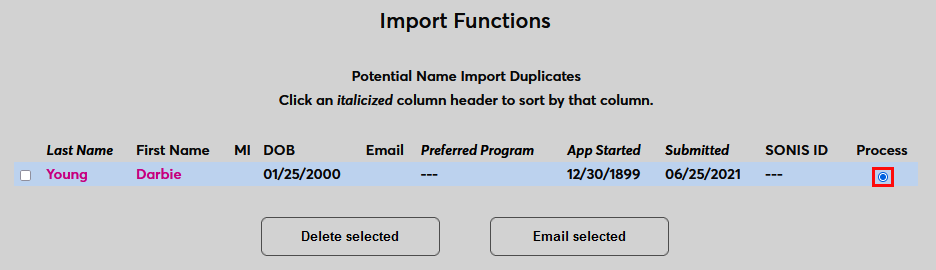
On the following page, select a record to Process.
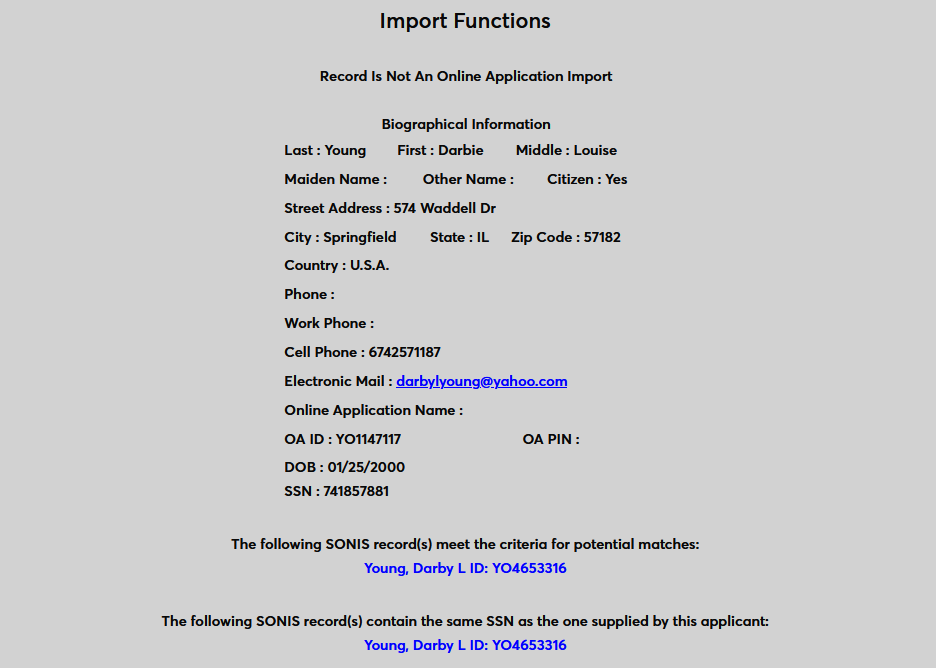
As with other Import Functions pages, the top of the page includes the Biographical Information of the latest record along with the SONIS record that it matches.
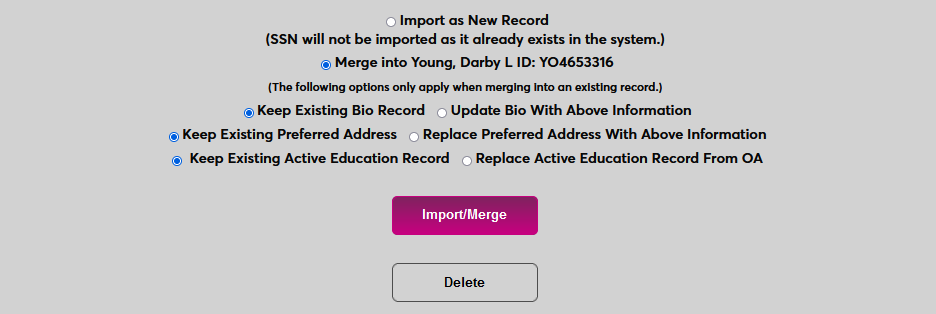
At the bottom of the page, the administrator can choose to Import as New Record or to Merge into the existing record. If merging, choose whether to Keep the old data or Replace it with the new data.
In this example, the biographical and address records are identical so neither choice will matter. The only difference between the two records is that the first name was misspelled in the latest import, so the administrator should ensure that the previous biographical record is kept.
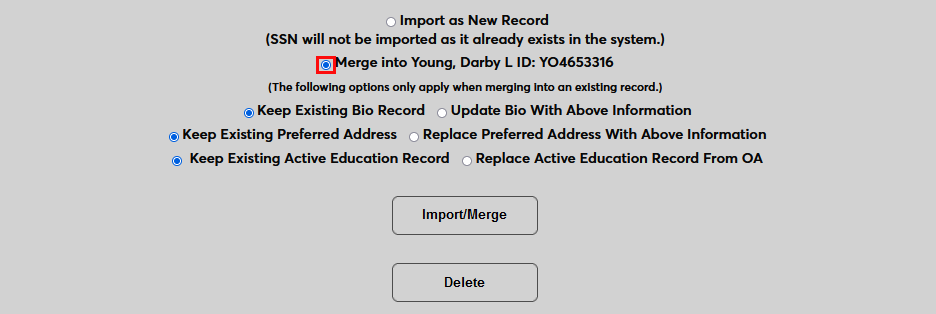
Once the proper selections have been made, click Import/Merge to complete the process.