Set No Class Dates
Overview
The Systems hub page, Set No Class Dates, allows administrators to mark days in the academic calendar year as dates on which there will be no classes. For example, winter and spring breaks, holidays, and in-service days. These dates are then automatically skipped when entering attendance through the Faculty portal portal and as an Administrator. These events are added automatically to the calendars in the Faculty and Student portals unless marked as internal display only. Multiple calendars with different no class dates can be created and associated with courses on the Section level.
Table Setup
No Class Calendars
Before events can be added, calendars must be created. Navigate to Table Maintenance and select No Class Calendars to begin.
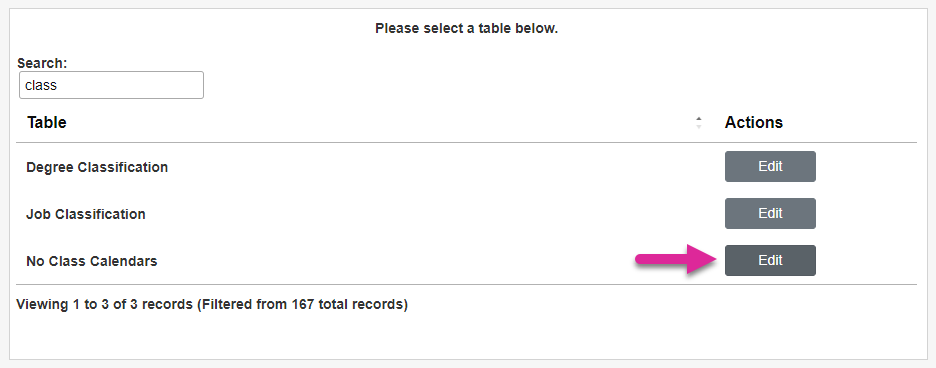
On the following page, click Add New Record to select an existing calendar to make edits.

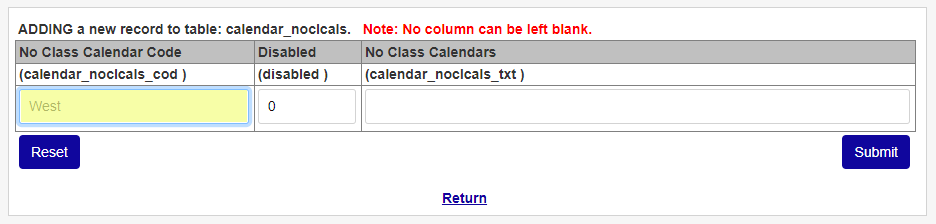
Enter a No Class Calendar Code that will be used to identify the calendar in the database. This field has a 10-character limit and cannot be edited once the calendar has been created.
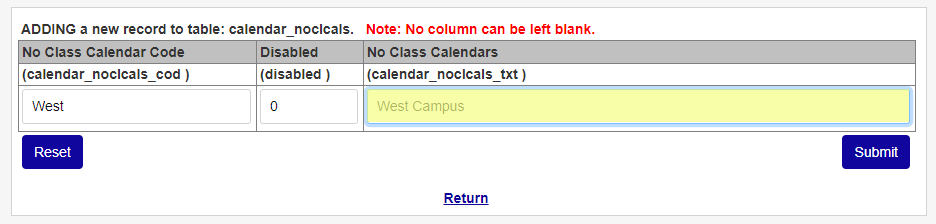
Enter an in-system display name for the calendar using the No Class Calendars field. This field has a 50-character limit and can be edited.
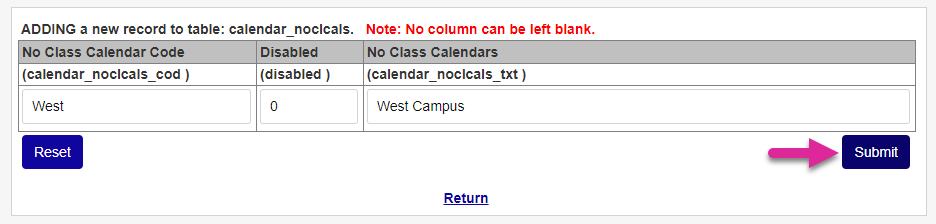
Click Submit to save the changes and create the calendar.
Event Types
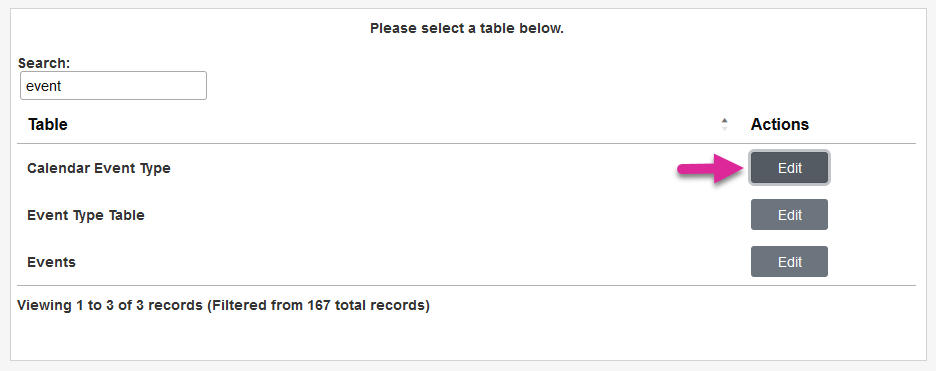
The Set No Class Dates utility also uses the Event Type designation. To set up event types, select the Calendar Event Type table. Click Add New Record or edit an existing record by clicking on the Code.
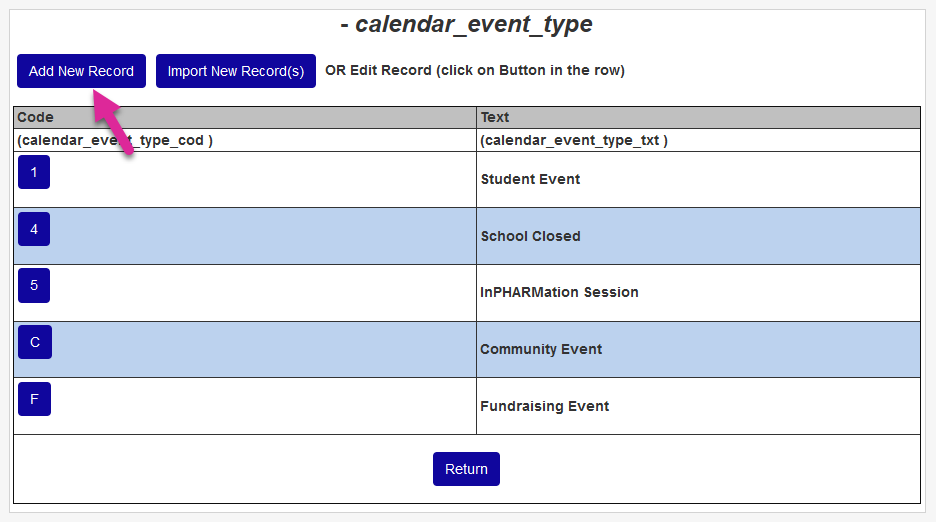
Create a Code for the event that will be used to identify it in the database and a Text name that will be displayed in Jenzabar SONIS.
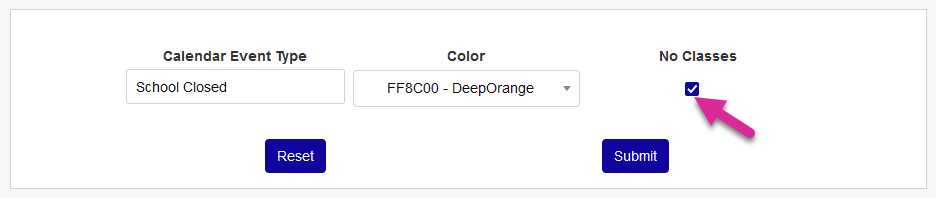
Once the appropriate types have been added, navigate to the Set Event Types utility. From here, administrators can select a color for the event type and designate it as a No Classes event. Only No Classes event types are available to select as an event in the Set No Class Dates utility.
Creating Events
To create a new no-class event, navigate to the Set No Class Dates utility in the Systems hub. Begin by naming the Activity.
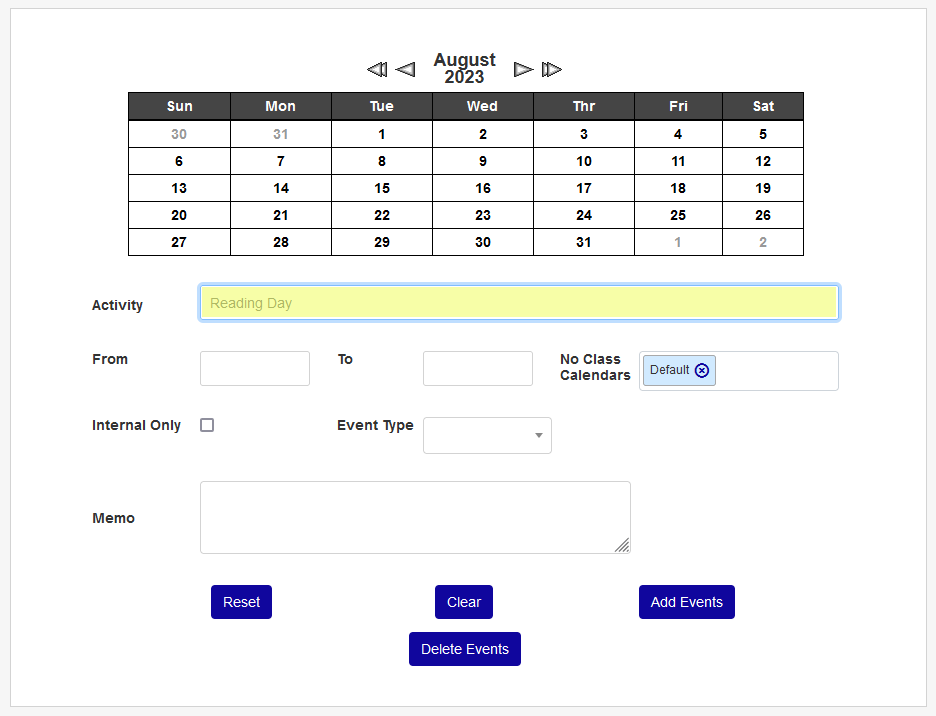
Next, enter a From date to designate when the event starts and a To date when it ends.
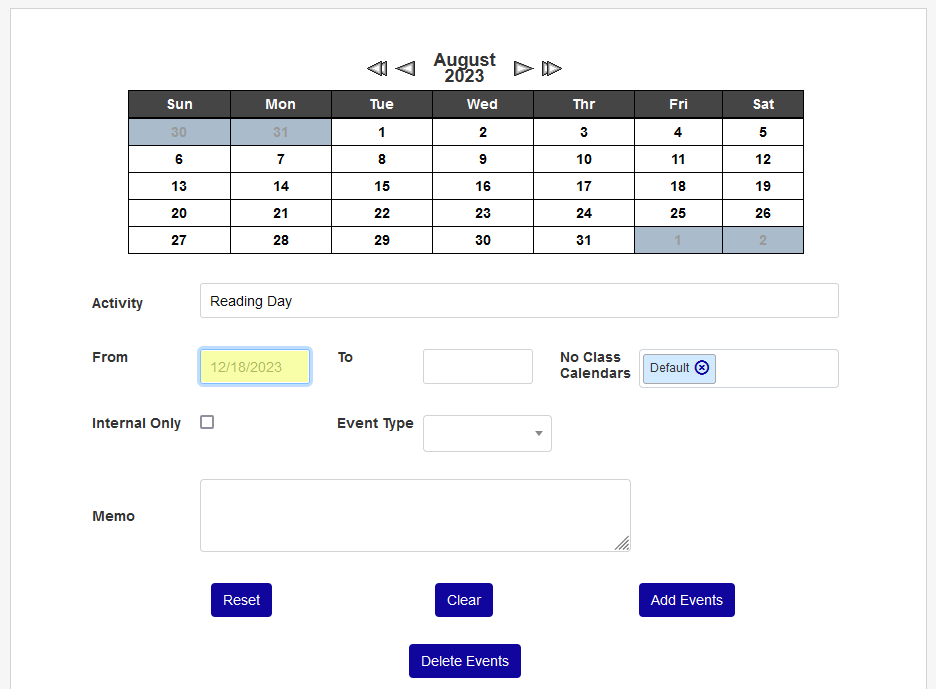

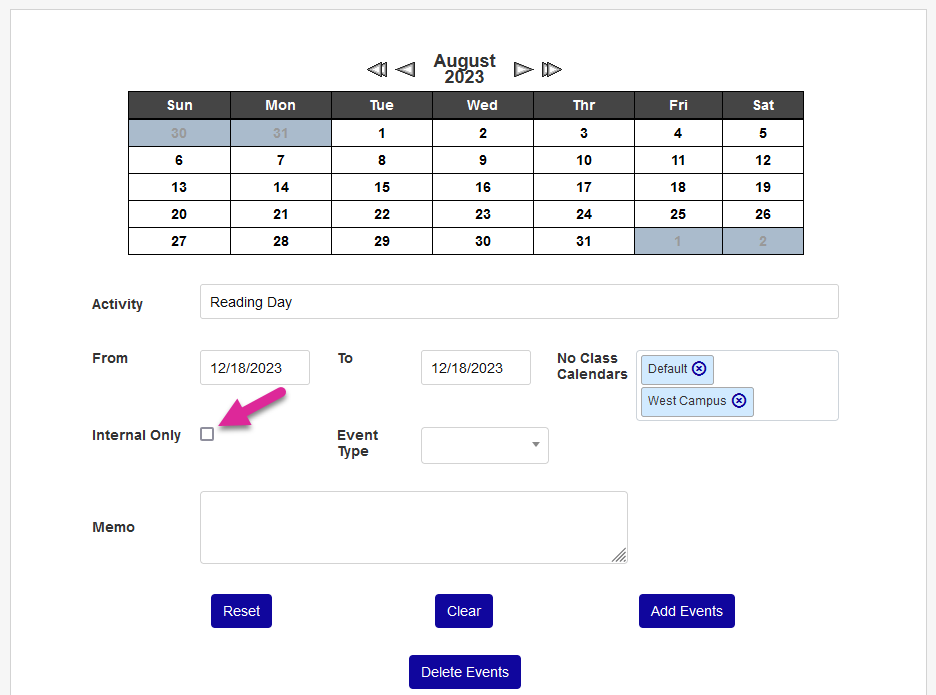
Associate the event with one or more No Class Calendars. If the Default calendar is selected, all new and existing course sections will recognize this event by default.

Check the Internal Only box to prevent the event from appearing in the portals and make it only viewable to administrators or leave it unchecked to add it to Student and Faculty portal calendars as well.
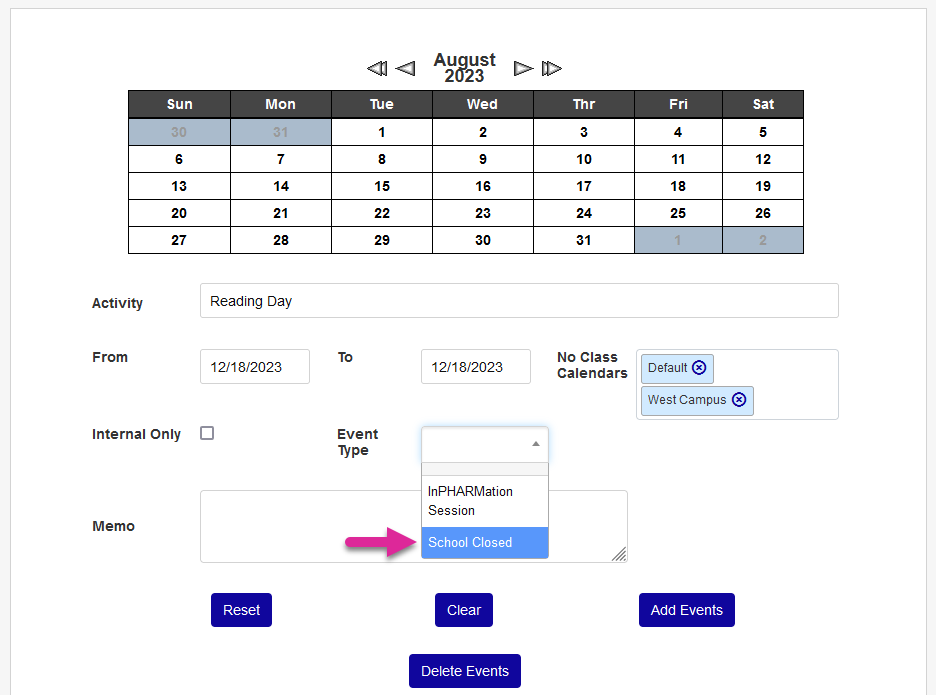
Select an Event Type for the event. As noted above, events can be color-coded by type and only No Classes events are available to select here.
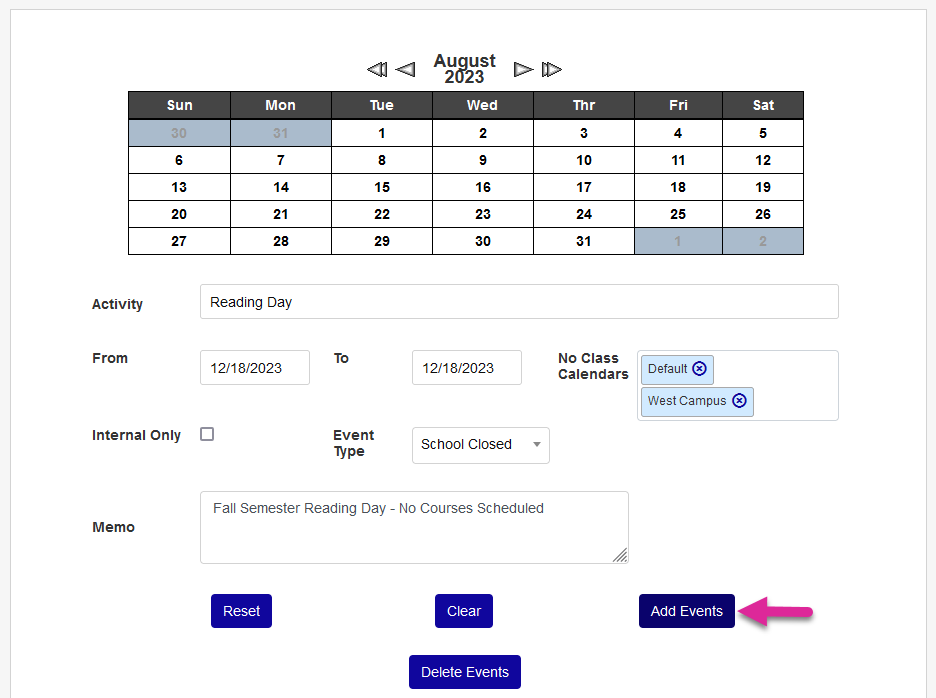
Add a Memo that other administrators can see when viewing this event or leave it blank if no memo is needed. Click Add Events to create the new event.
Viewing Events
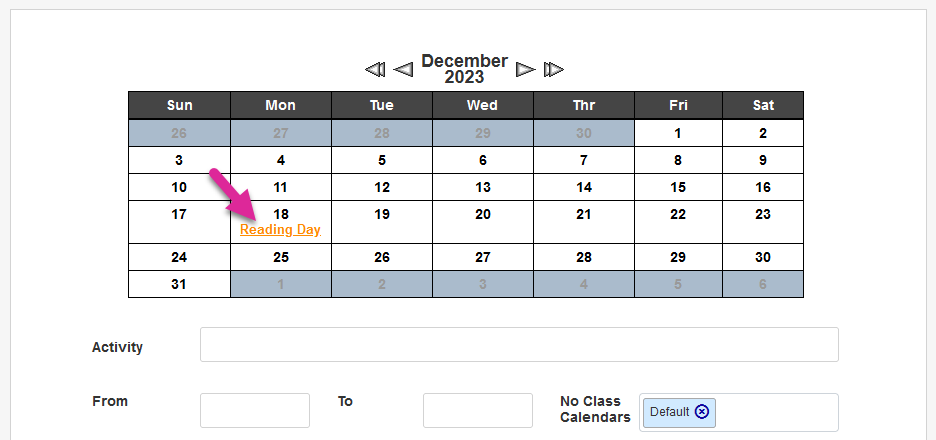
To see an event that's been created, scroll through the calendar at the top of the page. Click the link that appears on a date when an event takes place.
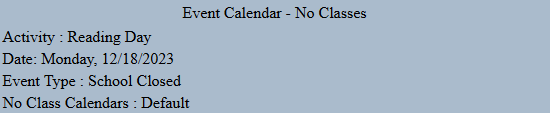
A new window will open displaying the details of the event.
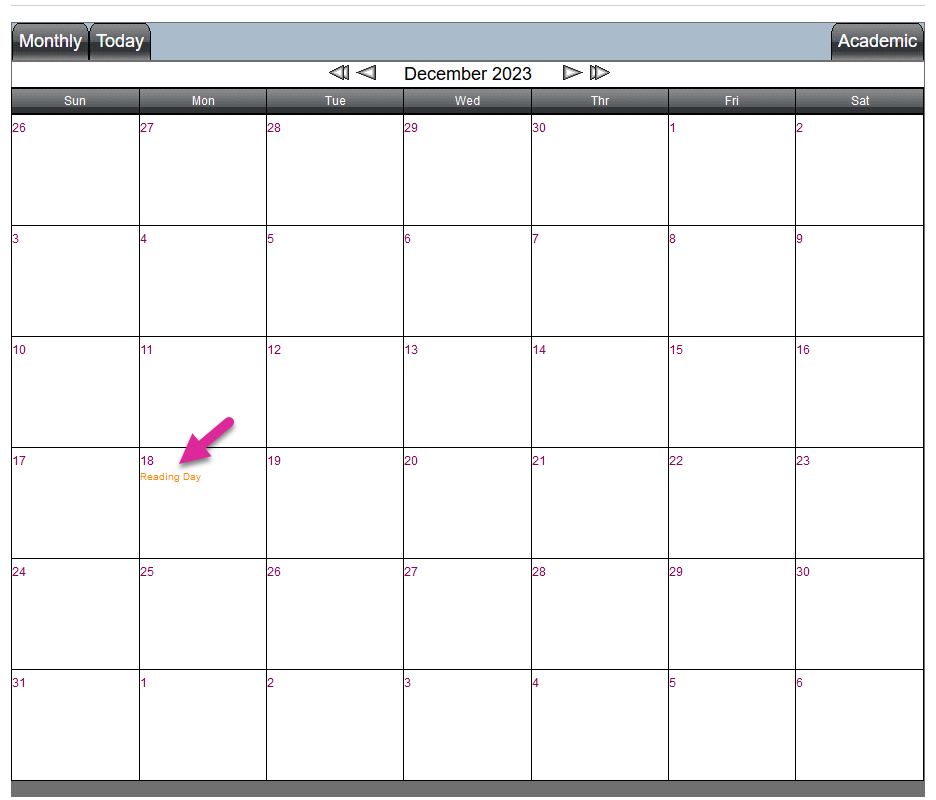
If the event was not marked as Internal, the same information will also appear on the Events calendar in the Student and Faculty portals.
Deleting Events
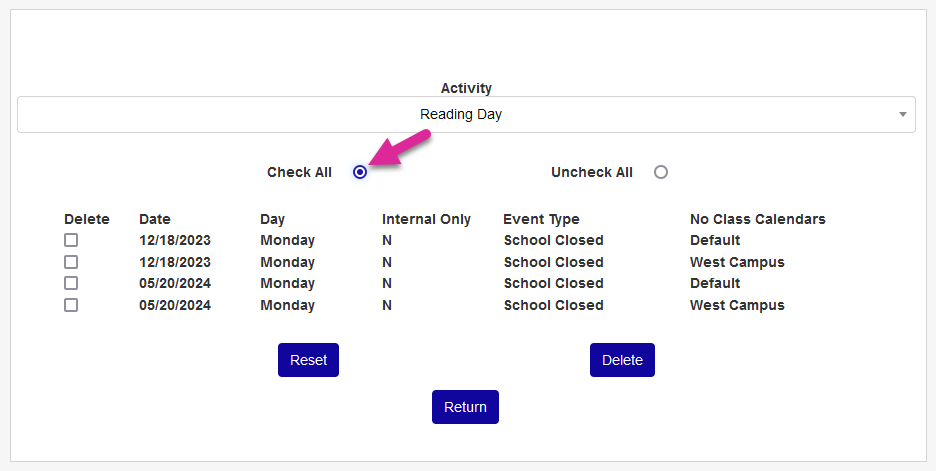
To remove an event that's been created, click on the Delete Events button and, on the following page, select the event by name. Note that multiple events can have the same display name.
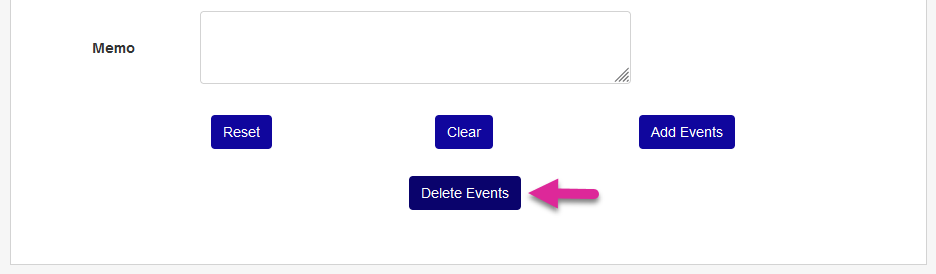

Click the Check All button to select all the boxes on the Delete column or check and uncheck boxes individually to delete just some of the events.
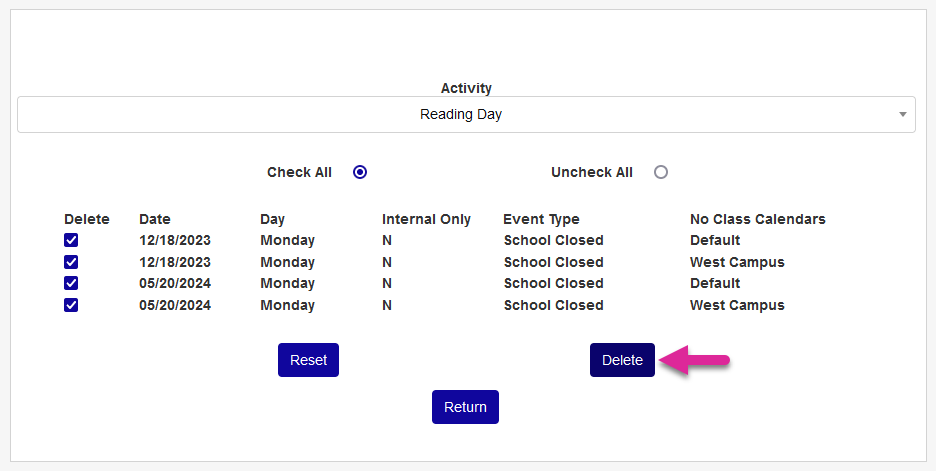
Click Delete to complete the process.
Associating Events with Courses
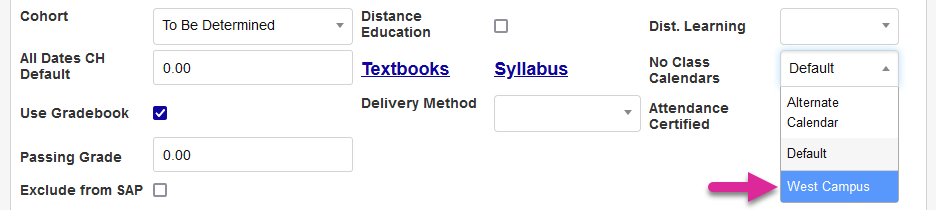
As mentioned previously, any event added to the Default calendar is associated with all courses automatically. To associate a course section with a different calendar of events, navigate to the Course Section edit page. Select a different No Class Calendar from the dropdown menu and submit the page.
This will now be the calendar used for this course when taking attendance.