Twilio Integration
Overview
Twilio is a cloud computing service designed to facilitate mass communication. The Jenzabar SONIS integration with Twilio allows institutions to send SMS text messages to users as a group or individually after creating a Twilio API. The Jenzabar SONIS Bulk Email/Text Message utility allows users to send text messages through SONIS without setting up a third party account, but these texts are sent as emails rather than through SMS. To send SMS texts to SONIS users, institutions should use the Bulk External Texting utility instead.
Note
All text conversations must contain an opt-out message for users who no longer wish to receive text communication from the school. This opt-out message can be configured through Twilio.
In addition to Twilio, SONIS also has an integration with Everbridge for bulk texting. Due to the ways in which these two products work and are integrated with SONIS, Everbridge is generally the better option for emergency texts while Twilio is a better choice for institutions who want to send regular communication through text messages. Administrators can choose between these services using the Texting Provider Accounts utility.
Setup
Twilio Setup
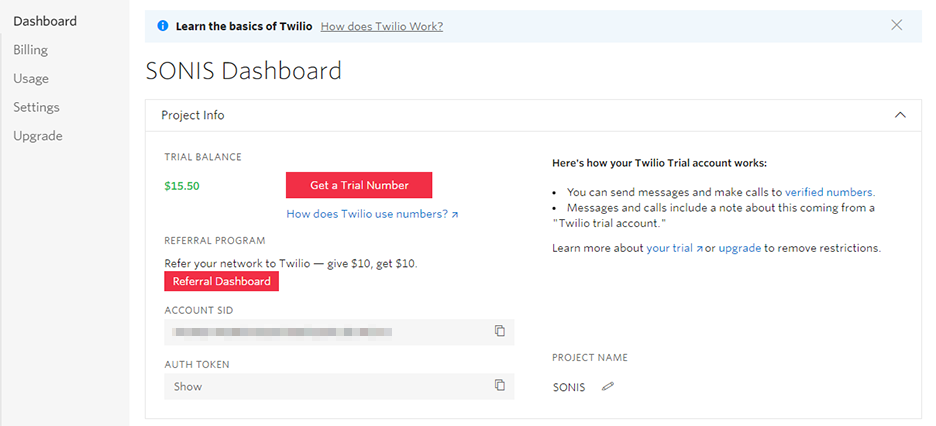
To begin, create a Twilio account on the Twilio website. The Dashboard page displays the Account SID and the Auth Token. These values will be needed for the SONIS integration. You'll also need to click the Get phone number link and purchase at least one phone number.
Note
If you plan to allow multiple staff members and faculty to text students through Twilio, you'll need to purchase a phone number for each of them so the SONIS and Twilio systems will know who to forward the messages to and who they come from. This purchase can be made after the initial setup is complete and tested when you're ready to move on to the Sub-Account setup.
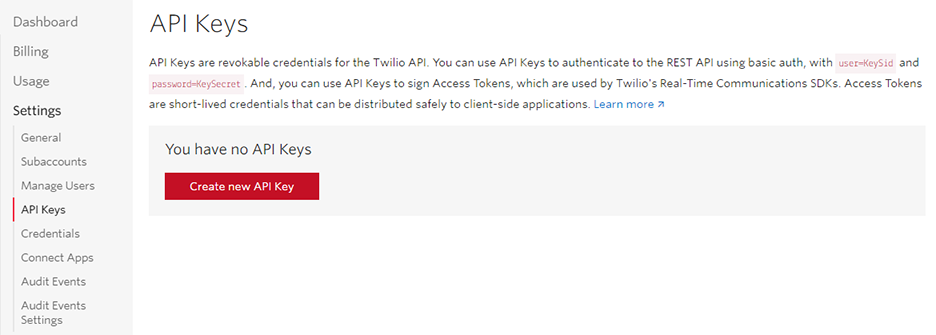
The next step is create an API key for the SONIS integration with Twilio. Click Settings in the Twilio left-nav and then API Keys . Click Create New API Key once the page loads.
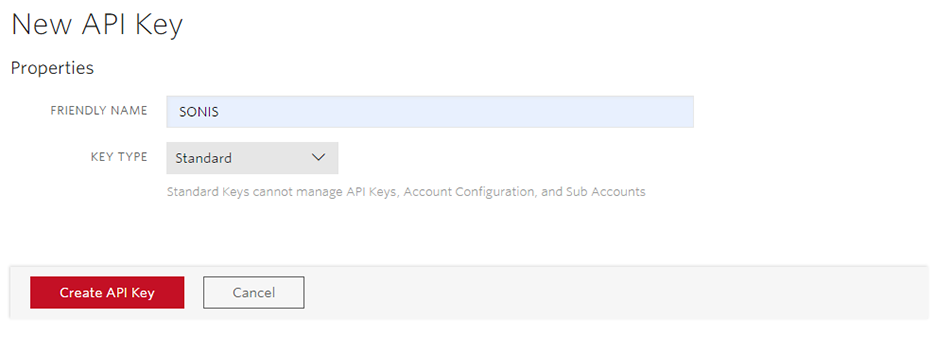
On the following page, create a Friendly Name for the API. The name will be used to identify the API within the Twilio system. Choose whether to create a Standard or Master key. Standard keys are application-specific while a master key can be used on all APIs created through Twilio.
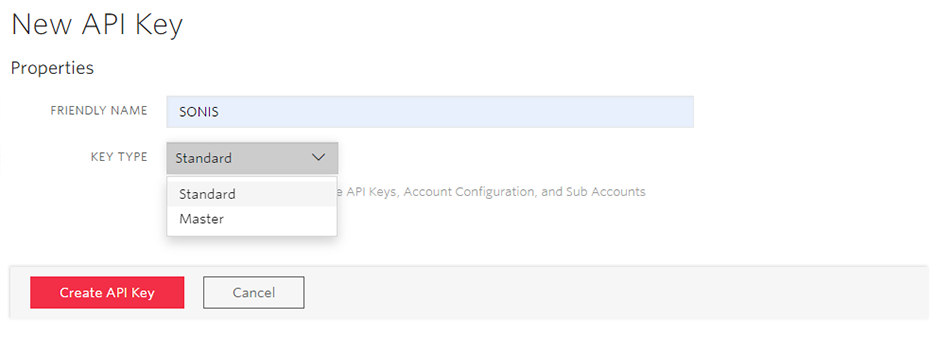
Click Create API Key to continue.
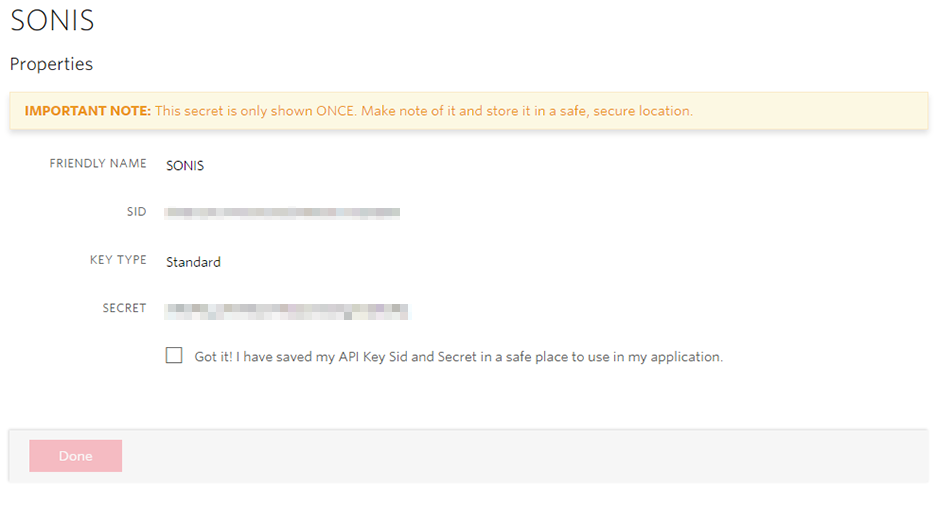
Once the key has been created, the SID and Secret will be displayed on screen. Copy the Secret and store it in a secure location. The Secret will only be displayed in Twilio once and will be encrypted when displayed in SONIS. Other settings can be configured to suit individual institution preferences.
SONIS Setup
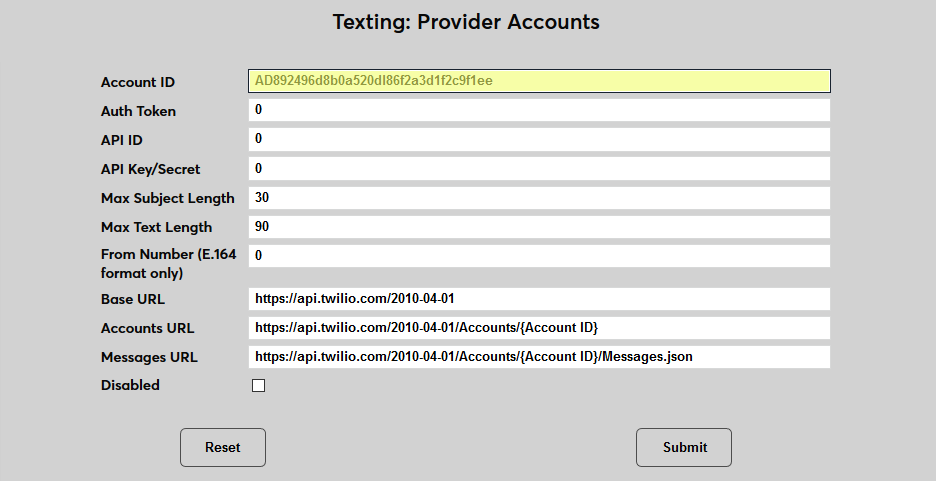
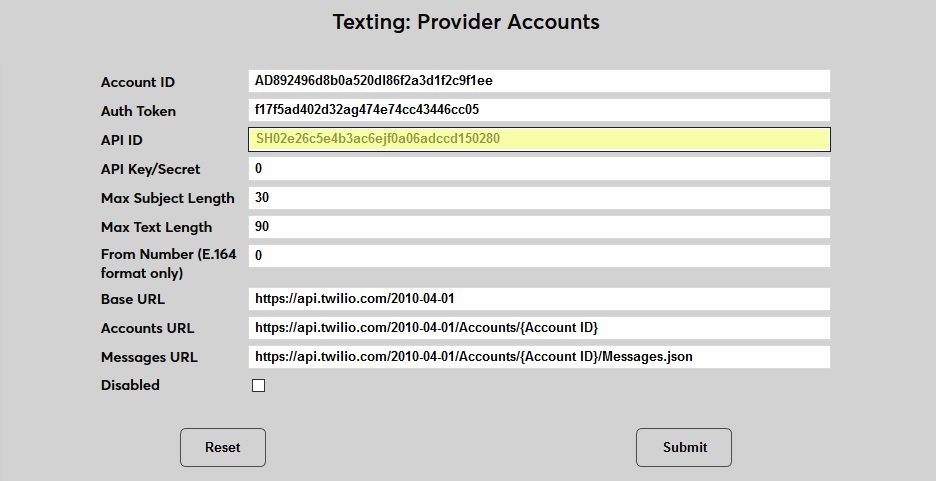
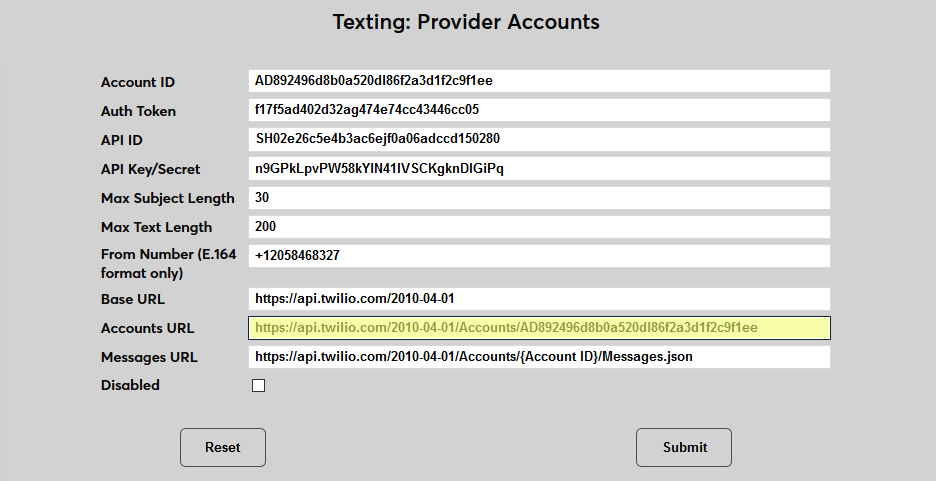
To link Twilio and Jenzabar SONIS, navigate to the Texting: Provider Accounts utility. Select Twilio and click Submit to begin.


The Account ID is listed as the Account SID in Twilio. Copy the ID from the Twilio Dashboard and paste it into the field.
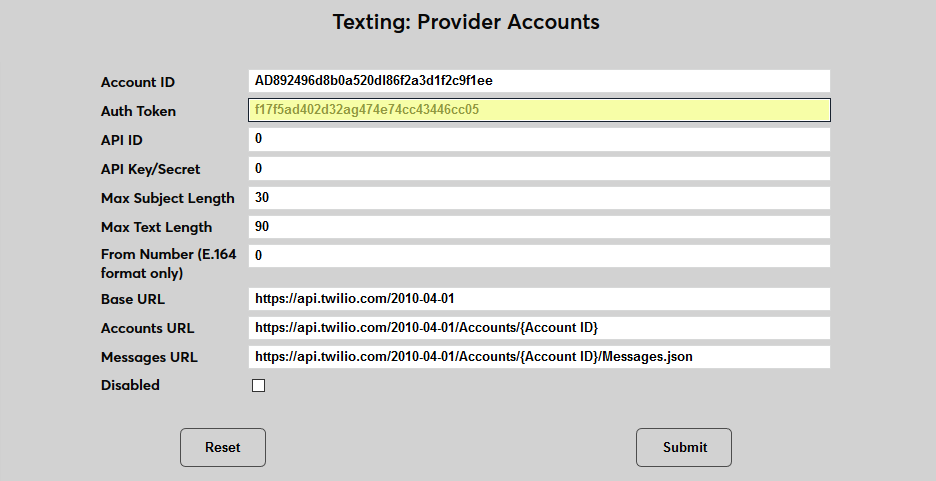
The Auth Token is also displayed on the Twilio Dashboard. Copy and paste the value into the Auth Token field.
The API ID is the API SID that's created by Twilio when creating the SONIS API. This value is stored in Twilio in the API Keys tab under the Settings menu.
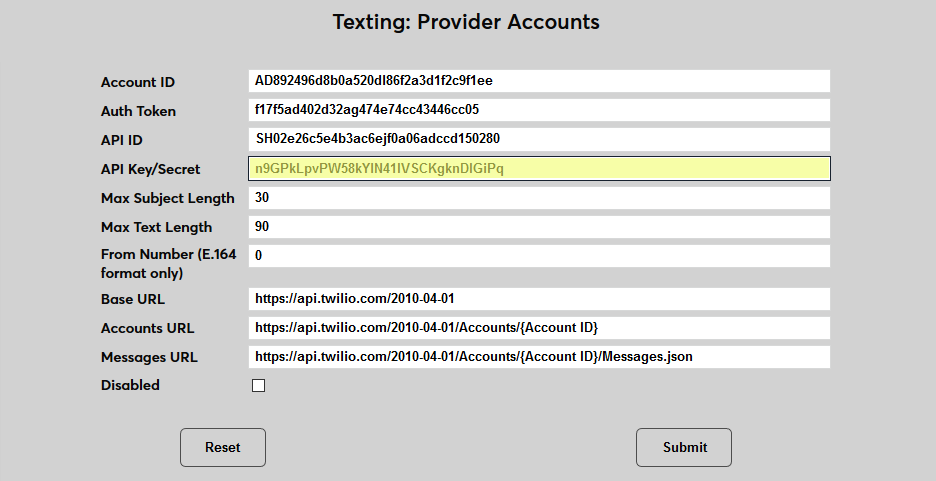
The API Key/Secret is the value displayed by Twilio as the Secret when the SONIS API is created. Twilio will not display this value again once it's been shown the first time. If the value is lost, a new API must be created, which would also create a new API ID.
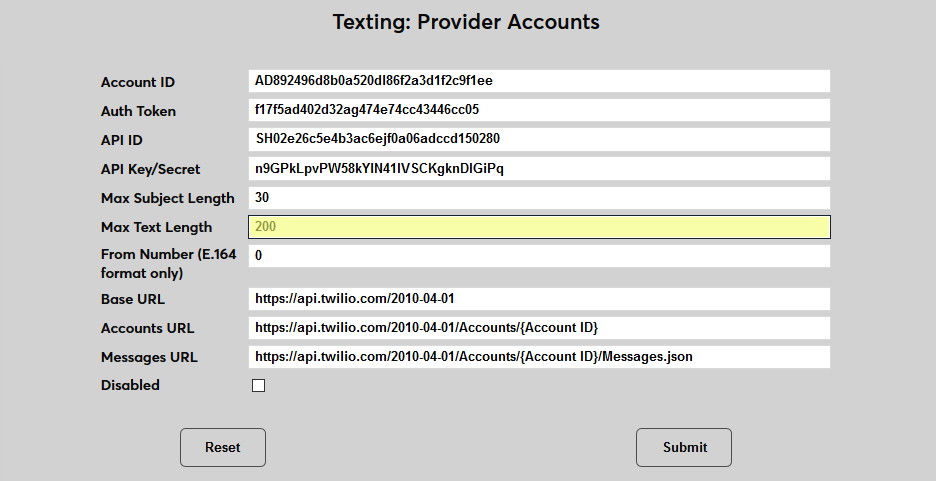
The Max Subject Length field is not currently being used and can be left unaltered. The Max Text Length field determines the maximum number of characters allowed in a text being sent. The highest value that can be set is 1,600, which is the limit that Twilio sets for all texts sent through their network.
Enter the Twilio number being used in the From Number field. This number must be in E.164 format, which means that a + and the country code must be appended to the front of the number. For more on E.164 formatting, visit the Twilio page on Formatting International Phone Numbers .
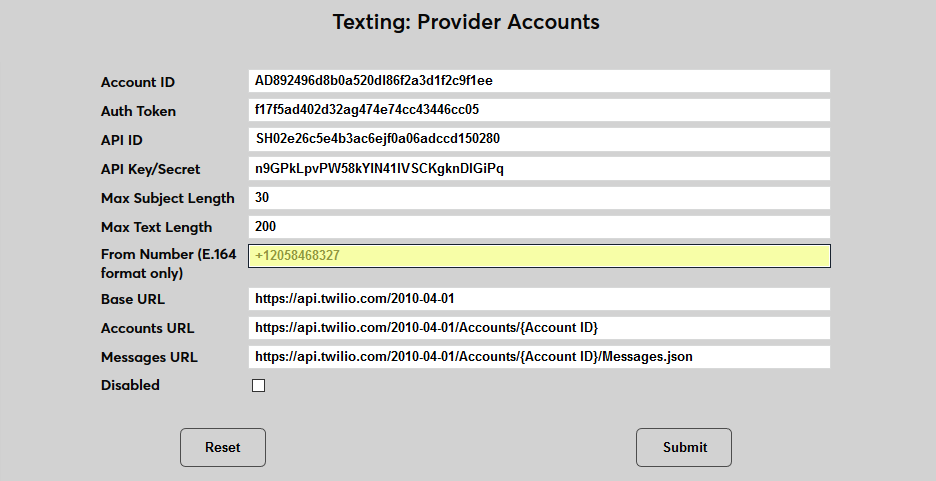
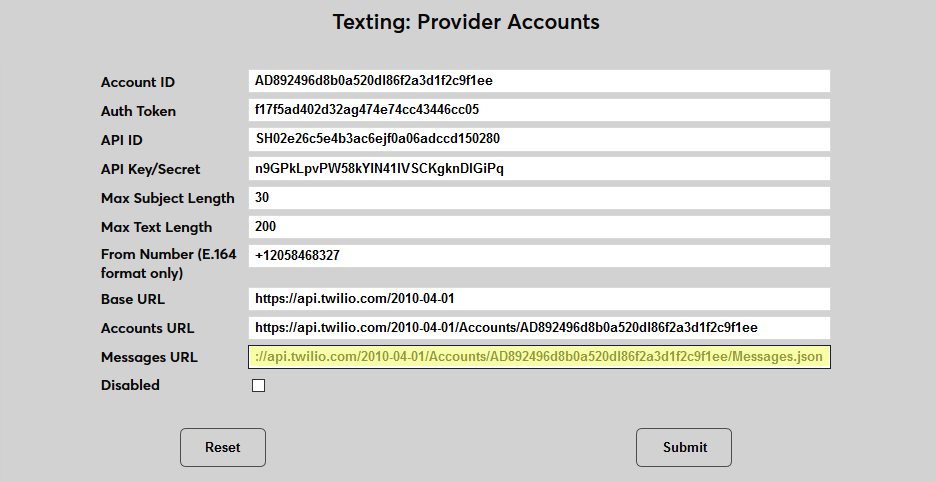
The Base URL is provided by SONIS and should not be altered. The Accounts URL and the Messages URL are both partially supplied. Replace the {Account ID} with the actual Account ID in each field.
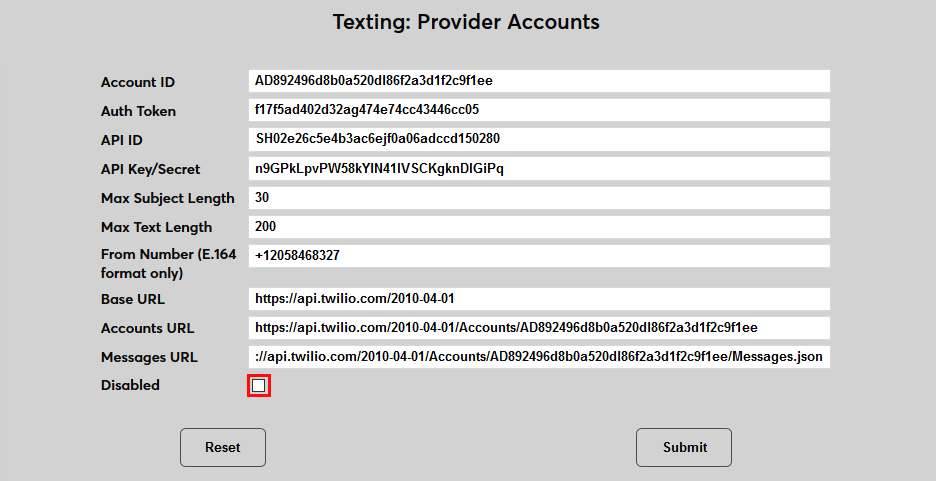
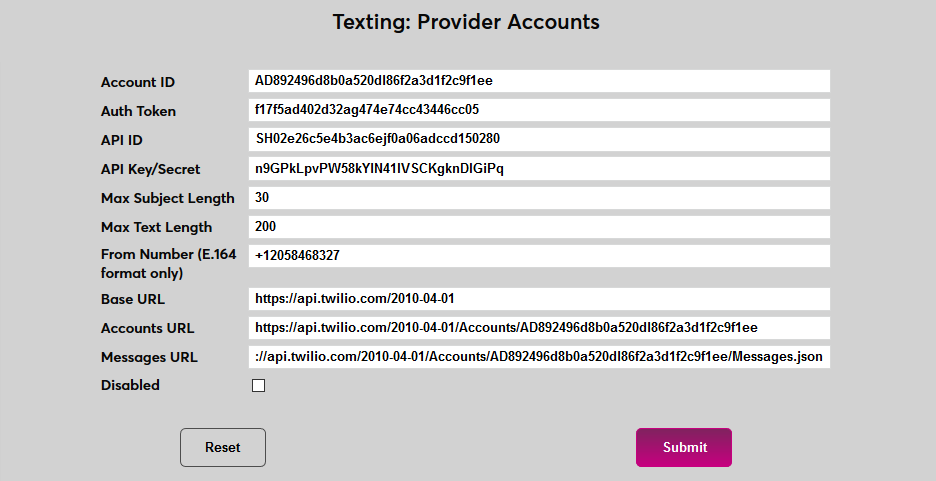
A Disabled checkbox is included to turn off access to the account. Click Submit to save the changes.
Note
This is the account that will be used for all bulk texting and is tied to your school's master account.
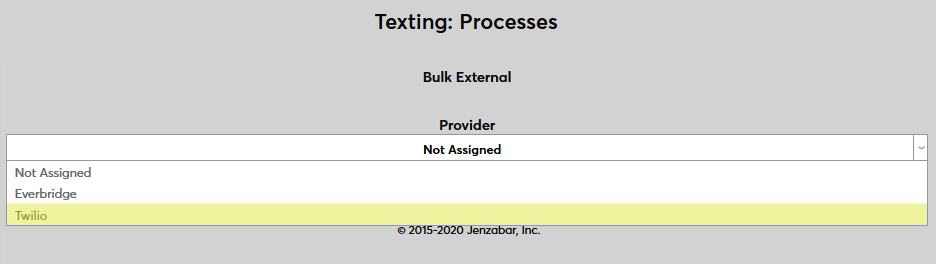
Once the Twilio account has been set up, navigate to Texting: Processes to activate it. Click Bulk External to begin.

On the following page, select Twilio as the Provider and click Submit .
Sub-Accounts
In order for a staff member or faculty member to carry on a one-on-one conversation with a student or other user via the staff or faculty member's portal, they must have a sub-account set up in Jenzabar SONIS. Sub-accounts link a specific Twilio number to an individual SONIS staff or faculty member. All texts sent from within Administration will be sent using the primary account configured in the Text Provider setup.
It's recommended that every institutional user who will be regularly texting students from their portal should have their own Twilio number and their own sub-account. This allows SONIS to track who the student is replying to and send the message only to that user. In some cases it may make sense for small groups of users to share an account.
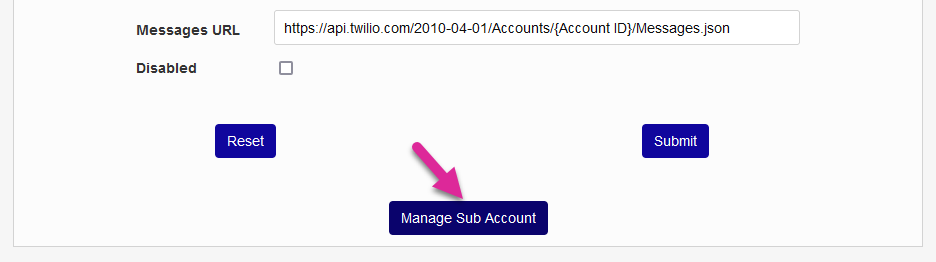
To set up a sub-account in SONIS, select Twilio again from the Texting Provider Accounts page and click Manage Sub Account.
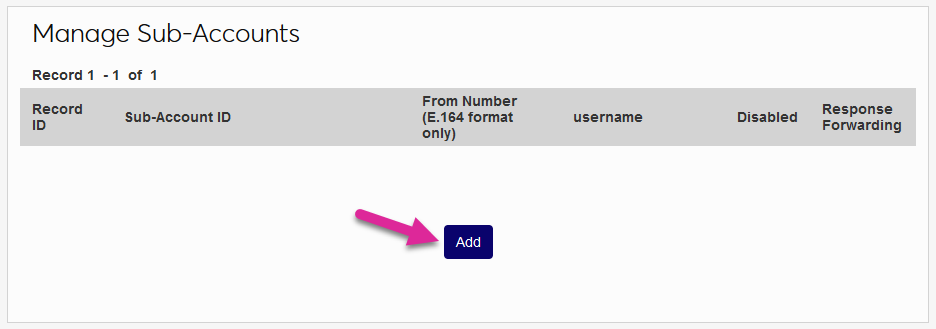
On the following page, click Add to create a new sub-account.
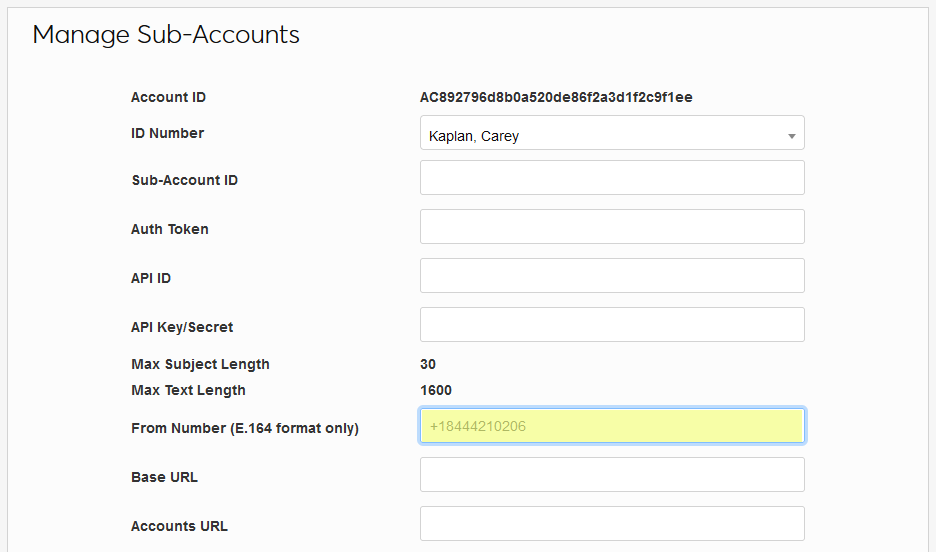
On the create page, theAccount ID will be automatically filled in based on the primary account information previously entered.
The ID Number field lists every user with a module status of Staff or Faculty. Select a name to create a sub-account for that user.
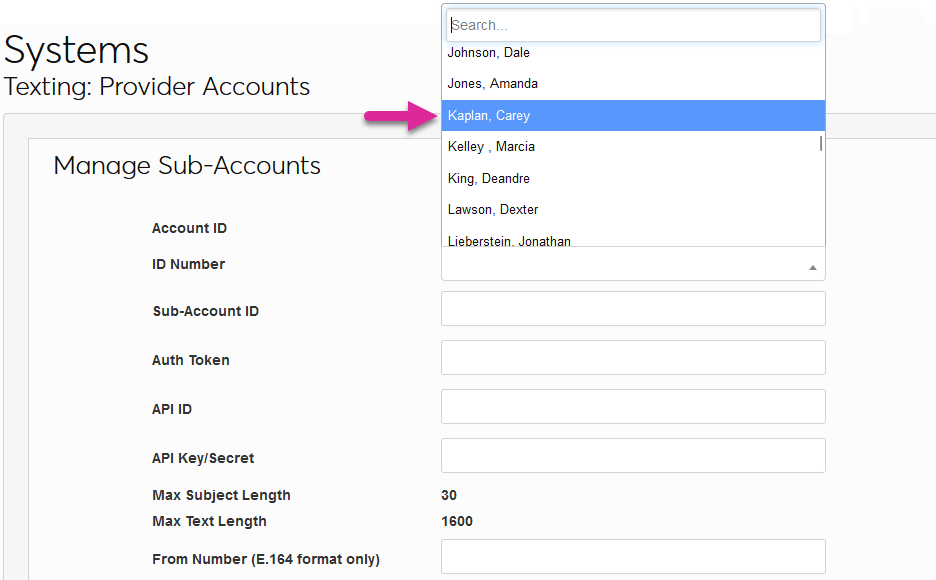
The From Number field should contain the number assigned to this user in Twilio in E.164 format. This is not for the user's personal cellphone number.
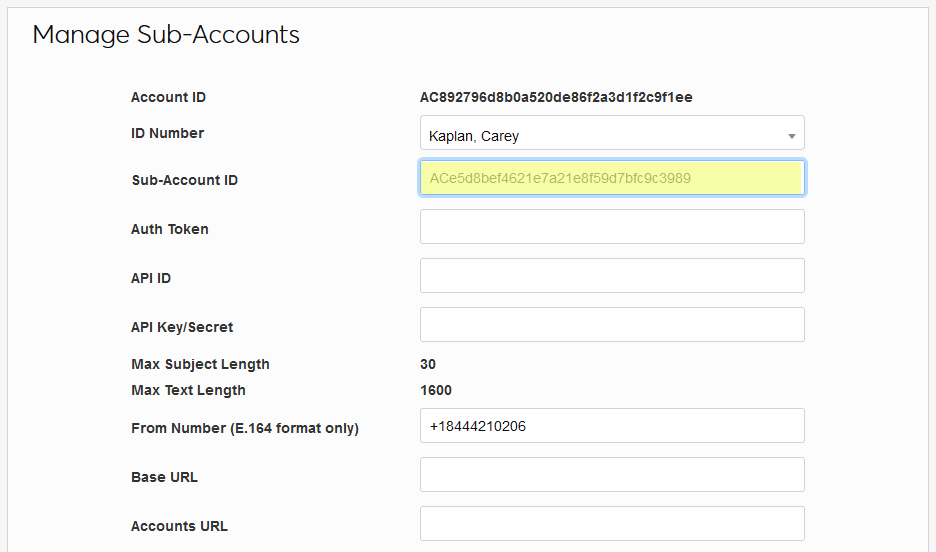
Paste the user's sub-account ID from Twilio into the Sub-Account ID field. The rest of the fields should match the setup information entered for the school's primary account.
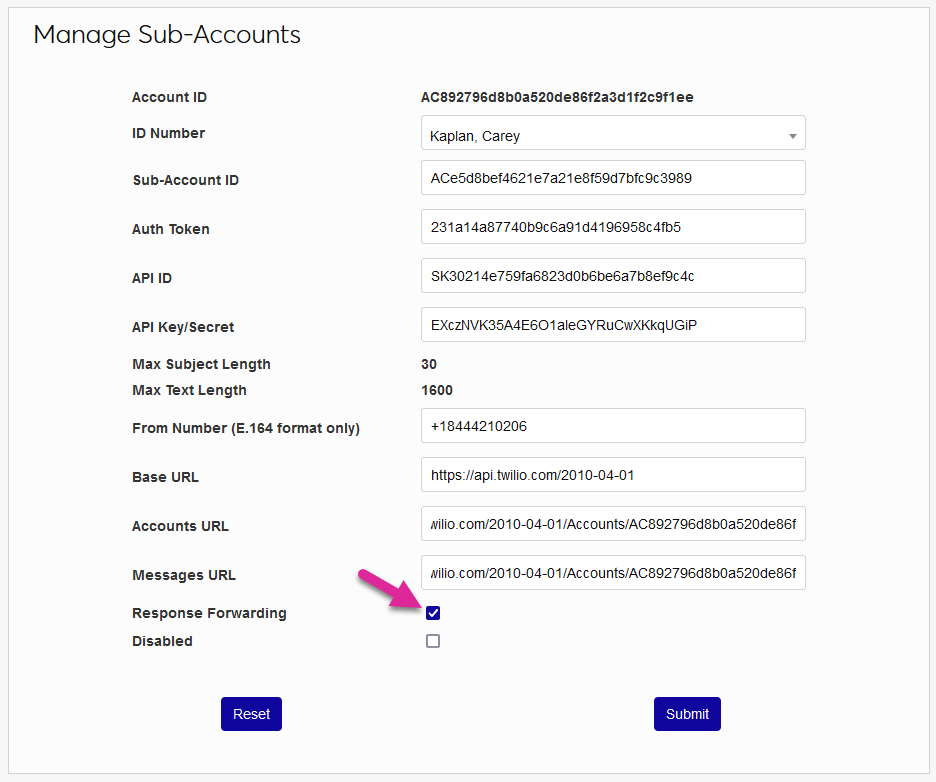
Leave the Response Forwarding box checked to send all text message responses to the user's cellphone based on the number in their Address record or uncheck the box to display these messages in SONIS only. If the sub-account is no longer needed in the future, you can use the Disabled box to deactivate it. Click Submit to save the settings and associate this Jenzabar SONIS user with the Twilio account. From this point forward, any texts they send through SONIS will be sent from the number listed here. Any responses to that number will be displayed for this user and saved in their text history.
Address Records
Before a user can receive an individualized text message, they must have a valid cellphone number in their primary Address record. The Text Me flag must also be checked. The Cell Provider field is not needed.

Note
If a users elects to no longer receive texts using the opt-out link sent when the conversation begins, their Text Me box will be unchecked as part of this process.
Texting
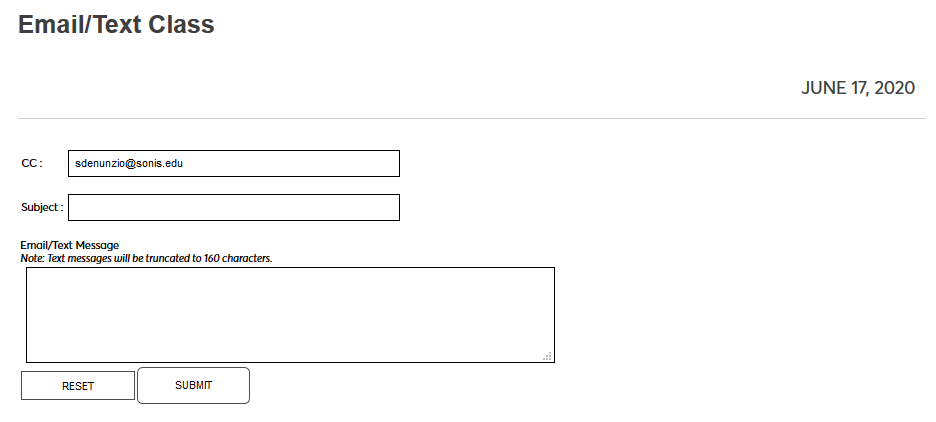
Once Twilio has been set up, texts can be sent to groups of users with the Bulk External Texting utility in the Administration portal, by attaching text-type Activities, or to students through the Email/Text Class utility in the Faculty portal. Texts sent through Administration will use the primary, institutional, Twilio account. Texts sent through the Faculty or Advisor portal will use the logged-in user's Twilio sub-account.
Additionally, all Notification Assignments that are set to send text reminders will send these texts through Twilio once it's been activated.
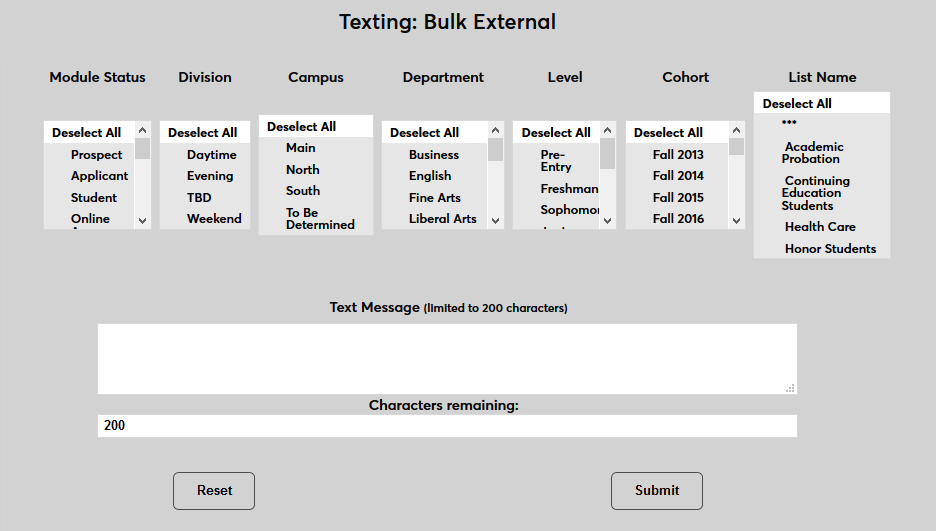
Bulk Texting
Once Twilio has been set up, texts can be sent to groups of users with the Bulk External Texting utility in the Admin portal or to students through the Email/Text Class utility in the Faculty portal.
Individual Texting
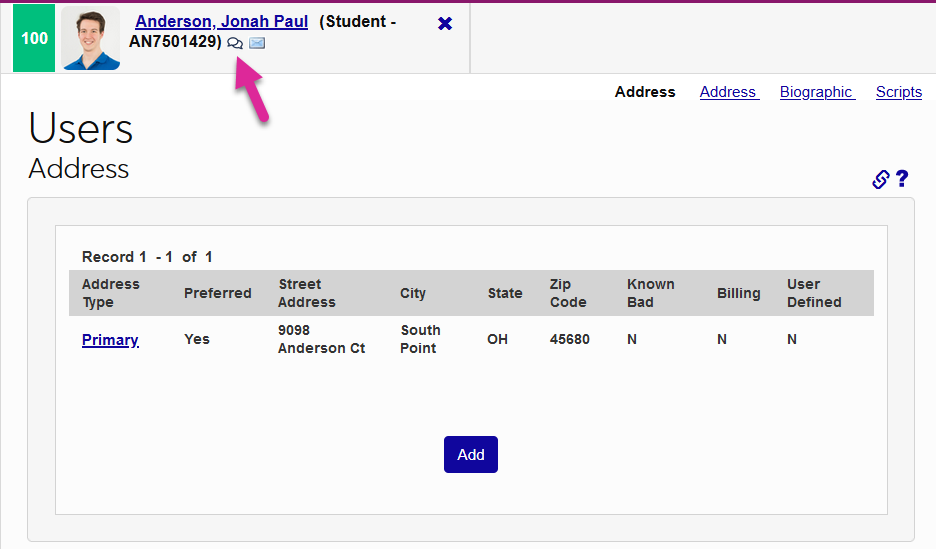
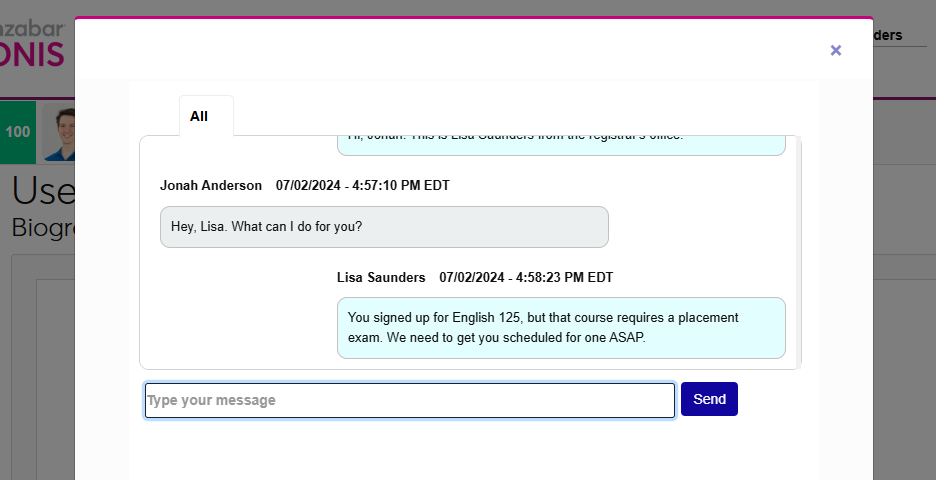
Once Twilio has been activated, any student with a Cellphone number in their Address record and the Text Me box checked will have a text bubble icon next to their name when selected. Click the bubble to see your text history with the student and to send them text messages. Any replies that the student sends will be displayed as part of this ongoing conversation.
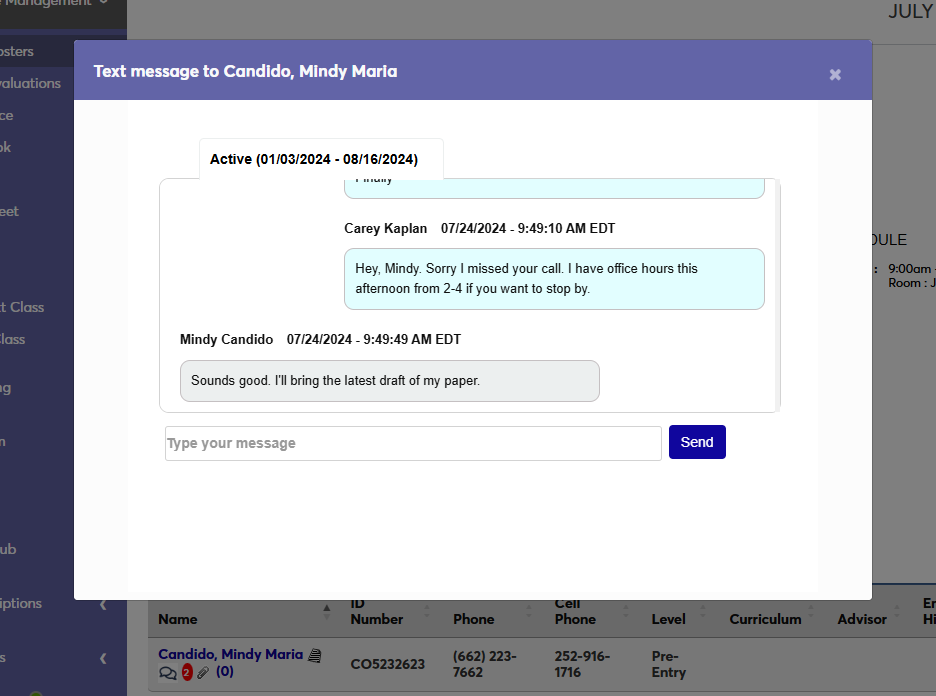
Faculty members can also text students enrolled in their current classes. Any student with a Cellphone number in their Address record and the Text Me box checked will have a text bubble icon next to their name in the faculty member's roster. The instructor can click the bubble to see their text history with the student and to send them text messages.
Note
Faculty members can only text students from the first day of class until 60 days after the final class date. Rather than responding to texts directly through their personal phones, faculty members are sent a link to a SONIS page where they can respond to any texts that they receive. This ensures that all history is retained.

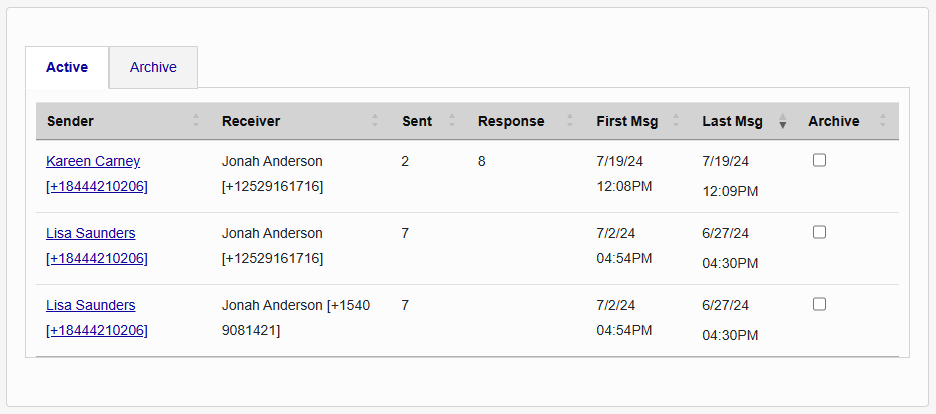
Text History
Text conversations between Jenzabar SONIS users are all logged on the user's Text History page. Each conversation is listed on the splash page and you can click on a Sender to read the full conversation.