Learning Management Systems Setup
Overview
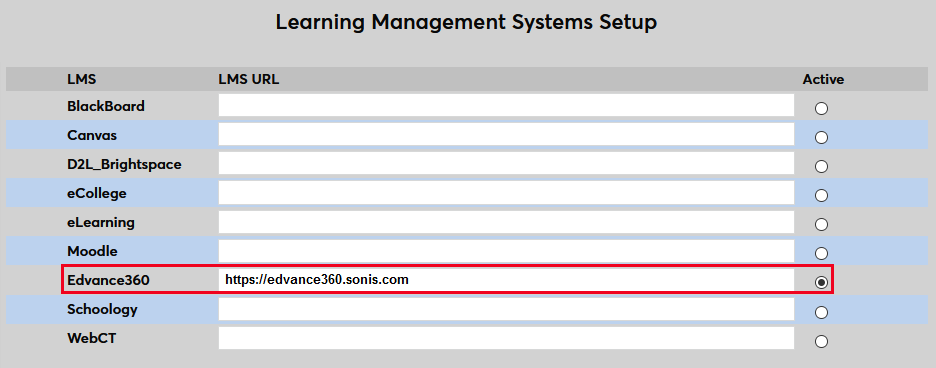
A Learning Management System (LMS) is a third-party application that assists institutions in managing courses and grades and can allow students to interact with their instructor and each other. Jenzabar SONIS supports exports and other interfaces with several popular LMS systems. Each must be activated using the Learning Management Setup page with only one active LMS allowed at a time. The process of activating an LMS is essentially identical for each system but additional options may be available depending on the system.
Visit the Learning Management System Export page to learn more about the basic LMS export process. Though keep in mind that some systems have an additional export tailored to the specific needs of users of this system.
Information on setting up the LMS Transfer Table within Jenzabar SONIS is found here.
Blackboard
To learn more about the Blackboard setup process, the fields that are exported, and the various places it interfaces with the Jenzabar SONIS system, visit the Blackboard overview page.
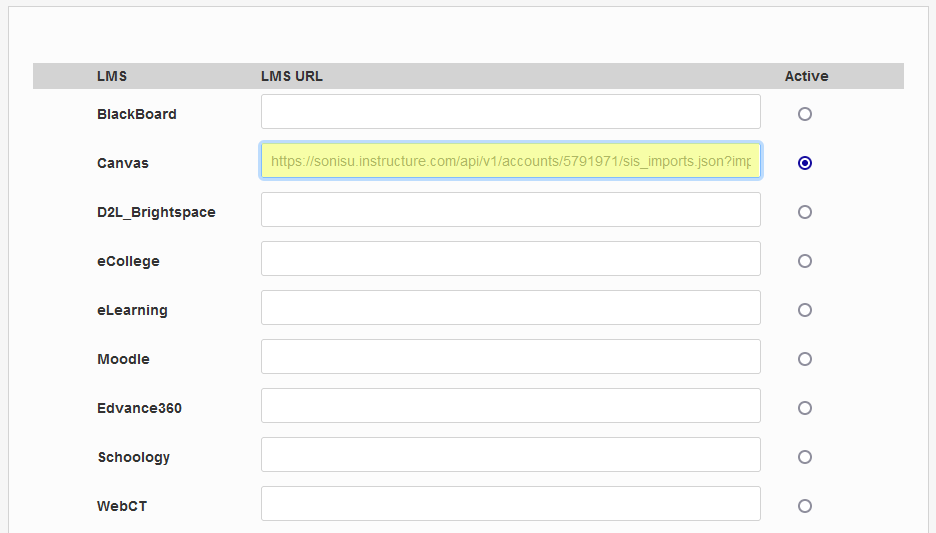
To link Blackboard to SONIS and activate it, navigate to the Learning Management Systems Setup utility. Enter the institution-specific web location where the Blackboard software has been uploaded and check the Active button.

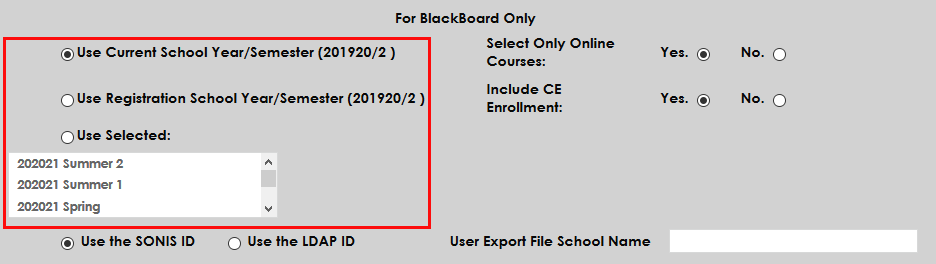
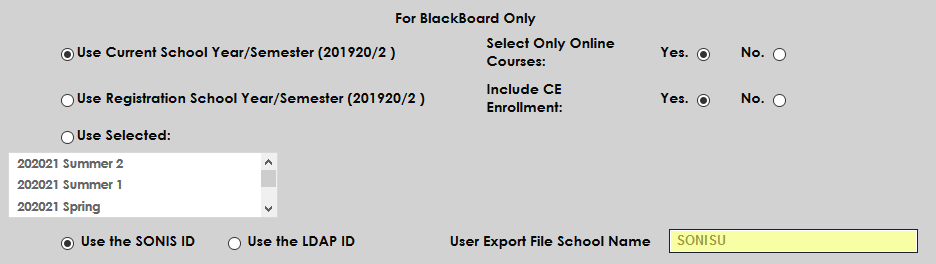
After activating Blackboard, scroll down to the For Blackboard Only section of the page. These controls allow schools to manage how their Blackboard integration will function. First, choose whether to use the Current School Year/Semester or the Registration School Year/Semester if different. Alternately, select a school year/semester that is neither of those. All school years and semesters that have been created in the SONIS system are listed in this menu.
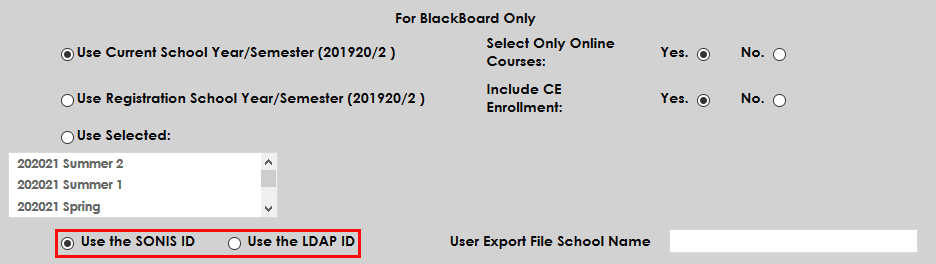
Next, choose whether students and faculty should log in with their SONIS ID or their LDAP ID, if applicable.
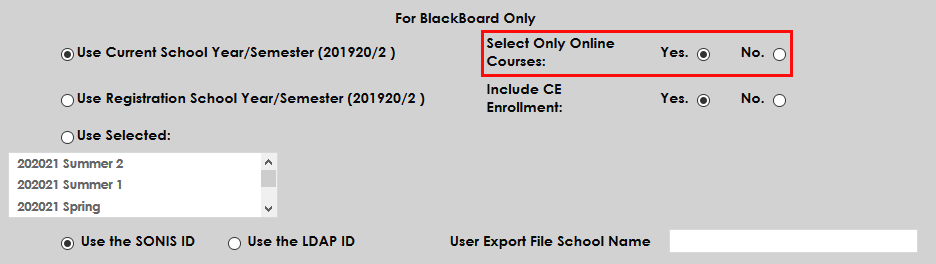
If the Select Online Courses option is set to Yes, only course sections with the On-Line box checked will be included in the export to Blackboard. If No is selected, all courses with a valid course type will be exported.
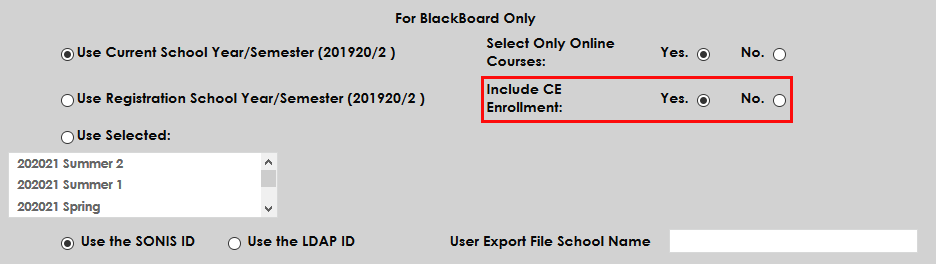
Administrators can choose whether to include Continuing Education courses in Blackboard or not by selecting Yes or No.
The User Export File School Name field is used to designate a name for the Blackboard Student Services Student/Teacher Extract file. The filename will be XXXXX_upload_DDMMYY with the date appended.
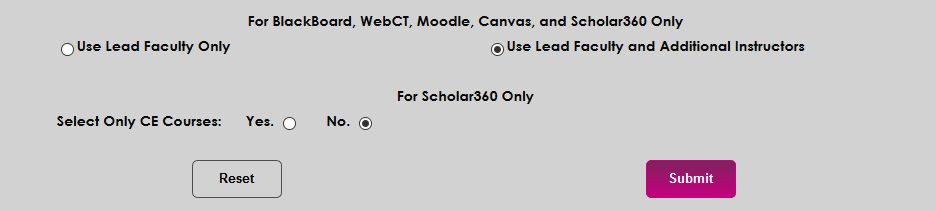
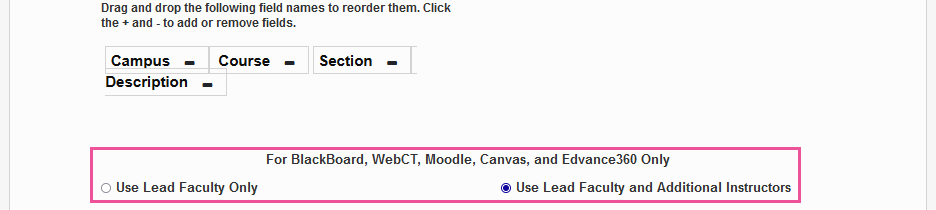
Once this section has been completed, scroll down to the section labeled For Blackboard, WebCT, Moodle, Canvas, and Edvance360 Only. Choose whether each course in Blackboard will Use Lead Faculty or Use Lead Faculty and Additional Instructors. Additional instructors are added on the Section: Edit page.

Click Submit at the bottom of the page to save the changes and activate Blackboard.
Canvas
To learn more about the Canvas setup process from the Canvas side and see the various places it interfaces with the SONIS system, visit the Canvas overview page.
To set up Canvas the institution's learning management system, navigate to the Learning Management Systems Setup page under the Systems menu. Click the Active button in the Canvas row and paste in the referral URL provided by Canvas. Note that this URL must be in all lowercase or an error will occur.
After activating Canvas, scroll down to the For Canvas Only section of the page. These controls allow schools to manage how their Canvas integration will function. First, choose whether to use the Current School Year/Semester or the Registration School Year/Semester if different. Alternately, select a school year/semester that is neither of those. All school years and semesters that have been created in the Jenzabar SONIS system are listed in this menu.
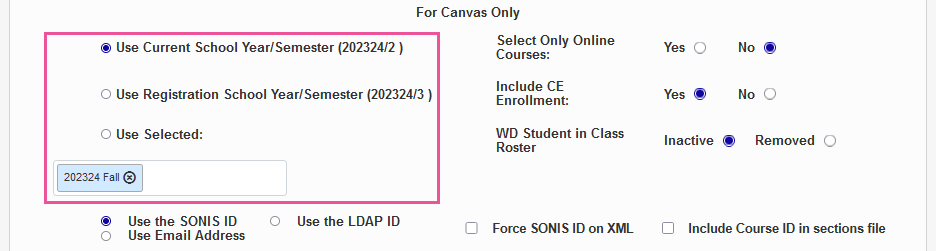
Next, choose whether students and faculty should log in with their SONIS ID, their LDAP ID, or their Email Address.
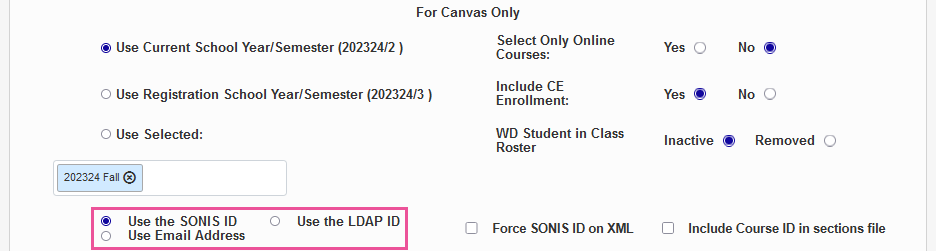
Note
If Use Email Address is selected, the user's email address will be sent to Canvas in the export file as the User ID only. If a user does not have an email address in their Address record, the user's SONID ID will be sent instead.
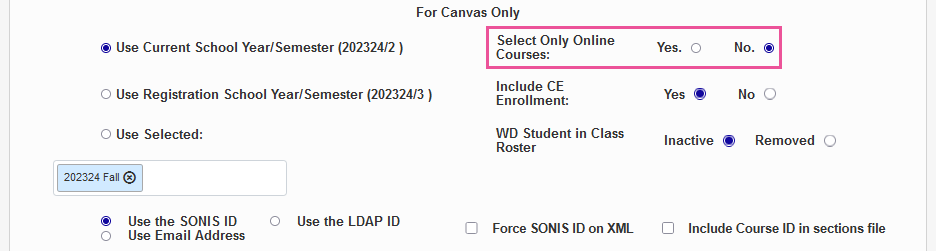
If the Select Online Courses option is set to Yes, only course sections with the On-Line box checked will be included in the export to Canvas. If No is selected, all courses with a valid course type will be exported.
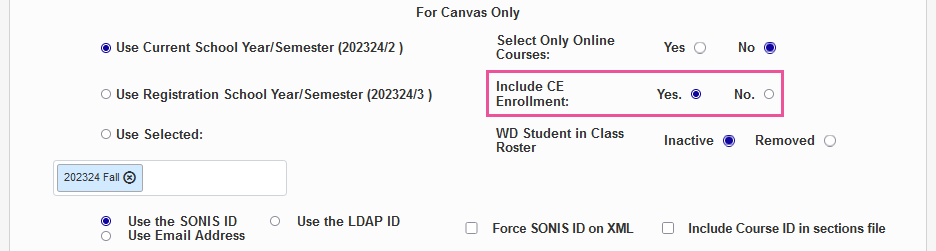
Administrators can choose whether to include Continuing Education courses in Canvas or not by selecting Yes or No.
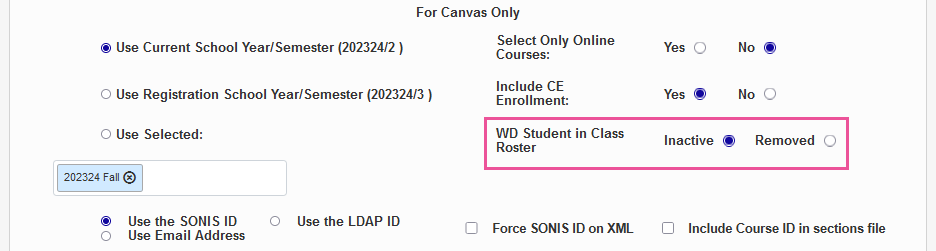
The update file can treat withdrawn students two different ways, depending on institutional preference. Choose the Inactive option to make withdrawn students on a Canvas roster inactive but leave them on the roster. Or choose Removed to remove these students entirely so the roster only includes active students.
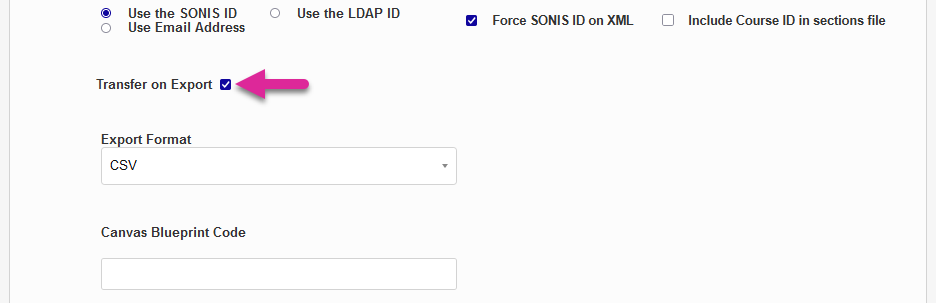
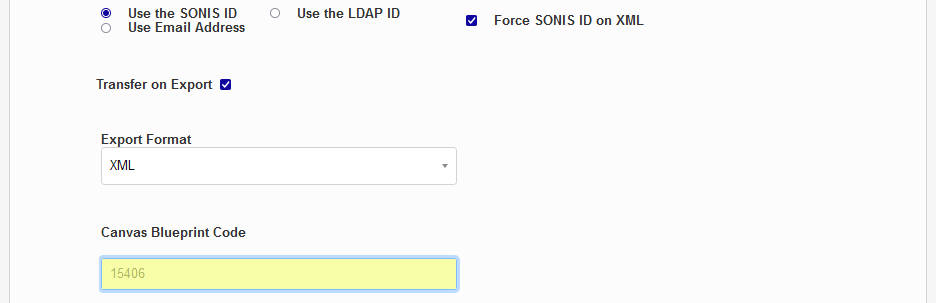
If the Transfer on Export box is checked, each newly created export file will be transferred automatically to Canvas using the URL saved in the LMS Transfer table settings. If no Canvas record has been added to this table, the checkbox is replaced by text reading Not Configured.
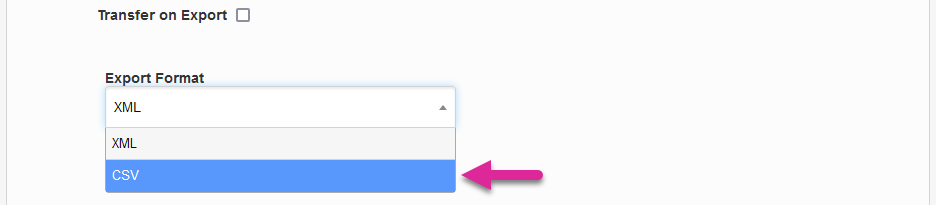
Previously, clients could choose to export a CSV or an XML file, but the XML option is no longer supported by Canvas. All clients should select CSV in this menu.
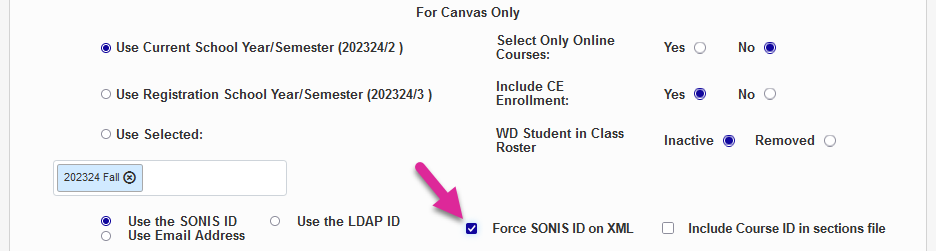
The Force SONIS ID on XML option was used to ensure that the XML export file would use the SONIS ID as the login even when users log in to Jenzabar SONIS using their email address. Since the XML option is no longer supported, this checkbox is no longer needed.
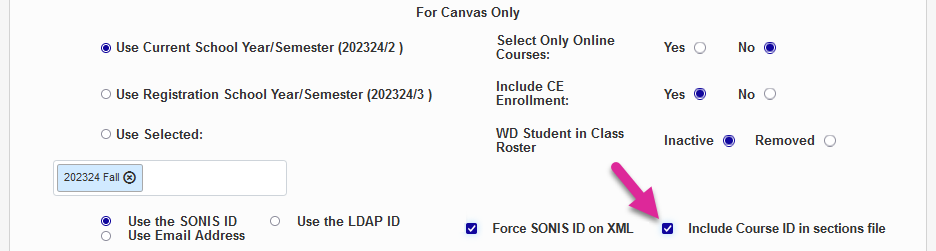
The sections file that's exported from SONIS to Canvas typically uses the section ID to identify both sections and courses. You can replace the second usage of the section ID with the course ID by checking the Include Course ID in sections file box.
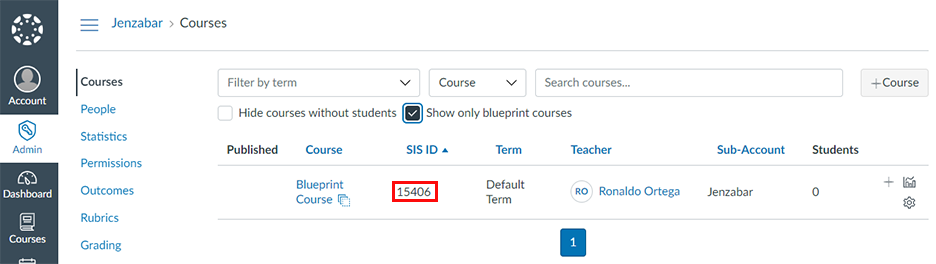
The blueprint code is optional. Canvas allows the creation of Blueprint Courses, which can be used as a template for other courses. Once a blueprint course has been created, the content can be pushed to other associated courses. To locate existing blueprint courses in Canvas, navigate to Courses under the Admin menu and check the Show only blueprint courses box. Copy the SIS ID of the blueprint course into the Canvas Blueprint Code field. This value will be exported to Canvas as the Blueprint Course ID. Courses imported from SONIS will follow this blueprint.
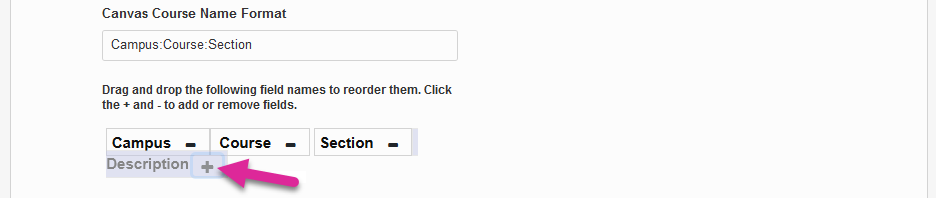
The Canvas Course Name Format field controls how course names are displayed in Canvas when exported from SONIS. This setting is used to generate the Long Name field in the Courses export file and the Name field in the Sections files. By default, the Course, Section, Campus, and Description will be displayed separated by colons. To rearrange the order, click on one of the field names and drag them to a new location.
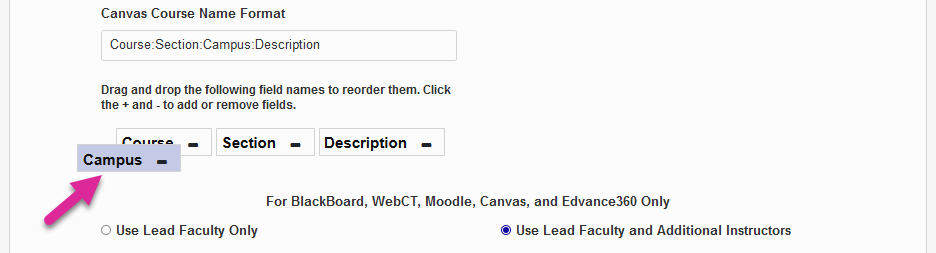
To remove one of the fields altogether and no longer use it in the course name in Canvas, click the -. To add back a field that has previously been removed, click the +.
Finally, scroll down to the section labeled For Blackboard, WebCT, Moodle, Canvas, and Edvance360 Only. Choose whether each course in Canvas will Use Lead Faculty or Use Lead Faculty and Additional Instructors. Additional instructors are added on the Section: Edit page.
Click Submit at the bottom of the page to save the changes and activate Canvas.
D2L Brightspace
For more about the D2L Brightspace setup process, visit the D2L Brightspace overview page.
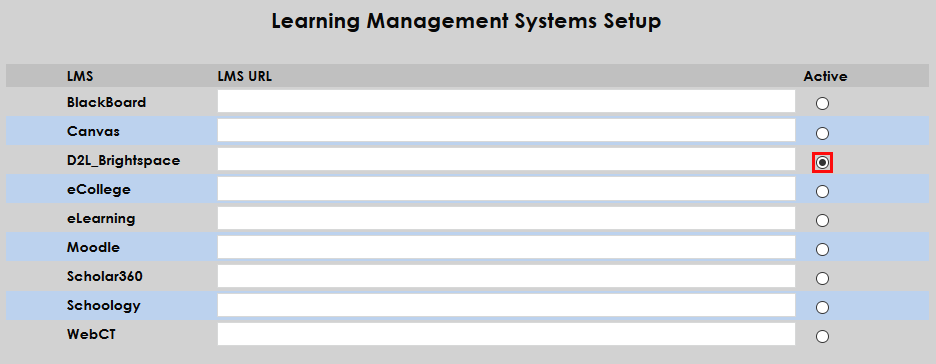
To designate Brightspace as the institution's LMS and, if needed, change some basic settings, navigate to the Learning Management Systems Setup page in the Systems hub. Begin by selecting D2L Brightspace as the Active system.
Once Brightspace has been activated, scroll down to the For D2L Brightspace section of the page. Choose whether to send data from the school's Current School Year/Semester or the Registration School Year/Semester if they differ.

If only courses with the On-Line designation in Course Setup should be included in the export set the Select Only Online Courses option to Yes. If continuing education courses should be included, set the Include CE Enrollment option to Yes.


Click the Submit button to save the changes to the page and activate Brightspace.

eCollege
To use eCollege as a learning management system, simply select the Active button for that system.
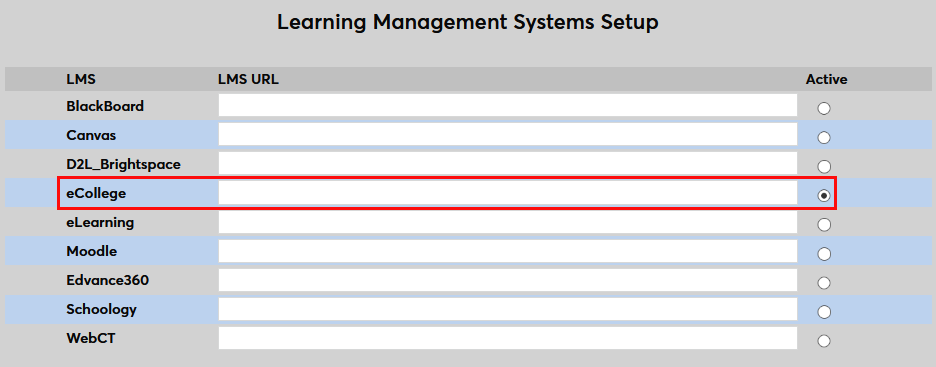
Click Submit at the bottom of the page to save the changes and activate eCollege.
No other setup on this page is required. Keep in mind that each course will need to be configured for export. See the Blackboard overview page for more information on this process.
eLearning
To use eLearning as a learning management system, simply select the Active button for that system.
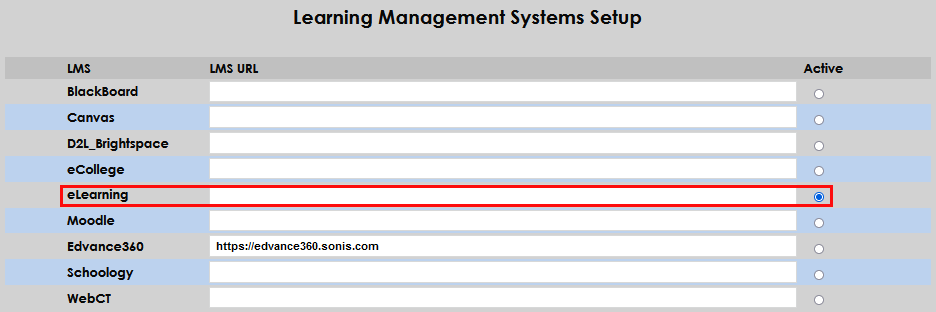
Click Submit at the bottom of the page to save the changes and activate eLearning.
No other setup on this page is required. Keep in mind that each course will need to be configured for export. See the Blackboard overview page for more information on this process. Course enrollments will be populated in eLearning via the export. All course assignment setup must be completed in eLearning.
Edvance360
Edvance360 was formerly known as Scholar360. To learn more about the Edvance360 setup process and see the various places it interfaces with the Jenzabar SONIS system, visit the Edvance360 overview page.
To link Edvance360 to SONIS and activate it, navigate to the Learning Management Systems Setup utility. Enter the institution-specific web location where the Edvance360 software has been uploaded and check the Active button.
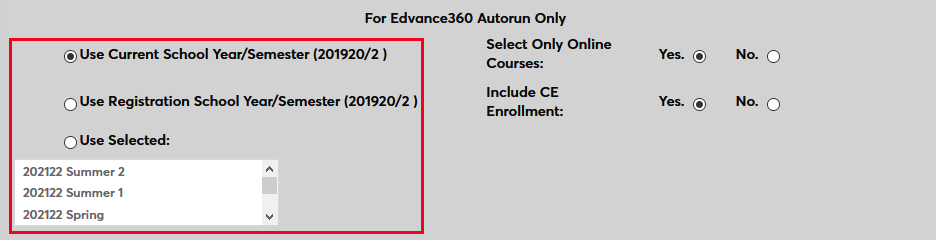
After activating Edvance360, scroll down to the For Edvance360 Autorun Only section of the page. These controls allow schools to manage how their Edvance360 integration will function. First, choose whether to use the Current School Year/Semester or the Registration School Year/Semester if different. Alternately, select a school year/semester that is neither of those. All school years and semesters that have been created in the SONIS system are listed in this menu.
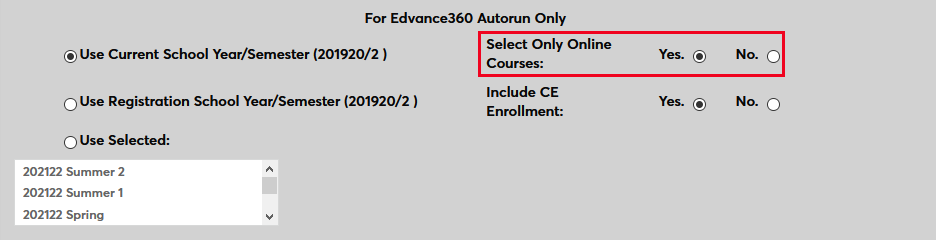
If the Select Online Courses option is set to Yes, only course sections with the On-Line box checked will be included in the export to Edvance360. If No is selected, all courses with a valid course type will be exported.
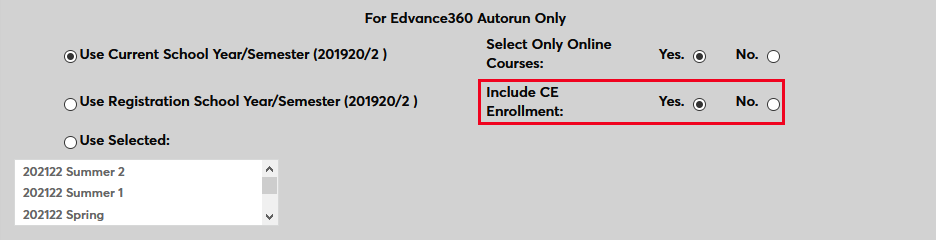
Administrators can choose whether to include Continuing Education courses in Edvance360 or not by selecting Yes or No.
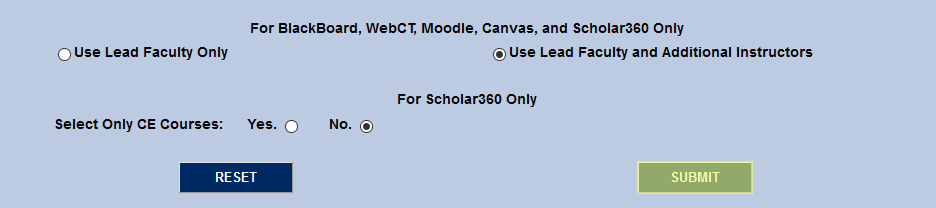
Once this section has been completed, scroll down to the section labeled For Edvance360, WebCT, Moodle, Canvas, and Edvance360 Only. Choose whether each course in Edvance360 will Use Lead Faculty or Use Lead Faculty and Additional Instructors. Additional instructors are added on the Section: Edit page.

Then, scroll down to the For Edvance360 Only section. Choose Yes to only export continuing education courses to or No to support all courses based on the previous settings.

Click Submit at the bottom of the page to save the changes and activate Edvance360.

Moodle
To learn more about the Moodle setup process from the Moodle side and see the various places it interfaces with the SONIS system, visit the Moodle overview page.
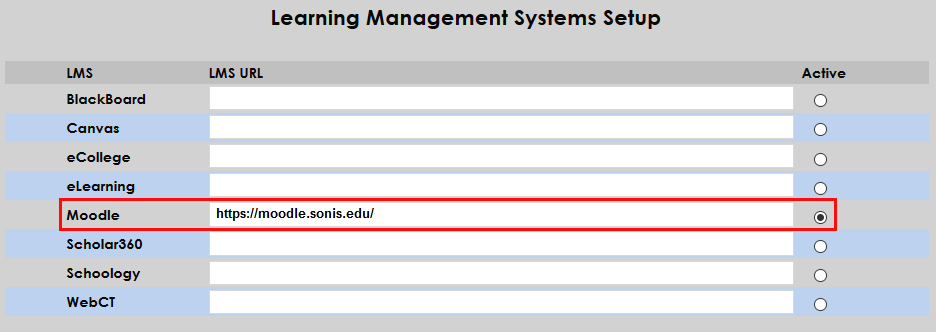
To link Moodle to SONIS and activate it, navigate to the Learning Management Systems Setup utility. Enter the institution-specific web location where the Moodle software has been uploaded and check the Active button.
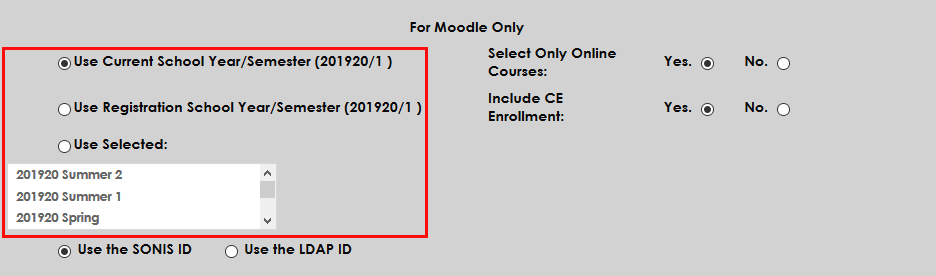
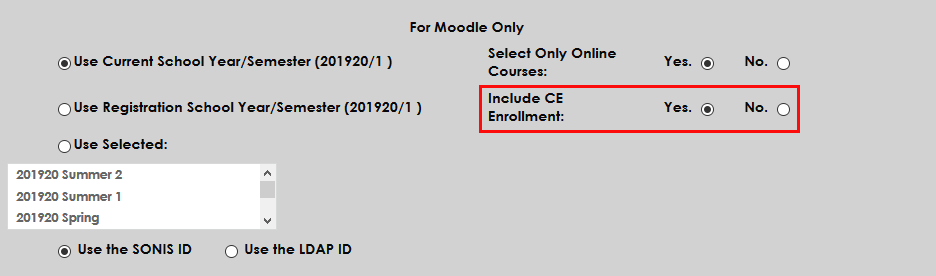
After activating Moodle, scroll down to the For Moodle Only section of the page. These controls allow schools to manage how their Moodle integration will function. First, choose whether to use the Current School Year/Semester or the Registration School Year/Semester if different. Alternately, select a school year/semester that is neither of those. All school years and semesters that have been created in the SONIS system are listed in this menu.
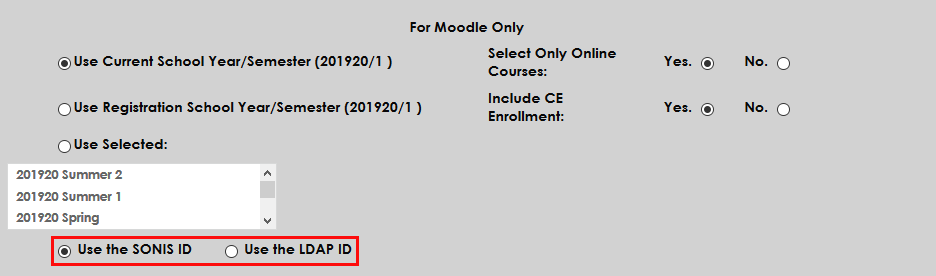
Next, choose whether students and faculty should log in with their SONIS ID or their LDAP ID, if applicable.
If the Select Online Courses option is set to Yes, only course sections with the On-Line box checked will be included in the export to Moodle. If No is selected, all courses with a valid course type will be exported.
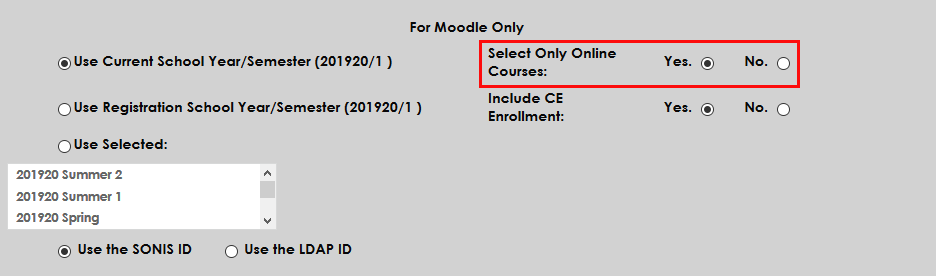
Administrators can also choose whether to include Continuing Education courses in Moodle or not by selecting Yes or No.
Finally, scroll down to the section labeled For Blackboard, WebCT, Moodle, Canvas, and Scholar360 Only. Choose whether each course in Moodle will Use Lead Faculty or Use Lead Faculty and Additional Instructors. Additional instructors are added on the Section: Edit page.
Click Submit at the bottom of the page to save the changes and activate Moodle.
Schoology
To learn more about the SONIS interface with Schoology, visit the Schoology overview page.
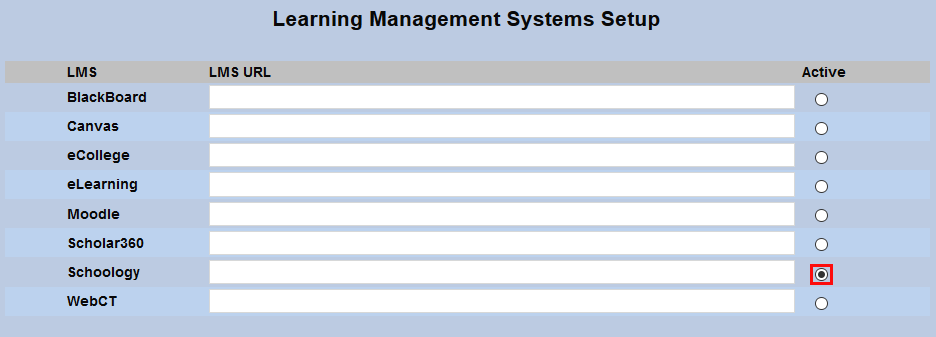
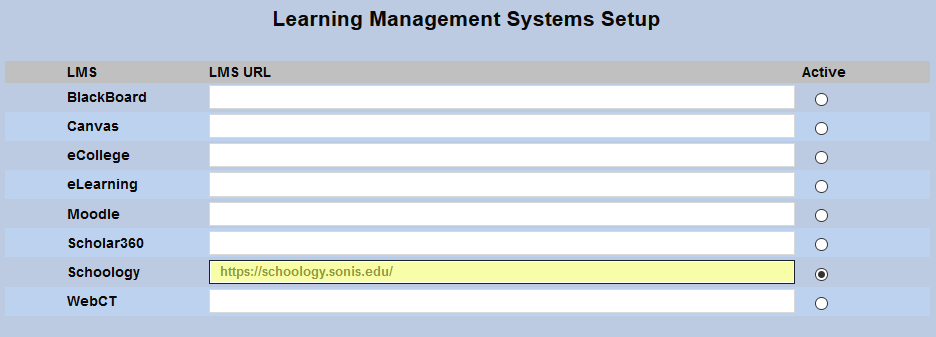
To set Schoology as the institution's learning management system, navigate to the Learning Management Systems Setup page under the Systems menu and check the Active button in the Schoology column.
Enter the referral URL in the Schoology field.
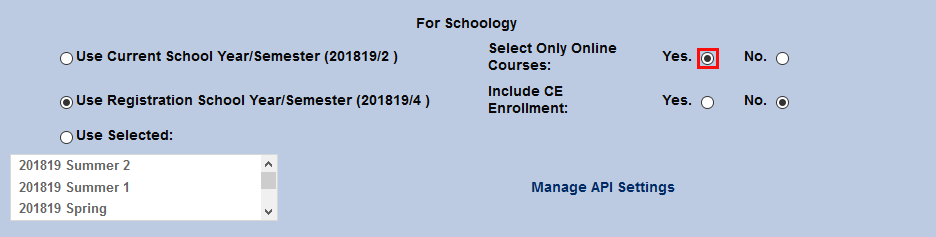
Scroll down to the For Schoology section and choose the semester to be used.

If only courses designated as Online should be included, change the Select Only Online Courses radio button to Yes. If CE courses should be included, switch the Include CE Enrollment button to Yes.

Click the Submit button at the bottom of the page to save the changes.
WebCT
To set WebCT as the institution's learning management system, navigate to the Learning Management Systems Setup page in the Systems hub and check the Active button in the WebCT column.

Next, scroll down to the section labeled For Blackboard, WebCT, Moodle, Canvas, and Scholar360 Only. Choose whether each course in WebCT will Use Lead Faculty or Use Lead Faculty and Additional Instructors. Additional instructors are added on the Section: Edit page.
Click Submit at the bottom of the page to save the changes and activate WebCT.
No other setup on this page is required. Though keep in mind that each course to be included must be configured for export. See the Blackboard overview page for more information on this process.