Grades
Overview
The Grades page of the Faculty Portal provides the ability to quickly enter the grades for courses at Mid-Term and Final. Functions are also provided to make the grades official, print and sign the graded roster, and to add notes.
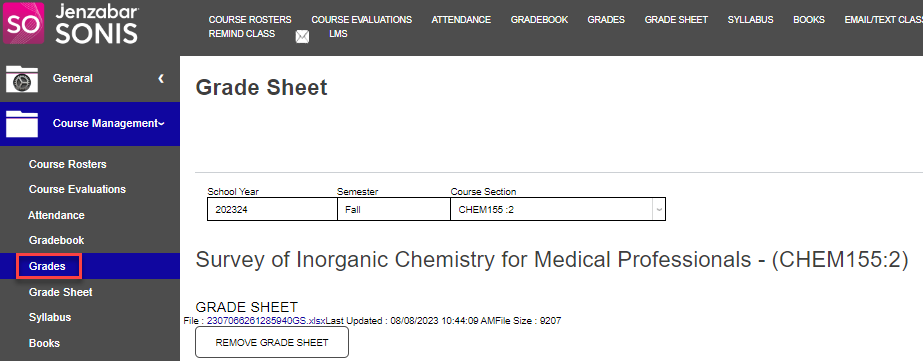
Entering Grades
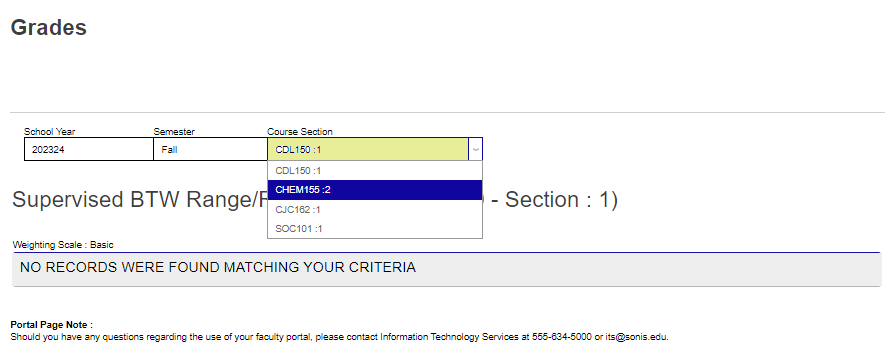
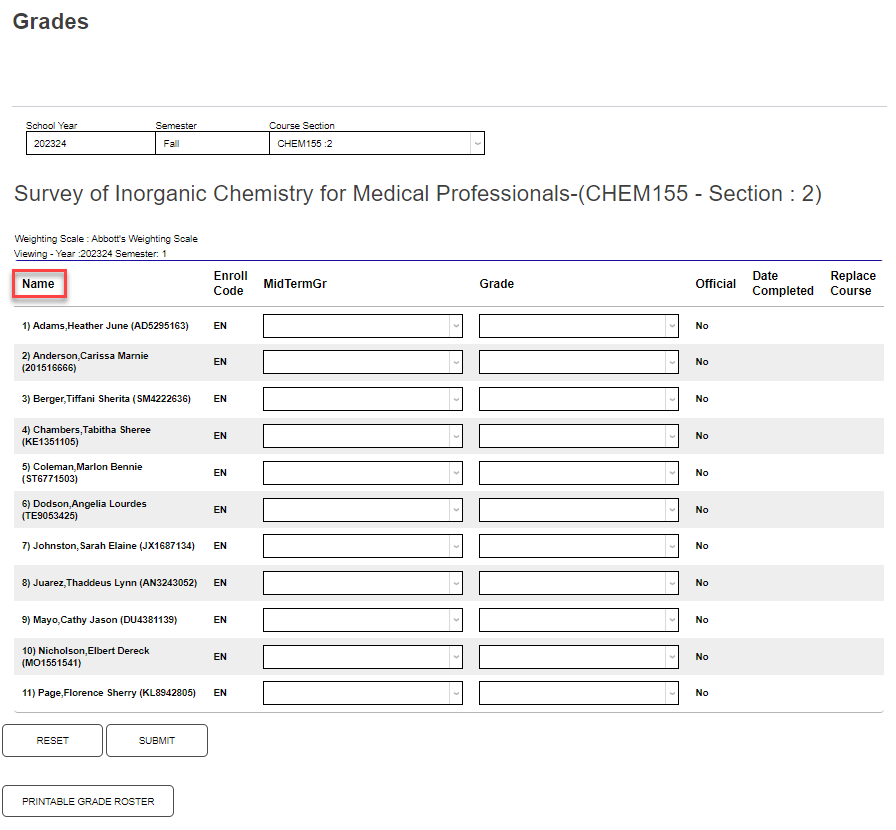
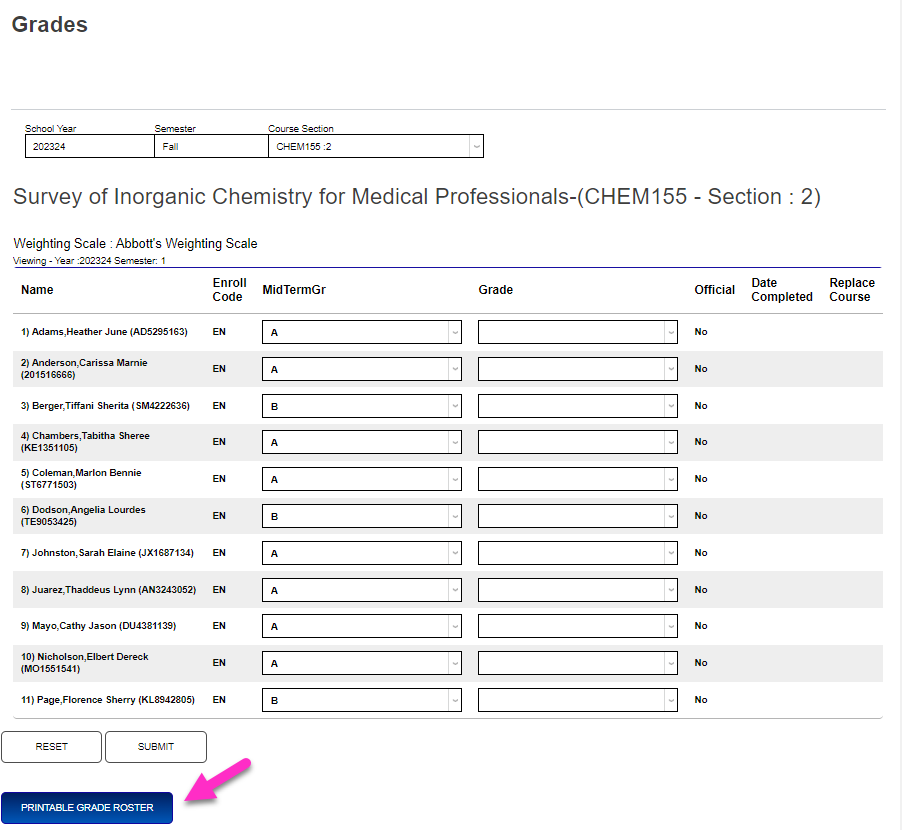
To enter midterm or final grades, click Grades in the Course Management menu. The School Year and Semester autofill based on the active year and semester settings. To change either value, click in the field(s) and select the desired year and/or term from the dropdown menu(s).

If the desired Course Section is not displayed, select it from the dropdown menu by clicking in the field and selecting it from the displayed options. The page will automatically repopulate and display the roster of enrolled students with areas for entering the midterm and final grades.
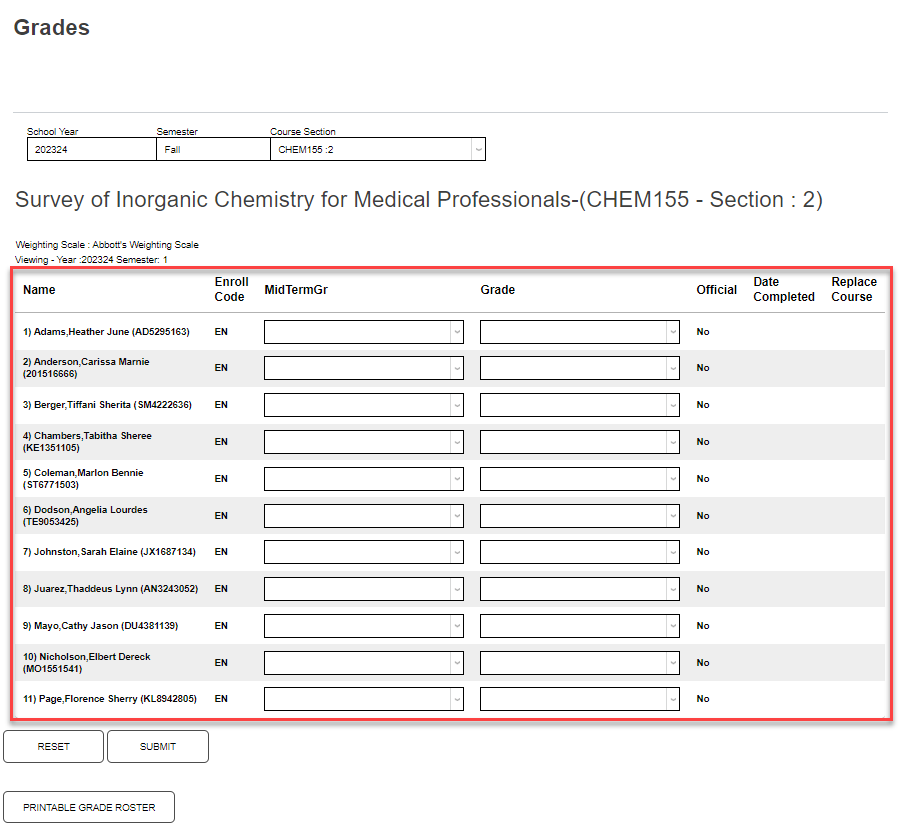
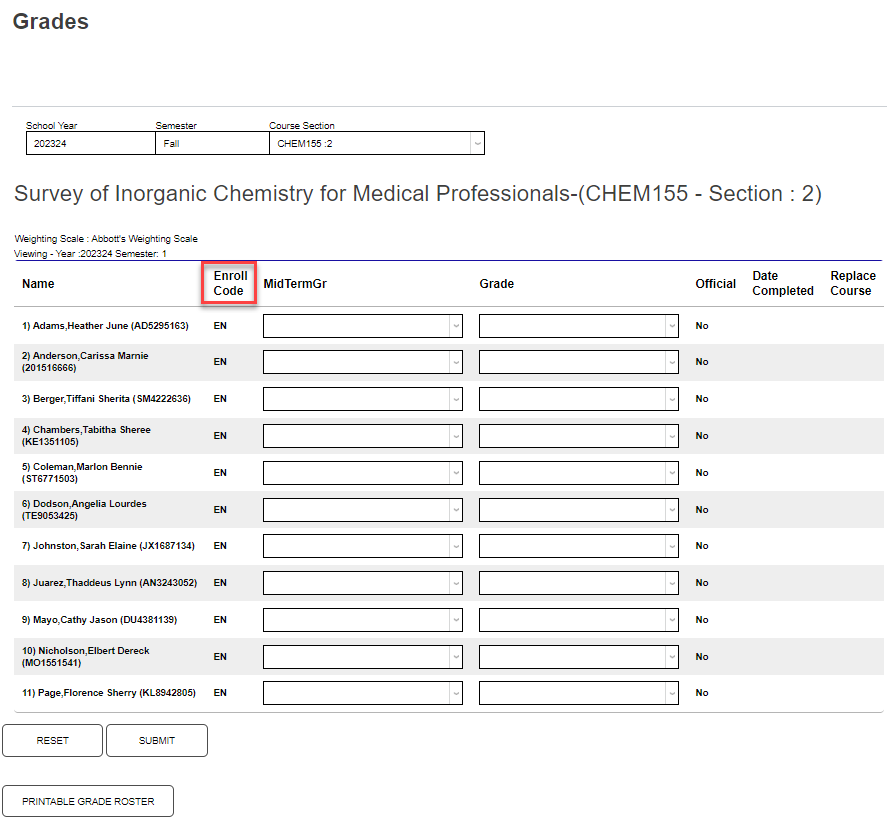
The student's name and ID display in alphabetical order by last name in the Name column. The student's current enrollment status displays in the Enroll Code field.
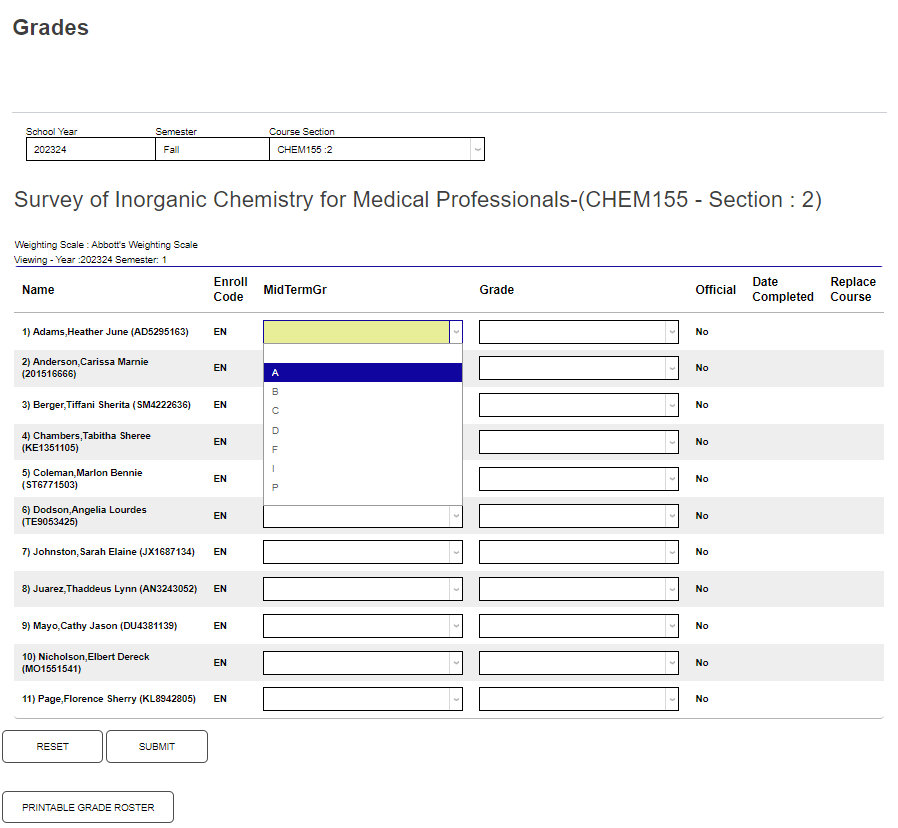
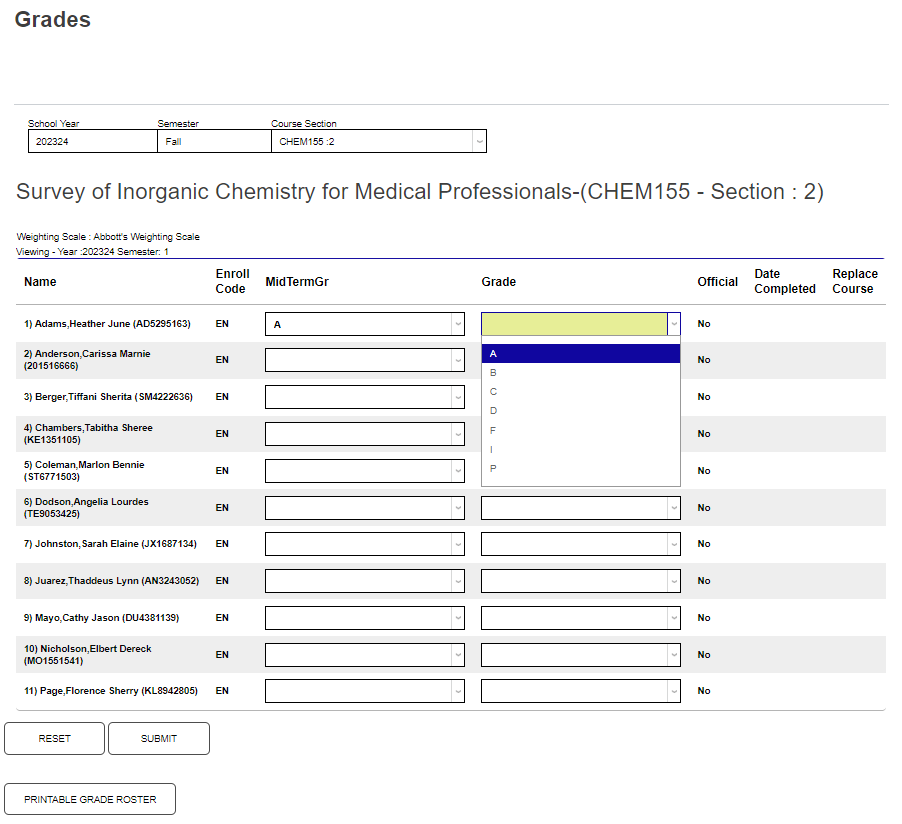
At the appropriate intervals or timeframes in the term, assign midterm grades by clicking in the MidTermGr drop down menu and selecting the desired grade. Assign final grades by clicking in the Grade drop down menu and selecting the desired grade.
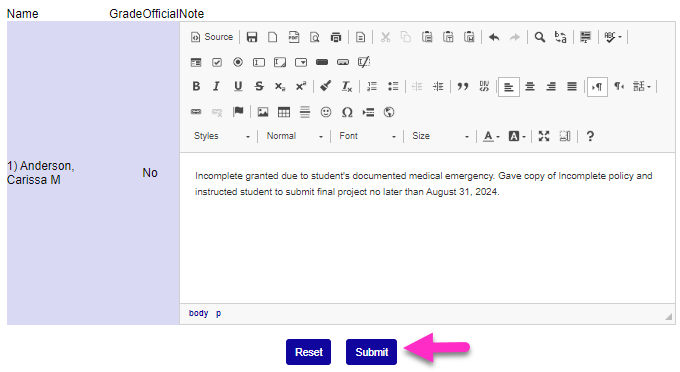
If a grade is selected that requires a note be entered, after selecting the grade, a new column Note Reqd will populate and display the word Note next to any grades that must have a note entered before the grade is submitted. Click Note to open the note entry window. The note entry window functions much like other web-based text entry boxes. Notes can be copied/pasted, formatted, and/or edited using the text editing options. After entering the note, click Submit to save it. The grade note will then be submitted to the SONIS administrative portal and can be viewed by administrators, as necessary.
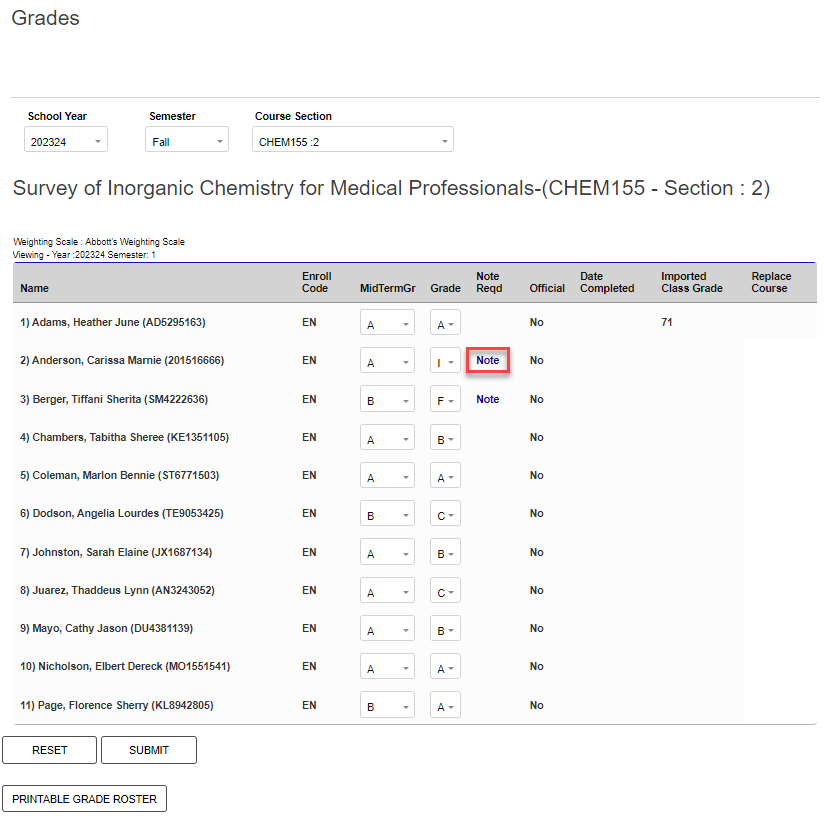
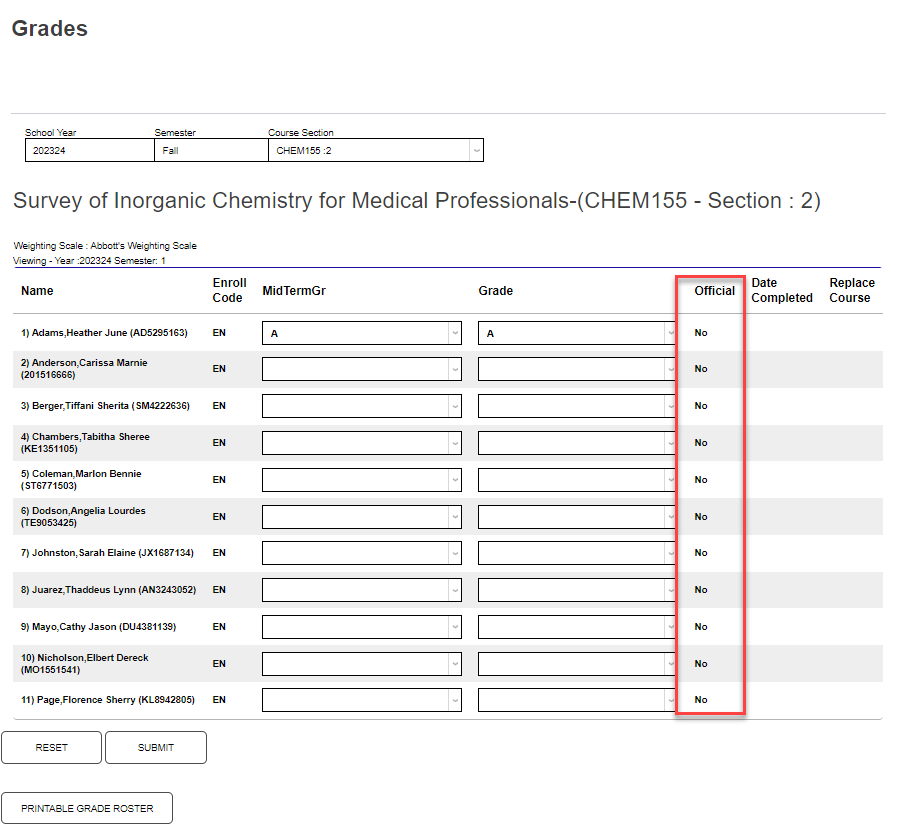
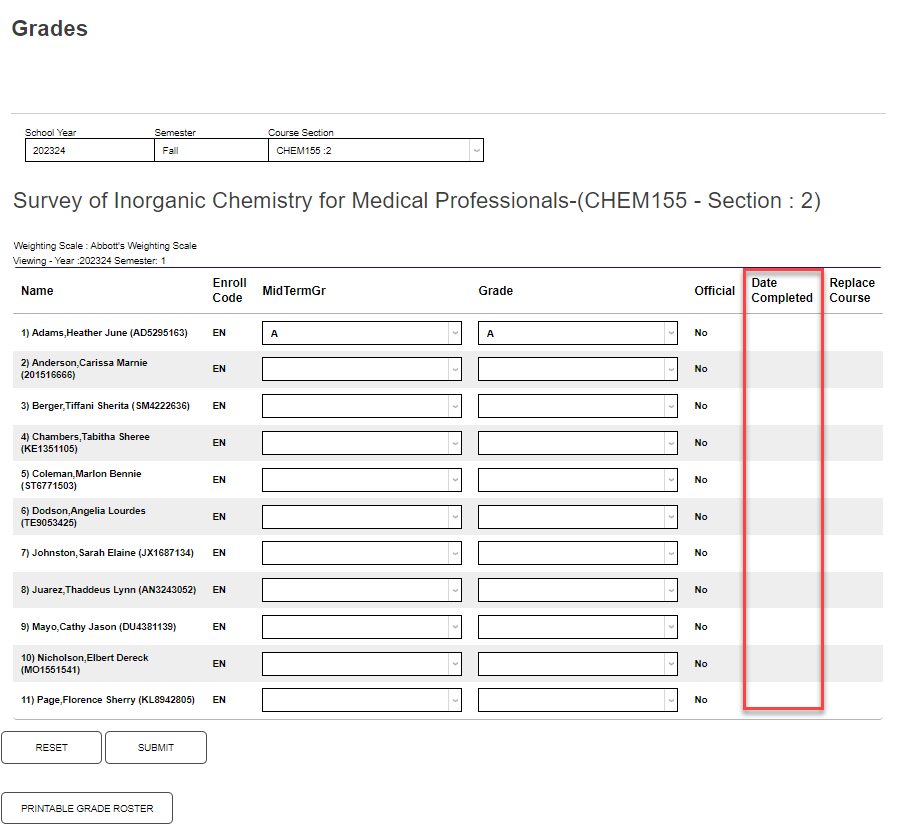
Depending upon institutional processes, an option to make the grade official may display. At others, the Official column will display the status of the grade instead of the option to make it official. If the option to make the grade official displays, the Date Completed column will populate with the last day of the course. It can be changed to reflect the last date of attendance for the student by clicking in the field and entering the desired date.
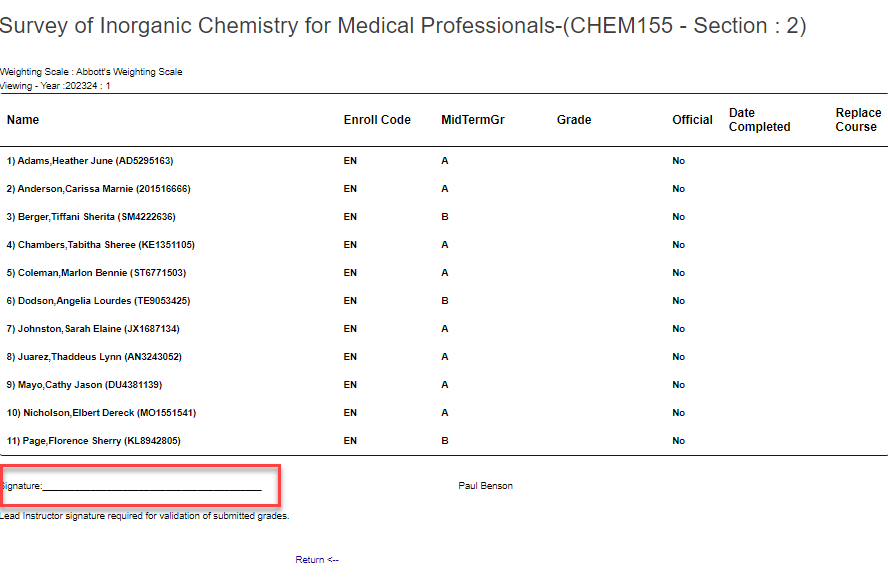
Click Submit to finalize the entries. If necessary or desired, clicking Printable Grade Roster creates a grade roster than can be printed and signed.
Official Grades
Normally, only staff members like the registrar can make grades official. However, faculty members can also mark grades as official if they have a Staff account with the correct permissions in addition to their Faculty login.
To give a faculty member with a staff profile access to make grades official, navigate to User Security, under the Users hub and turn on the Make Grades Official permission.
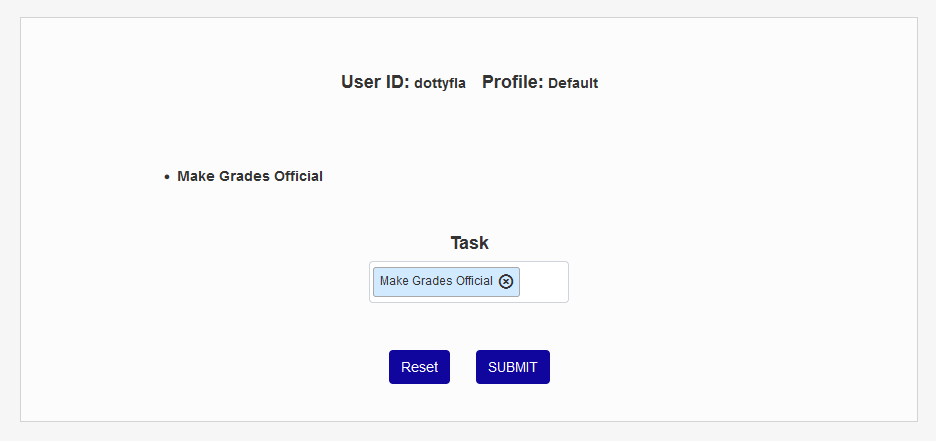
Once the proper settings are in place, the option to make grades official should appear. Check the Make All Non-Blank Grades Official box. Then enter the date when the grades should be official in the field to the right. When you save your changes to the page, all grades being entered will be marked as official with the specified date attached.

Numeric Grades
Some schools may require faculty to assign letter grades using numeric grades rather than letter grades. If your school uses this method, the grade select drop-down menu will be replaced by free-form fields which accept only numbers. Type the appropriate numerical grade into each Grade and, if applicable, Mid-Term Grade field. Click Submit to save your changes.
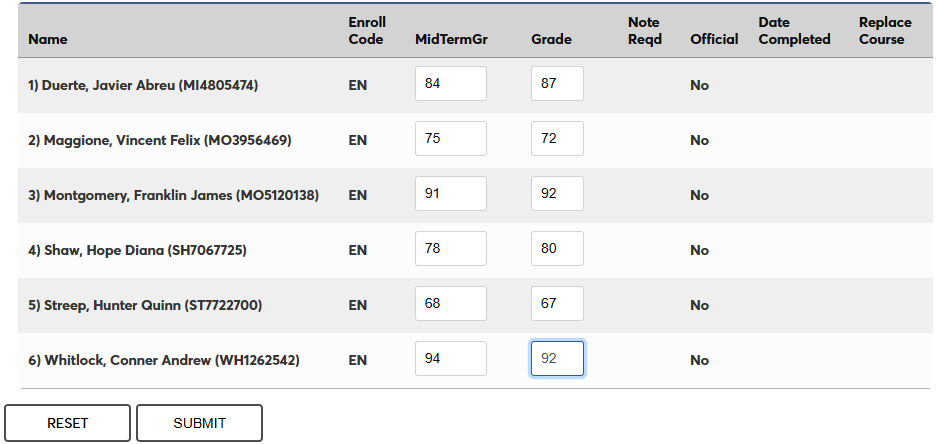
When the page reloads, the letter grade that corresponds with each numerical grade based on your school's grading scale will be displayed. You can edit the grades and submit the page again as long as they haven't been made official.

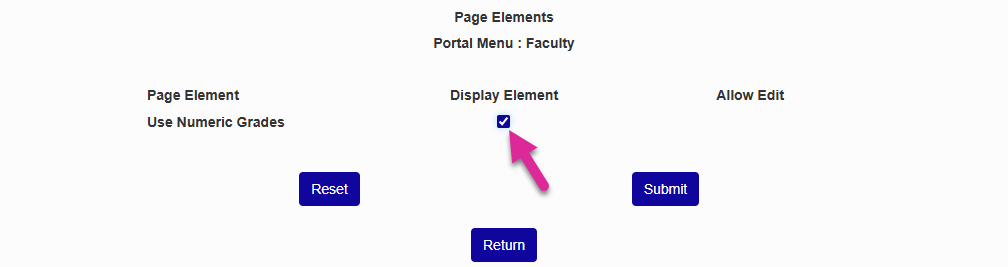
Administrators, to turn this feature on, navigate to the Faculty page of the Portal Menu Utility. Click the Edit button for the Grades page.
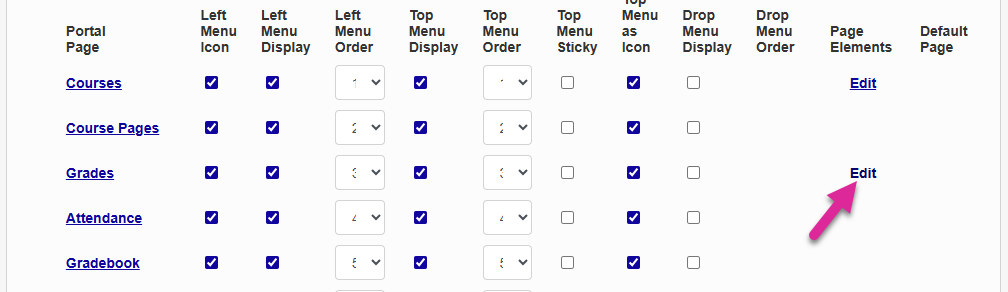
On the next page, check the Use Numeric Grades Display Element box and click Submit.