Language Translation
Overview
To accommodate international clients and allow our clients in primarily English-speaking countries to welcome minority populations, Jenzabar SONIS offers the ability to translate internal text in the Student, Faculty, and Alumni portals to an alternate language. Additionally, institutions can turn on multi-language functionality for the Online Application and Prospect Inquiry Card. Due to the number of languages spoken by SONIS clients and their students and the regional and colloquial variations that can greatly affect comprehension when translating any text, SONIS requires each institution to create their own translations and use the tools that SONIS provides to input this data.
Translation Options
The following options for language translation are available and can be activated by a SONIS consultant:
• Language: Makes language options visible.
• Language Log: Creates a log that notes every piece of text that has not been translated. This should only be activated during testing as it creates an entry every time the untranslated word is encountered, resulting in a huge file when a large number of users access the system at once.
• Portal Translations: This feature turns translations on inside the Faculty, Student, and Alumni portals. When active, these portals will appear in the user's Preferred Language as set on their Biographic page.
• Online Application Translation: Allows applicants to view the Online Application in the language of their choice. When active, the applicant must choose a language before beginning their application.
• Prospect Inquiry Translation: Allows prospects to view the Prospect Web Inquiry Card in the language of their choice. When active, the prospect must choose a language before beginning their inquiry.
• Administration: This feature is in progress. Coming soon.
Language Table
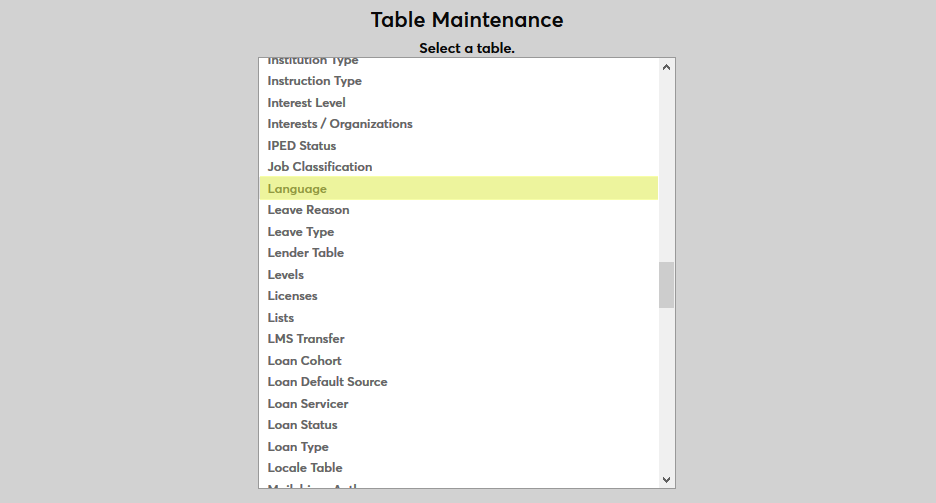
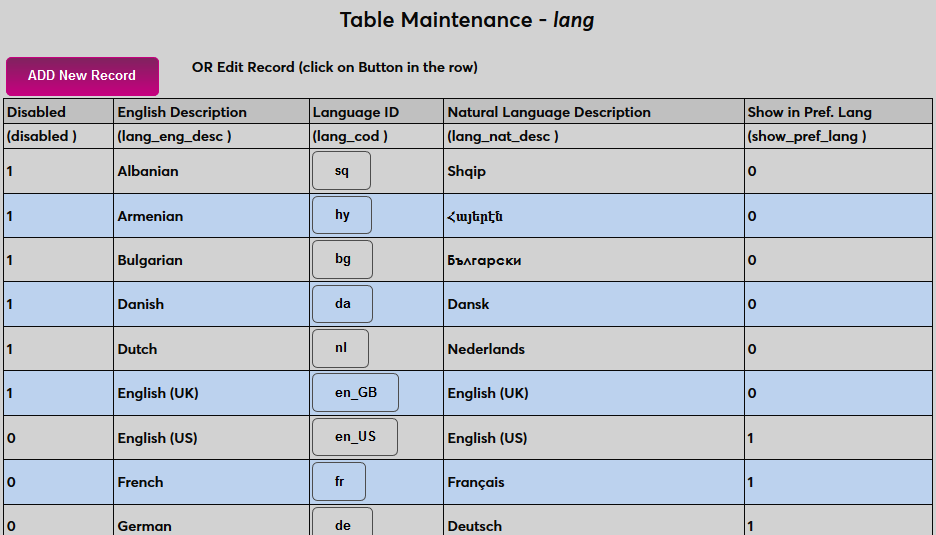
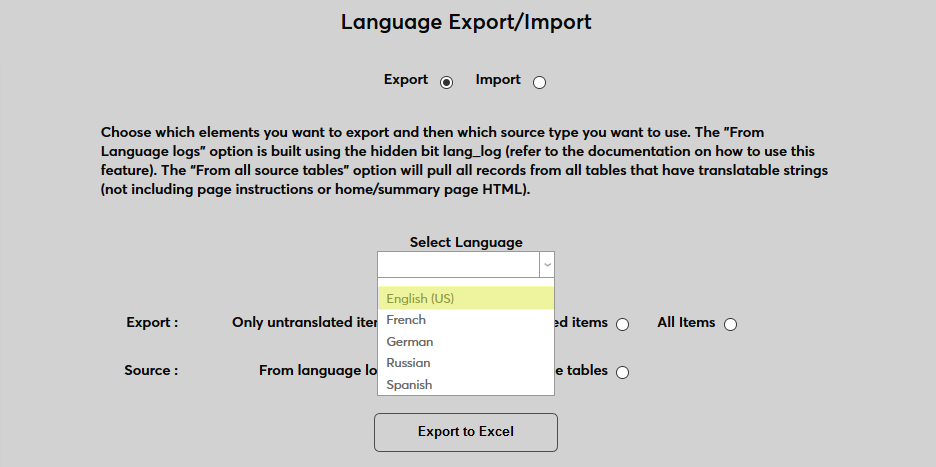
Before translations can be created, each language to be utilized must be set up and enabled. Navigate to Table Maintenance in the Systems hub and select Language. Many common languages are prepopulated to the table. Click Add to create a new entry or click on the Language ID to edit an existing language.
On the following page, begin by creating an English Description for the language.

Next, provide a Natural Language Description, what the language is called in the language.

Create a Language ID, a shortened version of the language name that the system will use to identify it. This field has a six character limit.
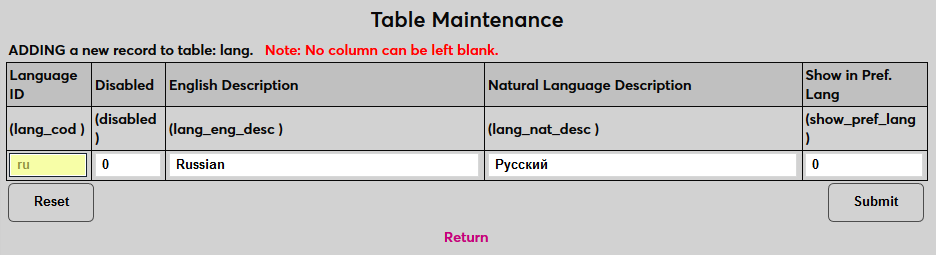
Place a 1 in the Show in Pref. Language field to make the language an option that can be selected as a user's preferred language or or leave a 0 to prevent it from being selected. This option must be turned on to use the language for internal translations.
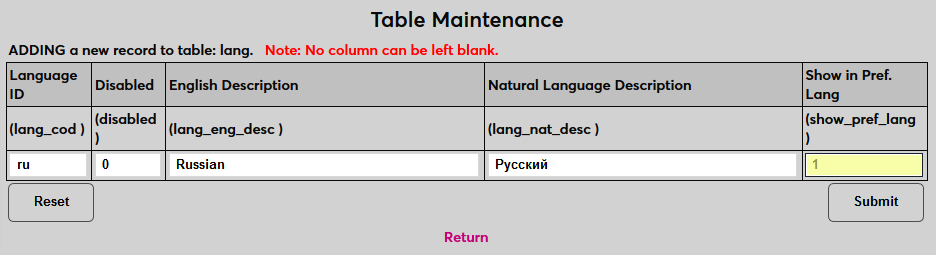
Place a 1 in the Disabled field to prevent the language from being used or leave a 0 to allow it to be used. In most cases, languages should not be enabled and set as available as a preferred language until the translation for that language has been uploaded and tested.
Click Submit to save the changes and create the language.
Language Export/Import
The Language Export/Import utility allows users to export text from the system, excluding page instructions, home/summary page HTML, and some data fields as an excel file. Institutions can then create a translation of each word or phrase in the file as a translation key. Once this key has been created, the file is then uploaded to SONIS where the system will replace the original English text with the translations when the new language is selected. The benefit of this method is that it's comprehensive and administrators can copy/paste text in large blocks into the file.
The following fields are not included in the export file and must be translated elsewhere in the system. The first column of the table lists the table, area, or field that's not included and the second column lists where it's found in the SONIS system for translation. For examples of what translating text on a field-by-field basis looks like, visit the Majors & Minors documentation.
Table/Area | Location |
Online Application page notes & help text | Systems/OA Setup |
Application Checklist items | Systems/Table Maintenance |
Dispositions for applicants | Systems |
As alluded to above and discussed in more detail below, many other areas of the Admin portal are not available through this file since Admin translation is still a work in progress. The majority of this text can be translated through the Captions and Columns utilities, but this is a much more time-consuming process.
Export
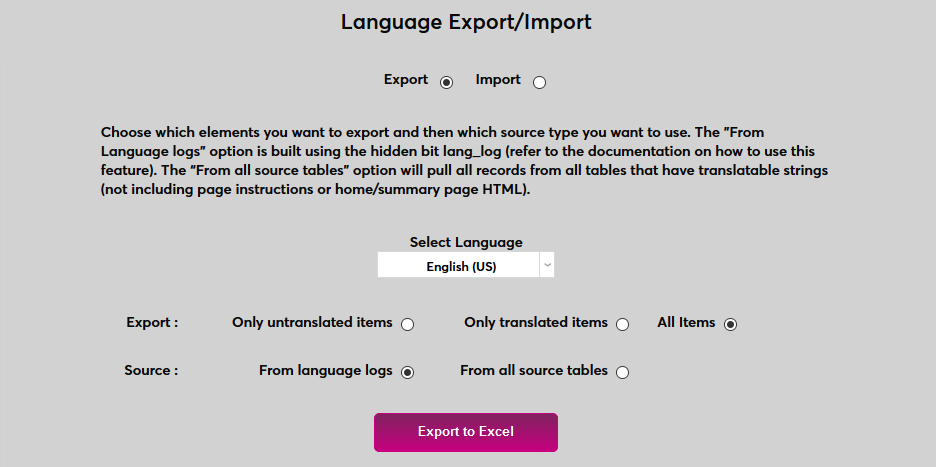
To begin the process, navigate to the Language Export/Import utility under the Systems hub. Ensure that the Export option at the top of the page is selected.
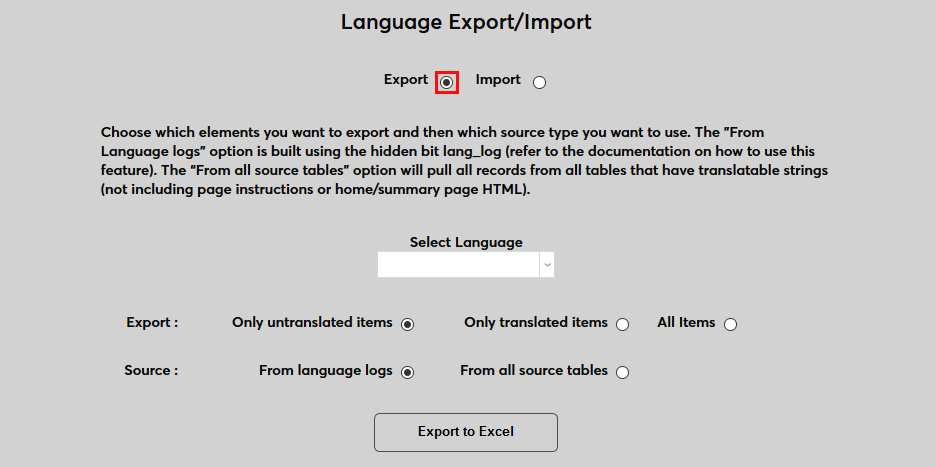
For the initial export, select English as the language since English is the default language for SONIS.
Select All Items. The Only untranslated items and Only translated items options can be used after the initial translation has been made to find fields that were missed.
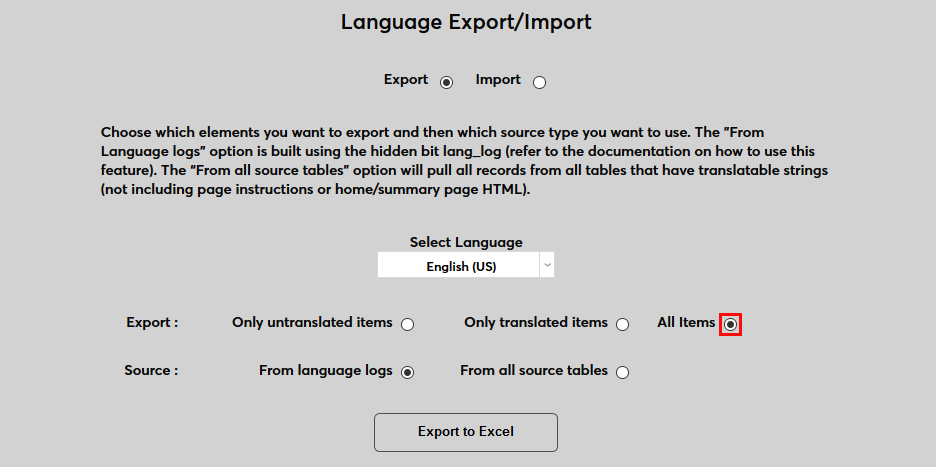
Select From all source tables as the Source. The From language logs option is designed to be used when a language log file has been created during testing as mentioned above.
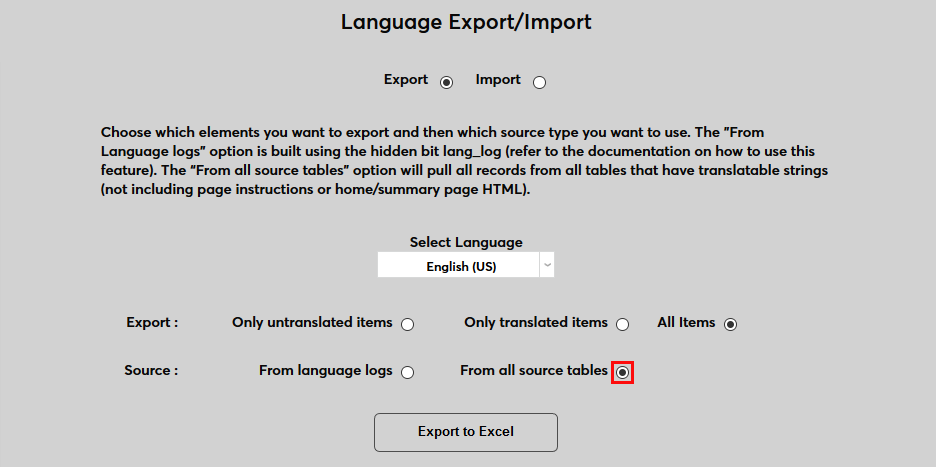
Click Export to Excel to create the export file.
Altering the File
Once the file has been created, fill out the Translated Text column with the proper translation for each value in the language being translated. This can be accomplished in masse by using a translation app to copy and paste several rows at a time. However, it's strongly recommended that each translation be verified by a person who is fluent in the language being translated to avoid errors based on homonyms, syntax, etc.
Additionally, the language code for the language being imported should appear in every field of the Language Code column. This value is found in the Languages table under Table Maintenance. Do not alter any other fields.

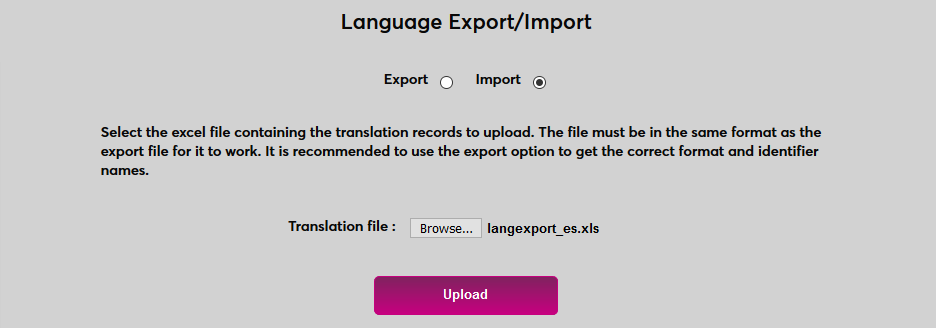
Once the translations have been entered, save the file for import. The file name should be langexport_[language code] For example, langexport_es for Spanish. Do not change the file format.
Keep in mind that this process can be repeated if fields are skipped to save time, though it's recommended that institutions translate as many fields as possible during their first upload.
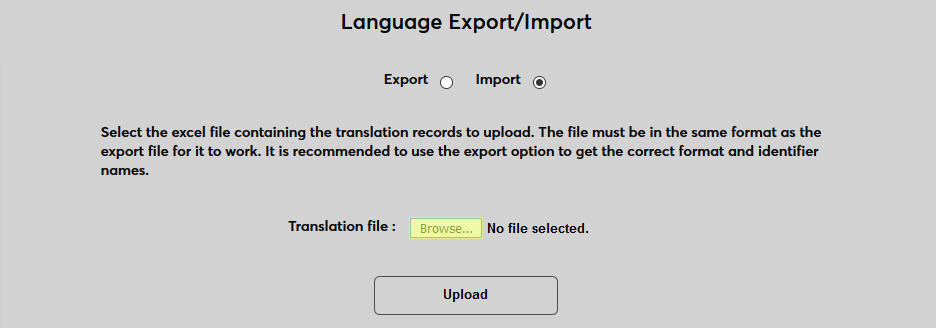
Import
To import a file with translations in place, select the Import button at the top of the page.

Click the Browse button. Locate and select the saved translation file.
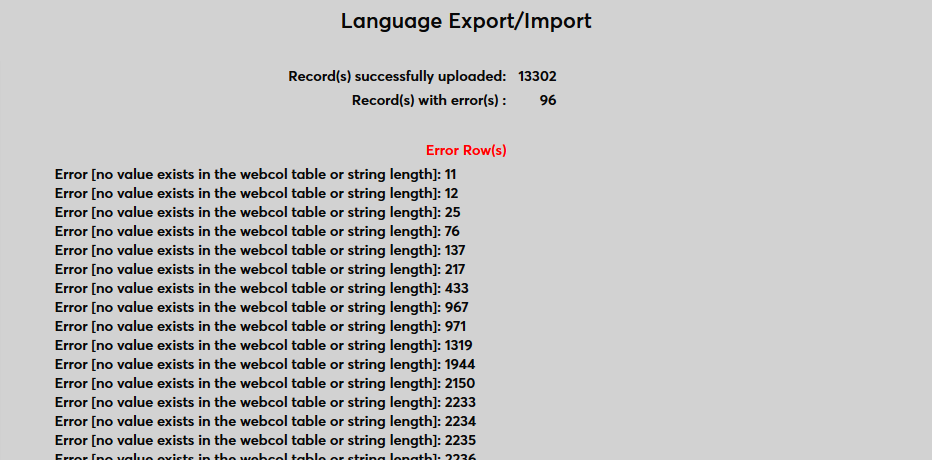
Click Upload to upload the file. Once the file is uploaded, a results page will appear listing specific errors along with the row where they appear.
Language Translation Utility
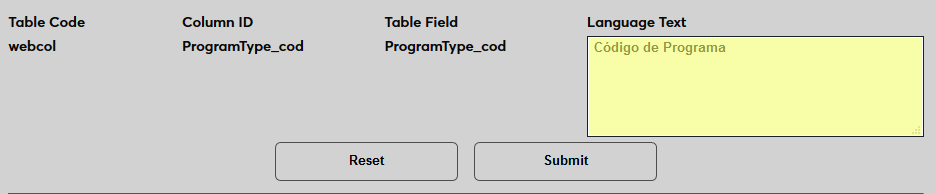
Once an initial translation has been created, the Language Translation Utility can be used to make quick updates to these translations. This utility allows users to select individual tables, columns, and fields to translate. Once a column, field, or table is selected, a field to create the translation for the selected language appears in SONIS with a Submit button to save it. The advantage of this method is that it allows quick, on-the-fly edits without the need for an export/import process that takes time as well as system resources. However, fields must have been translated already to appear.
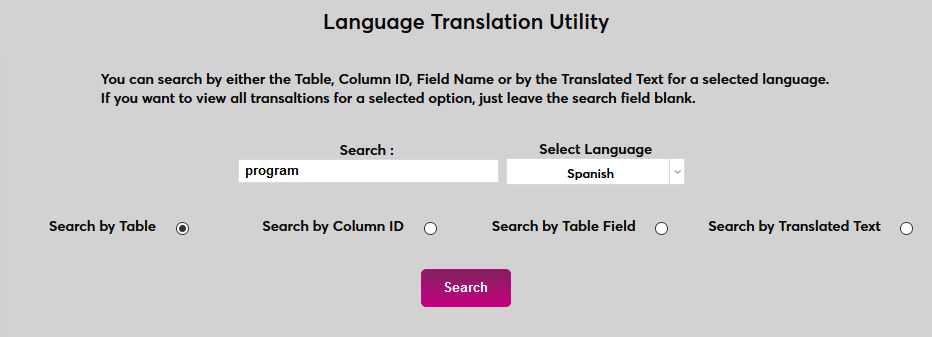
To use the utility, navigate to the Language Translation Utility in the Systems hub. Select a Language to search. All active languages are listed, but only languages that have translations will return results.
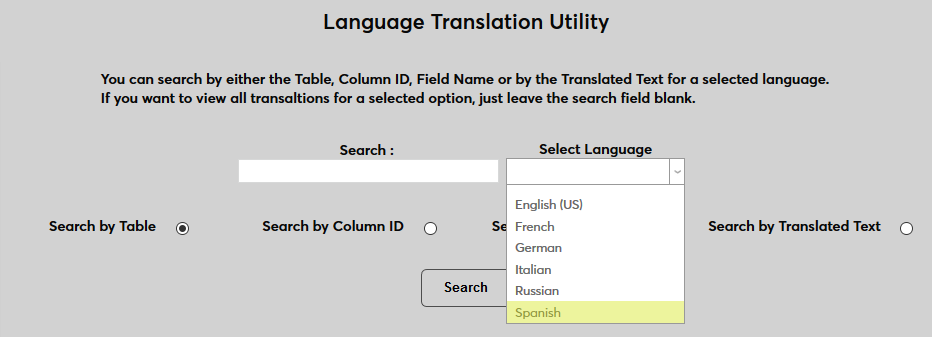
Next, choose whether to search by Table, Column ID, Table Field, or Translated Text. Each of these options corresponds to a column on the language export/import spreadsheet.
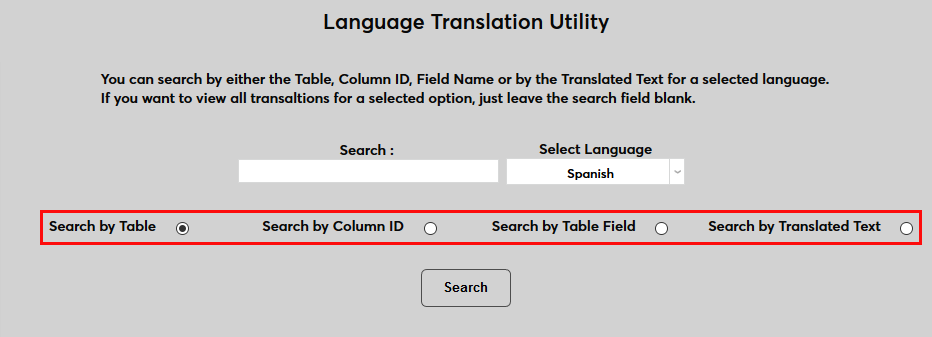
Enter a Search term. These terms can be broad or specific depending on the number of results needed. Keep in mind that the utility will only pull results for actual values found in the selected data set. The Translated Text field is most useful for broad searches as those fields should contain full words and sentences rather than abbreviations.

Click Search to search for the text in the selected data set.
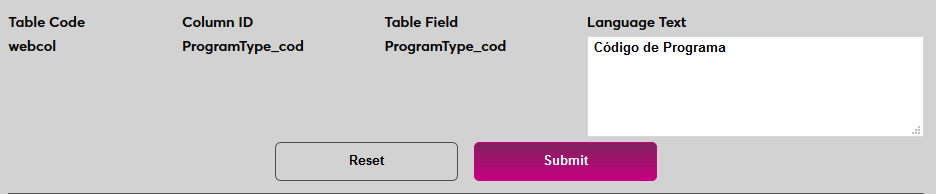
Alter the text in the appropriate field and click Submit to update it. The translated text will be changed wherever it appears.
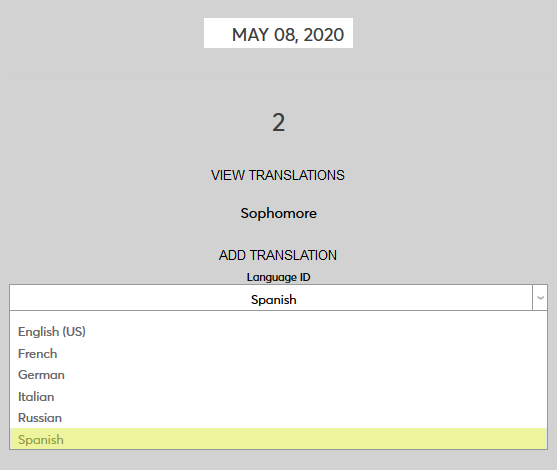
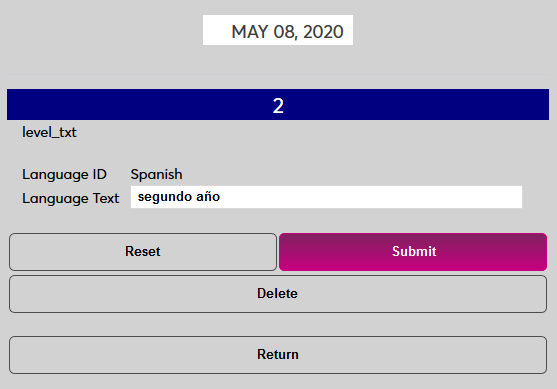
View Translations Link
As alluded to above, some values are not included in the language export file. Many of these values can still be edited using the View Translation links located throughout the Systems hub in the Admin portal. The links are found in Table Maintenance, Columns, Captions, and OA Setup among other places. To view or change a translation click the View Translation link. A new window will open.

Select a Language ID to add a language.
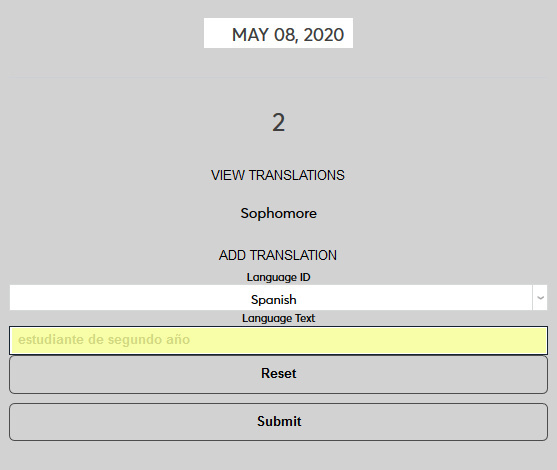
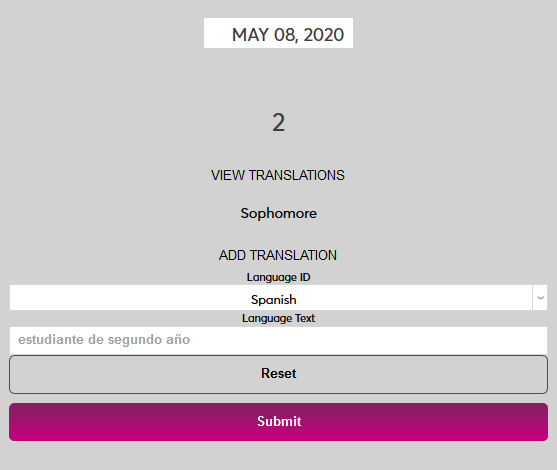
Enter the correct translation of the word of phrase in the Language Text field and click Submit.
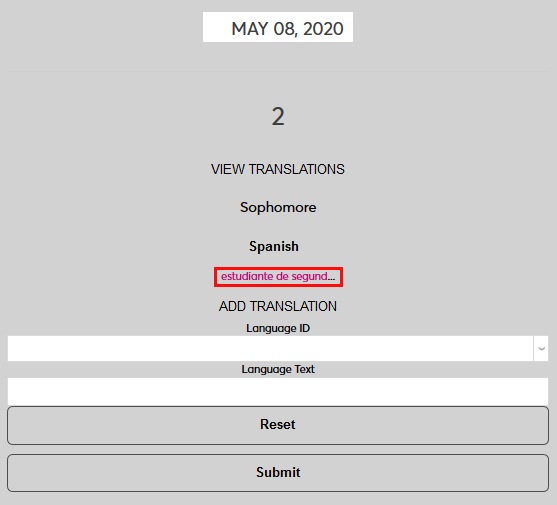
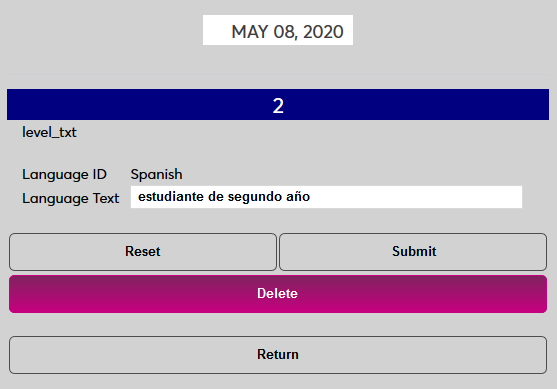
Once the translation has been added, the link displays all current translations. Click the translation text to edit or delete the translation.
On the following page, update the Language Text and click Submit to update the translation or click Delete to remove it.
Activating Translations
Online Application
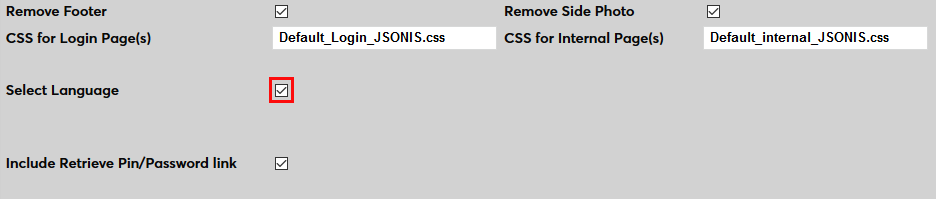
After the Online Application translation option has been activated by SONIS and language translations have been created, navigate to Login Page Setup and select Apply Online. Check the Select Language box and click Submit to save the change.
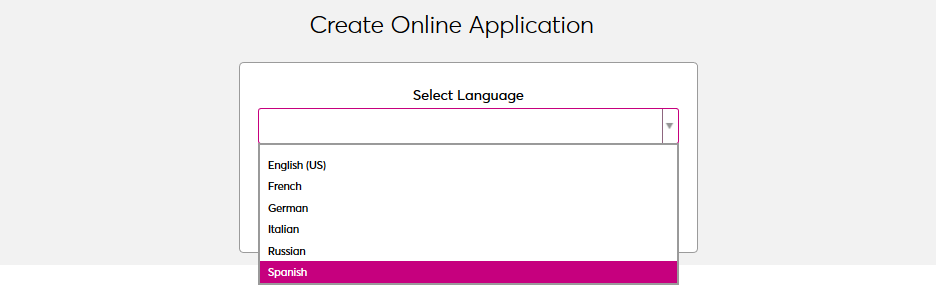
Once the select language feature has been activated, applicants will be asked to choose a language when beginning an application. The application will automatically be translated to their chosen language based on the translation data uploaded.

Prospect Inquiry Card
After the Prospect Inquiry Card translation option has been activated by SONIS and language translations have been created, navigate to Login Page Setup and select Prospective Students. Check the Select Language box and click Submit to save the change.
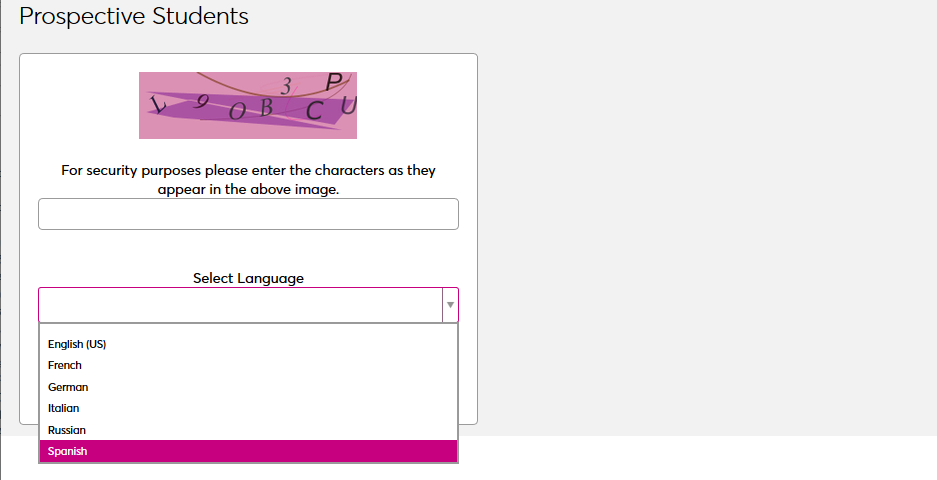
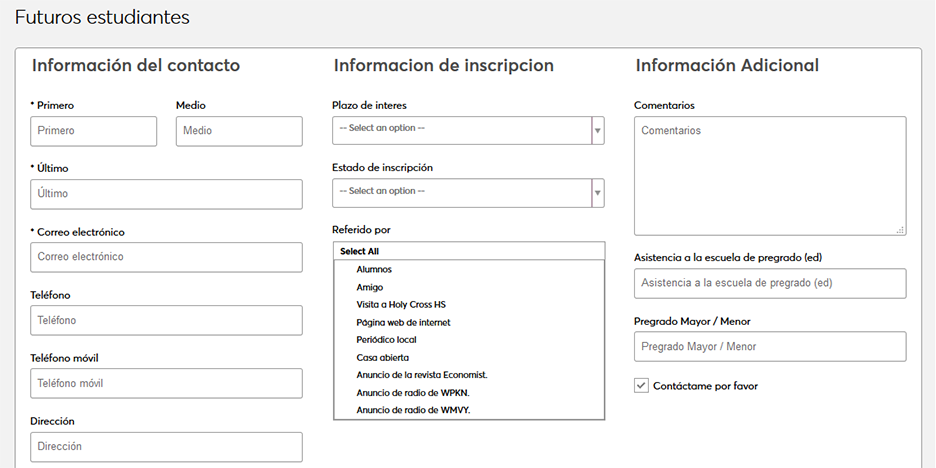
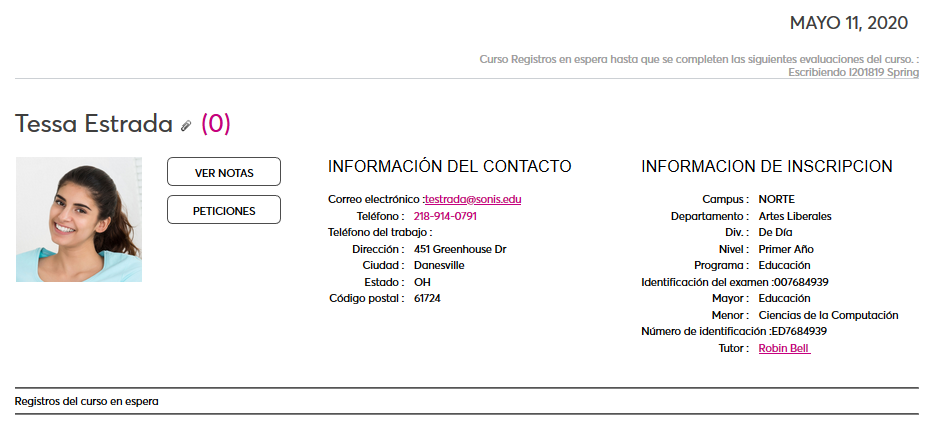
The language that the student selects is automatically added as their Preferred Language when their prospect record is created.
User Portal Translations
Text is translated in the student, faculty, and alumni portals based on the user's preferred language. After the Portal Translations option has been activated and languages have been translated, select a user and navigate to their Biographic page. Select the language that the user's portal should be displayed in under the Pref. Language field. Click Submit to save the change.

The user will see the page in the selected language the next time they log in.