PayPal Integration
Overview
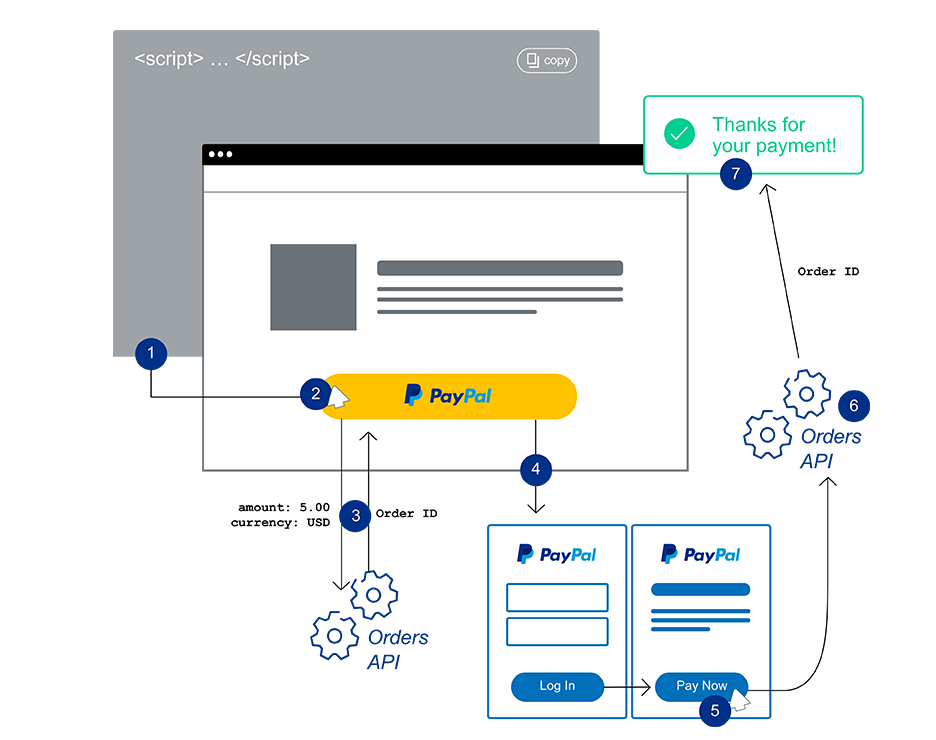
Jenzabar SONIS allows institutions to use PayPal, a popular online payment system, for checkout credit card processing. The simplest, most effective method is PayPal's client integration model, implementing the PayPal Checkout API. The integrated PayPal checkout does not require a web server to set up or execute payments. Instead, the PayPal Checkout Smart Button sets up and executes payments directly from the user’s web browser.
For an overview of Smart Button integration from PayPal, click here. Keep in mind that the coding portion of the process has already been completed by the SONIS development team.
PayPal can be configured to accept alternate currencies from users by enabling the Jenzabar SONIS Multiple Currency option.
Setup
Currency Locale
The PayPal Smart Button needs to know the currency locale of the institution when processing payments. This value is located on the System Variables page in the Systems hub. The Currency Locale will default to English US, but can be changed to a number of alternate values that PayPal will recognize.

PayPal Sandbox and Live API Credentials
In order to set up PayPal payments through SONIS, an institution must first have a PayPal Business Account. Creating an account is free through the PayPal website.
Once a Business account has been created, visit the PayPal Developer Dashboard located at https://developer.paypal.com/developer/applications/. Navigate to the Dashboard and select Accounts under the Sandbox tab in the left-nav. Click the Create Accounts button at the top of the page to create dummy Business and Personal accounts to be used for testing purposes before going live.
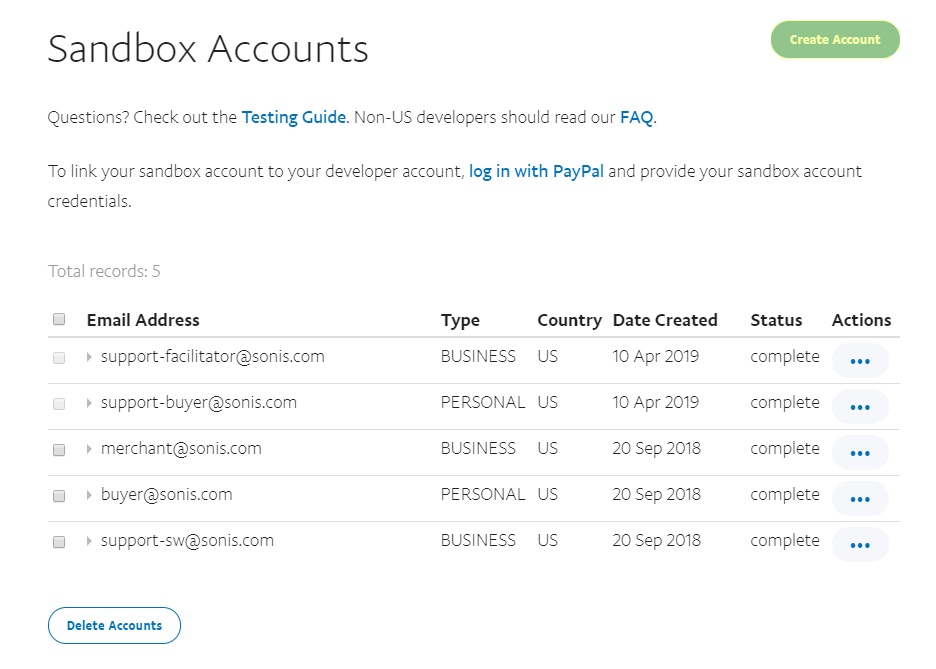
When setting up the Sandbox Accounts, please note that a fictional PayPal Balance of $5000 or more is recommended to avoid account creation setup errors. The email addresses entered for each account can be fictitious as well.
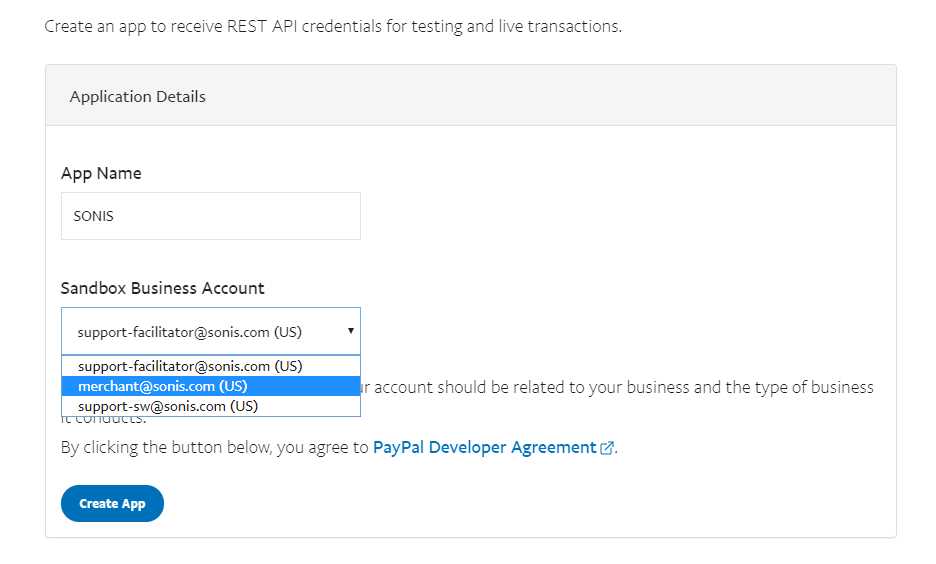
Once the Sandbox Account(s) are in place, navigate to the My Apps & Credentials under the Dashboard menu. Under REST API apps, click the Create App button. On the following page, name the app and select the Business account that will be used with the app for testing purposes. Click Create App again.
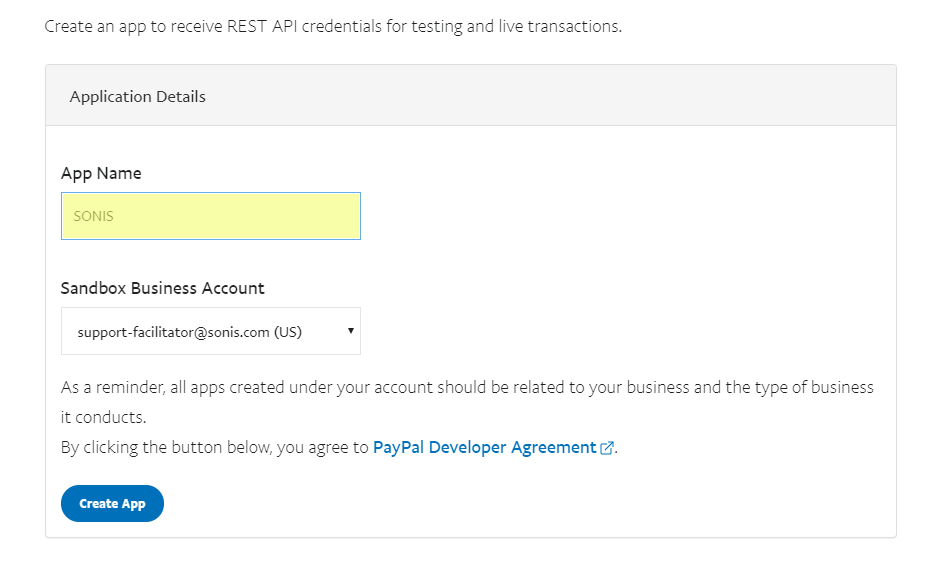
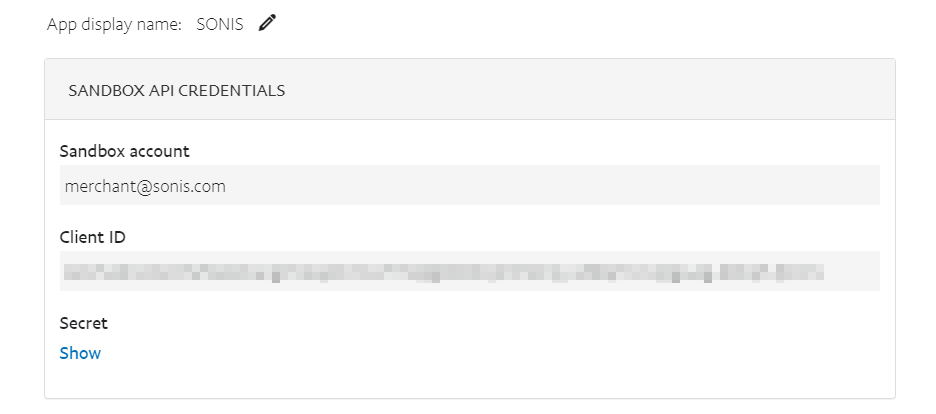
Once the app has been created, PayPal will display the Client ID and Secret. These can be accessed again at a later time by clicking on the app name from the My Apps & Credentials page.
PayPal Account Setup in SONIS
The PayPal Account setup utility is located in the Systems hub. Before setting up and activating the PayPal API in a live environment, it's strongly recommended that administrators test the API using the Sandbox Credentials located at the bottom of the page.
PayPal Testing
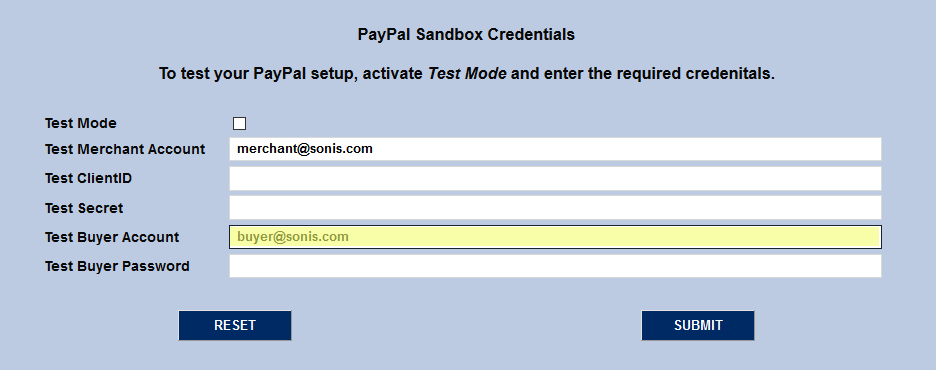
When testing the PayPal setup, the top portion of the page with the Live setup information can be ignored with the exception of the PayPal Account field. The PayPal Account field must contain the institution's actual account name in order for PayPal to connect from SONIS for testing purposes.
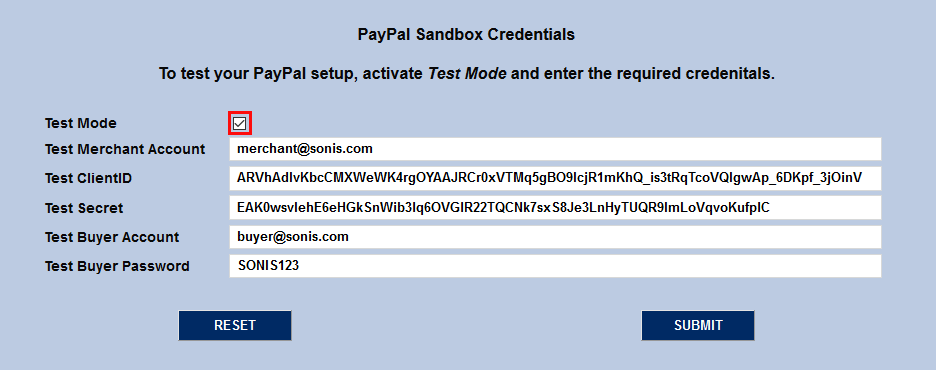
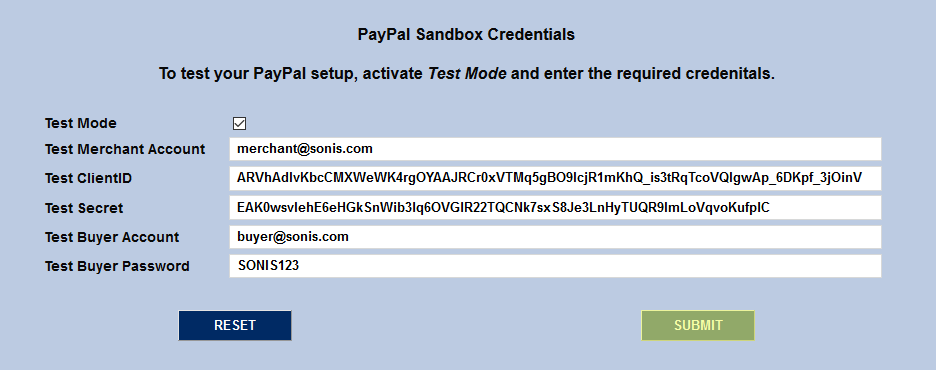
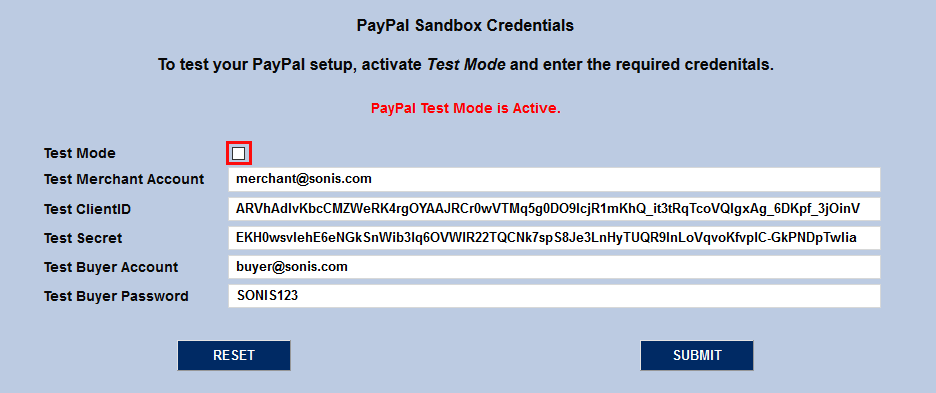
Next, in the lower portion of the page, enter one of the dummy accounts created in PayPal as the Test Merchant Account. This will be the account receiving the funds. Enter another dummy account as the Test Buyer Account. This will be the account sending the funds.
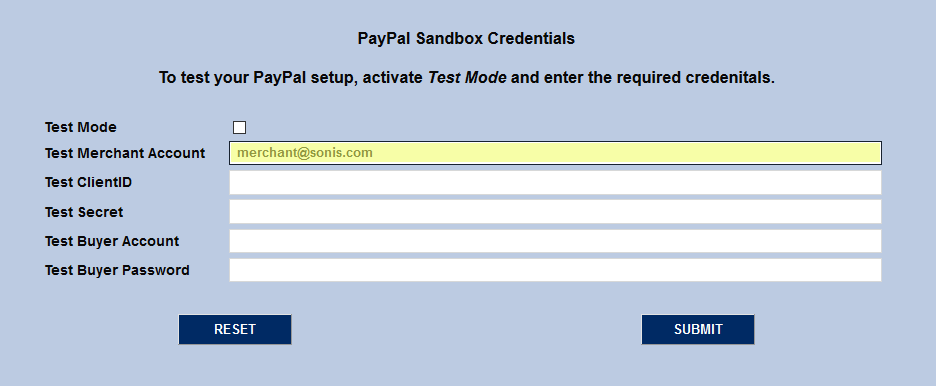
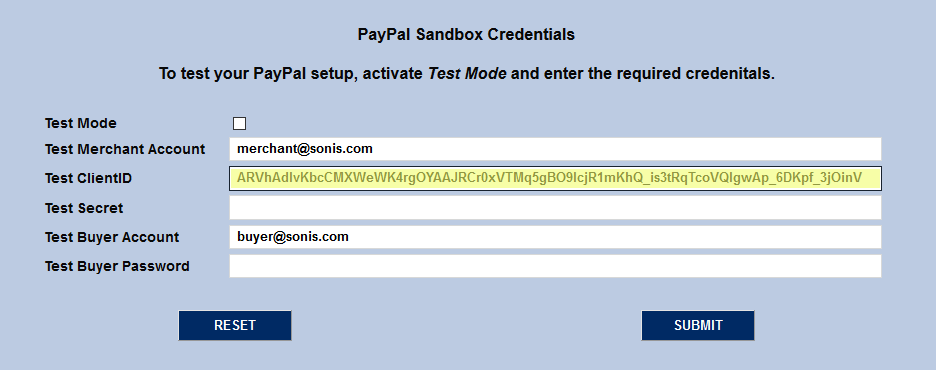
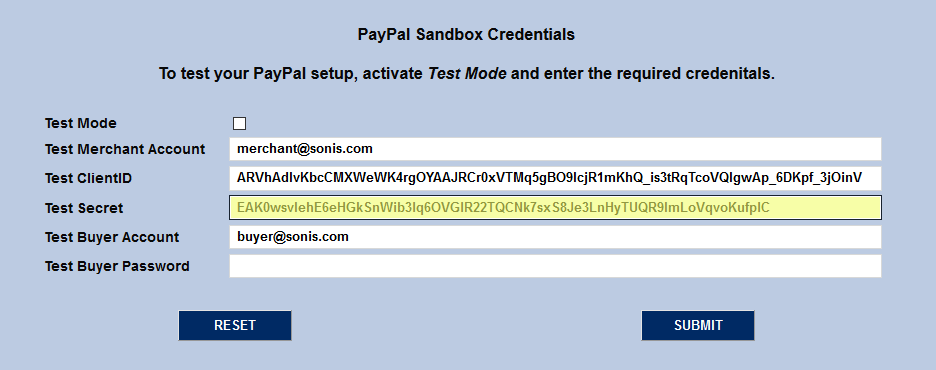
Copy the Test ClientID and Test Secret from the Sandbox API Credentials section on the PayPal website and paste them into the matching fields.
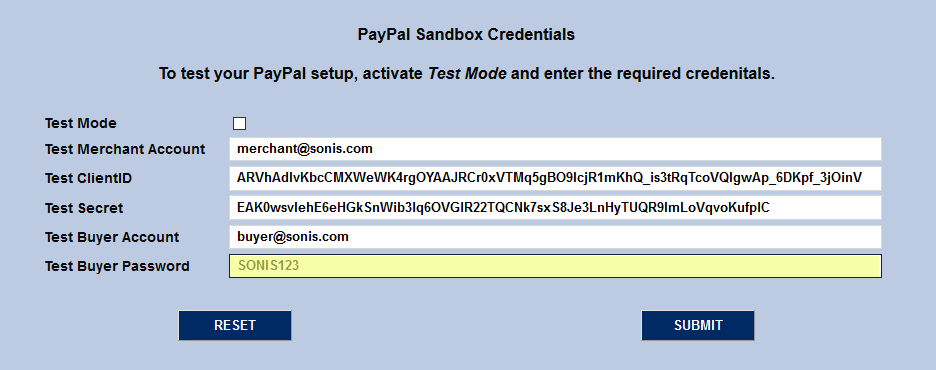
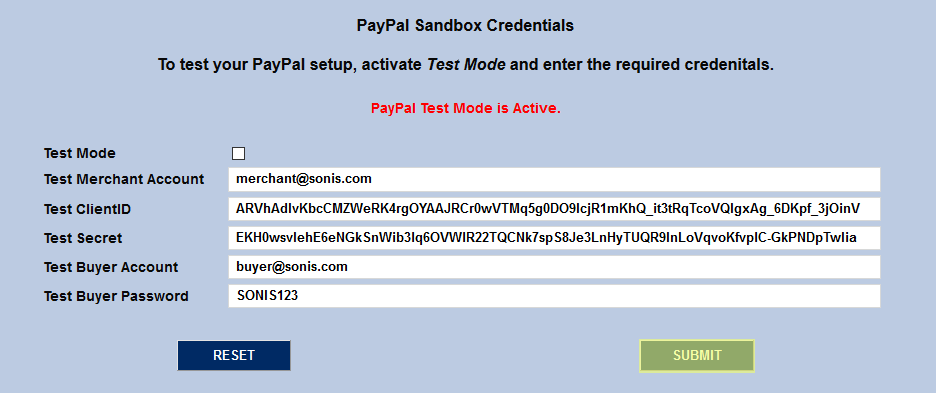
Enter the Test Buyer Password created on the PayPal site for the chosen buyer and check the Test Mode box. Click Submit to save the changes.
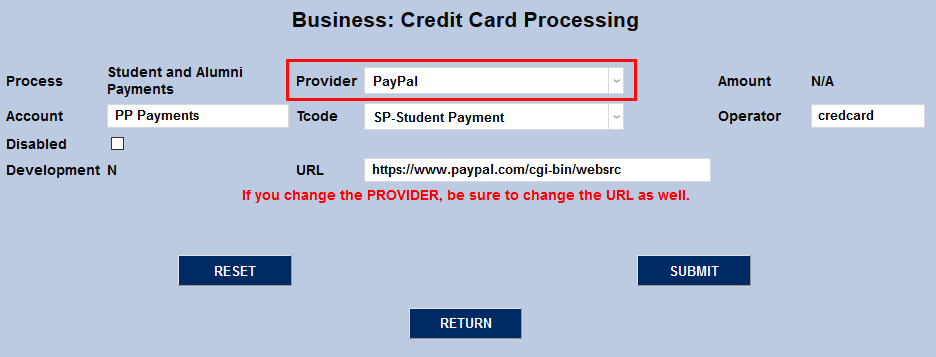
Before running the test, ensure that PayPal is selected as the Provider in the Credit Card Processing utility for the type of payment being tested.
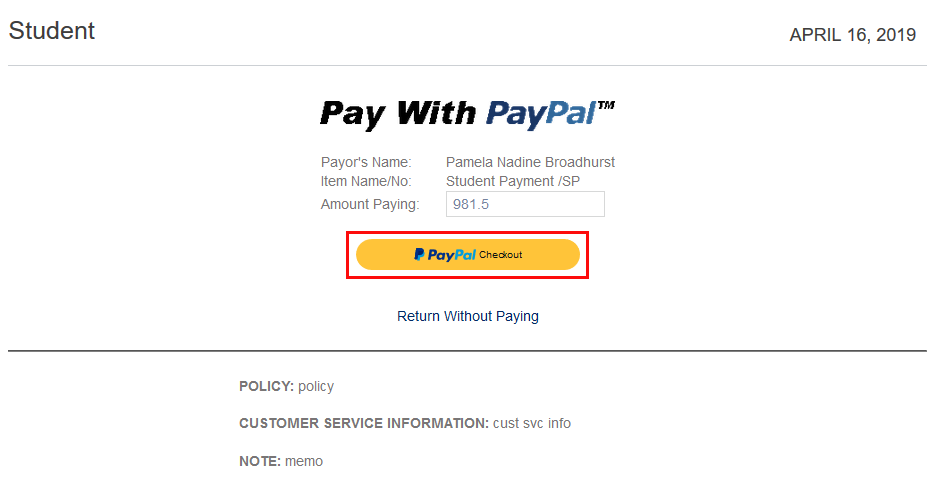
To test the PayPal setup, log into a test student account and navigate to Billing under the Financials heading. Click Credit Card Payment to proceed.
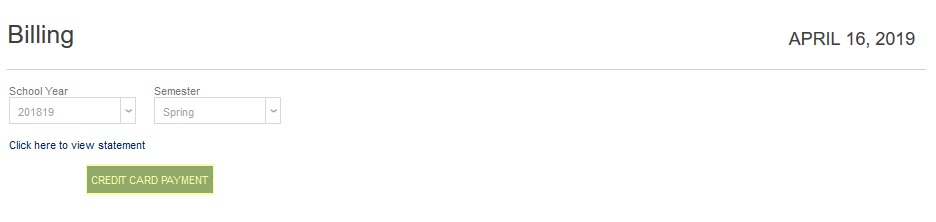
If the PayPal API has been set up properly, a PayPal Checkout Checkout Smart Button will be shown. Enter an dollar amount in the Amount Paying field if it's not filled in already and click the PayPal Checkout button.
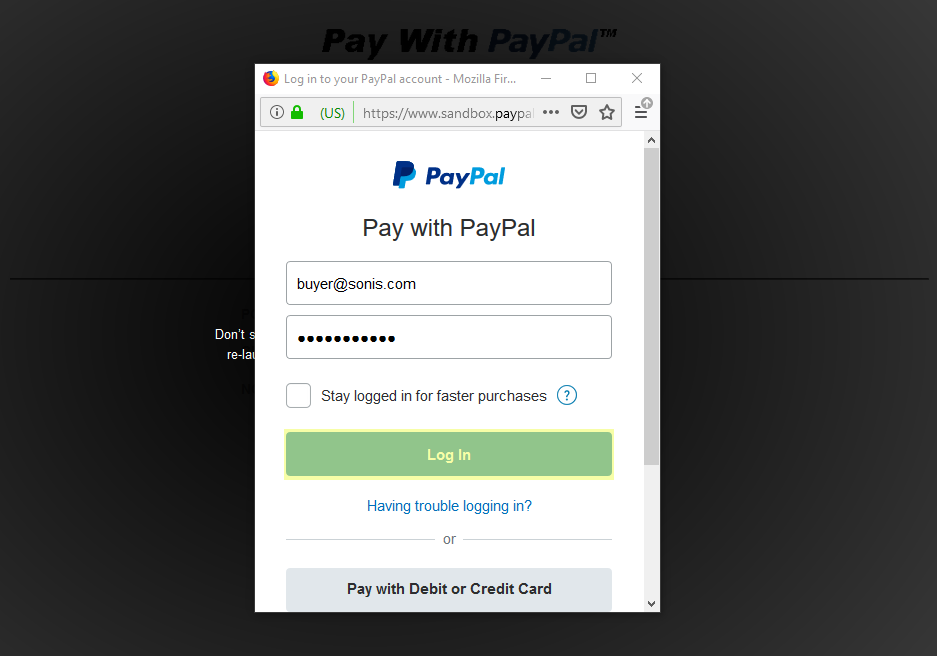
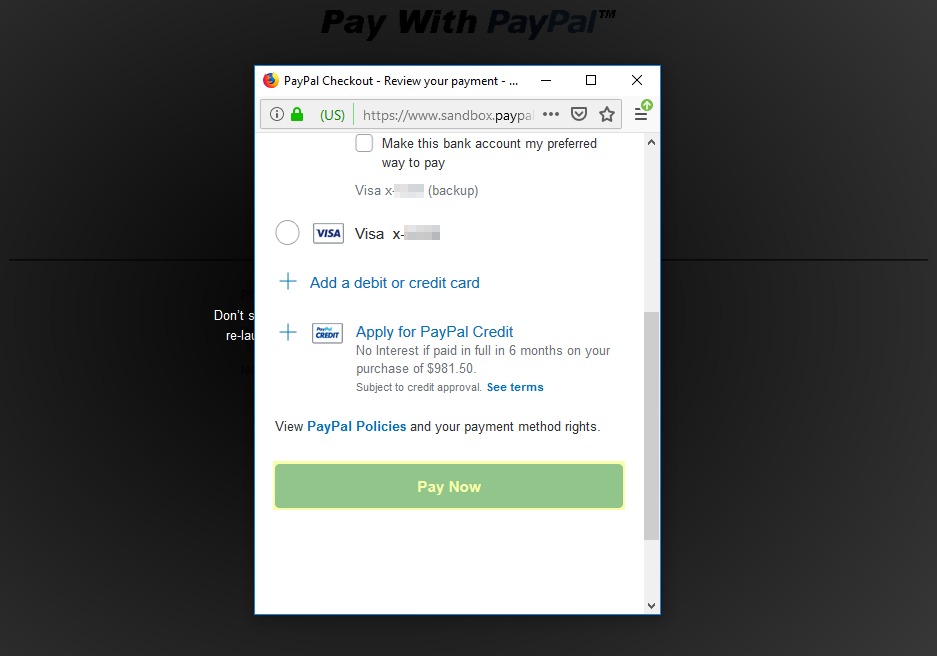
A new window will pop up asking for PayPal login information. Use the account and password entered for the Test Buyer in the SONIS portion of the setup. Click Log In to continue and Pay Now to complete the test transaction.
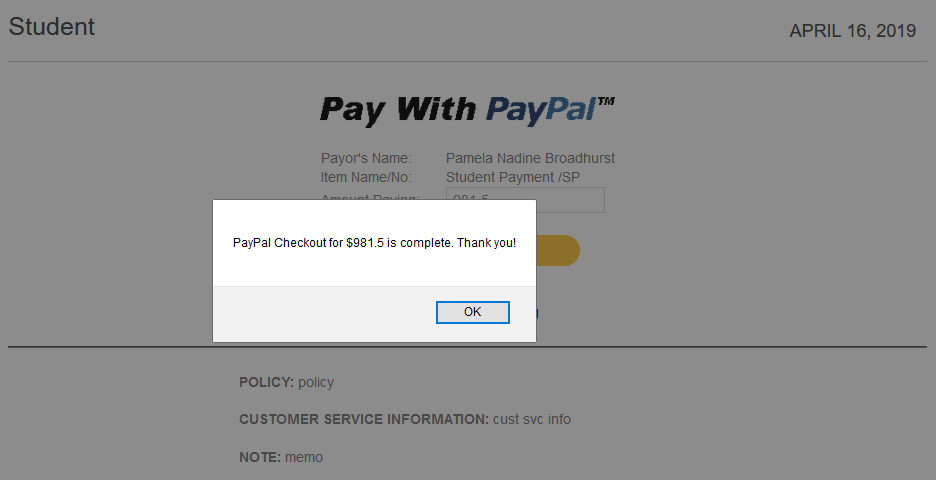
When the payment completes, a message will pop up noting that it was finalized. This message can be changed via the Columns utility under the Systems menu.
Live Setup
Once the PayPal Checkout API has been tested, select the Live option from the Sandbox/Live toggle at the top of the Dashboard page.
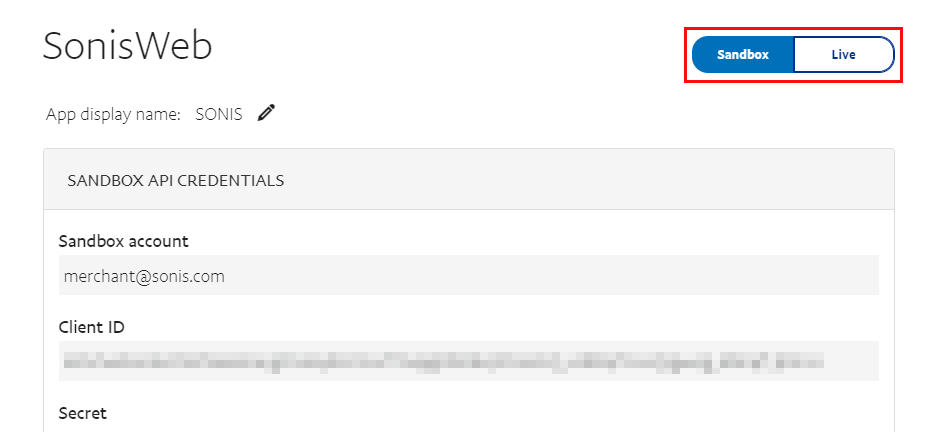
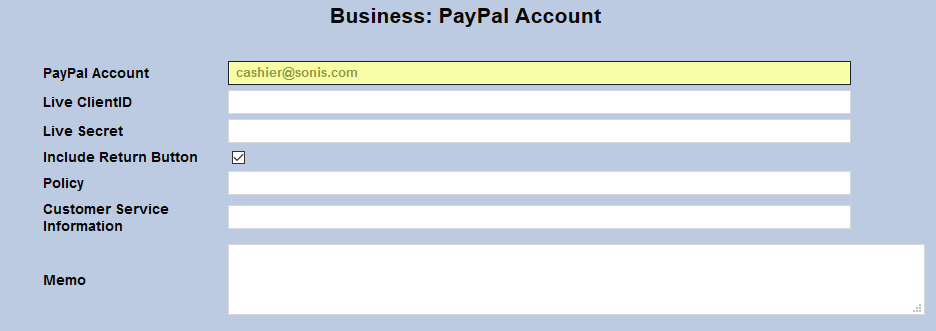
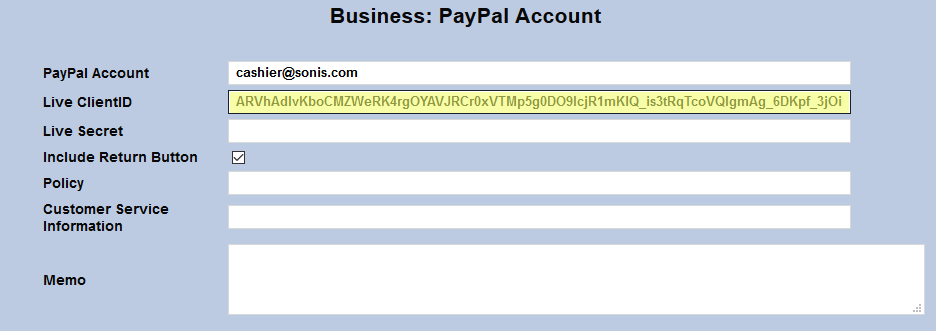
For the SONIS setup, navigate to the PayPal Account page under the Systems menu again. At the top of the page, enter the email address used to log in to the institution's PayPal Business account.
Fill in the live API Client ID and Secret.

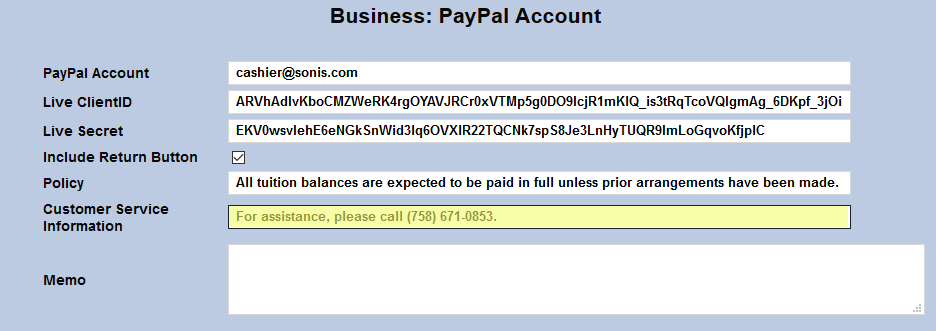
The Policy, Customer Service Information, and Memo fields can be used to display any information the institution wants the buyer to know before continuing to PayPal including legal disclaimers and other relevant information. The Policy and Customer Service Information fields both have a 200 character limit. The Memo field has no character limit.


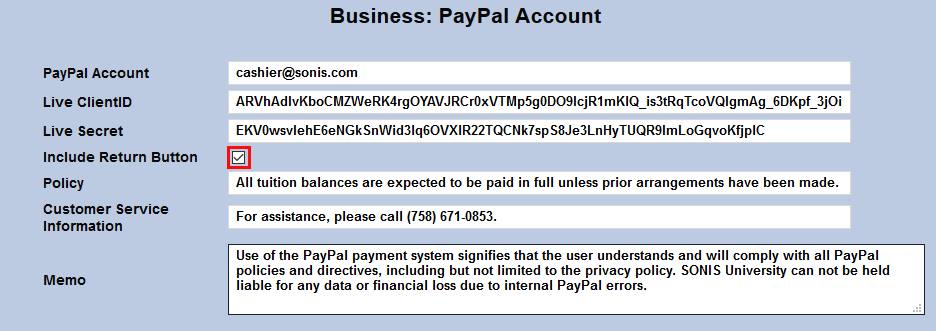
Check the Include Return Button box to display a Return Without Paying option on the page. Otherwise, this text/link will not be included.

Ensure that the Test Mode button in the Sandbox Credentials section is turned off and click Submit to save the changes. The PayPal Checkout API will now be live and available to use for any form of payment where PayPal is listed as the provider in the Credit Card Processing utility.
PayPal Transactions Report
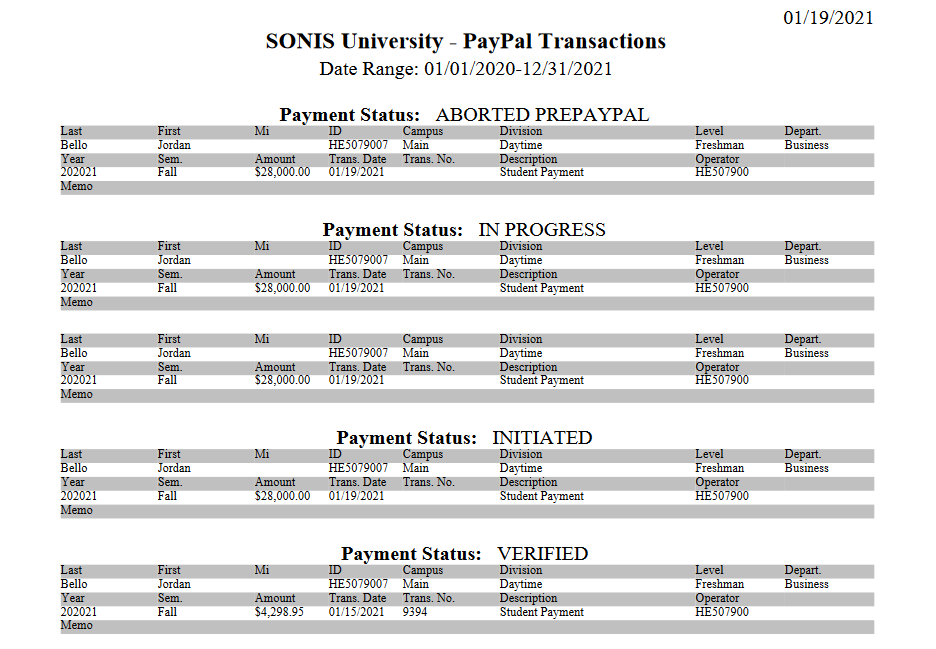
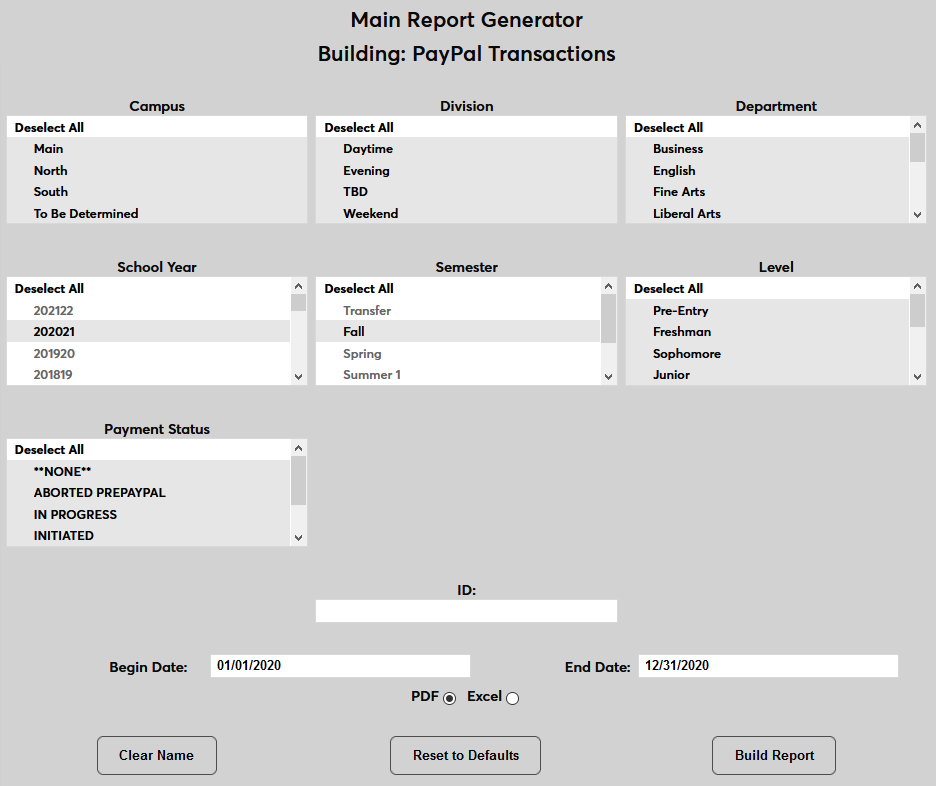
SONIS offers a PayPal Transactions Report that can be used to track successful payments through PayPal as well as to troubleshoot payments that have failed. To run the report, navigate to PayPal Transactions Report under the menu.
The report can be filtered by Campus, Division, Department, and Level as well as the School Year and Semester and the Payment Status. A date range must be entered. The ID of an individual user is optional. The report can be viewed as a PDF or an Excel file.
When viewing the report, each transaction will have a status that corresponds to how far into the process the user was able to get. Transactions made before the Fall of 2020 may have a status of None, but more detailed reporting was added from that point forward. The current statuses are:
• Initiated: The user has clicked to make a payment but has yet to be presented with the PayPal button.
• In Progress: The user has been sent to PayPal to pay.
• Aborted PrePayPal: The user was presented with their balance due and a PayPal button, but the user canceled before clicking the PayPal button.
• Aborted PostPayPal: The user aborted the payment after being sent to PayPal.
• Verified: PayPal has verified that the payment was made.
• Verified-Hold: PayPal has verified that the payment was made, but there is a hold on it.
• Invalid: PayPal returned that the payment was invalid.