Name CSV Export Notifier
Overview
The Name CSV Export Notifier is used to create a CSV file that contains the First Name, Last Name, Email Address, and Cell Phone Number of every user with a Student or Faculty status. The file is created through the Notification Assignments utility and automatically saves to the Batch Folder. The file is a simple output and can be used for a variety of purposes.
Click here to download a sample file.
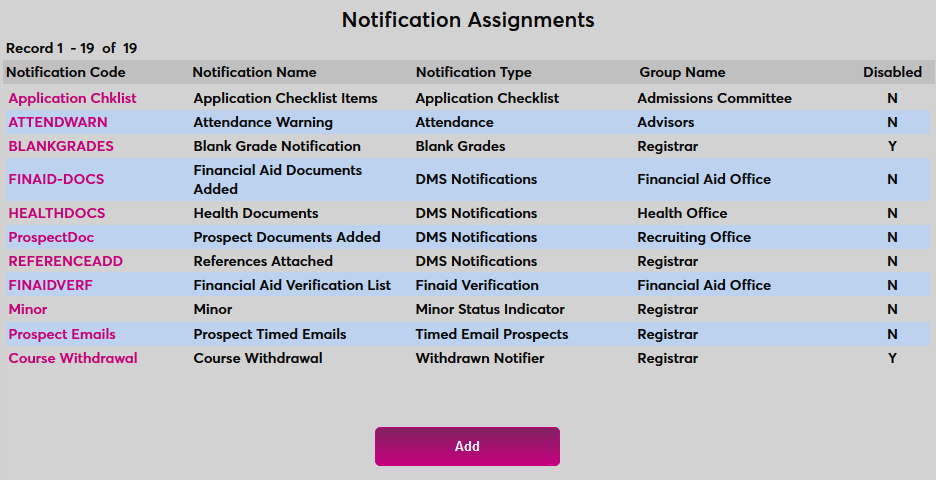
Notification Assignment
To begin, set up a notification assignment for Name CSV Export records deletion by navigating to the Notification Assignments page under the Systems hub. Click the Add button to proceed.
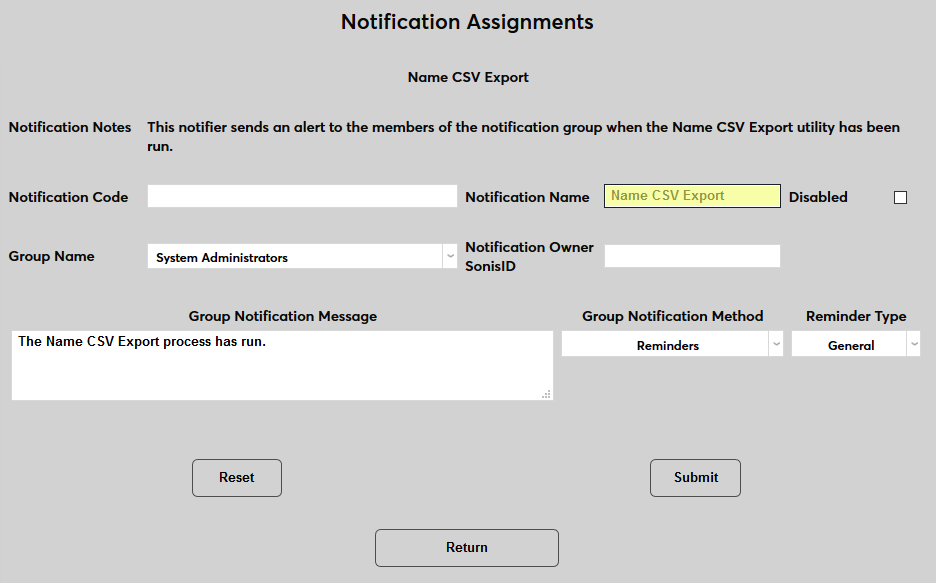
On the following page, select Name CSV Export from the Notification Type dropdown menu and click the Submit button.


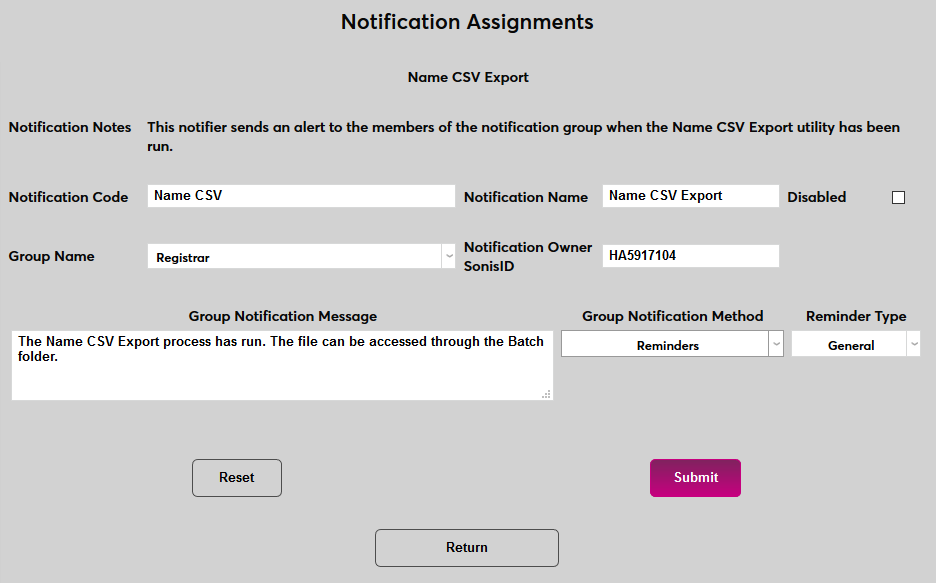
Next, create a Notification Name, a descriptor of the notifier's purpose with a 50 character limit, and a Notification Code, a shorter version of this name with a 20 character limit that the SONIS system will use internally to identify the notifier.
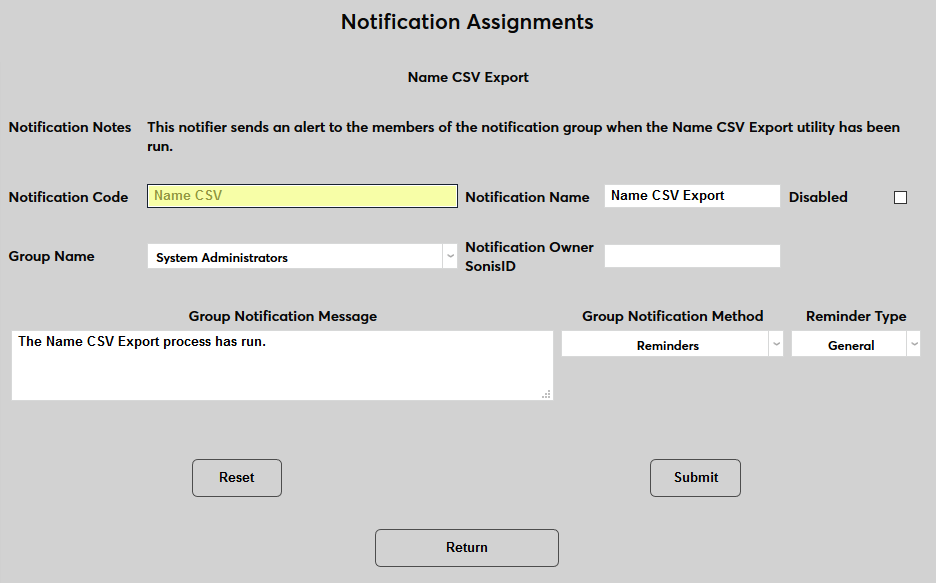
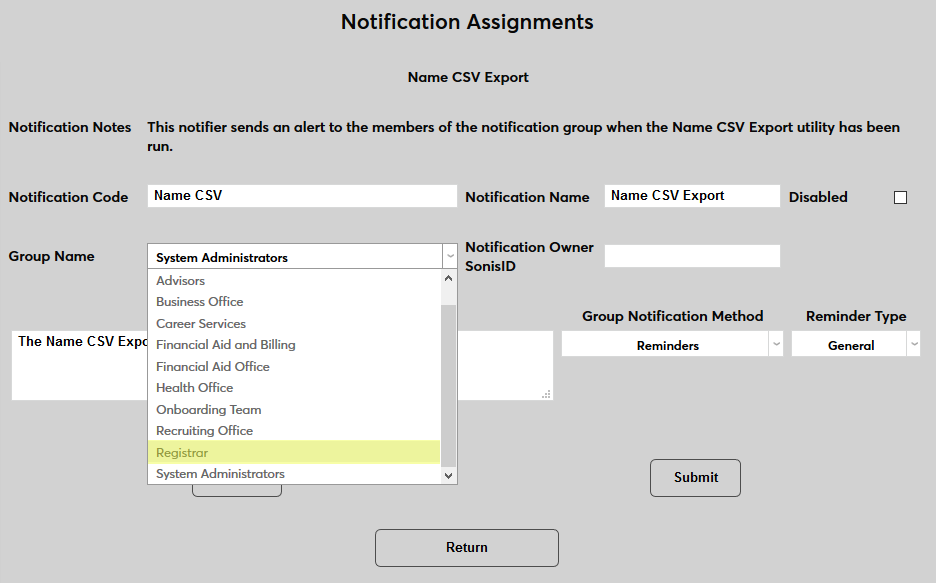
Select a group of staff/faculty to receive the notification from the Group Name dropdown menu. Groups can be added and edited through the Table Maintenance utility.
Enter the ID of the staff or faculty member who will be managing this notification in the Notification Owner SONIS ID field.
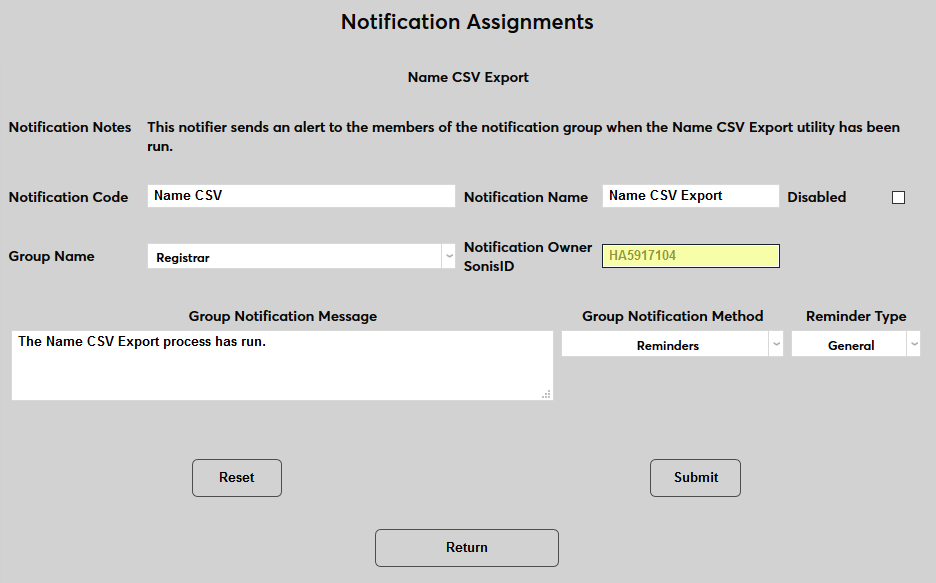
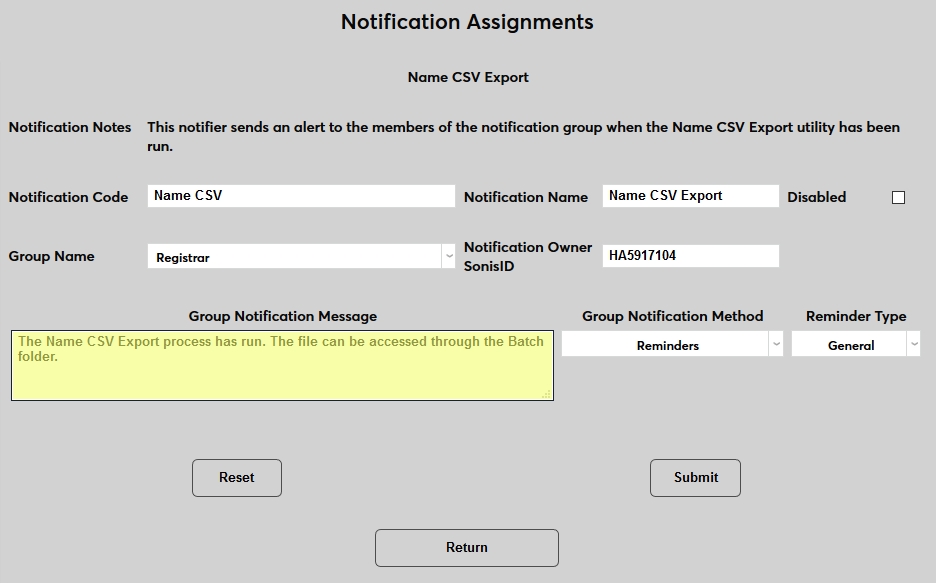
Create a Group Notification Message that will be sent to the group members when the task takes place.
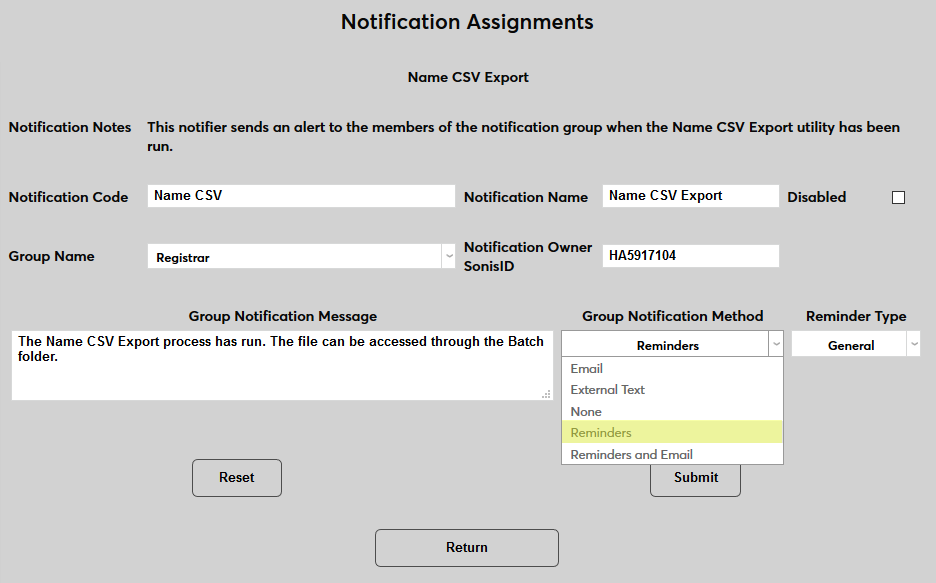
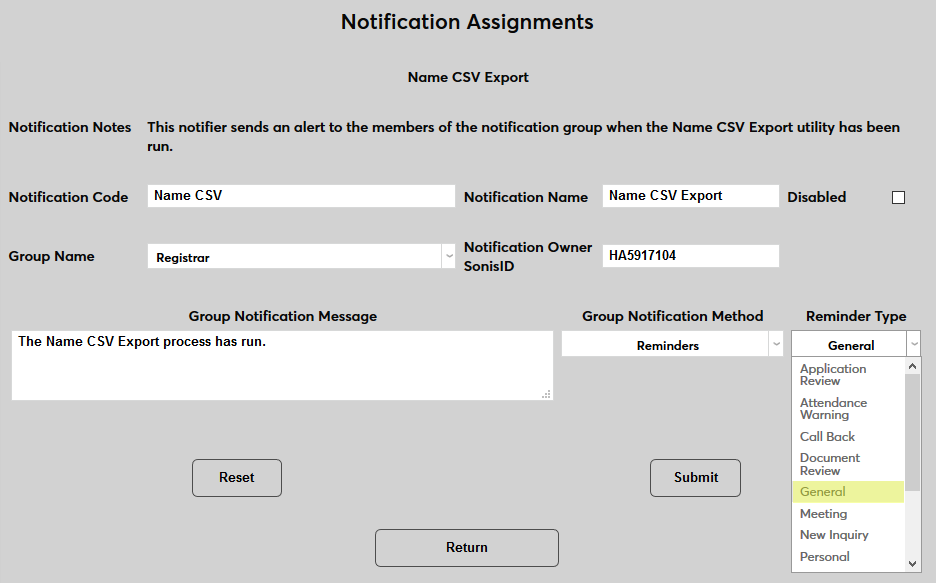
The Group Notification Method dropdown menu designates whether the group and individual users will receive an in-system reminder, an email, a text, or no notification when the process is triggered. The Reminder Type dropdown can change how the in-system reminder displays. This list can be created and edited via the Table Maintenance utility. The User Notification Method and Reminder Type menus work in the same manner.
Click Submit to activate the notifier.
Timed Tasks Scheduler
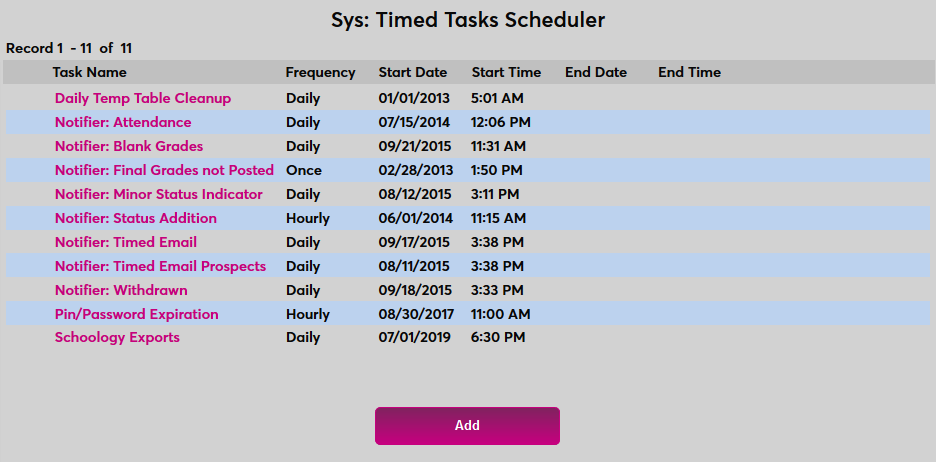
Once the notifier has been created, the task must be scheduled to take place. Navigate to the Timed Task Scheduler in the Systems hub and click Add to begin.
On the following page, select Notifier: Name CSV Export from the Task Name menu.
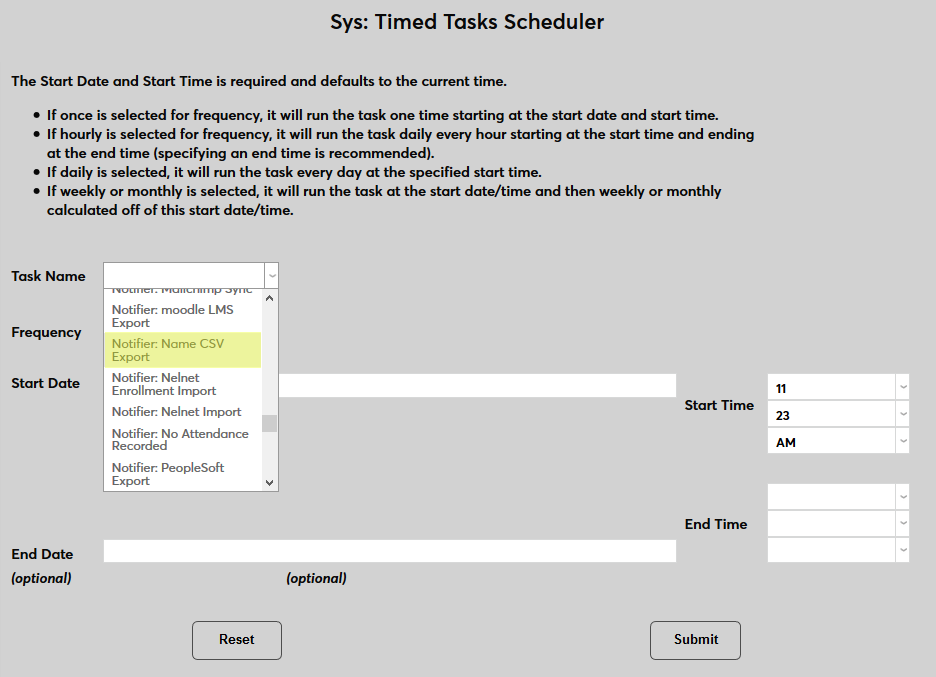
Select how often the task should occur with the Frequency dropdown. This particular task wouldn't need to take place any more frequently than daily since all records that had reached the previously specified number of delta days would be deleted during the first task and nothing would be left to delete on the next hour. Larger schools may want to schedule for daily deletion whereas smaller schools may want to configure longer intervals.

The Start Date and Start Time will automatically be set to the current date and time but can be changed to suit individual preferences. The End Date and End Time are optional.

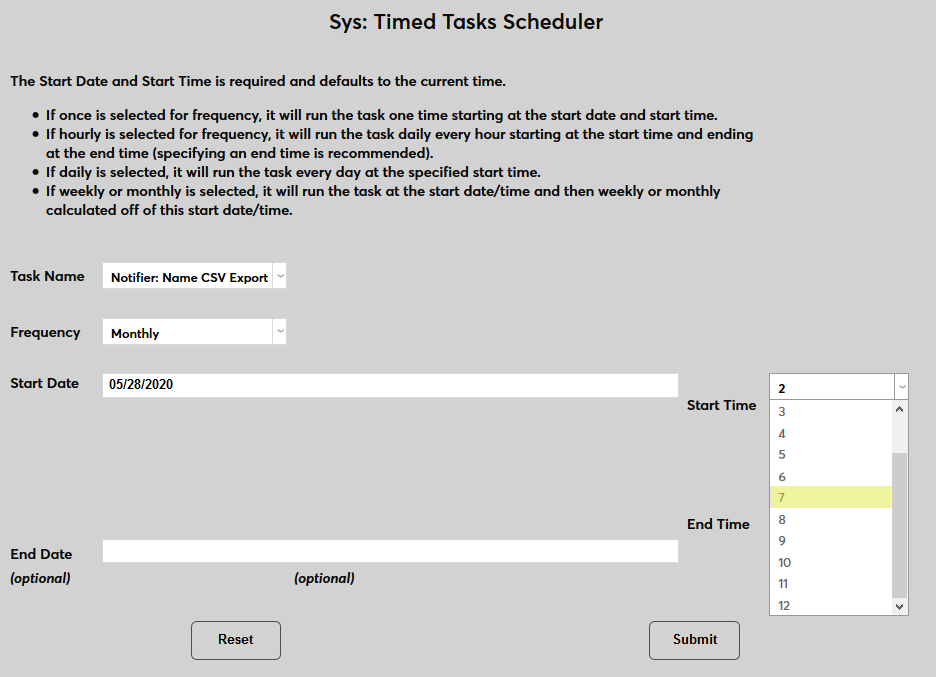
Click the Submit button to create the scheduled task.
