Credit Card Processing
Overview
The Credit Card Processing utility, located in the Systems hub, allows schools to set up and define the way they process credit card payments based on the type of payment being received. SONIS has built-in integration for credit card payments with EFSNet, Nelnet, PayPal, Trust Commerce, AmeriaBank, Heartland/ECSI, and AuthorizeNet. Administrators may also set up a custom processing system.
Processing Setup
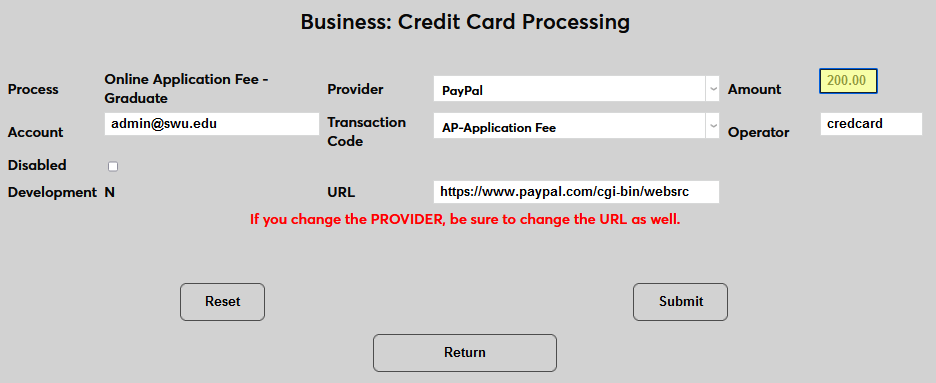
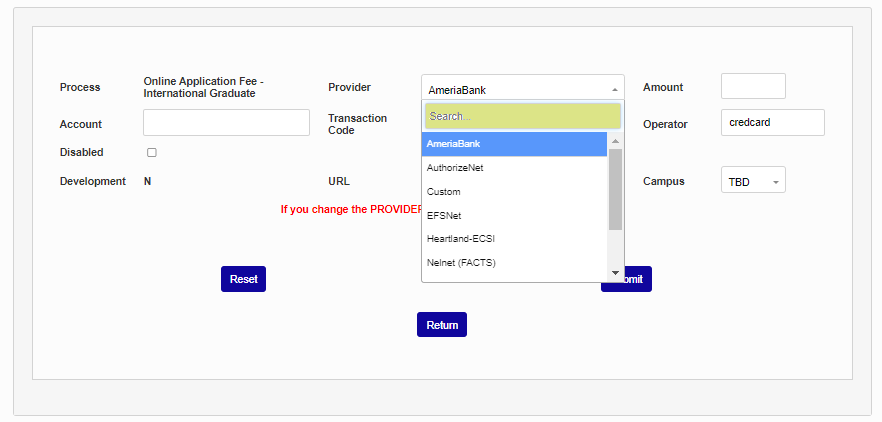
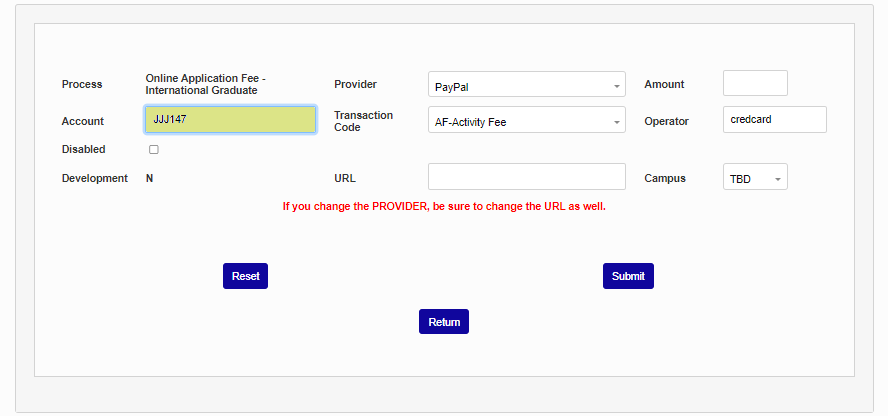
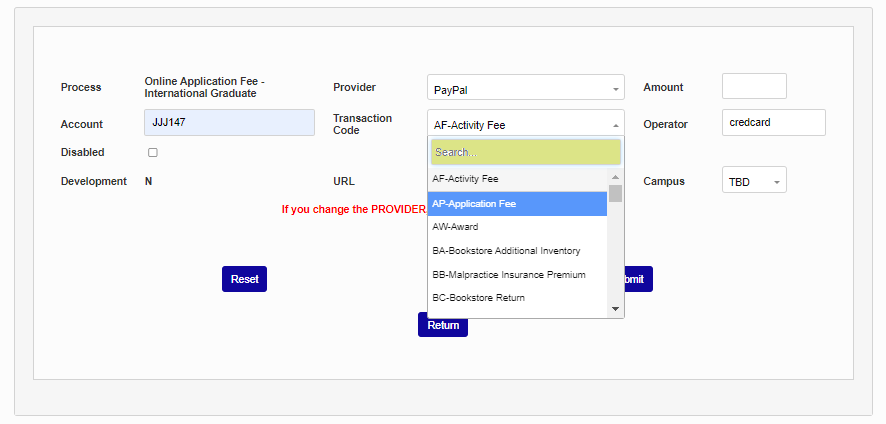
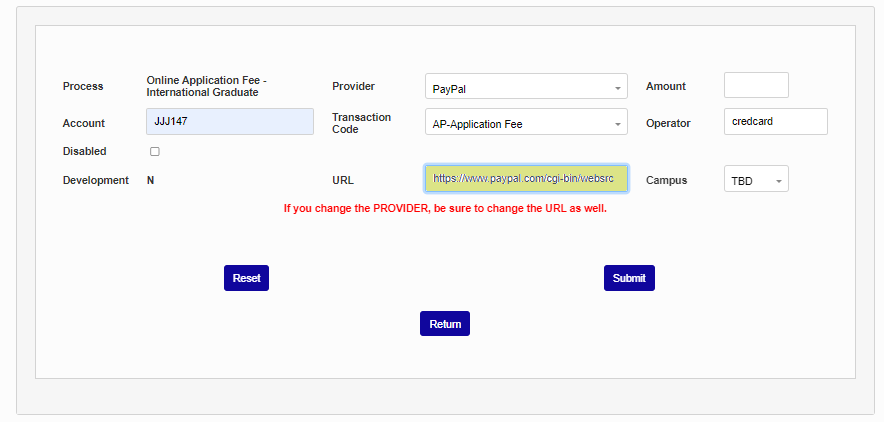
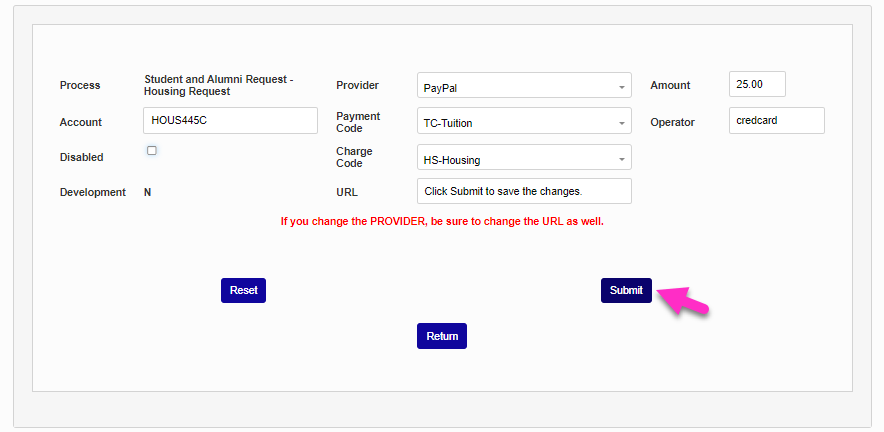
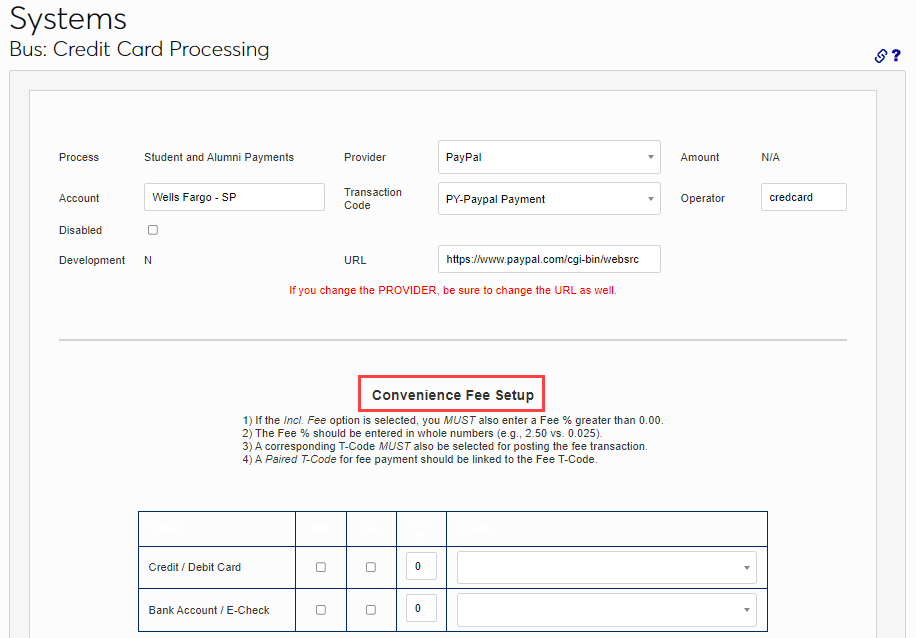
The first Credit Card Processing page displays each type of process along with the Provider currently set up for that process, the Account, the standard Amount if there is one, the Transaction Code, and the Operator. The table also lists whether the process is Disabled or not. The Dev field is no longer used.

To set up a process type, click the link for that type in the Process column.

Select a provider from the Provider dropdown menu and enter the school's account number for that provider.
Next, select a Transaction Code from the T-code dropdown.
Finally, fill in the proper URL for the payments to be processed and click Submit. This URL will be provided by the payment processor with the exception of Trust Commerce. The Trust Commerce URL must be cc_trustcommerce.cfm.
Set Amount
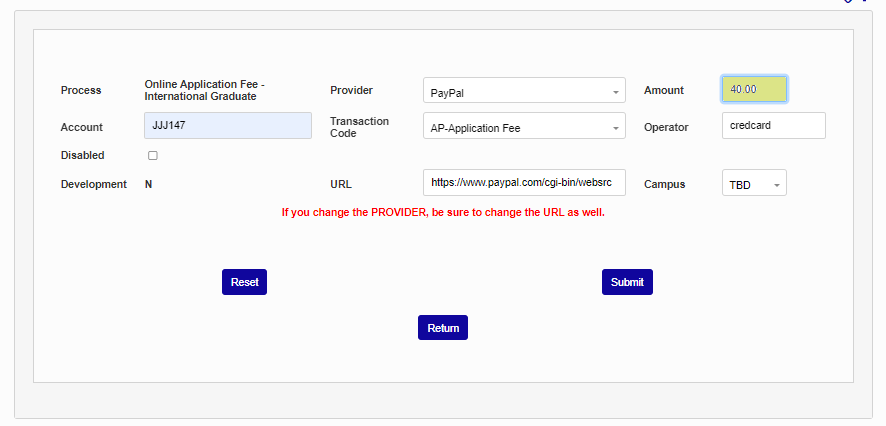
The Online Application Fee, Housing Request, Transcript Request, and Tutor Request processes can be set up to charge a fixed amount. Simply fill in the Amount field with a dollar figure using a decimal. The amount can be set to "0.00" if there is no fee for this request.
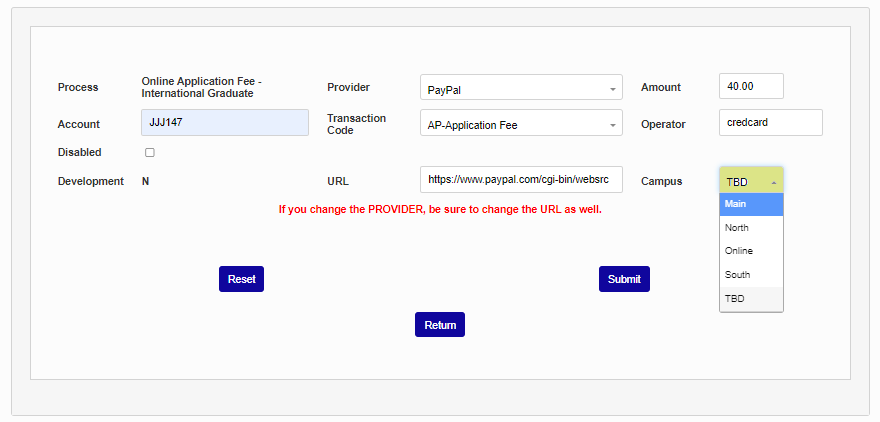
If the payment amount should be associated with a specific campus, select that Campus from the dropdown. Click Submit to save the entries.

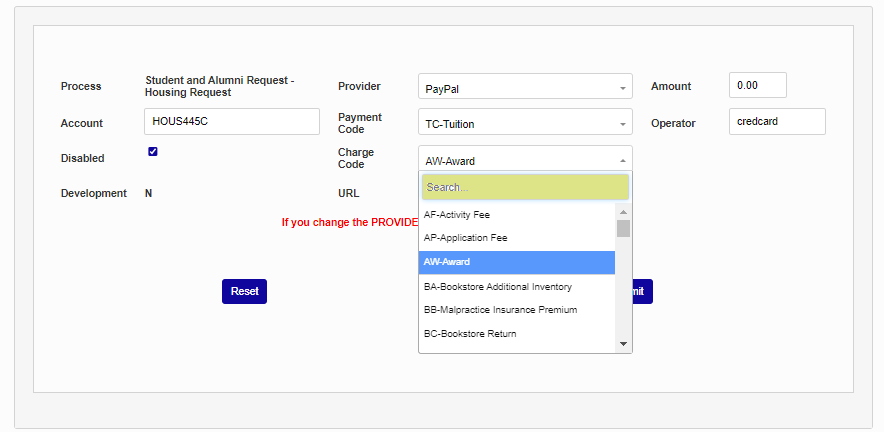
Charge Code
In addition to the fields listed above, the Housing Request, Transcript Request, and Tutor Request processes have a Charge Code associated with them. Because these requests initiate a charge rather than accepting payment for a previous charge, the charge given to the student must have a transaction code associated with it. Select the appropriate transaction code from the Charge Code dropdown menu and click Submit to save any changes.
CE Registration Provider Return
The setup for CE Registration credit card processing has one additional field that is not included on the other setup pages. The field is labeled From Provider Return To and must include the exact URL of the local CE Registration page.

Payment Options/Processing Fees
Transactions made through Authorize.Net and Trust Commerce can be assigned a processing fee to pass on the associated costs to the student. When Authorize.Net or Trust Commerce have been selected as the provider for a payment type, a Payment Processing Options section will appear at the bottom of the page. Authorize.Net offers separate fees for each payment type, while Trust Commerce only offers a single fee for either type.
When using Authorize.Net, to include a payment option, click the Include box. If neither option is selected, the Credit/Debit Card option will automatically be offered to users by default.
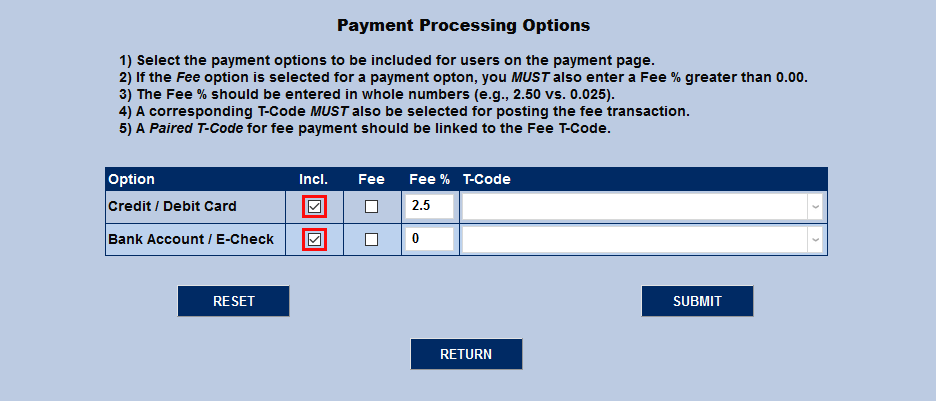
Administrators can choose to have a fee associated with one, both, or neither payment type. To include a fee with purchases made using one or both of the options, check the Fee box.

If a fee is being charged, a Fee % must be set. This value should be entered as a percentage, not a decimal, though it can be a mixed number that includes a tenths decimal place.
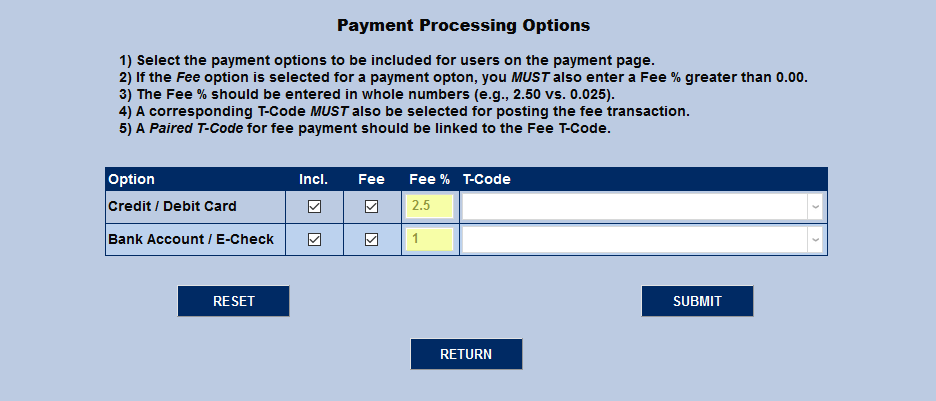
Finally, each transaction type must have a T-Code associated with it. For accurate bookkeeping, institutions should create a specific transaction code for each payment type. These t-codes should be linked to the t-code for the payment type itself. Some institutions may also wish to link the fee code under the payment type code as well for added clarity.
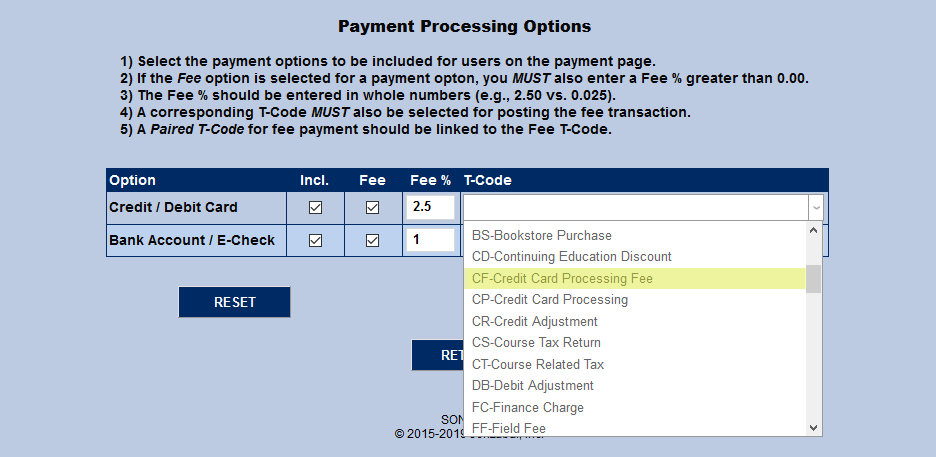
Click the Submit button to save the changes.
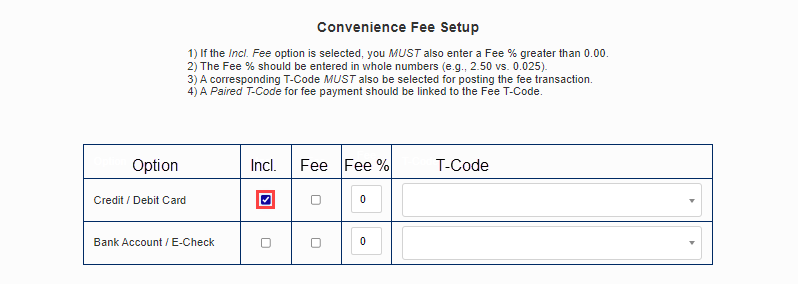
PayPal Convenience Fee Setup
To assess a fee to defray the costs of offering users the convenience of paying their charges online, it must be setup in the Payment Processing Options section. The fee amount will be calculated by SONIS to be a percentage of the balance due. The percentage amount is determined by the institution and added to the balance before the payment due amount is sent to PayPal.
A check in the Incl. box allows the payment type to be displayed on the payment page as an option for making payments. A check in the Fee box determines if a convenience fee will be added. When Fee is selected, the fee will be calculated and added to the balance due before the balance is sent to PayPal.
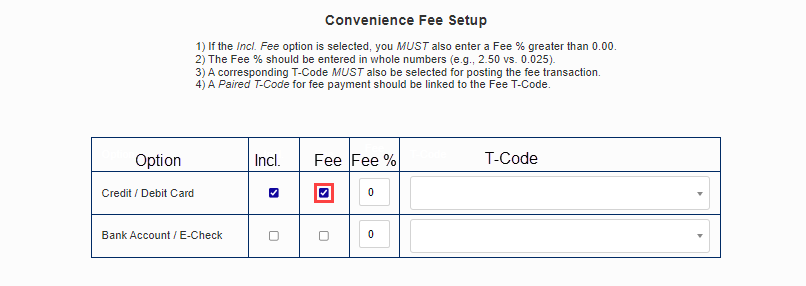
Enter the percentage of the balance that should be calculated and added as the Fee %. This field supports decimal values. Select the T-Code that will be associated with this fee.
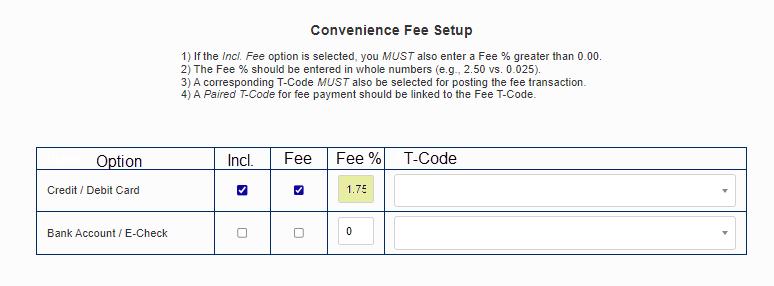

Repeat these steps for other payment methods, as appropriate for institutional circumstances. If desired, an explanatory statement that will be viewable to the user can be added in the Default Balance Memo field. Click Submit to save the entries.
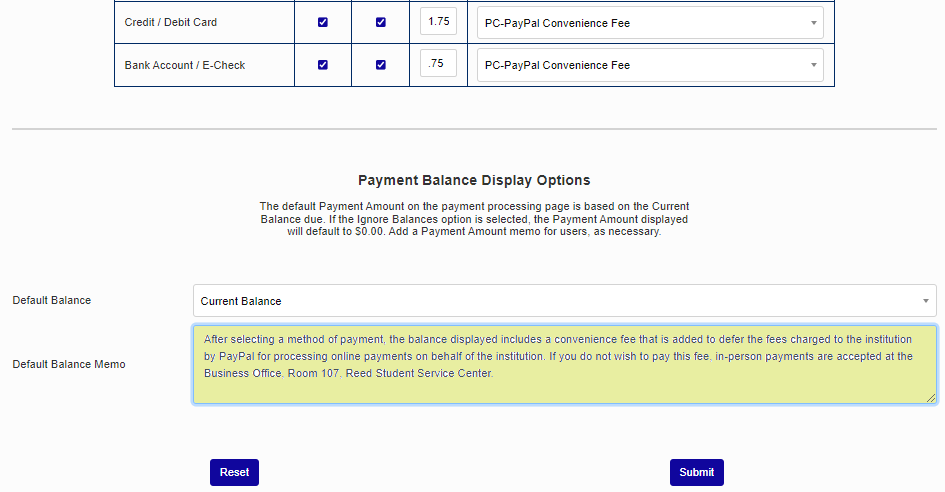
Payment Balance Display Options
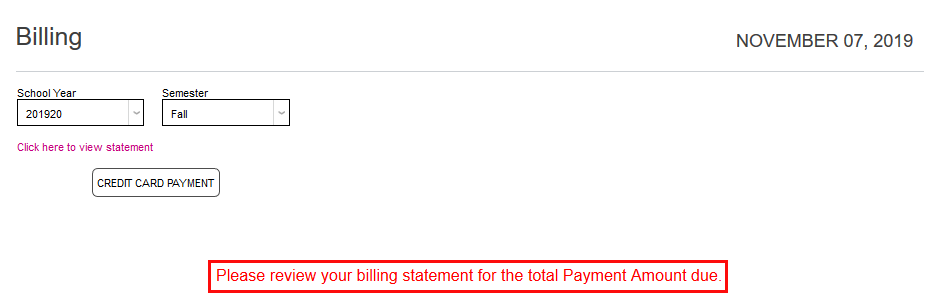
While some institutions post all charges immediately, others take advantage of the Jenzabar SONIS Pre-Billing feature to create what is essentially a balance preview before the charges are posted. This pending balance is shared with the student, allowing them to anticipate charges and make payments towards those charges. However, the SONIS Credit Card Processing utility only displays charges that have been billed and cannot display pre-billing information. For this reason, some schools wish to show students a balance of zero when they make a payment rather than showing them a balance that may be less than their full charges for the semester and encourage partial payments.
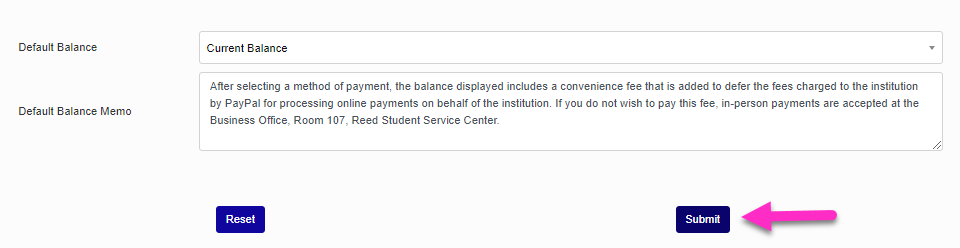
To change the way the Credit Card Processing Utility displays student balances, scroll down to the Payment Balance Display Options section of the page. By default, the utility will display the student's Current Balance. Select Ignore Balances to display a zero balance instead.
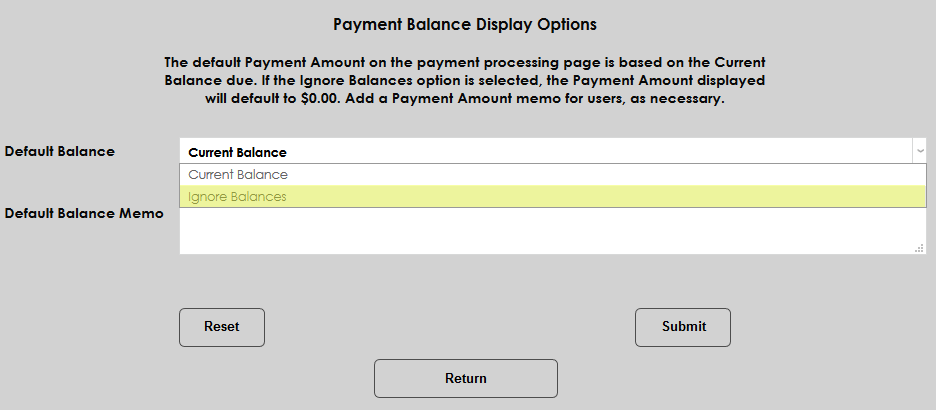
It's recommended that schools add a Memo as well to let students know why their balance isn't displaying and where to find the total they should pay.
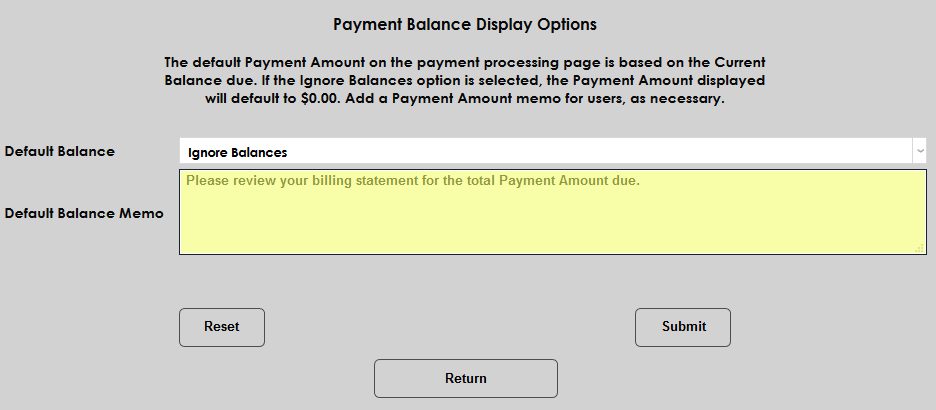
Click Submit to save the changes. The memo will display on at the bottom of the page when students access their Billing page and the Payment Amount on the following page will display as 0.00 regardless of the student's actual balance.

Allow Admin Payments with Zero Balance
By default, payments can only be made through when a user has a current balance. But some clients may wish to make a payment on a user's behalf even when that user does not have a balance. To allow this option, navigate to the Student Payments-Admin setup page and check the Always Show Admin Payment Button box. Click Submit to save the change.
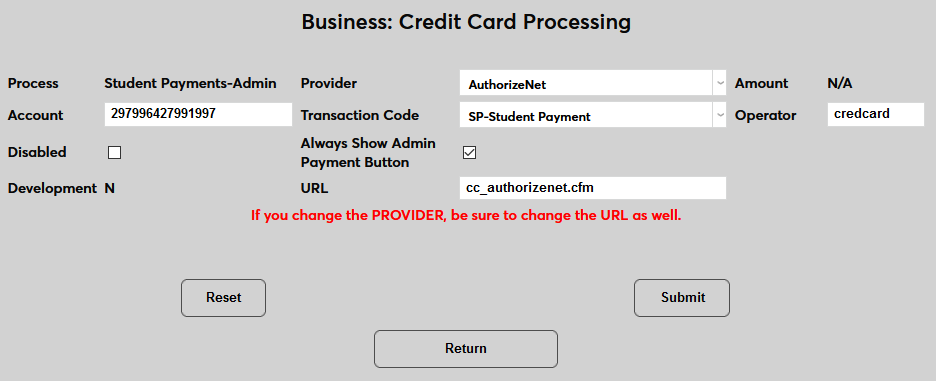
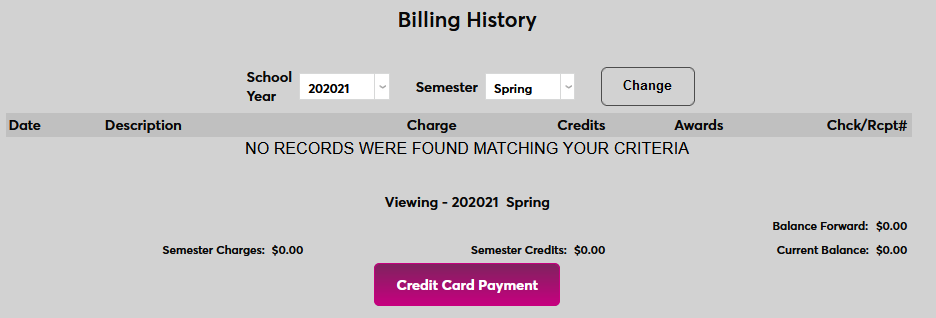
Once this option is active, the Credit Card Payment button on each user's Billing History page will appear at all times, allowing administrators to make payments even when the user has a 0 balance.

Application Fee T-Code Pairing
Users can also pair an application fee charge T-Code with a corresponding payment T-code. Clients who use this option should not use the Application Fees utility. Pairing application fee T-codes and also creating an Application Fee through the utility will result in double charges.
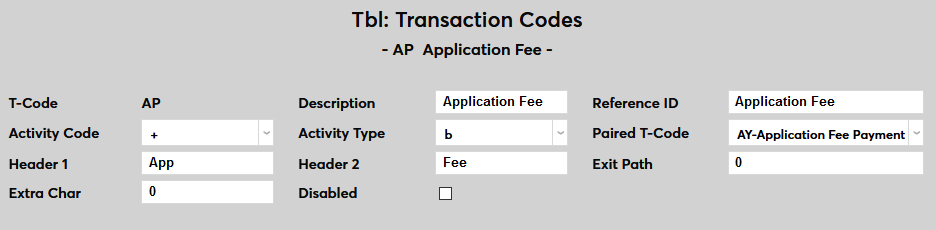
The fee that's charged is set from the Credit Card Processing page. If the school is using multiple Online Applications, each individual application is listed separately and can have a different fee. Click on an application and set the Amount.