Moodle Integration
Overview
Moodle is a free, open-source learning management system used by many institutions to facilitate distance learning and other online instruction. The Jenzabar SONIS system provides utilities to export student and course data to Moodle and to import attendance and final grades to SONIS from Moodle. The export can be performed manually or set up to occur at timed intervals. The imports are timed tasks.
The following student and course data fields are exported:
Table | Column | Description |
|---|---|---|
Course Table (course) | ||
course | Course number | |
crs_txt | Course text | |
crs_id | Course record ID | |
Course Section (crssect) | ||
sid | Section ID (unique value) | |
sch_yr | Section school year | |
semester | Section semester | |
lead_fac | Lead faculty SONIS ID | |
start_dt | Section start date | |
end_dt | Section end date | |
lms_template | LMS template | |
section | Section number | |
Name | ||
last_name | Student last name | |
first_name | Student first name | |
soc_sec | Student ID | |
suffix | Student suffix | |
pin | Student PIN | |
ldap_id | Student LDAP (if LDAP is used) | |
Address | ||
e_mail | Student primary email address | |
Name | ||
last_name | Faculty last name | |
first_name | Faculty first name | |
soc_sec | Faculty ID | |
suffix | Faculty suffix | |
pin | Faculty PIN | |
ldap_id | Faculty LDAP (if LDAP is used) | |
Address | ||
e_mail | Faculty primary email address |
SONIS Setup
Course Setup
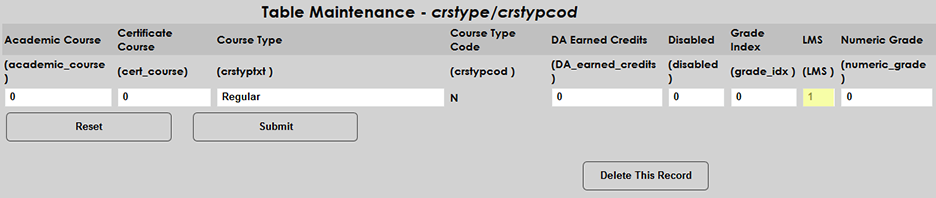
Before setting up the Moodle integration, schools should ensure that their courses are properly configured to pass data to LMS systems. Navigate to the Course Type table in Table Maintenance in the Systems hub and ensure that any course types that may use Moodle or another LMS have a 1 in the LMS field.
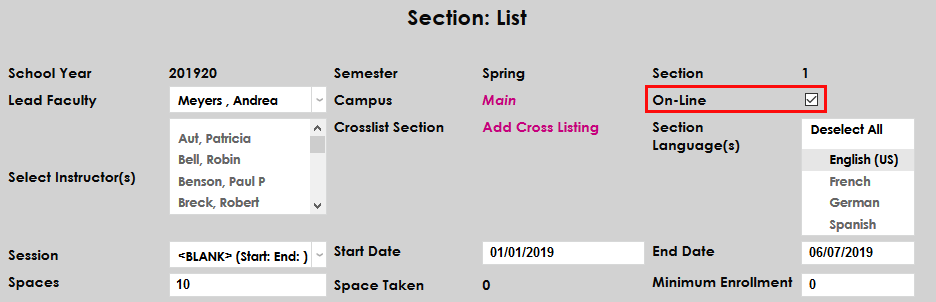
Additionally, each individual course section that will be available through Moodle should have the On-Line box checked on the Course Section page. For most schools, a course must have a section type that’s LMS enabled and have the On-Line box checked or it will not be exported to Moodle.
LMS Setup
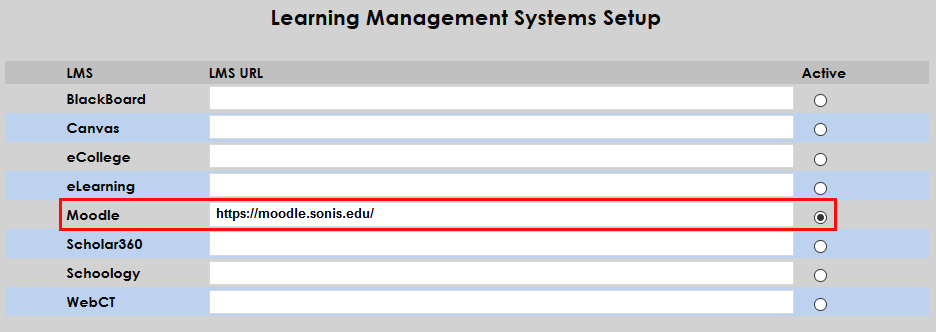
To link Moodle to SONIS and activate it, navigate to the Learning Management Systems Setup utility. Enter the institution-specific web location where the Moodle software has been uploaded and check the Active button.
After activating Moodle, scroll down to the For Moodle Only section of the page. These controls allow schools to manage how their Moodle integration will function. First, choose whether to use the Current School Year/Semester or the Registration School Year/Semester if different. Alternately, select a school year/semester that is neither of those. All school years and semesters that have been created in the SONIS system are listed in this menu.
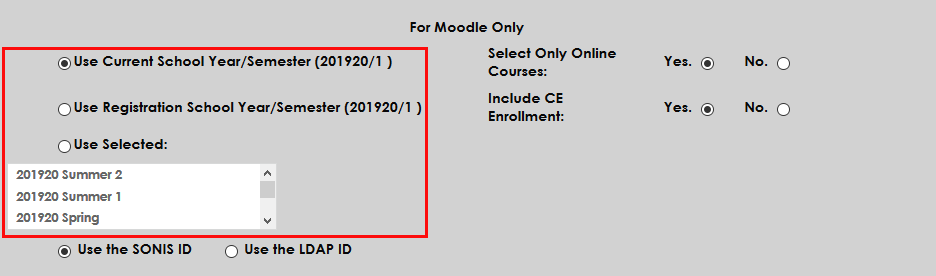
Next, choose whether students and faculty should log in with their SONIS ID or their LDAP ID, if applicable.
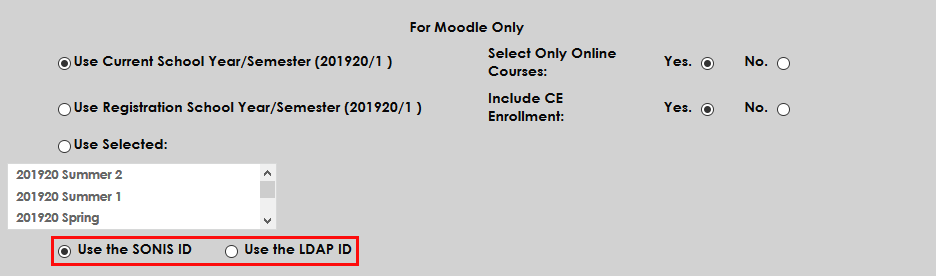
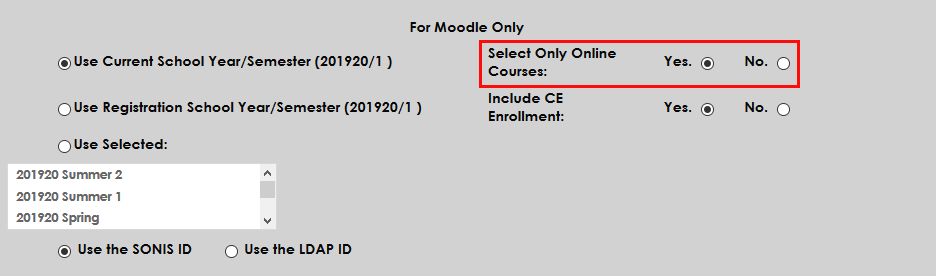
If the Select Online Courses option is set to Yes, only course sections with the On-Line box checked will be included in the export to Moodle. If No is selected, all courses with a valid course type will be exported.
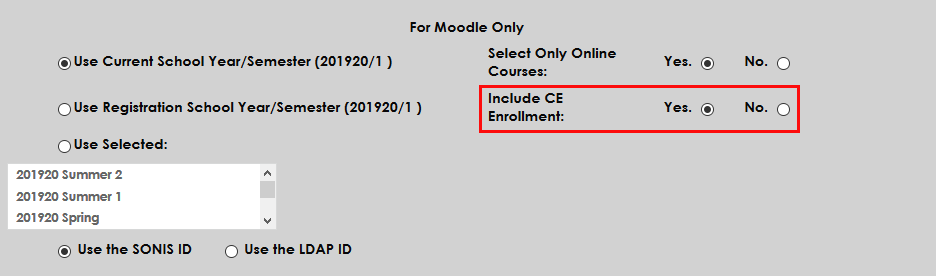
Administrators can also choose whether to include Continuing Education courses in Moodle or not by selecting Yes or No.
Finally, scroll down to the section labeled For Blackboard, WebCT, Moodle, Canvas, and Scholar360 Only. Choose whether each course in Moodle will Use Lead Faculty or Use Lead Faculty and Additional Instructors. Additional instructors are added on the Section: Edit page.

Click Submit at the bottom of the page to save the changes and activate Moodle.

File Transfer
The File Transfer table must be configured for the attendance import timed task to run.
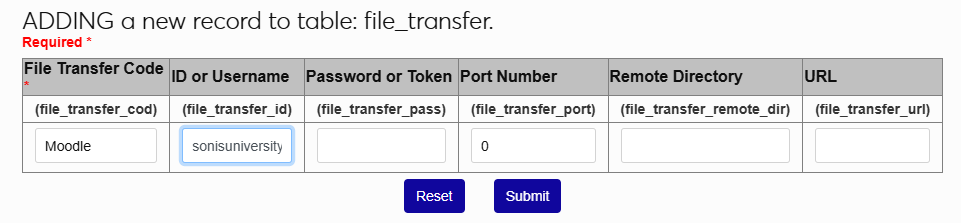
From the Systems hub, select Table Maintenance, then LMS Transfer, and click Add New Record to begin. On the following page, give the entry a descriptive name using the LMS Code field.
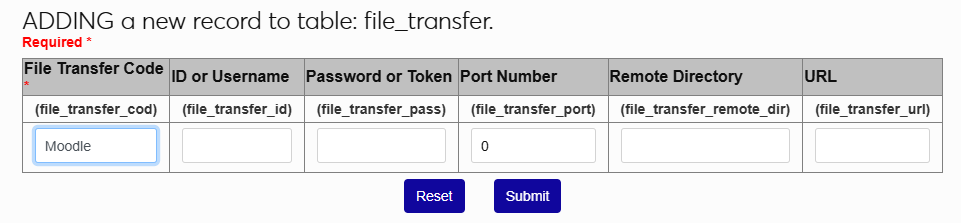
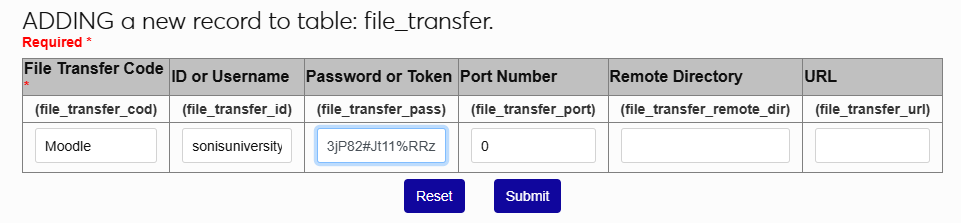
Next, enter the administrative username and password used to access the LMS in the ID or Username and Password or Token fields.
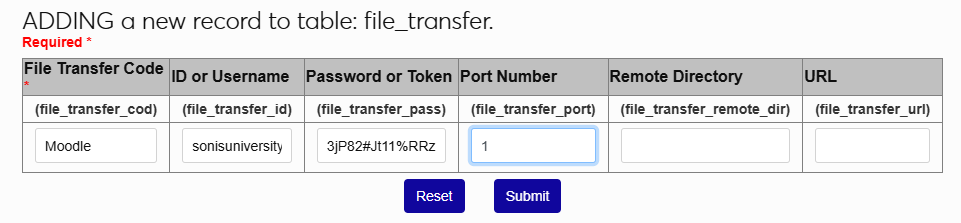
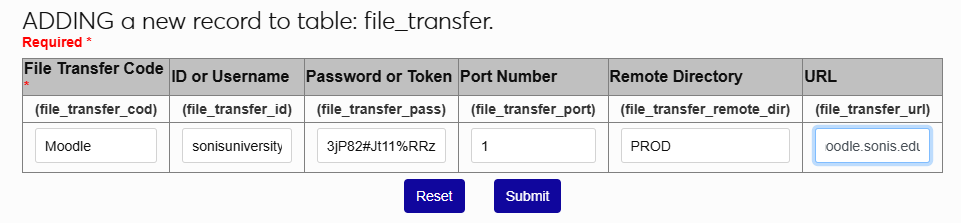
Enter the Port Number for the port that is used for SFTP transfer. The Remote Directory field is used to designate the folder where the LMS files are located. This will be PROD for most users, but may be QA for clients running a test account.

Finally, enter the URL that SONIS will use to communicate with Moodle. Click Submit to save the entries.
LMS Holds
The Jenzabar SONIS Holds system can be used to prevent students from using Moodle and other Learning Management Systems. To place a hold on a student, navigate to that student's Holds page and click Add to create a new hold. Select LMS Hold from the Hold menu and check the Active box. Enter the start date and select a staff member to authorize the hold. An additional memo or notes for student viewing can be included as well but are optional. Click Submit to create the hold.
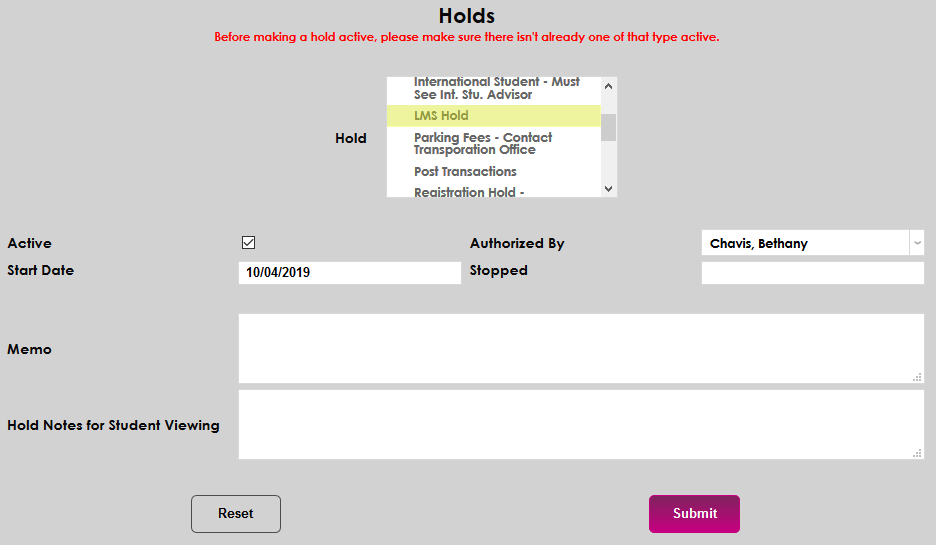
When a student has an active LMS Hold in their records, the student’s data will still be sent to Moodle, but they’ll be marked as inactive in the Moodle system.
Timed Export
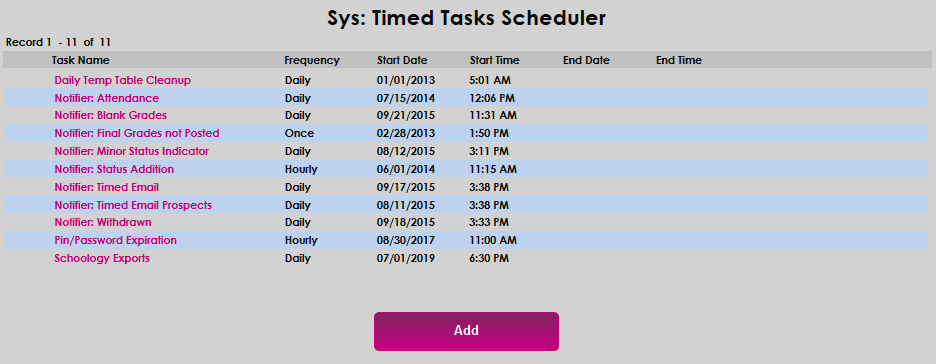
Once Moodle has been designated as the LMS system being used in SONIS, schools can set up timed tasks that will create the student and course data export file on a regular interval and/or import the attendance file. Both are set up the same way. Navigate to the Timed Task Scheduler in the Systems hub and click Add to begin.
On the following page, select Notifier: Moodle LMS Export from the Task Name menu.
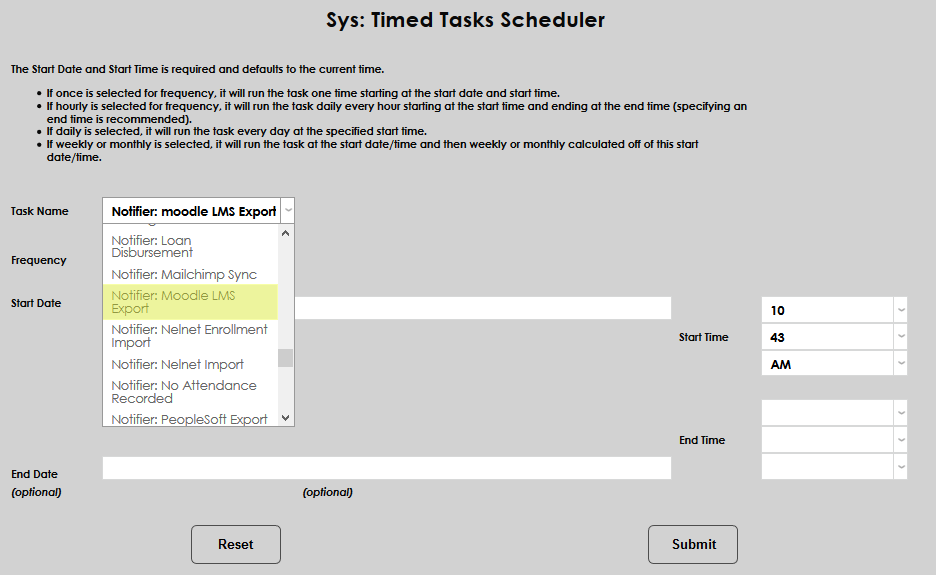
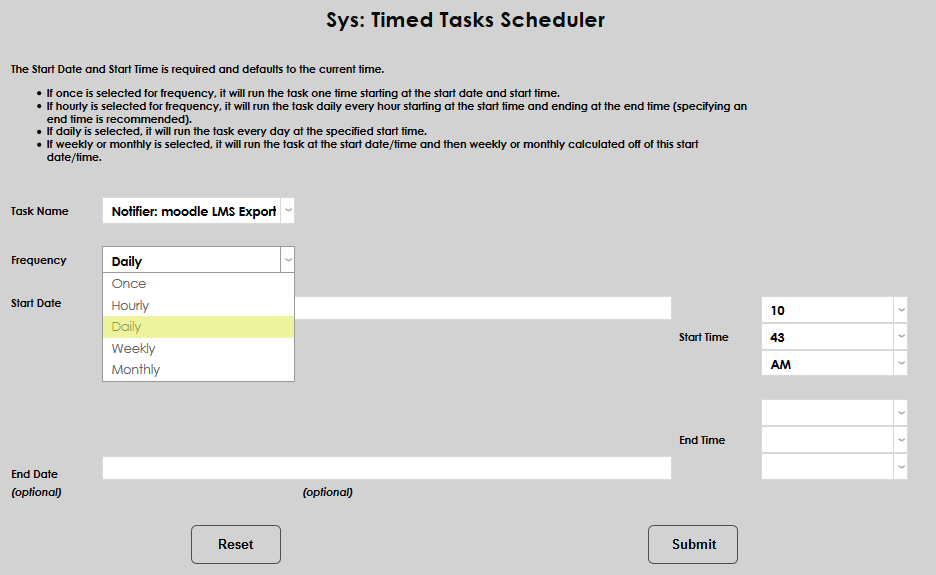
Select how often the task should occur with the Frequency dropdown. Schools may wish to run the export more frequently during each semester's drop/add period and edit the task to run only daily once this period has ended.
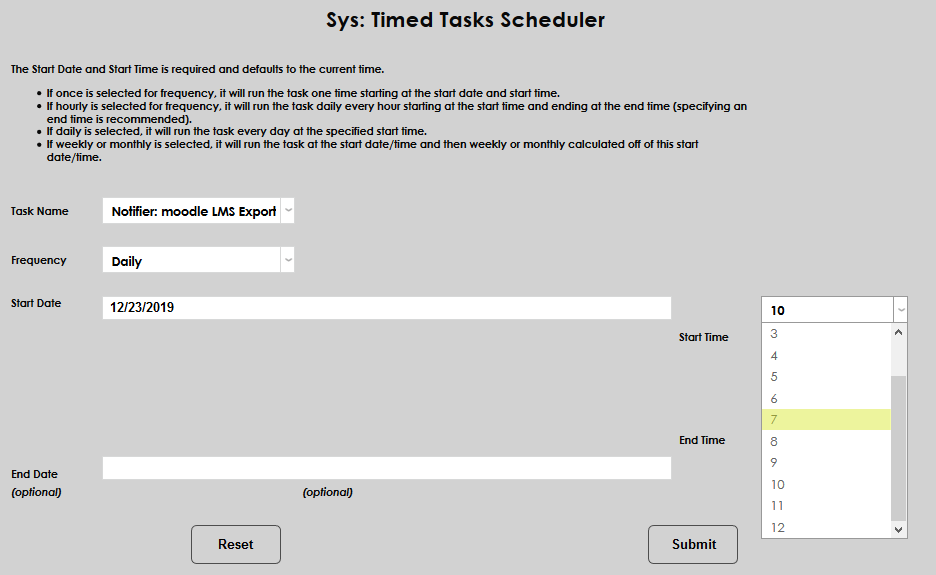
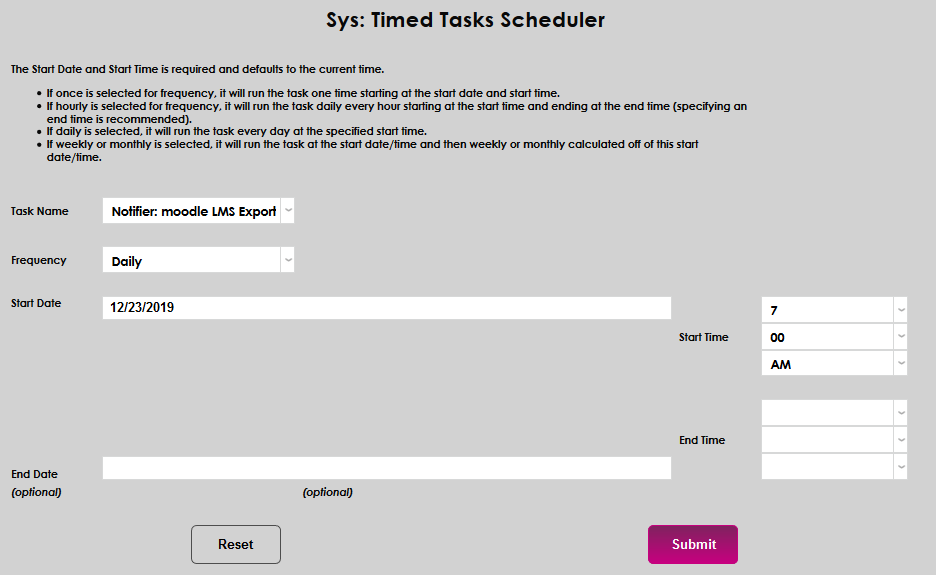
The Start Date and Start Time will automatically be set to the current date and time but can be changed to suit individual preferences. The End Date and End Time are optional.
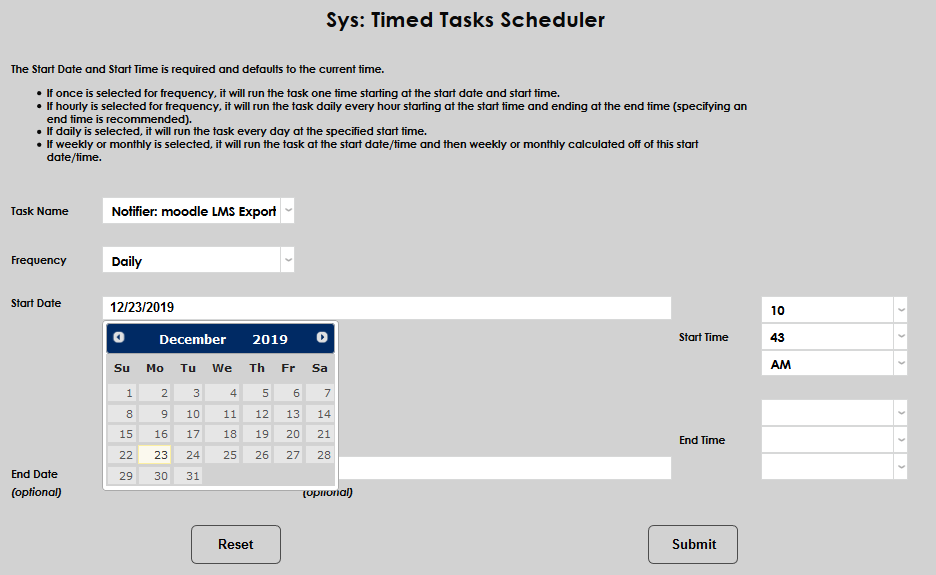
Click the Submit button to create the scheduled task.
Moodle Setup
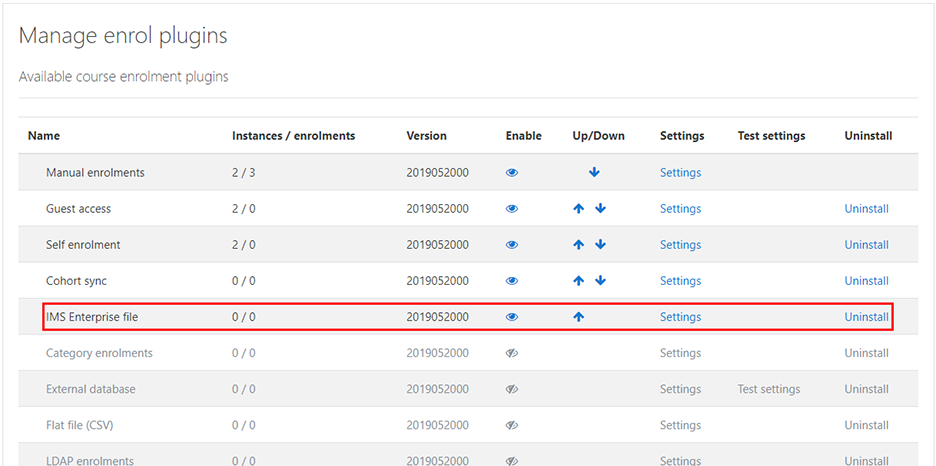
The first step to setting up the Moodle side of the integration is to log in to the Moodle system as an administrator. Once logged in, navigate to Site administration > Plugins > Enrolments > Manage Enrol plugins and ensure that the IMS Enterprise File plugin is enabled by clicking the eye button next to it.
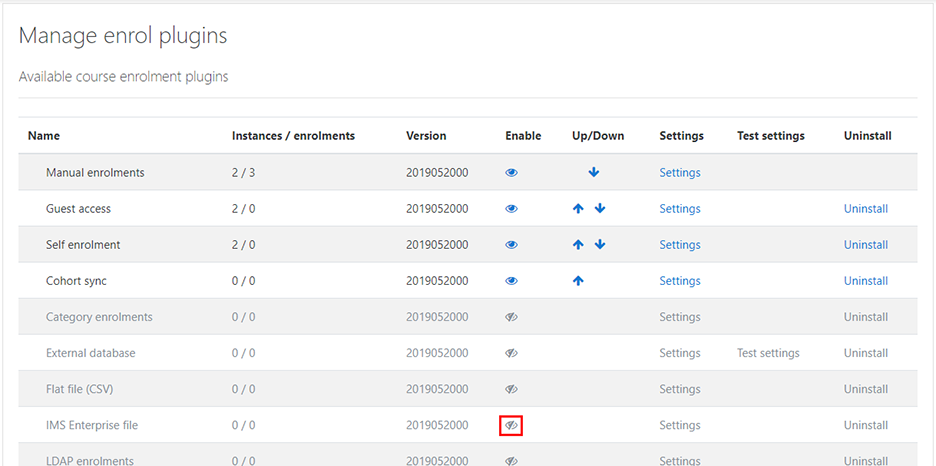
Once the plugin has been enabled, click Settings to continue.
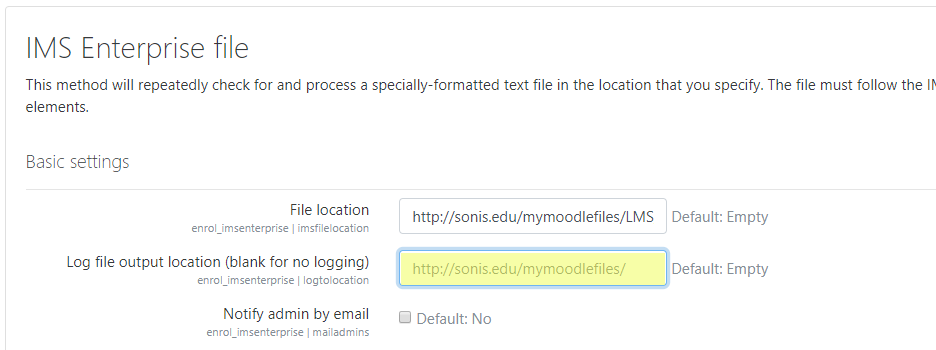
On the following page, indicate the path where the SONIS enrollment data file will be placed, including the filename at the end of the path. The default filename coming from SONIS is LMS_Moodle.xml.
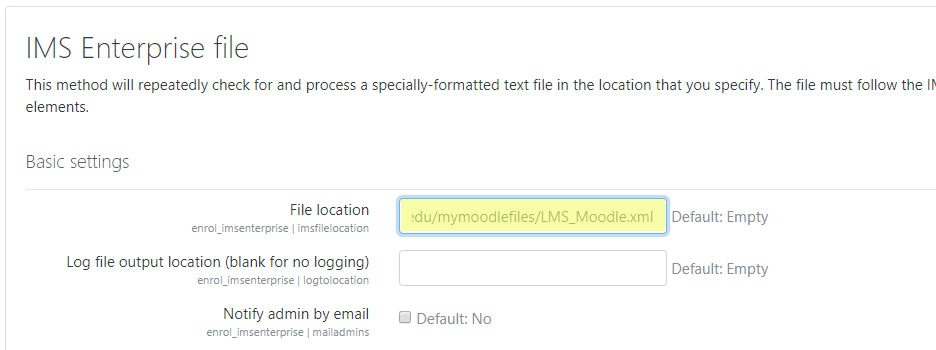
Next, indicate the path where the log file showing the status of imports will be found. The same directory can be used for both files.
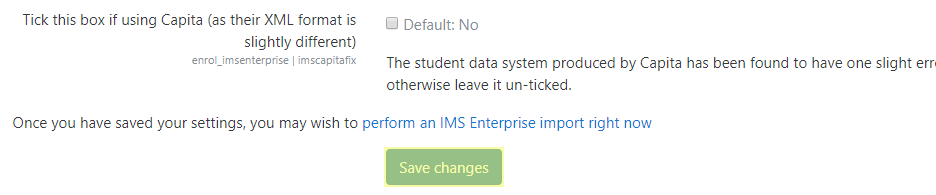
Under User data options, check the box next to Create user accounts for users not yet registered in Moodle if the XML data from SONIS should be used to create users within Moodle. Note that this only allows creation of new users; it does not alter existing users. Also, it does not provide passwords — this will need to be managed by another mechanism.

Under the Course data options heading, check the box next to Create new (hidden) courses if not found in Moodle. This will allow new courses to be created based on enrolment data from Jenzabar SONIS. These courses, by default, are hidden from student view and will need to be turned on separately when ready for use.

Click the Save Changes button at the bottom of the page to complete the setup.
Importing SONIS Data to Moodle
Manual Import
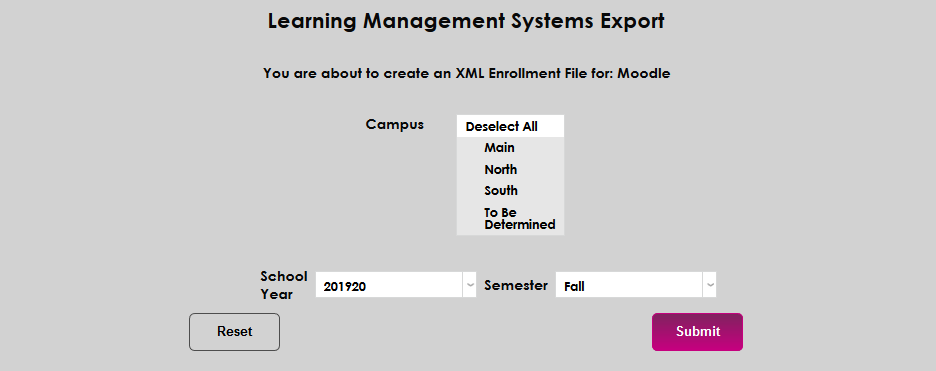
Jenzabar SONIS course and student data can be uploaded to Moodle through a fairly simple manual process. First, navigate to the SONIS Learning Management Systems Export utility in the Systems hub. Select the appropriate School Year and Semester for the data and the Campus or campuses that should be included and click Submit to create the XML file. The file will be saved in the batch folder designated under Web Options.
Note
When utilizing SFTP transfer, Jenzabar SONIS only supports password authentication.
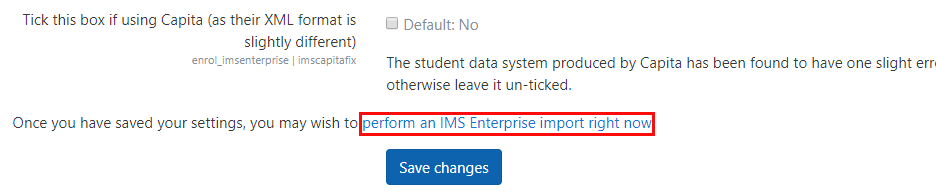
If the SONIS batch folder and the Moodle system are in two different locations, the file should be transferred to the place where the Moodle system is located using an FTP client or other transfer utility. Once this has been accomplished, log in to the Moodle system and navigate to Site administration > Plugins > Enrolments > Manage Enrol plugins. At the bottom of the page, just above the save button, click the link that says perform an IMS Enterprise import right now.
Once this link has been clicked, the IMS Enterprise cron function will be launched. The import log will be displayed, giving details of any problems that might require attention.
Timed Import
Moodle can be configured to import updated course information at regular intervals. To begin this setup process, navigate to Site administration > Server > Tasks > Scheduled tasks within the Moodle system. Scroll down to Enrolment file processing and click on the settings icon.

On the following page, enter a timeframe in one of the fields. Administrators can click on the help icons next to each field description for an explainer on how the notation works. For most schools, once a day should be sufficient, but needs can vary. Whatever interval is chosen should match the interval chosen in the Jenzabar SONIS system to update the export file. Moodle will only make changes when there is a new file in the specified folder.
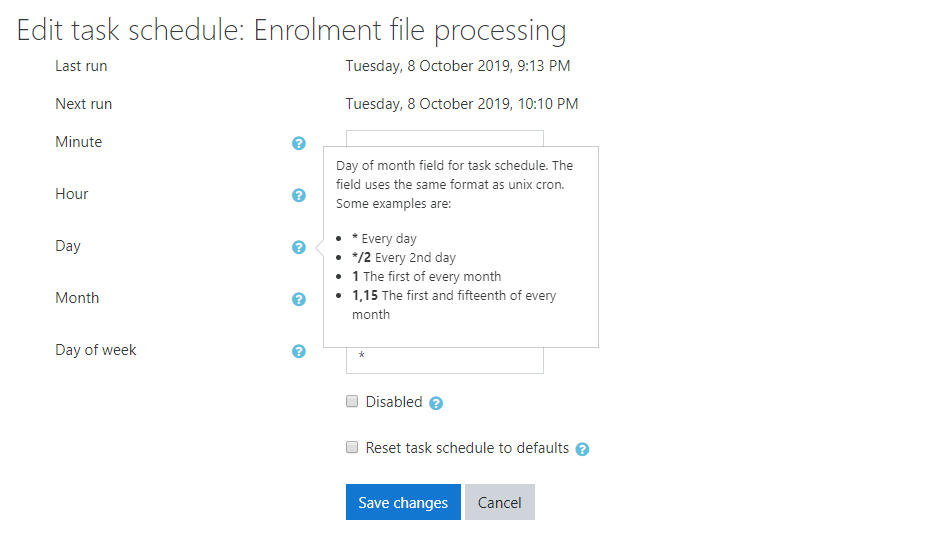
Click Save changes to complete the process and schedule the import.

Exporting Final Grades to SONIS
Once a semester has been completed, SONIS/Moodle users can export final grades from Moodle and import them to SONIS. To export the grades from Moodle, navigate to the course page and then to the Grades section. Click Export and then choose the Excel Spreadsheet format. Modify Export options if necessary and click Download to create the file.
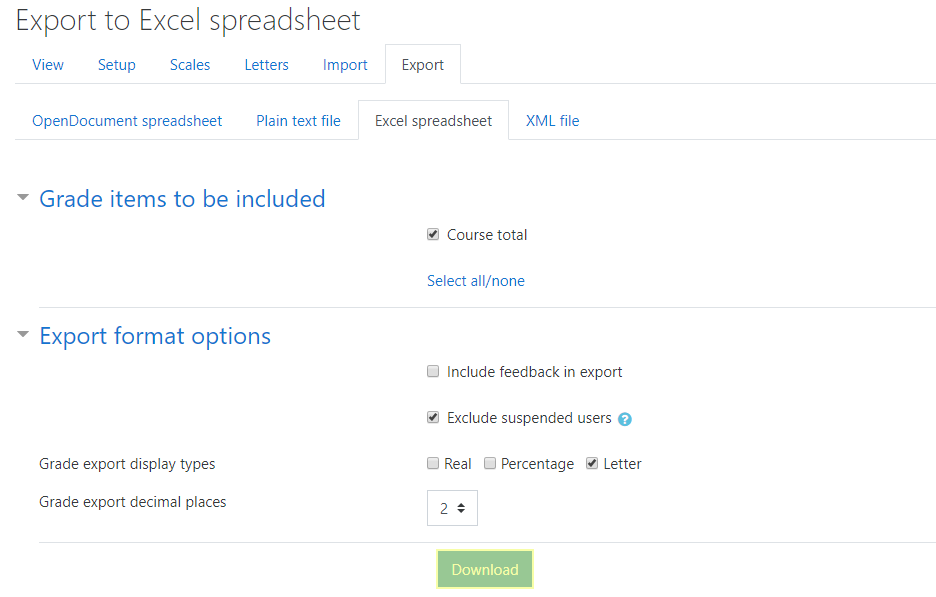
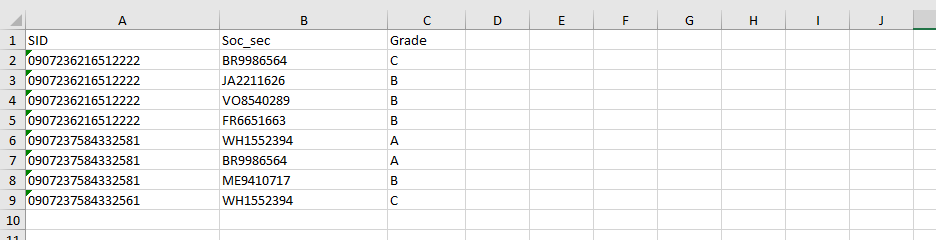
Before the file can be imported to SONIS, the filename must be altered to comply with SONIS protocols. The filename should be the SONIS course ID number followed by _grades.xls. For example, 201920_grades.xls. The file format may need to be altered from xlsx as well.
In addition, the file must be formatted to match the SONIS import requirements. It must have the following three columns labeled and in order:
SID – The course section identification number.
Soc_sec – The student’s SONIS ID number.
Grade – The student’s final grade. This can be a letter grade or numeric, but it must match the existing grades setup for the institution’s SONIS system.
Next, navigate to the Import Final Grades utility under the Systems menu. Click Browse at the top of the page and locate the file.
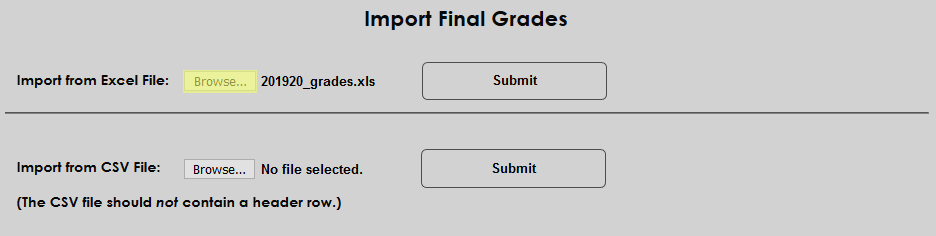
Once the file has been selected, click Submit to upload the file.
Attendance Import From Moodle
If attendance is being taken in Moodle, the data can be imported into SONIS using the timed task discussed previously in this article. The utility will retrieve and process files from Moodle directly using the settings entered in the LMS Transfer table. If the file does not exist there, SONIS will not be able to import it. For more information on exporting from Moodle, visit the Moodle help forum.
It is important to note the following:
• Students, and their corresponding course enrollment, in SONIS must match the students and courses for which attendance is being received.
• If a student has no attendance for a course, the record will not be updated with attendance information.
• If a student has attended, the record will be marked present.
• If multiple unprocessed attendance files exist in Moodle, the utility will process each file uniquely.
• Each line in a file is processed individually.
• The utility will verify whether or not nmattend and/or nmattend_detailtable entries exist. If an entry does not exist, the process will insert the attendance record. If it does exist, the process will update it.
• The file format from Moodle is: soc_sec, last_name, first_name, sid, and rawdate.