System Variables
Overview
The System Variables page is a utility that allows users to set core school information and toggle several key options. These options are global with changes affecting the entire Jenzabar SONIS system. Most options that cannot be changed through System Variables are available through the Web Options utility.
Top Menu
School Name Short Desc
Some processes require a three-letter abbreviation for the institution that will be used to identify the school. Entering the three-letter abbreviation in the School Name Short Desc field makes this available as necessary. Click Submit to save the change.

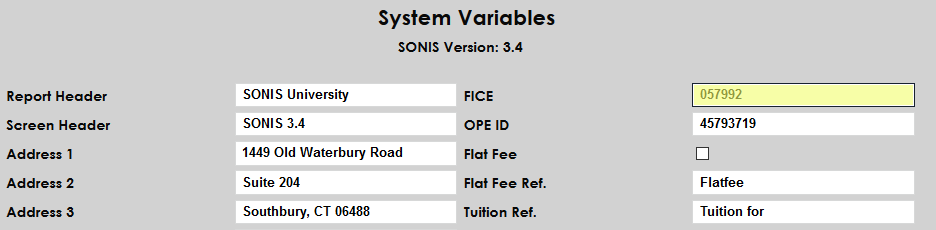
FICE
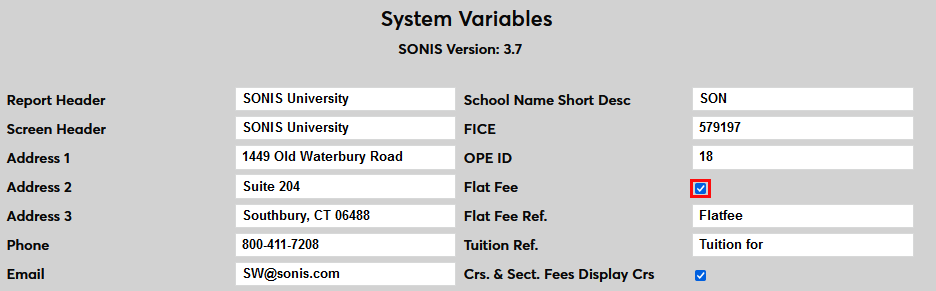
Every school that utilizes National Student Clearinghouse for reporting must have a six-digit FICE code for identification. The FICE field is located in the upper right-hand corner. If the school's code is not already listed in this field, enter the number and click Submit to save the page.
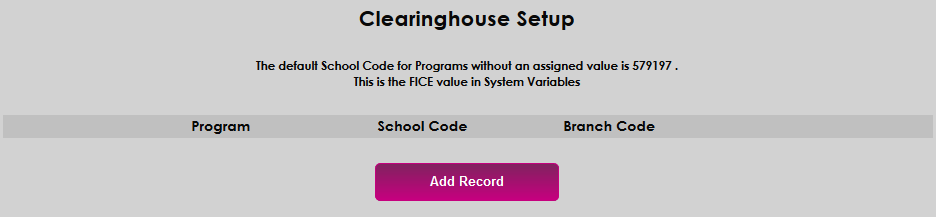
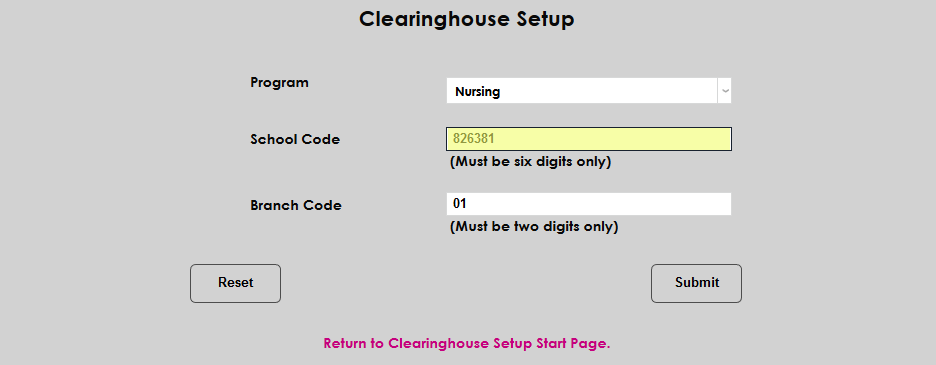
Some institutions may have more than one location, each with its own FICE code. Contact SONIS support to turn on the multi-NSLCH option if this is the case. Once this option has been activated, a new utility is available under the Systems menu called Clearinghouse Setup . Navigate to this utility and click Add Record to continue.
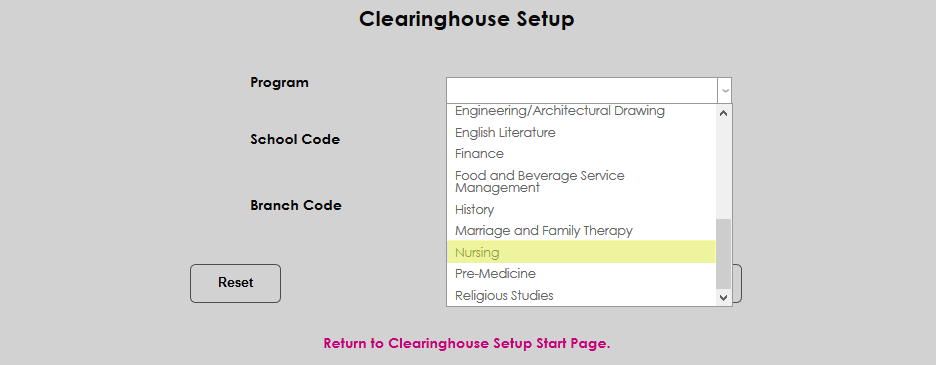
Any programs under the institution's primary FICE code designated in System Variables will still have that value attached for Clearinghouse purposes. Any programs which do not fall under that code must be listed separately. Select a Program from the dropdown menu and enter the FICE code for that program in the School Code field.
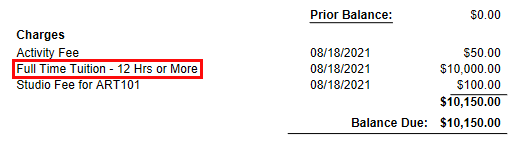
Flat Fees
Before flat fees can be used within SONIS, this variable must be activated. Check the Flat Fee box to turn this feature on.
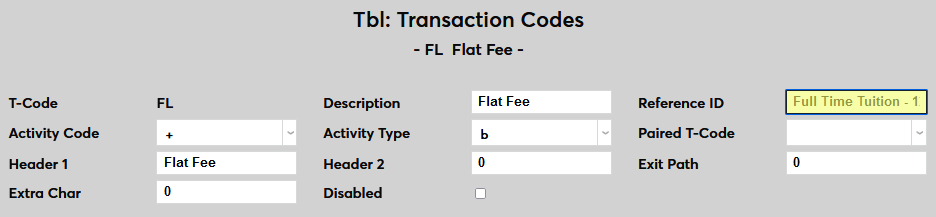
The option to change the default display option for flat fees is also available. Member institutions who have created a T-code to use for flat fees only can replace the default "FlatFee" text with text of their choice. Delete the "Flatfee" text from the Flat Fee Reference field and Submit the page to save the changes.
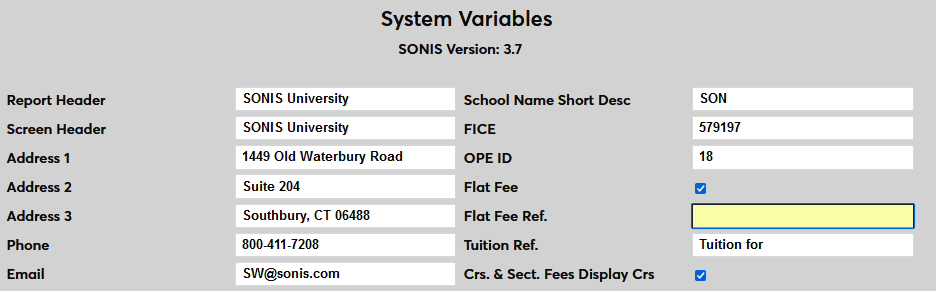
Once the text has been removed and the page has been saved, flat fee transactions will be labeled with the text from the Reference ID of the flat fees T-code on student bills.
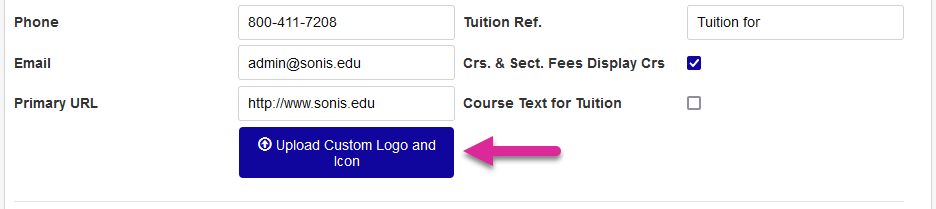
Admin Logo & Favorites Icon
System administrators can replace the default SONIS logo with a custom logo that will appear in the upper left-hand corner for all Admin users. There's also a version for mobile users and a favorite icon that will appear in each user's browser tab and favorites menu.
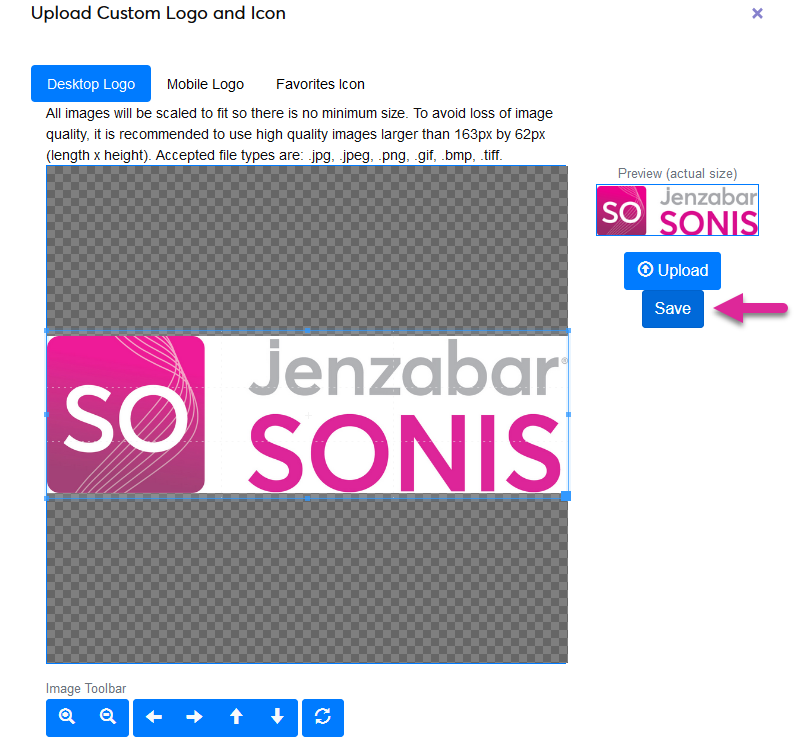
To make changes to either of the three logos, click the Upload Custom Logo and Icon button.
To change the logo that will appear in the upper left-hand corner of the SONIS window for desktop users, leave the Desktop Logo button selected and click Upload . Locate and select the image file on the local system. The file must have an extension of .jpg, .jpeg, .png, .gif, .bmp, or .tiff.
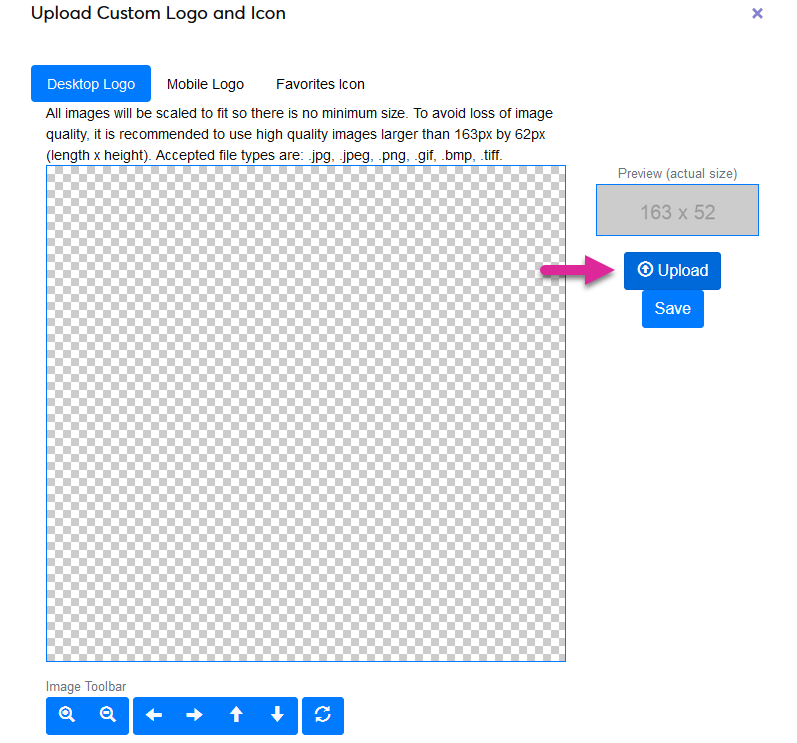
Once a file has been uploaded, the image appears in the editor. Use the Image Toolbar at the bottom of the window and/or adjust the crop box manually to capture the full image, leaving as little extra white space as possible. The Preview window on the right shows what the final version will look like as presently cropped.
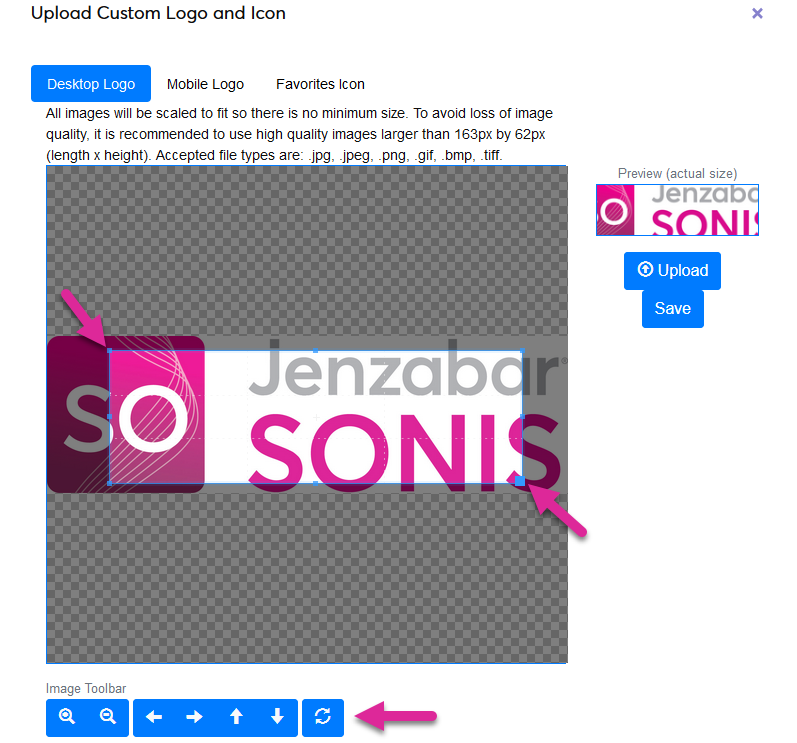
Once the image has been successfully edited, click Save to complete the process. The uploaded logo will replace the Jenzabar SONIS logo in the upper left-hand corner of the page.
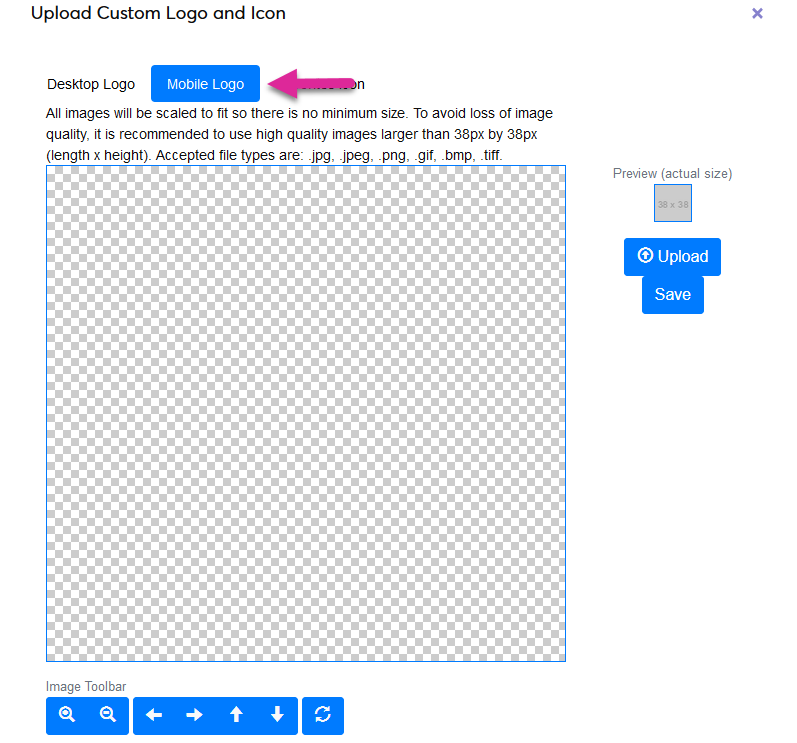
The same process can be used to upload and edit a Mobile Logo that will display when the browser window is sized for a mobile device. A Favorites Icon that will appear in the browser tab and when the page is saved as a bookmark can be uploaded and edited using this same process as well.

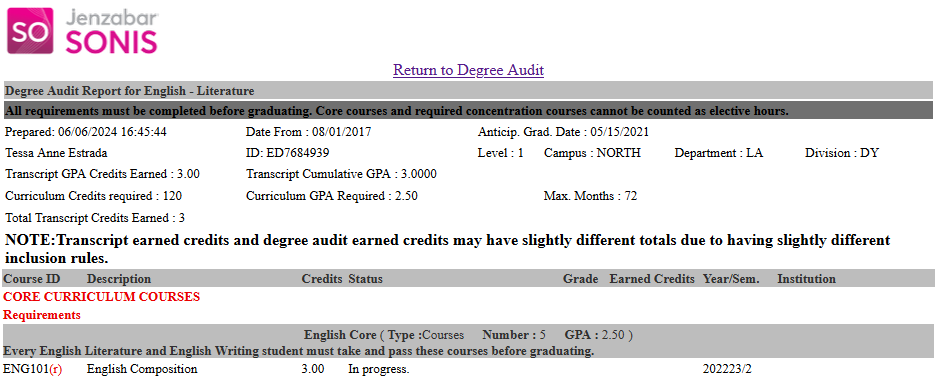
The chosen logo will also appear on the Degree Audit report in the administrative system and in the portals.
Third Section: Academic and Financial Settings
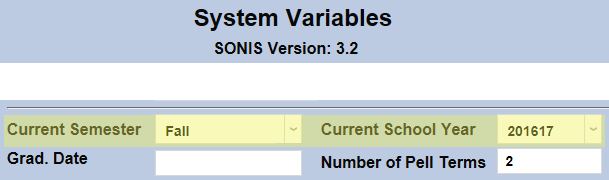
Current School Year & Semester
Current Semester and Current School Year determine the semester and school year that will be active and used throughout Jenzabar SONIS processes and functions.
Post to Billing/Post Transactions Date
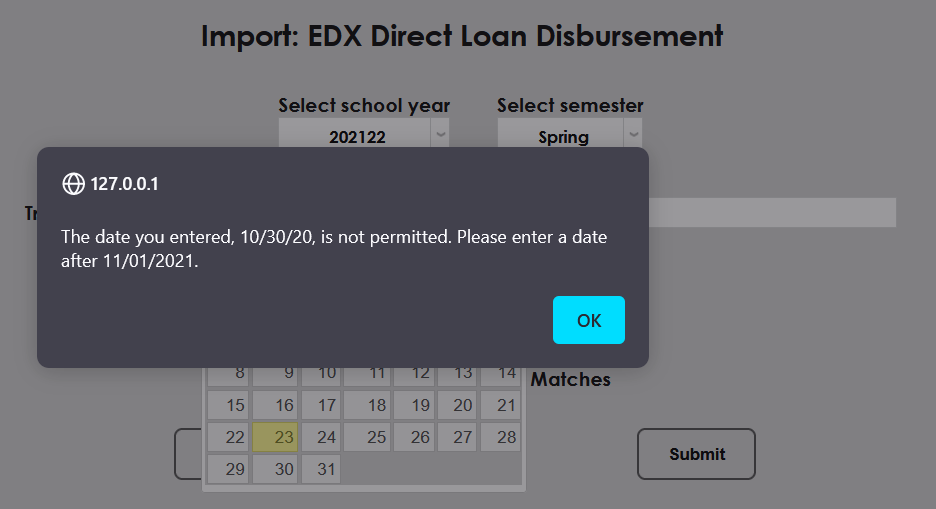
The 'No Post to Billing' nor 'Post Transactions' on or before date defines when posting to billing and posting transactions can begin. Throughout SONIS, the user will be alerted if the user attempts to select a date before the defined date. The alert includes the No Post to Billing nor Post Transactions on or before date, so the user is immediately notified of the date defined here.
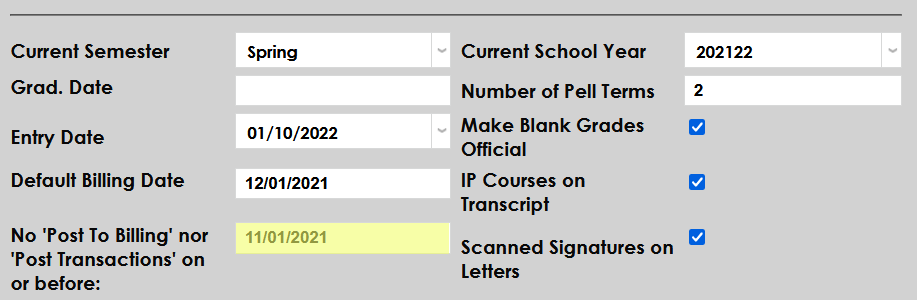
Note that the Regent Award disbursement and PowerFAIDS disbursement processes do not adhere to the No Post To Billing nor Post Transactions on or before date setting.
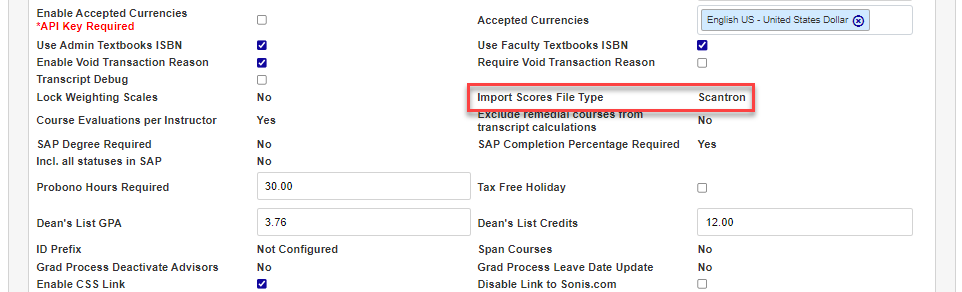
Import Scores File Type
The Gradebook Import Scores function allows institutions using ParScore/Scantron or LXR*TEST for scoring assignments to import the scores to Jenzabar SONIS and the Faculty Gradebook. Institutions interested in utilizing this solution must contact Jenzabar SONIS Support and request that it be enabled. After it is enabled, the chosen score system name will display here and scores will be imported via an export file provided by the scoring system.
GPA Settings
These settings are controlled behind the scenes and can only be displayed in the System Variables menu. Contact Jenzabar SONIS Support to make changes.
Multi-Transcript GPA
If Multi-Transcript GPA is set to Yes, then each education record will have its own GPA, completely separate from any other education records that a student may have.

GPA Grouping
If GPA Grouping is set to Yes, then institutions can group degrees that will share a GPA and exclude degrees that should not be part of that degree using the Degrees utility.

If both Multi-Transcript GPA and GPA Grouping are set to No , then an additional option will appear for SAP .
Truncate GPA
The Truncate GPA setting offers an alternative way to round GPAs for transcripts that some schools need.

Enable Accepted Currencies
This variable enables multiple currency functionality and designates the accepted currencies. Scroll down to the Enable Accepted Currencies option and check the box.

Next, select a currency or currencies from the Accepted Currencies menu.

Click the Submit button to save the changes and activate multiple currency functionality.

Enable Admin Print
When turned on, Enable Admin Print allows administrative users to print the SONIS page they are on without printing the sidebar menu and toolbar graphics. Checking the box enables the Print option when the user clicks on the user's name link at the top right of the page.

Include All Statuses In SAP and SAP Completion Percentage Required
The Include all statuses in SAP and SAP Completion Percentage Required variables are read-only. Contact Jenzabar SONIS support to change either of these values.
No - Include All Statuses In SAP
By default, the setting is No which means that only those with a module status of student (ST) will be included in SAP processes. This means, for example, that if a student's status has changed to alumni, that student's SAP data will not be determined.
No - SAP Completion Percentage Required
A No setting will not include the student's Completion Percentage in the criteria used to determine SAP standing, the GPA alone determines the SAP status.

Yes - All Statuses
Without a Student status, a user will not be reviewed in SAP processes. Consider returning and restarting students when deciding whether this should be set to yes or no. For example, an administrator may wish to see an individual's SAP in semesters before they changed status. When set to yes the SAP will be considered and available for each school year/semester regardless of an individual's current module status. A Yes setting means that all statuses will be considered, making status changes easier to manage. For example, if a student graduated in 201516, their status student (ST) might have been changed to alumni (AL) as part of the graduation process. If so, the SAP records for that alumnus (AL) will not show unless the function reviews for all statuses.
Yes - SAP Completion Percentage Required
With SAP Completion Percentage Required set Yes, the student's GPA and Completion Percentage will be reviewed in SAP processes.

SAP Degree Required
This variable determines whether or not individuals with no assigned Degree will be included in SAP processes. If the SAP Degree Required setting is No, then SAP Completion Percentage must also be No. If the SAP Degree Required setting is Yes, then SAP Completion Percentage can be either Yes or No.
No = students with and without degree assignments
Yes = only students with degree assignments

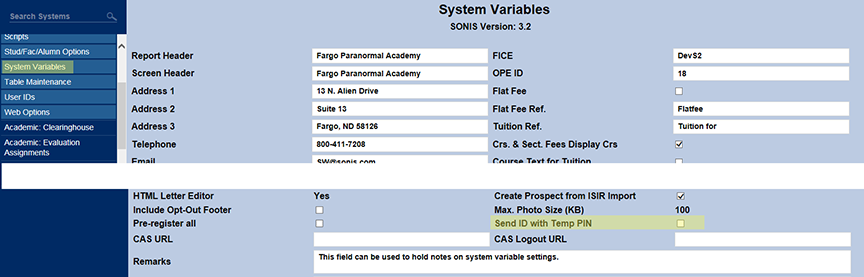
Create Prospect from ISIR Import
If the Create Prospect from ISIR Import box is checked, prospect records can be created during the ISIR Import process.

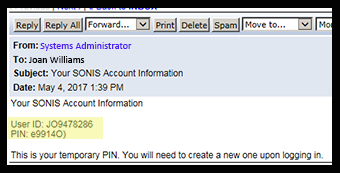
Send ID with Temporary PIN/Password
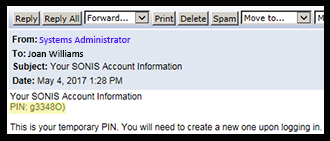
The Send ID with Temp PIN option controls whether the user's SONIS ID is sent when they request a new PIN or password or not. On the positive side, sending the ID along with the temporary PIN/password is helpful to new users who may not remember either value. On the negative side, anyone who has hacked into that user's email account can now access that user's ID and new PIN/password.
When the box is checked, users who click on the link to retrieve a lost PIN/password will receive the following email:
When the box is unchecked, users who click on the link to retrieve a lost PIN/password will receive the following email:
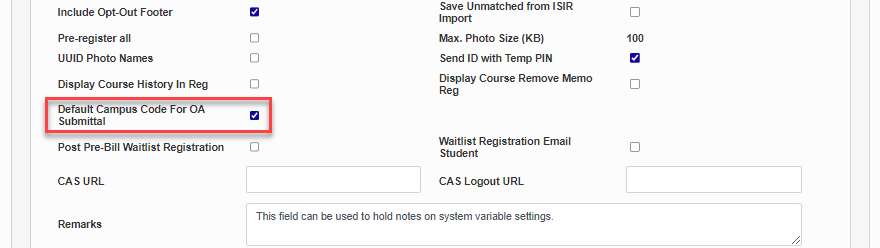
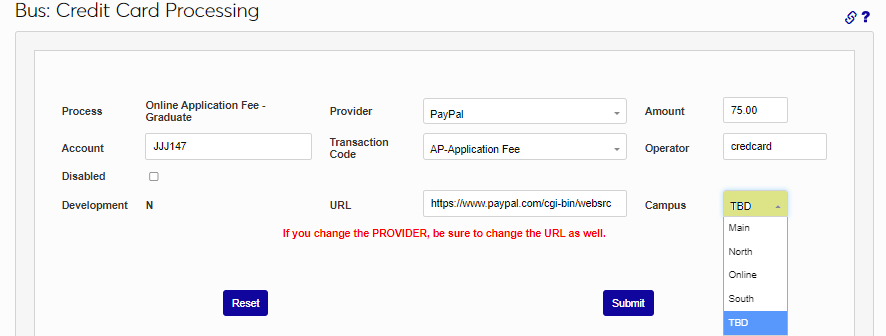
Default Campus Code For OA Submittal
This checkbox allows administrators to turn on and off the ability to choose a default campus for each entry in Business: Credit Card Processing. When turned on, each entry will have a campus drop-down, allowing the administrator to designate which campus is associated with an online application submission payment transaction.
Enable Admin Print
The Print Page function allows administrators to print a page of a Jenzabar SONIS page without including menus and toolbar graphics.

Once the Enable Admin Print option has been activated, administrators can click the Print link under their user card dropdown menu to view a "printable" version of the page they're on.

Enable Admin Icons
The default value for the administration top menu is to display items with button-like links with text as shown below.

This occurs when the Systems Variables setting for Enable Admin Icons is unchecked.

There is an option to use icons on the administration top menu as below.

This occurs when the Systems Variables setting for Enable Admin Icons is checked.

Admin Profile Switch
Sometimes an individual has more than one administration profile. By default, an administrator would be forced to log out and back in again to access a different profile. However, if the Admin Profiles Switch box is checked, an option will appear in the User Card dropdown menu allowing them from one profile to another.

Display Course History In Registration
Check the Display Course History In Reg box to enable a Registration History link on the Registration Users page. When a staff member clicks this link, a pop-up window opens displaying the user's registration history for the currently selected term.

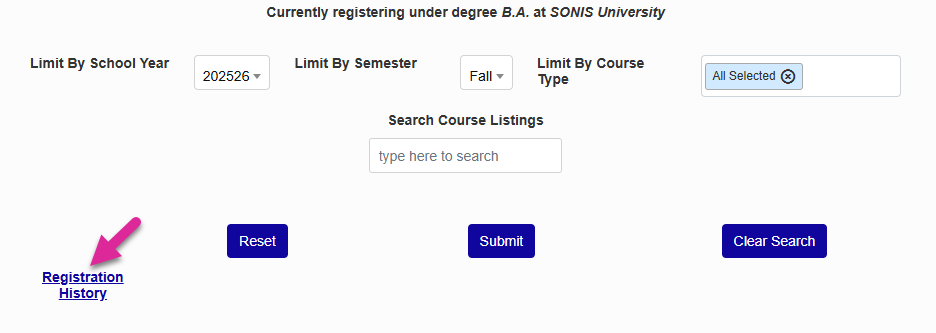
The staff member must also have the Multi-year registration User Security option active in order for the link to appear.

Course Removal Memo & Registration History
There are two checkboxes in System Variables that allow schools to better control and audit the registration process.
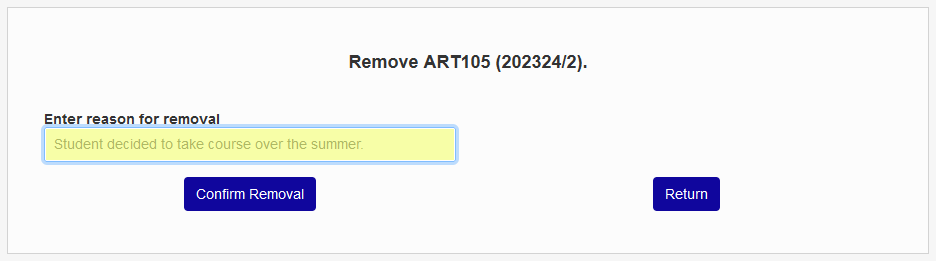
Check the Display Course Remove Memo Reg box to require users to enter an explanatory memo whenever a course is removed during the registration process.

Once this box is checked, staff, faculty, and students who attempt to delete a course using their Registration utility will be taken to an intermediate page with a field labeled Enter reason for removal. Text must be entered in this field before the Confirm Removal button can be used.
Note
The memo requirement only applies when the registration process has been completed. Users can still delete courses from their cart.
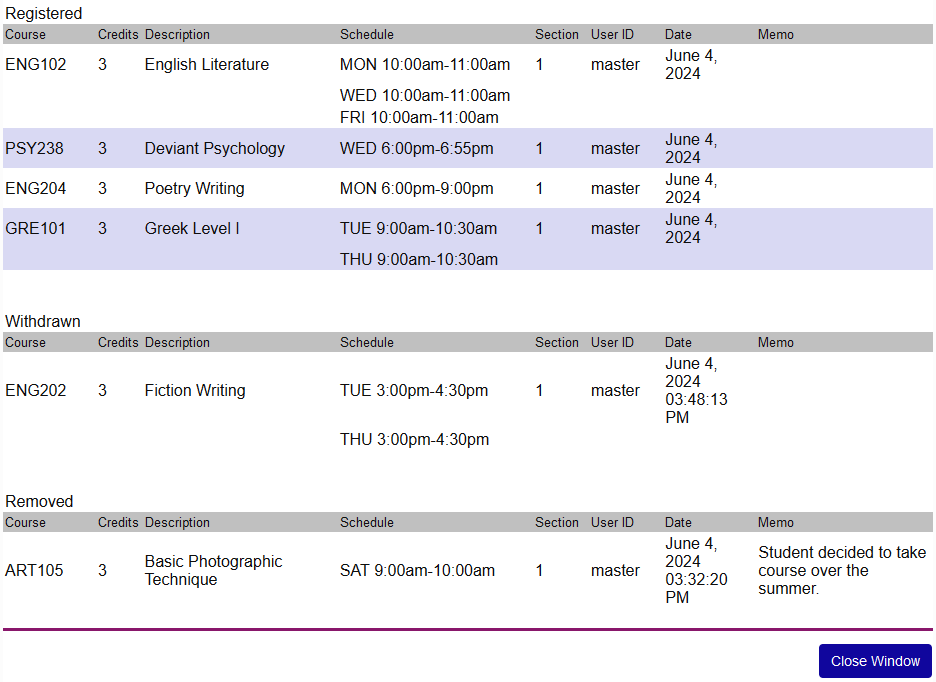
In order for this memo to display, the second System Variables registration option must also be turned on. Check the Display Course History in Registration to activate a Registration History link on each Registration page.
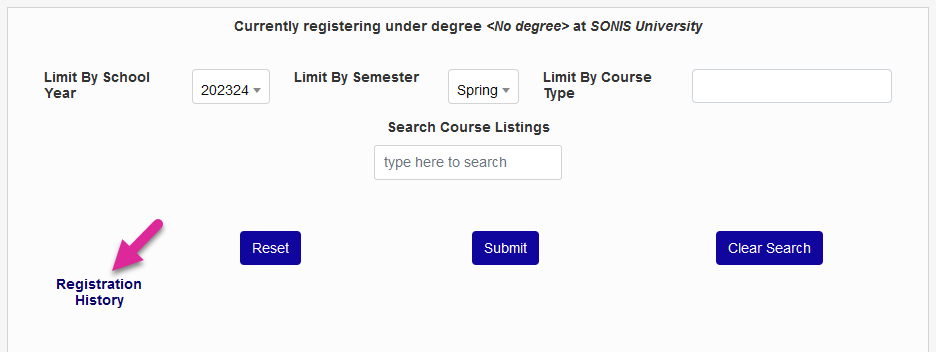
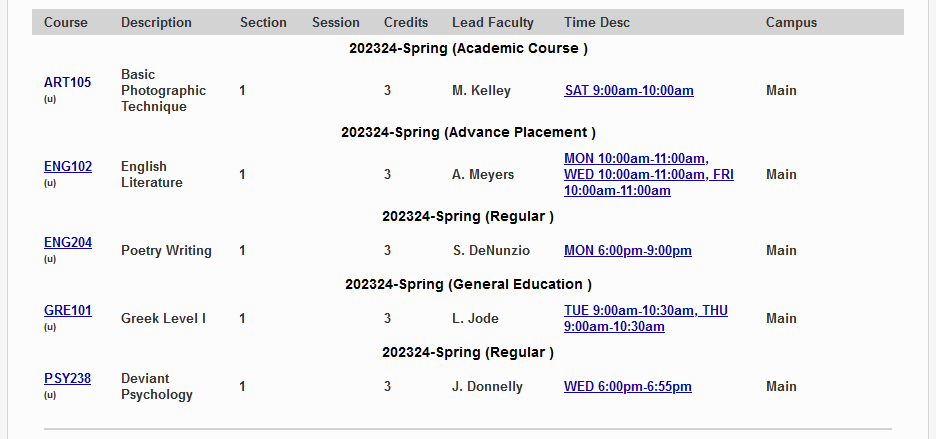
The history opens in a popup window. Users can see the student's registered, withdrawn, and removed courses for the selected semester.