Schoology Integration
Overview
Schoology is a cloud-based learning management system that helps schools manage their courses and enrollment. Jenzabar SONIS offers a simple, easy to use export process, which allows institutions to register students in SONIS and then pass that information to Schoology. The process includes a scheduled task to perform the export automatically at regular intervals.
In addition, SONIS offers a real-time API integration with Schoology for institutions that need greater functionality and more timely updates. Click here to view and download a technical document detailing the API setup. Contact Jenzabar SONIS Support with additional questions.
Export Path
Before exporting a file, the export path must be set up. Navigate to the Web Options page and locate the Schoology Export Path field. Enter the default path for the institution's Schoology exports and click Submit to save the page.

Manual Export
LMS Setup
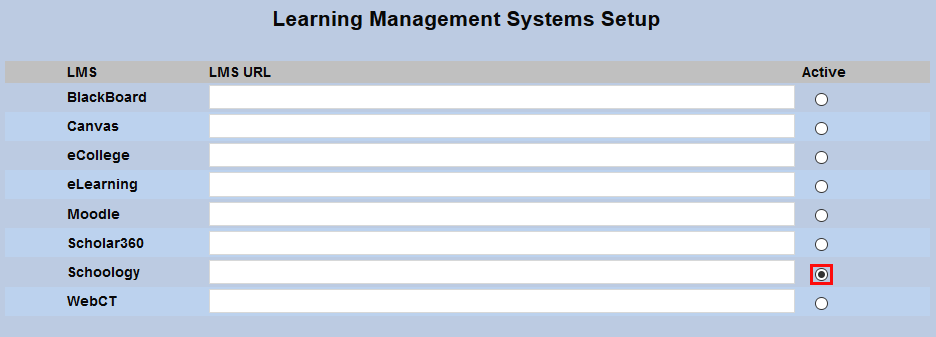
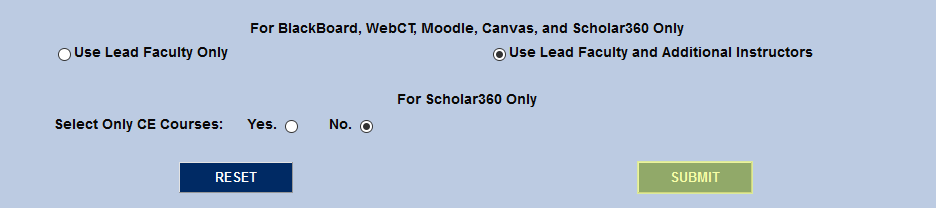
Though most institutions will prefer to set up a timed task to export data at regular intervals, data can also be manually exported. To begin, set Schoology as the Active LMS on the on the Learning Management System Setup page in the Systems hub.
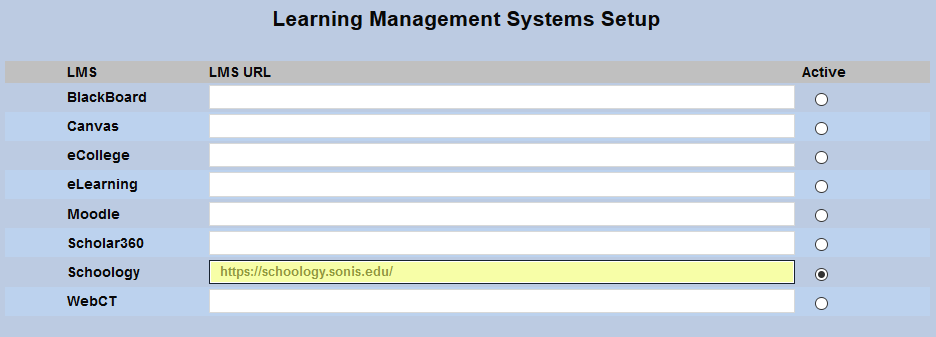
Enter the referral URL in the Schoology field.
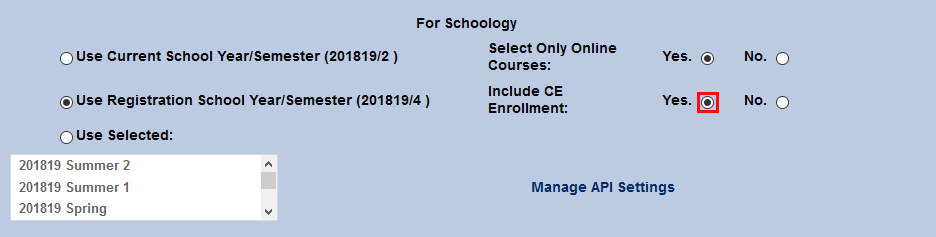
Scroll down to the For Schoology section and choose the semester to be used.
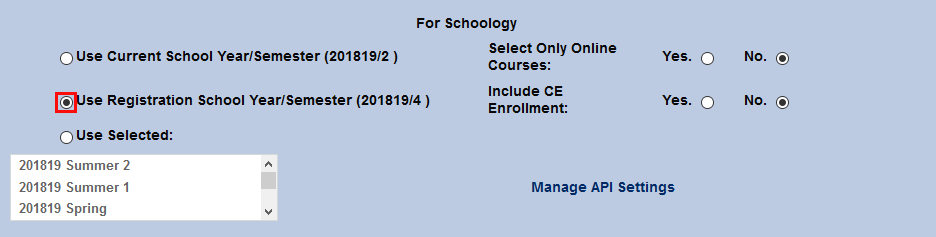
If only courses designated as Online should be included, change the Select Only Online Courses radio button to Yes. If CE courses should be included, switch the Include CE Enrollment button to Yes.

Click the Submit button at the bottom of the page to save the changes.
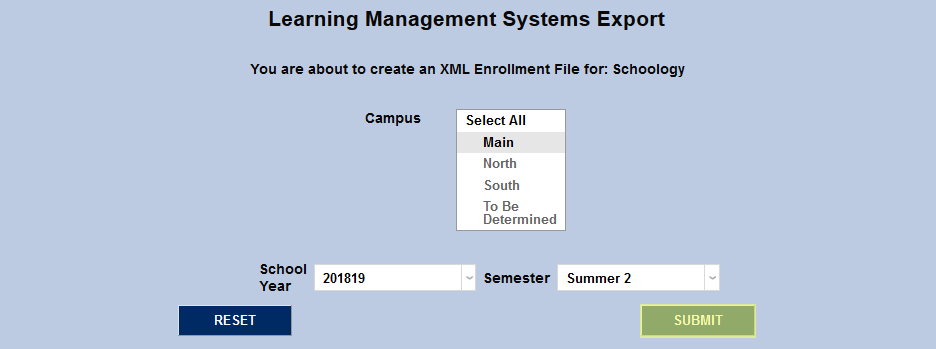
Export
To initiate the export, navigate to the Learning Management System Export page under the Systems menu. Choose a Campus or leave all campuses selected.
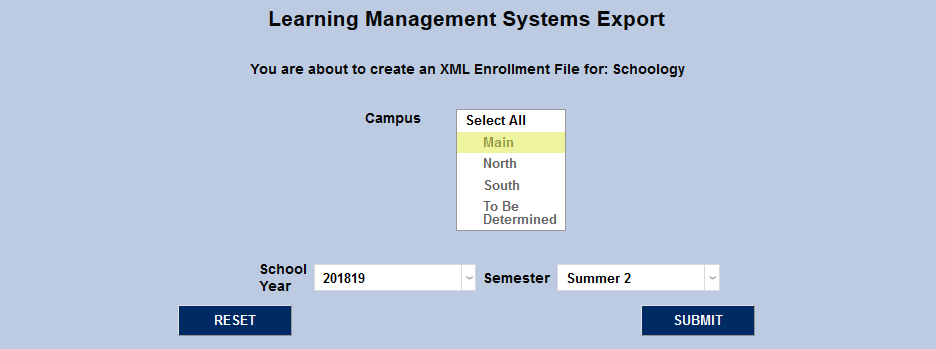
The School Year and Semester will default to the values selected on the Learning Management System Setup page, but can be changed if needed.
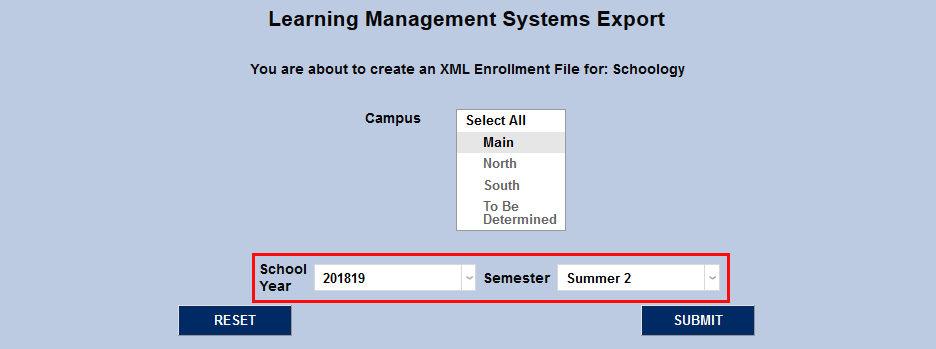
Click the Submit button to complete the export.
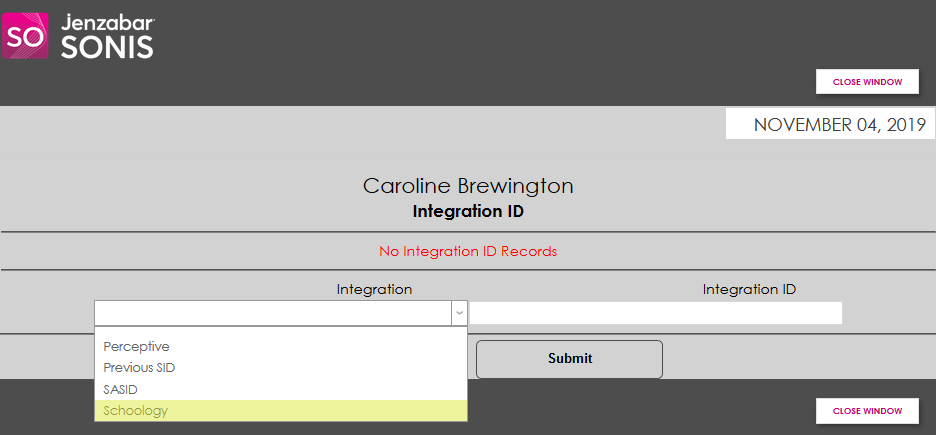
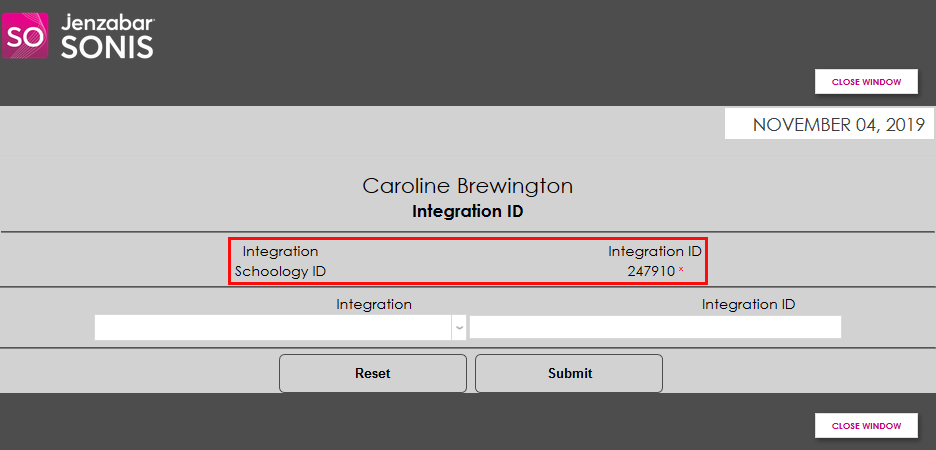
Integration ID
In order to be listed properly on Schoology, each student must have an Integration ID in addition to their SONIS ID. This value is provided by Schoology when a new student is added to their system through the SONIS export process. To add an integration ID to a student's account or view a student's existing ID, navigate to the student's Biographic page and click the View link next to the Integration field. A new window will pop up.

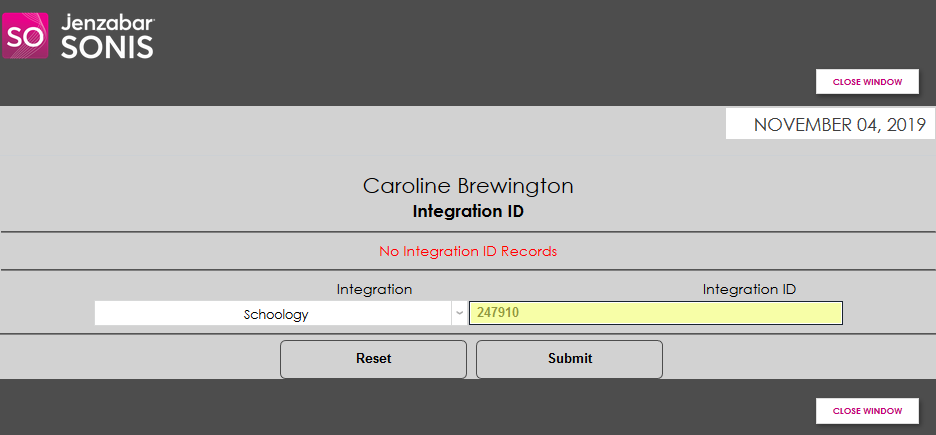
In the pop-up window, select Schoology from the Integration dropdown menu. This list is populated by SONIS Product Development and Support and may vary from school to school. Type the ID into the Integration ID field and click Submit.
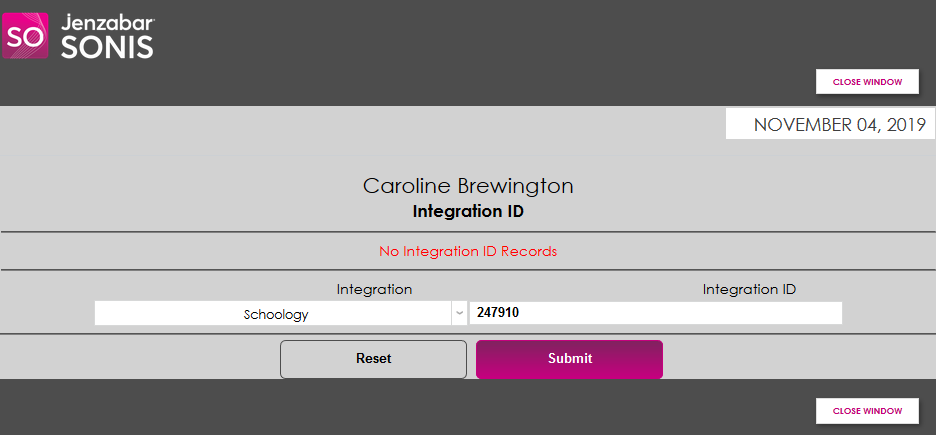
Once the student has an ID on record, the ID is listed at the top of the page along with the integration it pertains to.
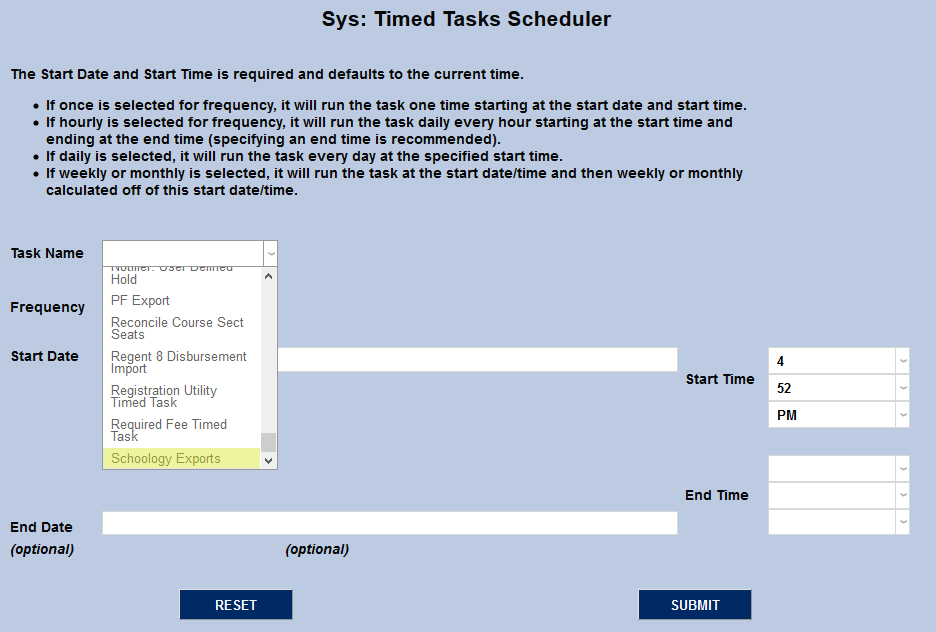
Timed Task
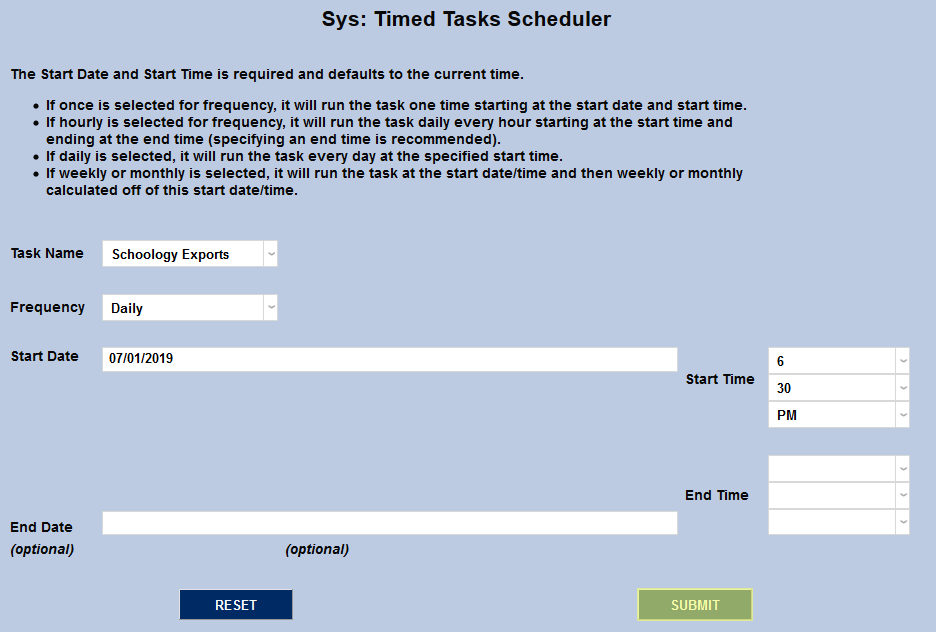
To set up a timed and repeated Schoology export, navigate to the Timed Task Scheduler under the Systems menu and click Add to begin.
On the following page, select Schoology Exports from the Task Name menu.
Select how often the task should occur with the Frequency dropdown. Schools may wish to run the export more frequently during each semester's drop/add period and edit the task to run only daily once this period has ended.
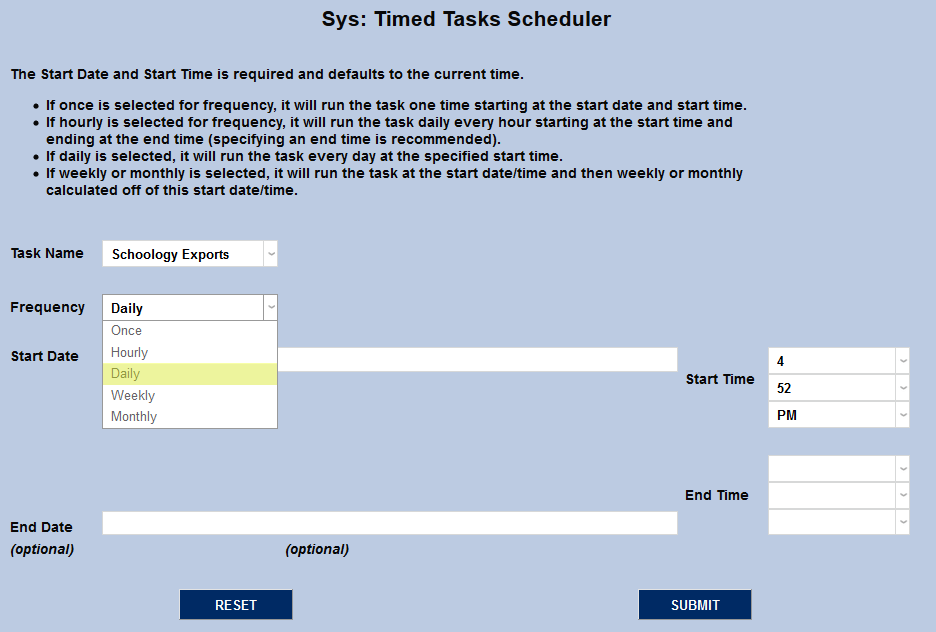
The Start Date and Start Time will automatically be set to the current date and time but can be changed to suit individual preferences. The End Date and End Time are optional.
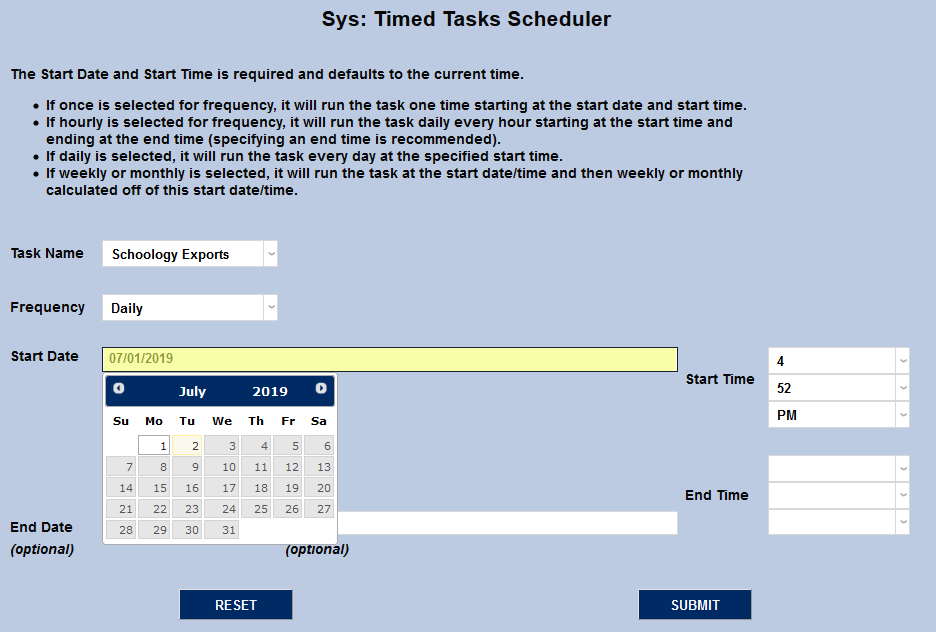
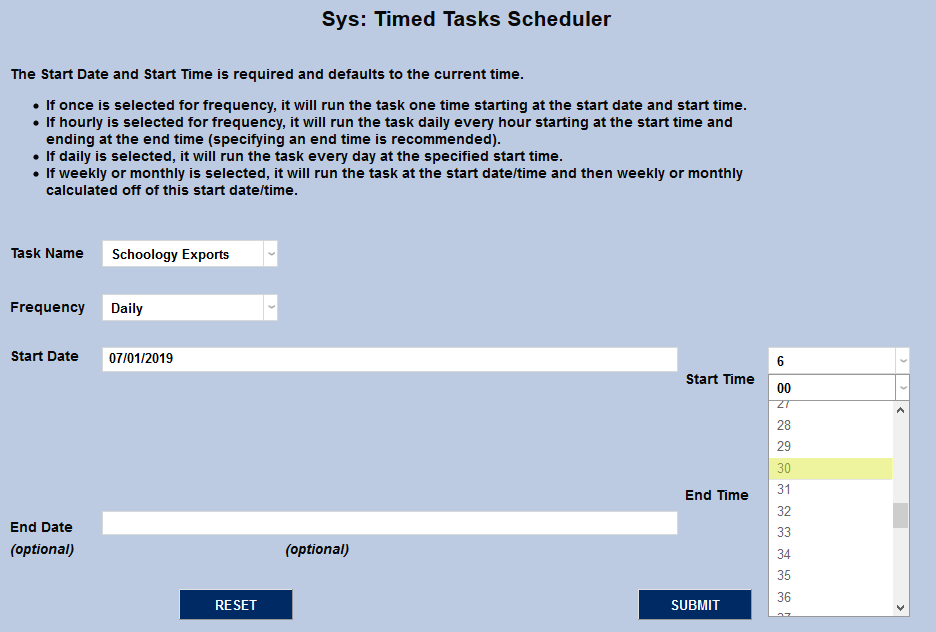
Click the Submit button to create the scheduled task.
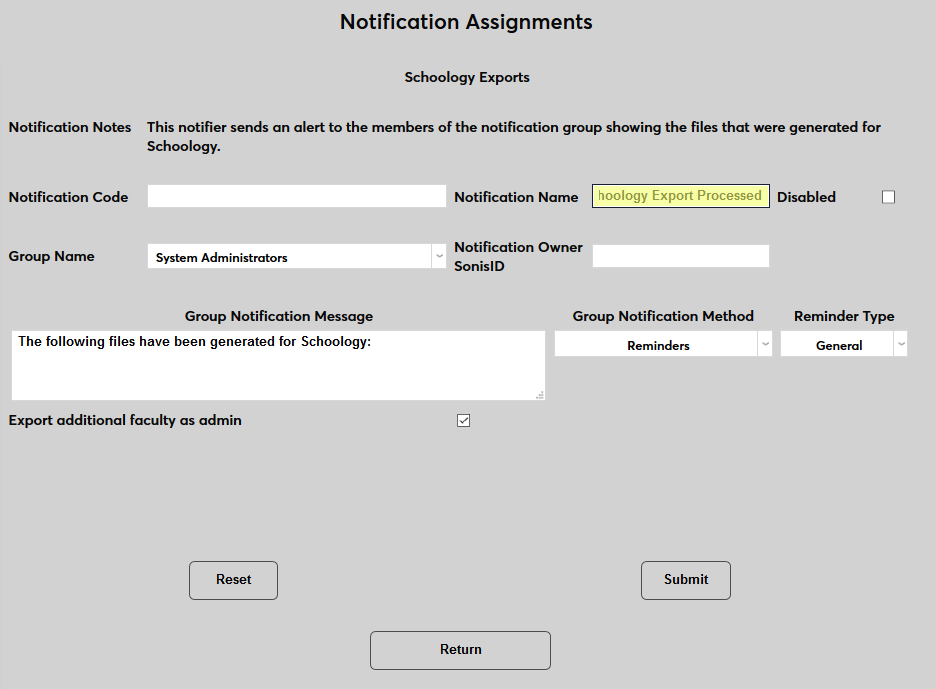
Notification Assignment
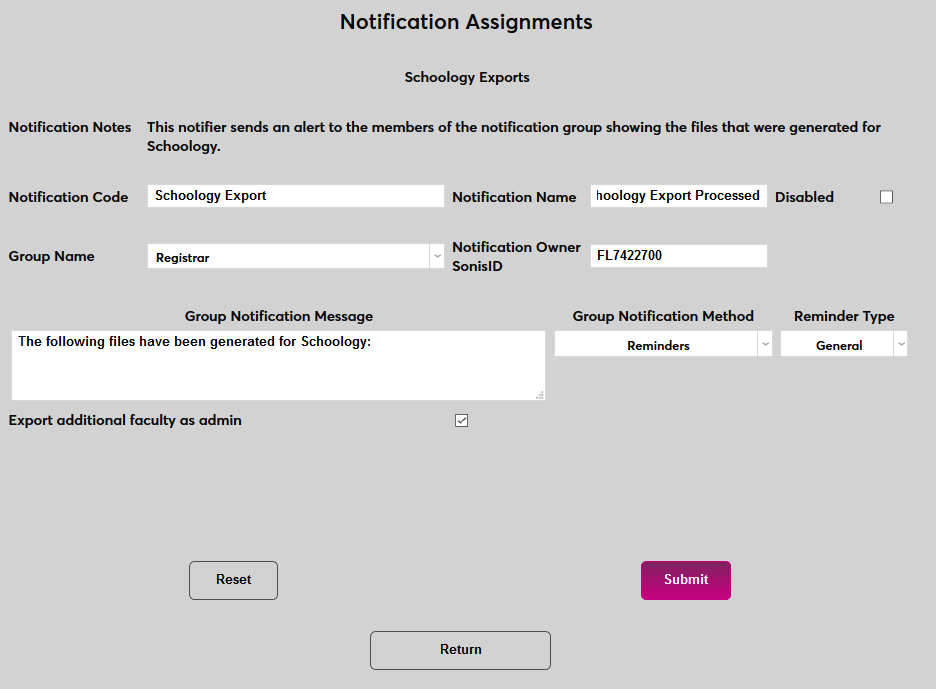
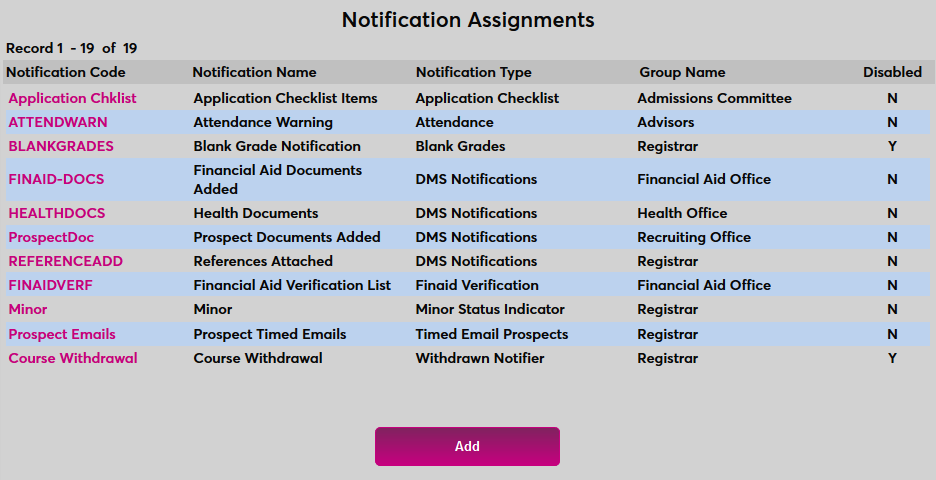
Some institutions may want to notify users whenever the Schoology export runs. To set up the notifier, navigate to Notification Assignments in the Systems hub. Click the Add button to proceed.
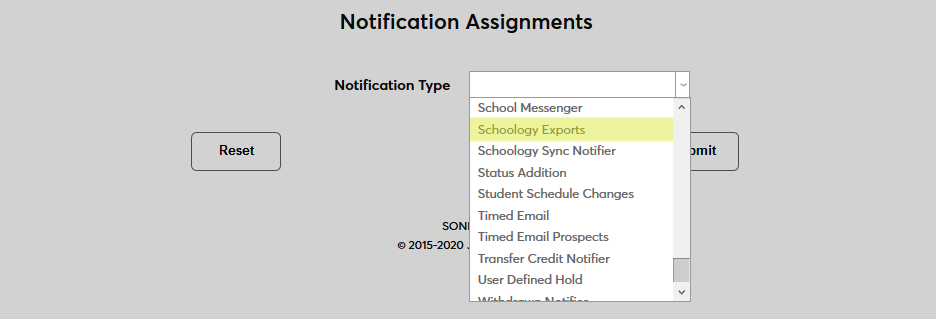
On the following page, select Schoology Exports from the Notification Type dropdown and click Submit.

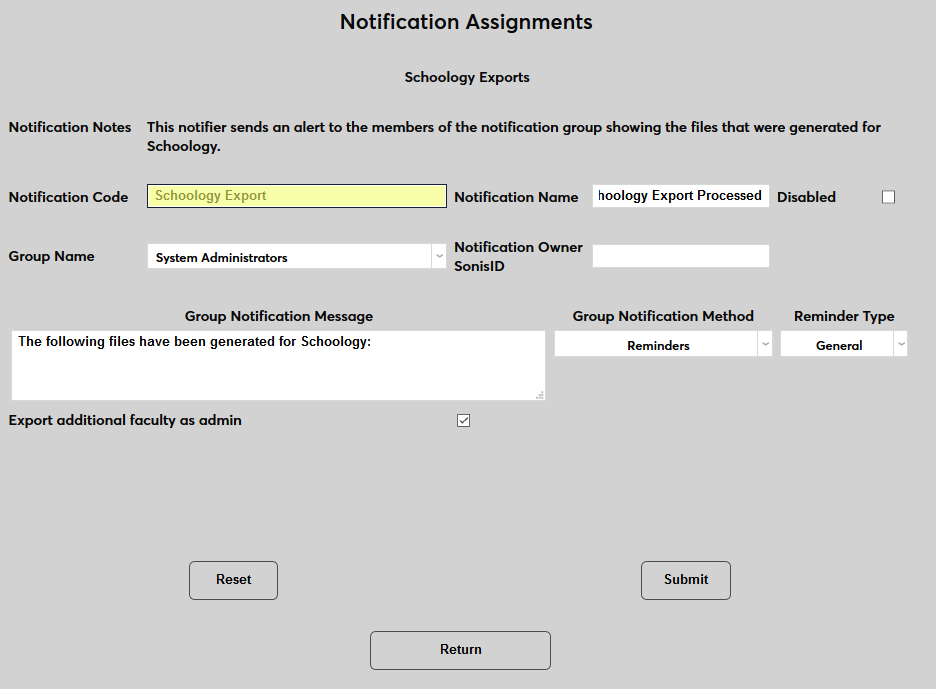
Next, create a Notification Name, a descriptor of the notifier's purpose with a 50 character limit, and a Notification Code, a shorter version of this name with a 20 character limit that the SONIS system will use internally to identify the notifier.
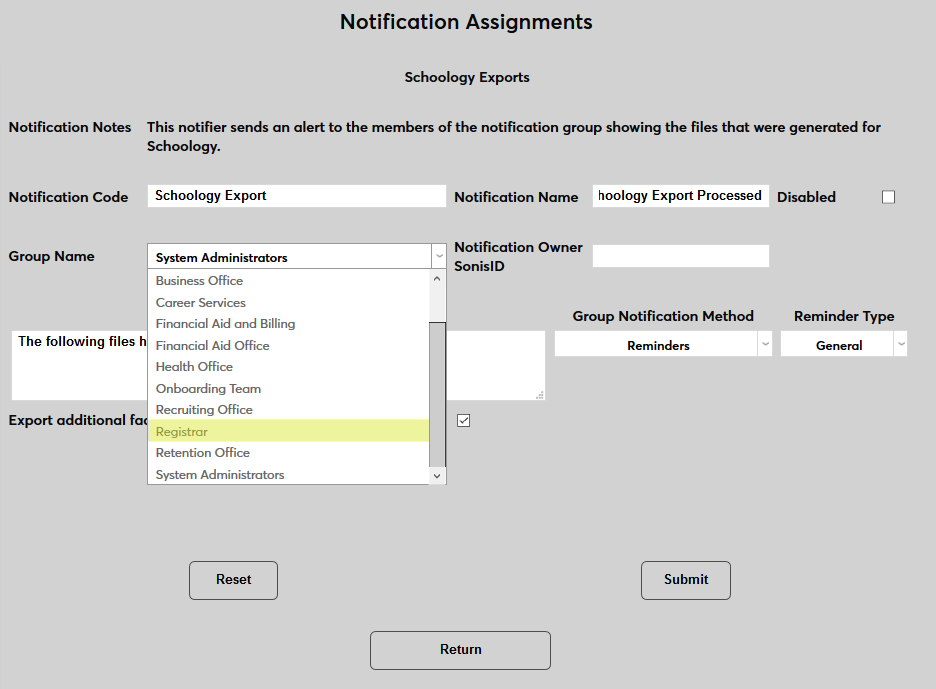
Select a group of staff/faculty to receive the notification from the Group Name dropdown menu. Groups can be added and edited through the Table Maintenance utility.
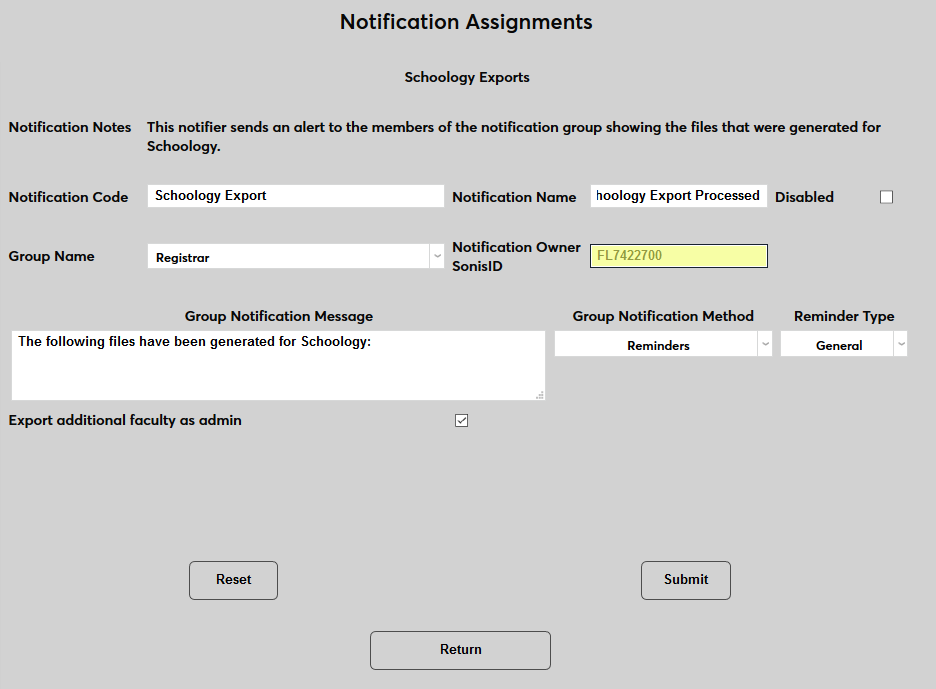
Enter the ID of the staff or faculty member who will be managing this notification in the Notification Owner SONIS ID field.
Create a Group Notification Message that will be sent to the group members when the task takes place.
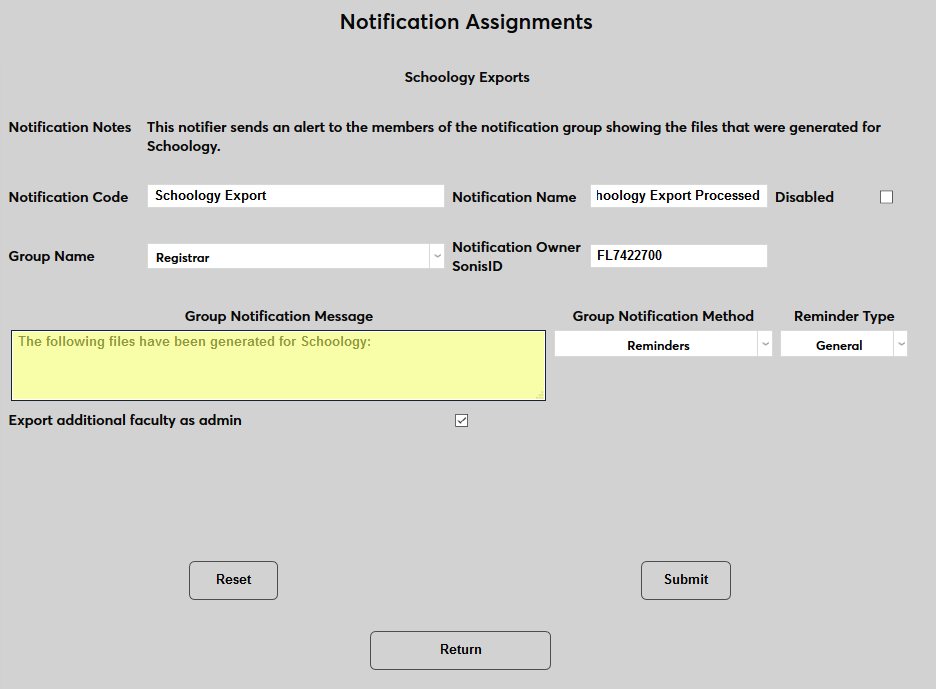
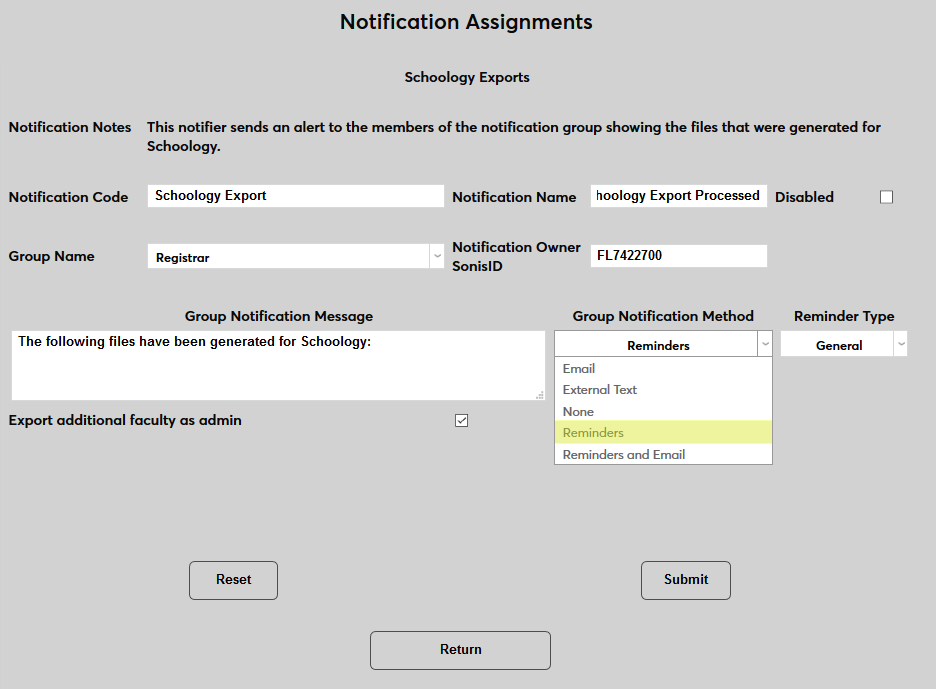
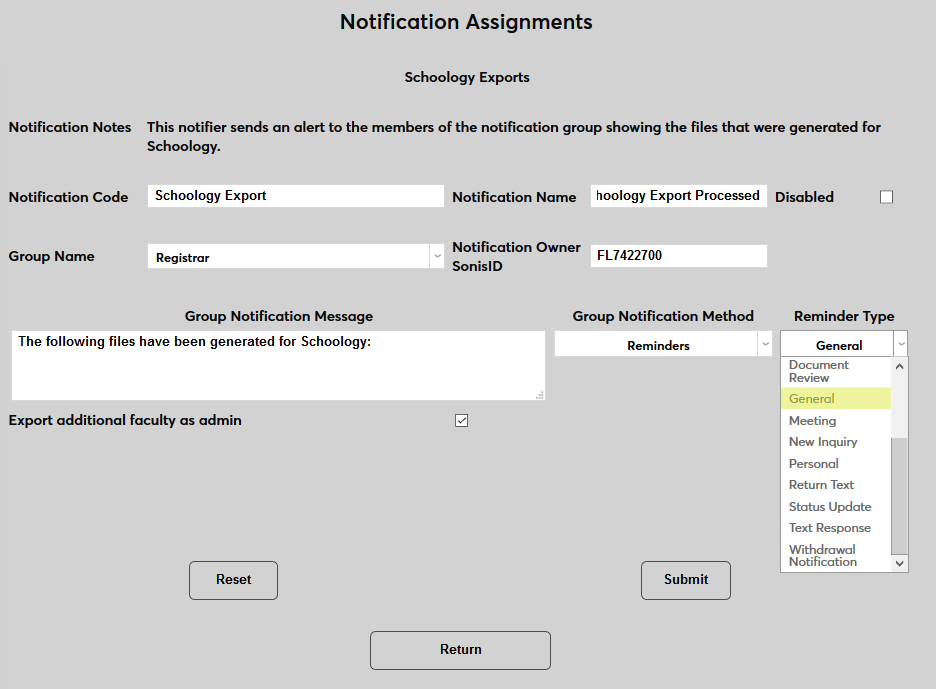
The Group Notification Method dropdown menu designates whether the group and individual users will receive an in-system reminder, an email, a text, or no notification when the process is triggered. The Reminder Type dropdown can change how the in-system reminder displays. This list can be created and edited via the Table Maintenance utility. The User Notification Method and Reminder Type menus work in the same manner.
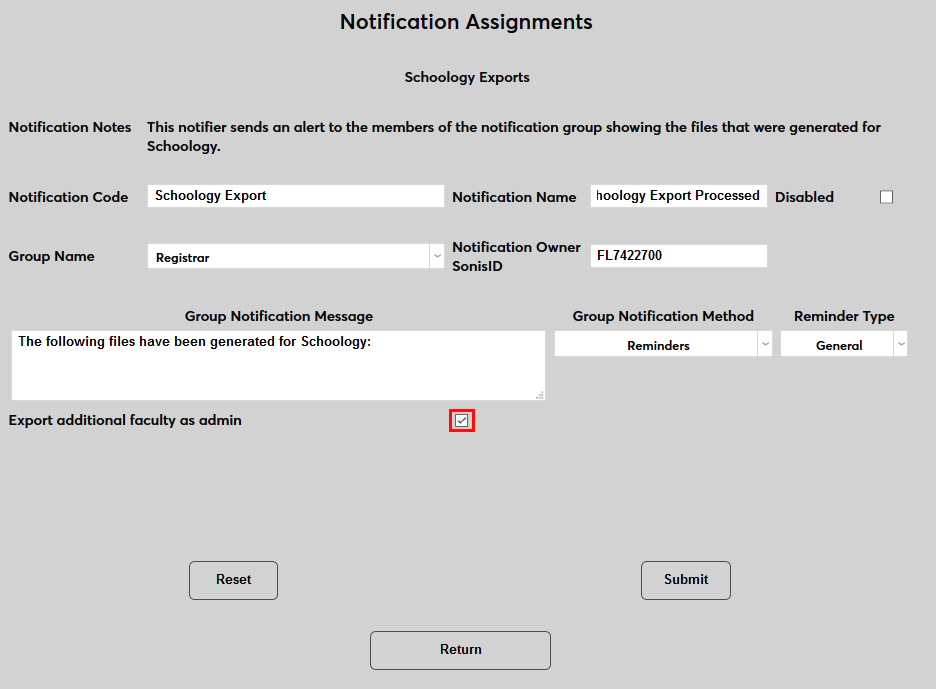
Check the Export additional faculty as admin box to give any additional faculty listed on a course Admin privileges in Schoology for that course. Otherwise, additional faculty will be listed as a Teacher in Schoology, which confers different access and abilities.
Click Submit to activate the notifier.