Login Page Setup
Overview
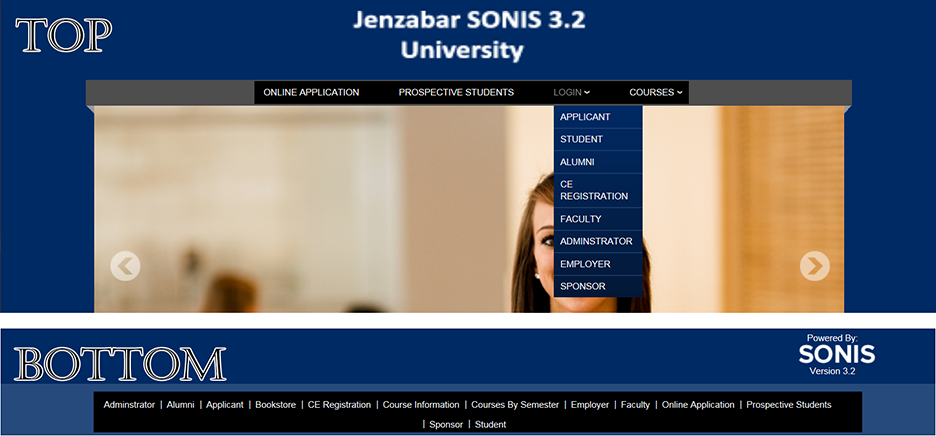
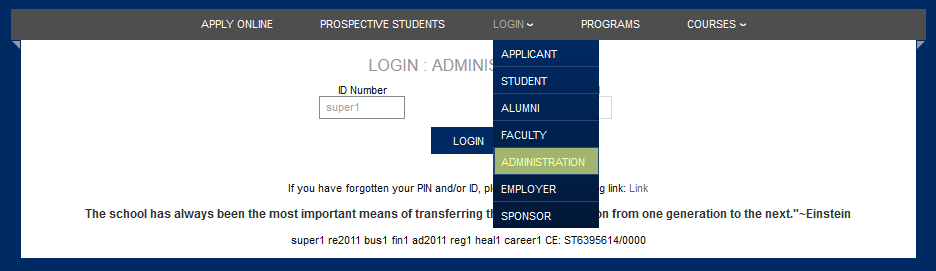
A login page is a link, generally displayed on an index page but optionally can be displayed on a school's home page, etc. These links take an individual to one or more functions. In some cases, the function asks for an ID and PIN/Password in order to access any number of functions. For example, clicking the Student login link asks for a student ID/PIN. If that ID/PIN is found with a student status assigned to it, access to a number of student-related functions is opened.
Other logins require no ID/PIN and therefore are open to the public at large. An example of this type of login is Prospective Student. This login has one function assigned to it. Those clicking the Prospective Student login link are taken to the Web Inquiry Card, a form that informs the school that the individual is interested in the school but not quite ready to apply. This card acts as an introduction and potentially communication between the prospective student and the school. This is the sole function of the Prospective Student login link.
These links can appear in various places on a web page, depending on the school's preference. For information on adding or editing notes on a login page, click here.
For an overview on setting up and customizing SONIS portals and login pages, click here to view the Portal Management in SONIS e-book from Jenzabar's Learning & Development.
Standard Options
Enabling/Disabling Login Page
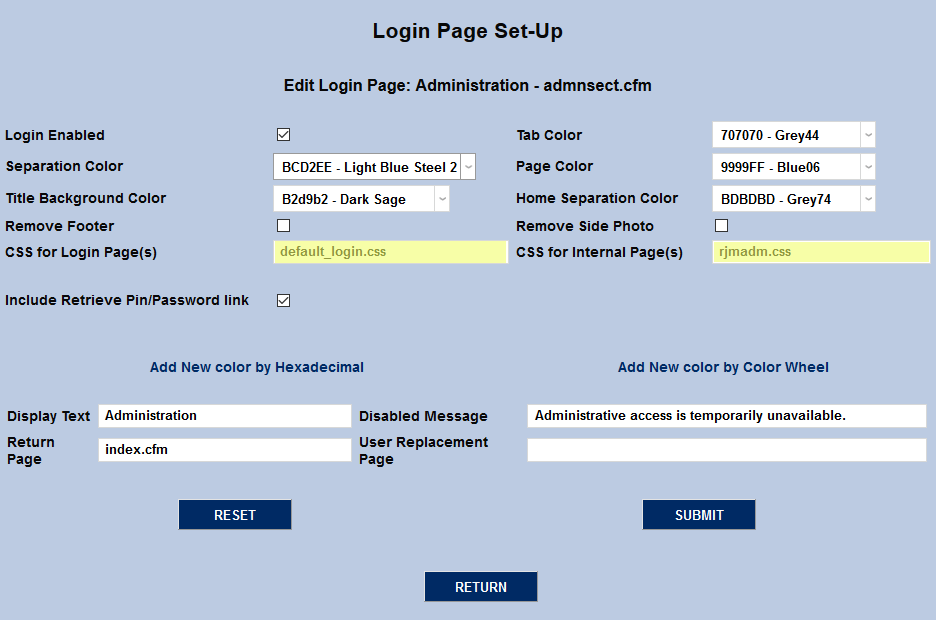
Before a login link can appear on the opening page, it has to be enabled. The image below shows all of the available logins enabled so as to show the full range of login links.

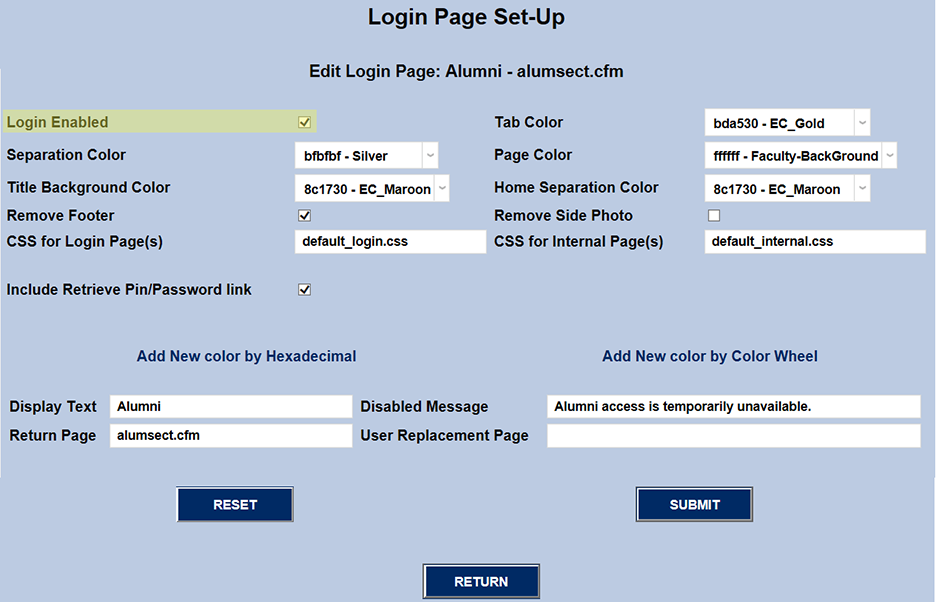
The Login Enabled checkbox near the top of the page determines whether or not a link for a given login page appears on that opening page. It's possible that a school does not plan on offering SONIS services to alumni, for example. If that were the case, the Login Enabled box would be left unchecked.
Sometimes a school needs to temporarily keep individuals from signing onto the system. That is accomplished by disabling the login pages. For example, if an upgrade is being done, to avoid something that might cause issues with the data and/or users, logins should be disabled and nothing should be done before those already logged in have logged out.
Warning
Do not disable the Administrator login. If this login is disabled, once all admin-level users log out of the system, there will be no way to reenable the page.
Cosmetic Changes
Page Colors
In previous versions of SONIS, users could customize their page colors from this screen using the dropdown menus. However, beginning with version 3.0, users must use a CSS page and can no longer edit colors. Thus, the color dropdown menus are now functionless.
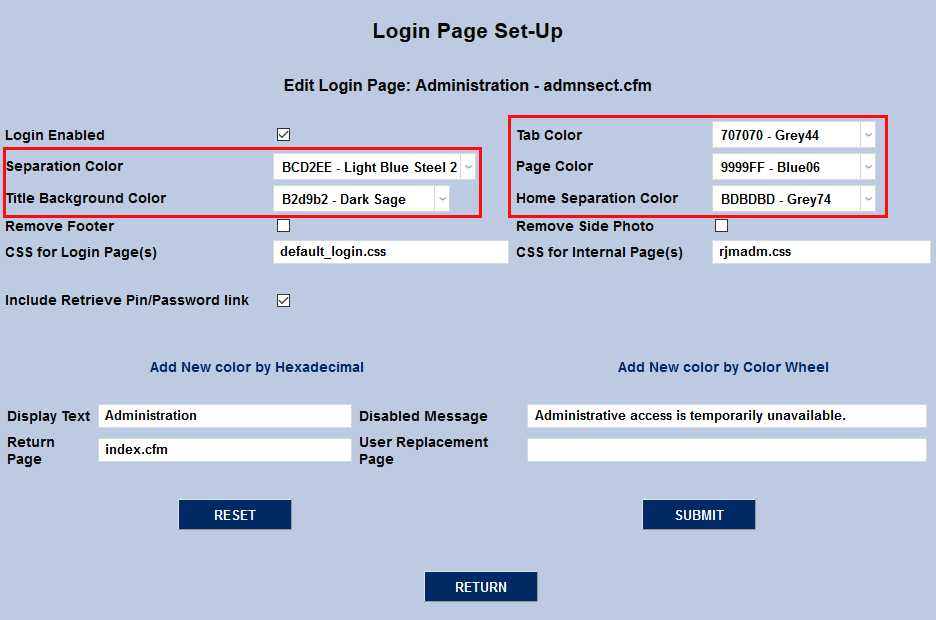
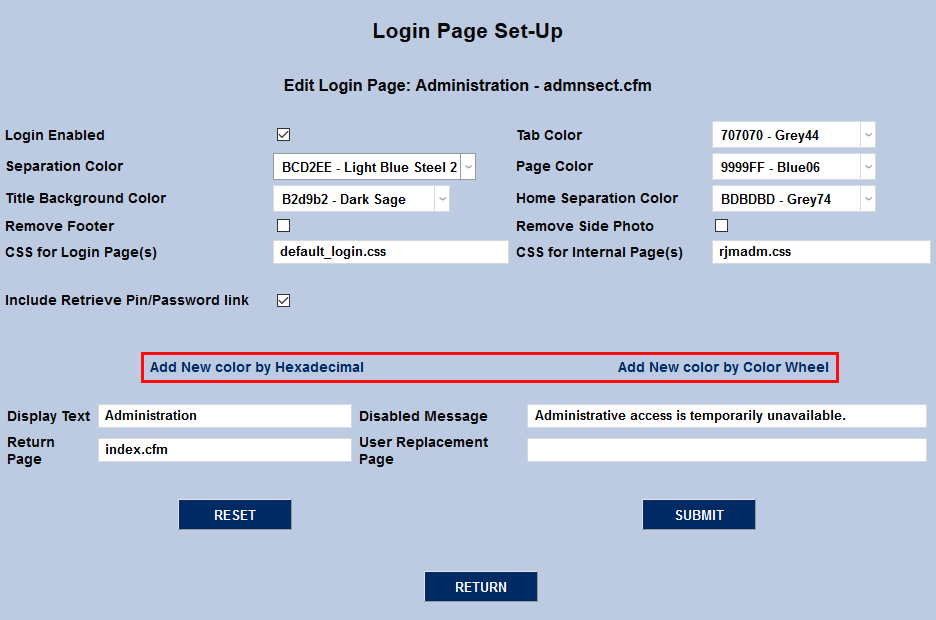
The Add New Color by Hexadecimal and Add New Color by Color Wheel links are no longer relevant as well.
CSS
Schools can create and utilize their own CSS pages for the login pages. Once these templates have been created, place the file in the appropriate SONIS folder and add the title to either the CSS for Login Page field or the CSS or Internal Page. The Login Page CSS controls what users see before logging in. The Internal Page CSS controls the look and feel of the SONIS system itself after login.
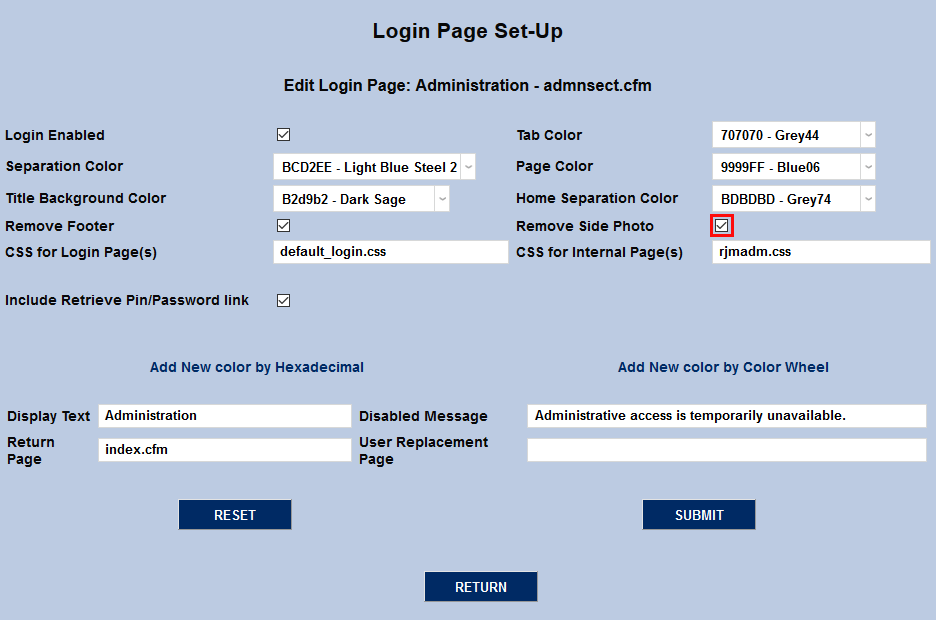
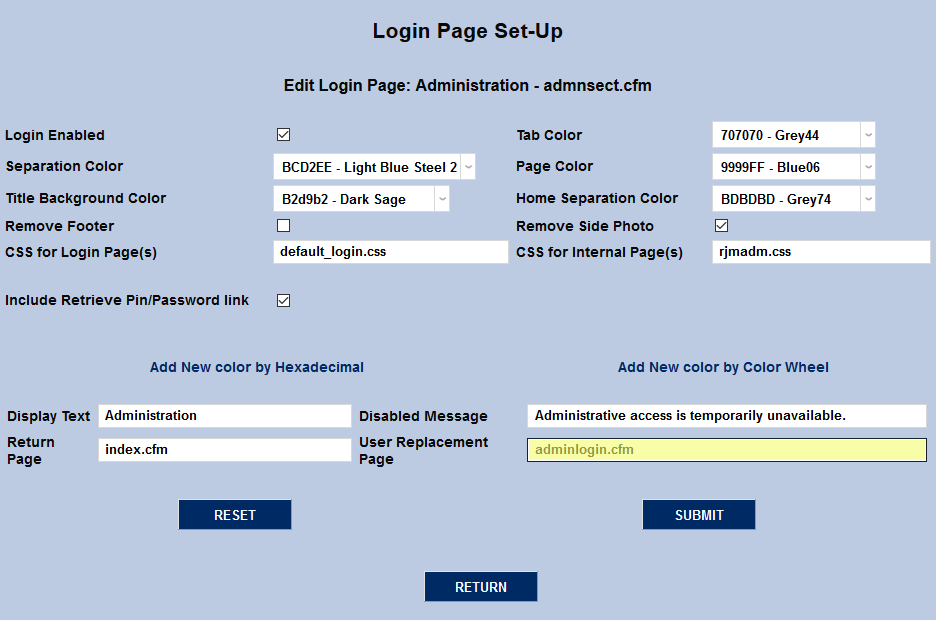
Footer/Side Photo
The utility also offers administrators the option to remove certain page elements from the login page. Check the Remove Footer box to remove the series of customizable images that, by default, appear at the bottom of the login page. The footer is shown below.


The Remove Side Photo checkbox previously served a similar function. However, the side photo is no longer a part of the standard SONIS page layout and thus the checkbox is no longer functional.
ID/PIN Retrieval Link
On the various "status" (i.e. Student, Faculty, etc.) login pages, there is a link that users can use to retrieve their forgotten ID and/or PIN.
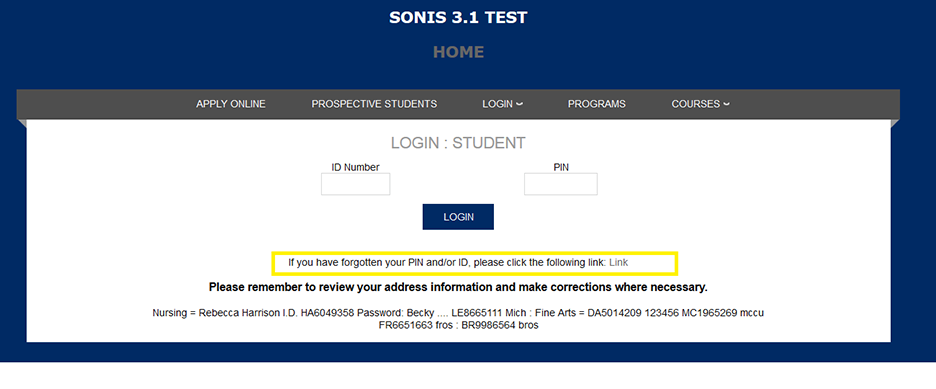
The Include Retrieve PIN/Password Link checkbox is checked by default, turning the link on.
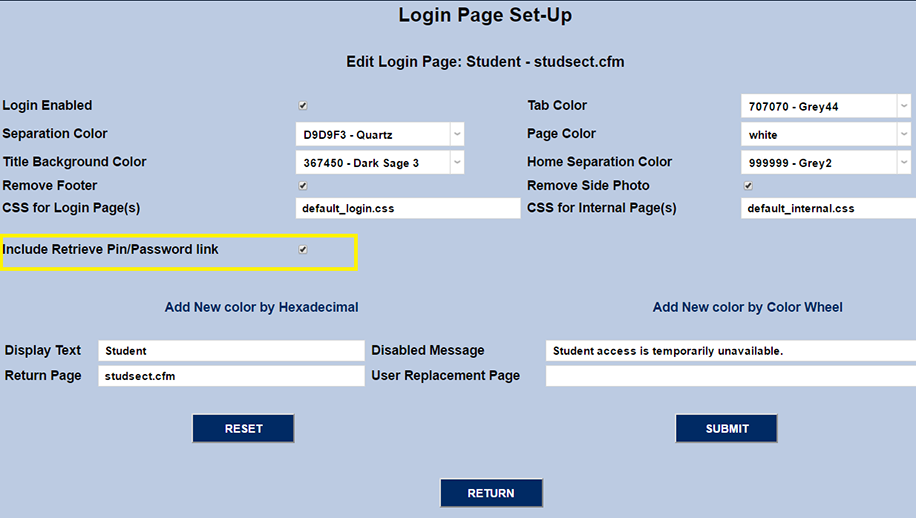
The screenshot below shows the link absent when the "Include Retrieve PIN/Password Link" checkbox is unchecked.

Text Descriptions
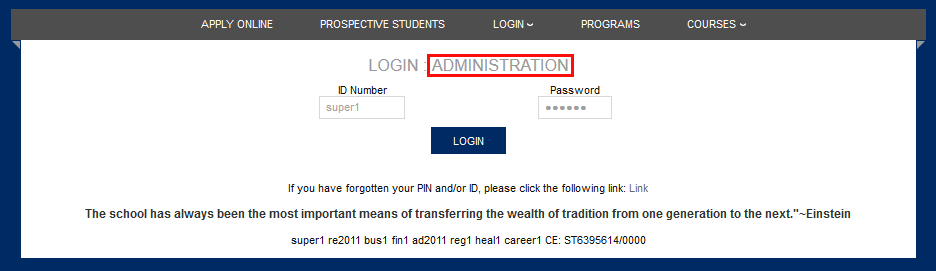
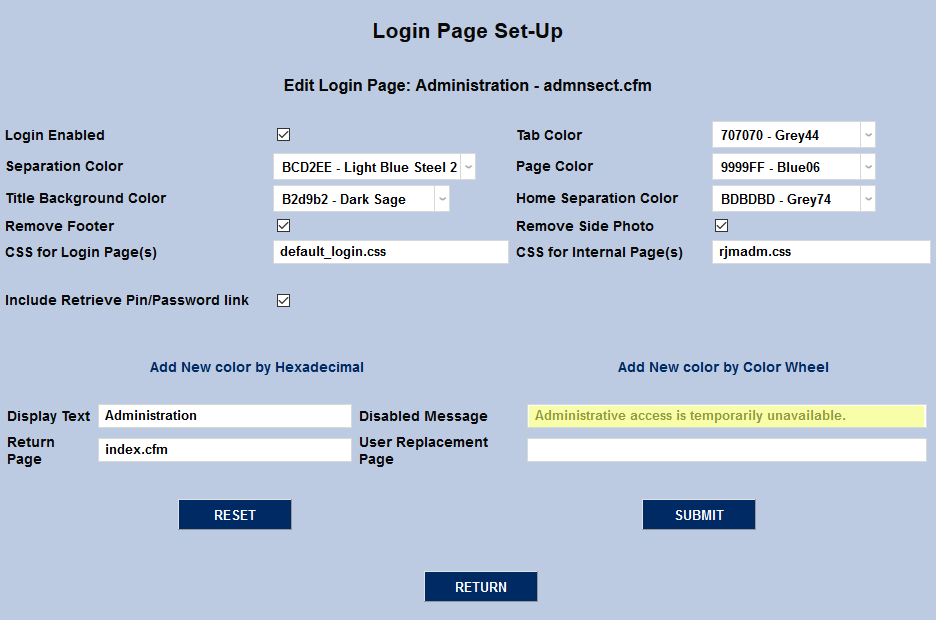
Administrators have the ability to change the name of the login page by altering the text in the Display Text field.
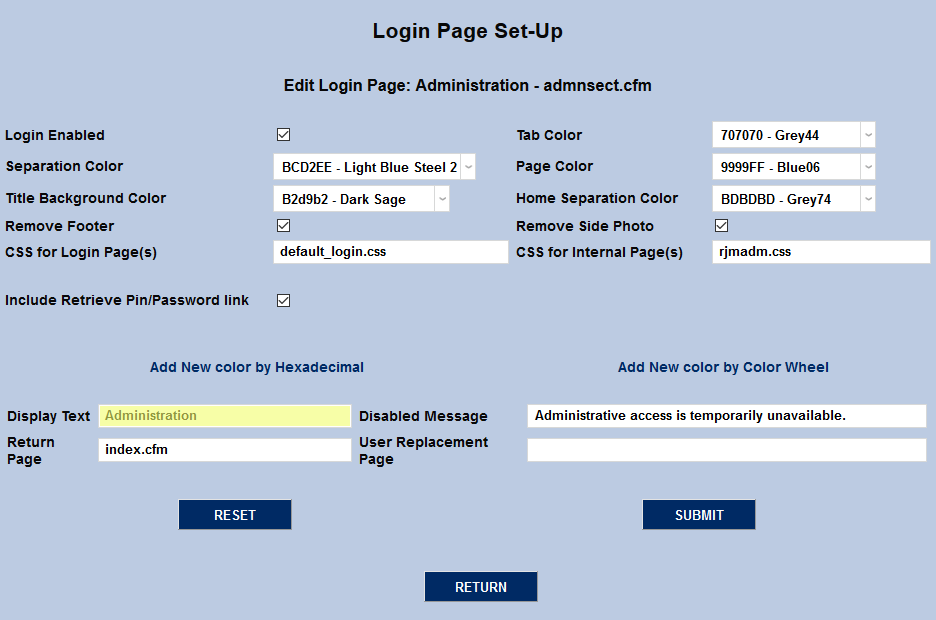
The text appears both in the dropdown page selection menu and at the top of the page once it's been selected.
The Disabled Message field serves a similar function, controlling the text that will appear when the page has been disabled by unchecking the Login Enabled box at the top of the page.

Return Page
The Return Page is the page that a user will return to when logging out of the system. Users logging out can be returned to the school's primary index page, their specific login page, or any other page within the SONIS system.
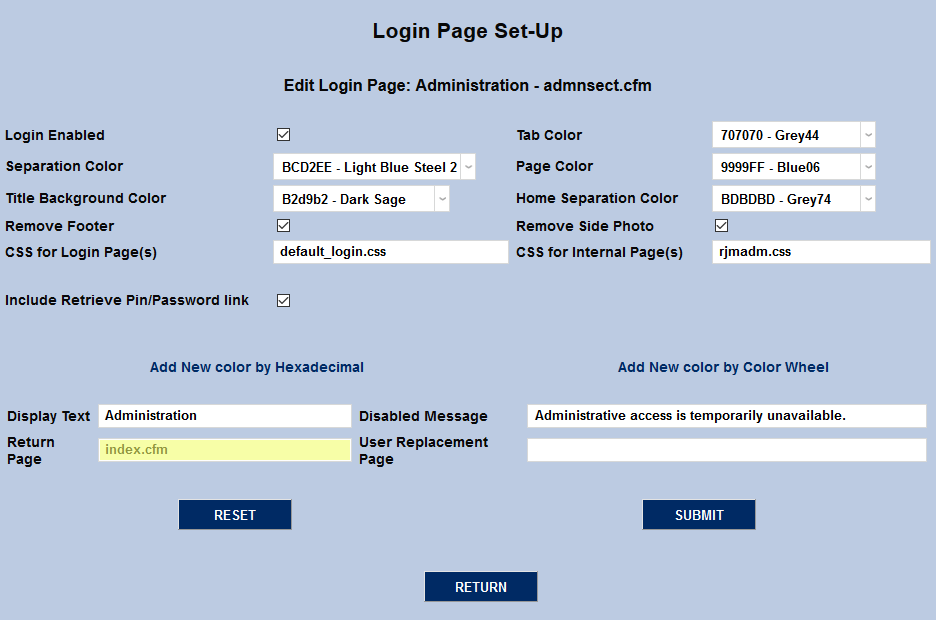
User Replacement Page
If a User Replacement Page is selected, this custom page will replace the login page altogether and nullify the other options.
Page Specific Options
Some Login Page Setup options are only available for specific Jenzabar SONIS pages. These fields are listed below along with the setup pages where they appear.
Hide Standard Login
Schools who allow their uses to log in to Jenzabar SONIS using Microsoft, Google, Facebook, Okta, or other single sign-on methods can remove the standard login options and force users to use these methods only. To hide the username and password/PIN fields on any login page, check the Hide Standard Login box and click Submit.
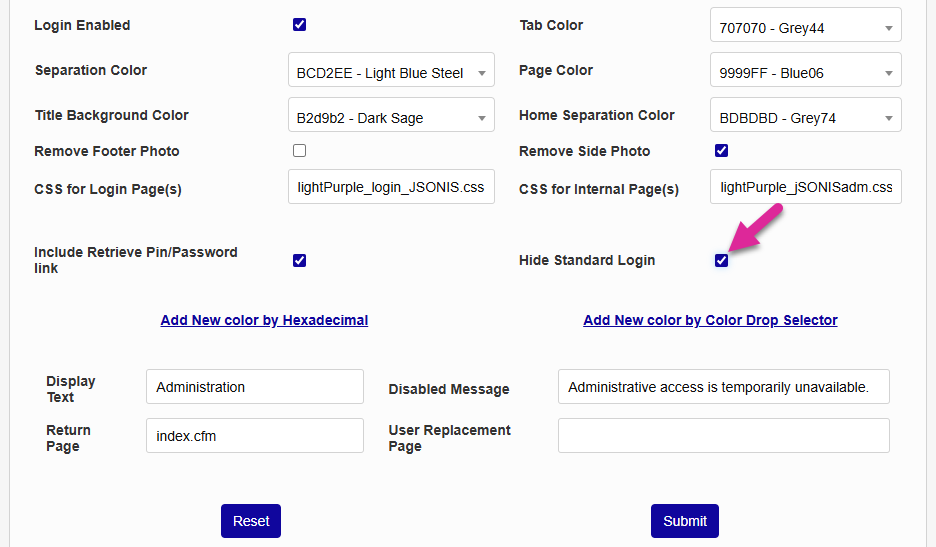
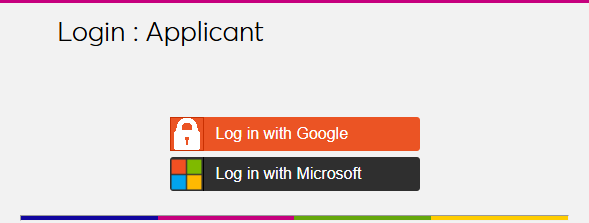
This option is available for the Administration, Alumni, Applicant, Faculty, Sponsor, and Student login pages.
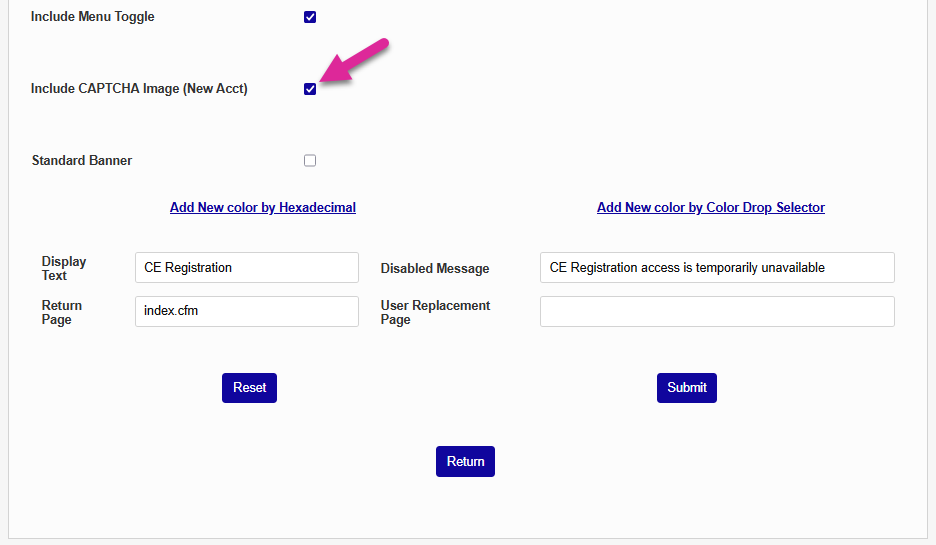
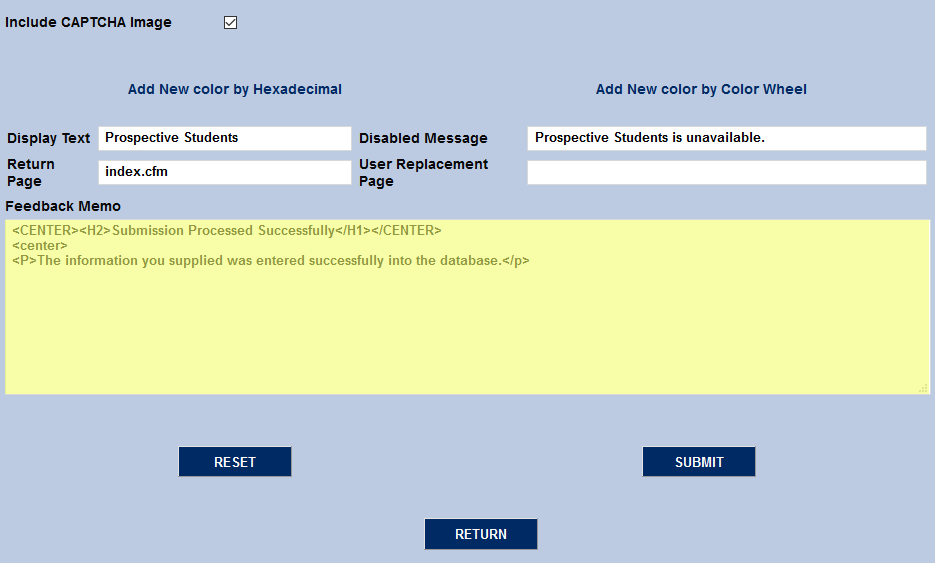
CAPTCHA
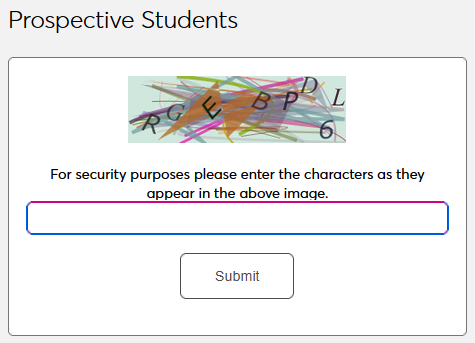
Some schools may wish to use a captcha image to prevent web crawlers and other automated systems from entering fallacious data and engaging in other forms of spam. These images are available on two pages where people without SONIS accounts can enter data, the Online Application and the Web Inquiry Card. Additionally, the CAPTCHA option can be added to the CE Registration page to prevent the creation of spam CE accounts. To activate a captcha on either of these pages, select Apply Online, Prospective Students , or CE Registrationfrom the Login Page Setup dropdown menu and click Select.
Check the Include Captcha Image box and click Submit at the bottom of the page.
Once the captcha option has been activated, the captcha image text must be entered correctly before prospective students can access the page.
Note
The CE Registration page CAPTCHA only appears when a user is creating a new account. Registered users will not be asked to complete a CAPTCHA before accessing their account.
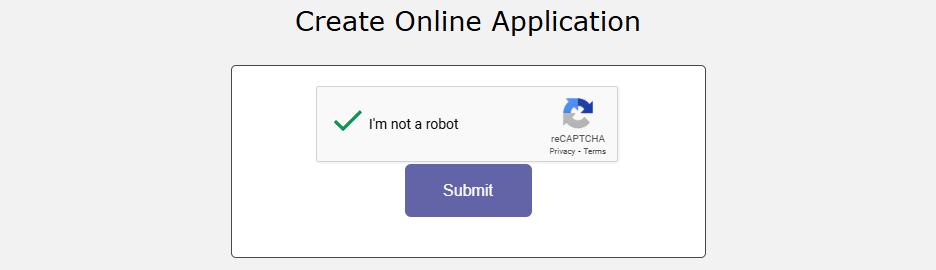
SONIS also offers a more modern security option that can replace the traditional CAPTCHA image. For more information on this setup, see Google reCAPTCHA. The Google reCAPTCHA is still activated from this page after the initial setup is complete.
Feedback Memo
Feedback Memo is another field that's unique to the Prospective Students setup page. Feedback Memo controls the text that displays once a prospect inquiry card has been submitted. The field accepts limited HTML for formatting purposes.

Standard Banner
Standard Banner is a checkbox found on the CE Registration setup page. It no longer has a function in the current SONIS builds.
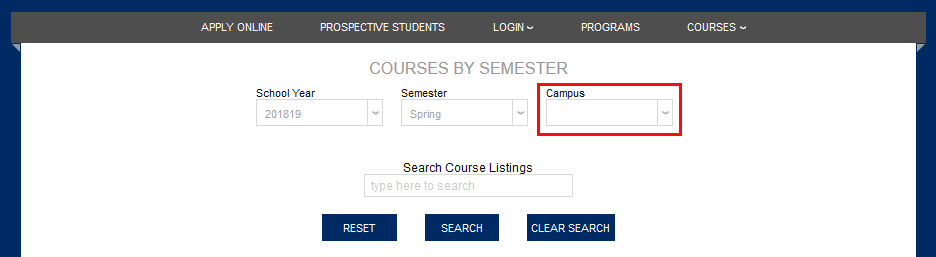
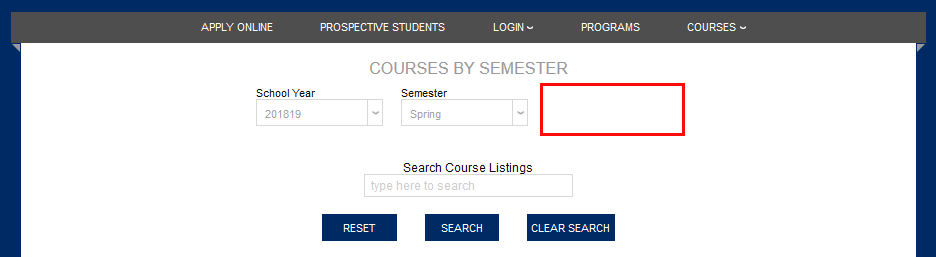
Remove Campus
Remove Campus is an option offered for the Courses by Semester page. If the box is not checked, a dropdown will appear at the top of the page allowing students to narrow down the displayed courses by campus. Schools that have only one campus can remove that dropdown menu so as not to confuse students.
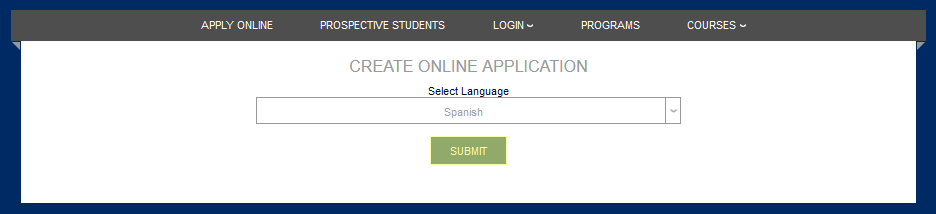
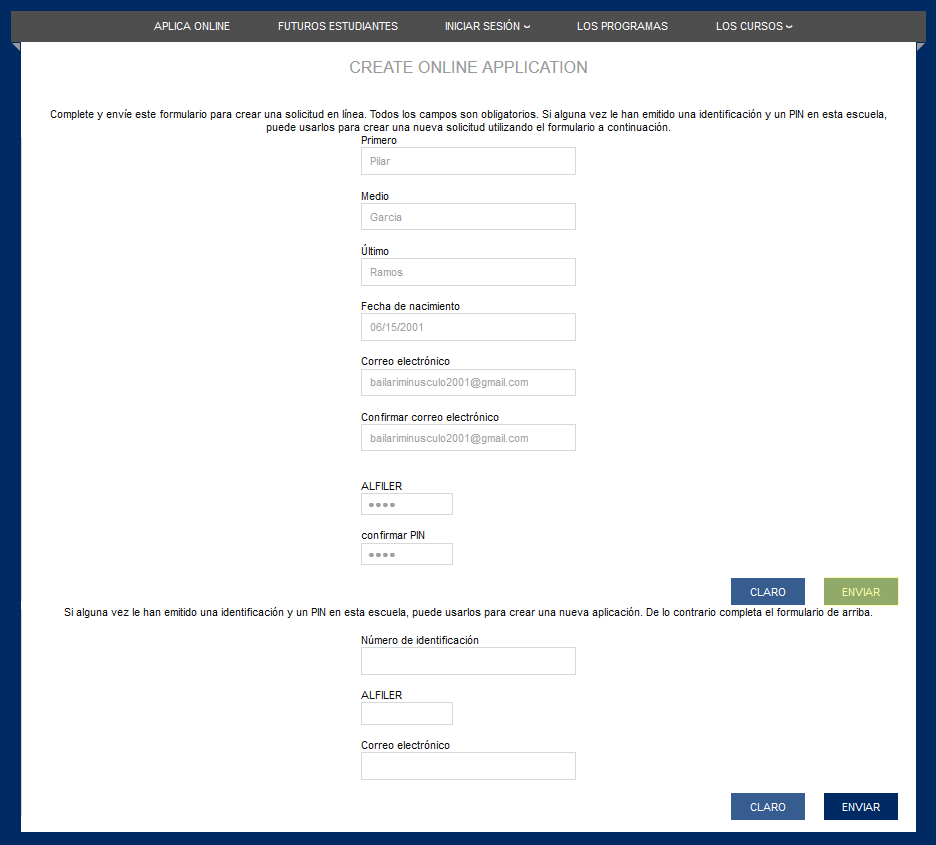
Language Select
Schools that have language translation activated can turn on translation for their Online Application. Select Apply Online from the Login Page Setup dropdown menu and click Select.


Check the Select Language box and click Submit. Applicants will be required to select a language before beginning the application.

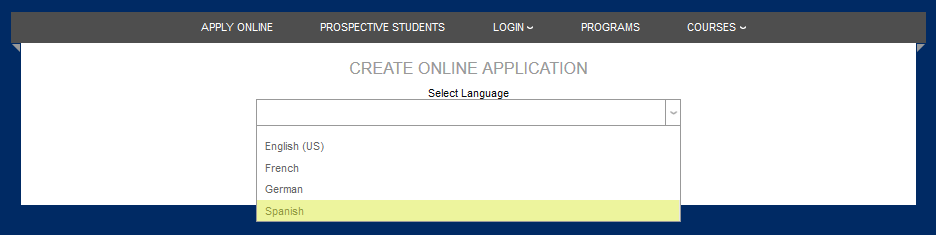
On the following page, the applicant will be asked to fill out an additional form before moving on to the application.
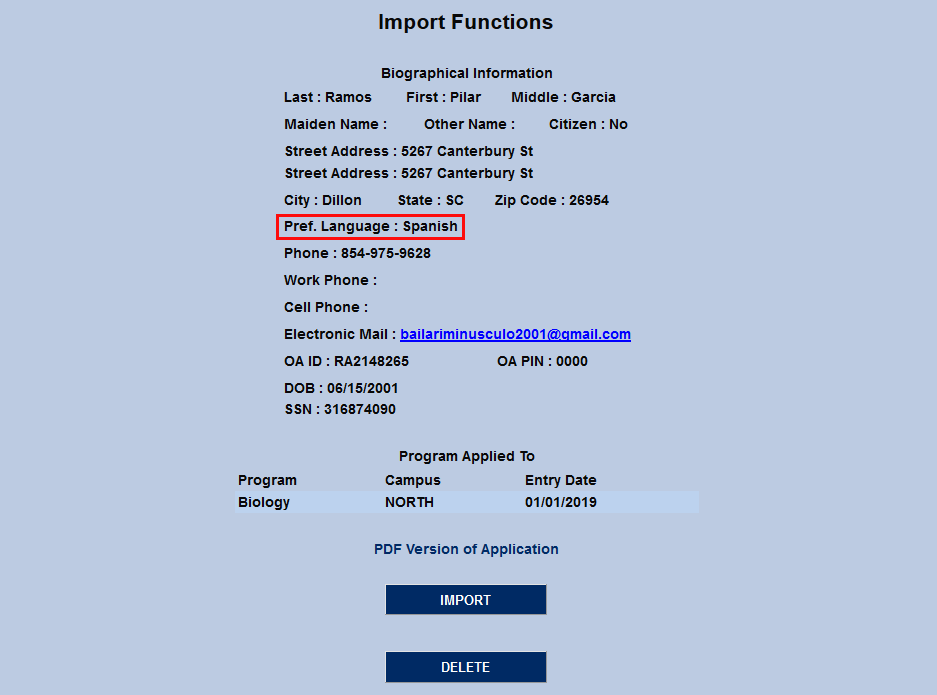
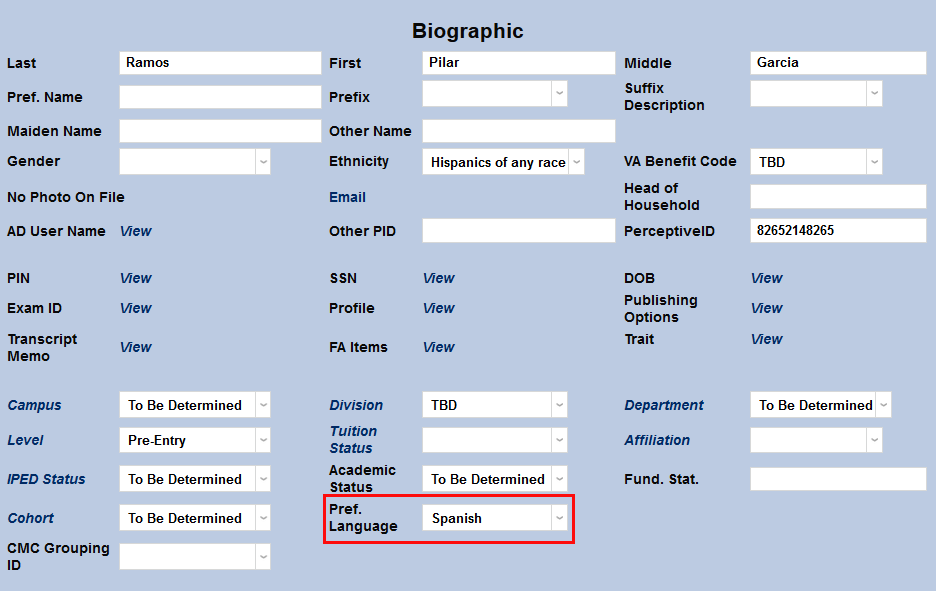
Once the student has submitted their application, the language they chose will be listed as their Preferred Language in Import Functions and will automatically populate to the student's Biography page once they've been imported.
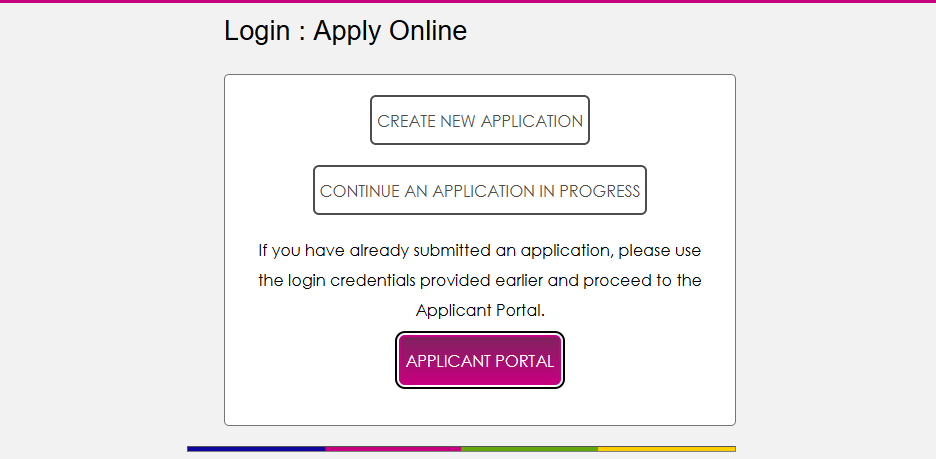
Applicant Portal Button
Once a user has submitted their Online Application and the application has been imported to SONIS, the applicant gains access to the Jenzabar SONIS Applicant Portal. You can now add a link to the Applicant Portal on the Apply Online page to ensure that new applicants know how to find the Applicant Portal. Check the Enable Applicant Portal Button box on the Apply Online Login Setup page to add the button.

Note
The page instructions that appear above the button can be edited from the Page Instructions/Buttons utility in the Systems hub.