Course Attachments
Overview
When courses have specific documents associated with them, attachments can be added, viewed, and edited after the course is created. The attachments can be set to display for a specific period of time or the life of the course. All files that have been attached to the course can be viewed, even after the end date. Attached documents display to students and faculty within the course information on their respective portals.
Adding an Attachment
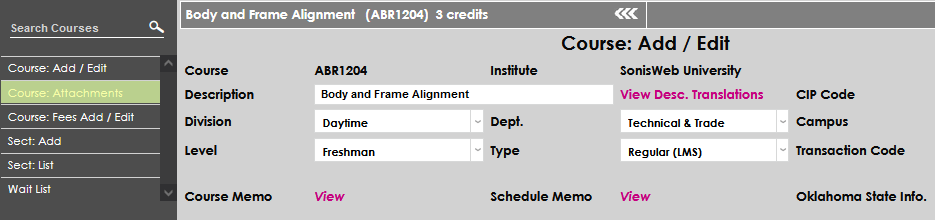
On the Course: Add/Edit page, select the course attachments will be associated with. After selecting the course, click on Course: Attachments from the Courses menu.
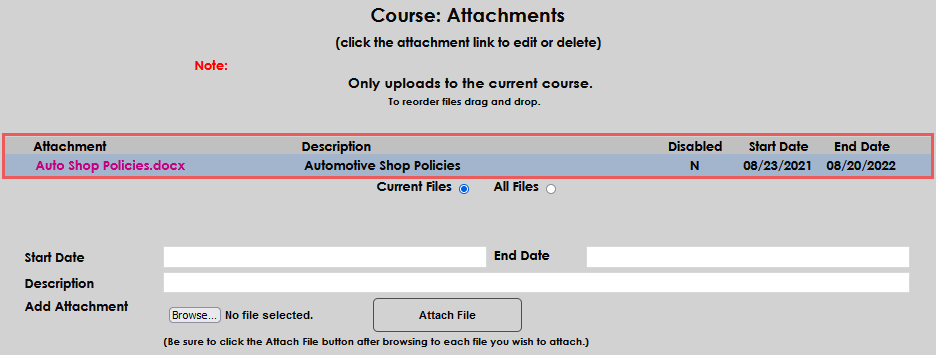
Enter the date the attachment should be visible to users in the Start Date field. The dates will also determine which sections of the course will have the attachment. If different sections have different start dates, and/or unique a precise start date that corresponds with the section must be used.

Enter the date the attachment should no longer be accessible to users in the End Date field. When the end date has passed, the attachments will still be available for administrators to view and work with on the page.

Enter a name that will display to users in the description field. The field allows up to 100 alphanumeric characters and symbols.

To add an attachment, click Browse, navigate to the desired file's location, select the file by clicking on it's name, and then click Open.

Confirm that the chosen file's name is displaying next to Browse button. If the wrong file has attached, simply click the Browse button or the file name and repeat the selection steps. Once the appropriate file name displays, click on Attach File to complete the attachment.


The page will update and display the attached document above the attachment entry fields.
Editing or Deleting Attachments
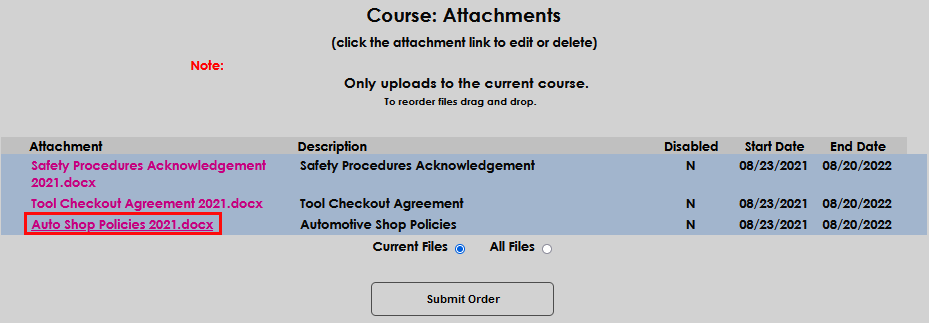
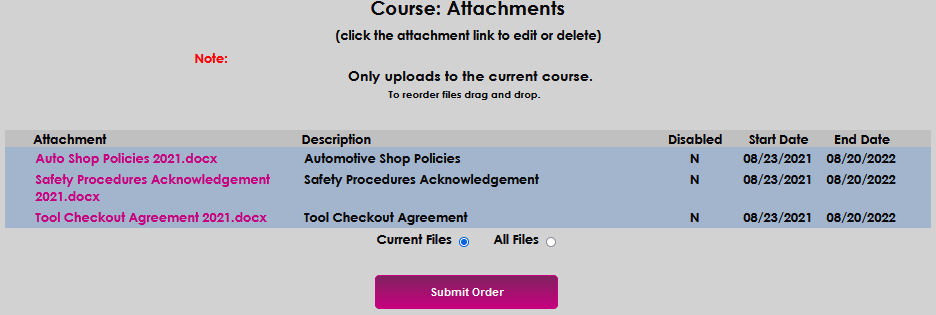
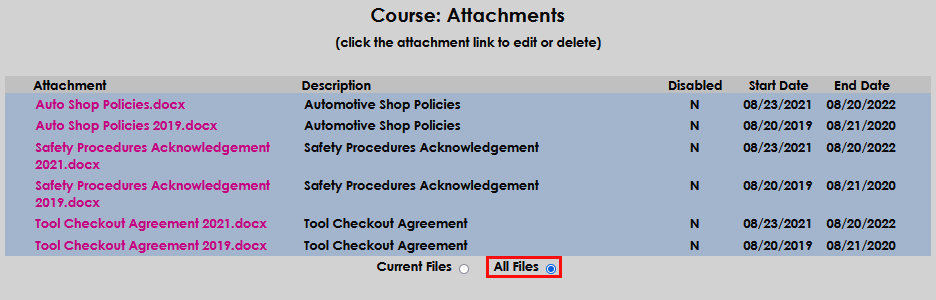
To edit or delete an attachment, an administrator must do so from the Course: Attachments page. Upon opening the page, a list of current attachments displays. Any expired attachments can be viewed by selecting the All Files radio button.

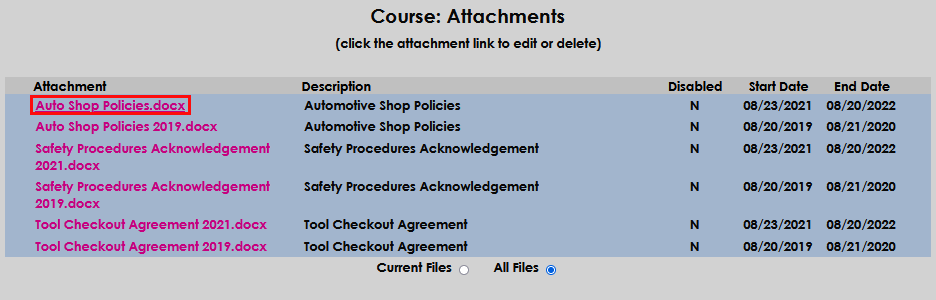
Clicking on an attachment file name opens the edit page.
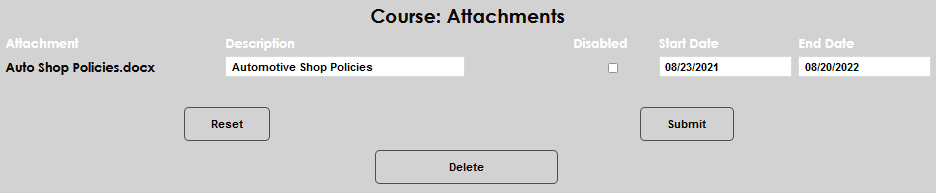
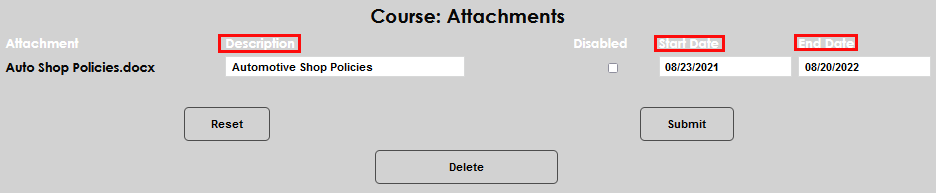
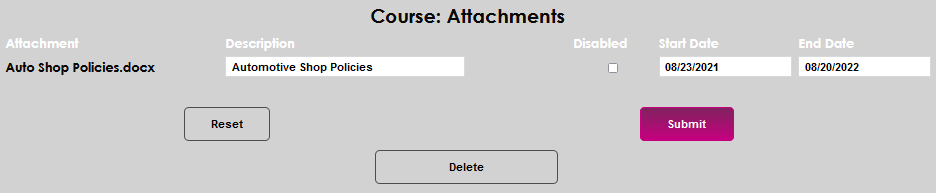
On the edit page, the administrator can modify the Description, Start Date, and/or End Date. The administrator can also end the display of the attachment by checking the Disabled box.
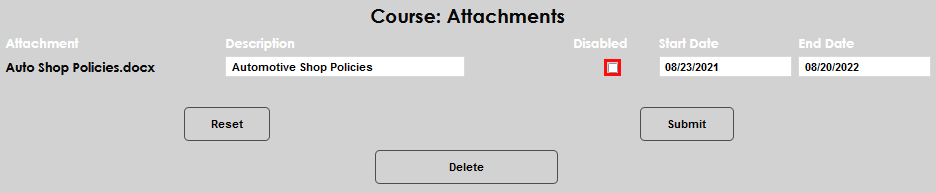
Click Submit to save any edits made.
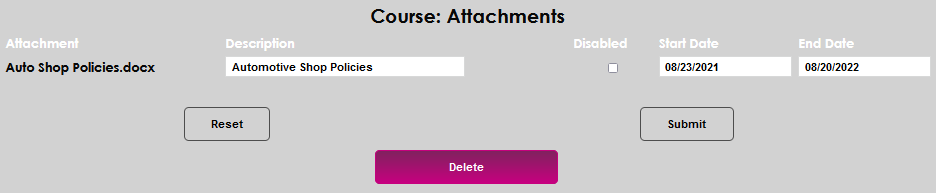
A current attachment cannot be updated or removed without deleting the entire entry. To delete an attachment, click the Delete button. This will function like all other delete processes and will offer the opportunity to confirm the delete before the attachment is removed.

The attachments can also be edited to display in a different order. To re-order the list of attachments, click an attachment name and drag it to the desired place in the attachment list. Release the mouse button to insert the attachment in the new location. Click Submit Order to save the updated list.