Portal Menu Utility
Overview
The Portal Menu Utility, available in the Systems hub, allows administrators to set up the menus of their portal (i.e. students, faculty, etc.) pages. This includes both WHAT functions will be available, and WHERE buttons/links to them will appear on the page.
For an overview on setting up and customizing Jenzabar SONIS portals and login pages, click here to view the Portal Management in Jenzabar SONIS e-book from Jenzabar's Learning & Development.
Menu Definitions
Beginning Setup
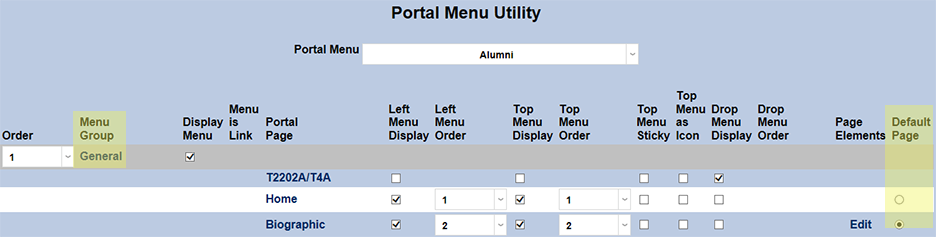
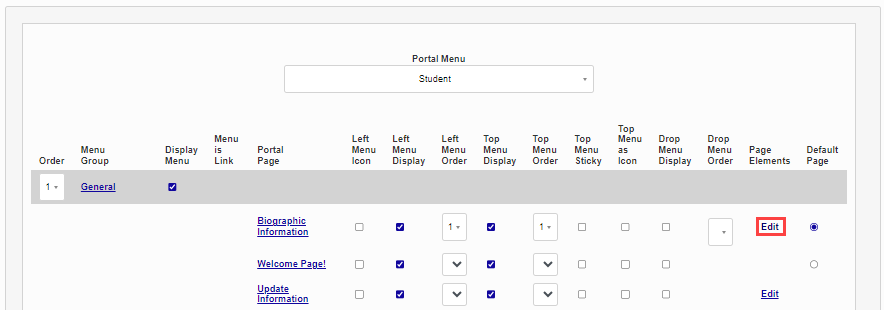
To begin setting up a portal, select the portal from the list.

Utility Columns
The Columns are settings for menu groups and their submenus. Rows are menu groups and their submenus.

Order
This sets the Order in which a page/function will appear in the Menu Group.
Billing
There are three display options for the Student Portal Billing page: a ledger, a link to the billing report, or both.
The field that must be updated by Managed Services is called custom_invoice.
Portal Page
This is the text that will appear in the Portal menus under the Menu Groups (i.e. "Billing" and "Giving" appear under the "Financials" Menu Group).
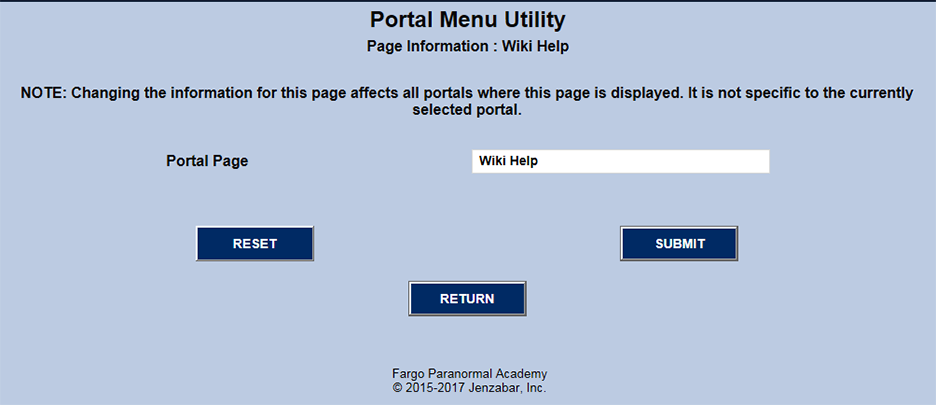
Portal Page Drill Down
When the Portal Page link is clicked, a page opens where you can change the text that appears in the menu. This setting is NOT changing the name of the page itself but merely the link text. When changed, the text is changed for ALL portals, not just the one the user has selected. In the example being used here, the user is logged into the ALUMNI portal. If the Portal Page text is changed from "Wiki Help" to "Wiki", the text will be "Wiki" in the student, faculty, etc. portals as well.
Top Menu Display
This checkbox controls whether or not a Portal Page link will appear within the Top Menu>.

Top Menu as Icon
This setting changes the link on the Top Menu from text to an icon.

Drop Menu Display
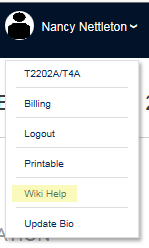
This setting places the link in the drop menu opened by hovering over the photo/name in the upper right corner.
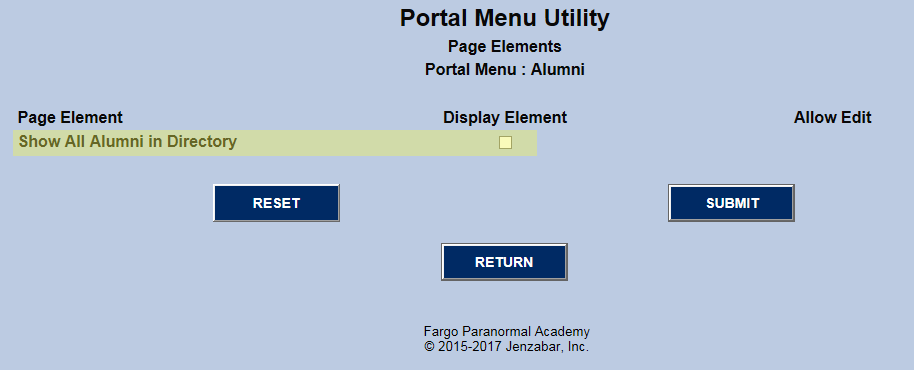
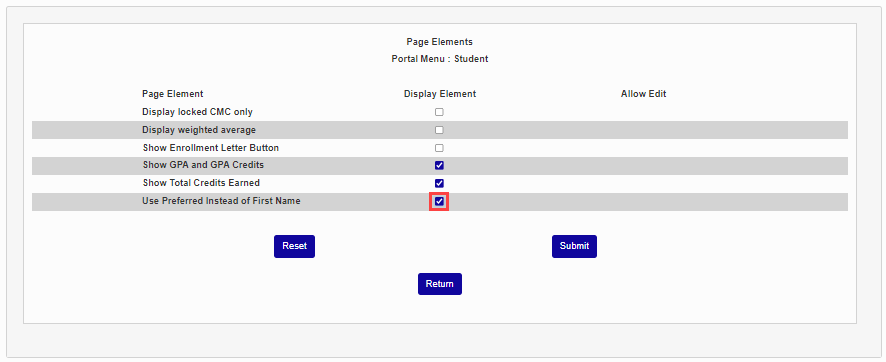
Page Elements
If the PORTAL PAGE has elements that can be edited, Edit will appear in the column. Below shows an example of a page when the Edit link is clicked.
Default Page
This setting appears only for the General Menu Group. It allows the administrator to set either the BIO or HOME page as the default page (i.e. the page that appears when an ALUMNUS, in this example, logs in.
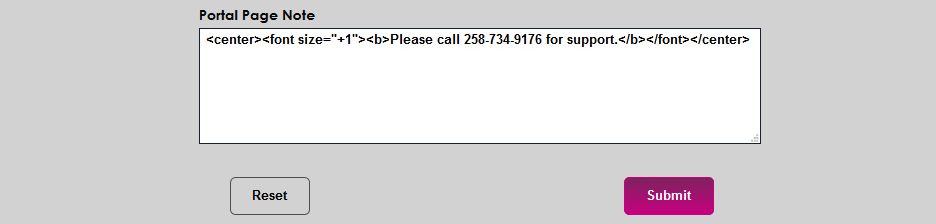
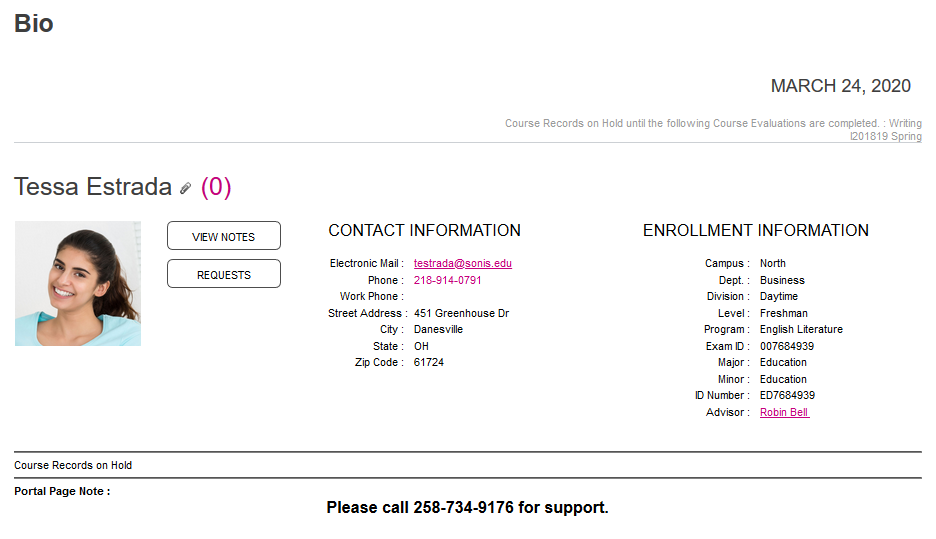
Portal Page Note
The Portal Page Note allows administrators to create a custom note that will appear at the bottom of each portal page. This note accepts basis HTML, including links. The field can also be used for deploying scripts for tools such as AI chatbots. See the SnatchBot page for more on this feature.
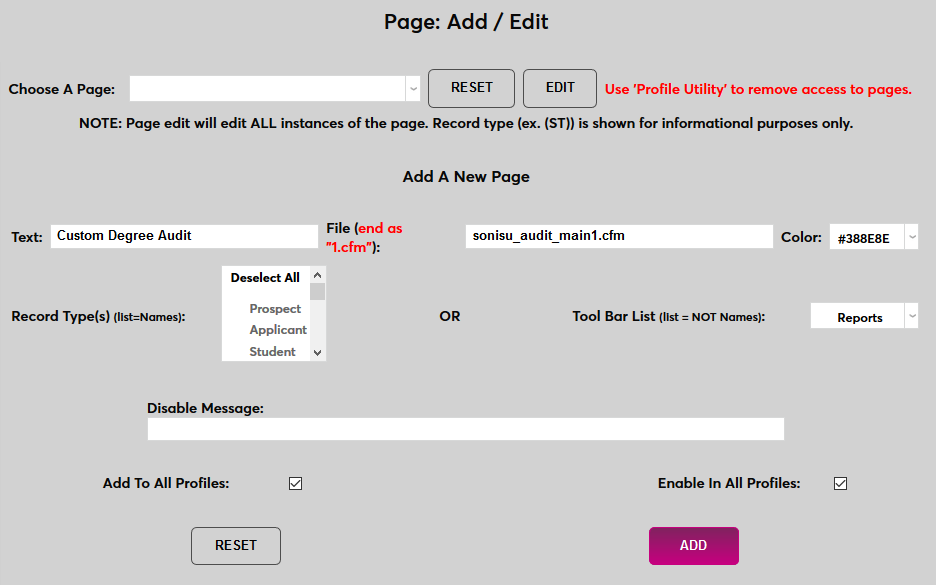
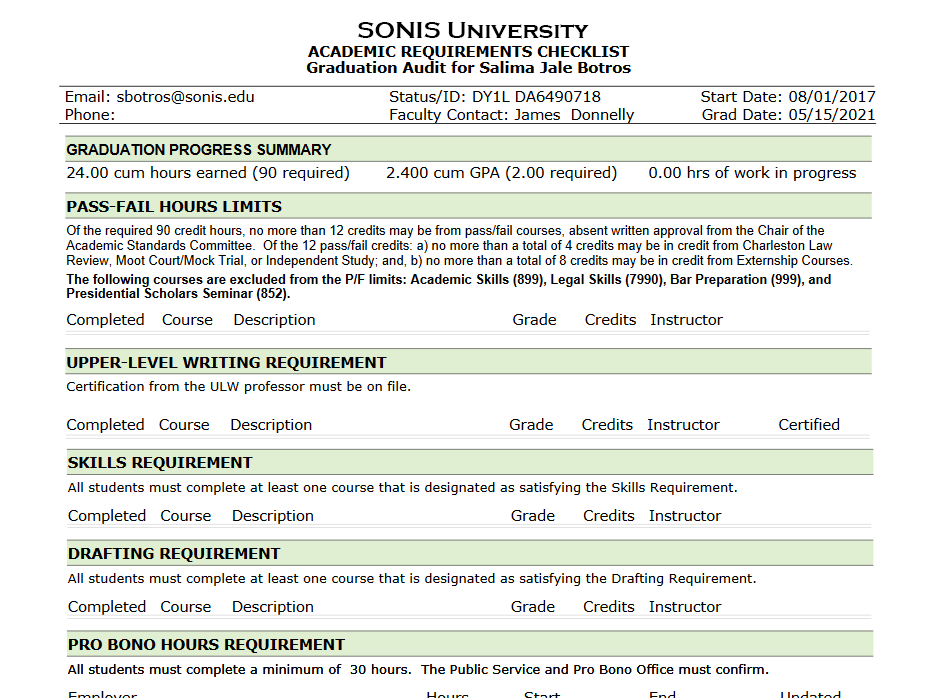
Custom Degree Audit
Many SONIS member institutions have their own custom degree audit that uses different criteria and displays different data than the standard SONIS degree audit. This custom degree audit can be set to display for students, faculty, and sponsors as well with a few simple steps.
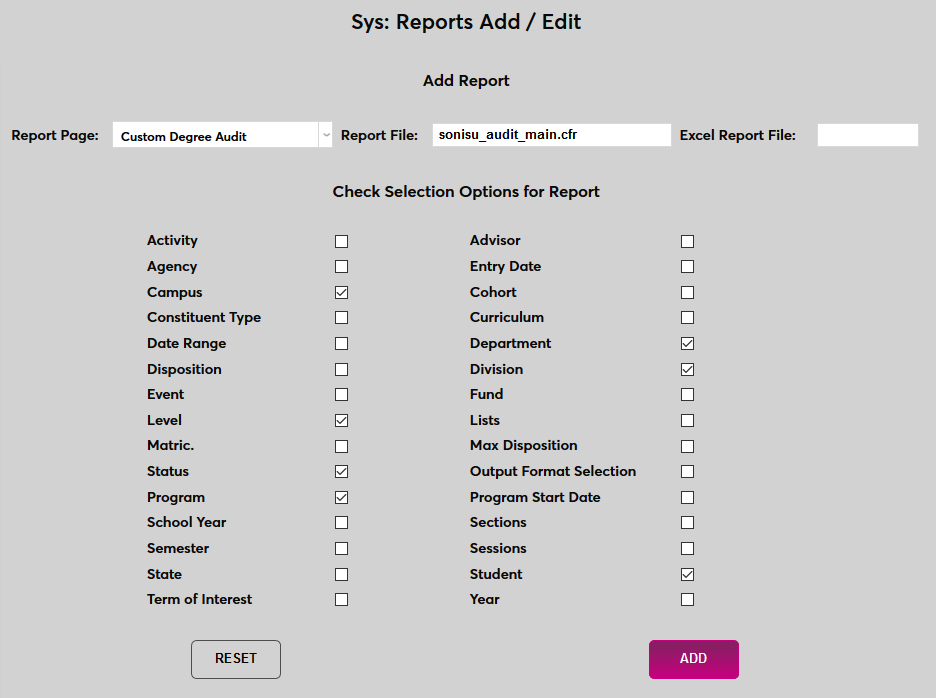
Schools using custom degree audits already should have the correct pages in their system already, but if not, the report display page must be added to the system through the Page Add/Edit utility and the correct report file must be specified using the Reports Add/Edit utility.
Once the page has been added, navigate to the Portal Menu Utility homepage and select Student, Faculty, or Sponsor. Scroll down to the Degree Audit option and ensure that it's set to display in at least one menu.
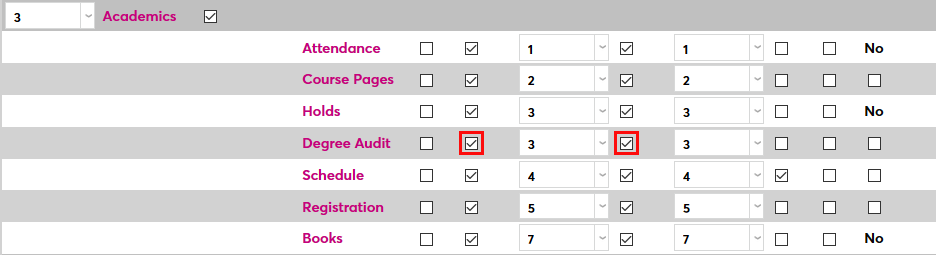
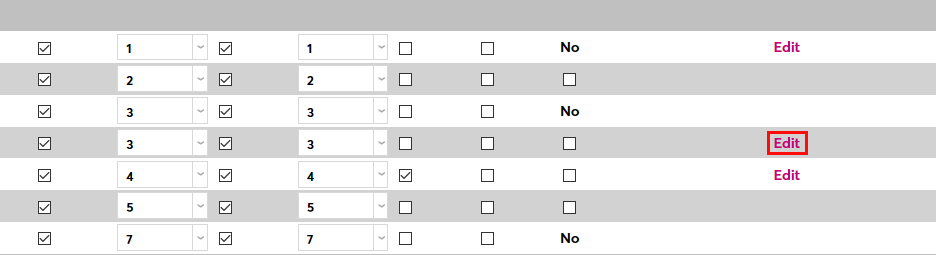
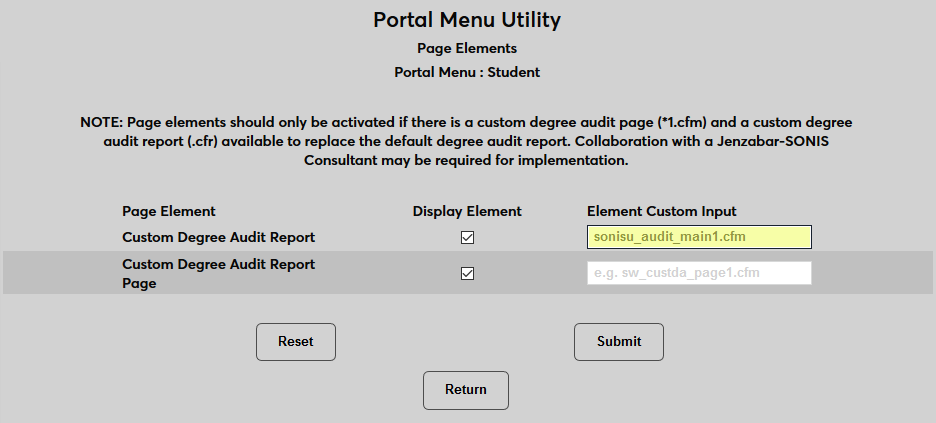
Next, scroll or scan to the right and click the Edit link in the Degree Audit row.
On the following page, check the Display Element box for both the Custom Degree Audit Report and the Custom Degree Audit Report Page. Both boxes must be checked in order for the display to work.
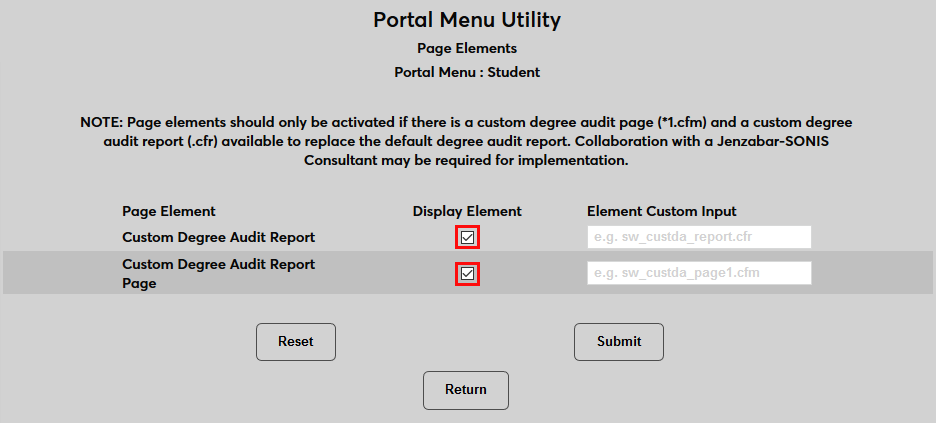
Enter the custom cfr page for the degree report and the custom cfm page for the report page. Both of these files should already be saved in the appropriate SONIS directory folders.
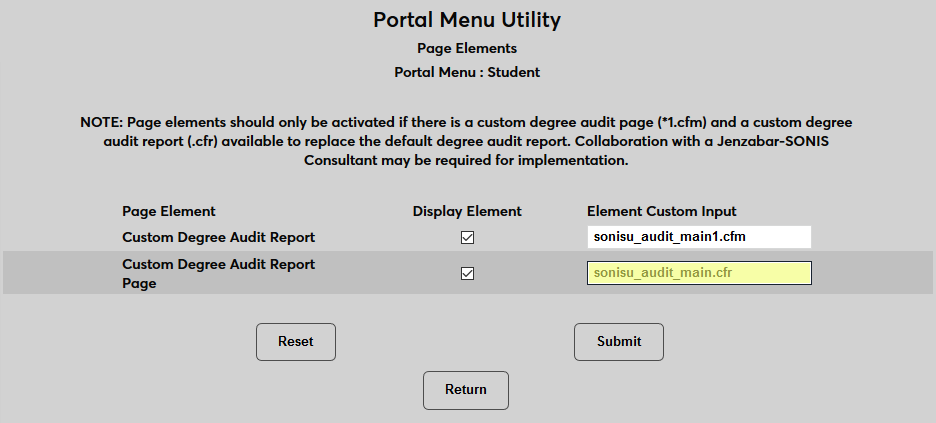
Once the correct pages have been inserted, click Submit to save the changes and actival portal access to the degree audit.
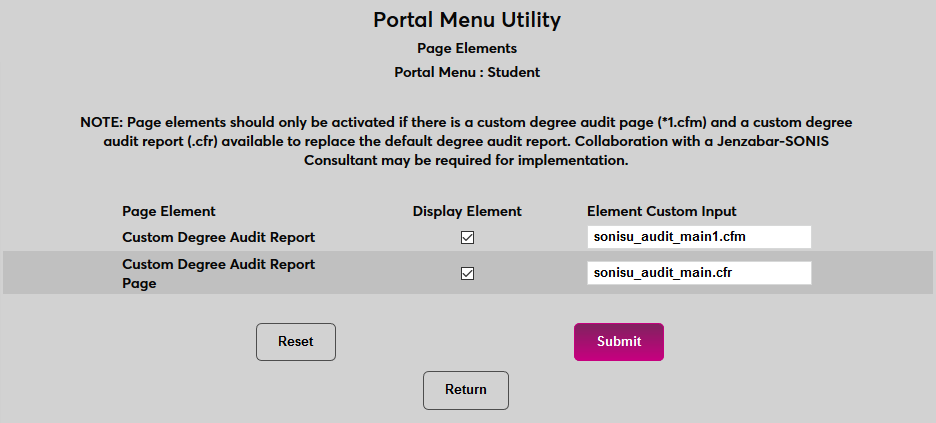
After the custom degree audit, students, faculty, and/or sponsors who select the Degree Audit link from their portal will be taken to the custom degree audit rather than the standard SONIS degree audit.
Preferred Name Display
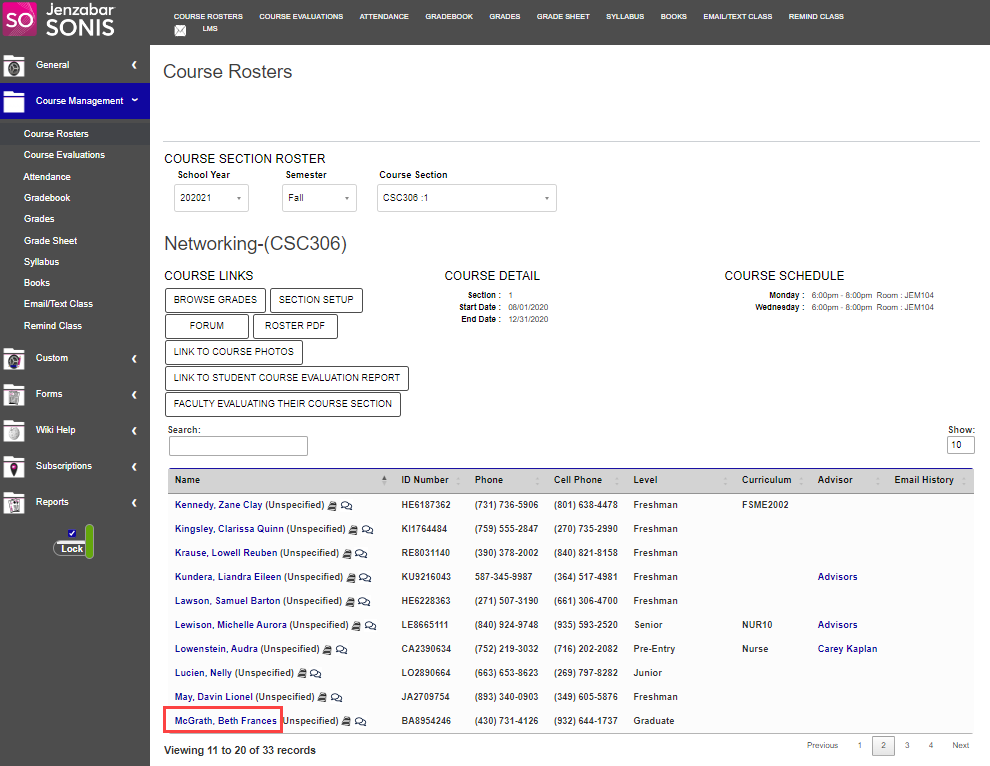
By default, a user's preferred name displays after the user's first and last names within a portal. To replace the first name with the preferred name in the Student and/or Faculty & Advisor portal, a setting is provided for each portal. When this setting is selected for the Student portal, the preferred name displays throughout the portal in place of the first name. In the Faculty & Advisor portal, the preferred name will display in place of the first name in the Course Roster and other Course Management pages.

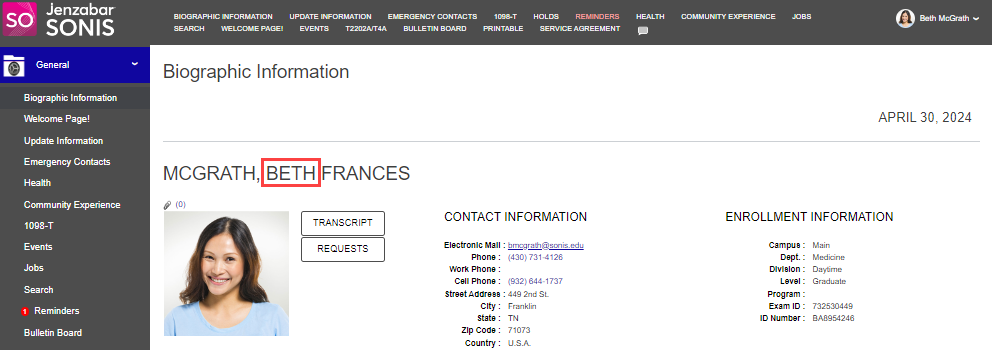
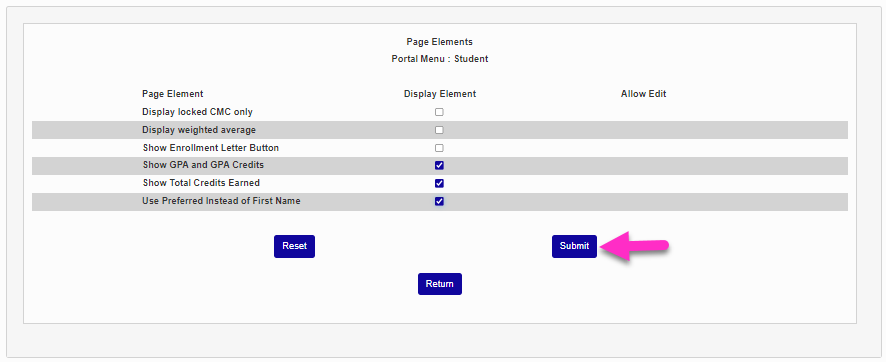
To change the display for the Student portal, select Student from the Portal Menu dropdown, then click Edit for the Biographic Information Page Element.

Check the Use Preferred Instead of First Name box in the Display Elements column, then click Submit.
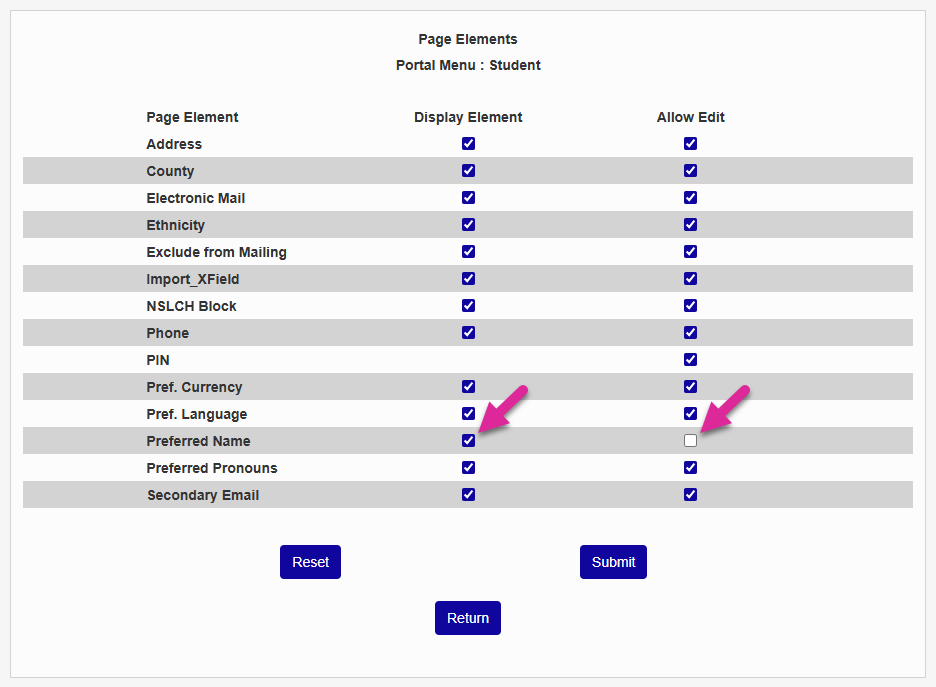
You can also allow students to view and/or change their preferred name from the Update Bio page. Click on the Page Elements Edit link in the Update Bio row. Check the Display Element box to display each student's preferred name on the Update Bio page. Check the Allow Edit box to allow them to change it.
Click Submit to save your changes.
Note
The Display Element option supersedes the Allow Edit option. This means that if you have the Display Element box unchecked and the Allow Edit box checked, the student will not be able to edit their preferred name since the box will not display.
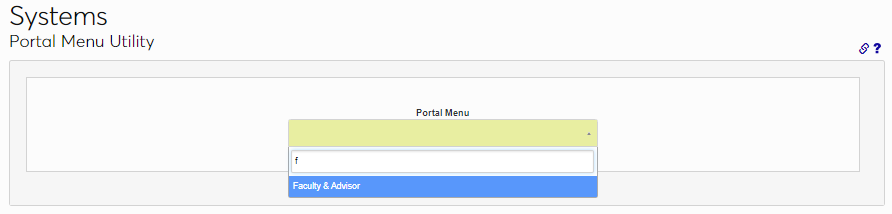
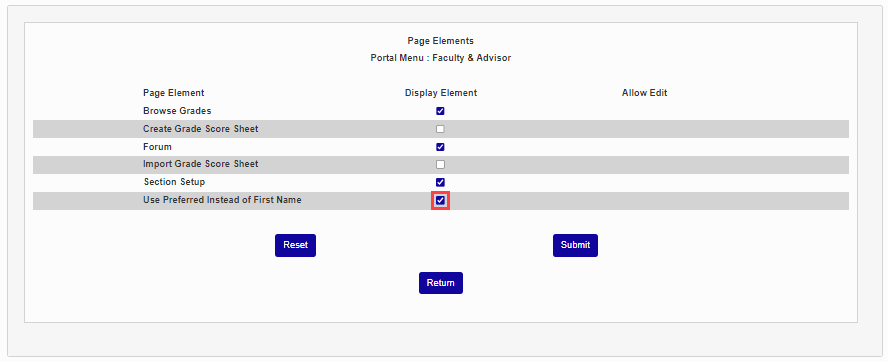
To change the display for the Faculty & Advisor portal, select Faculty & Advisor from the Portal Menu dropdown, then click Edit for the Course Rosters Page Element.
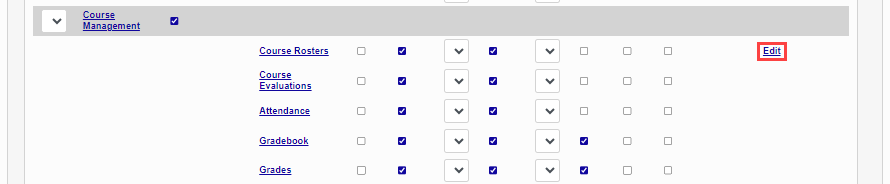
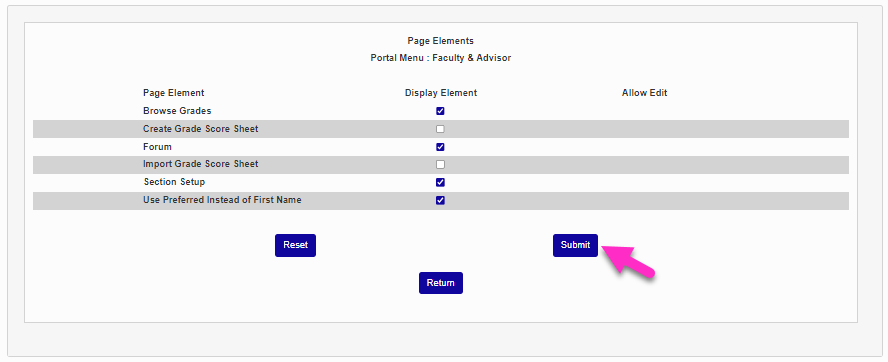
Check the Use Preferred Name Instead of First Name box in the Display Elements column, then click Submit.
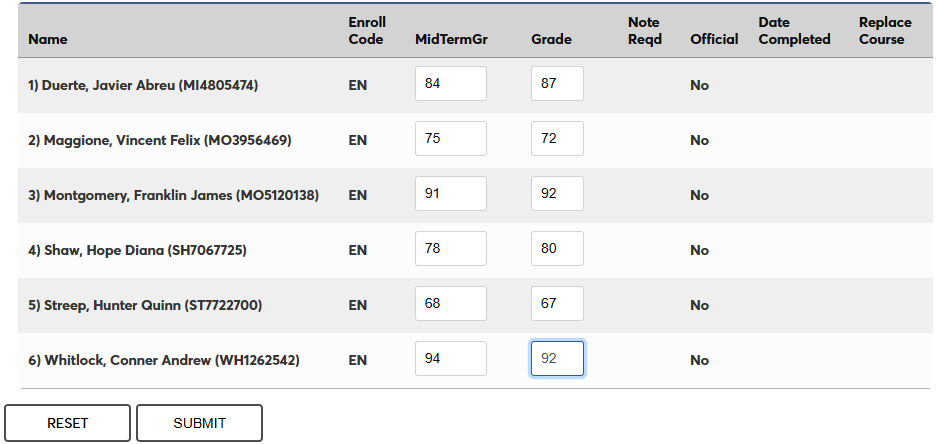
Faculty Numeric Grade Entry
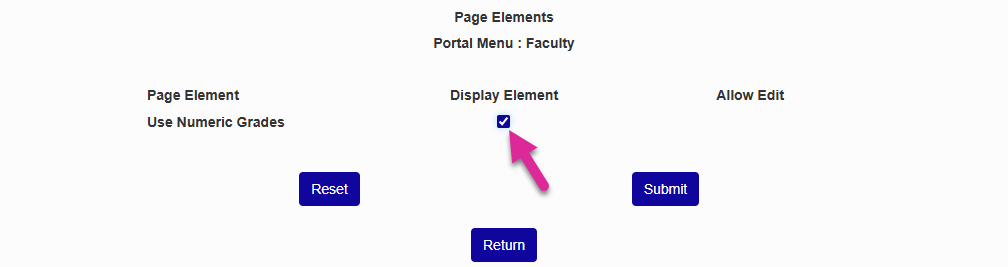
Some schools may wish to require faculty to assign letter grades using numeric final grades rather than letter grades. To turn this feature on, navigate to the Faculty page of the Portal Menu Utility. Click the Edit button for the Grades page.

In the new window that pops up, check the Use Numeric Grades Display Element box and click Submit.
Once this option has been turned on, faculty will see blank fields that accept only numbers on their Grades page instead of the standard grade select drop-down menu. When they submit the page, the corresponding letter grade based on the settings in your Grades Utility will appear.