Enrollment Import Utility
Overview
The Jenzabar SONIS Enrollment Import Utility was designed to accommodate an import file from CORE Higher Education Groups' ELMS, a software program for managing externships. However, the utility can be utilized to import enrollment data from a variety of sources with proper formatting. Students can be enrolled or removed from courses using the utility. Records are imported through a CSV file.
Note
Enrollments are added using the program association and GPA group tied to the student’s active Education record. Historical enrollments for students who have an older, inactive education record will need to be updated manually to associate them with the old program and GPA group.
Import File
The import file must be a .csv file. The file must have a header row with the labels as shown in the chart below. There must be no empty line, row, or column prior to the header.
Click here to download a sample file.
The import file can contain the following labels and data. Required data is indicated in bold.
File Header | SONIS Data Location | Naming Convention | Details |
|---|---|---|---|
Action | Not Applicable | Enroll = Enroll the student in the course. Any other word = Withdrawal. | Values in this field will either enroll the student in the course or withdraw/remove the student from the course. Any word other than enroll will cause a withdrawal from the course and the student will no longer show as enrolled in the course. |
Campus | campus.camp_cod and crssect.camp_cod | Must be exactly the same as the code used in SONIS. | The campus code representing where the course is delivered. |
Department | nmcrs.dept_cod and name.dept_ced | Must be exactly the same as the code used in SONIS. | The department code that corresponds with the department in which the student is placed. |
Division | nmcrs.div_cod and name.div_cod | Must be exactly the same as the code used in SONIS. | The division code that corresponds with the division in which the student is placed. |
Course | course.course and nmcrs.course | Must be exactly the same as the code used in SONIS. | The course code as shown on Course Add/Edit that represents the course the student will be enrolled in or withdrawn from. |
Session | crssect.session and session.session | Must be exactly the same as the code used in SONIS. | The session field must contain the session code for the course section, if sessions are used. If sessions are not used, this field can be left blank. |
Section | crssect.sid and nmcrs.sid | Must be exactly the same as the code used in SONIS. | The section field must contain the section code for the course section page. |
School Year | nmcrs.sch_yr and crssect.sch_yr | Must match the school year associated with the course section in SONIS. | This value must be six characters. For example: 2021-2022 would be 202122. |
Semester | crrsect.semester and nmcrs.semester | Must be numerical and match the semester associated with the course section in SONIS. | The semester field must contain the semester of the course section. |
Username | soc_sec or name.ldap_id | The username field is optional if a SONIS ID is provided. If no SONIS ID is provided, the username field is required. | If no SONIS ID is provided, the username must be provided and is generally the same value as the local active directory username. If LDAP or Azure AD Synchronization is enabled, the value would be the LDAP ID or SAMLAccountName. |
SONIS ID | soc_sec or nmcrs.soc_sec | Optional if a username is provided. If no username is provided, a SONIS ID is required. | If no username is provided, the SONIS ID is required. The SONIS ID is the student's 9-character, alphanumeric identifier. |
Last Name | name.last_name | Optional. | The student's last name in SONIS. |
First Name | name.first_name | Optional. | The student's first name in SONIS. |
Grade | nmcrs.grade | Optional. | The letter grade that the student received in the course. Must match existing letter grades in your Grades table. Imported grades replace existing grades, if present. |
Using the Import
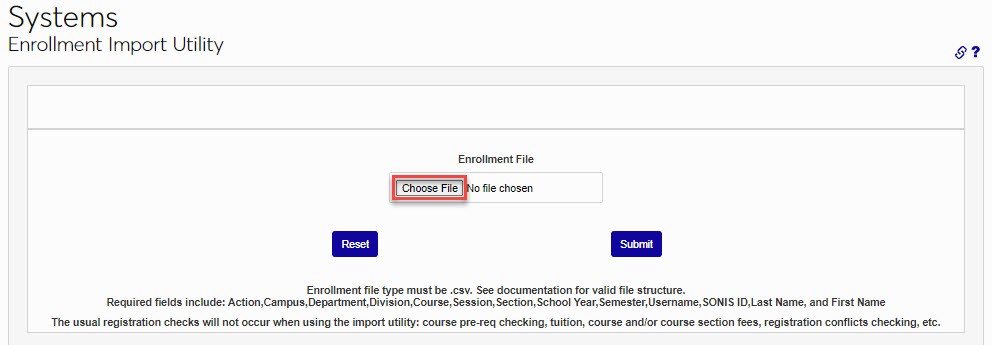
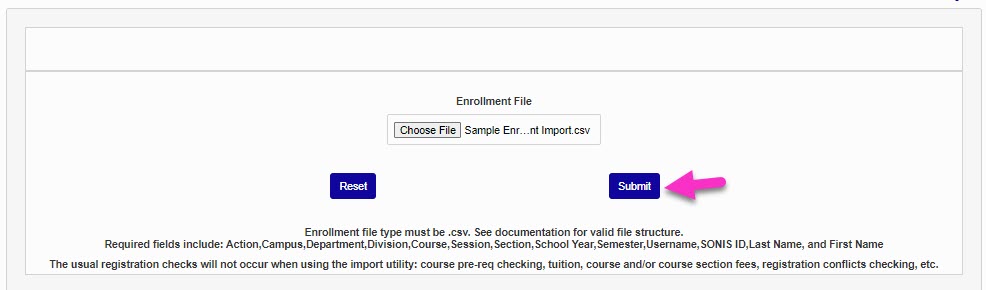
To begin importing an enrollment file, navigate to the Enrollment Import Utility in the Systems hub. Click Choose File to locate and select the file. Click Submit to begin importing the file.
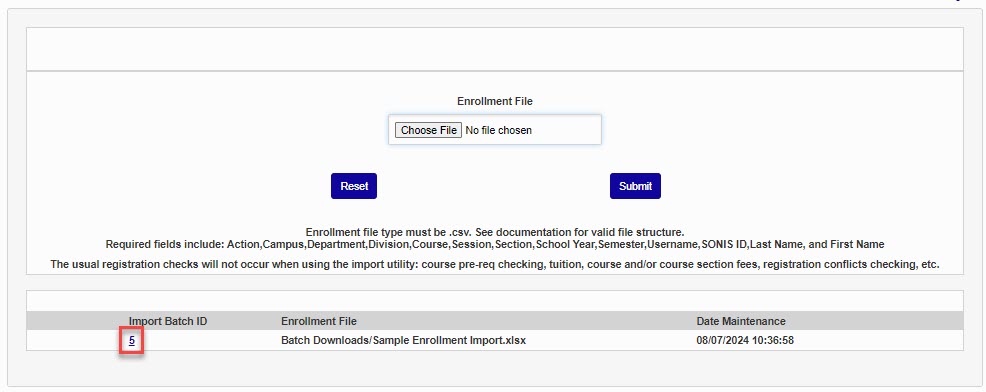
After importing, click Import Batch ID to view the contents of the file in a new window.
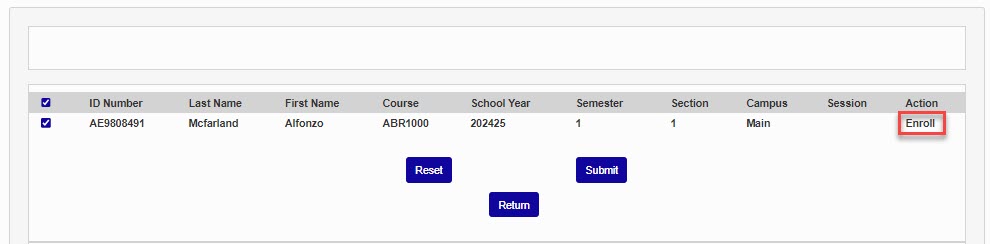
After submitting, a new page displays. Students who will be successfully processed are displayed at the top of the page. If there are any content issues that will not allow a student to be processed, they will display in the lower portion of the page.
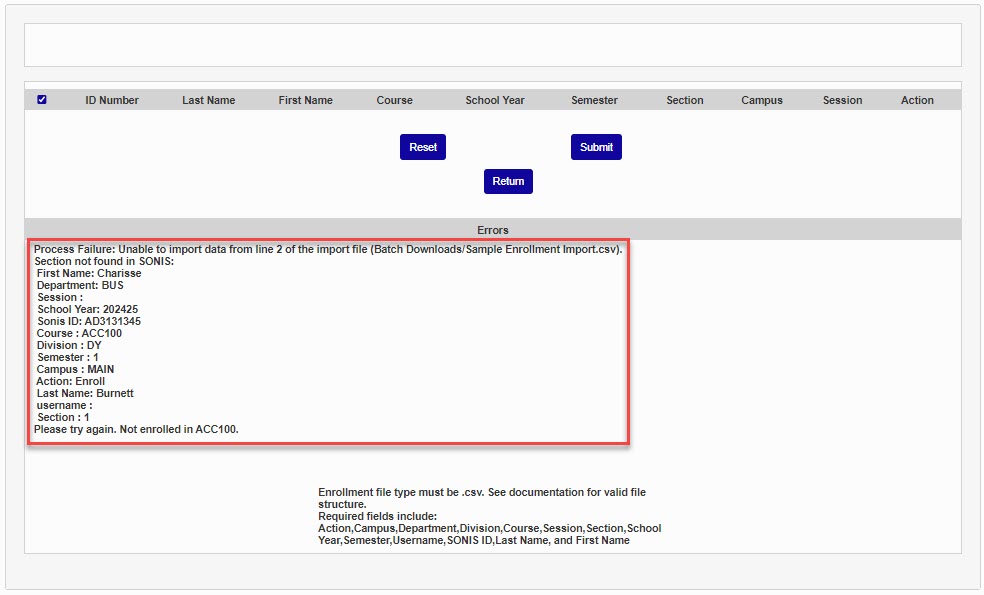
To proceed without resolving the errors and without updating enrollment for the students who errored, click Submit to finalize the import of the students who did not have errors. No action will be taken for the students with errors.
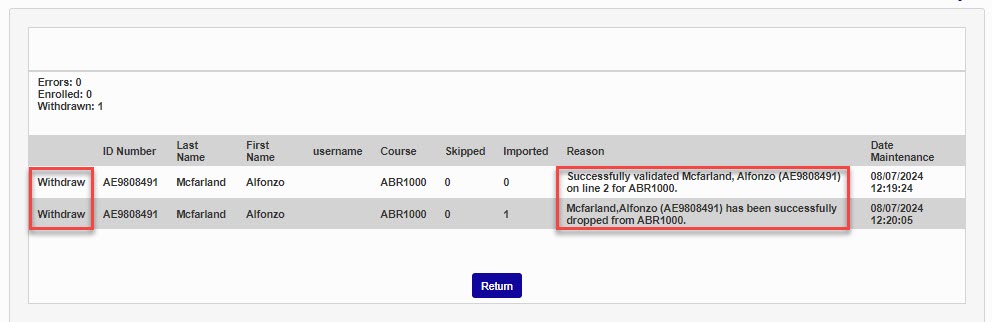
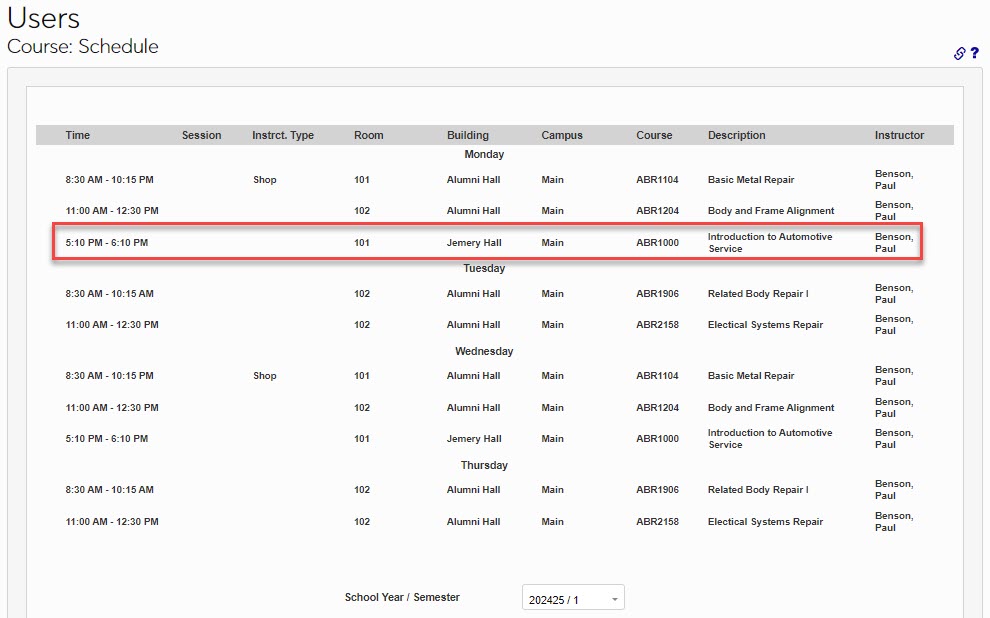
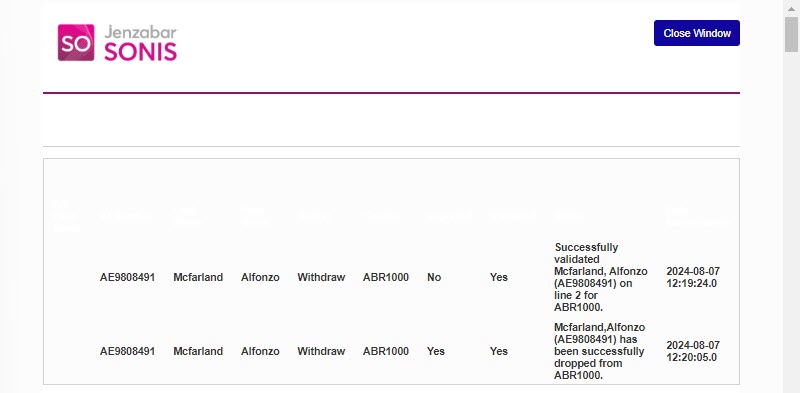
After importing, results will display. For each student processed, there will be two rows. One row will confirm the validation of the student's data and the second will confirm the action taken. Reviewing the student's Users hub page Schedule will confirm the action taken, as well.