Course Section List
Overview
The SONIS Course Section List page allows administrators to create and edit course sections, assign faculty, assign fees, assign textbooks, etc. To access the page, select a course using the Course Search utility.
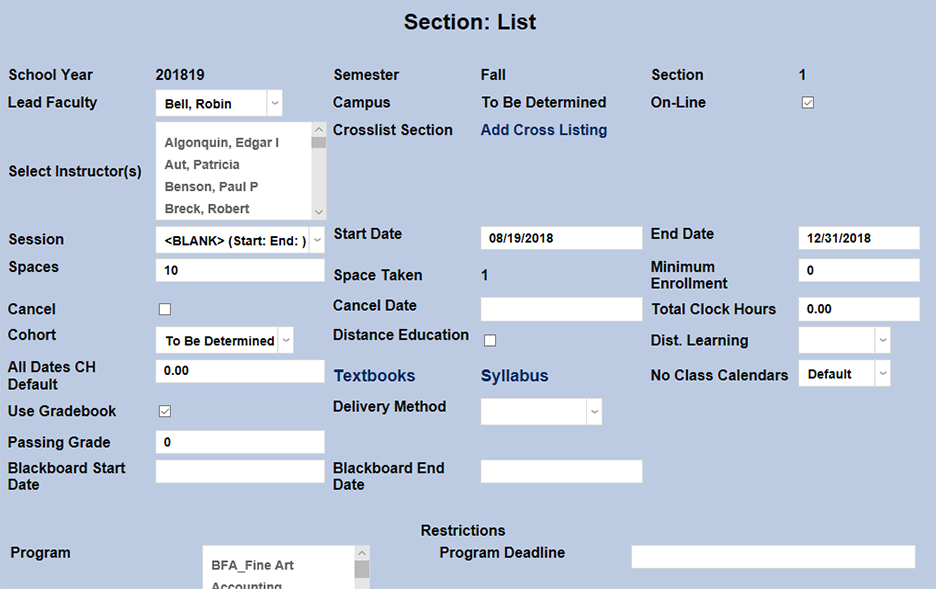
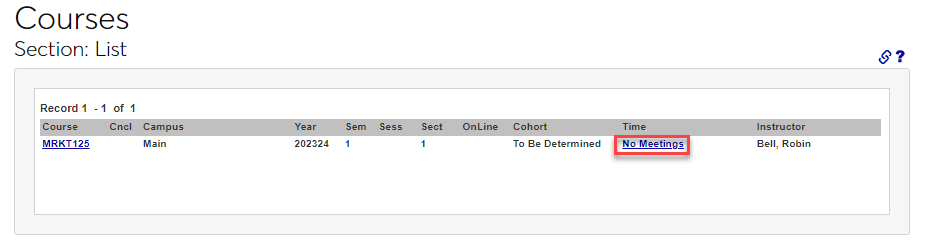
Once a course has been selected click Section List in the left-nav menu. If the course is newly created and does not have any previously existing sections, use the Section Add utility to create them. If sections already exist for the selected course, they will be listed on the first Section: List page along with the campus, year, semester, session, section number, online availability, cohort, time, and instructor for each section.
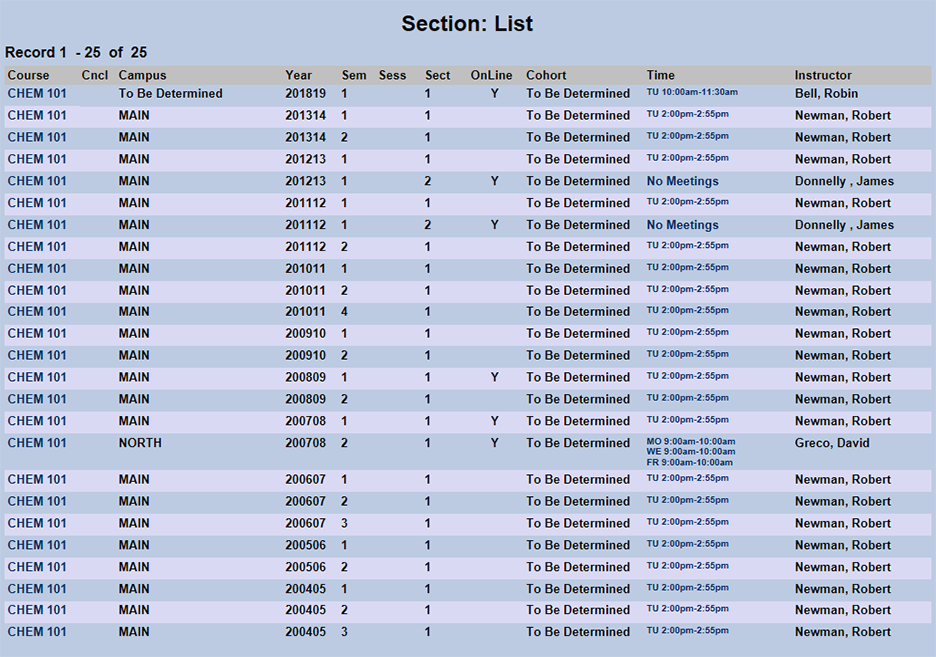
Click on the course name or the time to edit the section. This same page can also be accessed by selecting a section from the COURSES+ dropdown menu in the top-nav or by clicking Section Edit on the left-nav.
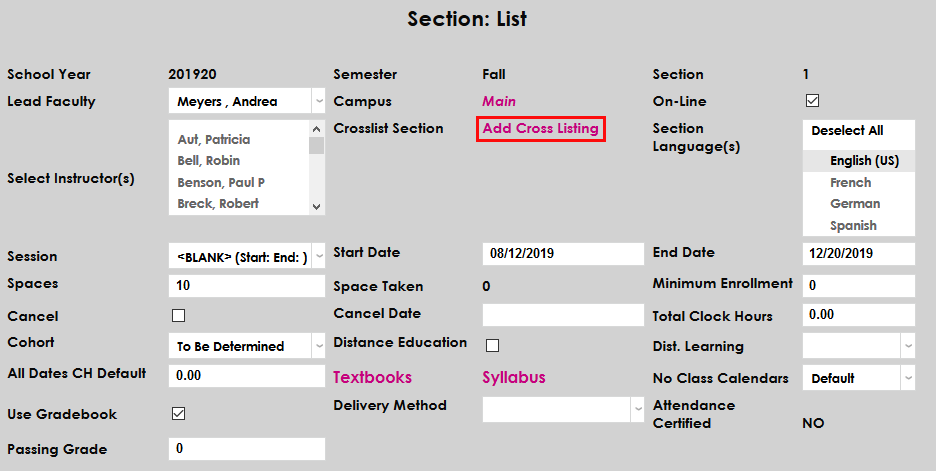
Crosslist Section
At times, institutions may choose to offer the same course under two different names or use the same faculty and space for two related courses. For example, a school may offer the same course to both graduate and undergraduate students using different grading criteria. Alternately, a certain Math class could be required for both Business majors and Math majors under different names but share a single room and instructor. These courses can be listed under both programs using the cross-listing feature found on the Section: List page.
Before assigning a cross-listing to a course section, ensure that both course sections have been created and that they have the same meeting time(s), meeting location(s), and instructor(s). Once both sections are set up, navigate to the Section List page and click the Add Cross Listing link at the top of the page.
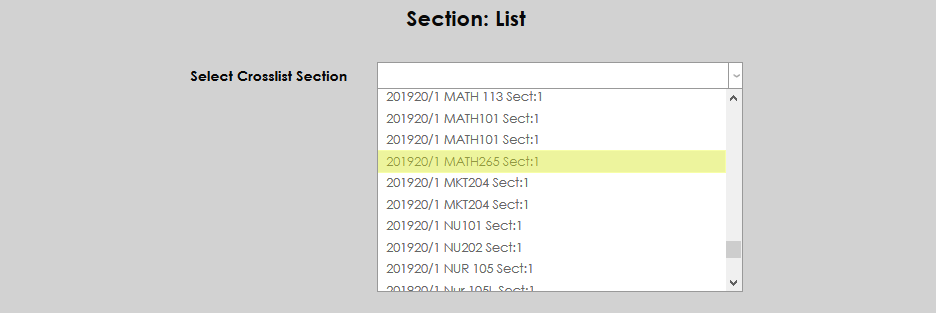
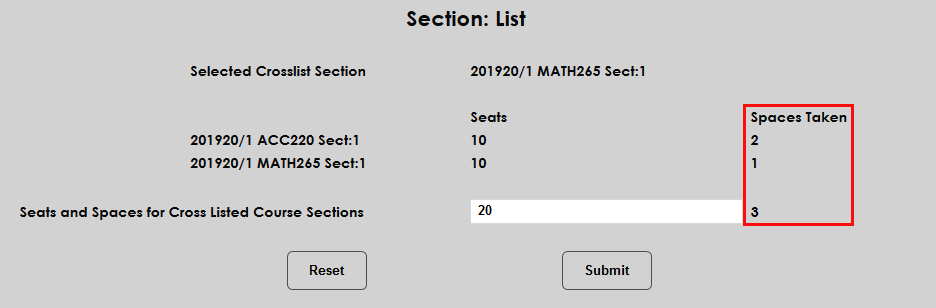
On the following page, select the course section to be crosslisted from the Select Crosslist Section dropdown menu and click Submit.

At this point, the SONIS system will display the two courses being listed together along with the Seats and the Spaces Taken. Administrators can choose to edit the number of available seats or leave the default value. In this example, the administrator chose to combine the 10 seats listed for each course and allow 20 students to take the course.
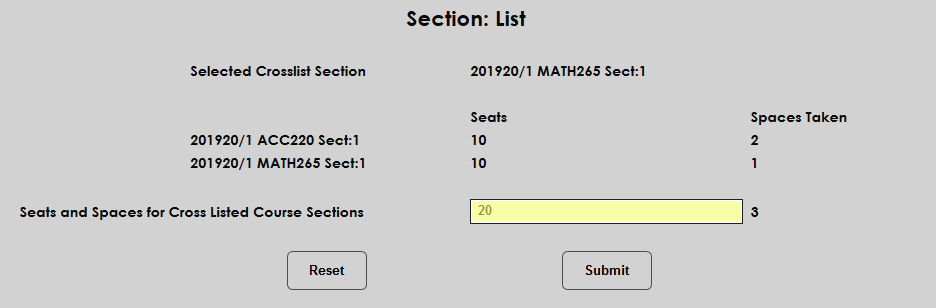
The Spaces Taken between the two courses are totaled in the right-hand column. The number of available seats must be more than this total. Click Submit to save the changes and create the cross-listing.
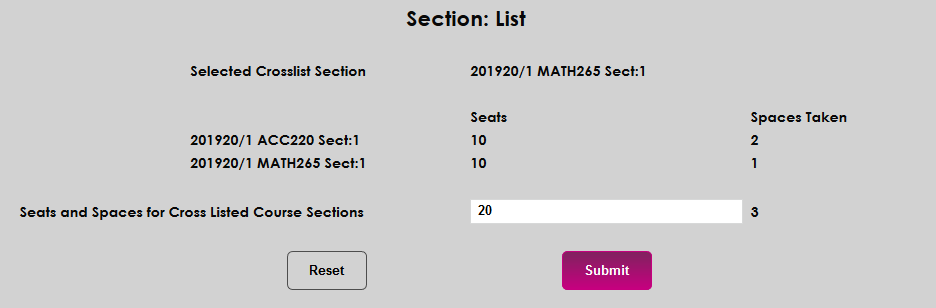
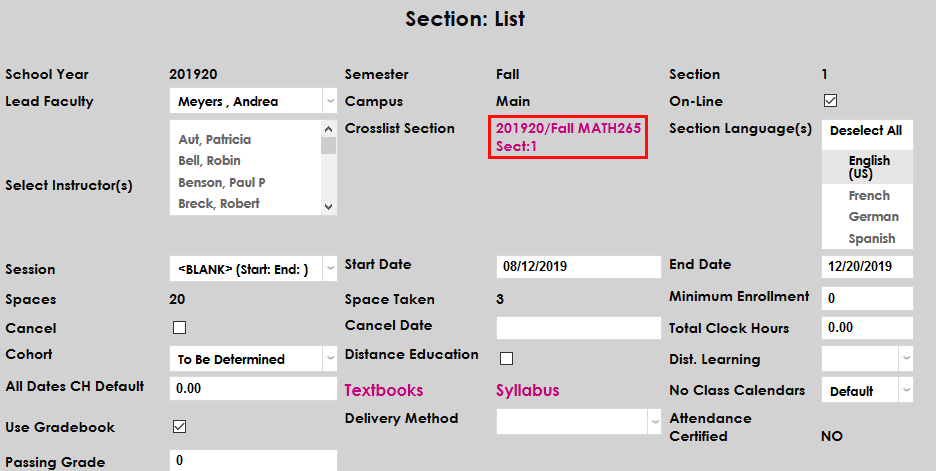
Once the courses have been cross-listed, each course will be listed for registration based on the new seat totals. The cross-listing also appears on the page for each section with a clickable link to make edits.
Textbooks
Administrators can add, change, or remove a specific textbook to be used in a course section by clicking on the Textbooks link.


If no book has been assigned to the course, users can search for an existing book listed in the SONIS system by title, author last name, or author first name.
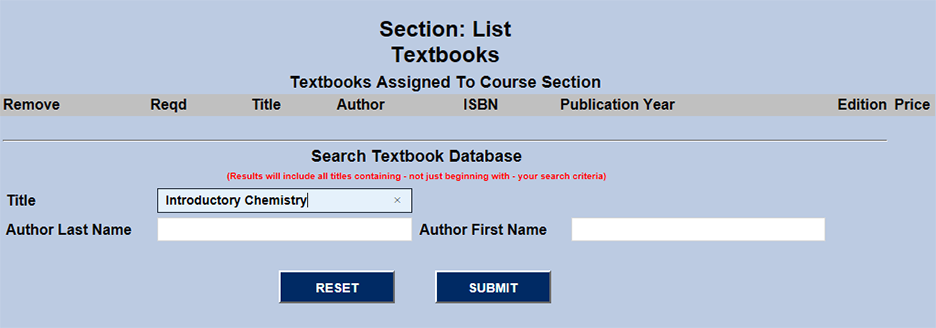
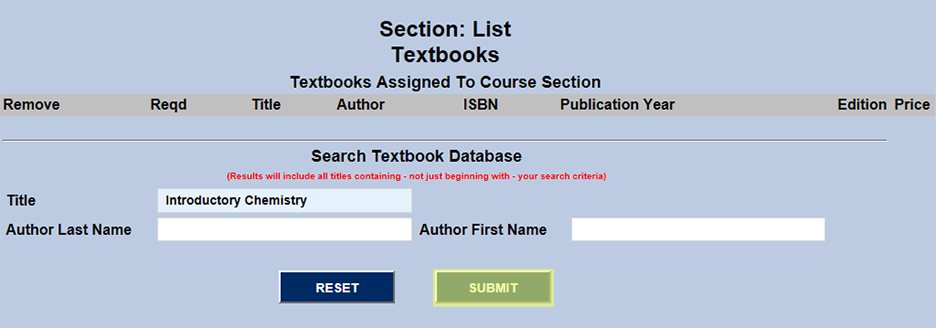
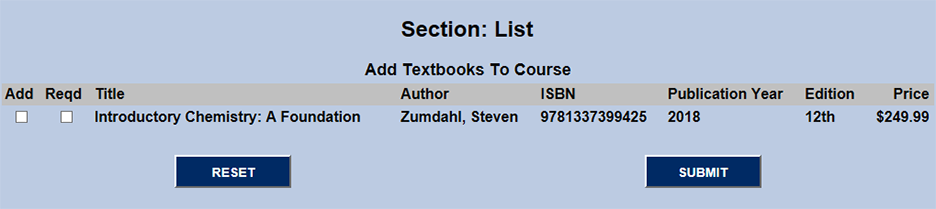
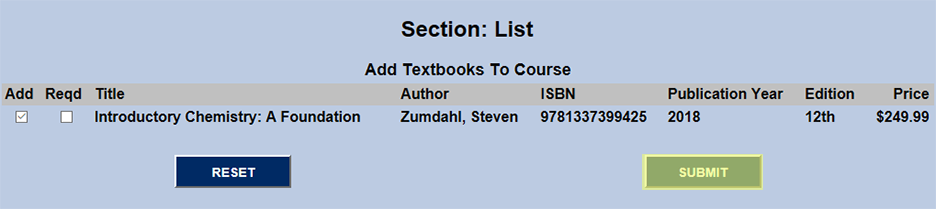
Find the book in the search results and click the Additional or Required checkboxes followed by the Submit button to add it.
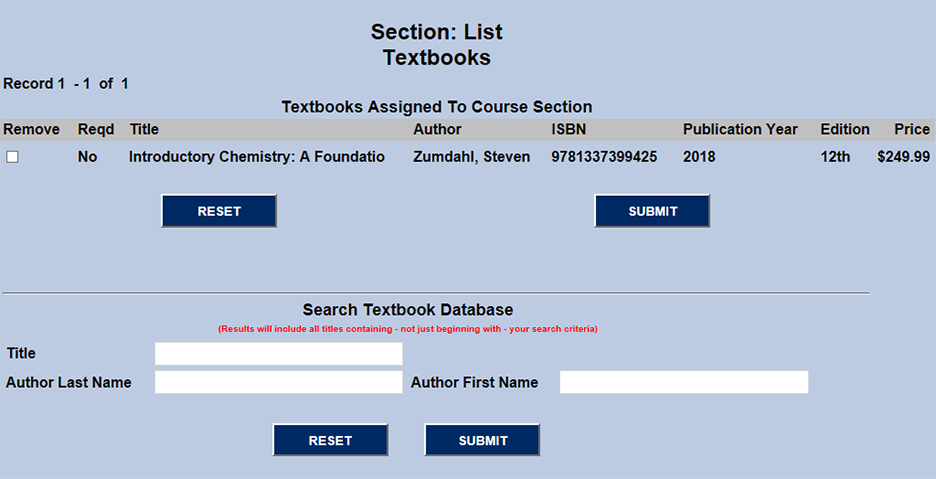
When a textbook is already assigned to the course, the book's title, author, ISBN, publication year, edition, and price will be listed. The book can be removed from the course listing by checking the Remove box and clicking Submit.
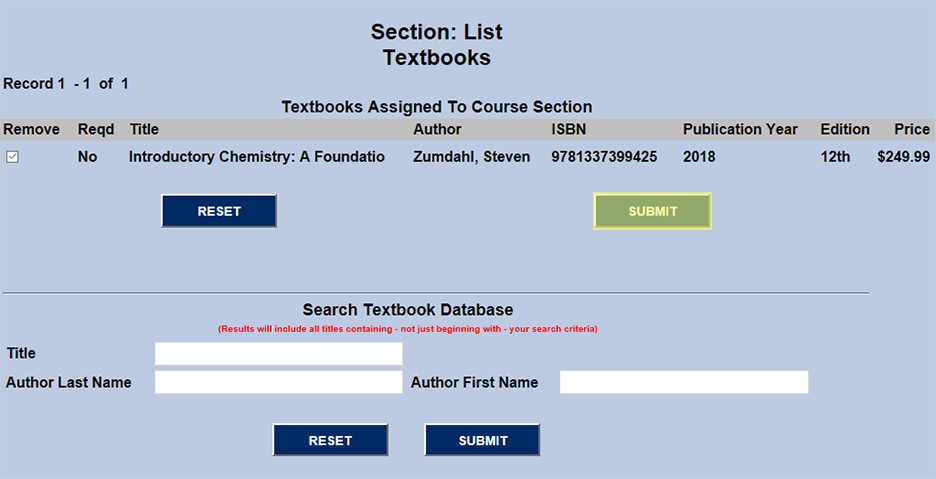
Textbooks not in the Jenzabar SONIS system can be added through the Textbooks table under the Systems hub. For more information on this process see: Faculty Books.
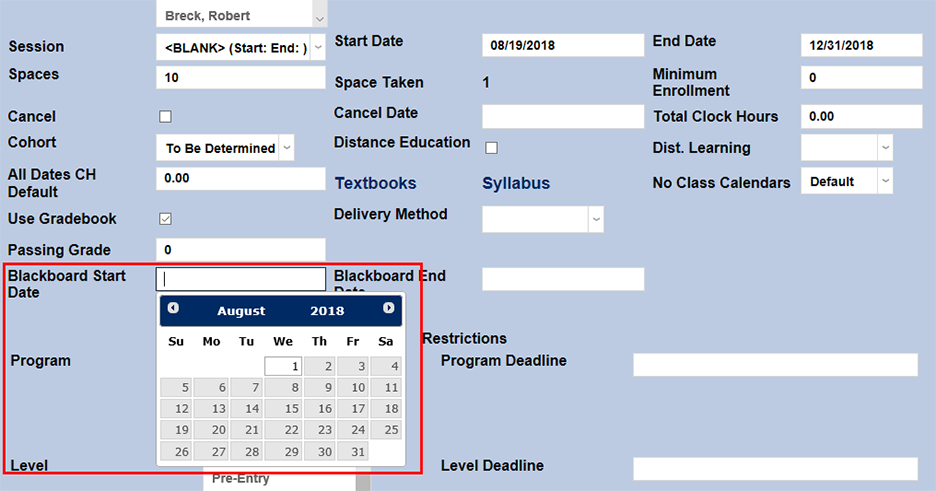
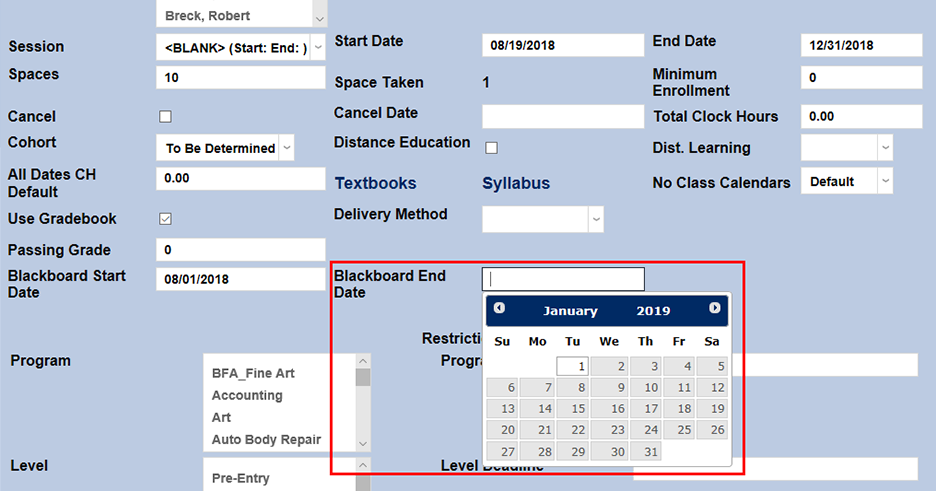
Blackboard Start/End Dates
In earlier versions of Jenzabar SONIS, students could only access the Blackboard virtual learning environment for their courses between the start and end dates of the course. This created occasional problems as some students may want to begin working in Blackboard before a course begins or access the information after it has ended. The Blackboard Start Date and Blackboard End Date fields were added to allow administrators to create separate dates for student Blackboard access outside that differ from the course's start and end dates. Simply select a date in each field and click the Submit button at the bottom of the page. If these fields are left blank, Blackboard access will default to the course start and end dates.
Canvas Start/End Dates
By default, the Canvas system can only be accessed between the start date and end date of each course. Some schools may wish to provide their Canvas users with access outside of these dates for setup or other purposes. When Canvas is set as the active LMS on the Learning Management System Setup page, each Section edit page includes a Canvas Start Date field and a Canvas End Date field. Administrators can enter dates in this field to replace the course start and end dates that are exported to Canvas and extend the access window. If one field is used and the other is left empty, the entered replacement date will be used and the default date will be used for the other value.

Note
These fields only apply to the CSV export from Jenzabar SONIS to Canvas. The XML export does not include the start or end dates, so these fields do not alter it in any way.
Visit the Canvas Integration page for more information on Canvas setup.
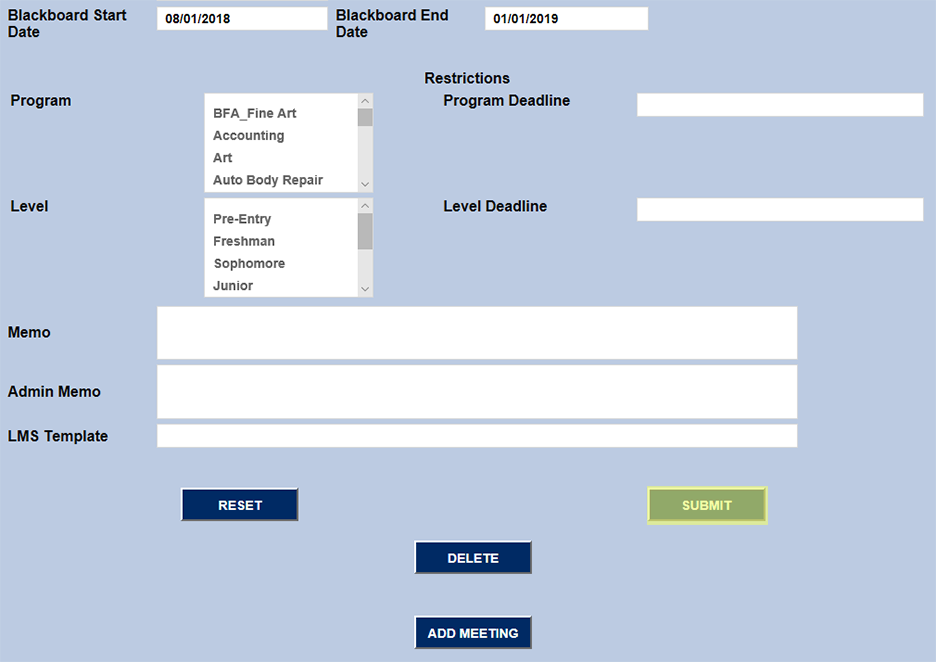
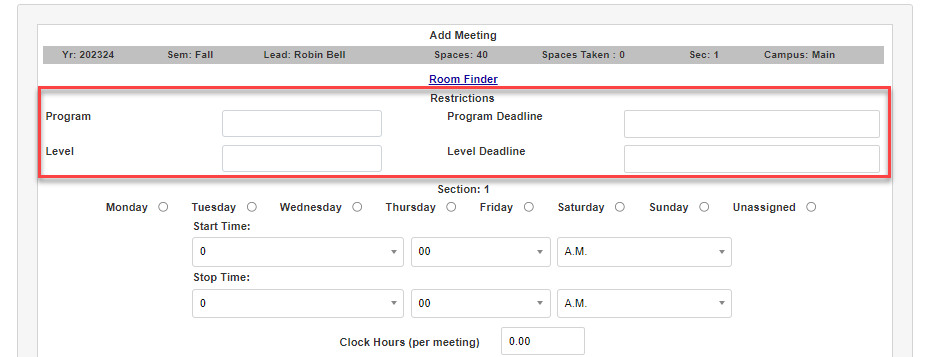
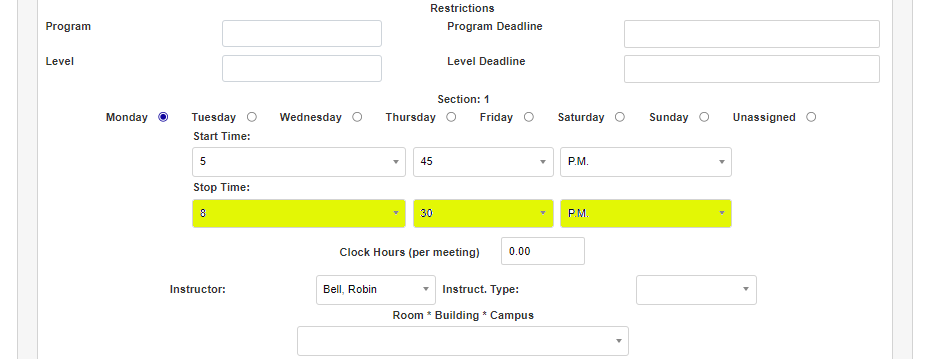
Restrictions
Administrators can use the fields in the Restrictions section to control who is eligible to register for the class.
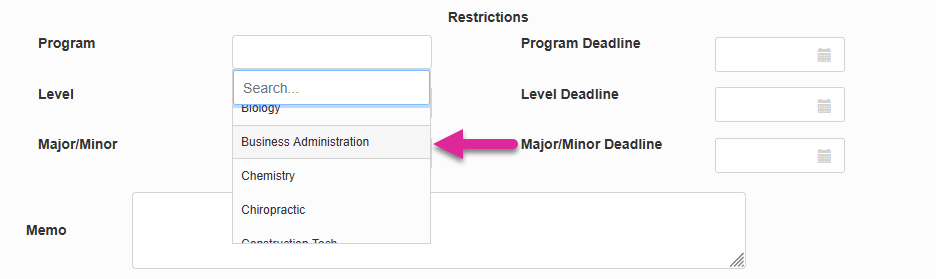
Program/Level
Course sections can be restricted by Program and/or Level using the menus included on each section page. One or multiple values can be selected. Once, programs and or levels have been selected, students who aren't in the selected demographic will not be able to register for the section without a faculty override. Levels can be added via Table Maintenance under the Systems hub.
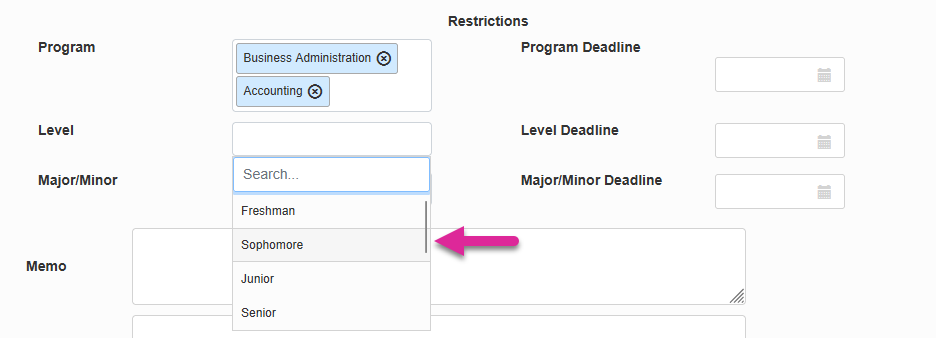
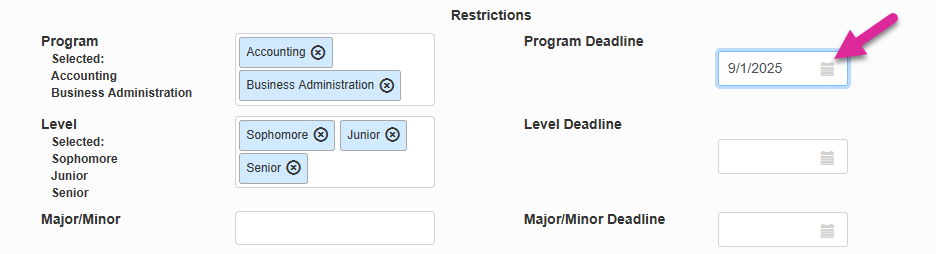
Previously selected program and level restrictions appear off to the side of the menu in a read-only list to make them easier to view and prevent restrictions from being added or removed with errant clicks. Newly selected programs and levels are added to the list immediately after the page is submitted.
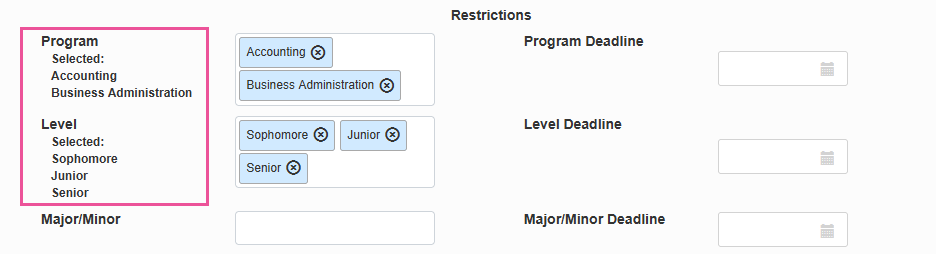
You can use the Program Deadline and Level Deadline fields to set a date for the restriction(s) to end.
Tip
For example, you could use the program and level restrictions to ensure that only upperclassmen in a certain program who need the course to graduate are allowed to register for the course during the first two weeks of registration but set that restriction to expire after that so other students who may want to take the course can register after that.
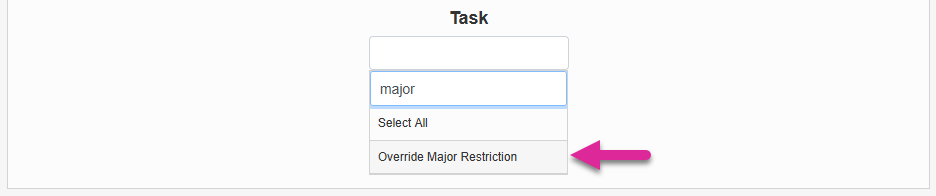
Students who attempt to register for a restricted course will see an error message telling them that they don't meet the requirements. Staff members can bypass this warning if the have the Override Program Restriction and Override Level Restriction User Security permissions.

Major/Minor
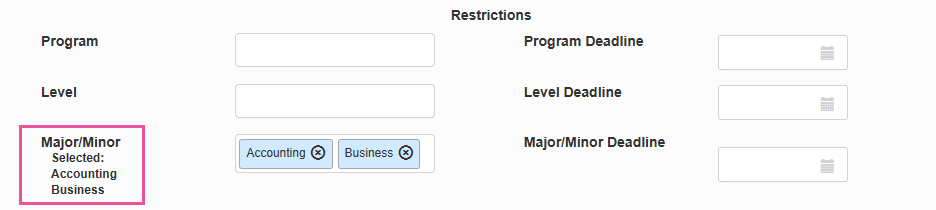
Course sections can be also restricted by Major and Minor. Select a major from the drop-down list. Students who have the selected value listed as either their major or their minor will be allowed to register for the course. Everyone else will be prevented.
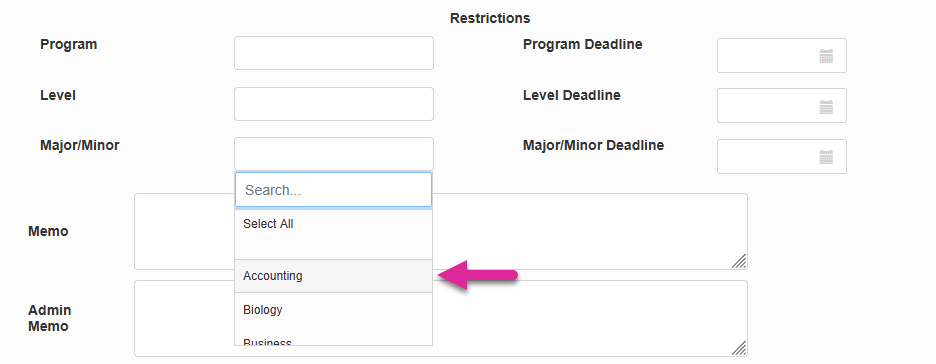
Previously selected major restrictions appear off to the side of the menu in a read-only list to make them easier to view and prevent restrictions from being added or removed with errant clicks. Newly selected majors are added to the list immediately after the page is submitted.
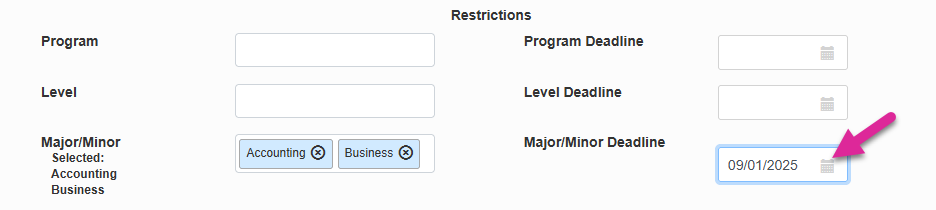
You can use the Program Deadline and Level Deadline fields to set a date for the restriction(s) to end.
Tip
For example, you could use the major and minor restrictions to ensure that only students in a certain major who are required to take the course are allowed to register for the course during the first two weeks of registration but set that restriction to expire after that so other students who may want to take the course can register after that.
Students who attempt to register for a restricted course will see an error message telling them that they don't meet the requirements. Staff members can bypass this warning if the have the Override Major Restriction User Security permission.
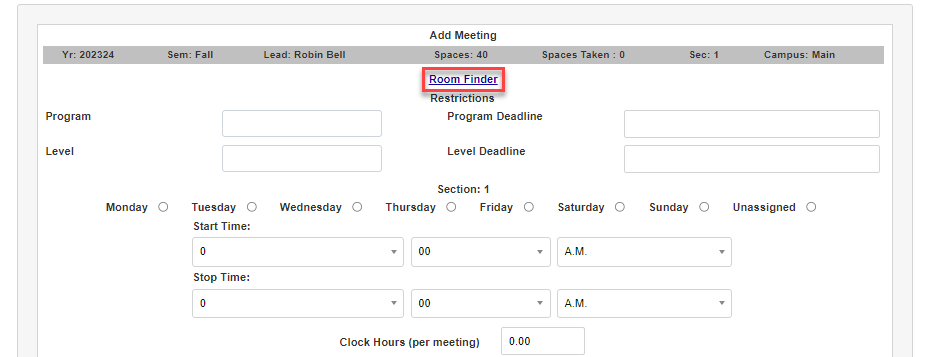
Adding Meetings
If meetings were not added when the section was created, they can be added from the Section List page. It is important to note that only ONE meeting may be added to the section when adding meetings after a section is created. Click No Meetings from the list of sections Time column.
A link to the Room Finder utility is provided at the top of the page, below a summary of the section being edited. #restricted-by-program-course-section-overrideRestrictions may also be entered or edited at this time, if necessary.
Click the radio button associated with each day of the week the section will meet and enter the Start Time by selecting the hour, minute, and AM or PM from the corresponding drop down menus.
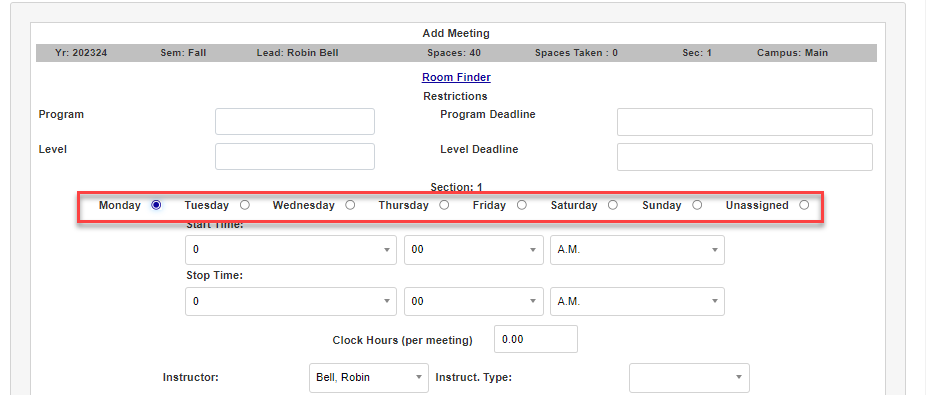
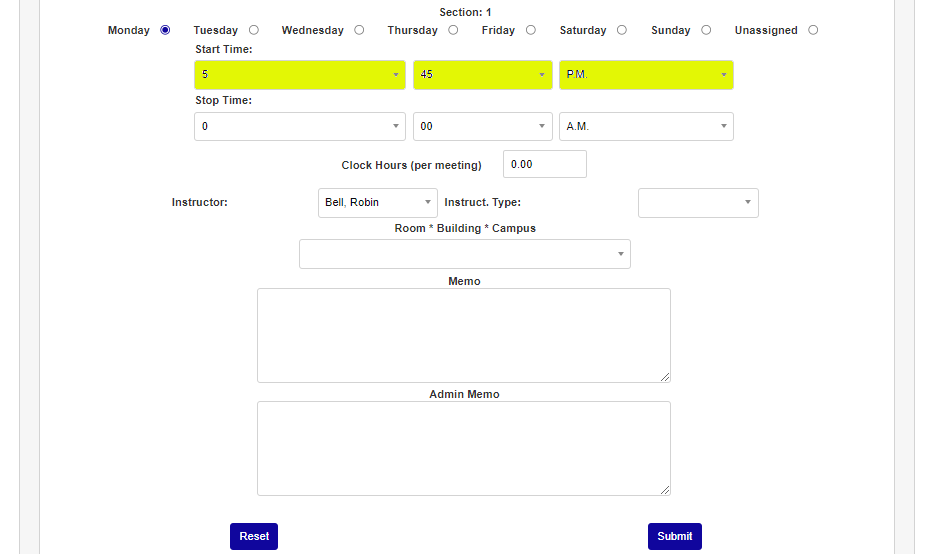
Enter the time the section meeting is scheduled to end in the Stop Time fields by selecting the times from the drop down menus. If this is a course measured in clock hours, enter the number of clock hours the student will earn per meeting in the Clock Hours (per meeting) field.
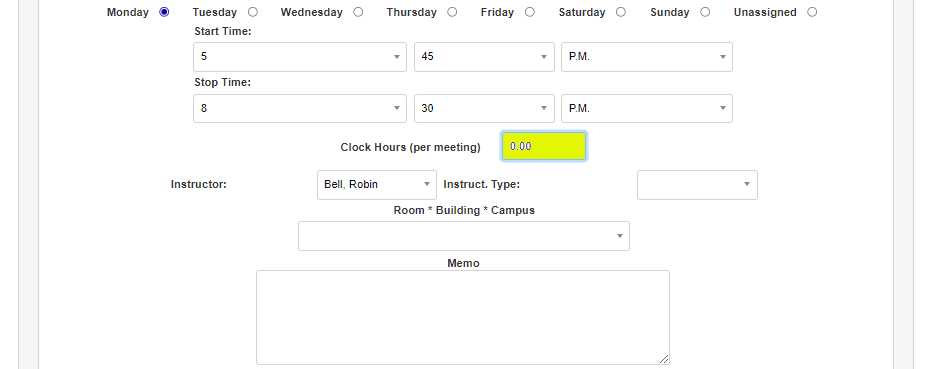
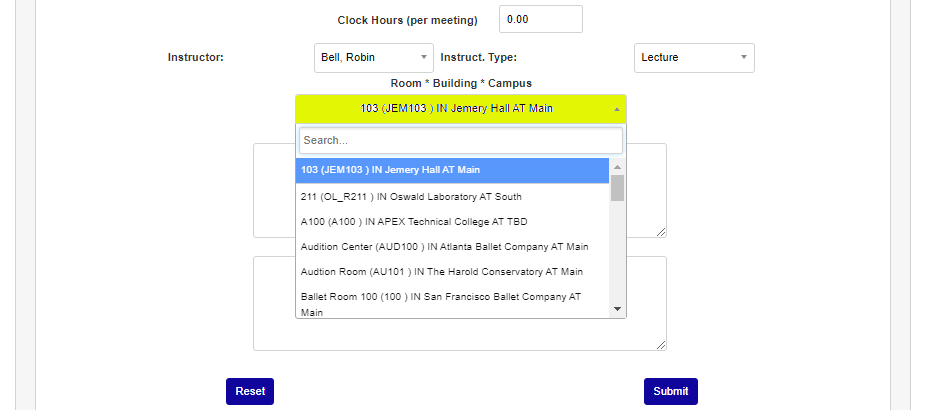
Edit the Instructor or Instruction Type using the corresponding selection menus. It is not necessary to edit these fields to add a meeting, but the option is available, if desired.
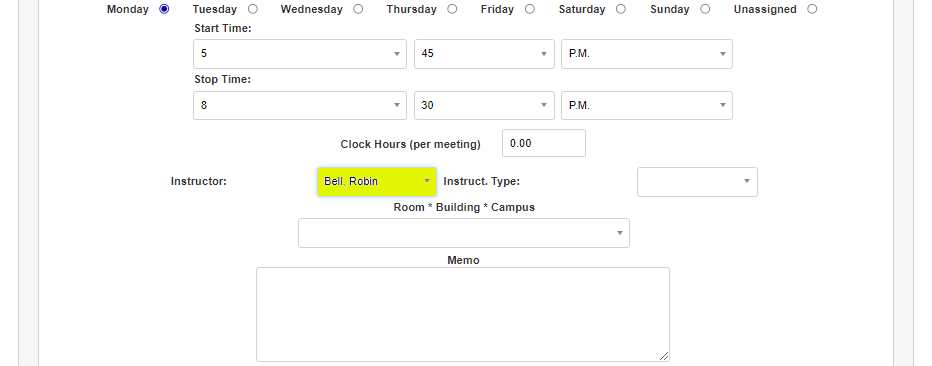
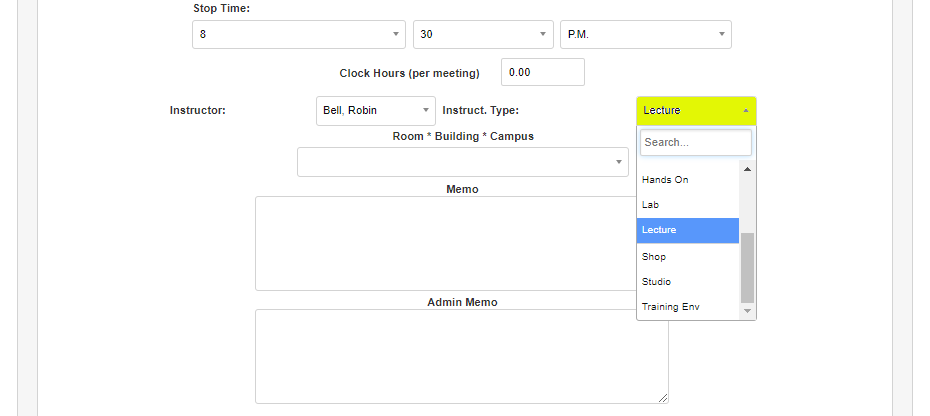
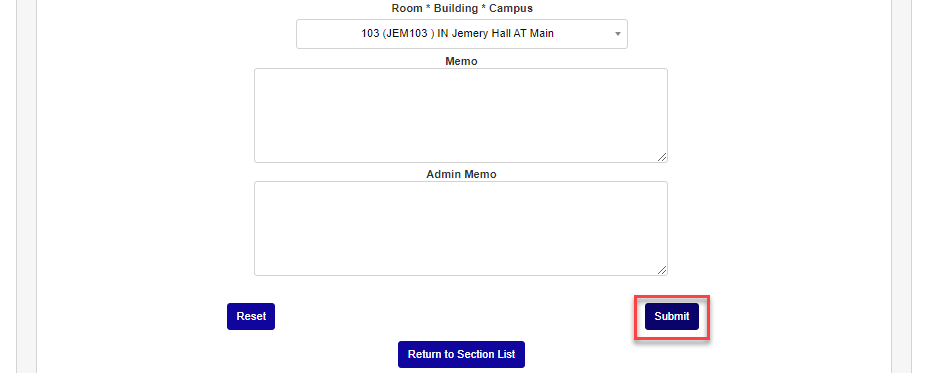
Select the room the section will meet in from the Room * Building * Campusdropdown. Any additional information about the course can be added in the Memo or Admin Memo fields.
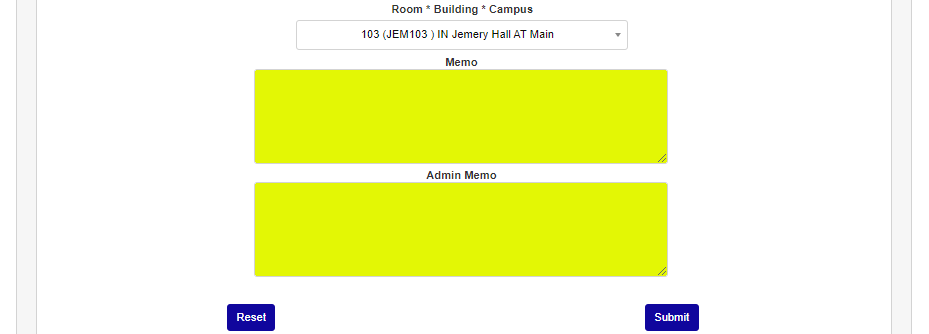
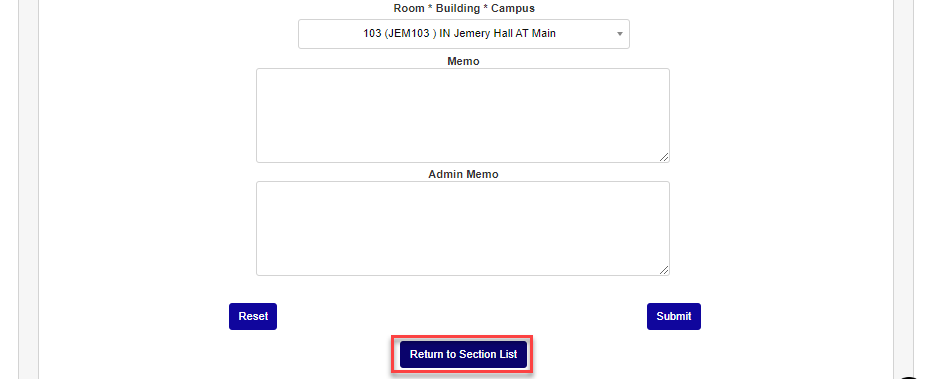
Click Submit to save the entries or Return to Section List to return to the section list and discard the entered information.