Course Import Utility
Overview
The Course Input Utility is a Jenzabar SONIS function that allows administrators to upload pre-defined courses and course sections to the system via Excel spreadsheets. The utility is located in the Systems hub.
The Course Import Utility will match previously uploaded course/course sections created by the import automatically and update those courses and sections accordingly. The Course Import Utility will not update/change any course or course section created by another process. If a course/course section that was previously created using the course import utility is not provided in the next import file, that course will not be altered. If section numbers are repeated within a term for course sections, the import process will only import one section.
Creating Files
The uploaded file must be in XLS format and have all of the following column headers in the exact order listed.
Crs_Id - A numerical value used to identify the course. This number is created by the SONIS system.
Course - The short name of the course, e.g. "ENG 101." Can contain letters and numbers.
Course_Txt - A longer description of the course, e.g. "First Year Composition.
course_type - The one or two letter abbreviation for the type of course being offered. Can be a specific program or other defining feature. Course Types are created and edited in Table Maintenance.
non_resident_per_credit - A numerical value that determines the cost per credit for non-resident (or out-of-state) students. Do not include dollar signs.
Note
This field is not required, but it should be included if there is a cost difference between in-state and out-of-state tuition.
division - The one to three letter abbreviation for the division of the school offering the course, e.g. "BUS."
campus - The campus where the course will be offered. Can be entered as "TBD" if the location is to be determined.
level - A single numerical value that identifies the level of the course, e.g. "1" for a first year course.
department - The one to three letter description of the department that the course falls under, e.g. "NU" for Nursing.
Inactive - This value must be either "True" or "False." It controls whether the course is active or inactive in the system. This can be manually changed later if necessary.
inactive_dt - The date at which the course should become inactive. Must be in standard date format with slashes, e.g. "6/15/2019." Leave blank if course should not become inactive at a set date.
Tcodes - The two letter transaction code for the course.
ce_credit - A numerical value that determines the credits this course offers as a Continuing Education class.
ce_per_credit - A numerical value that determines the cost per credit for Continuing Education students. Do not include dollar signs.
CEreg - Must be either "True" or "False." Controls whether the course is available as a Continuing Education class.
Cost - A numerical value setting the cost to students for taking this course. Do not include dollar signs.
Credits - The number of credits offered by this course. Decimals can be used for partial credits.
SID - A numerical value used to identify the course section. This number is created by the SONIS system. When manually creating a file, place an "X" in each field.
school_year - The school year in which the course is offered. Must be written as one number with no special characters, e.g. "201819."
Semester - A numerical value identifying the semester in which the course takes place.
Section - The section number of the course. Each section must be listed separately and it's number must be unique per term, even if utilizing sessions.
Note
This field can be blank if you're creating courses but not course sections.
Sessions - The number of sessions over which the course takes place. Can be left blank.
Sec_Camp_Cod - The campus code for this particular section. Can be set as "TBD" if unsure.
Spaces - The number of students who can sign up for this course.
Start_Dt - The start date of the course. Must be in standard date format with slashes, e.g. "6/15/2019."
End_Dt - The end date of the course. Must be in standard date format with slashes, e.g. "6/15/2019."
Cancel - Must be either "True" or "False." Controls whether a class should be canceled or not.
Cancel_Dt - The date for a course to be canceled. Must be in standard date format with slashes, e.g. "6/15/2019." Leave blank if course should not be canceled at a set date.
Lead_Faculty - The SONIS ID number for the lead faculty member responsible for the course. This column must be filled even if no course section is being created.
Memo - An optional field to fill in any additional information that someone viewing or editing the course may need to know. The field can also be used to add meetings, but for this purpose, it must be formatted exactly as shown in the sample file with the instructor ID, the room number, the day, and the times in that order. To create more than one meeting for the same section, create an additional row with the same information in the other columns.
To download a sample file, click here.
Note
Course IDs can be in any format but must be consistent when used to identify sections or two otherwise identical courses will be created. Section IDs must be consistent as well when identifying multiple meetings of the same section.
Uploading Files
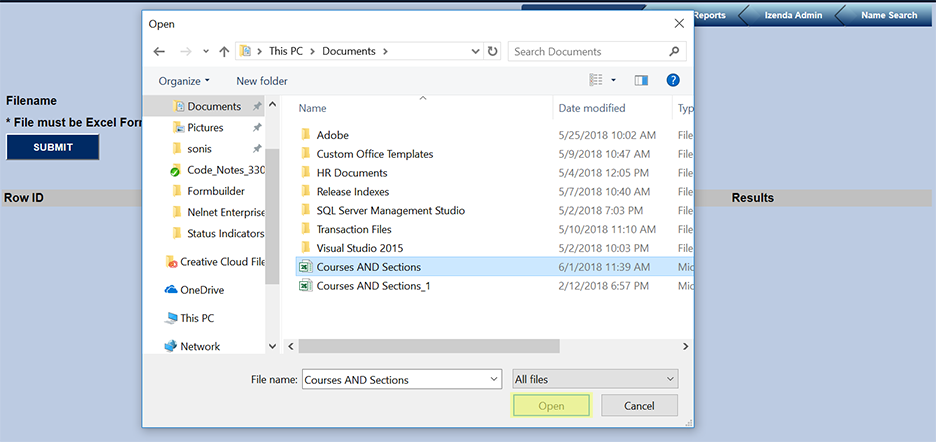
To upload a course file, navigate to the Course Import Utility in the Systems hub. Click the Browse button and select the file to be uploaded either by double-clicking it or by single-clicking on the file and then clicking the Open button.

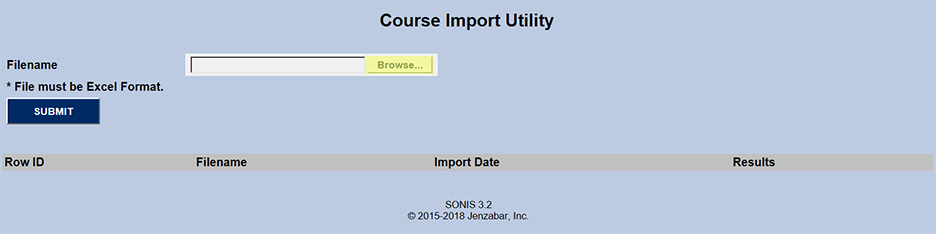
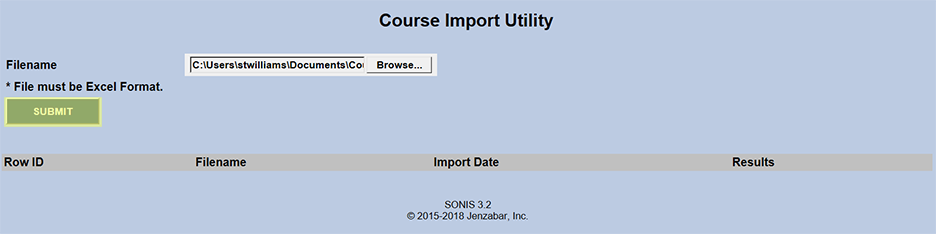
Once the proper file has been selected, click Submit to upload the file.
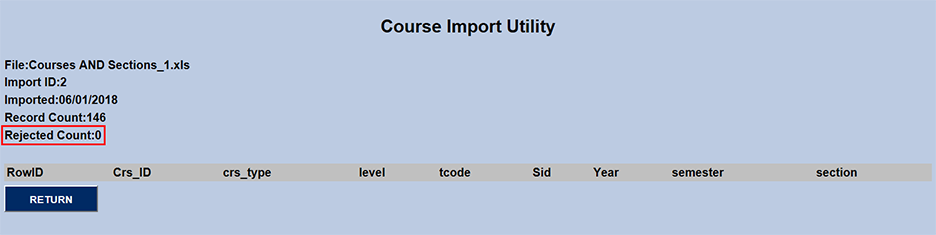
Once the file has been submitted, it will be automatically processed into the Jenzabar SONIS course and course section tables. All files that have been imported will be listed on the Course Import Utility page with a link to view the results.

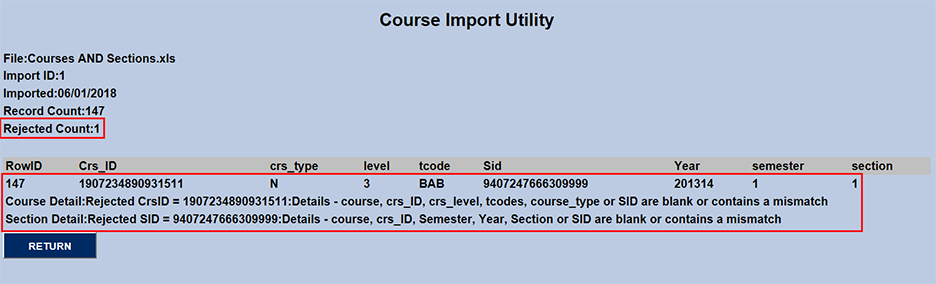
The text at the top right of the Results page provides a rundown of how many records were in the file and how many were Rejected. If the number is zero, the file uploaded successfully and no changes need to be made.
If the file had errors that the system rejected, the listed Rejected number will be higher than zero and those errors will be listed at the bottom of the page. If a course/course section is flagged as rejected, all fields related to rejections are listed to help determine issue. One or more of the fields have data that does not match with the corresponding tables. For example, a missing T-code in the Transaction table. Correct the errors and upload the file again.