Prospect Web Inquiry Setup
Overview
The Prospect Web Inquiry Utility is used to determine what data is captured from prospective students when they fill out a Web Inquiry Card. The utility is located in the Systems hub and consists primarily of a series of checkboxes allowing Jenzabar SONIS administrators to turn web inquiry card fields on and off.
Page Content Setup
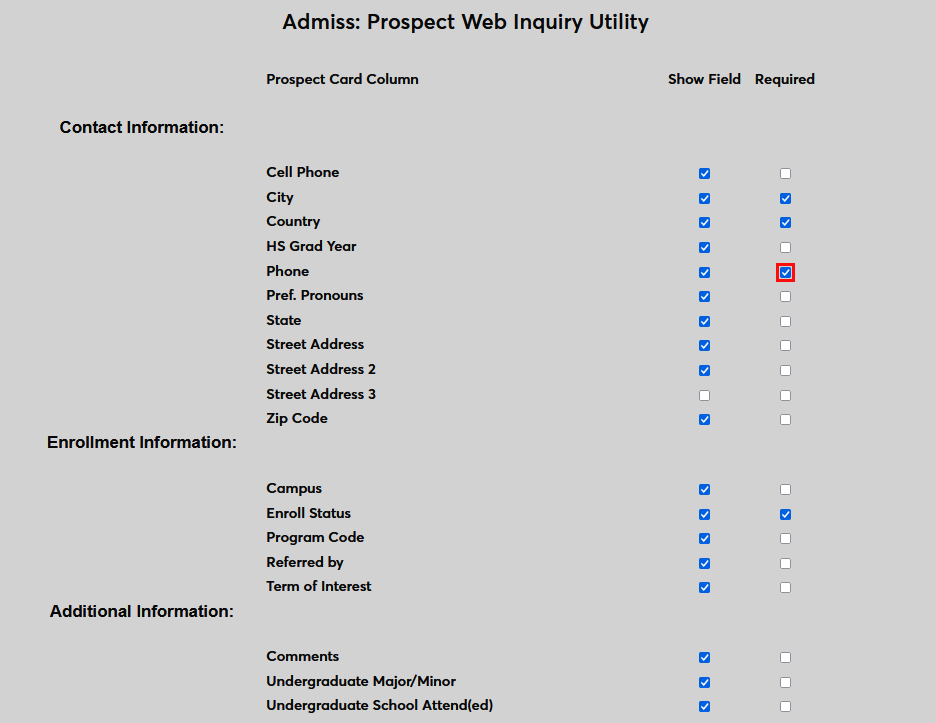
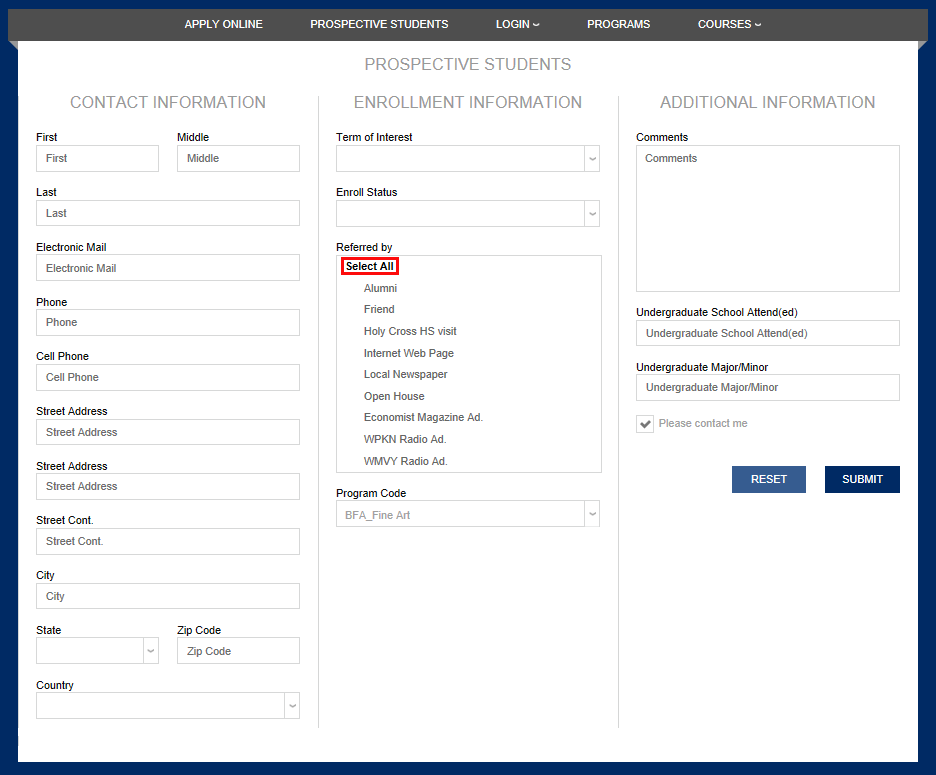
The top portion of the Prospect Web Inquiry Utility page is used to determine which fields are shown on the inquiry card and which are required. The First, Middle, and Last name fields and the Electronic Mail field are all required for the prospect inquiry card to function and can not be turned off. The additional fields are as follows:
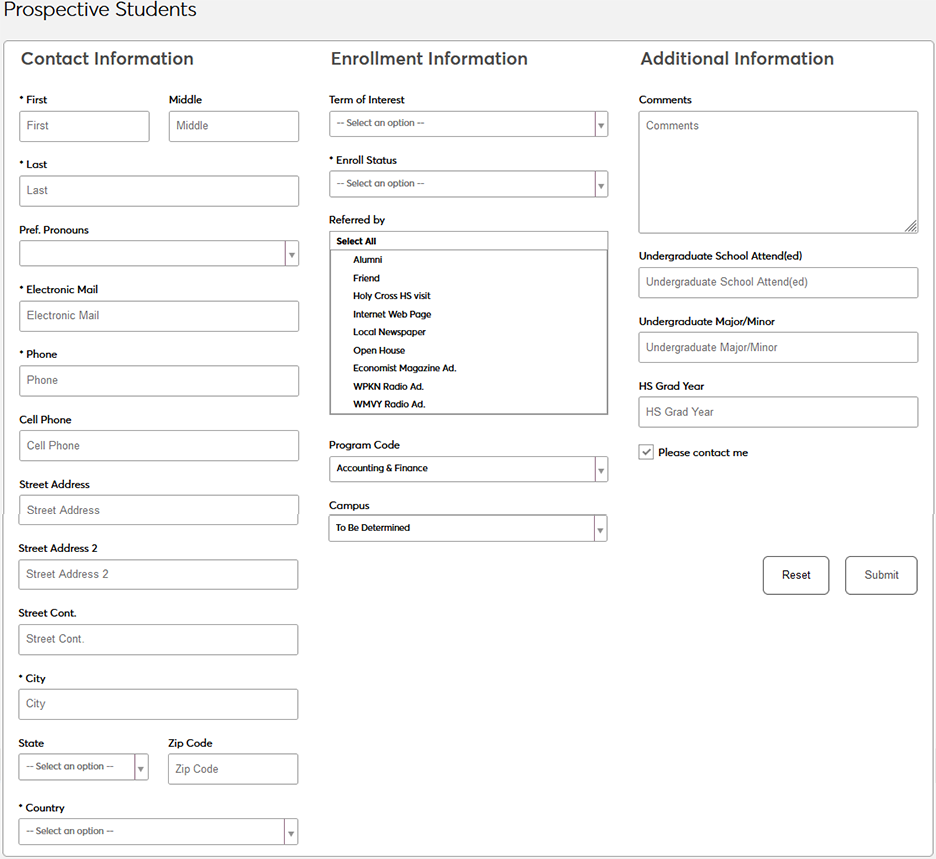
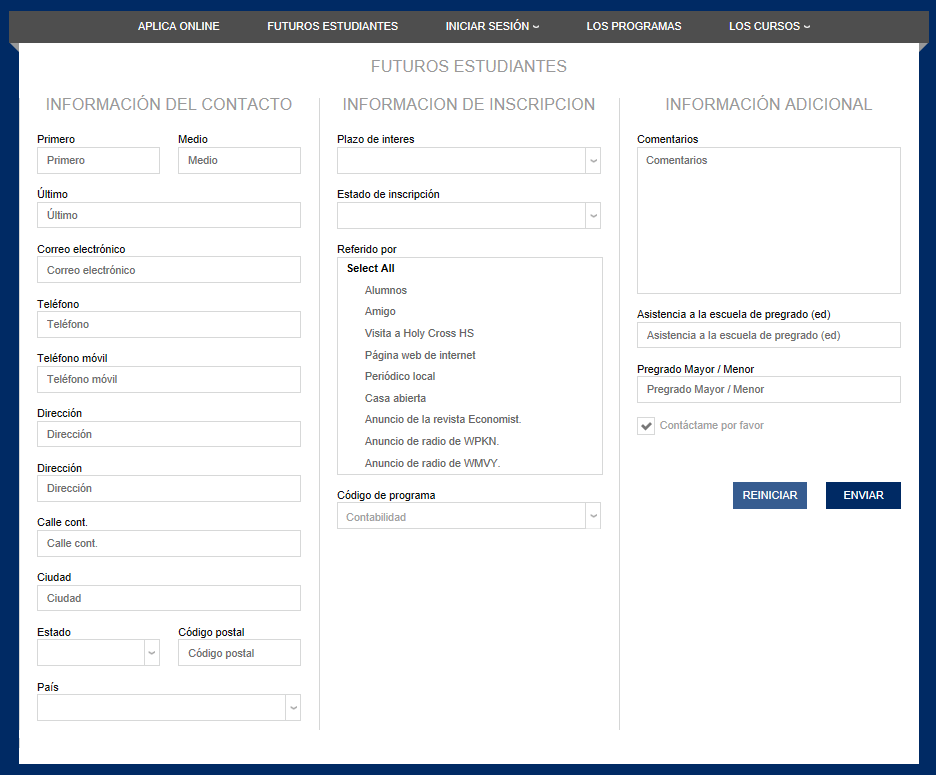
Contact Information:
• Cell Phone - The prospect's mobile phone number.
• City - The city where the prospect resides.
• Country - The country where the prospect lives.
• HS Grad Year - The prospect's high school graduation year.
• Phone - The prospect's landline phone number.
• Pref. Pronouns - The pronouns that the prospect uses. Click here for more details.
• State - The state where the prospect lives.
• Street Address - The prospect's mailing address.
• Street Address 2 - Additional space for address information.
• Street Address 3 - Even more space for address information.
• Zip Code - The prospect's zip code.
Enrollment Information:
• Campus - The campus where the student is interested in taking classes. The list of available Campuses is set via Table Maintenance in the Systems menu.
• Enroll Status - The enrollment status that the prospect is interested in; full-time, half-time, etc. The list of available Enrollment Statuses is set via Table Maintenance in the Systems menu.
• Program Code - The program that the prospect is interested in. The list of available Programs is set via Table Maintenance in the Systems menu.
• Referred by - The person, people, or institution who referred the student. The list of available Referrals is set via Table Maintenance in the Systems menu.
• Term of Interest - The school term when the prospect would enroll. The list of available Terms is set via Table Maintenance in the Systems menu.
Additional Information:
• Comments - Any comments that the prospect would like to pass on to the staff members reviewing the inquiry card. Can be renamed to give more direction.
• Undergraduate Major/Minor - The prospect's major and minor when/if they retained an undergraduate degree.
• Undergraduate School Attend(ed) - The school that the prospect attended or is attending for their undergraduate degree.
Check the Show Field box to display a field on the Prospect Inquiry Card. If the Show Field box is not checked, the field in question will not be displayed.
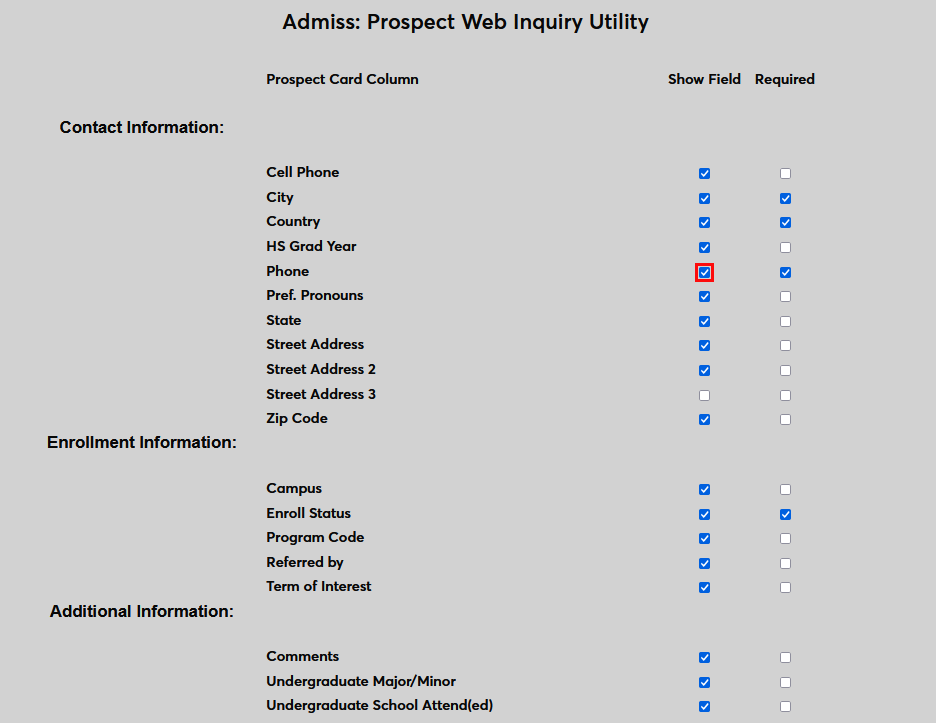
Check the Required box next to any field to prevent the prospect from submitting the form without providing a value for the field in question.
With all the fields selected to show, the Prospect Web Inquiry Card will have the following appearance:
Click Submit at the bottom of the page to save all changes to that have been made.
Note that in order for the Preferred Pronouns field to show up on the Prospect Web Inquiry, the option must first be activated in Web Options.

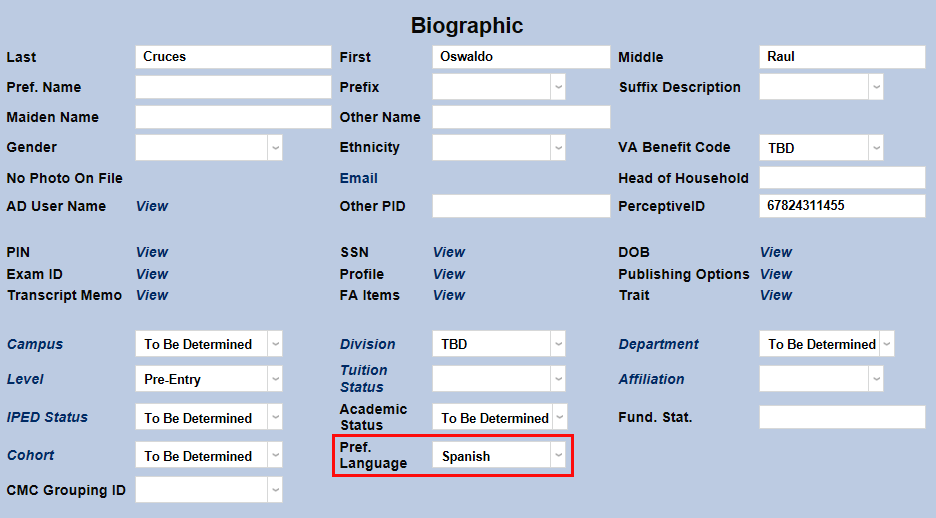
Visit the Biographic page for more information on how this feature works.
Page Two
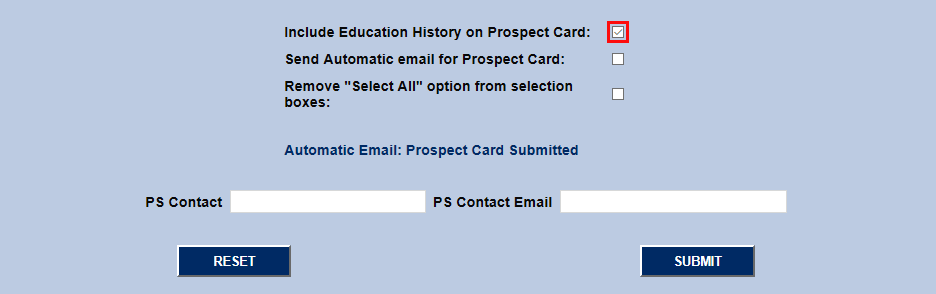
The bottom portion of the Prospect Web Inquiry Utility page includes a checkbox for schools that wish to know more about the prospective student's education history. If this box is checked, the prospect will be sent to a secondary page requesting this information. Fields on this page include: Institution, Degree, Outside Institution Program, Entry Date, Leaving Date, Graduation Month, and Graduation Year along with a Graduated checkbox. Only the institution is required.
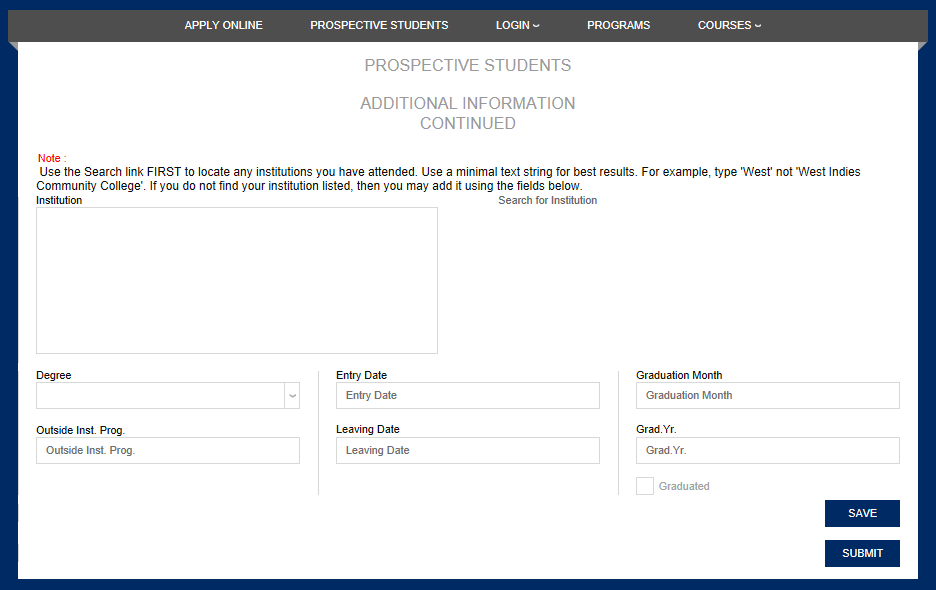
When directed to the page, the student should first click on the Search for Institution link. The next page will allow them to search for the previous school they attended. Only schools listed in the Institution table will be available to select.
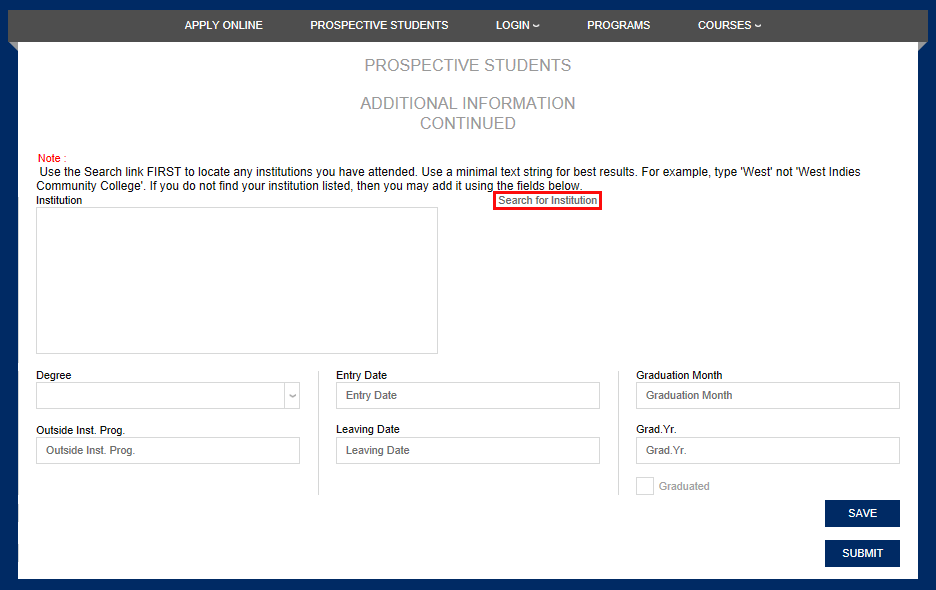
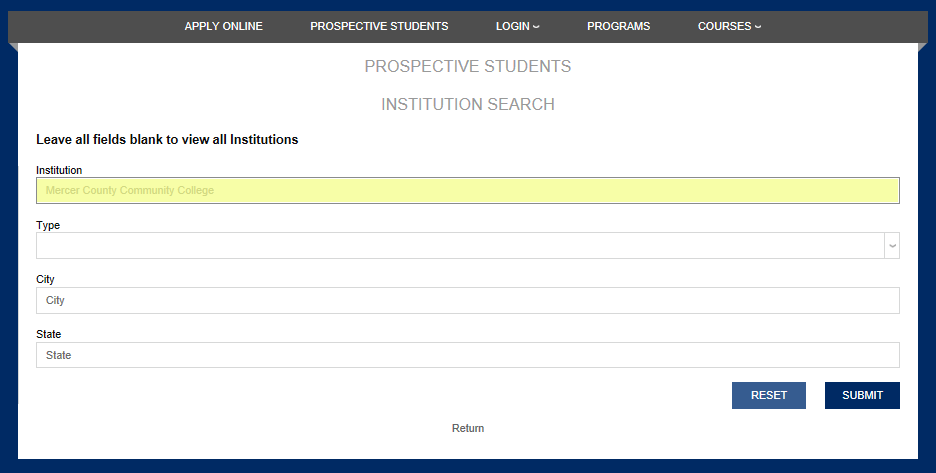
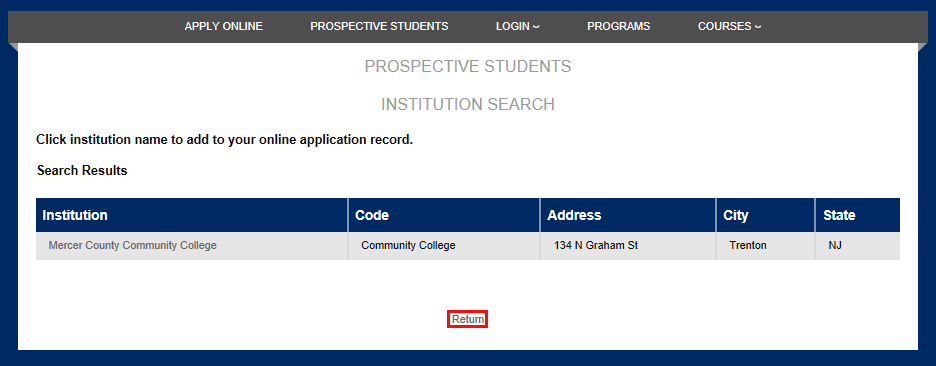
A list of schools matching the criteria entered will appear. If the correct school is listed, the student should click on the name of the Institution . If the correct institution is not found, the student should click Return and enter it manually.
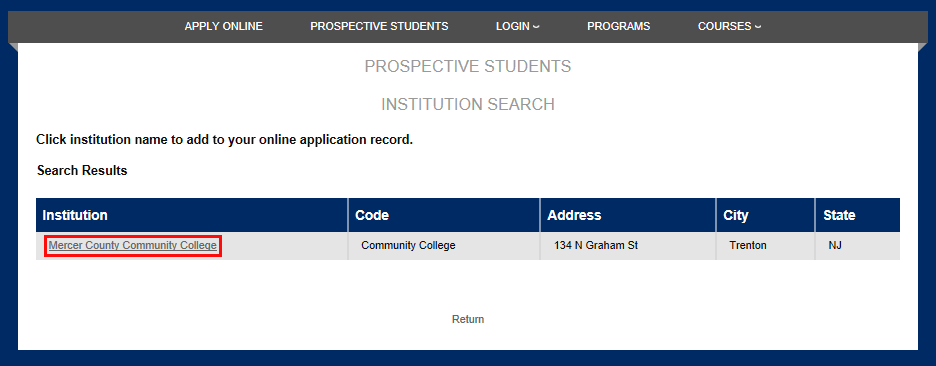
If the prospective student found their institution on the previous page and selected it, the institution will appear in bold on the page. The prospect should fill out the rest of the applicable information and click Submit .
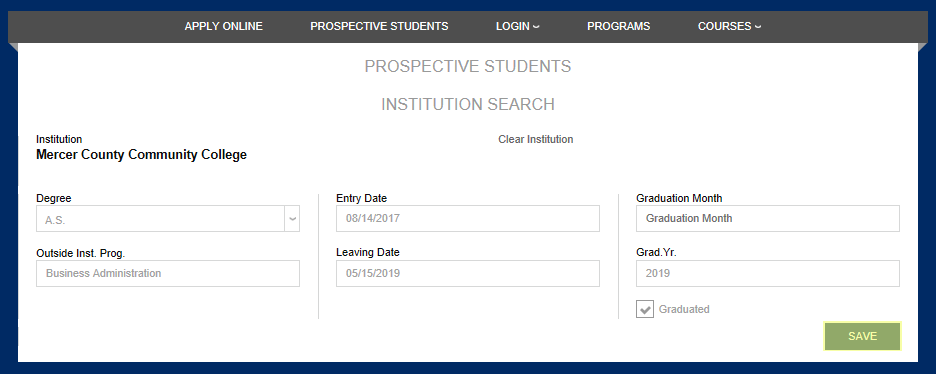
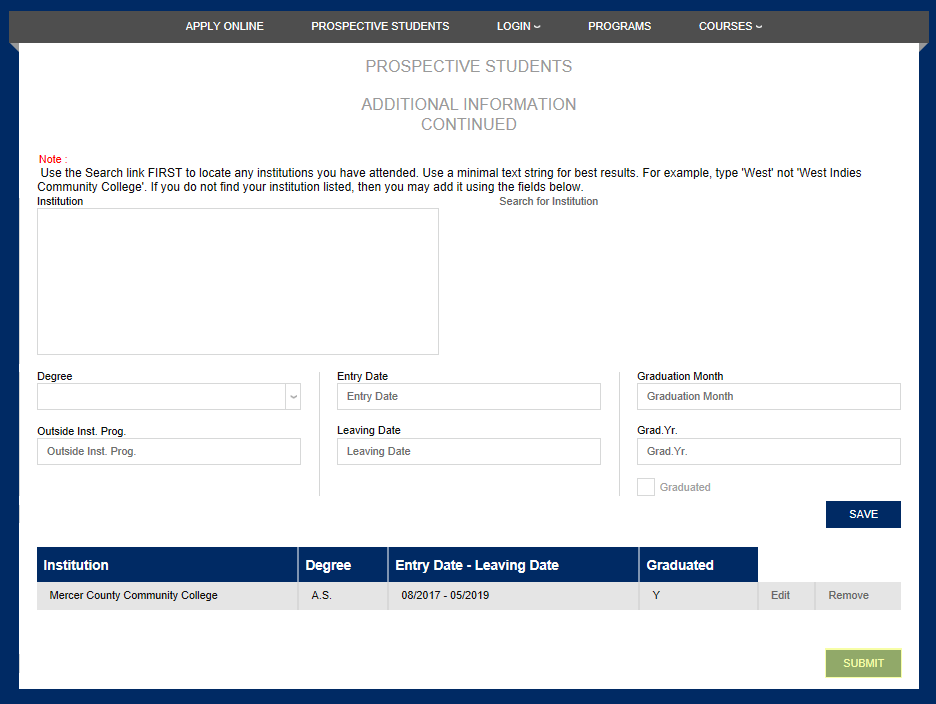
The information entered by the prospect will appear in a table at the bottom of the page. It can be changed or deleted using the Edit and Remove buttons.
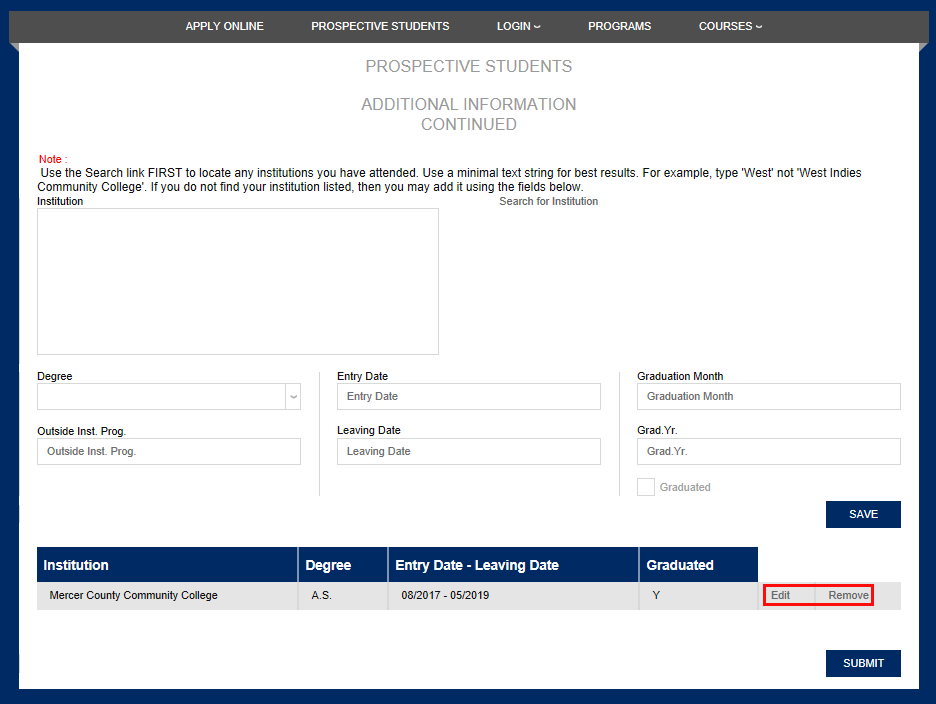
If the prospective student has additional institutional history to enter, they can do so at the top of the page, following the same procedure and clicking Save to add it to the chart at the bottom. Once all information has been entered, they should click Submit .
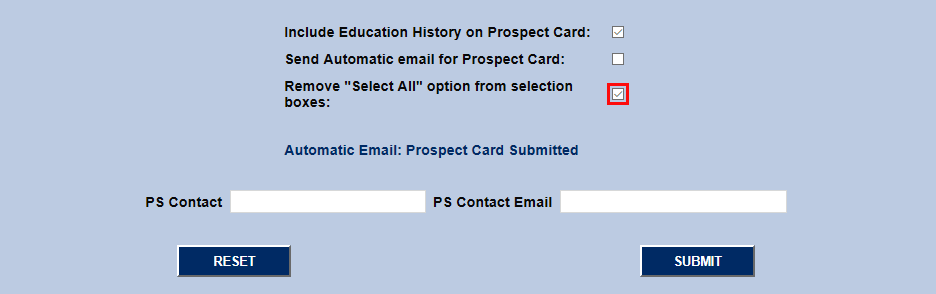
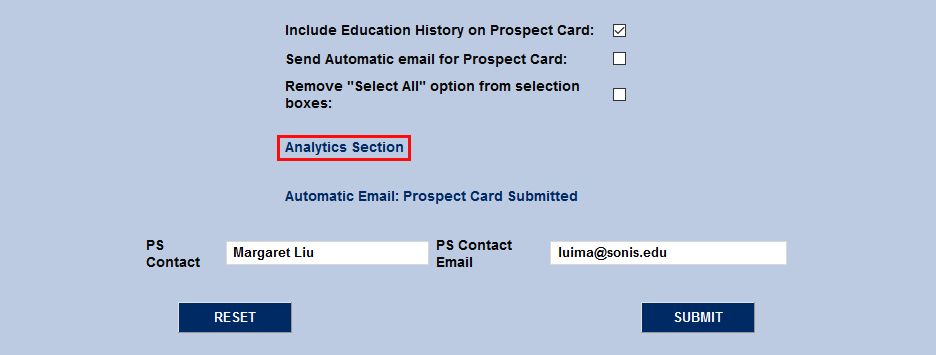
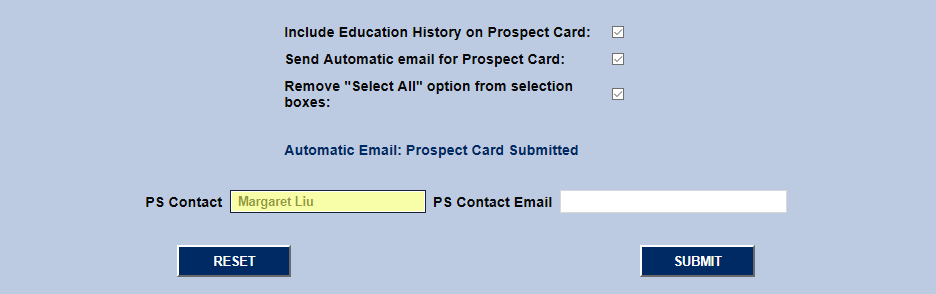
A smaller scale change is also available in this section of the utility. Check the Remove "Select All" Option from Selection Boxes box to prevent prospects from being able to select every option in a menu with one click.
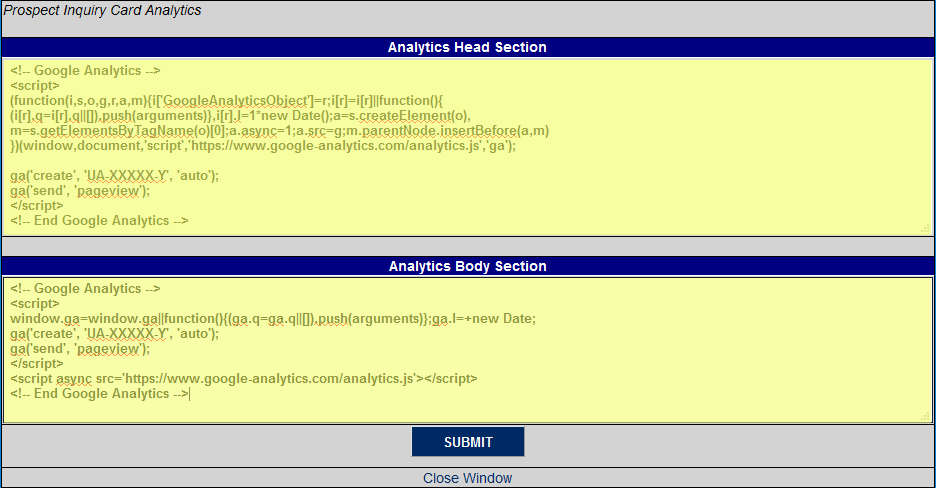
Analytics Section
Some institutions may wish to track visits to their prospect inquiry card. Using the analytics tracking code from Google, Facebook, or another provider, schools can gather data such as the number of visits to the inquiry card and the referral page. Some analytics trackers like Google require code in both the header and body of the page while others only require it in the header.
To add analytics tracking code, click the Analytics Section link.
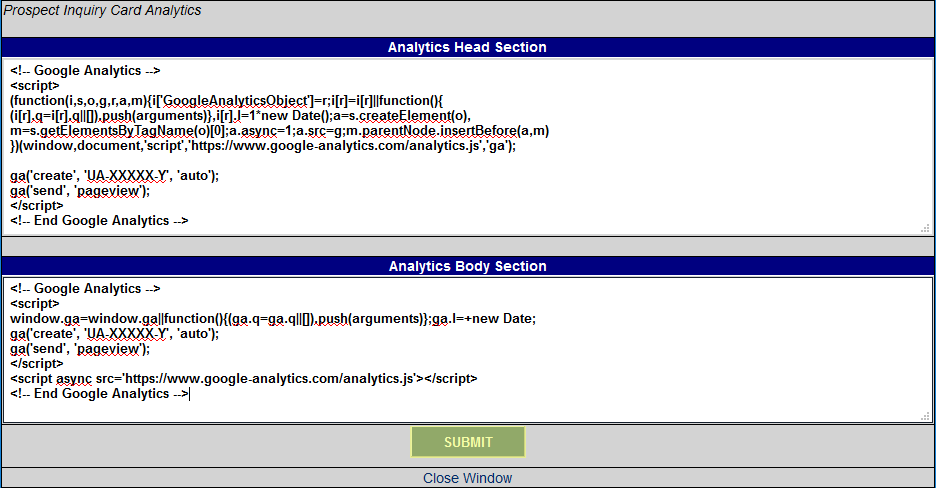
A new window will pop up. Enter analytics tracking code in the Head Section and/or Body Section and click Submit to save the changes and update the inquiry card.
Caution
If two single quotes (apostrophes for non-programmers) appear side-by-side in the analytics code, the code must be edited to function properly. For example, if the following exists: ’’ (two single quotes), then only one single quote will appear: ’.
In order for two single quotes to appear side-by-side, the number of single quotes must be doubled. For example, in order for ’’ to appear in the code, the administrator must enter ’’’’.
The same does not hold true for words surrounded by single quotes. For example, if the code says: ‘datalayer’, the text ‘datalayer’ will appear without changes.
Automatic Email Setup
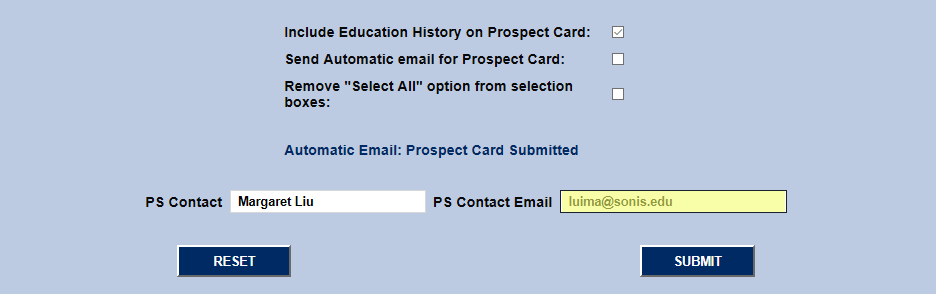
The bottom portion of the Prospect Web Inquiry Utility allows the school to generate automatic email responses to prospective students upon processing the Web Inquiry Card. To set up automatic emails, first check the Send Automatic Email for Prospect Card box.
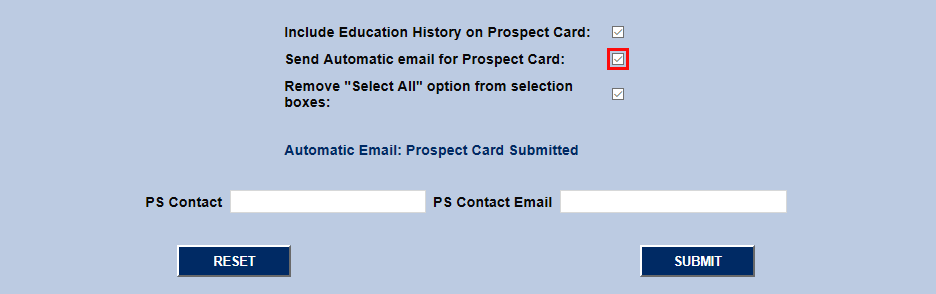
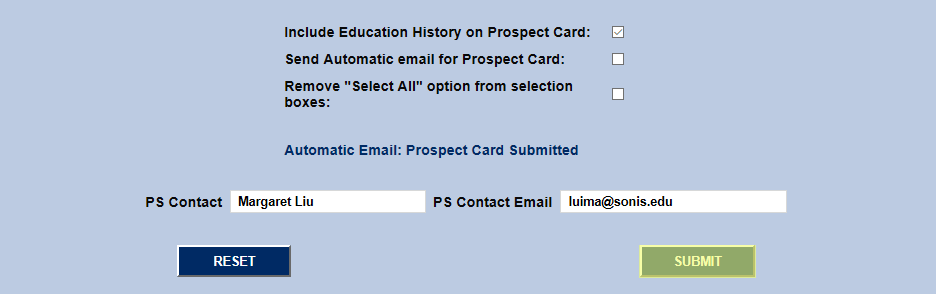
Enter the name of the SONIS user who will contact the prospective student in the PS Contact box and that person's email address in the PS Contact Email box. It is important that the email address be an address that is monitored regularly because it is how the prospect will contact the school. Click Submit to save these changes.
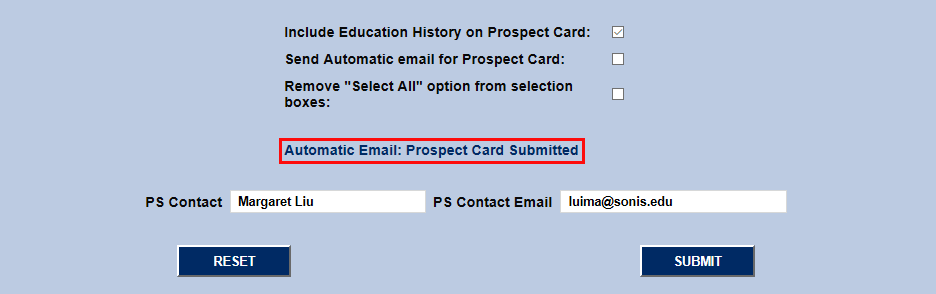
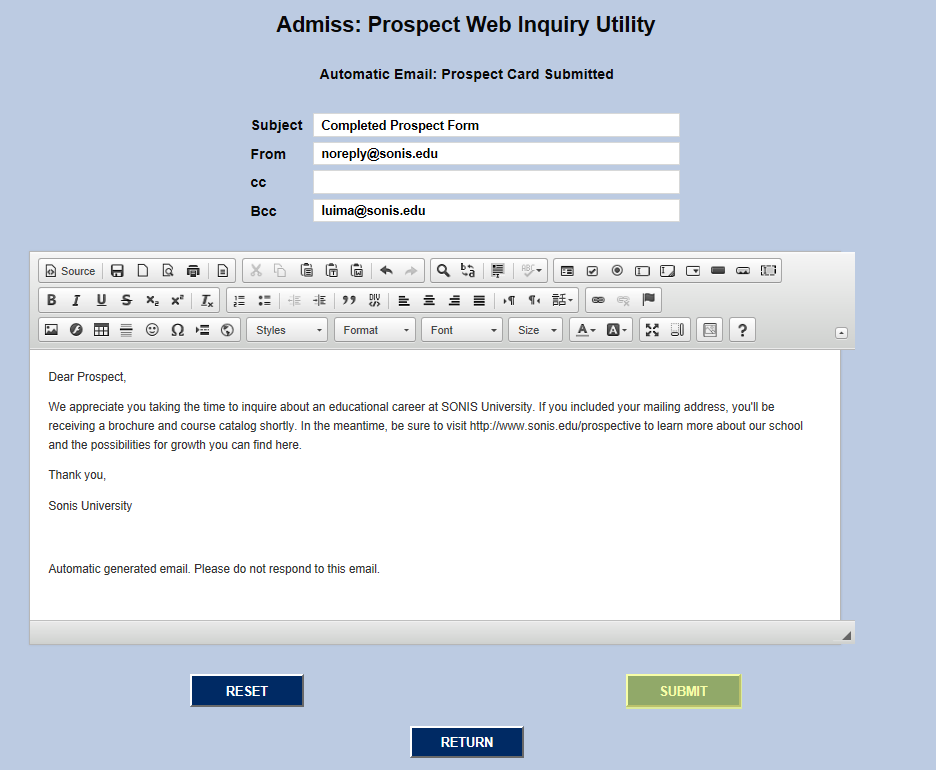
Click Automated Email: Prospect Card Submitted to set up the automatic email that will be sent to prospects. Enter a Subject and a From email along with Carbon Copy and Blind Carbon Copy addresses if needed. Unfortunately, no user-defined values can be inserted from the inquiry. Click Submit to save the email. Going forward, every student who fills out a Prospect Web Inquiry Card will be sent this email automatically.
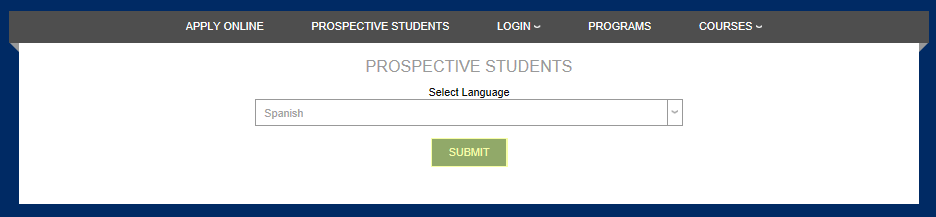
Language Translation
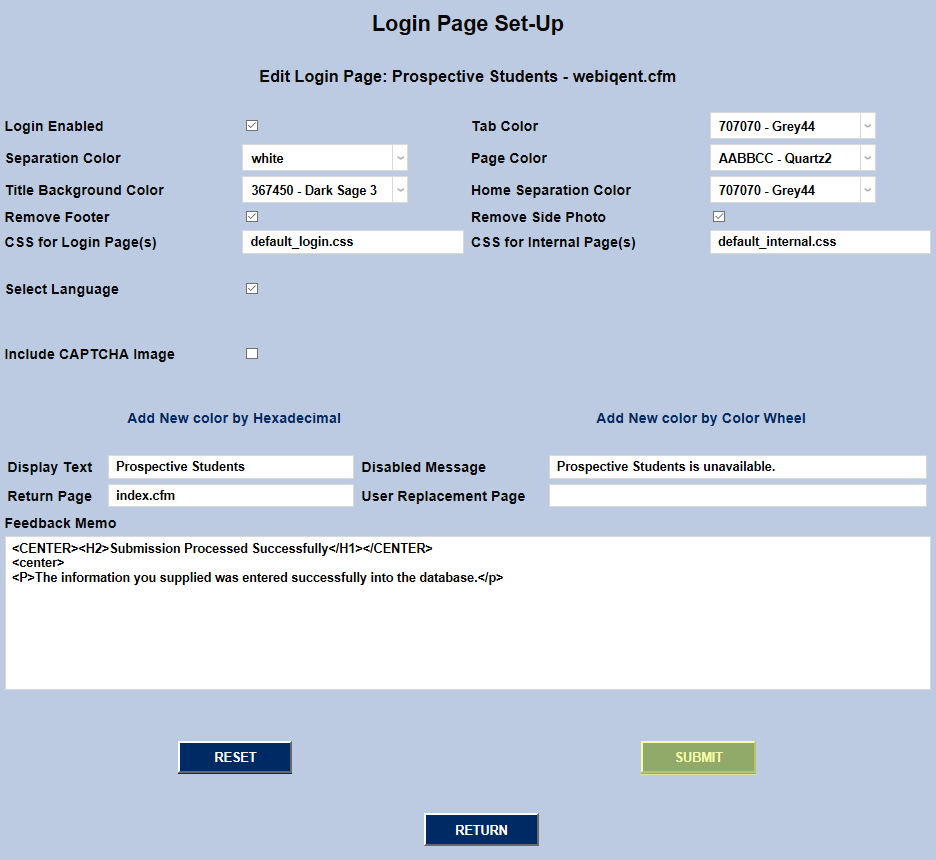
Schools that have language translation set up can allow prospective students to select their preferred language when filling out the Inquiry Card. To turn this feature on, navigate to the Login Page Set-Up utility under the Systems. Select Prospective Students and click Submit.


On the next page, check the Select Language box and click Submit to save the change.

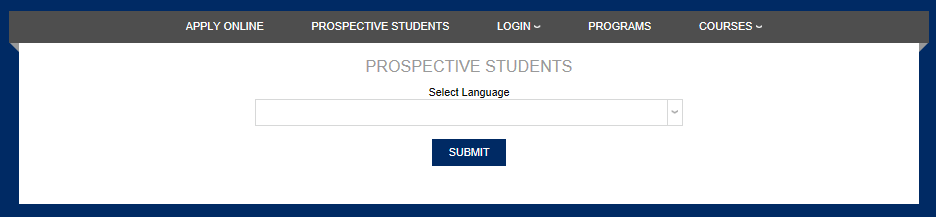
Once this feature has been turned on, any prospect who visits the Prospective Students page will be prompted to select a language before the Prospect Web Inquiry Card loads.
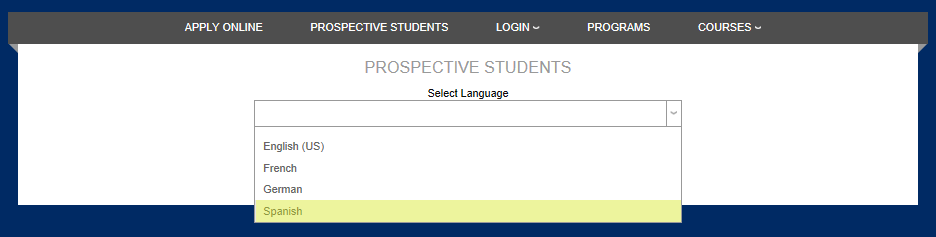
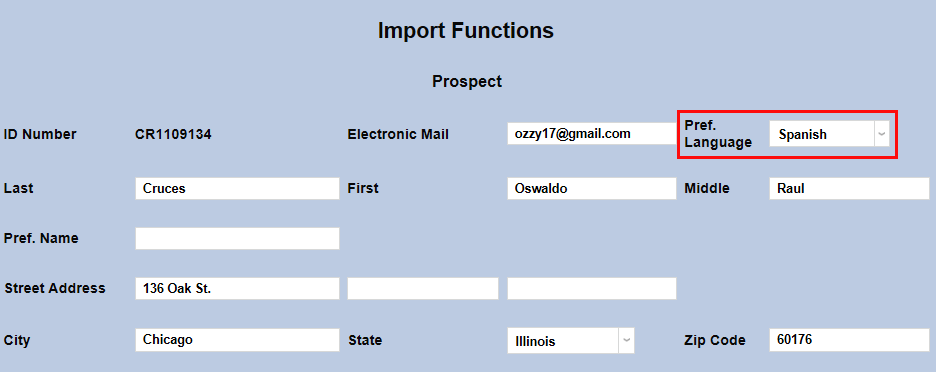
When the Web Inquiry Card loads, it will load in the prospect's chosen language.
In addition, the language chosen by the student will automatically be added as their preferred language.