Admissions Hub
Overview
The Admissions Hub groups many of the key tools used in the admissions process in one easy to access location. Admissions staff can use the hub to move applicants through every step of the application process, making changes to their data and their status and contacting them directly from these pages. Staff members can be designated as Admissions Counselors and can be assigned to specific applications, making it possible to filter active applications by the assigned counselor. The page also includes a direct link to the User Summary page for each applicant.
Admissions Counselor Designation
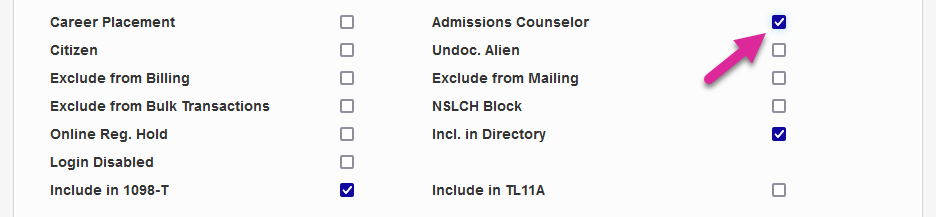
Many schools prefer to have each Admissions Counselor on their staff assigned to a specific pool of applicants. In order to make that assignment, Jenzabar SONIS users must first be designated as Admissions Counselors within SONIS. A user must have a module status of Staff in order to be set as an Admissions Counselor in SONIS.
To designate a user as an Admissions Counselor, navigate to their Biographic page and check the Admissions Counselor box. Then click Submit to save the change.
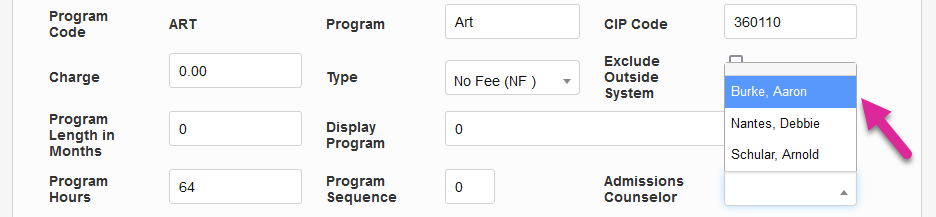
Once Admissions Counselors have been designated, schools can assign each Admissions Counselor to a specific set of programs. To assign a counselor to a program, navigate to the Programs page in the Systems hub.
Select a staff member from the Admissions Counselor menu and click Submit to save the assignment.
Filter & Sort Options
By default, the Admissions Hub displays all active applications in two lists: those ready to be imported and those that have already been imported. These lists can be narrowed down using four different filters, available in the left-navigation menu under the Search Filter label.
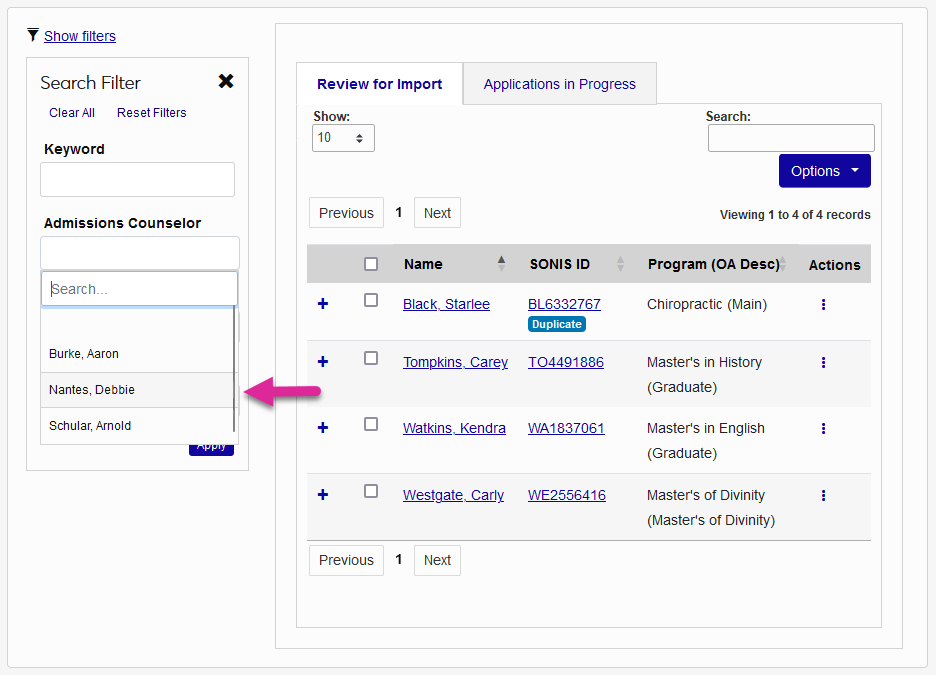
To filter applications by the staff member assigned to the program of interest selected on the application, choose a counselor from the Admissions Counselor menu and click Apply.
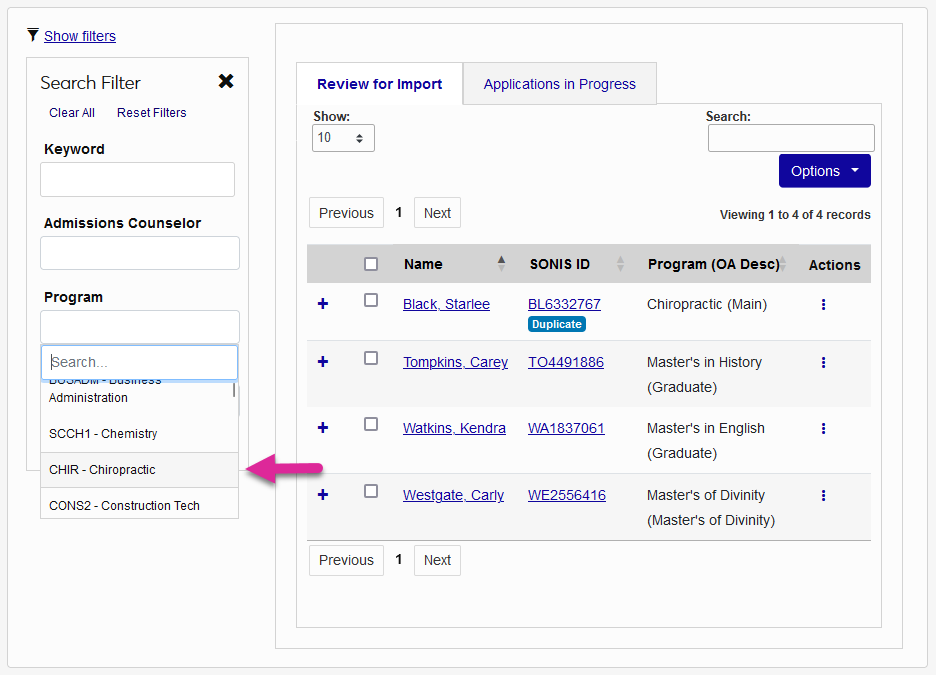
To filter applications based on the program of interest, select one or more options from the Program menu and click Apply.
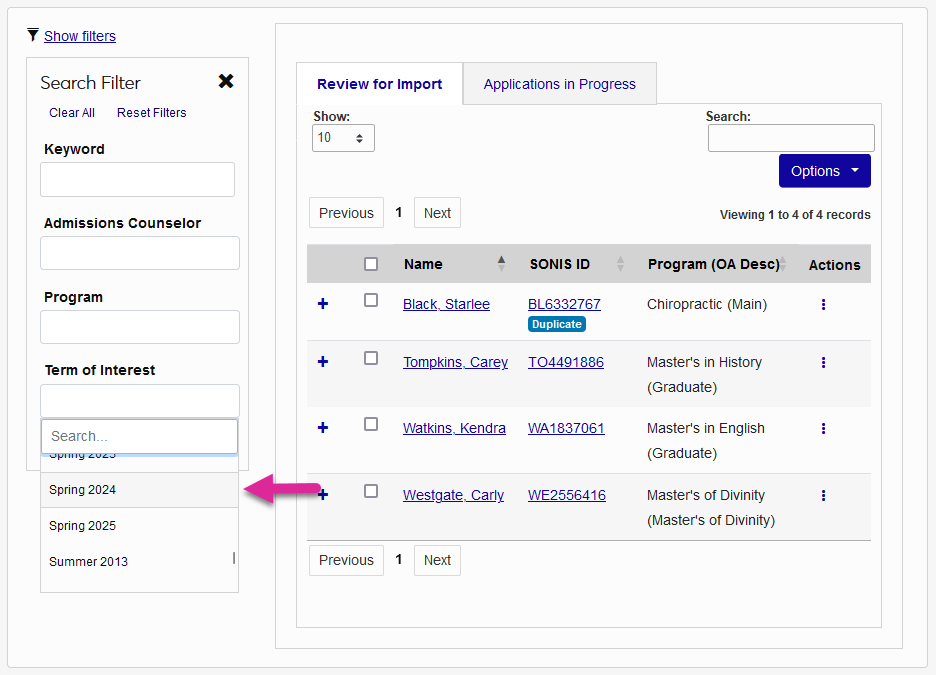
To filter applications by the term of interest that the applicant has selected, select a value from the Term of Interest menu and click Apply.
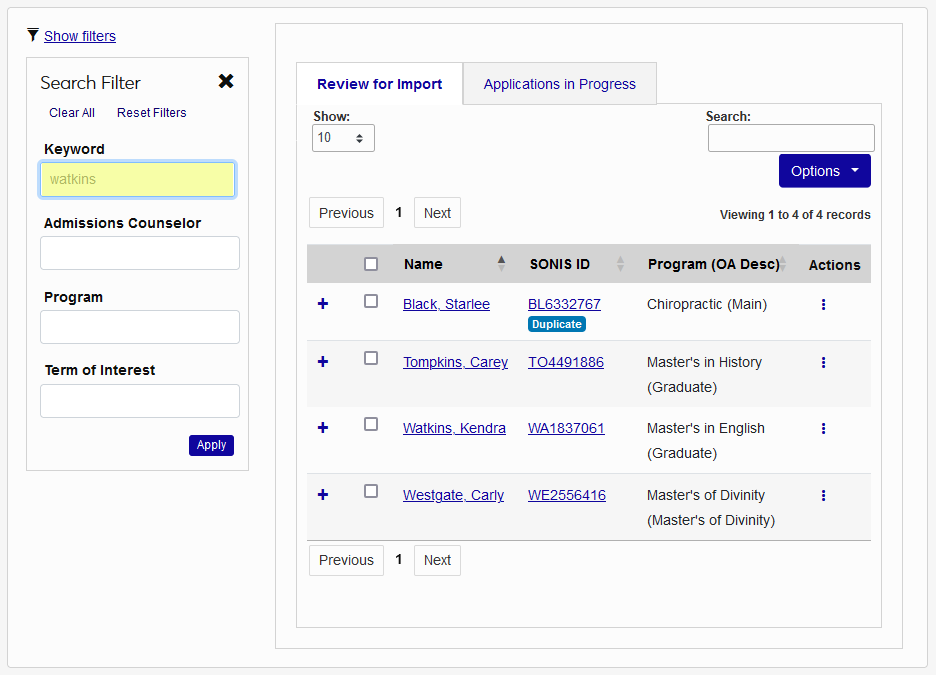
You can also filter the applications by a search term using the Keyword field. Any word that appears in the displayed data can be used as a filter. Click Apply to execute the search.
You can use the Show Filters toggle or the X to open and close the filters menu.

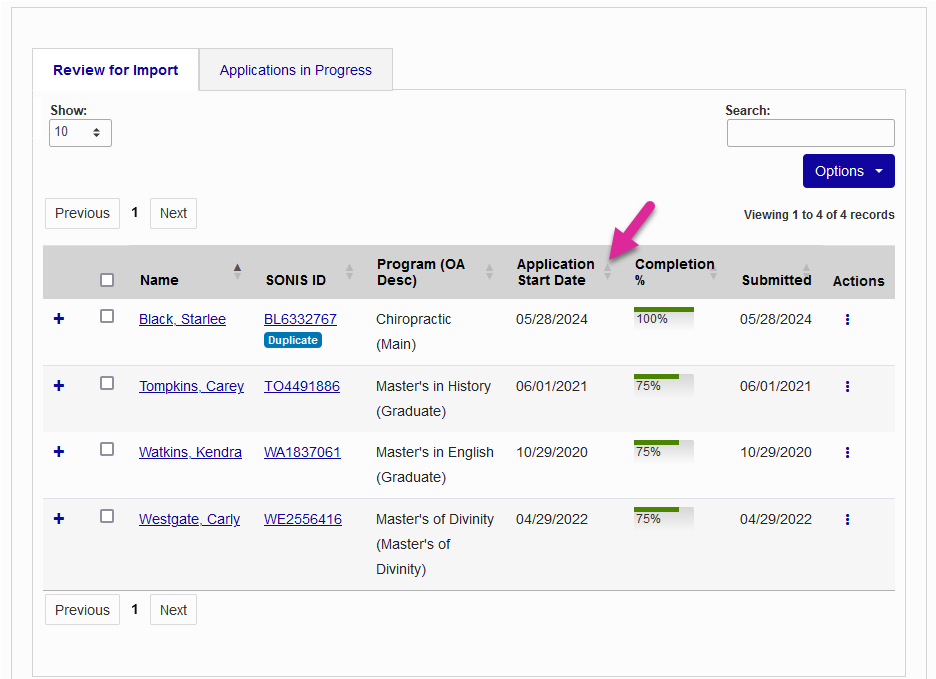
Additionally, you can sort the applications by any column of the table in ascending or descending order using the up and down arrows located next to each column header.
Managing Applications
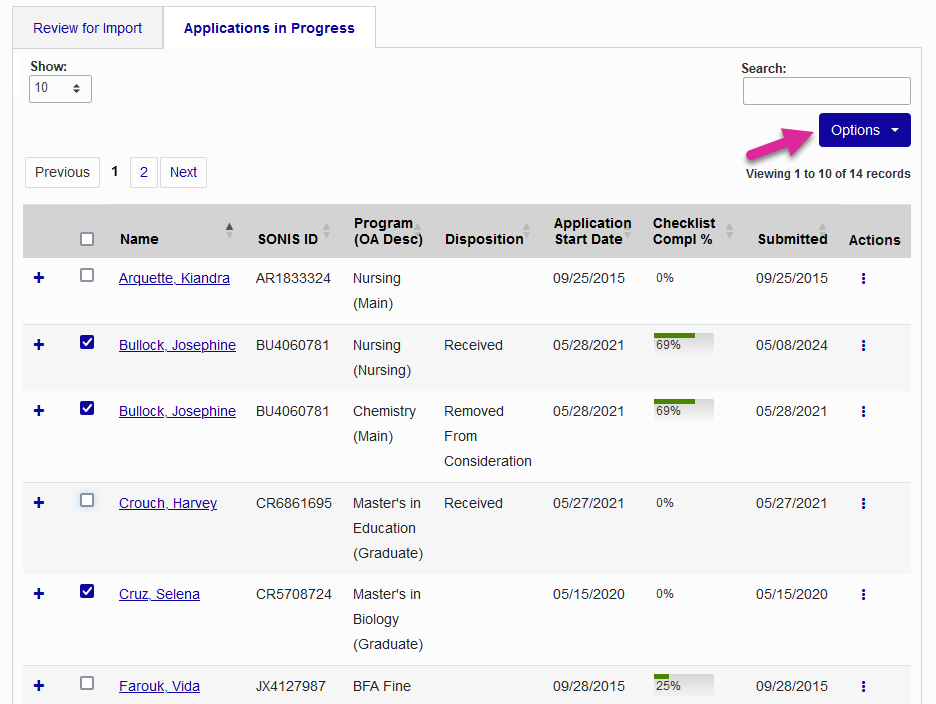
The Admissions Hub sorts all applications into two main tabs: Review for Import and Applications in Progress.
Review for Import
The Review for Import tab displays Jenzabar SONIS online applications that have been started by an applicant but have not yet been imported to the system, creating a user record for the applicant.
The Completion Percentage column allows Admissions Counselors to quickly see how many pages of the application have been completed.
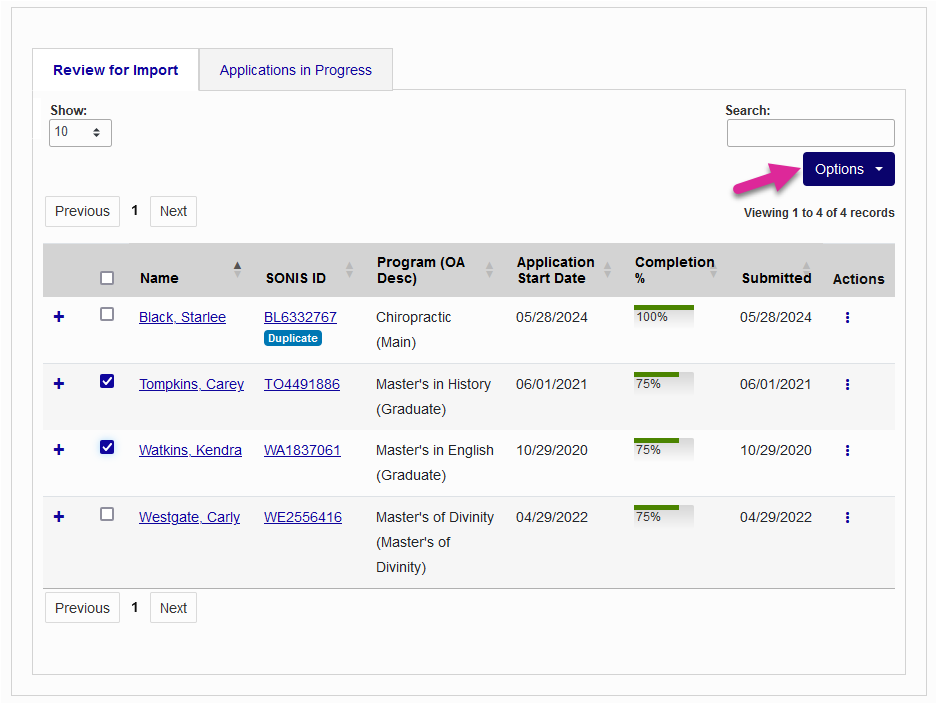
Use the Search box to locate specific applications. The Show menu controls how many applications appear per page.
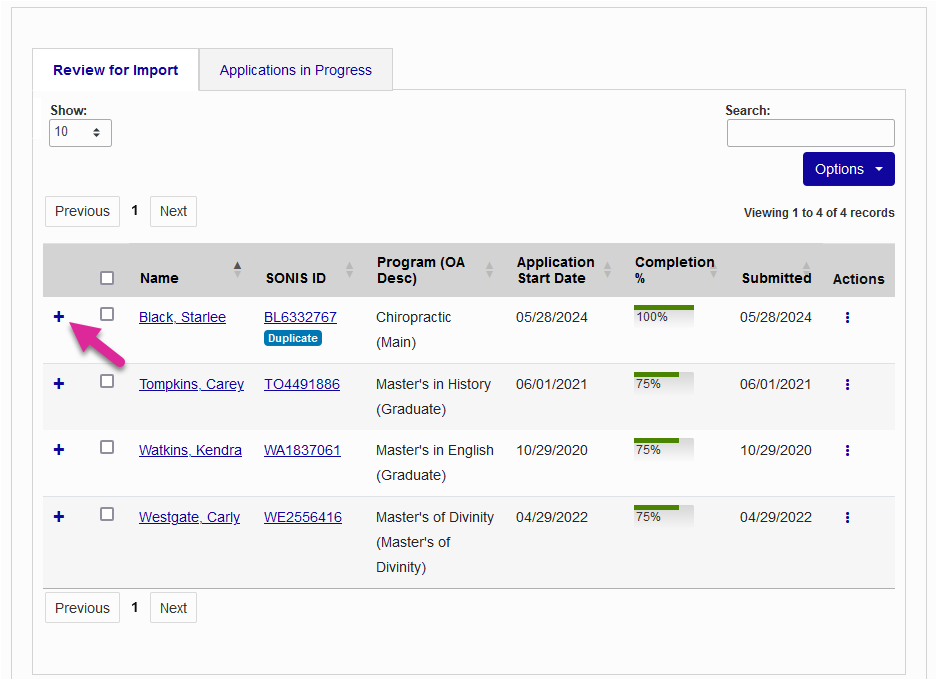
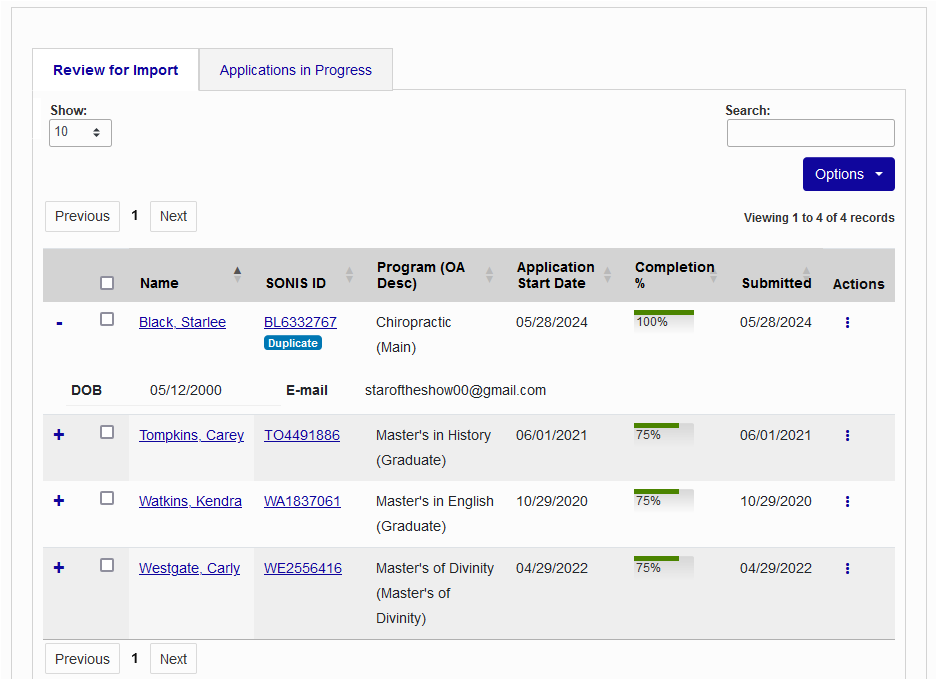
Click the + button on any record to view additional details.
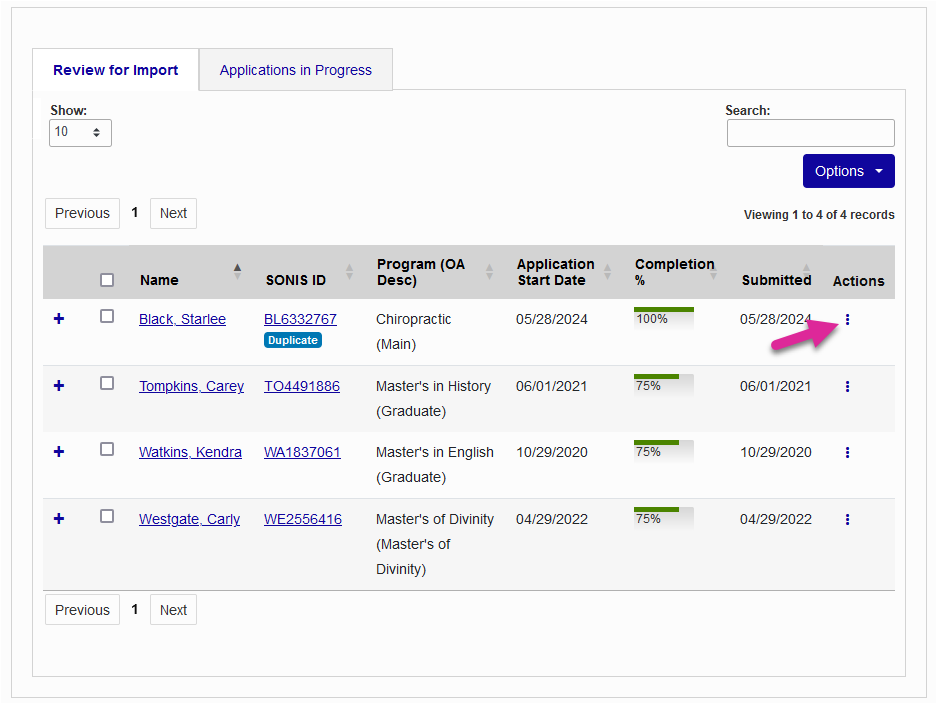
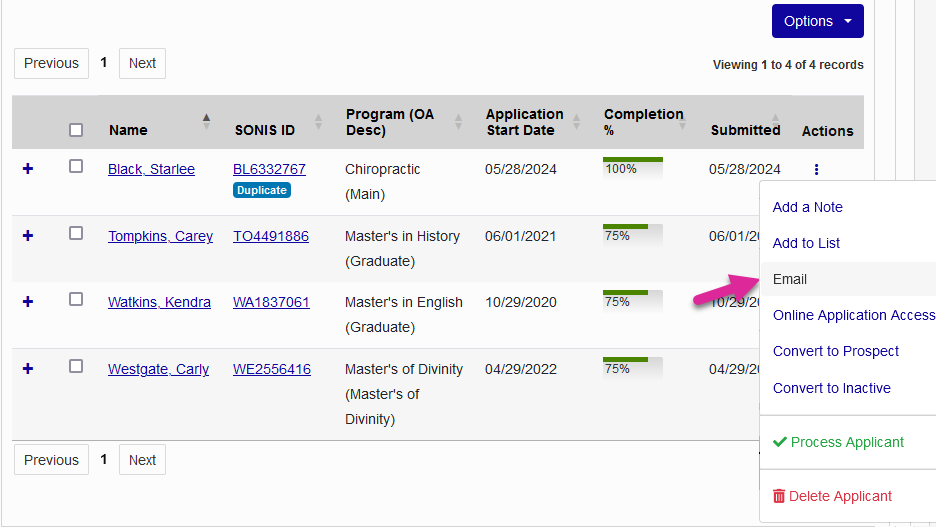
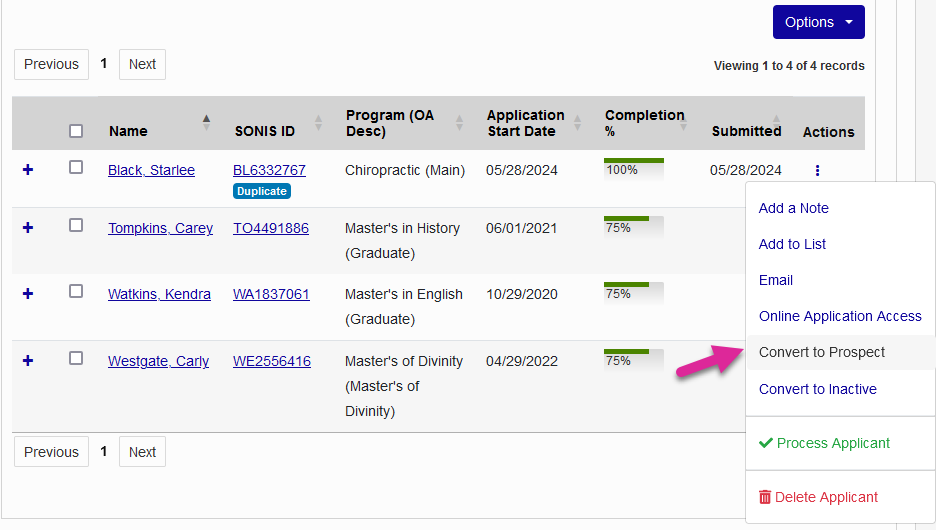
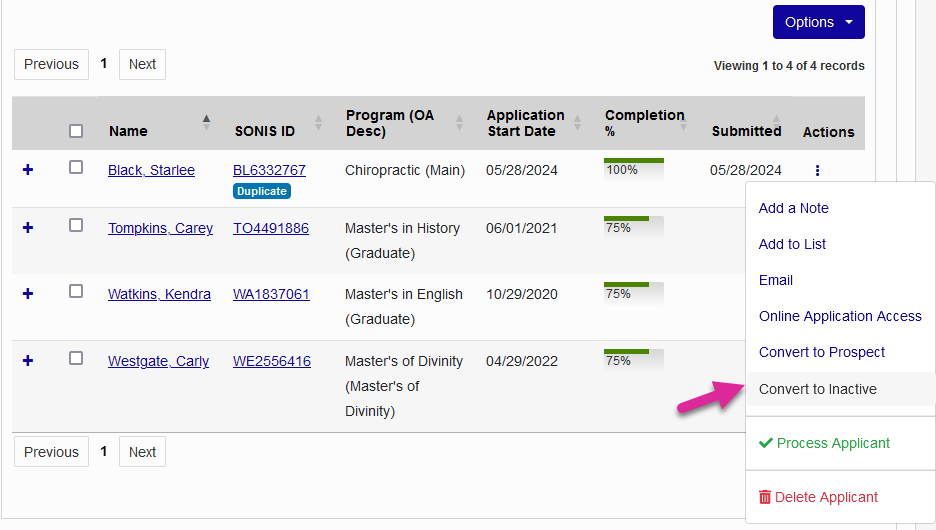
Click on a user's name or SONIS ID to view their User Summary page. You can interact with a single application by clicking the three dot icon under the Action column or make changes in bulk by selecting applications and clicking the Options button. Both menus offer the same options.
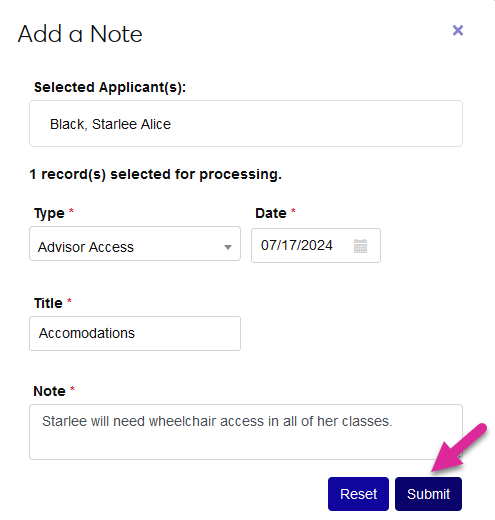
The Jenzabar SONIS Notes record is used to leave free-form comments on a student's record. It can be used for a wide variety of notations. Click Add a Note and fill out the fields in the pop-up card to add a note to the applicant's Users hub Notes page record.
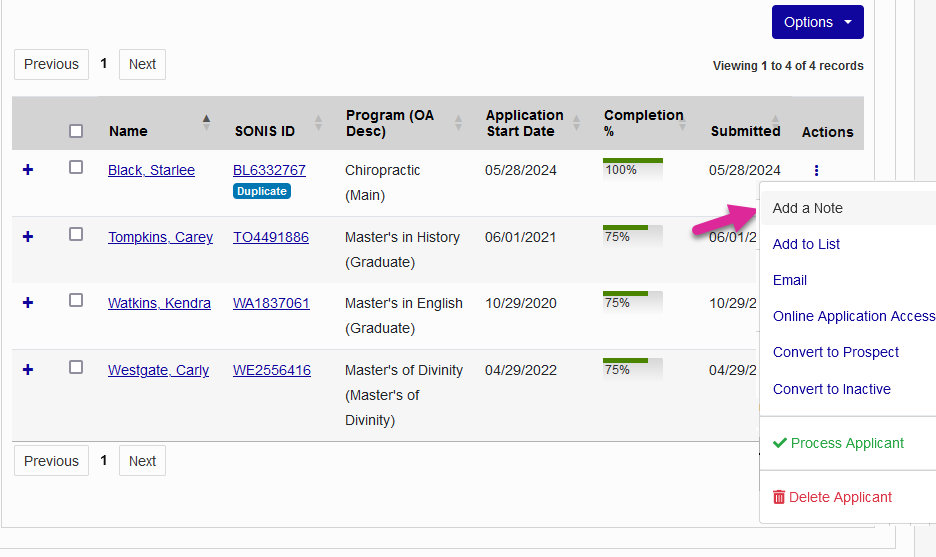
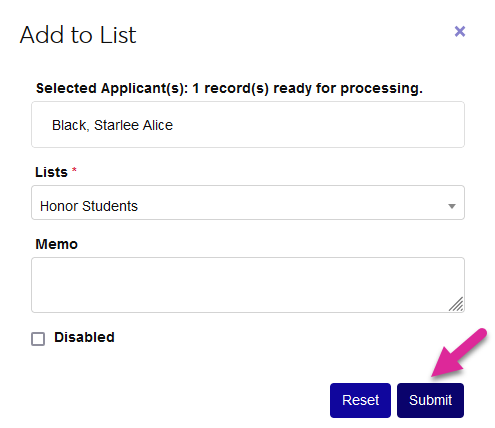
Jenzabar SONIS users can be added to Lists, grouping them together for various purposes like bulk emails, reports, holds, etc. Click Add to List and select a list from the pop-up card to add the user to a list. The Memo field is optional.

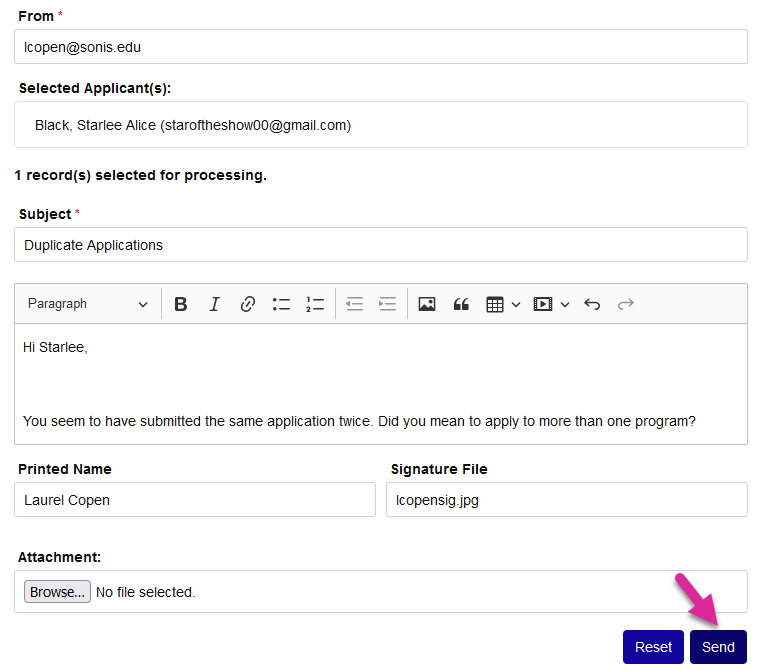
Click the Email button to compose and send an email to the email address that the applicant(s) provided. All the standard SONIS email functionality is available, including the ability to add attachments and use variants that are replaced text customized to the user.
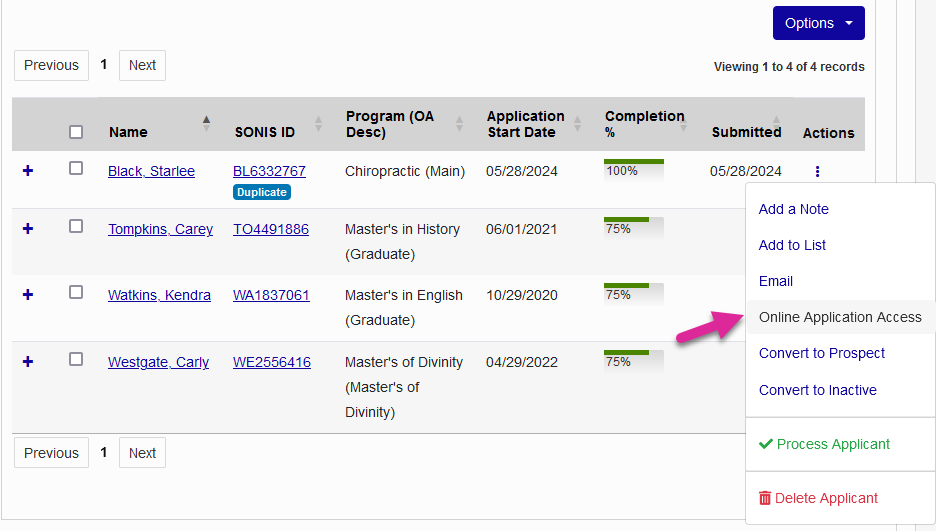
You can access this user's application via User Portal Access by clicking the Online Application Access button and clicking Load Portal on the pop-up card. This option is only available when using the three dot icon menu to manage an individual user since you cannot access more than one application at a time.
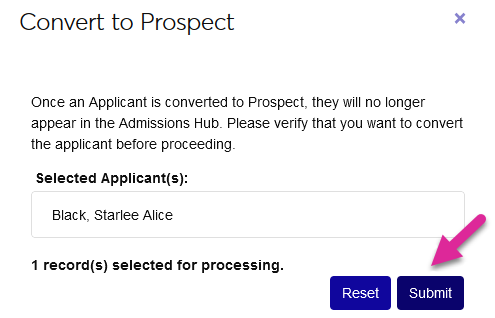
Click Convert to Prospect to create a Prospect record for this person. This allows you to retain the applicant's contact information and other details for recruitment purposes even if they did not complete or submit their application.
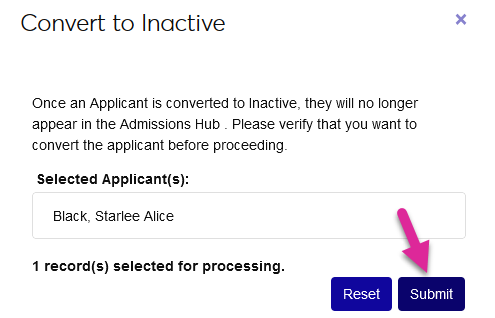
Click Convert to Inactive to mark the application as inactive and remove it from the list without deleting it.
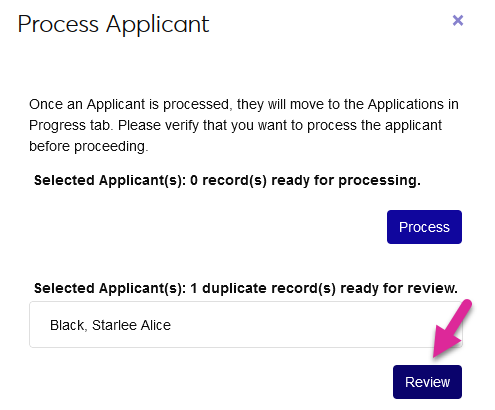
Click Process Application to import the application and create an Applicant record for the person. Duplicate checking occurs as part of this process.
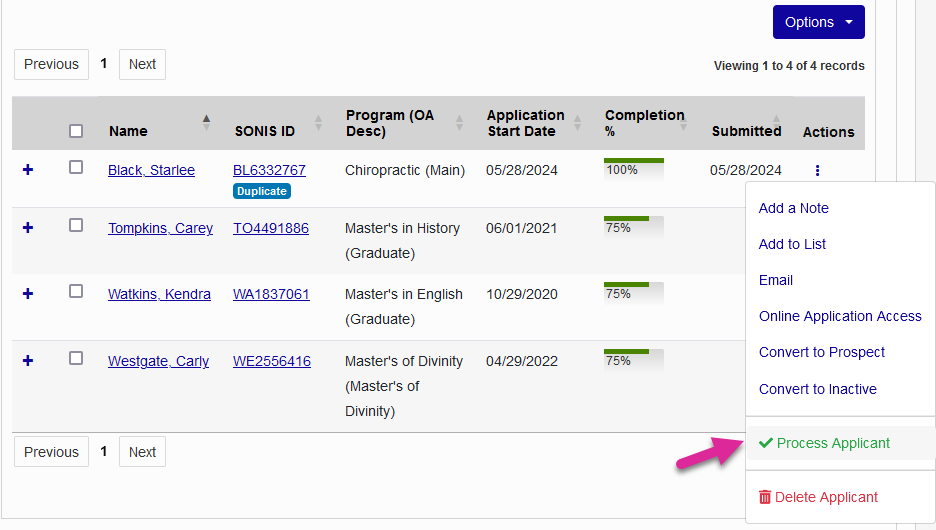
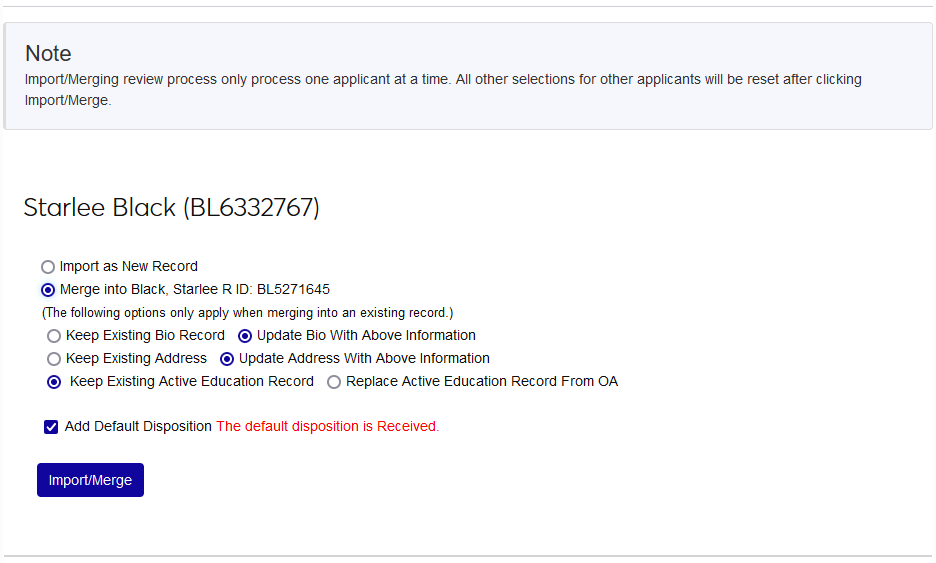
If the system has flagged the user as potentially matching an existing Jenzabar SONIS user based on the duplicate-checking settings in OA Setup, you will be asked to review the existing applicant record(s) before processing.
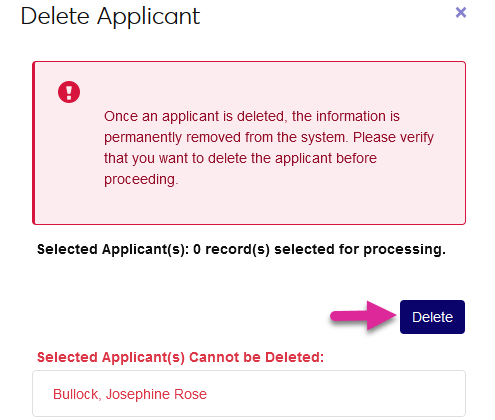
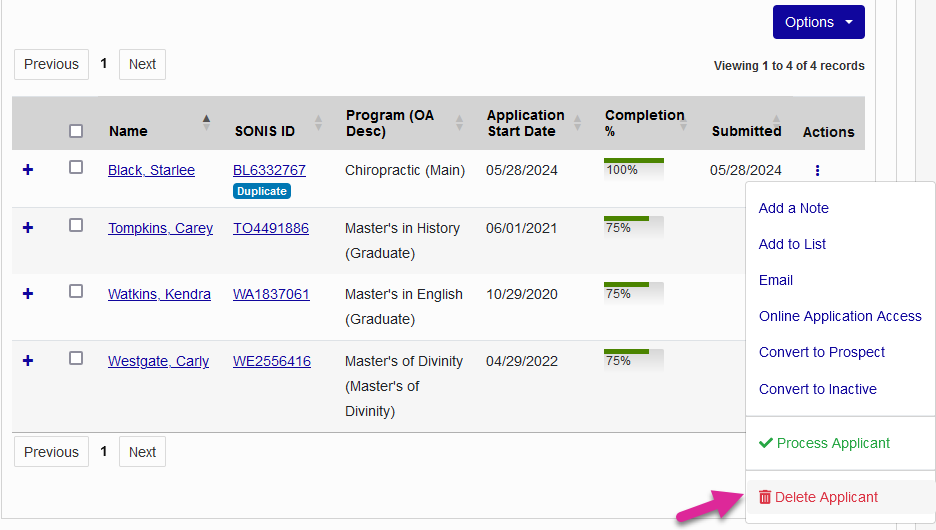
Click Delete Applicant to remove the application data from Jenzabar SONIS.
Warning
Once an application has been deleted, it cannot be restored.

Applications in Progress
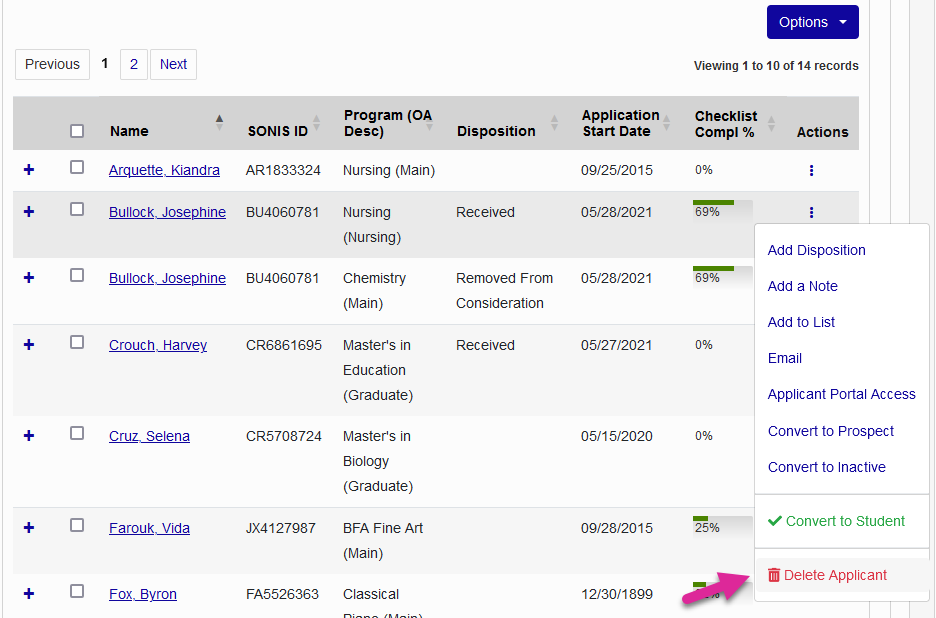
The Applications in Progress tab displays active applications that have been submitted. These applicants will all have records in the Jenzabar SONIS system with an Applicant module status.
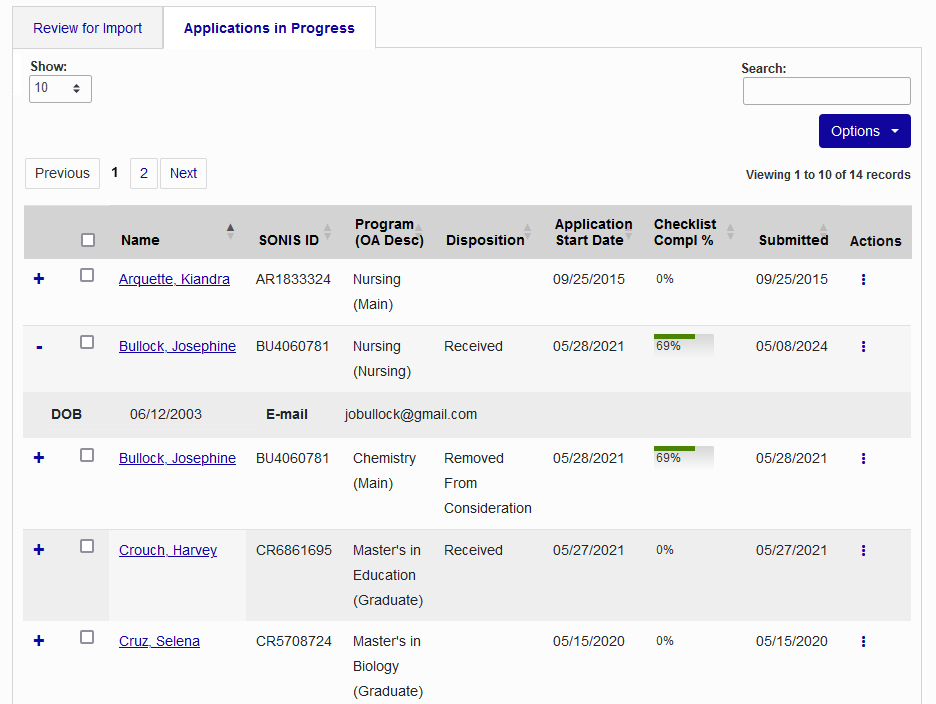
The Checklist Completion % column allows Admissions Counselors to quickly see how many Application Checklist items have been completed. Click the + button on any record to view additional details.
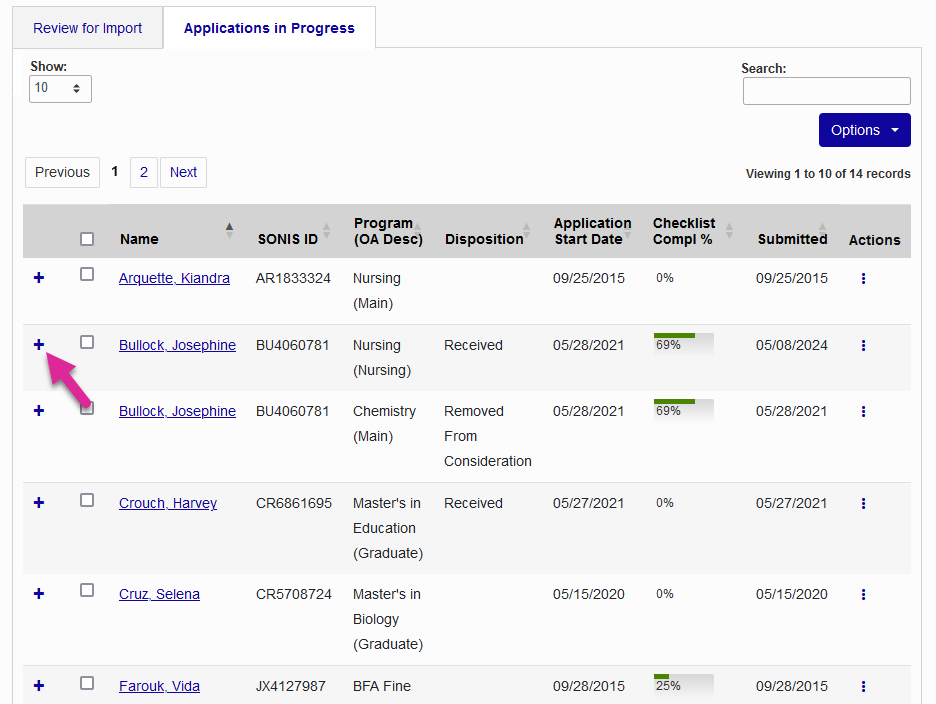
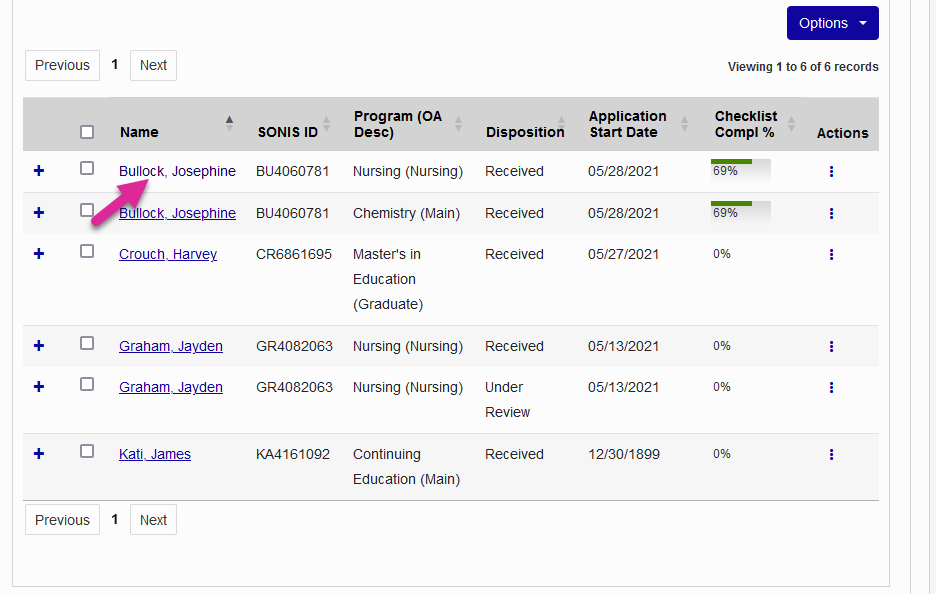
Click on a user's name or SONIS ID to view their User Summary page.
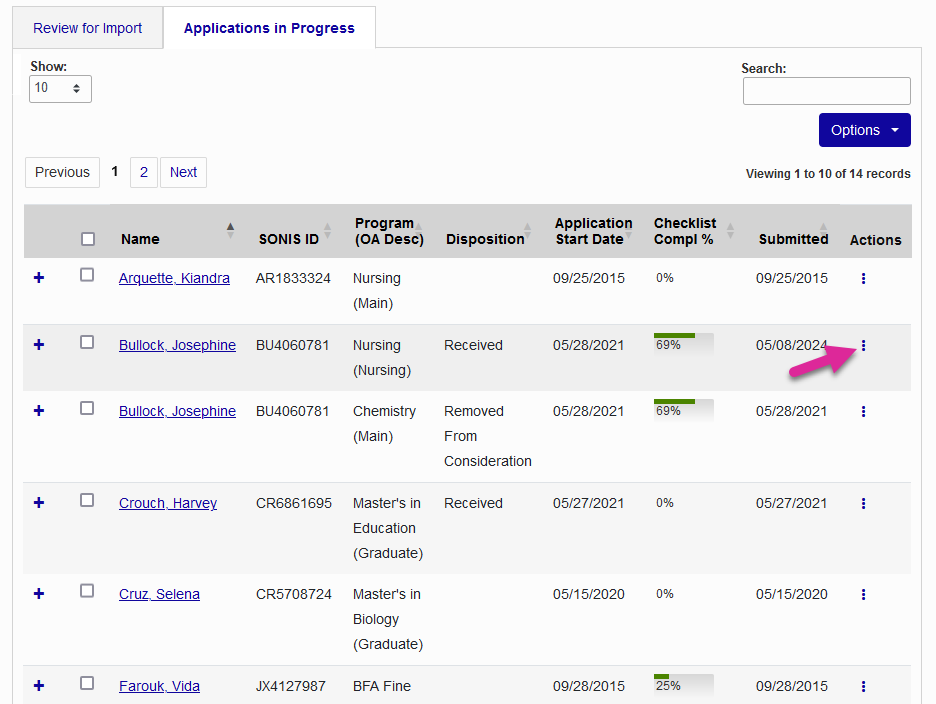
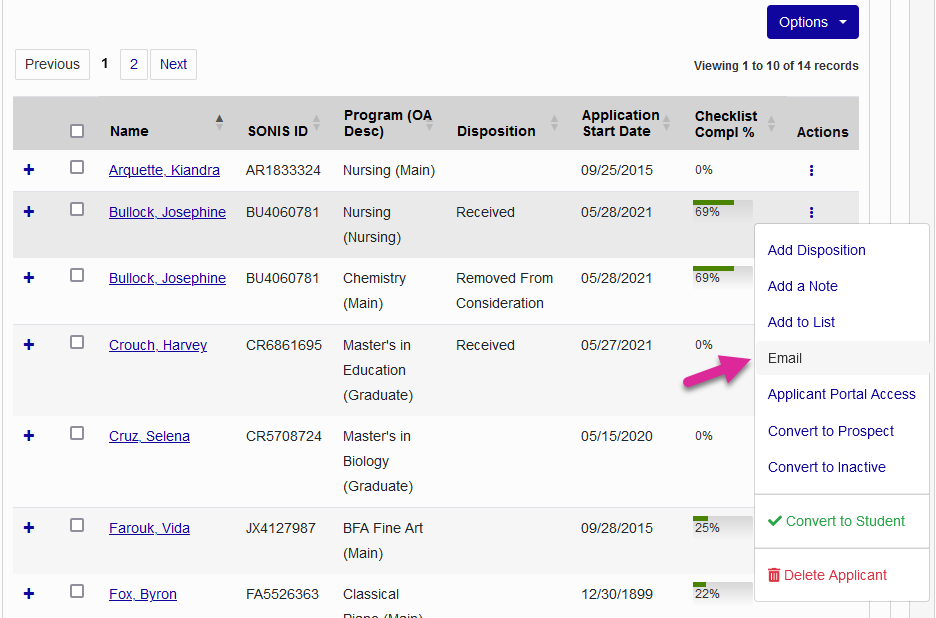
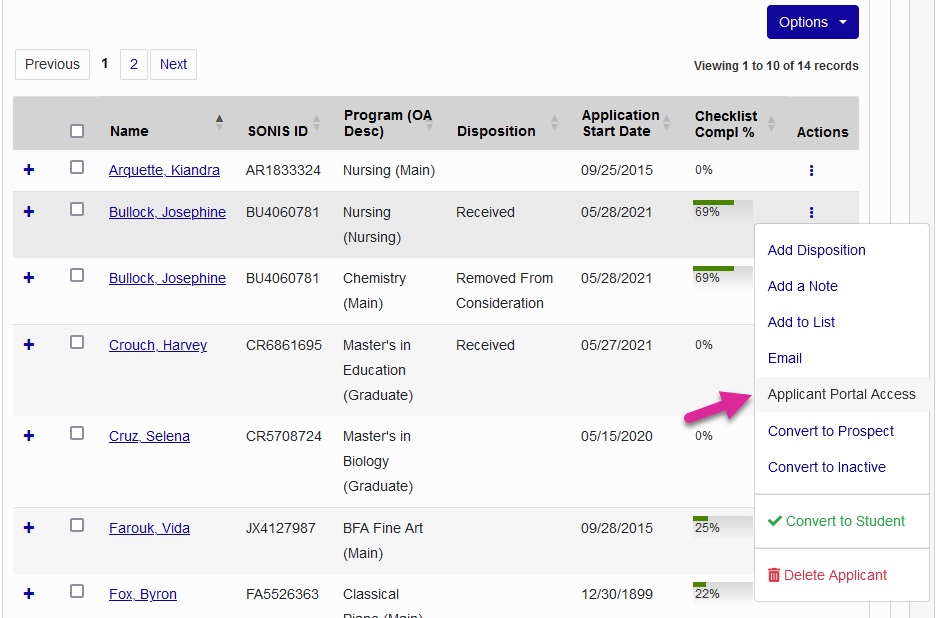
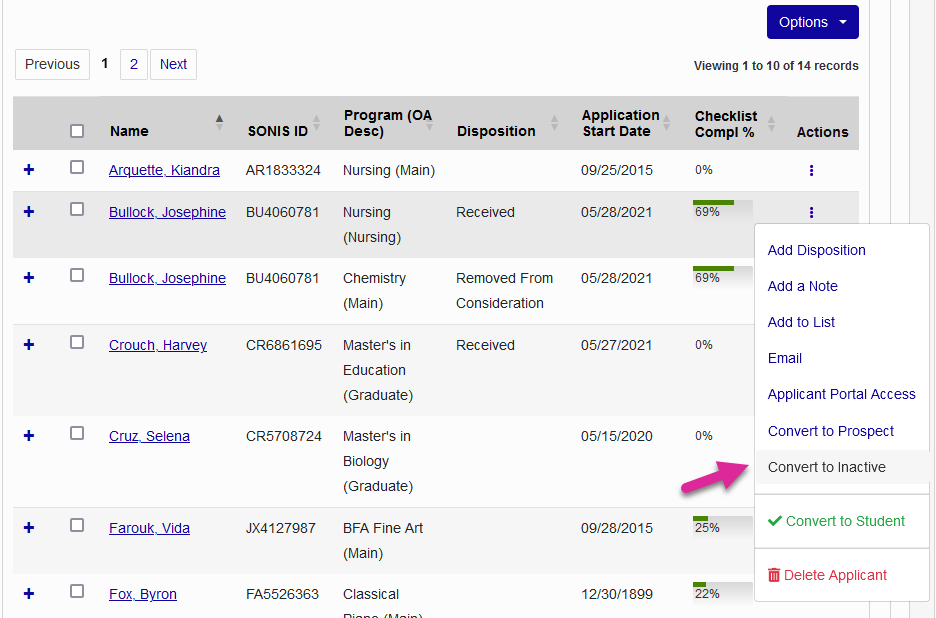
You can interact with a single application by clicking the three dot icon under the Action column or make changes in bulk by selecting applications and clicking the Options button. Both menus offer the same options.
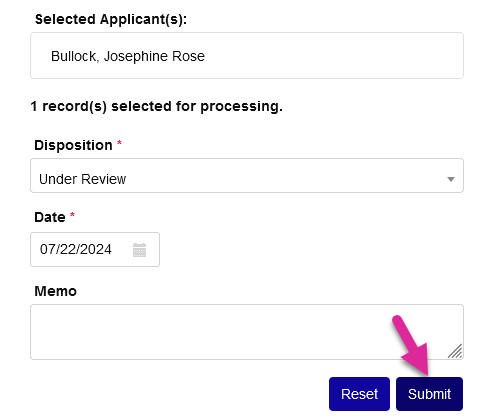
Dispositions are used to track an applicant's status as they move through the admissions process. Click Add Disposition to add a new disposition for the applicant. From the pop-up card, select a disposition, enter a date, add an optional memo, and click Submit to add it. This will now be the applicant's active disposition.

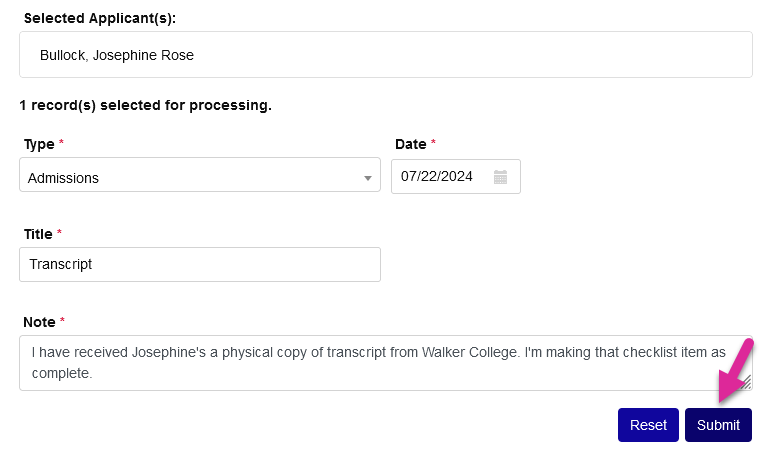
The Jenzabar SONIS Notes record is used to leave free-form comments on a student's record. It can be used for a wide variety of notations. Click Add a Note and fill out the fields in the pop-up card to add a note to the applicant's Users record.

Jenzabar SONIS users can be added to Lists, grouping them together for various purposes like bulk emails, reports, holds, etc. Click Add to List and select a list from the pop-up card to add the user to a list. The Memo field is optional.
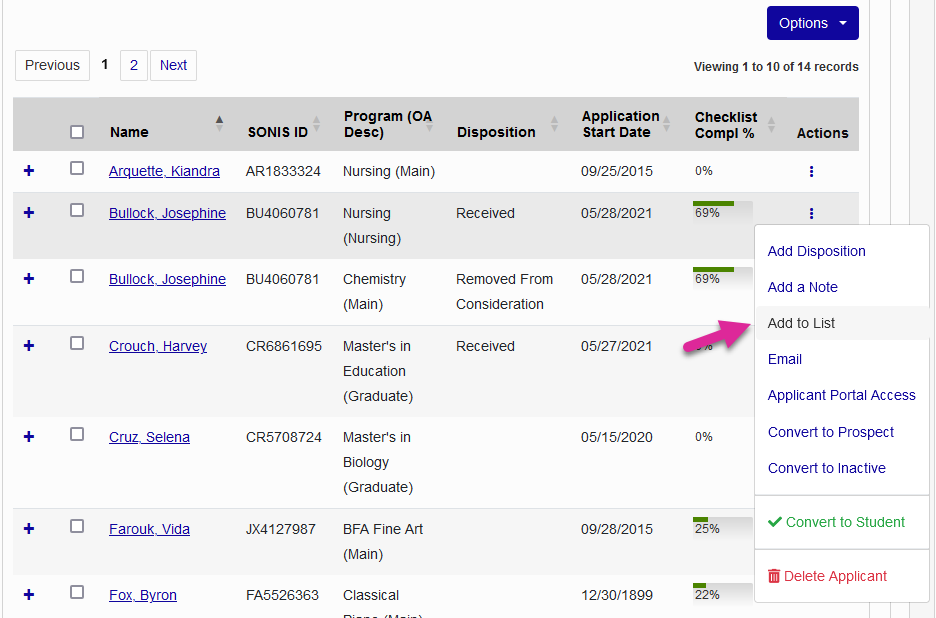

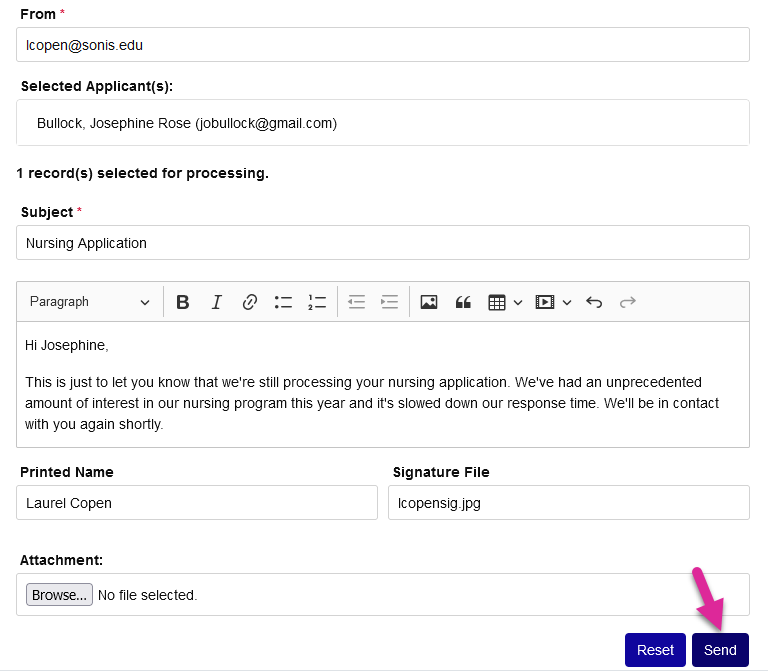
Click the Email button to compose and send an email to the email address that the applicant(s) provided. All the standard SONIS email functionality is available including the ability to add attachments and use variants that are replaced text customized to the user.
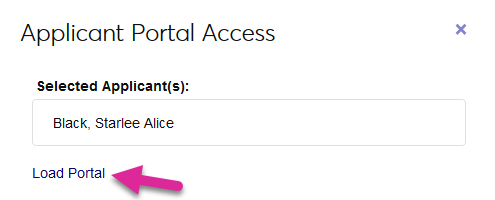
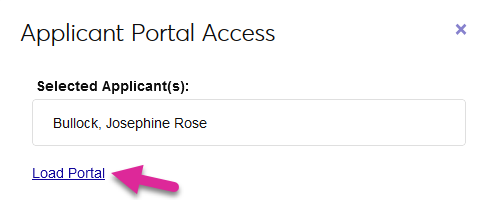
You can access this user's Applicant Portal via User Portal Access by clicking the Applicant Portal Access button and clicking Load Portal on the pop-up card. This option is only available when using the three dot menu to manage an individual user since you cannot access more than one user's portal at a time.
Click Convert to Prospect to change this user's module status from Applicant to Prospect. This removes the user's access to the Applicant portal and removes them from this list, but allows you to retain the applicant's contact information and other details for recruitment purposes.
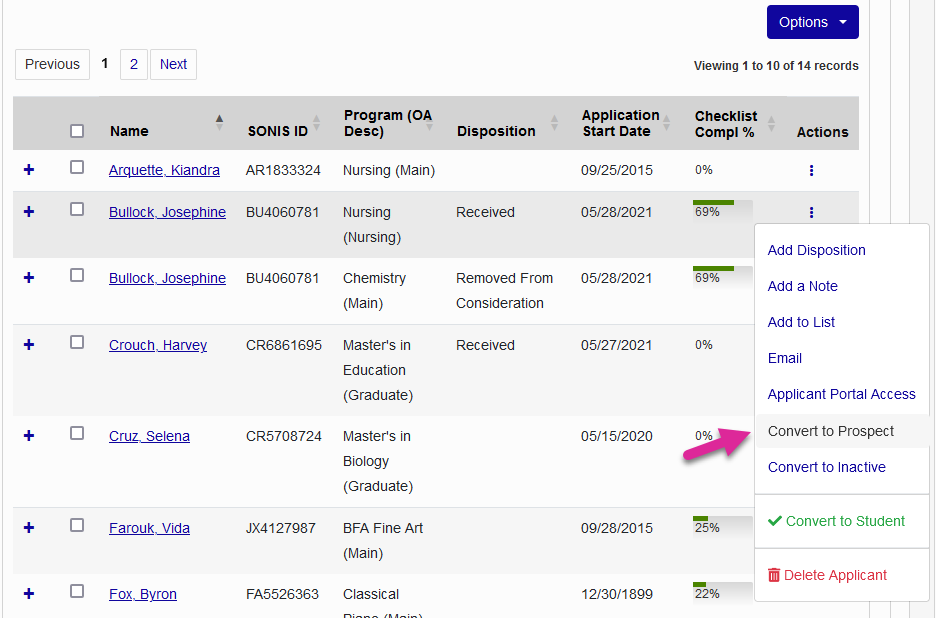

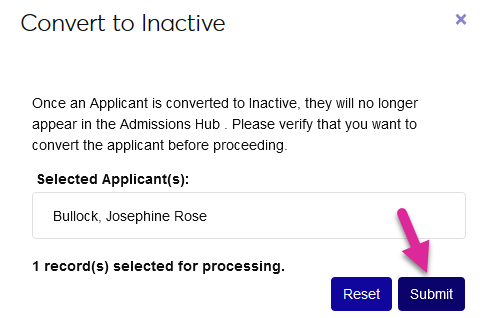
Click Convert to Inactive to change the user's module status from Applicant to Inactive and remove them from the list without deleting their Jenzabar SONIS profile.
Click Convert to Student to give the user a student status. The user's Application record will be updated with the date that the user was made a student. This step should only be taken after the applicant has been accepted and confirmed that they will be attending.
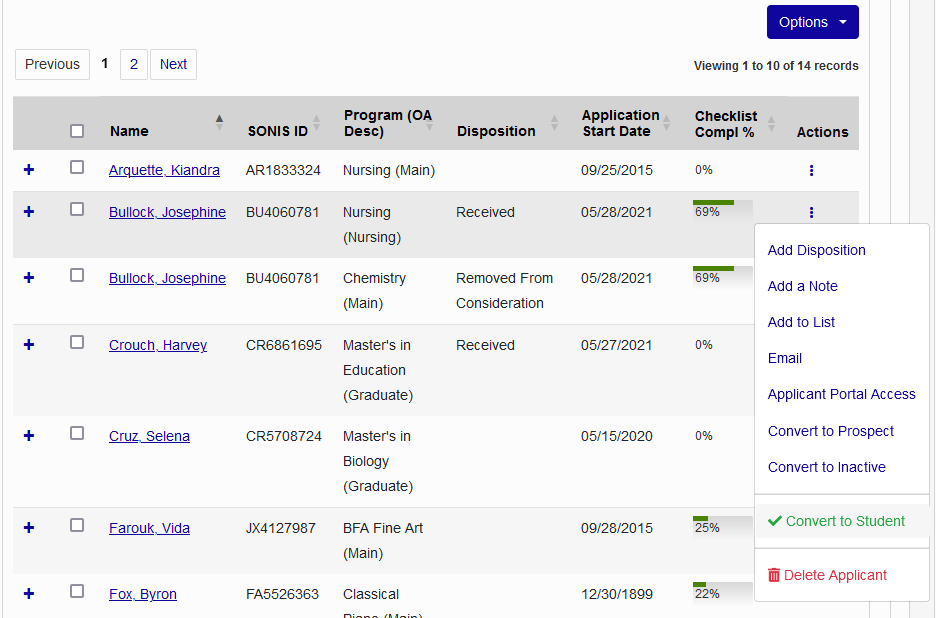

Click Delete Applicant to remove the user and all of their data from Jenzabar SONIS.
Warning
Once an applicant has been deleted, their records cannot be restored.