Web Options
Overview
Web Options is one of the most vital pages in the Jenzabar SONIS system. Along with System Variables, Web Options allows institutions to customize how they use SONIS in ways both big and small. Many utilities and features are turned on and off and otherwise modified from the Web Options page. In addition, registration settings and the various batch folders are controlled from this page. The utilities and features listed below are some of the many that connect to the Web Options page.
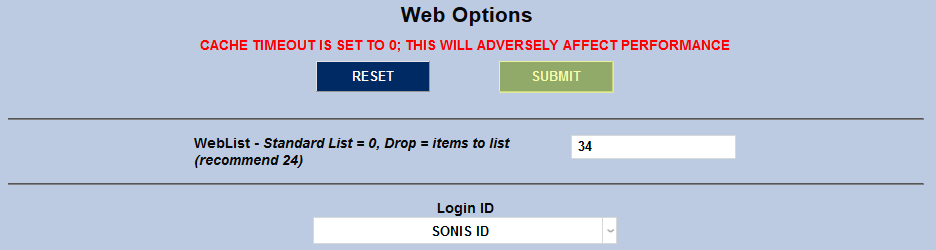
WebList
The WebList is the menu that appears on the left side of the page in Jenzabar SONIS. The size of this menu can be changed with the WebList size setting. While the page note suggests 24 as the recommended size, for most modern, high-resolution computers, 34 is actually the better value to place in this field.

Login Settings
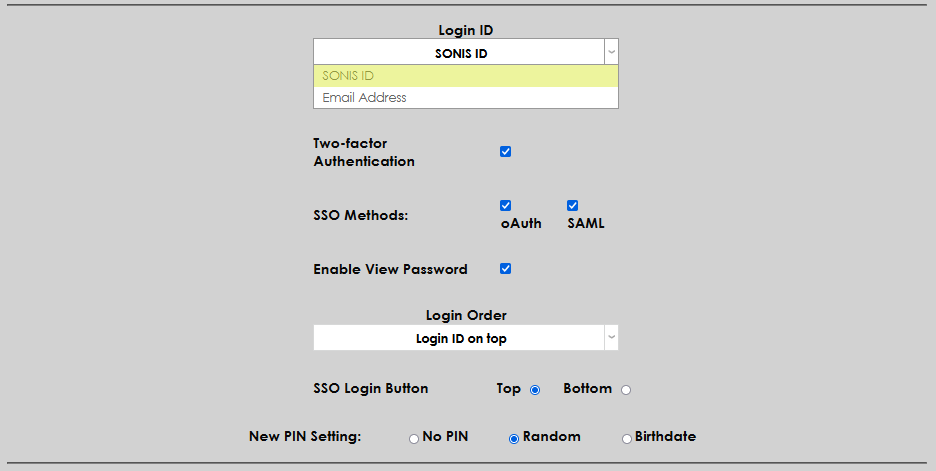
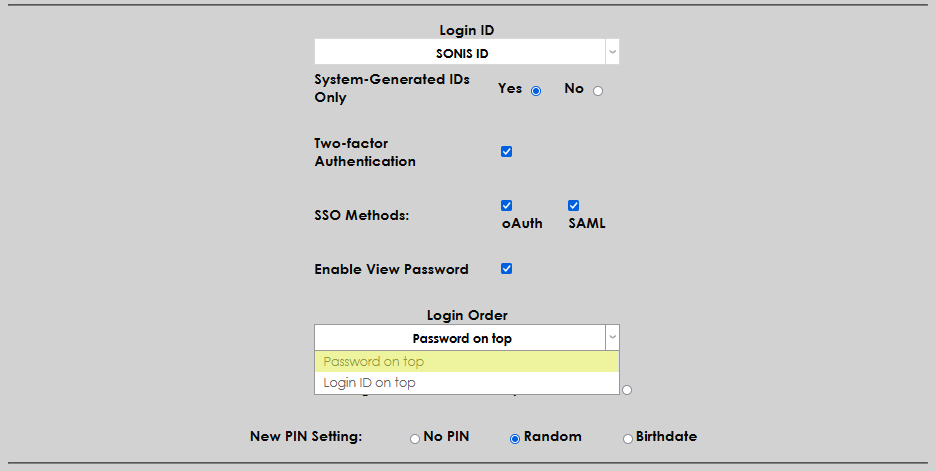
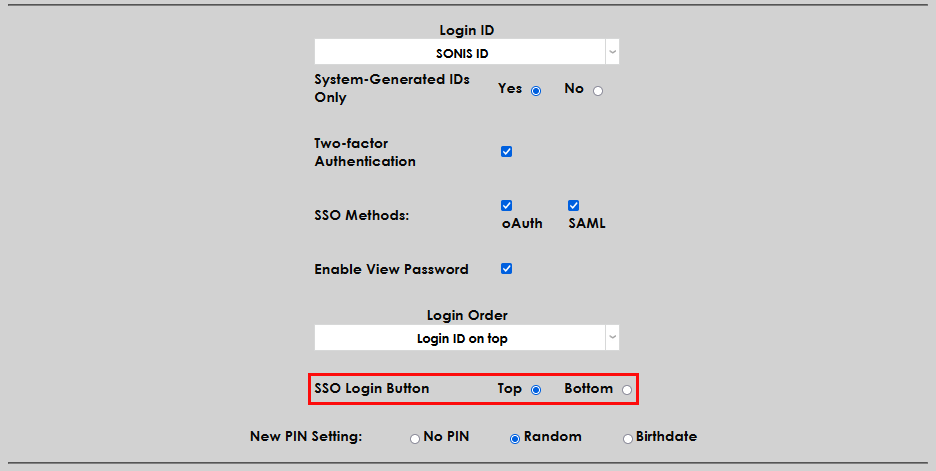
The Login ID menu allows administrators to choose how all SONIS users will log in to the system. Choose SONIS ID to require users to enter their SONIS ID when logging in or Email Address to require them to use their email address instead. Keep in mind that users without a valid email address in their Preferred Address record will not be able to log in if the email option is selected.
The System-Generated IDs Only option controls how SONIS ID numbers are provisioned. If this setting is active, users will automatically be assigned a SONIS ID number as they are added to the system and no manual creation of IDs will be allowed. The Yes setting is recommended.

If the Two Factor-Authentication box is checked, users will be required to use a second form of identification to log in to the system. This should not be turned on unless Two-Factor Authentication has been properly set up and tested.
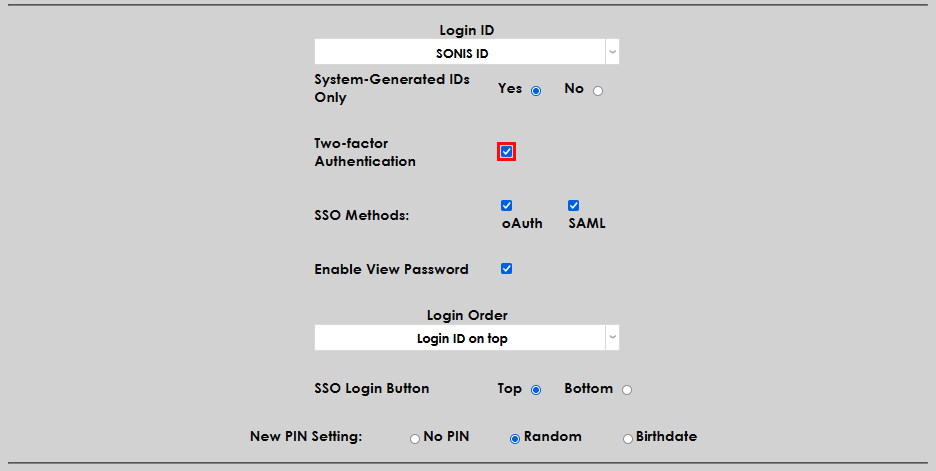
This setting overrides the individual Active settings in the Two-Factor Authentication utility.
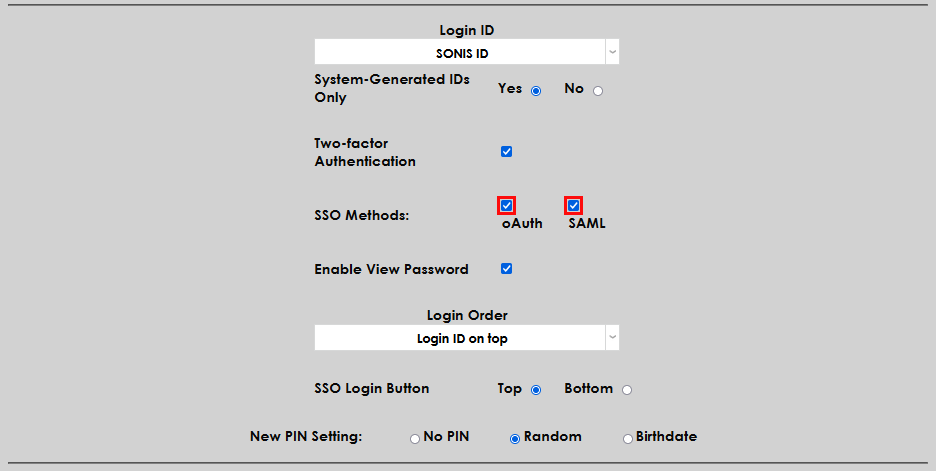
Use the SSO Methods checkboxes to turn on one or both of the two types of SSO connections. This option is only used for the old SSO Configuration method and is not needed for the newer certificate-based SSO.
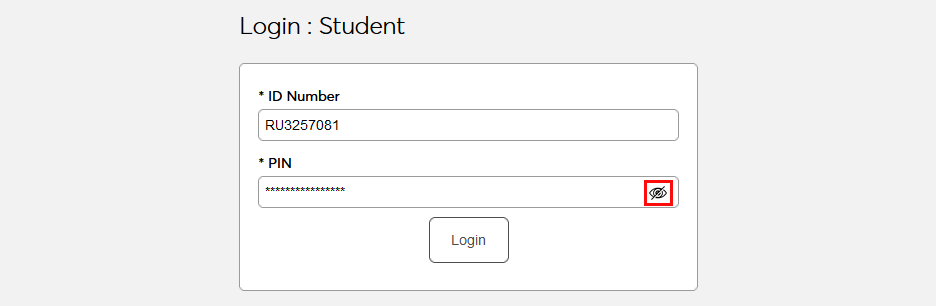
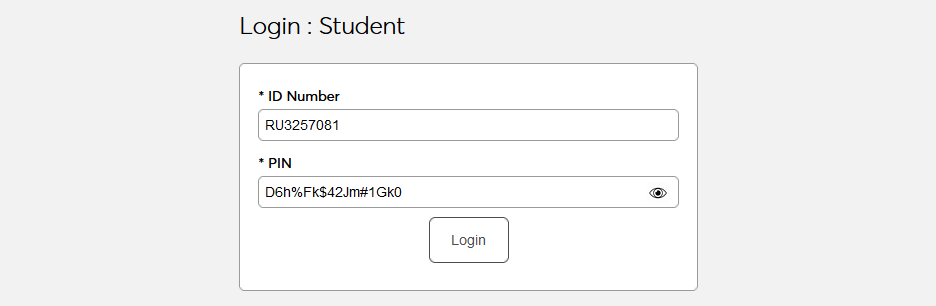
Check the Enable View Password box to turn the view password feature on for all portals.
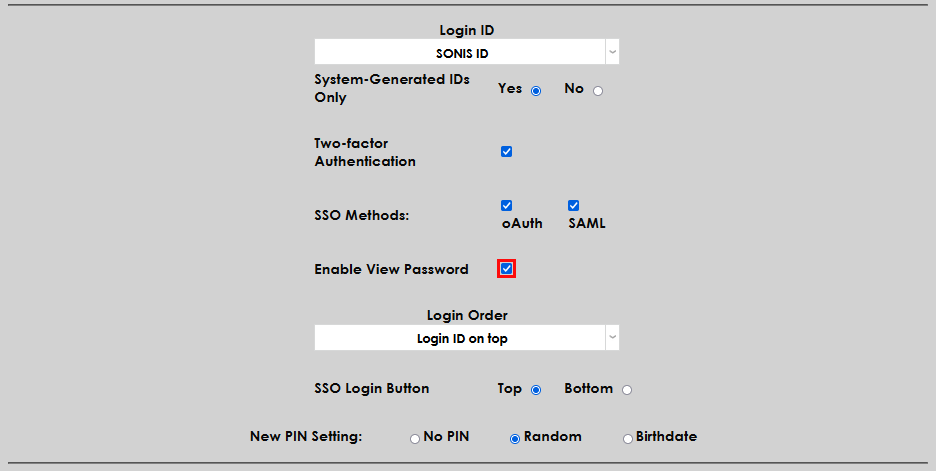
With this option active, each user's password will appear as masked by default, but they can click the eye button in the password field to view what they've typed. This option also applies to internal setup fields in the Admin portal that contain passwords.
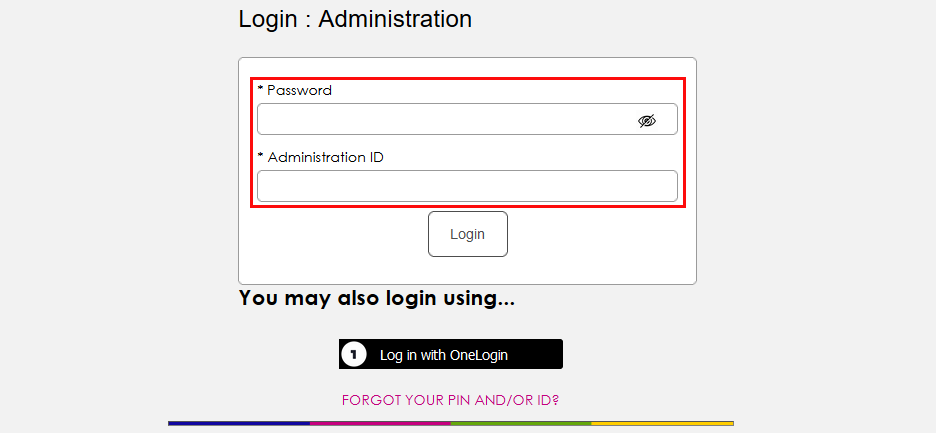
The Login Order menu allows users to change the order in which the identity fields appear on login pages. By default, the Login ID field appears first and this is typical for most websites, but administrators can choose to have the password field display first.
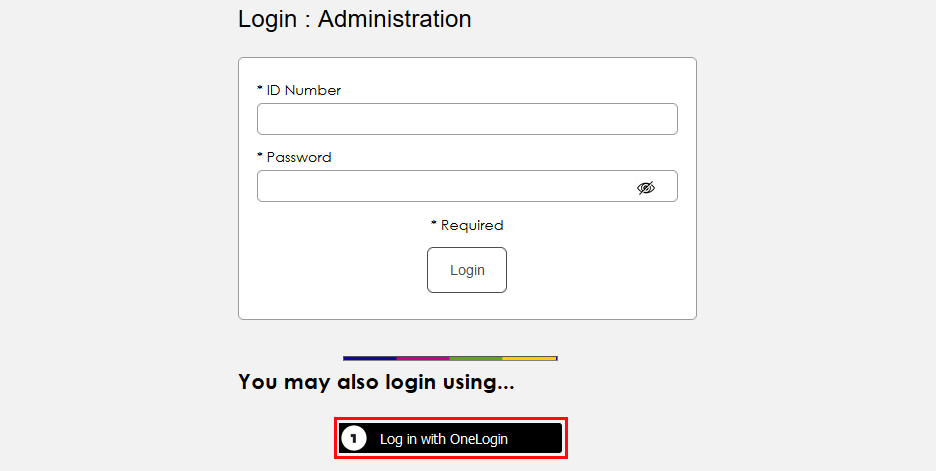
The SSO Login Button options allow administrators to choose where the buttons that display when SSO login is active will display on the page. They can either appear above or below the login ID fields. This setting applies to both the old SSO Configuration and the newer certificate-based SSO.

The New PIN Setting controls how new PINs are created when a new user is added to the system. There are three options:
No PIN - With this choice, users do not have PINs and log in with their IDs only. This is not recommended.
Random - With this choice, PINs are generated automatically to comply with the PIN rules. This is the most secure method.
Birthdate - With this choice, PINs are generated to conform with the individual's birthdate in the mmddyy format. (Ex. 010396)
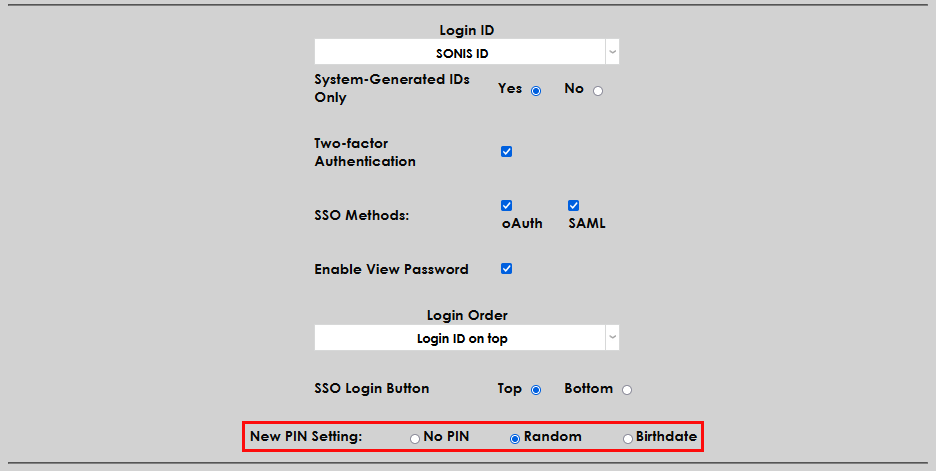
Regardless of the method chosen, users will be asked to create their own unique PIN when they log in for the first time. Visit the Password & PIN Utility for more PIN settings.
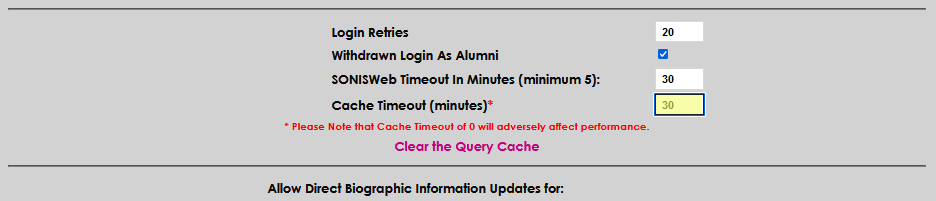
The Login Retries setting controls how many wrong attempts are allowed before the user's account is locked. An account can be unlocked from the user's Biographic page.
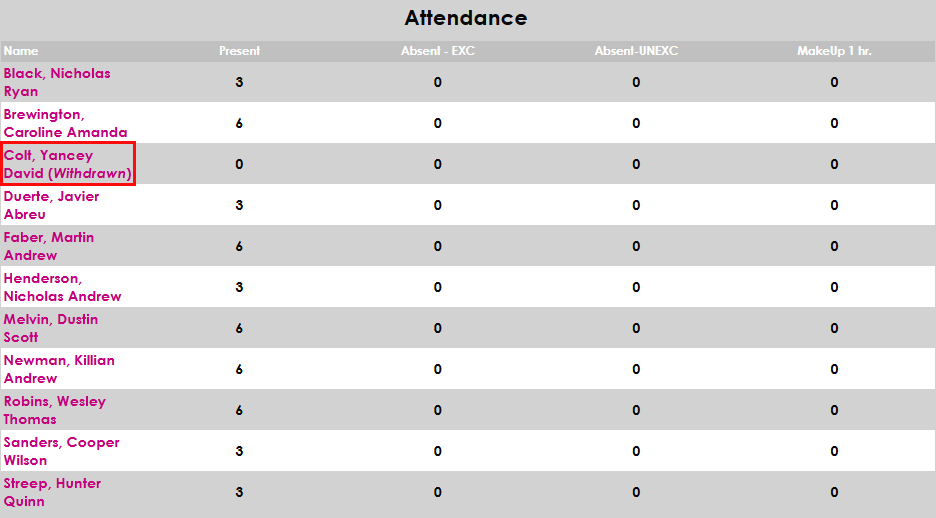
Check the Withdrawn Log In as Alumni box to allow withdrawn students to access their records through the Alumni portal. If this box is left unchecked, withdrawn students will no longer have access to the Jenzabar SONIS system.
Display Settings
Below the login settings are a group of settings sections that all relate to the way things are displayed on SONIS.
The first is the Status Link Color. This controls the color of the name that's displayed at the top of the page when Name Search is used to select a user. A number of predefined colors are available to choose from. Please ensure that the chosen color has enough contrast from the background color that it can be read easily.
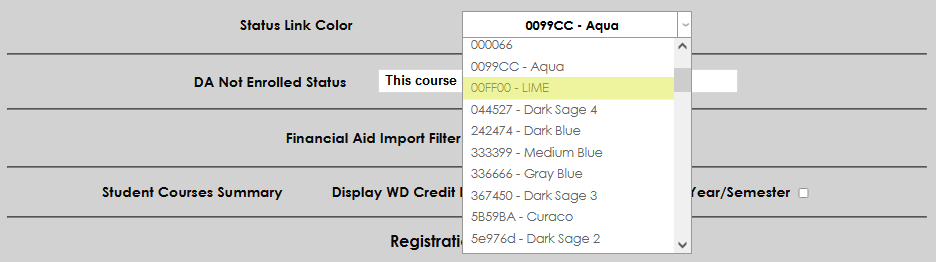

The second display option in this section applies only to the Degree Audit. When a student has not completed a course required as part of their degree, text will appear to show this. Update this field to change what that text says.


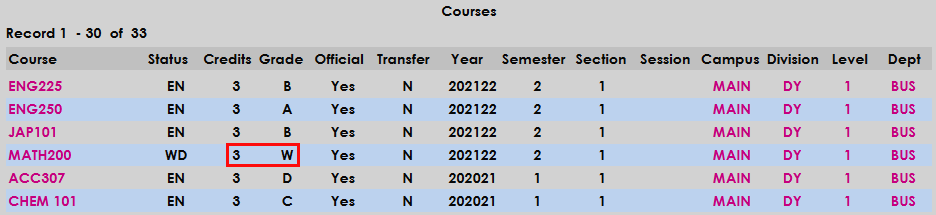
There are also two display settings that apply only to the Courses Users page. The first is labeled Display WD Credit Hours.

If this box is checked, courses listed on the Courses summary page that have an enroll code of withdrawn will have the attempted hours listed. If the option is left unchecked, the hours for these courses will display as 0, the actual credits that the student received.

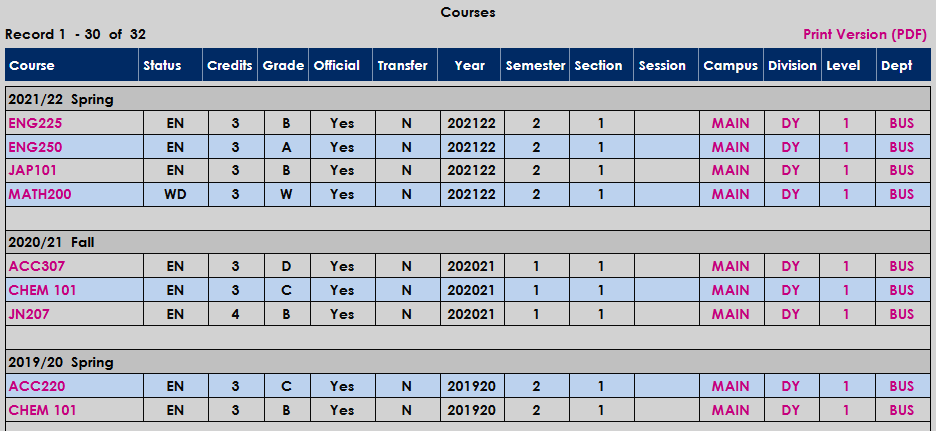
The other Courses summary page display option affects the way the page displays all courses. Check the Display By School Year/Semester box to activate an enhanced view that separates courses by the school year and semester in which they were taken and adds grid lines to make the page more readable.

Though not grouped with these other options, the Display Page Notes setting has a similar function. This setting controls whether the notes that appear at the bottom of the various login pages are displayed or not. If the box is checked, these notes will display globally.

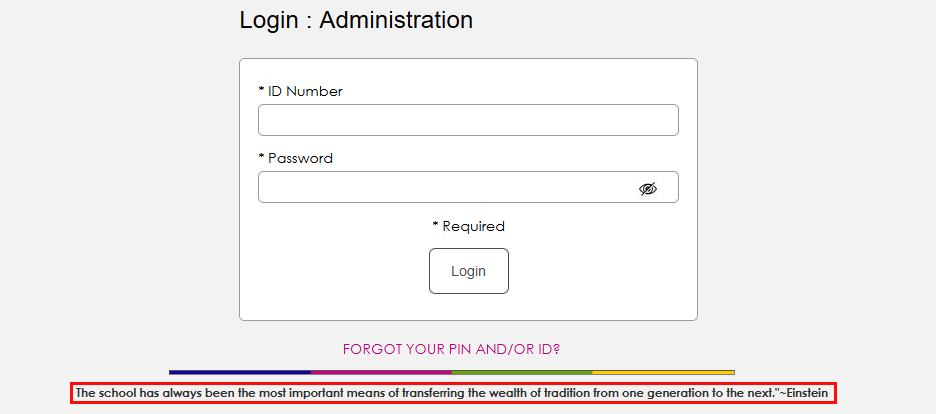
To add a note or edit an existing note, navigate to Login Page Notes: Edit under the Systems menu and select a portal.

Financial Aid Import Filter
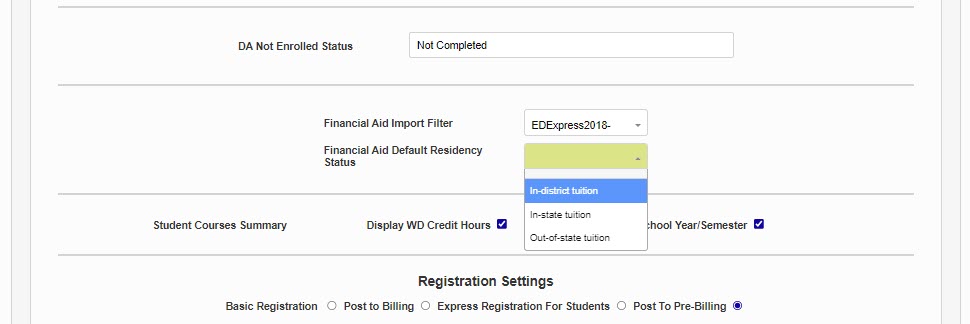
The Financial Aid Import Filter was previously used to set the format of the award file that would be imported through the Financial Aid Award Import utility. This utility has been updated to only handle EDExpress files and has been renamed Import EDX. EDExpress users should select the version that your school currently uses. Clients who do not use EDExpress or do not import this data to SONIS can select None or ignore the setting altogether.

Financial Aid Default Residency Status
The Financial Aid Default Residency Status is used to bulk update the residency status field on the Financial Aid page, which then is used for Gainful Employment reporting. This value should be set to the one that corresponds to the majority of the institution's students and individual students that have a different status can be manually updated on the Financial Aid page. The possible values are the same as used by the NSC Gainful Reporting process. After setting the desired value, click Submit at the top or bottom of the page.
Note
The bulk update occurs for newly created Financial Aid records. It does not update the status for existing records or for records that were manually updated.
Registration Settings
Registration Type
The first registration setting controls what type of registration process will be run. Some institutions may wish to use different settings at different points in the school year to make managing registration and billing easier.
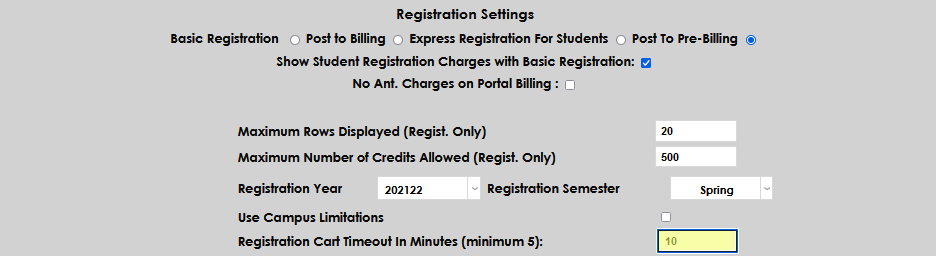
The Basic Registration setting does not automatically create transaction records. When using this setting, transaction records will need to be created separately using Post to Billing or Post to Pre-Billing.

If the Show Student Registration Charges with Basic Registration box is checked, users registering through the Student portal will see the amount they will be charged when registering.

If this setting is turned off, charges do not appear on this page.
The Express Registration for Students setting functions identically to the basic registration setting. The only difference is that, when this setting is active, students are taken directly to the Registration page when logging in to their portal. This option should only be used during an open registration period, for obvious reasons.

The Post to Billing and Post to Pre-Billing settings do not affect registration in the student portal. Registration there will operate the same as if basic registration were selected. However, the registration process in the Admin portal differs if one of these settings is selected.
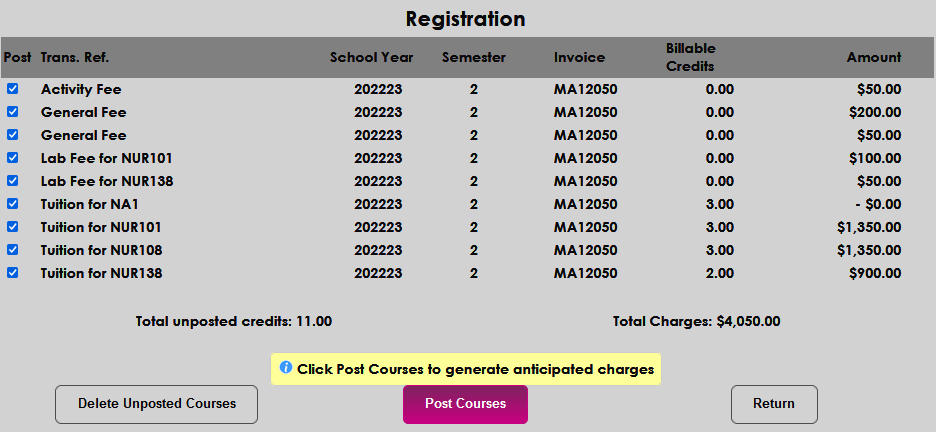
When Post to Billing is selected, administrators are be given the option to post the charges to billing at the end of registration.


When Post to Pre-Billing is selected, administrators are be given the option to post the charges to pre-billing at the end of registration.

For more on the billing and pre-billing processes, visit the Post to Billing wiki page.
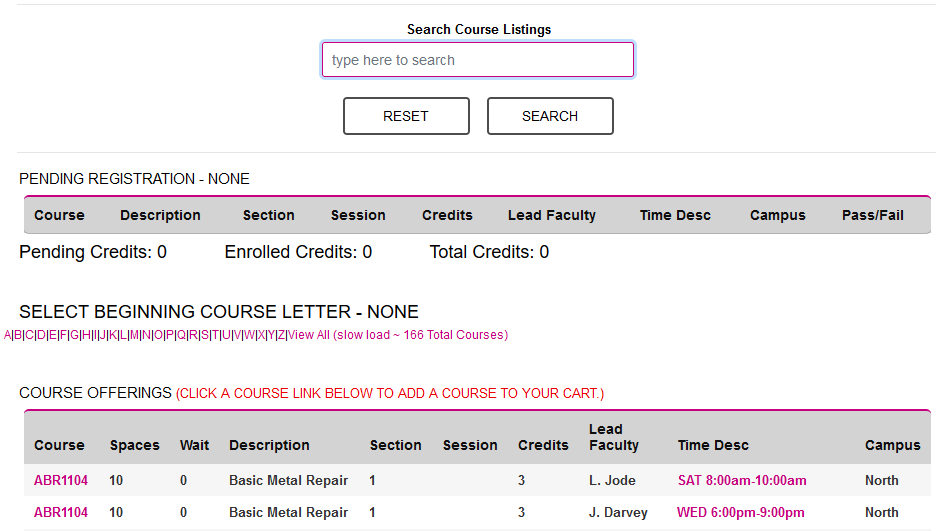
Search Box
Check the Display Search Box option in Web Options to add a search field to all Registration pages.

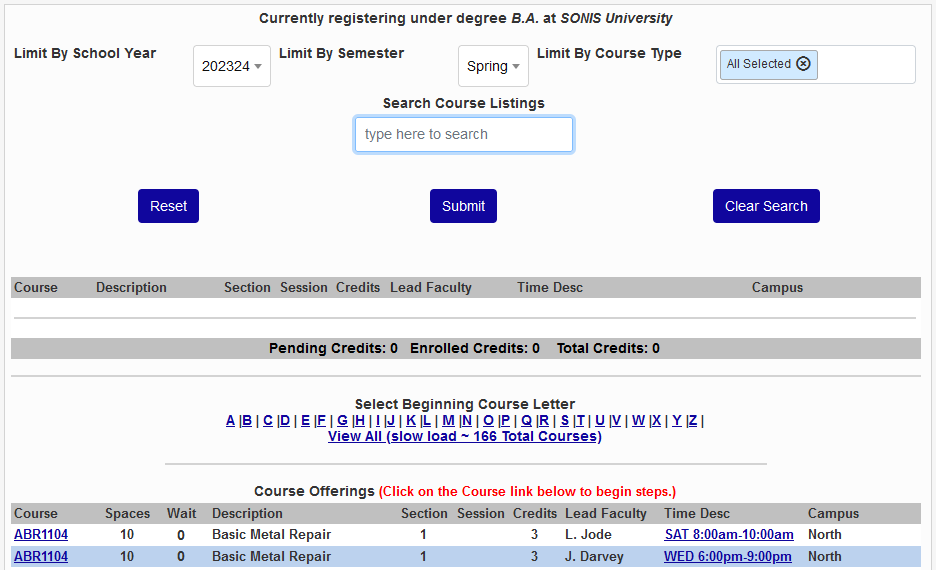
The Registration search field allows users to search for any term that appears within a course listing, including the Course, Description, Lead Faculty, Time, and Campus. Users can submit multiple search terms to continue refining the results.
Repeat Settings
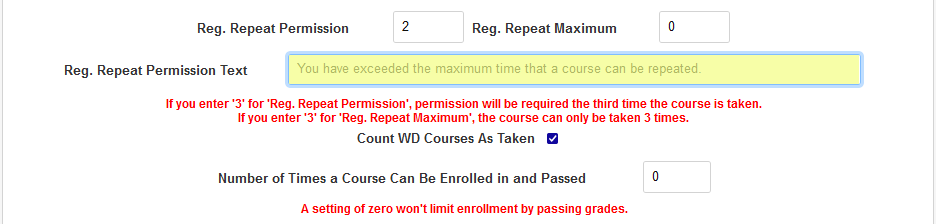
Some institutions may wish to control how many times a student can register for the same course. The Registration Repeat Permission can be used to require the student to be registered for the course by an administrator once they've registered for it a certain number of times. A 0 in this field turns the option off and does not limit repeat registrations. A one or higher will require the student to seek permission when registering that number of times or higher.
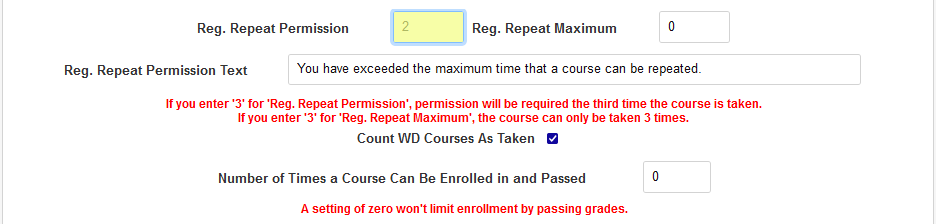
The Registration Repeat Permission Text controls the text that a student will see when attempting to exceed this limit.
An administrator must have the Override Repeat Permission User Security privilege to override this setting and register users who exceed the number entered in the field.
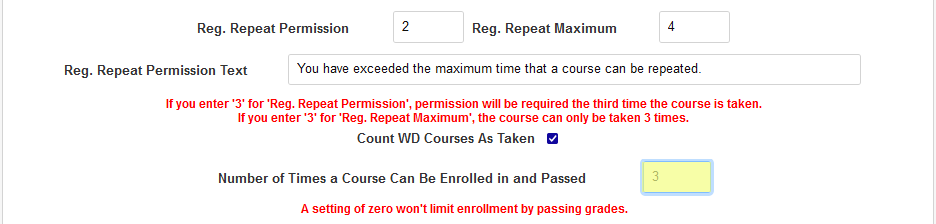
The Registration Repeat Maximum setting works similarly. A 0 in this field turns the option off and does not limit repeat registrations. A one or higher will completely prevent the student from registering when they've registered for the course that number of times or higher. This setting cannot be overridden.

The Number of Times a Course Can Be Enrolled in and Passed setting also blocks students from retaking courses, but only applies to courses that have been passed. Courses without a grade or with a failing grade as designated in the Grades table will be exempt from this setting. Like the other settings, a 0 in the field turns the setting off and allows unlimited repeats.
Note that the Repeat for Credit box on the course level will not override any of these settings. The Repeat for Credit setting only changes whether the course can be retaken for credit or the previous grade is replaced.
Audit Registration in Portals
When a student audits a course, they participate in the course without receiving a grade or credit. Administrators always have the option to register a student as an auditor.
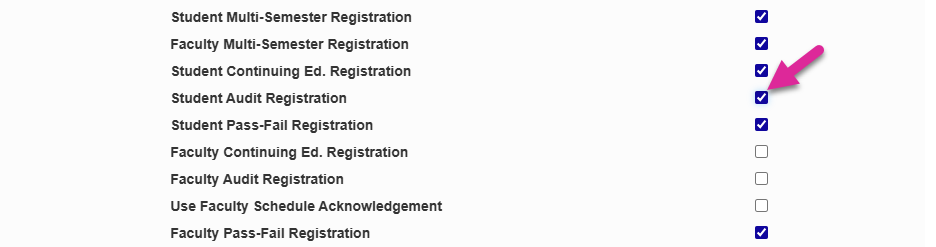
To allow students to register for a course as an auditor through the Student Portal, check the Student Audit Registration box.
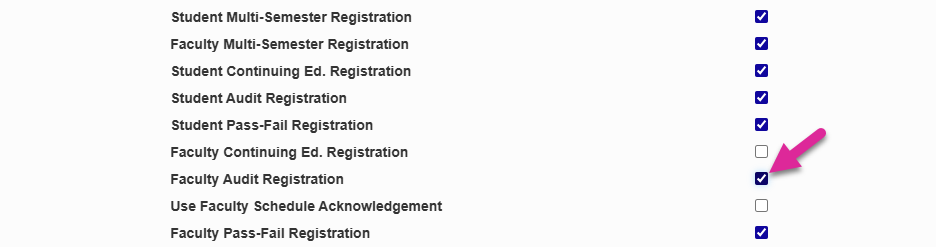
To allow faculty advisors to register their advisees as an auditor through the Faculty Portal, check the Faculty Audit Registration box.
Pass/Fail Registration in Portals
Overview
Some students may wish to take a course with a pass/fail designation rather than receiving a letter grade and/or member institutions may choose to offer courses with that will receive pass/fail grades instead of letter grades. Pass/fail registration is available through the Student and/or Faculty portals.
Setup
To allow pass/fail registration through the Student and/or Faculty portals, navigate to the Web Options page under the Systems menu. Check the Student Pass-Fail Registration box and/or the Faculty Pass-Fail Registration box and click Submit to save the changes.

Student
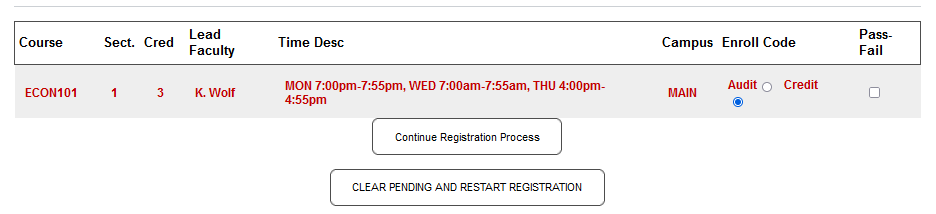
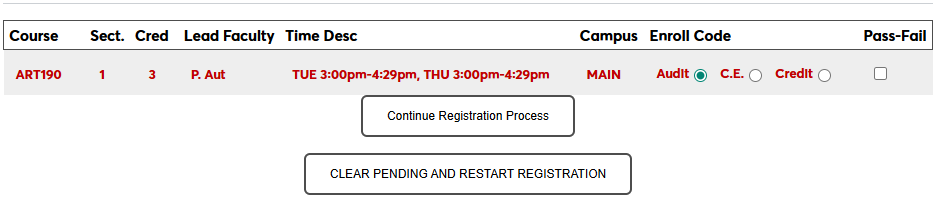
Once the pass/fail option has turned on, students will see a checkbox in the Pass-Fail column when registering. If the course is set up to be pass/fail for all students, the column will still note this in text and not allow students to change the setting. Students should check the corresponding box and click Continue Registration Process to take a course with the pass/fail designation.
Faculty
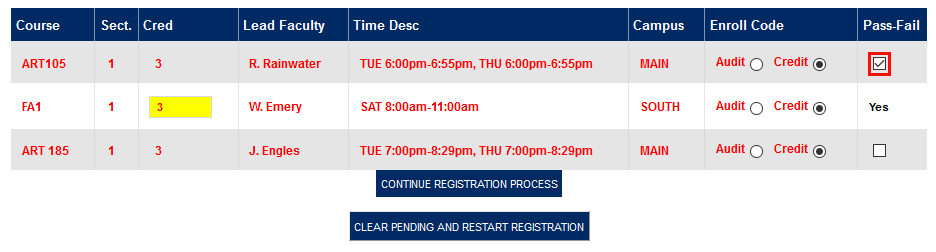
The pass/fail option displays identically on the Faculty portal. When the option has been turned on, faculty members will see a checkbox in the Pass-Fail column. Just as in the student portal, courses that are set up to always be pass/fail will have text notifying the user of that fact in the place of a checkbox. Check the corresponding box and click Continue Registration Process to register a student for a course with the pass/fail designation.
Drop/Add Delta Days
The Course Delta Days web option allows administrators to create a set number of days after which course registration can not be changed. The delta day countdown begins on the day that the course starts. To use this feature, enter a number in the Registration Started Course Delta Days field. If this box has a zero in it, the feature will not be activated. Once a number is entered in the box and the page has been submitted, students will not be able to register for a course once the course has started and the chosen number of days have passed.

Administrators can also prevent students from dropping courses after the delta day period by checking the Prevent course drops per Delta Days box. Should a student attempt to drop the course section, they will be alerted that the last date to drop the course section has passed. Further, no link will be available to allow the student to remove the course from their schedule.

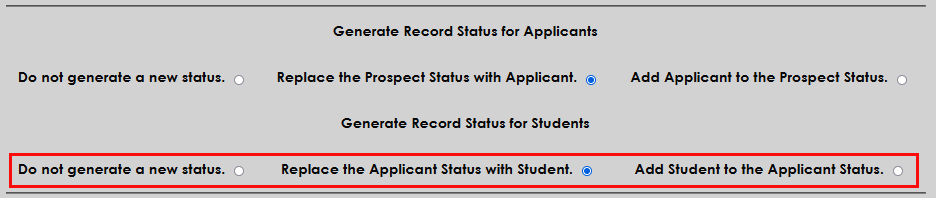
Generate Status Options
The generate status options allow institutions to automatically create a new module status for prospects that become applicants and/or applicants who become students.
New statuses for prospects who become applicants can be triggered by checking the Application Received box in the Prospect Inquiry Details and submitting the page. Converting prospects to applicants and applicants to students rather than having multiple module statuses for the same person is considered the best practice in Jenzabar SONIS, but flexibility is allowed since some institutions may have reason to retain the old status.

If Do not generate a new status is checked, nothing will happen automatically and administrators will have to create an applicant status manually. If Replace the Prospect Status with Applicant is selected, the user's module status will be converted to Applicant with all records retained. If the Add Applicant to the Prospect Status option is selected, the user will be given an Applicant status in addition to their Prospect status and all records will be copied over.

New statuses for applicants who become students can be triggered by checking the Create Student Status box in the user's Application Record and submitting the page.

If Do not generate a new status is checked, nothing will happen automatically and administrators will have to create an applicant status manually. If Replace the Applicant Status with Student is selected, the user's module status will be converted to Student with all records retained. If the Add Student to the Applicant Status option is selected, the user will be given a Student status in addition to their Applicant status and all records will be copied over.
Add Campus to Sessions
The Add Campus to Sessions option provides the ability to create an association between a campus and a session.
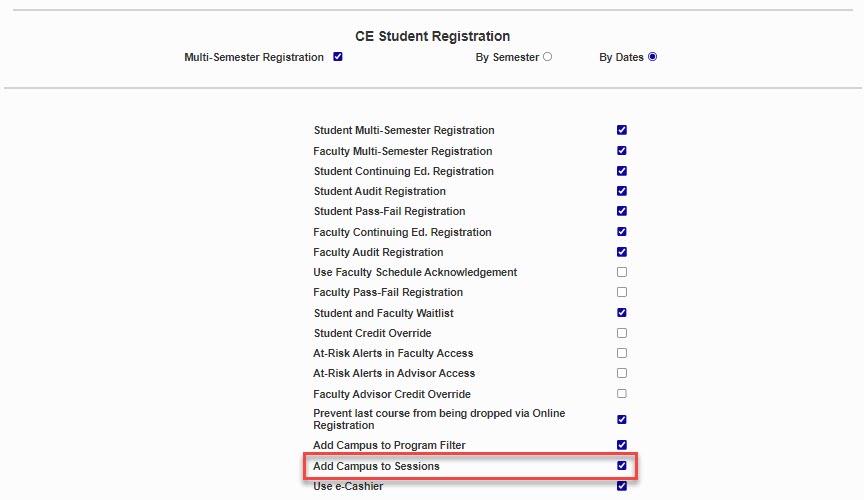
Note
It's important to note that this association is specific to the logged in administrative user, therefore, the campuses that display will vary depending upon the campuses they have access rights to, while also allowing sessions to not be associated with any particular campus and so maintain the ability to show those sessions to all staff.
After checking the Add Campus to Sessions box, navigate to the Sessions table to complete setting up an association.
Auto-Repeat Courses Option
To allow equivalent courses to be repeated as a grade replacement, check the Auto-Repeat Courses box. When this box is checked, a student taking a course a second time or taking an equivalent course has the grade of the second course substituted for the grade of the first.

Note that using equivalent course as automatic replacements can cause issues if students actually want to take both courses for credit. Replaced courses still appear on a student's transcript, but do not factor into their GPA.
Clearinghouse Data in Programs Option
Some institutions may wish to view and edit clearinghouse data in the Programs table. To enable this option, navigate to the Web Options page in the Systems hub and check the Display Clearinghouse Data in Programs box. Click Submit to save the change.

Once the option has been activated, a Clearinghouse Items section will appear in each program in the Programs table. Altering these fields will change what data is reporting to the NSC through the Clearinghouse utility. The fields can be hidden again once they've been filled out and the data will still be reported.

Course Quick-Access Limit
The SONIS system saves previous courses that have been selected for quick access. To see the list of the most recently selected courses, mouse over the Courses+ menu item in the top-nav. The list appears in order with the most recently selected course on top. However, selecting a course from this menu will not change its position on the list.
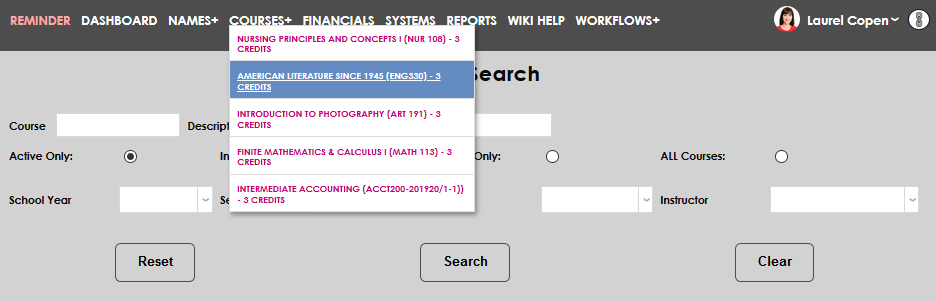
To change the number of courses that appear in this dropdown menu, navigate to the Web Options page under the Systems hub. Scroll down to the Course Search Save Limit option and edit the number in the field to the right.

Deep Linking Settings
To enable the SONIS Deep Linking feature, navigate to the Web Options utility in the Systems hub. Scroll down to the Deep Linking Configuration section. Check the Enable Deep Linking box to turn on deep linking for all admin portal users.

From this same location, administrators can modify the options that users have to control the expiration of links. Administrators can set a Default Delta Days value. If this field is populated, all links will expire after they've been active for the number of days in the field. Users sending individual links will not be able to change this value. To allow individuals to control their own link expiration, leave the field at 0.

If Default Delta Days are not activated, administrators can choose to offer the option to have links Expire by Delta Days, Expire by Date, and/or Expire by Page Visits. If more than one box is checked, users sending deep links can choose one or more options based on their personal preference.


The SONIS system checks link viability in the following order.
Has the default number of delta days passed
Has the user-specified number of delta days passed
Has the date passed
Has the link been visited the defined number of times
A link must pass all four checks before it can be accessed. If an expiration option was not activated, all links will automatically pass that check.
Click the Submit button at the top or bottom of the page to save the changes that have been made and turn on deep linking.
Registration Settings - Post to Billing
Some institutions may wish to forgo the normal Post to Billing process using the Financials utility and have all tuition charges post to billing or pre-billing during the registration process. To set this up, navigate to the Web Options page under the Systems hub and locate the Registration Settings section. Select either Post to Billing to have registration charges automatically posted to billing or Post to Pre-Billing to have registration charges posted to pre-billing during student registration.

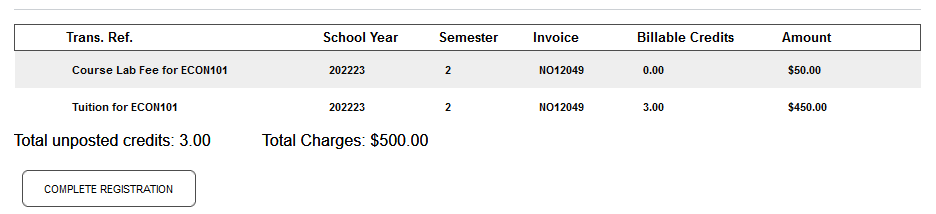
When the Post to Billing or Post to Pre-Billing registration options have been checked, administrators will have the option to Post Courses as the final step in the registration process. These charges will go directly to pre-billing or billing with no additional posting required.

Regent Award XML Directory
Before the Regent Award timed task can be created, the location of the Regent Award XML files must be set. Scroll down to find the Regent Award Imports (XML) Directory field. Fill in the directory where Regent Award files will be stored and submit the page to save the changes.

Timeout Settings
Cache Timeout
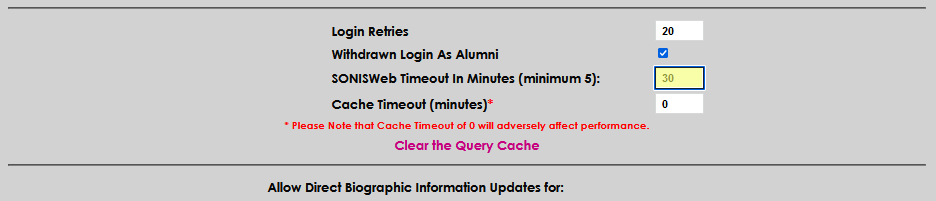
The Cache Timeout setting determines the length of time that user sessions remain in the session cache before they are removed. Microsoft recommends, and in some cases requires, 30 minutes for cache timeout, so we recommend this length of time. A warning message displays to notify administrators that setting this to 0 minutes will adversely affect performance.
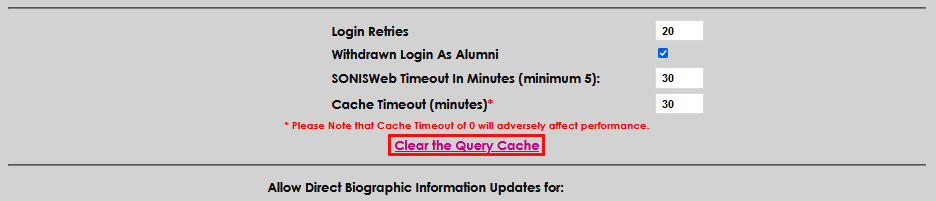
Additionally, an option to clear the cache on demand is provided. Clearing the cache will affect cached queries for all users. It will not clear the template or component cache(s). Those must be cleared in Coldfusion Administrator.

Registration Cart Timeout
Student Online Registration has a checkout function much like other online shopping "carts". The checkout cart has a configurable timeout setting. The recommended setting is 5-10 minutes. It is important to balance convenience for users who may make decisions as they register with security and keeping registration data up-to-date, especially during peak registration periods.
SONIS Timeout
The Jenzabar SONIS portal provides a configurable user timeout to support data security efforts. Administrators may set a number of minutes after which an inactive user is automatically logged out of Jenzabar SONIS. The user will be required to log in again before resuming SONIS activities. Our standard recommendation for SONIS Timeout is 30 minutes. The lowest allowable time limit is five minutes. Some considerations that might change the desired timeframe:
How often do users get caught up in some non-SONIS activity that prevents them from working in the system for longer than "X" minutes?
How irritating is it for them to have to log in again?
Does the institution utilize automated desktop locking functions that lock after a brief period of inactivity (5-10 minutes)?
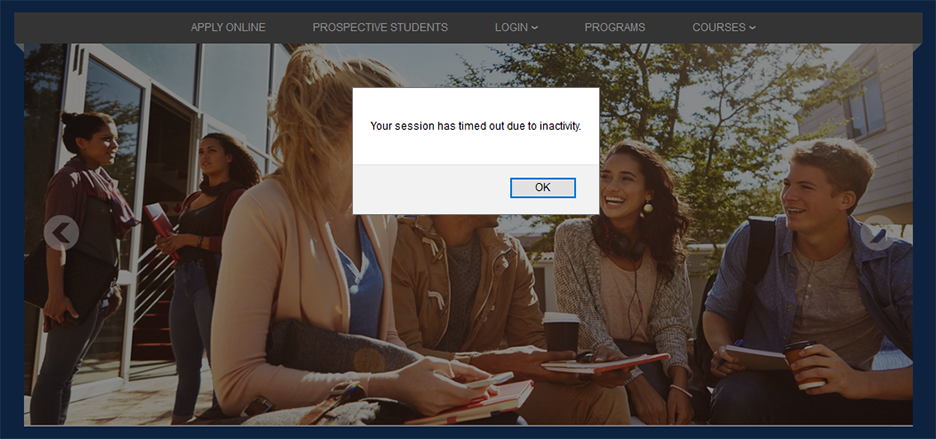
The Captions page in the Systems hub allows administrators to edit text that Jenzabar SONIS displays. To change the logout message, search for the default text "Your SONIS session has timed out." and create User Defined Text to replace it.

When a user times out, they're immediately sent back to the Jenzabar SONIS homepage with a pop-up message displayed to let them know that they timed out.
Biographic Updates
The Allow Direct Biographic Information Updates setting controls whether portal users can make updates to their biographical and address details directly or whether these updates must first be approved and imported.

In order for users to have access to make changes at all, the Update Bio page must be turned on in the Portal Menu Utility for the portal in question.

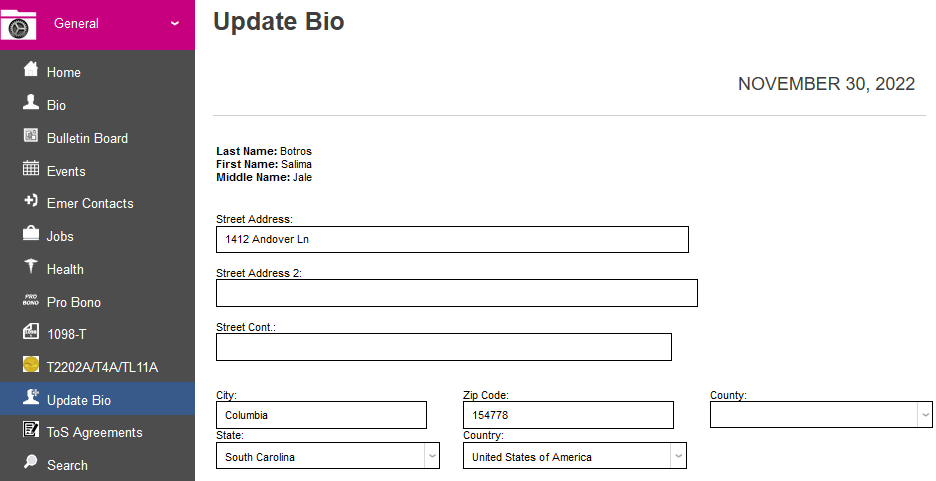
When the Update Bio page has been turned on, users will have access to make changes to their basic biographical details as well as their address. If the Allow Direct Biographic Information Updates option is on for their portal, these changes will be immediately published to the appropriate fields.
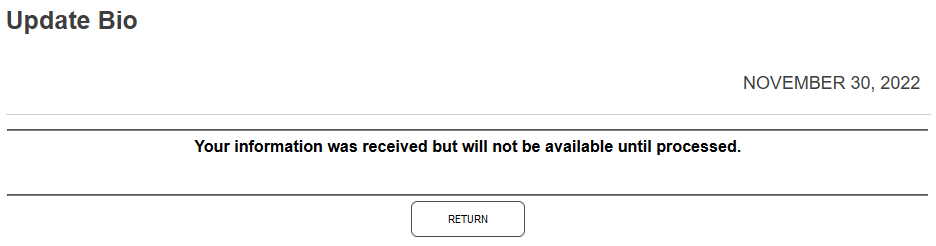
If the Allow Direct Biographic Information Updates option is unchecked for the user's portal, once they submit their biographic changes, they'll see a message informing them that the changes have been received but must be processed. These updates are processed through Import Functions.

Session Monitor
The session monitor is a diagnostic tool that system administrators can use to see the level of activity on the SONIS system and who is currently logged on. Because it uses system resources, most clients should probably leave it off on a daily basis and only turn it on when it's being used. Check the box and submit the change to turn it on.

To use the tool, navigate to Session Monitor in the Systems hub.

Workflows
Before Workflows can be used, they must be turned on from the Web Options page. Check the Enable Workflows box and click Submit to save the changes. Workflows will be turned on for all SONIS users with an Administration login.

Portal Access Settings
Advisors
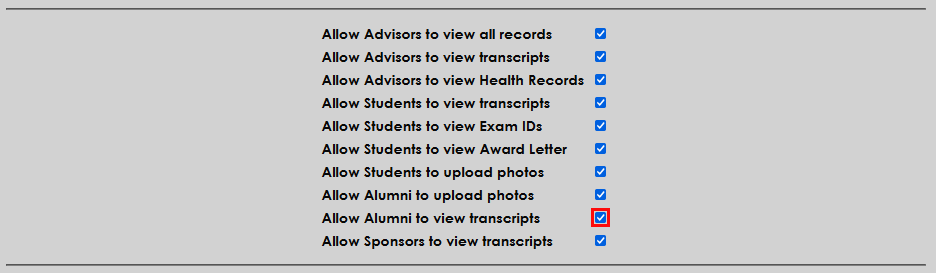
The Allow Advisors to view all records option controls which records faculty advisors are allowed to view from the Advisor section of the Faculty portal. If the box is unchecked, advisors can only view the records of students who have been assigned to them as advisees. If the box is checked, they can view the records of all students.
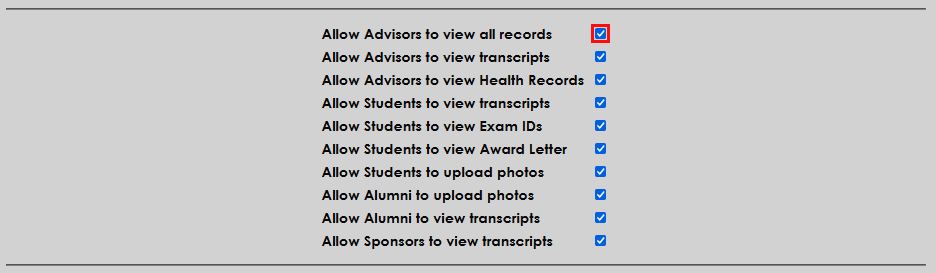
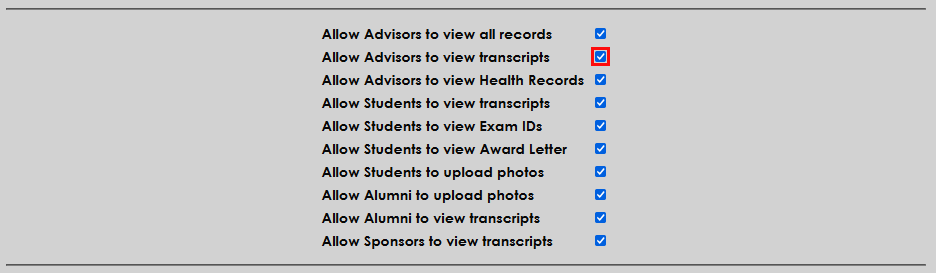
If the Allow Advisors to view transcripts box is checked, advisors will be able to open a full transcript for students in their Advising portal. The Transcript link is located on the student's Grades page. When the box is unchecked, no transcript link is shown.
Students
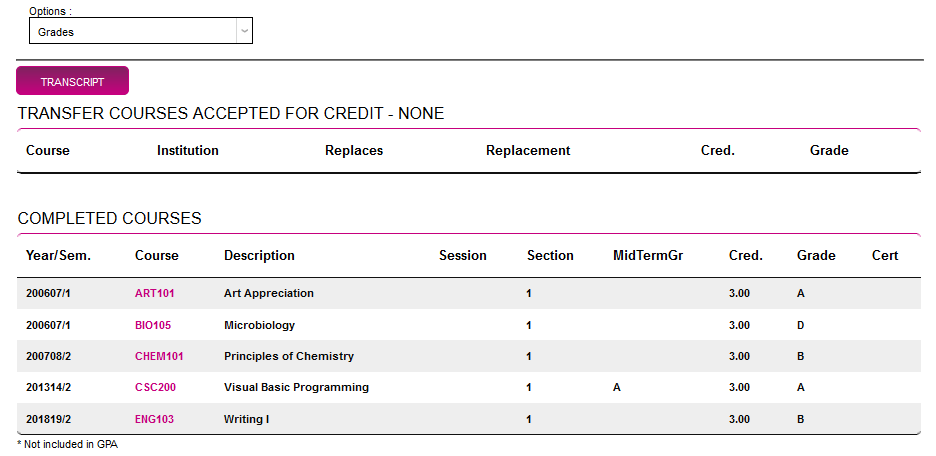
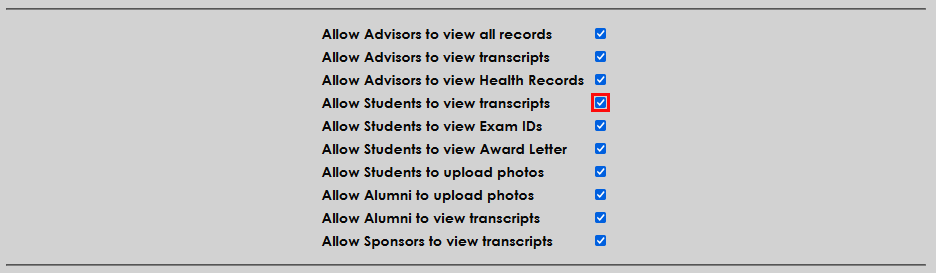
If the Allow Students to view transcripts box is checked, students will be able to view their full transcript from the Student portal, though the transcript is marked "unofficial." Some institutions may wish to allow this, while others may wish to require students to reach out to the school to receive any copy of their transcript.
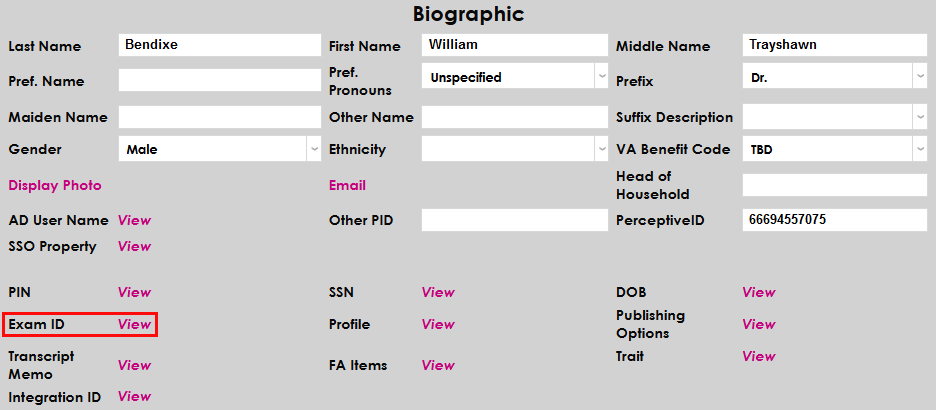
Exam IDs are used to grade students anonymously, among other functions. These values can be set and altered through the student's Biographic page.
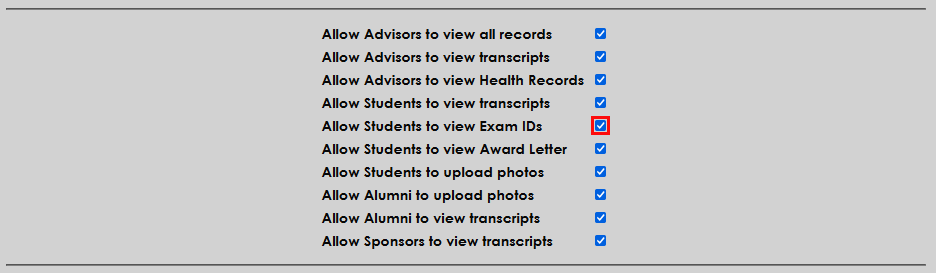
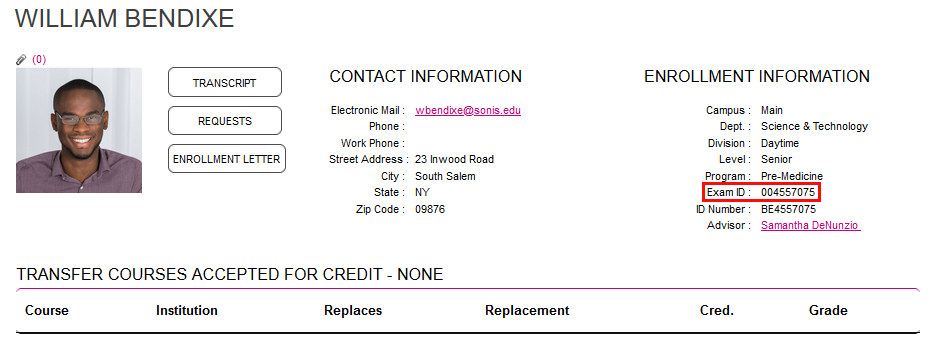
If the Allow students to view Exam IDs option is active, each student's ID will be listed on their Bio page in the Student portal. If the option is turned off, it will not appear.
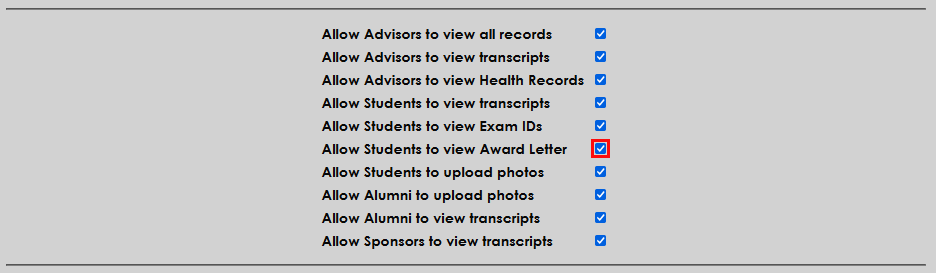
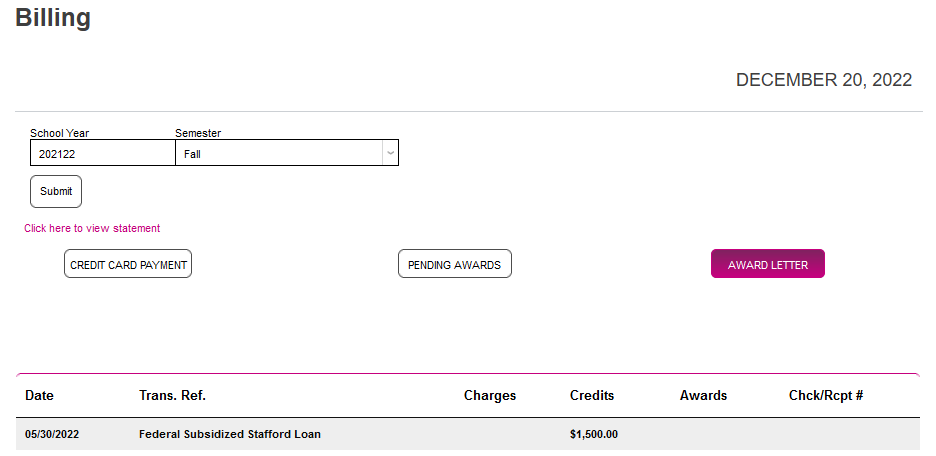
The Allow Students to view Award Letter option controls whether students will see an award letter in the Student portal when they receive financial aid. When the option is active, the link is available on the student's Billing page.
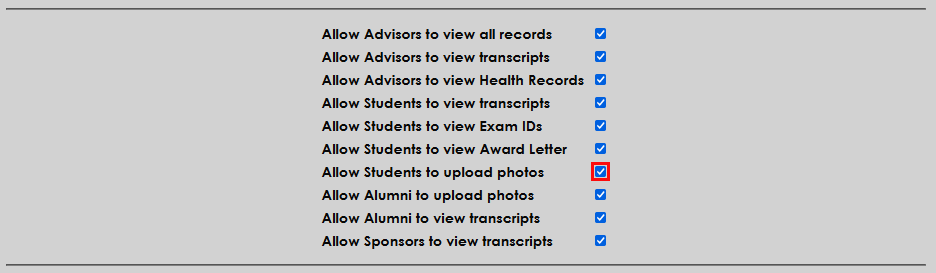
Check the Allow Students to upload photos box to give students the option to upload a profile picture to the SONIS system that will appear in all portals. When active, the photo upload controls appear on the student's Update Bio page along with a link to view their current photo. If the option is not active, administrators can still upload photos from the student's Biographic Users page.

The Display unofficial final grades on Student Access Schedule setting controls grade display on the Schedule page of the Student portal. With the box checked, students can see grades on this page that have not yet been made official, though the unofficial designation is included. With the setting turned off, grades will not display on this page until they are marked as official.


Check Display Default Billing Due Date in Student Access to use the default due date on the Billing page in the student portal. With this option checked, the default billing due date for the current semester will display as the due date.

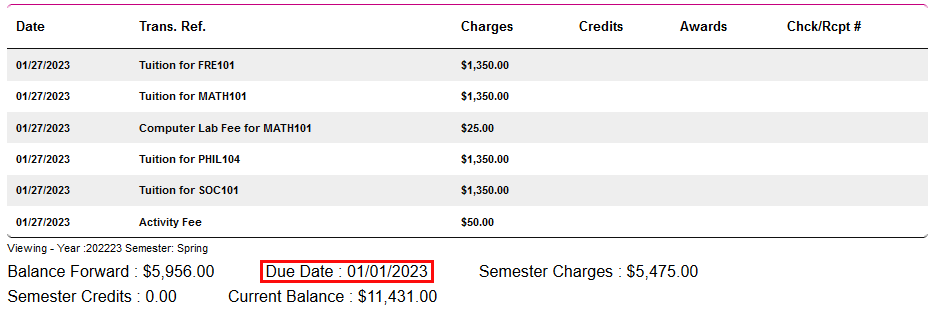
The default billing due date is set on the System Variables page.

Alumni
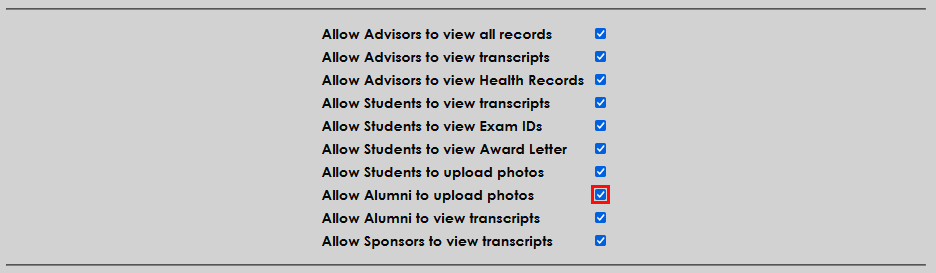
The Allow Alumni to upload photos box has the same function as the student equivalent but turns on this option for the Alumni portal. When active, the photo upload controls appear on the alumnus's Update Bio page along with a link to view their current photo. If the option is not active, administrators can still upload photos from the alumnus's Biographic Users page.
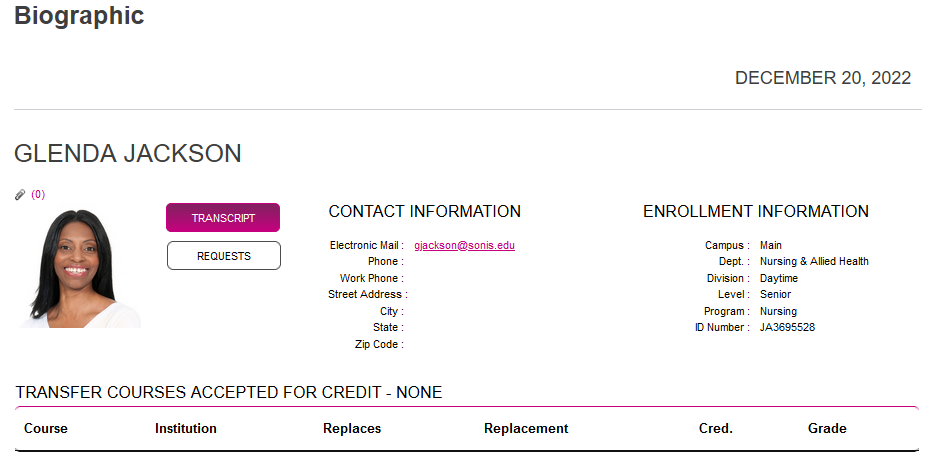
The Allow Alumni to view transcripts option also has the same function as the student equivalent, conferring and removing the link to view a full transcript from the Alumni portal. When the option is active, this link is available on the Alumni Bio page. The transcript marked with an "unofficial" watermark.
Sponsors
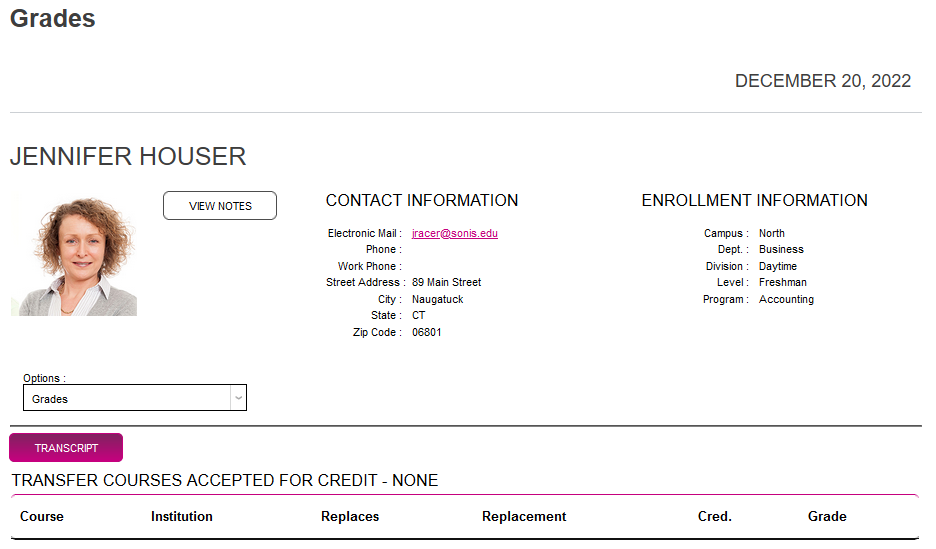
Allow Sponsors to view transcripts is the sole option available here for the Sponsor portal. With this option active, sponsors can view a complete transcript for the students they sponsor from each students Grades page. If it is inactive, they will still have access to view grades, but the full transcript will not be available. Like the transcript in the Student portal, the transcript here is marked "unofficial."

Faculty
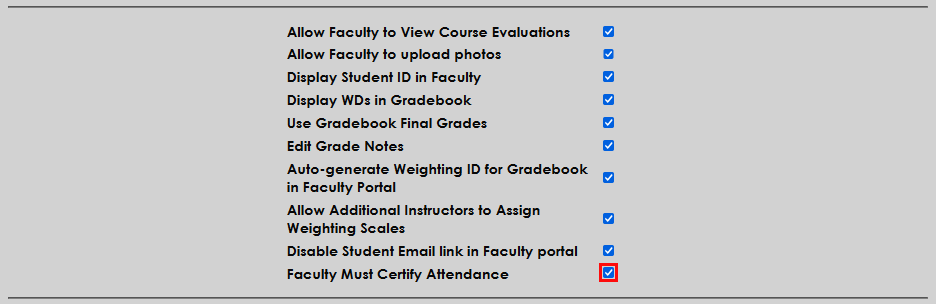
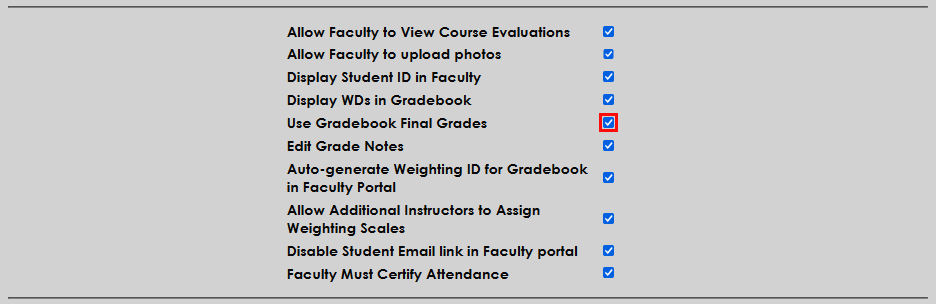
Course evaluations are a way for students to give feedback on a course they have taken. They're created and assigned using the Course Evaluations utility. The Allow Faculty to View Course Evaluations allows instructors to view these evaluations from the Courses page in the Faculty portal once the specified date has passed.
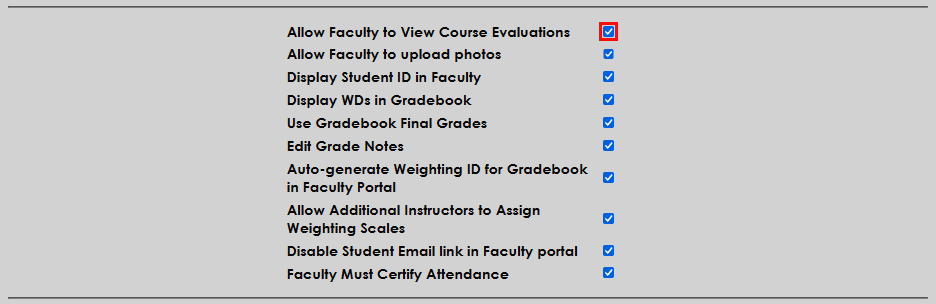

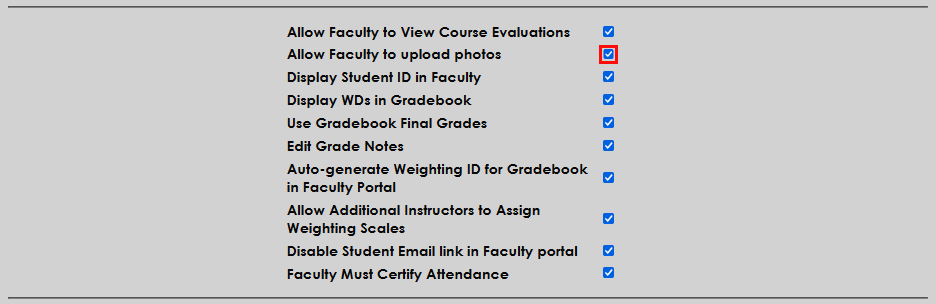
Check the Allow Faculty to upload photos box to give faculty members the option to upload a profile picture to the SONIS system that will appear in all portals. When active, the photo upload controls appear on the faculty member's Update Bio page along with a link to view their current photo. If the option is not active, administrators can still upload photos from the faculty member's Biographic Users page.
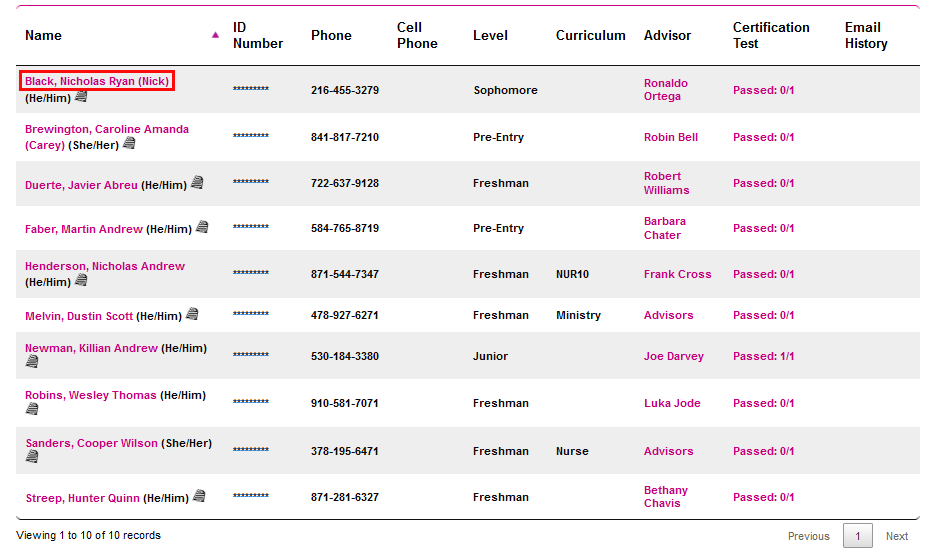
When the Display Student ID in Faculty option is active, faculty members can view each student's SONIS ID in the course roster.

With this option turned off, each student's ID number is replaced by asterisks to shield it.

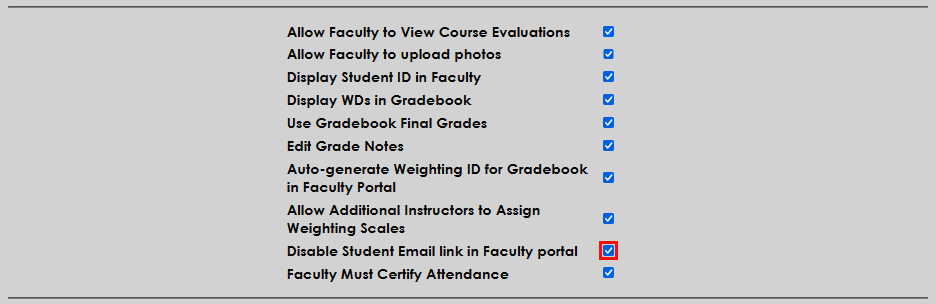
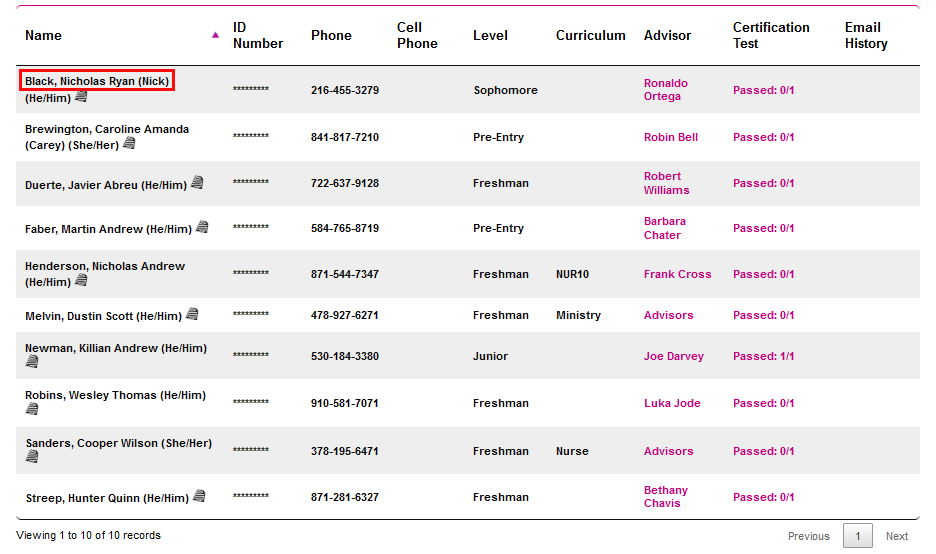
The Disable Student Email Link in Faculty Portal option removes the option for faculty members to email students directly through course roster pages. With this box unchecked, each student's name is a link that will open the faculty member's default email client with the student's email address in the "To" field.
When the box is checked, this link is no longer present.
Some schools ask their faculty to certify that their attendance is correct before the census date. Check the Faculty Must Certify Attendance box to turn this feature on.
Once this option has been turned on, the Attendance page in the faculty portal will include a checkbox marked Attendance Certified . Instructors should check this box once they have inputted attendance for the period in question.
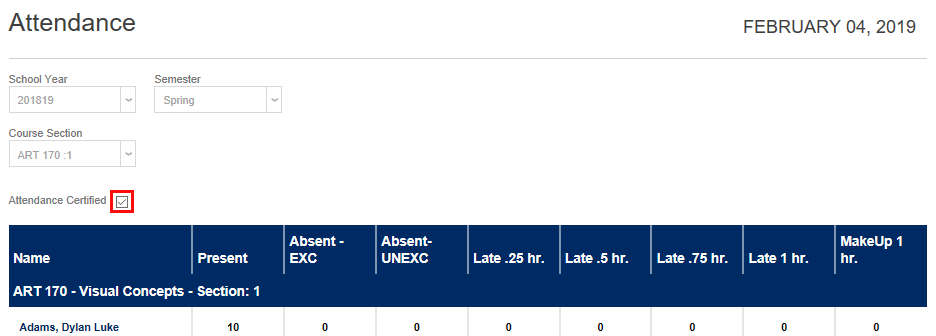
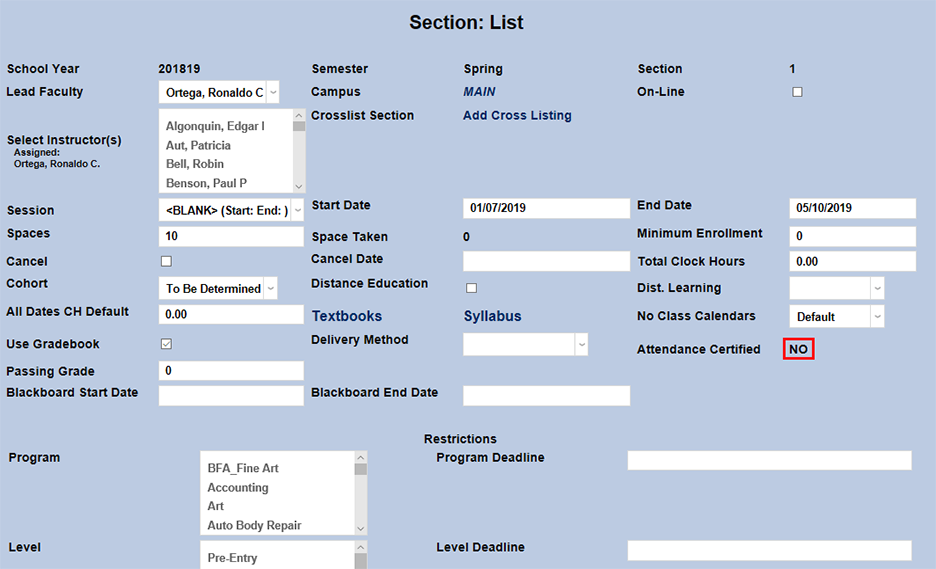
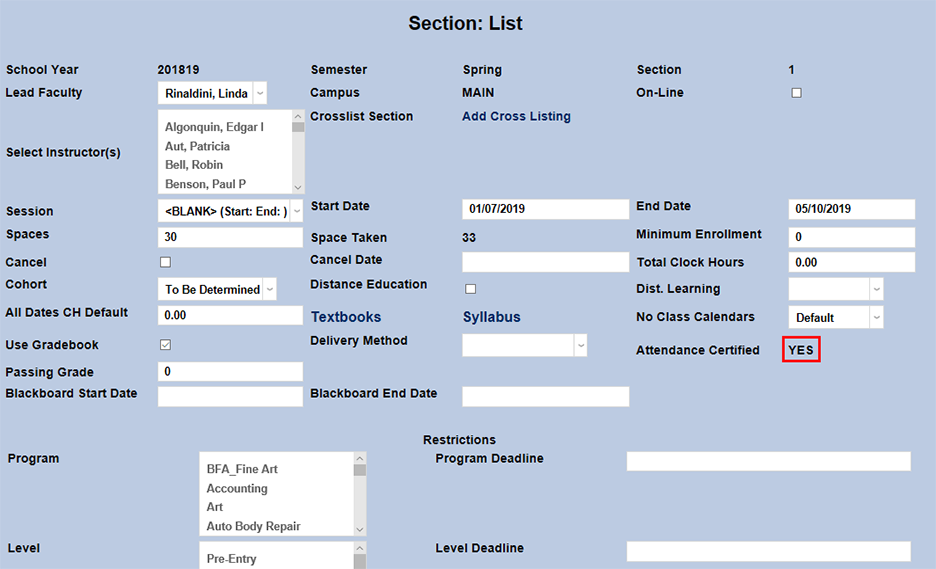
The Course Section page for each course will note whether the attendance has been certified yet, updating automatically once the certification box has been checked.
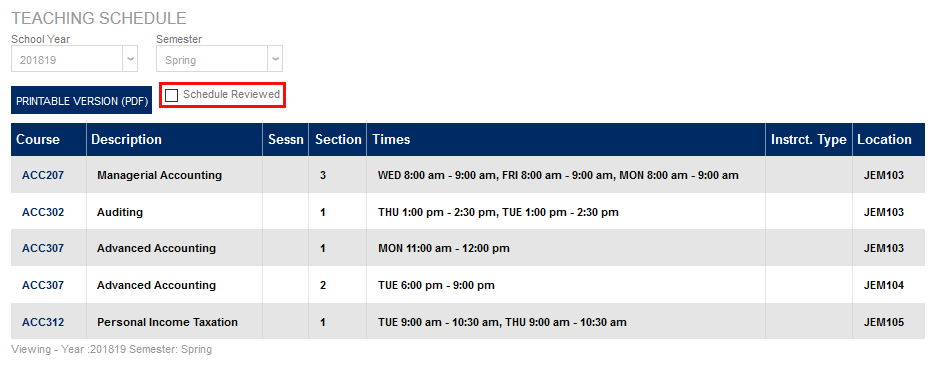
The Faculty Schedule Acknowledgement option requires faculty members to certify their teaching schedule at the beginning of each term.

Once the Faculty Schedule Acknowledgement function has been enabled, faculty members will see a Schedule Reviewed checkbox when viewing their schedule.
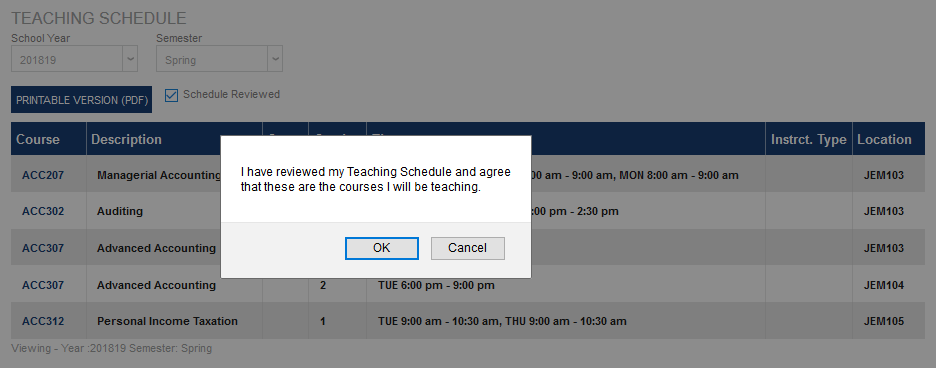
When faculty member clicks the Schedule Reviewed button, they will be prompted to confirm that they've reviewed the schedule. Clicking OK will lock in the choice and alert the system that the schedule is reviewed. If the instructor clicks Cancel, the box will be unchecked and their schedule will remain unreviewed.

The Faculty Schedule Acknowledgement Report in the Reports hub displays acknowledged and unacknowledged schedules in two easy to parse sections.
Grades
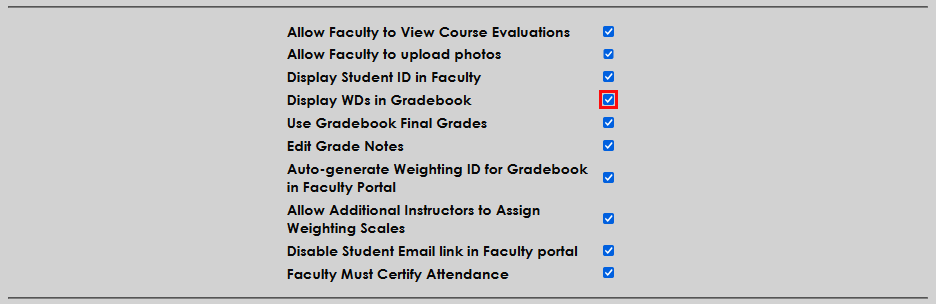
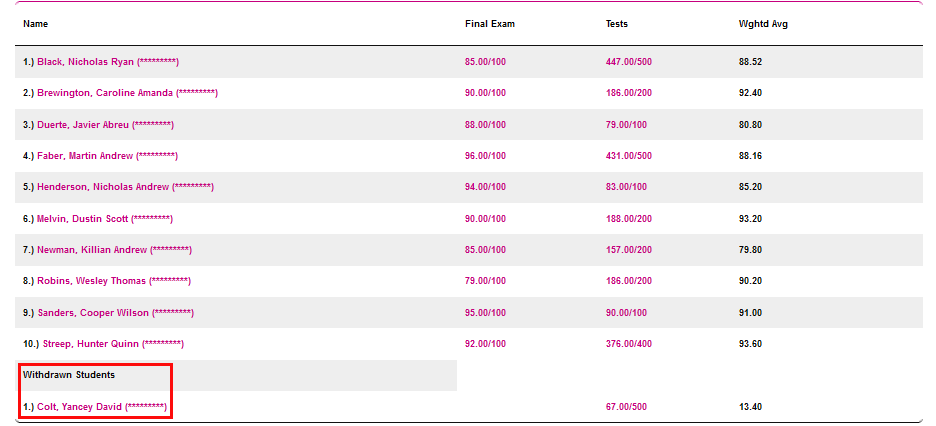
The Displays WDs in Gradebook option controls whether withdrawn students appear in the gradebook in the Faculty portal. When the option is active students with an Enroll Code of Withdrawn for a course will appear on the Gradebook page for the course in the Faculty portal, listed separately from the active students. If this box is unchecked, these students will not appear in the gradebook at all.
When a faculty member has submitted grades for the course period for the students in a course, they can Post Grades to Student Records . If the Use Gradebook Final Grades option is active, instructors can choose to designate the grades they're sending as Final Grades .
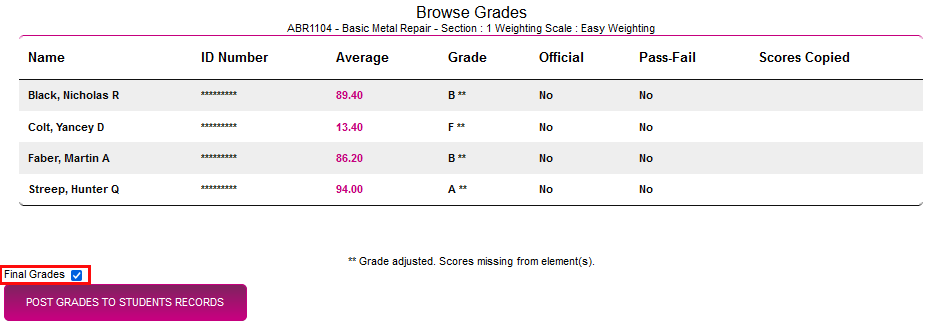
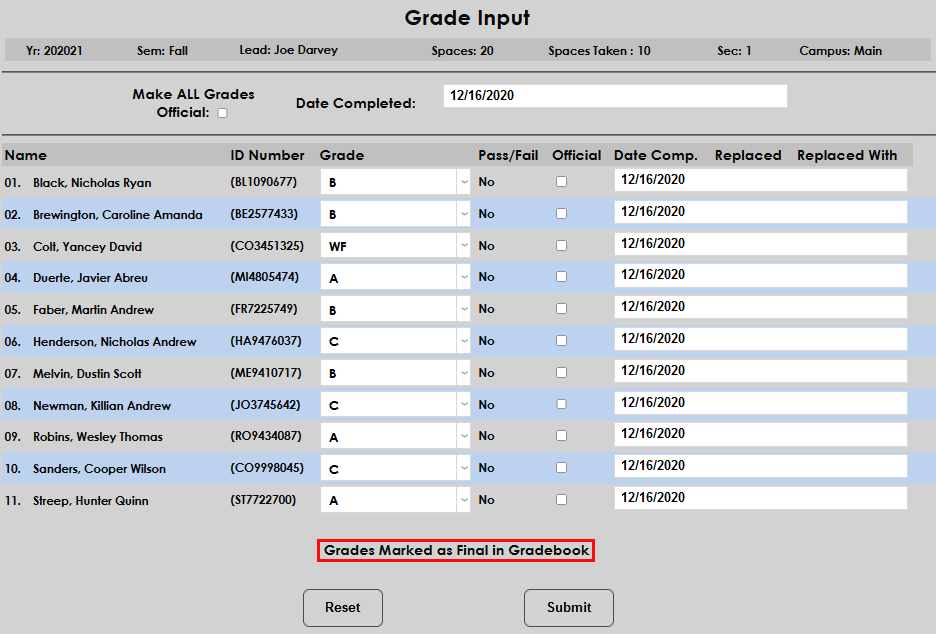
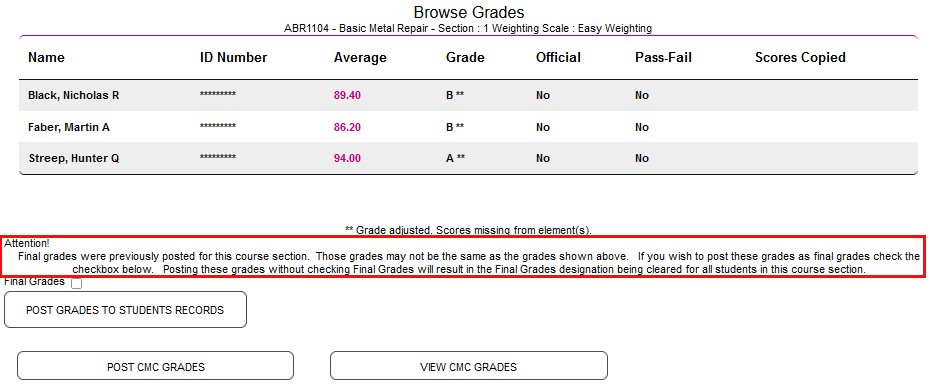
When grades are designated as final, this designation appears on the Grade Input page for the course in the admin portal and instructors are given a warning when returning to the Browse Grades page. Faculty can remove the final designation by posting grades again without the box checked.
Administrators can also see which grades have been marked as final using the Gradebook Final Grades Report .
When the option is turned off, the Final Grades checkbox is not shown on this page and all published grades are treated as the same.
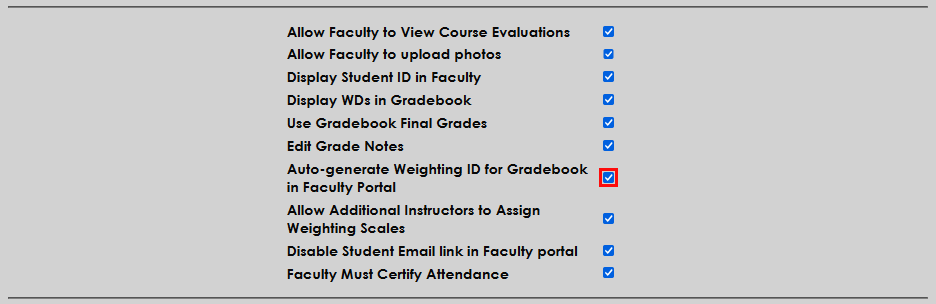
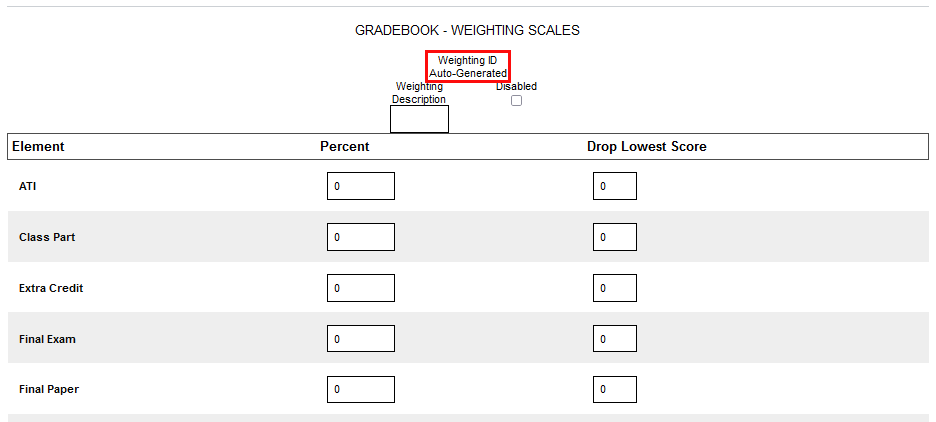
The Auto-generate Weighting ID for Gradebook in Faculty Portal option should be active for all institutions. In the past, the weighting ID was shown in dropdowns rather than the display name of the weighting scale, making it beneficial in some cases to create custom weighting IDs. Now, however, the display name of the weighting scale is shown and there is no reason to not let the system create the ID automatically rather than attempting to come up with an ID that has not been used each time a weighting ID is created.
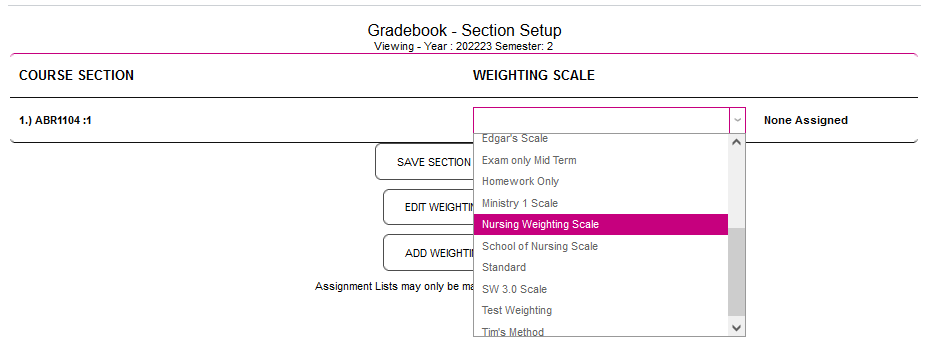
The Allow Additional Instructors to Assign Weighting Scales option allows faculty members who are not designated as the lead instructor on the Course Section Add/Edit page. When the box is checked, additional instructors have access to add a weighting scale from the Gradebook - Section Edit page.
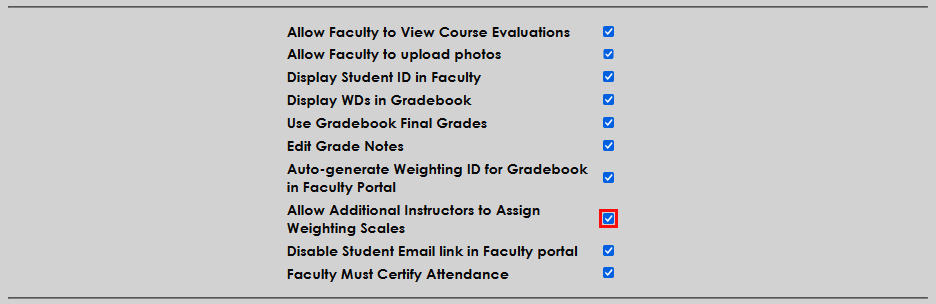
When the option is unchecked, only the primary instructor on the course will have access to add a weighting scale. Additional instructors attempting to do so will see a message informing them that they do not have access.

Display Withdrawals in Attendance
If the Display WDs in Attendance box is checked, students who have withdrawn from a course will still be displayed in the attendance records both in the Faculty portal for administrators. In this scenario, withdrawn students are marked as withdrawn and no attendance can be added for them. If the box is unchecked, these students do not appear at all.

Use Exam ID
Exam IDs are designed to allow instructors to grade exams and other course material anonymously. Each student's exam ID is stored on their Biographic page and can be added or updated to a random number with the Generate ID button.

Exam IDs can also be generated using the Registration Exam ID Utility under the Systems menu.

When the Use Exam ID box is checked, students are still listed by their name in the course roster in the Faculty portal, but their name is replaced by their exam ID in the Gradebook.


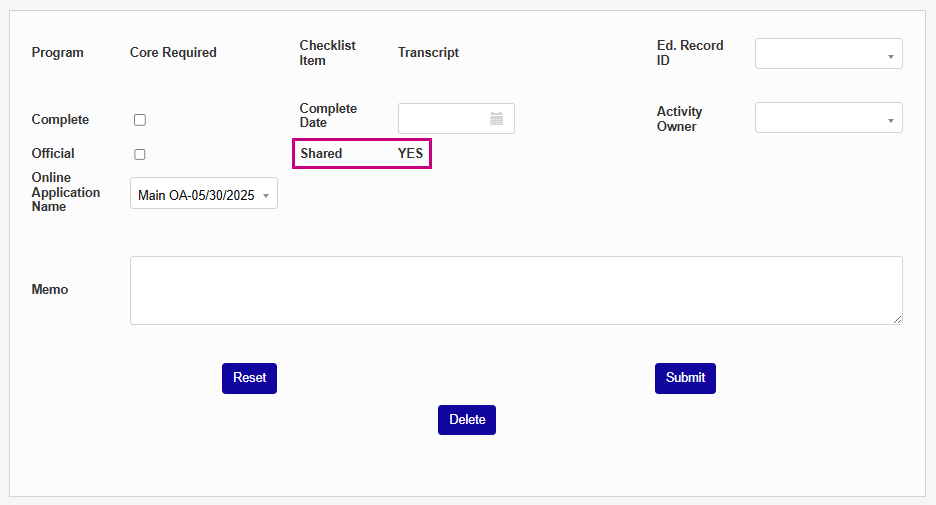
Shared Program and Core Checklist Items
This option ensures that core checklist items are shared between programs and applications. Additionally, program-specific checklist items are shared between applications. Existing duplicates are not deleted but become linked. See Application Checklist for more details.
Grade Archiving
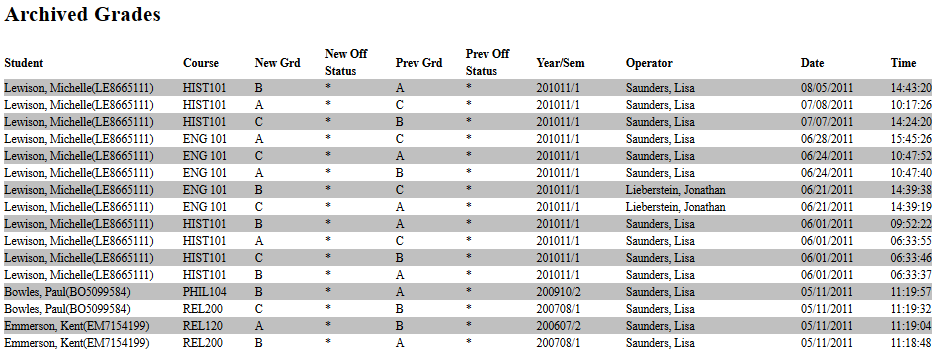
Once a student's grade in a course has been marked as final, it should not be changed under most circumstances. However, there are occasions when changes do need to be made. SONIS offers the ability to track these changes by archiving them.
Three settings are offered. The first is No Grade Archiving, which turns off the feature altogether. The second is Archive ALL Official Grade Changes, which does what the name suggests, making an archive entry every time a grade is changed after it has been made official. The third is Archive Non-Transfer Official Grade Changes. This setting creates a record for official grade changes only for home institution courses since transfer grades may need to be changed more frequently.

Once grade changes have been archived, they can be viewed through the Grades: Archived Report, which displays each change that was made along with the date and time and the name of the staff member who made the change.
Preferred Pronouns
Beginning with SONIS version 3.8, the Biographic page contains an optional Preferred Pronouns field where administrators can specify the pronouns that the user uses. To turn this feature on, navigate to Web Options in the Systems hub and check the Enable Pronouns box. Submit the page to save the change.

By default, this field includes he/him, she/her, and they/them pronouns. To add additional pronouns, navigate to Table Maintenance and Edit the Preferred Pronouns table.
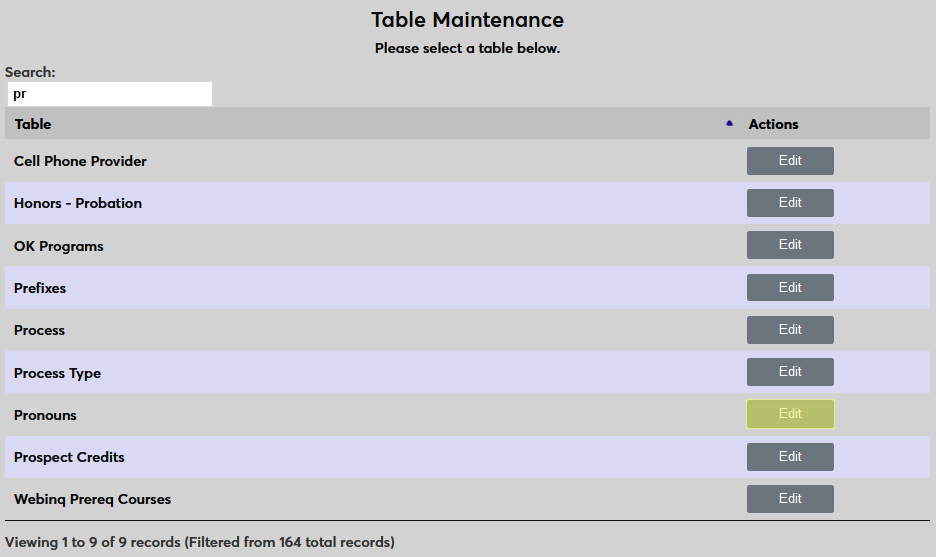
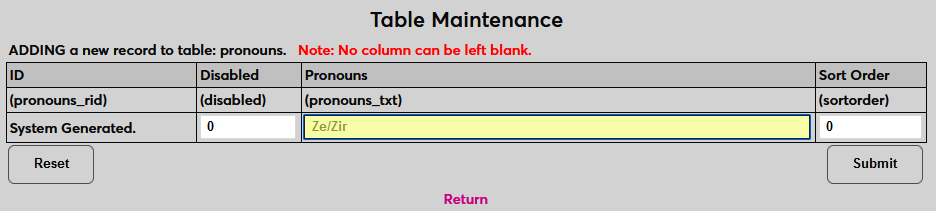
Once the Preferred Pronouns table has been selected, click Add New Record to create a new set of pronouns.
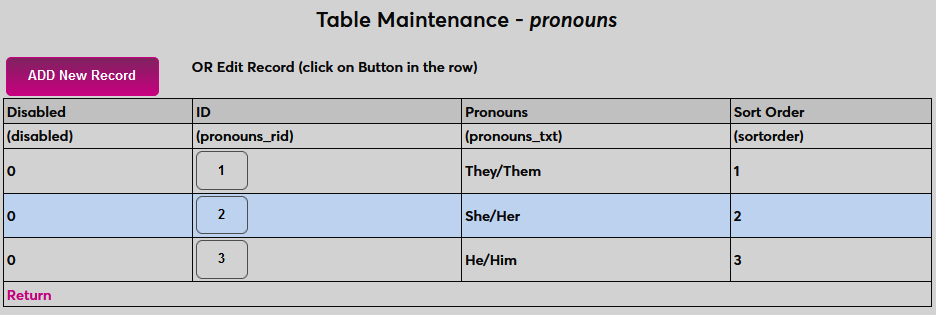
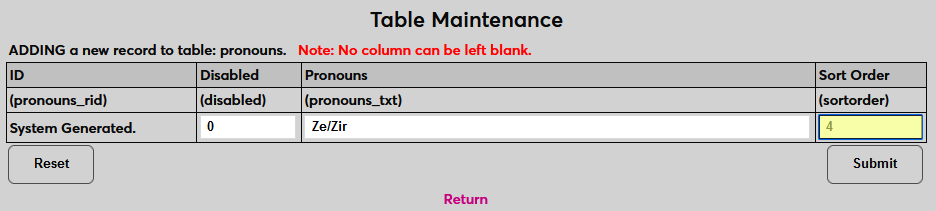
On the following page, enter the pronouns in the Pronouns field and enter a whole number for the Sort Order. The sort order controls where they appear in menus. Click Submit to complete the process.
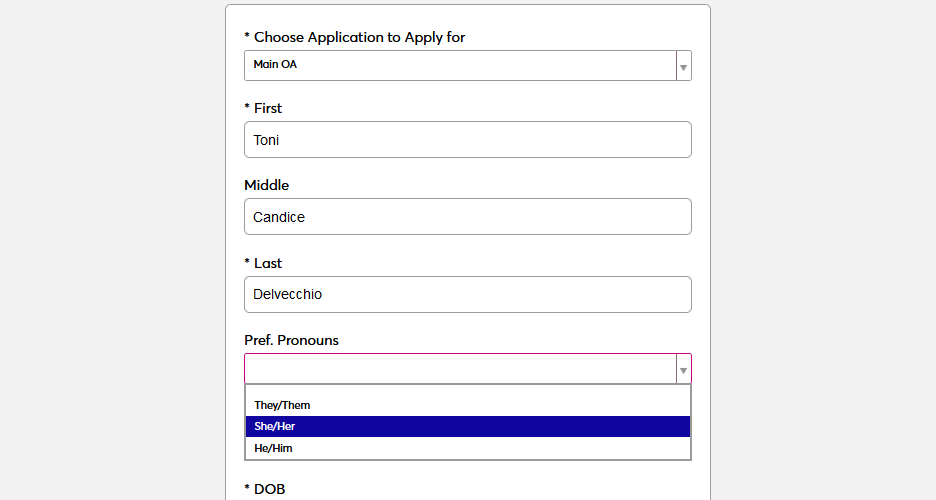
Users can enter their own pronouns through the Prospect Web Inquiry page or when applying through the Jenzabar SONIS Online Application.
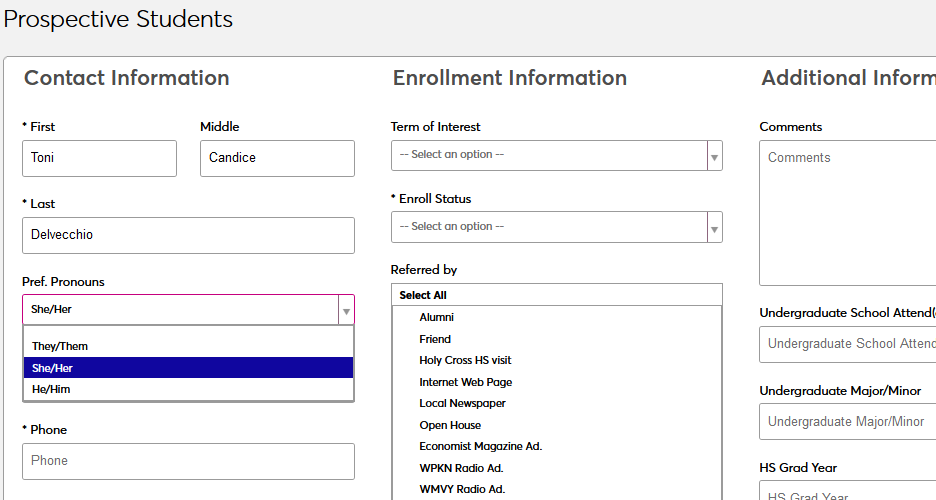
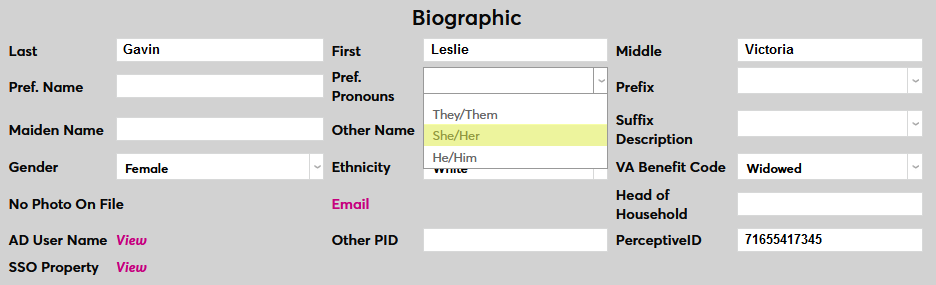
To set pronouns for a user from the Biographic page, simply select the correct pronouns from the Preferred Pronouns dropdown menu and save the page.
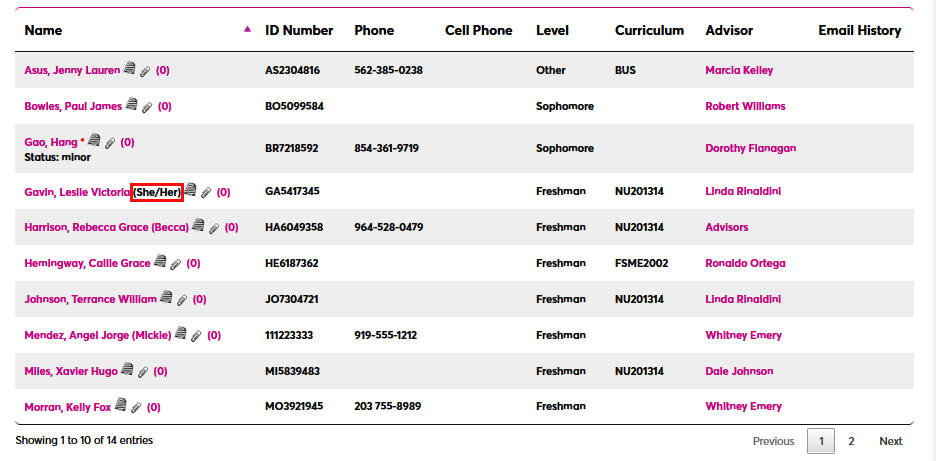
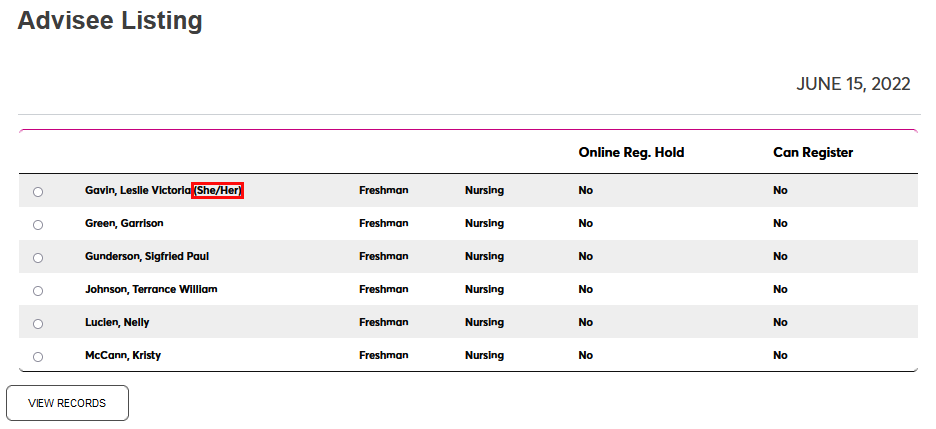
Once preferred pronouns have been set, they can by viewed by faculty from their Course Roster or Advisee Listing.
Pop-Up Calendar
SONIS offers a pop-up calendar feature that allows users to select a date from the calendar rather than having to type it out. Check the Date Field Calendar Pop-Up box to turn this feature on or leave it unchecked to turn it off and require that dates be entered manually.

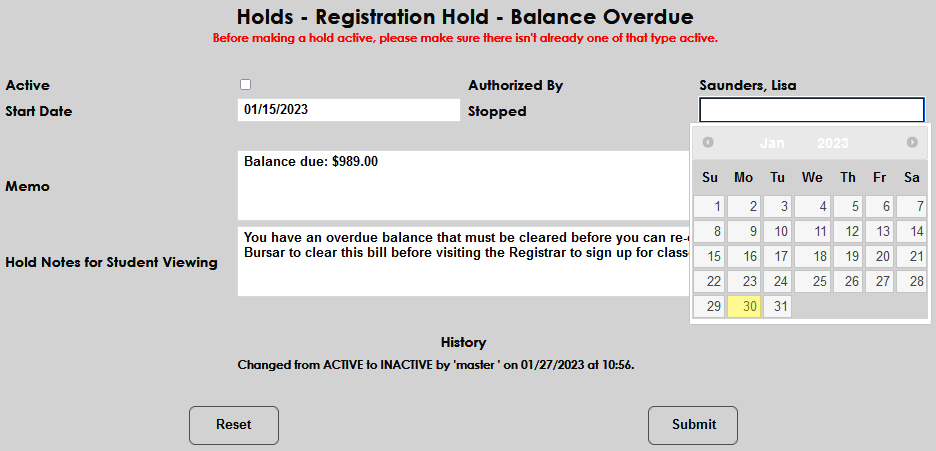
The Calendar Pop-Up One Click option controls how the calendar pops up. With the option off, users must click a date field, click somewhere else, and then click back on the date field for the calendar to display. With the option on, the calendar appears as soon as the field is selected.

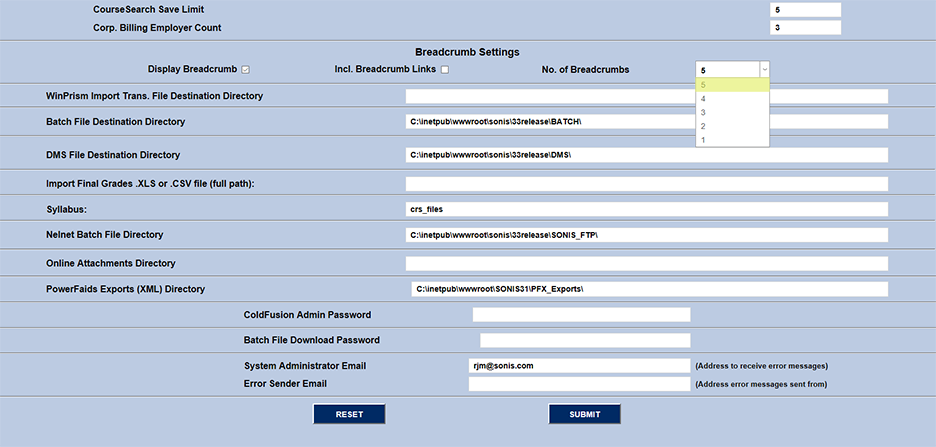
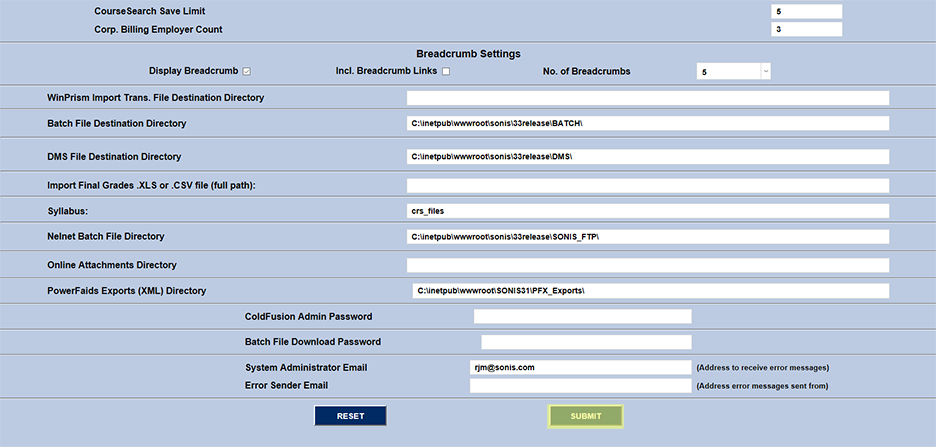
Breadcrumbs Activation
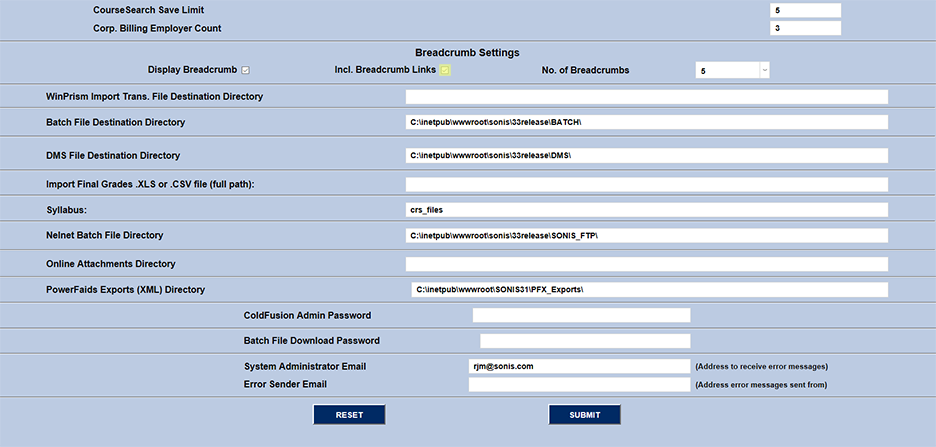
To enable breadcrumbs, visit the Web Options page in the Systems hub. The Breadcrumb Settings section is near the bottom of the page. Click the checkbox next to Display Breadcrumb to activate them. The page also provides the option to make each breadcrumb a link and to choose how many breadcrumbs will display. The administrator can choose to display between one and five breadcrumbs using the dropdown menu. As with other Web Options changes, enabling breadcrumbs will turn them on for all users.

Once breadcrumbs have been enabled, they will display at the top left of every page the user visits, providing a record of the last one to five pages visited. If the Include Breadcrumb Links option has been checked, each breadcrumb will be a link to the previous page visited.
Note that these links will return the user to the active state they were in when they visited that page. For example, if a user searches for a name and brings up that account, make some changes in that account, and then searches for and accesses another account, clicking the earliest breadcrumb will return to the first account selected rather than the most recent one.