Authorize.Net Integration
Overview
Authorize.Net is an online payment gateway, which allows institutions to process payments quickly and securely. Jenzabar SONIS allows customers to use Authorize.Net to process student payments once they've completed a simple setup process.
Account Setup
The first step to setting up the Authorize.Net integration with SONIS is to create an Authorize.Net developer account. Once this has been done, the user will have access to the values they need and can proceed to the account setup in SONIS.
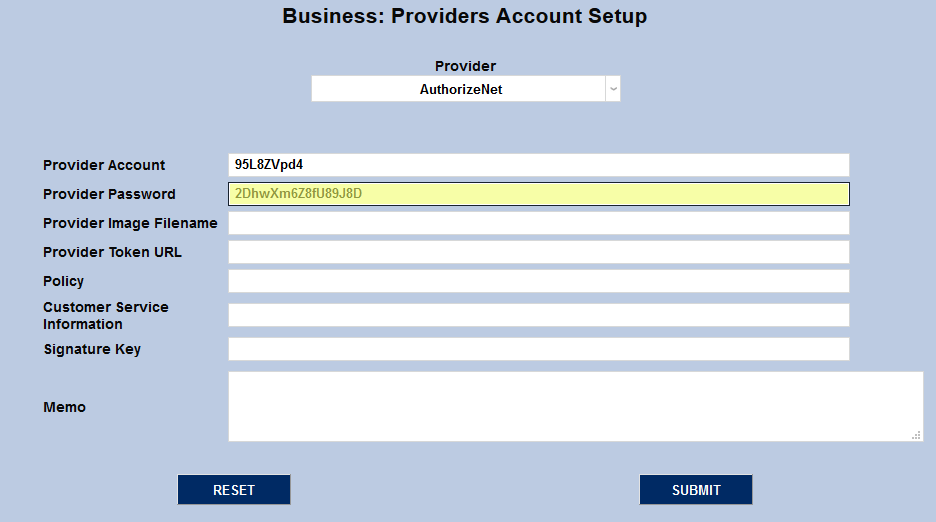
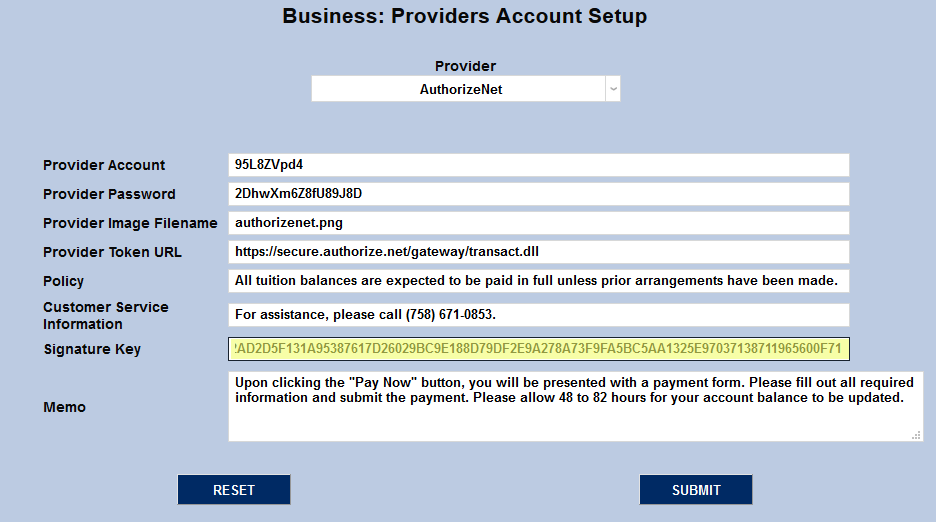
To set up the Authorize.Net account, navigate to the Providers Account Setup page in the Systems hub. Select AuthorizeNet from the Provider dropdown menu.

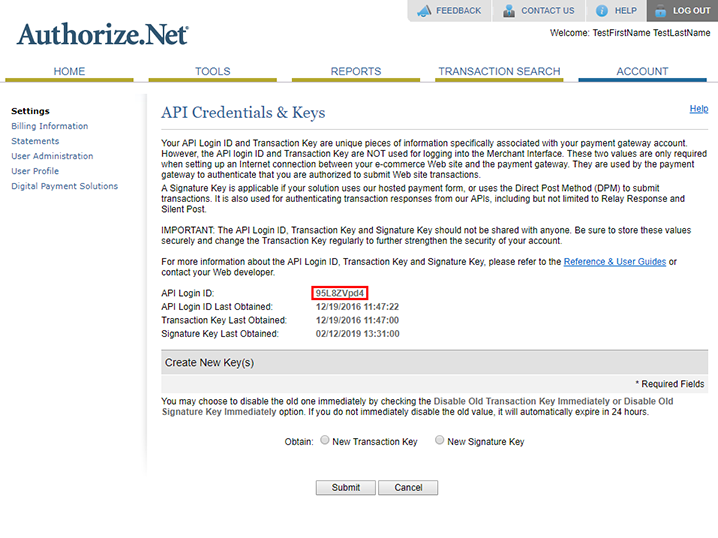
When the account setup fields appear, begin by filling in the Provider Account field. This value is found in Authorize.Net on the API Credentials & Keys page under the account tab. It's listed there as the API Login ID.
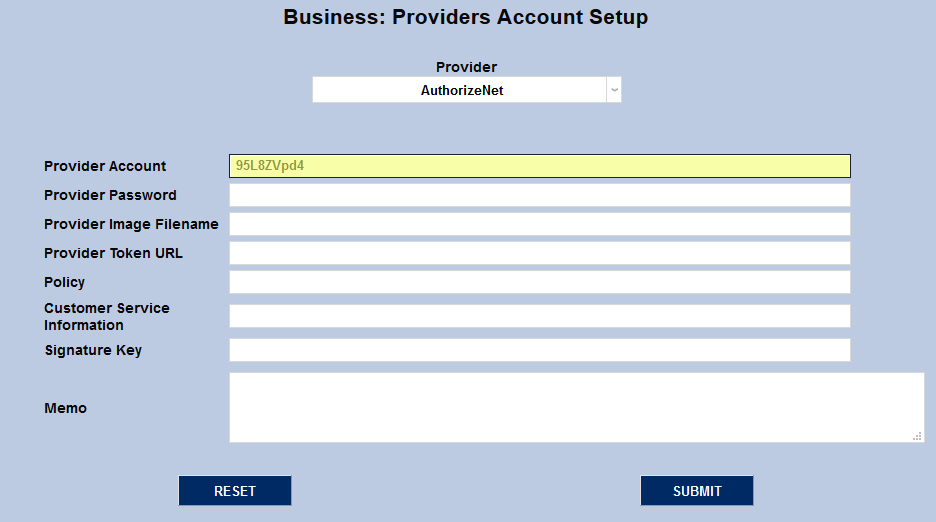
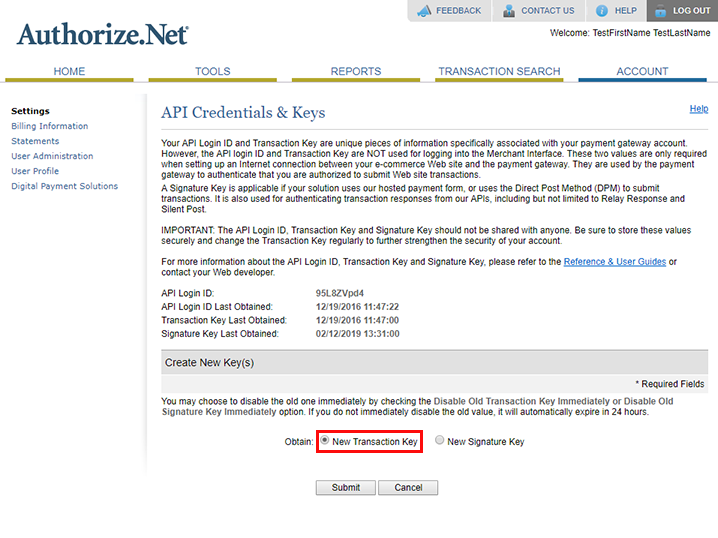
The Provider Password is called the Transaction Key within the Authorize.Net developer site. Click the New Transaction Key button followed by the Submit button to obtain this value.
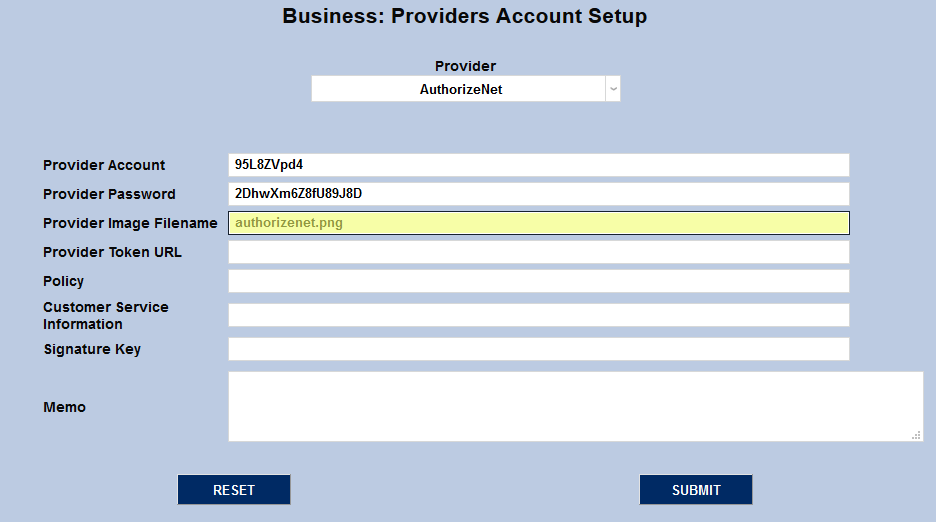
Each customer's SONIS Images folder should already contain an Authorize.Net logo file. If this file is missing or an administrator wishes to use a different logo, they can place the new file in their Images folder. Place the filename in the Provider Image Filename field to create a link to the logo.
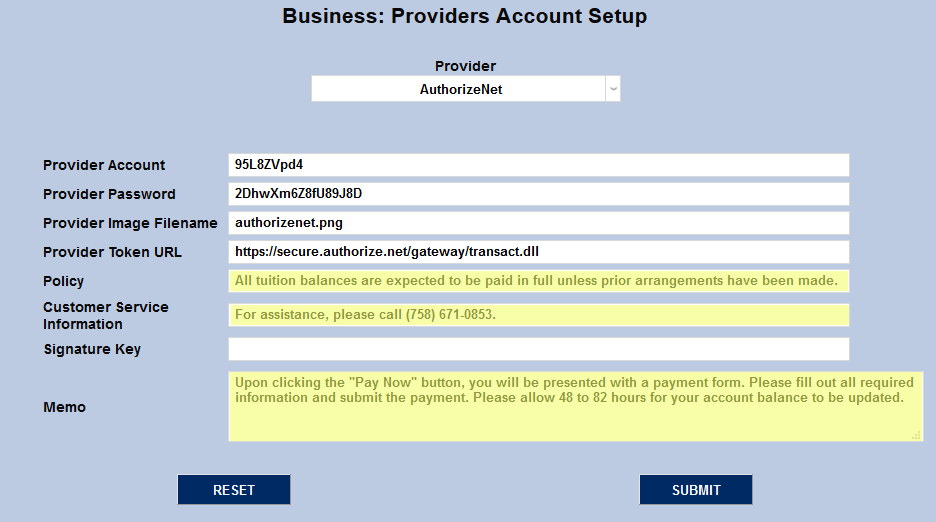
The Provider Token URL is the same for every institution. Based on the current Authorize.Net setup, the URL for testing is https://test.authorize.net/gateway/transact.dll while the URL for production is https://secure.authorize.net/gateway/transact.dll.

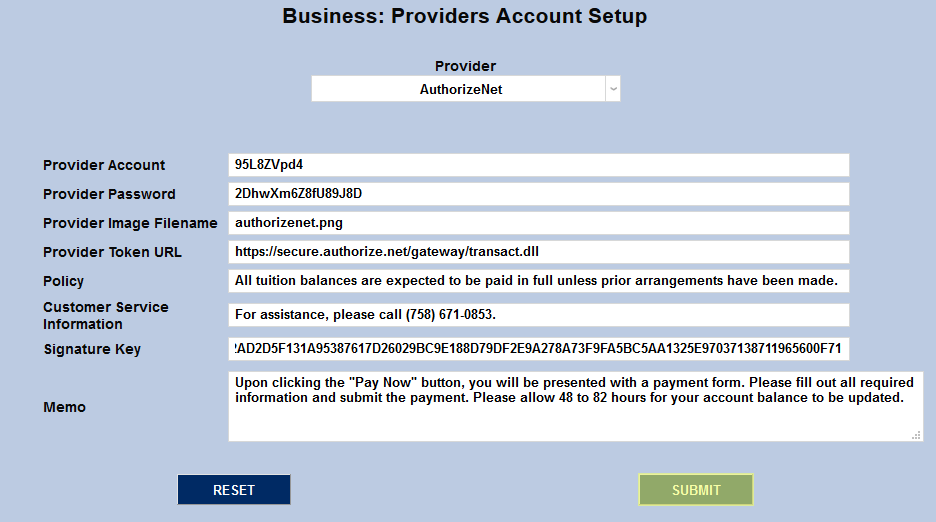
Policy, Customer Service Information, and Memo are all fields that display on the initial page before going to the Authorize.Net site and can be tailored to the needs of the customer.
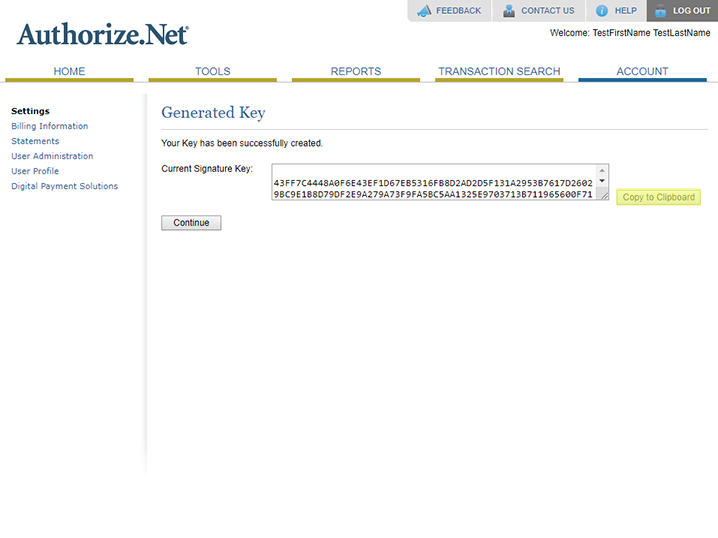
The Signature Key is another value obtained from the Authorize.Net developer site. On the API Credentials & Keys page, click the New Signature Key button and then Submit.
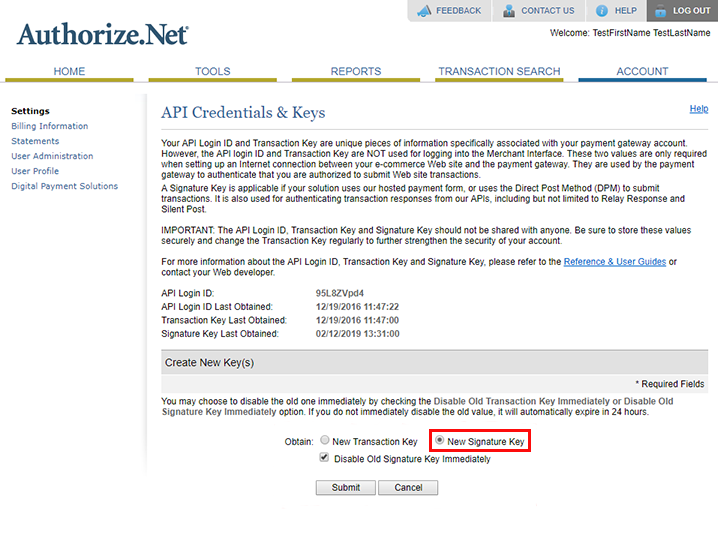
Users may be asked to create a new pin before viewing the new signature key. Once the new pin process has been completed, the new signature key will be displayed and can be copied to the Signature Key field.
Once every field has been completed, click Submit to save the account setup data.
Relay Response URL
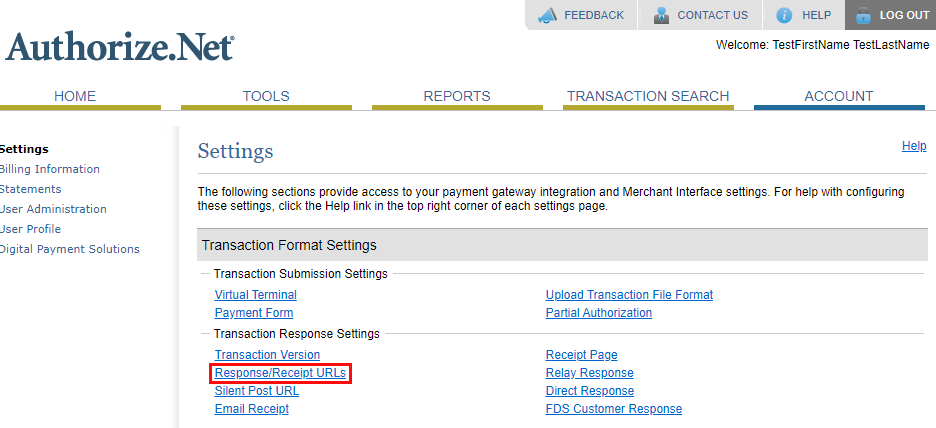
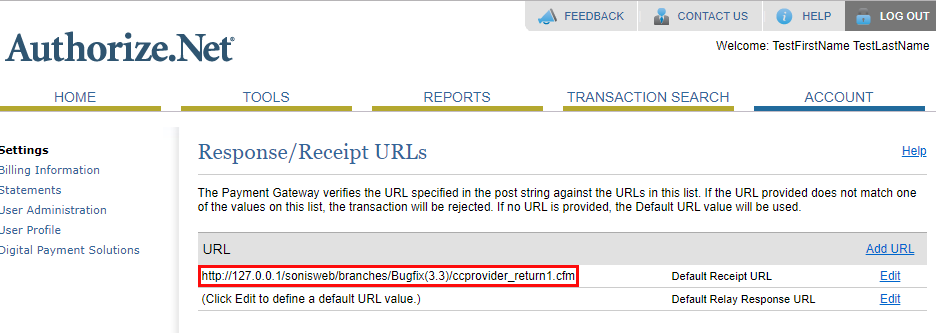
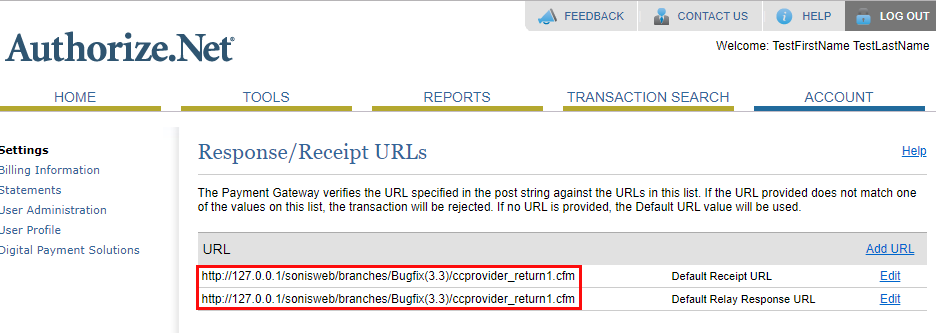
In order to avoid a security error that prevents Authorize.Net payments from functioning properly, users must also set up a default relay response URL in their Authorize.Net system. To do so, first log in to the Authorize.Net sandbox account and select Response/Receipt URLs under the Account Settings tab.
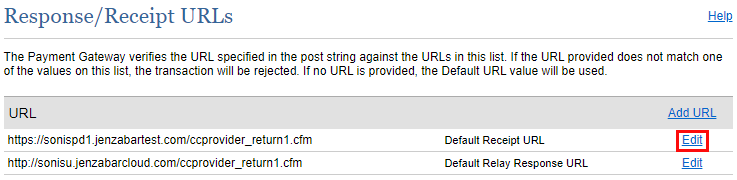
On the following page, begin by Editing the Default Receipt URL
Set the URL to the local address where the page, ccprovider_return1.cfm is hosted. For example, https://sonisu.jenzabarcloud.com/ccprovider_return1.cfm.
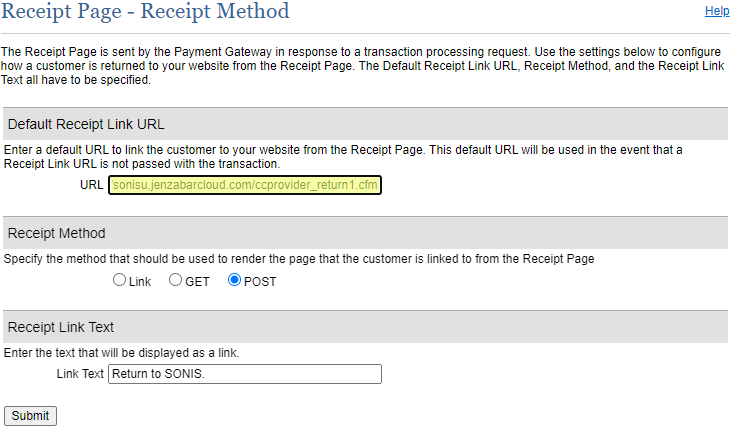
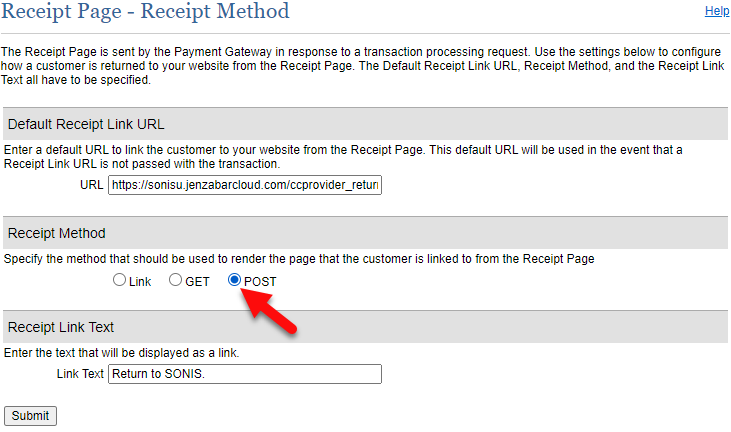
Ensure that the Receipt Method is set to Post. The Receipt Link Text is the text that will appear above the button that the student clicks to return to SONIS. This can be set according to institutional preferences.

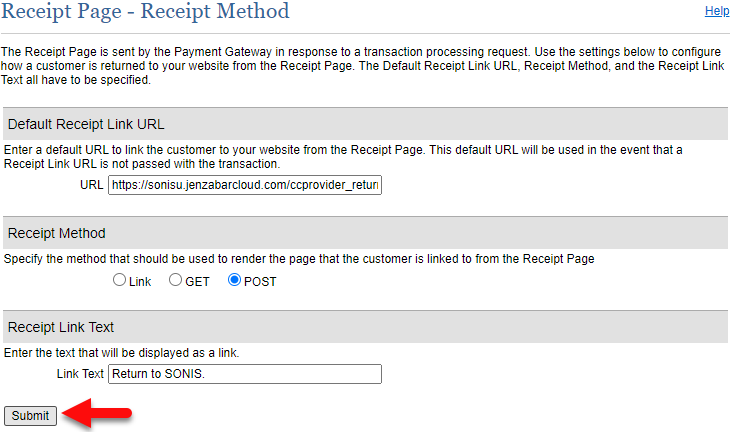
Click Submit to save the changes and return to the previous page.
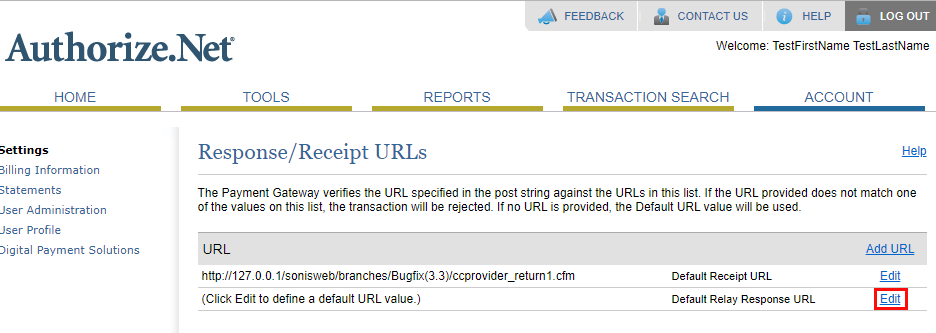
Next, copy the Default Receipt URL that was just entered and click Edit next to the Default Relay Response URL.
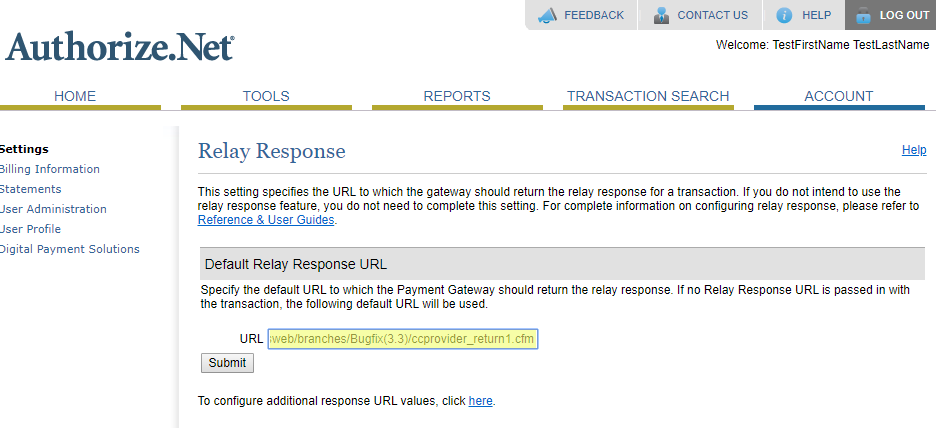
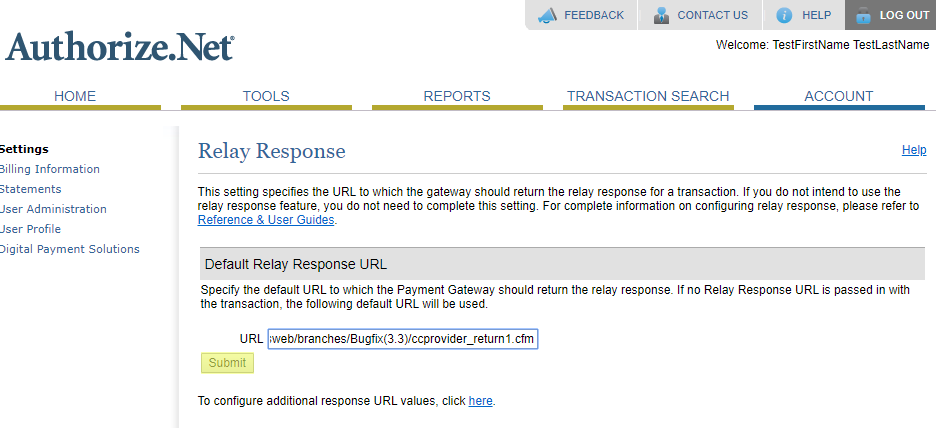
Paste the previously copied info in to the URL field on the Relay Response URL page. Click Submit to save the change.
Return to the Response/Receipt URLs that both URLs are in place.
Credit Card Processing
Once the Authorize.Net account information has been set up, administrators must choose a payment type or types to be handled by Authorize.Net. Navigate to the Credit Card Processing utility in the Systems hub.
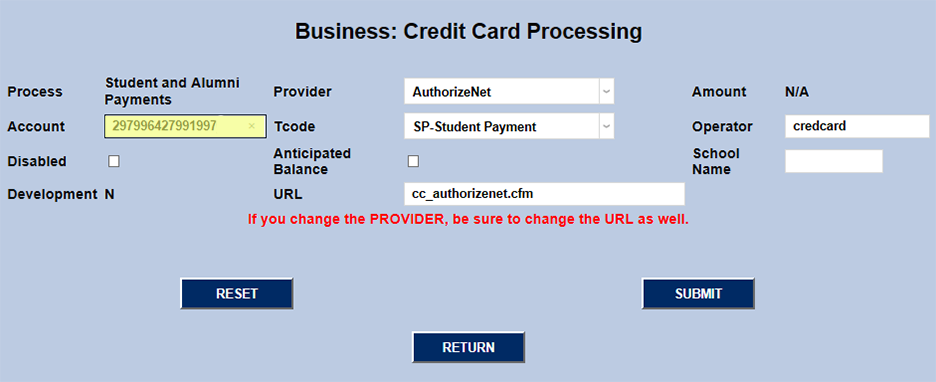
The start page displays each type of process along with the Provider currently set up for that process, the Account, the standard Amount if there is one, the Transaction Code, and the Operator. The table also lists whether the process is Disabled or not. The Dev field is no longer used.
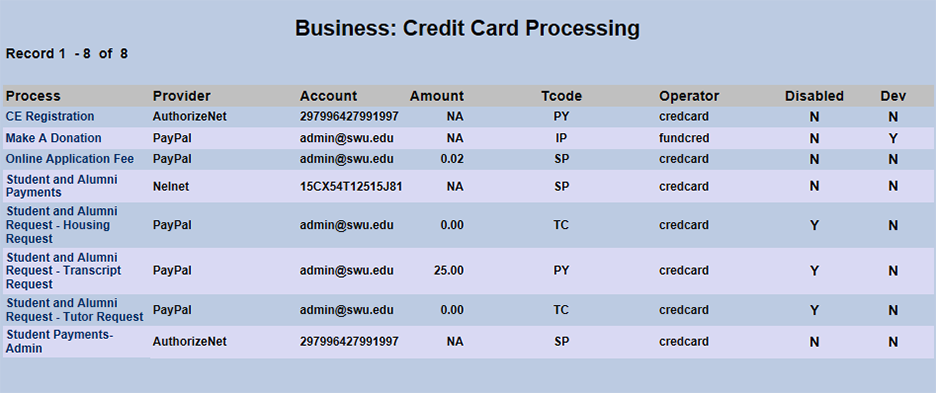
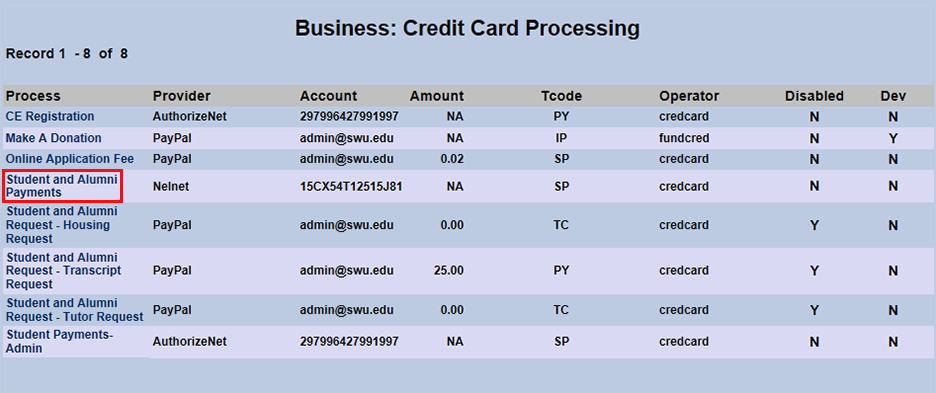
To set up a process type, click the link for that type in the Process column.
Select AuthorizeNet from the Provider dropdown menu and enter the school's Authorize.Net account number.
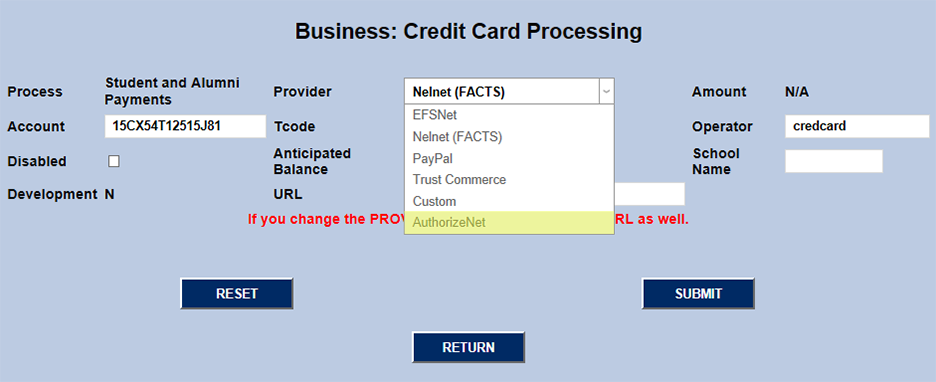
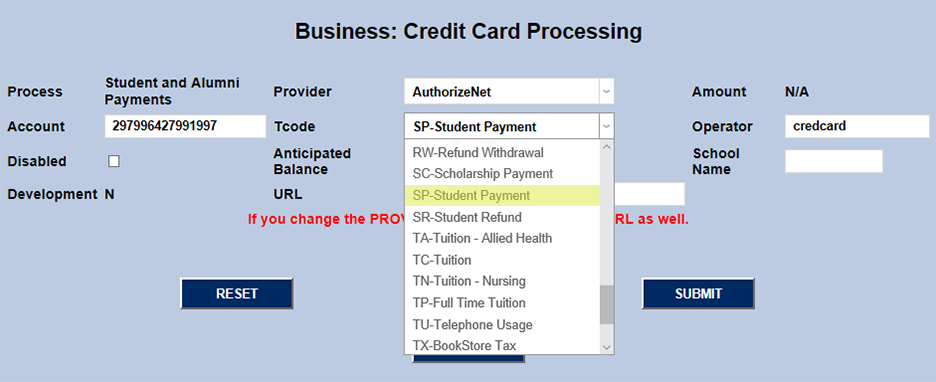
Next, select a Transaction Code from the T-code dropdown.
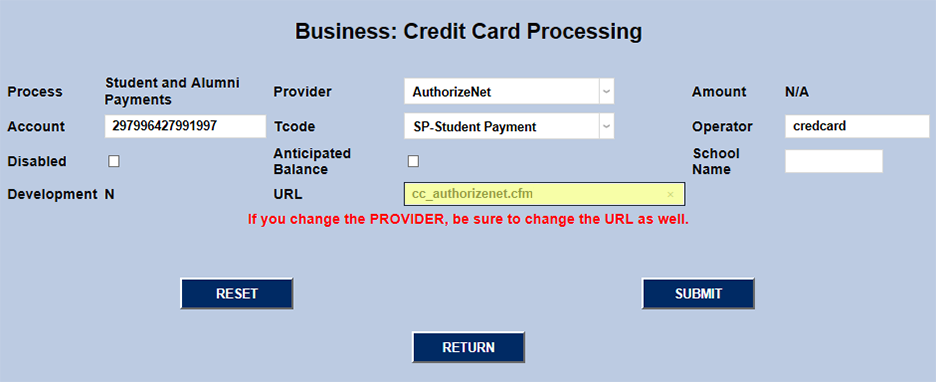
Finally, fill in the proper URL for the payments to be processed and click Submit. For the current Authorize.Net setup, this URL is cc_authorizenet.cfm.
Payment Processing Options
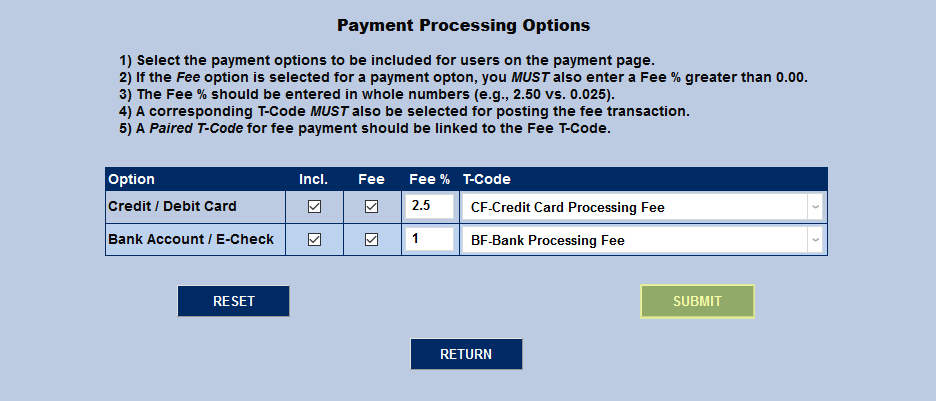
Two kinds of payments can be processing through Authorize.Net: credit/debit card payments and bank account/echeck payments. These transactions can be assigned a processing fee to pass on the cost associated with providing each type. To control which types are available to users and the fees charged, scroll down to the Payment Processing Options section of the page.
To include a payment option, click the Include box. If neither option is selected, the Credit/Debit Card option will automatically be offered to users by default.
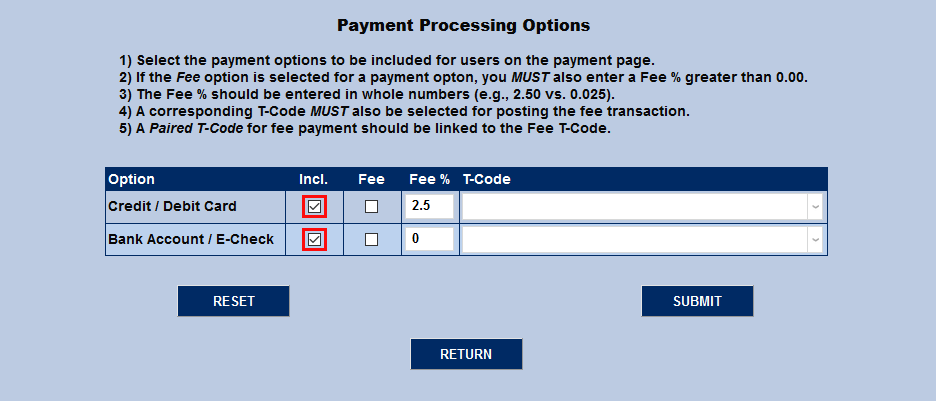
Administrators can choose to have a fee associated with one, both, or neither payment type. To include a fee with purchases made using one or both of the options, check the Fee box.

If a fee is being charged, a Fee % must be set. This value should be entered as a percentage, not a decimal, though it can be a mixed number that includes a tenths decimal place.
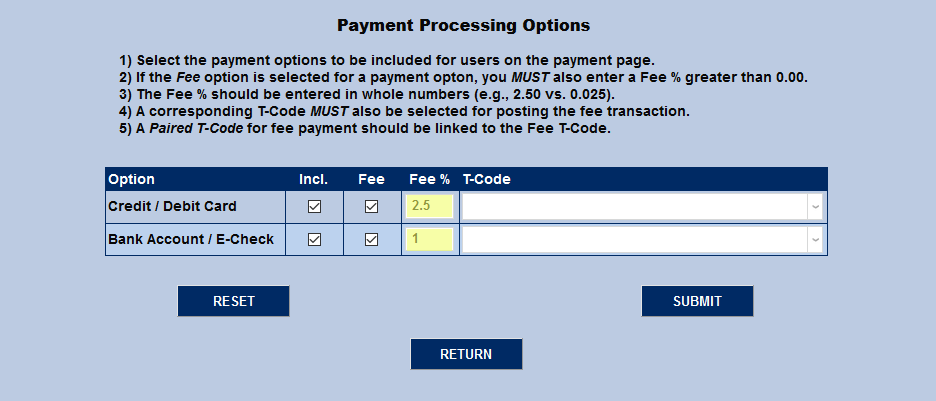
Finally, each transaction type must have a T-Code associated with it. For accurate bookkeeping, institutions should create a specific transaction code for each payment type. These t-codes should be linked to the t-code for the payment type itself. Some institutions may also wish to link the fee code under the payment type code as well for added clarity.
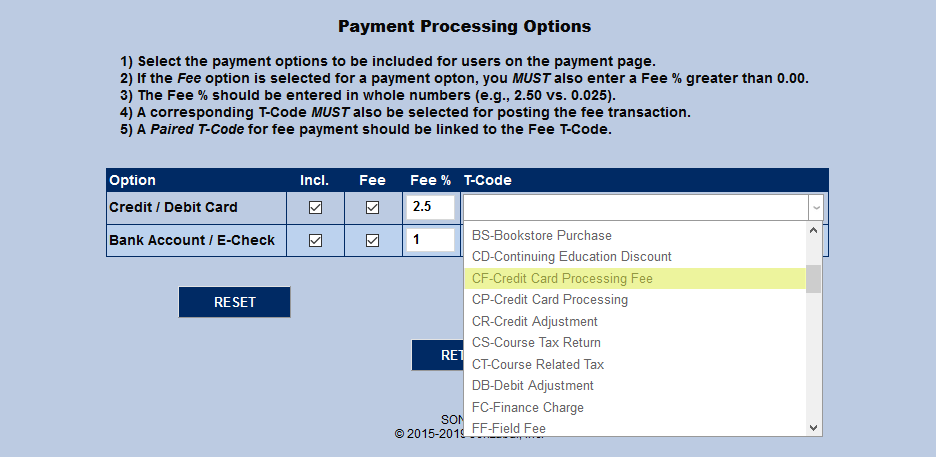
Click the Submit button to save the changes and activate Authonize.Net as a payment provider.