Profile Utility
Overview
The Profile Utility, available in the Systems hub, is designed to allow administrators to choose and edit the level of access that groups of users have to the Jenzabar SONIS system. Once an administrator has created a set of user profiles, individual users can be placed within these profiles as a quick way of setting their access level without having to grant or restrict access to each and every SONIS feature to each and every user. Most schools create these profiles to match up with certain job descriptions. So for example, all admissions personnel may share one basic profile while recruiters would have a different profile. It's still possible to edit an individual user's access if they need to use features that are not part of the profile to which they've been assigned. The Profile Utility provides a starting point and saves time. From here, administrators can create new profiles or edit existing profiles.
Creating a Profile
To create a new staff profile, navigate to the Profile Utility under the Systems hub.
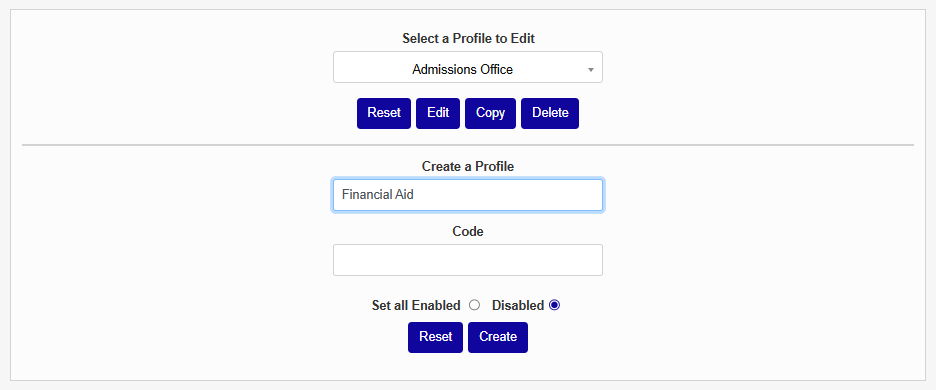
Enter a name for the profile in the Create a Profile box. The name should be something easy to remember that describes the job title and/or the access level. Other users should have a basic idea of the SONIS features these users will have access to based on reading the name.
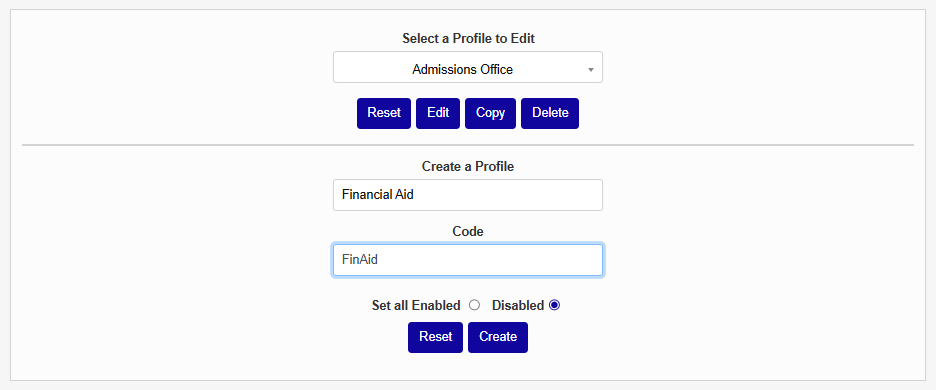
Enter an abbreviation of some kind for the profile in the Code box. The code is how the SONIS system will recognize the profile. The code must be between one and ten characters. It can contain letters or numbers, but no spaces or special characters.
The Profile Utility provides the option for a new profile to start with every feature enabled or every feature disabled. When creating a profile for power users who will need to access all or almost all of the SONIS features, it's best to choose the Set all Enabled option. When creating other accounts that will be more limited, the Disabled option should be selected.
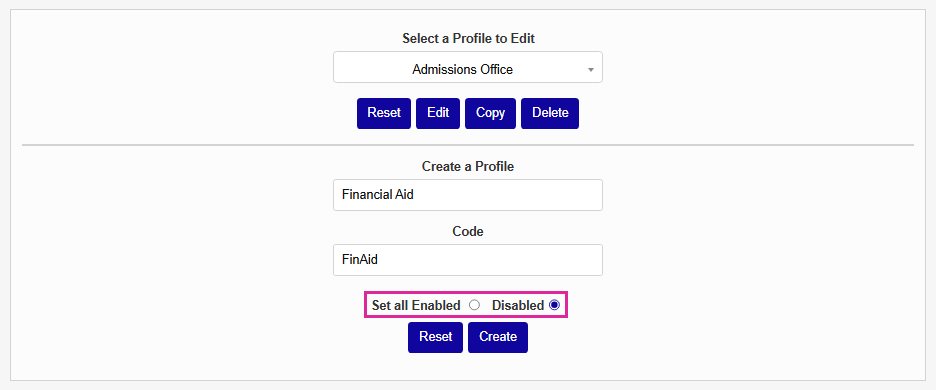
Once the profile name and code have been entered and the Enabled or Disabled option has been chosen, click Create to create the profile and begin choosing the specific access areas.

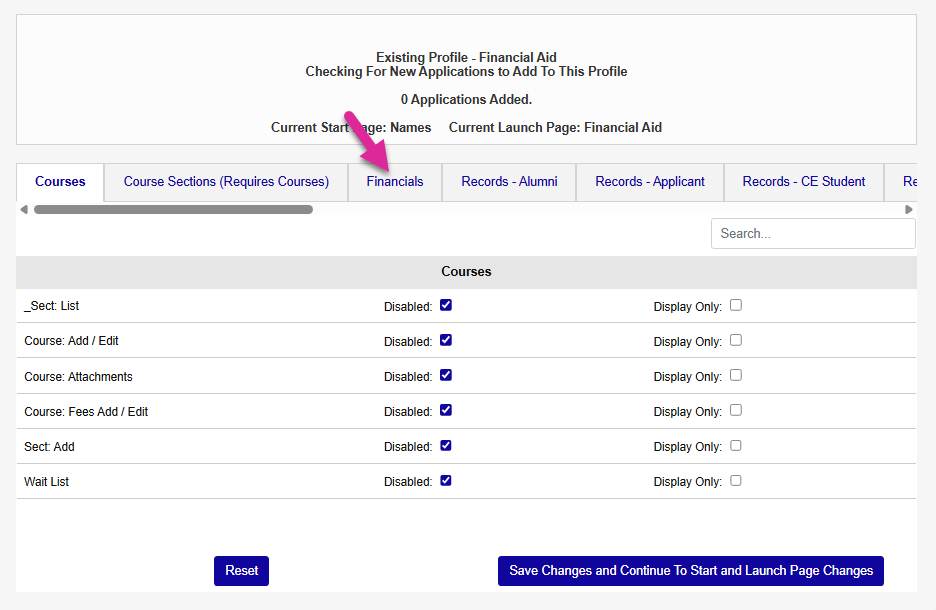
The page list is organized into tabs that make it easier to navigate. Each tab corresponds to a different SONIS hub and user type. Select another tab to locate additional pages.
Note
When you've selected a tab with a long list, you can use the search box on the right to narrow down the list and find the page you're looking for more quickly.
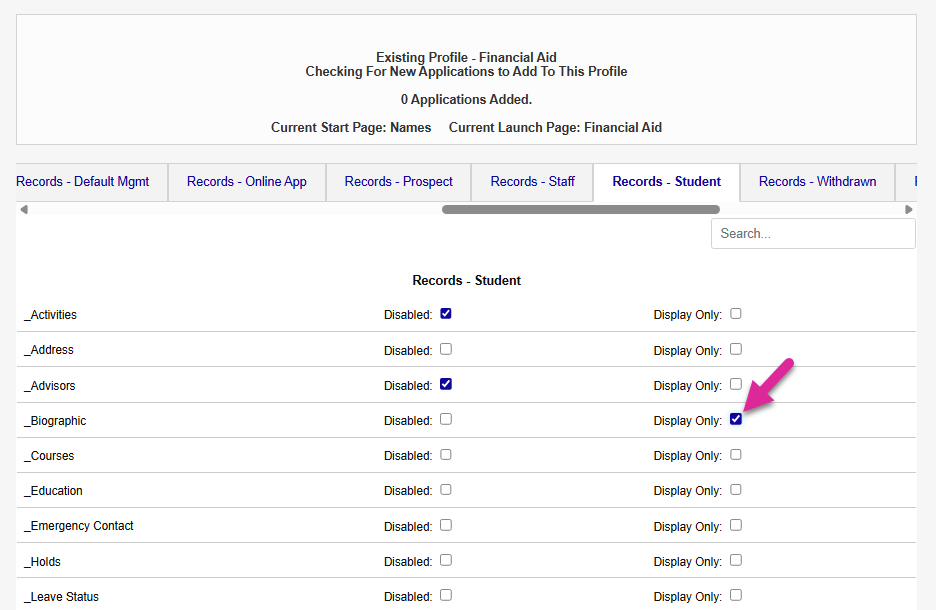
If you chose to start the profile with every page disabled, locate the pages you want to give the users access to and uncheck the Disabled box for each of them. If you chose to start the profile with every page enabled, locate pages that you want to remove access to and check the Disabled box for each of them.
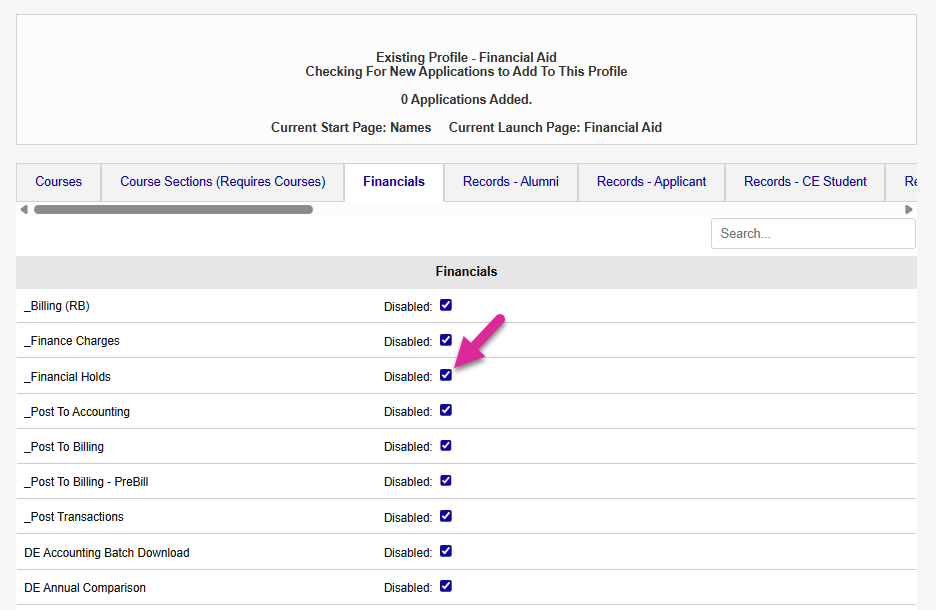
Some pages offer a display-only version. This means that the user can view everything on the page but they can't make any changes. To grant display-only access, ensure that the Disabled box is unchecked and the Display Only box is checked.
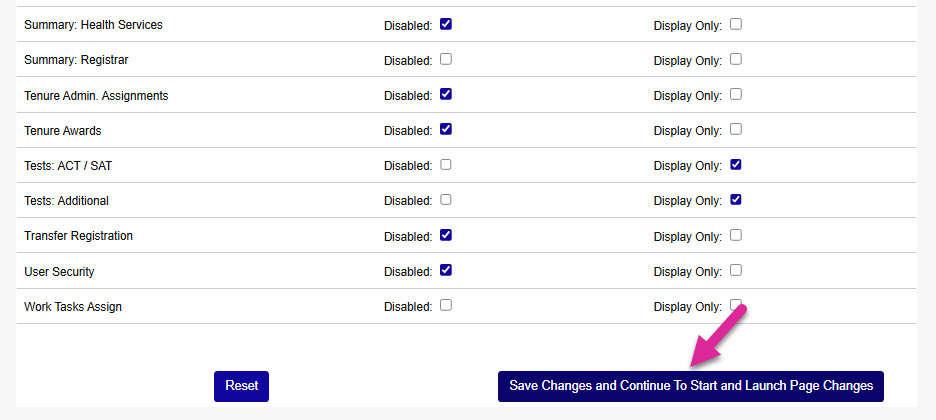
Once the proper boxes have been checked and unchecked, scroll down to the bottom of the page to save the changes to the profile using the Save Changes and Continue to Start and Launch Page Changes button. The system also provides the option to Reset the profile to the state it was in before the edit began if access to boxes were checked or unchecked inadvertently.
Setting the Start Page
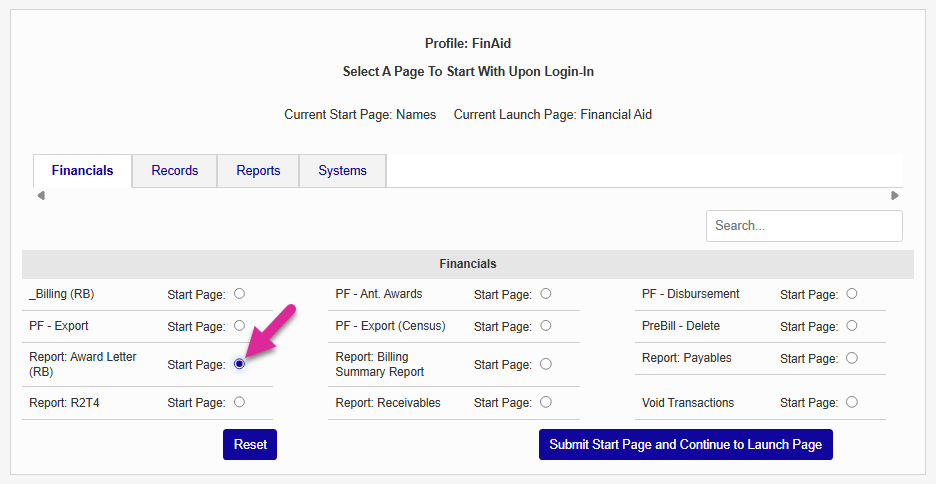
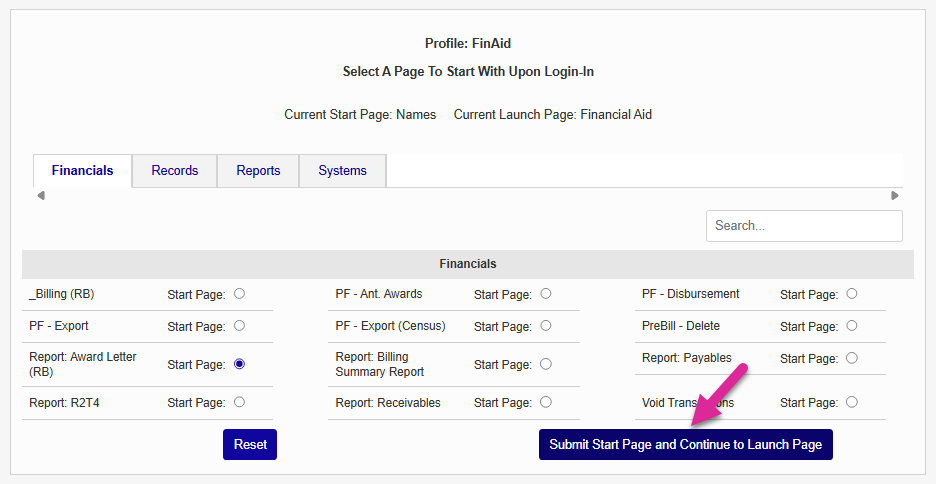
Next, the administrator will be prompted to designate which page the profile's users will see as their Start Page. The Start Page is the first page the user will see when logging into the Jenzabar SONIS system. The chosen page should be the one that will likely be used the most frequently for users under this profile. Every page that the profile has been granted access to is listed as an option. Again, they're organized in tabs. Only one page may be chosen.
Choose a Start Page and then scroll down and click the Submit Start Page and Continue to Launch Page button to save changes and continue. As on the last page, a Reset button is provided to undo inadvertent changes.
Setting the Launch Page
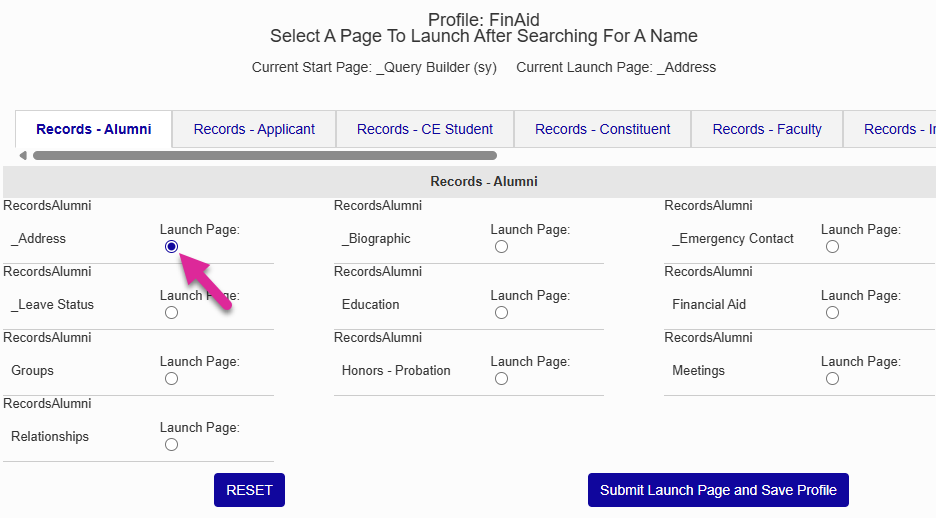
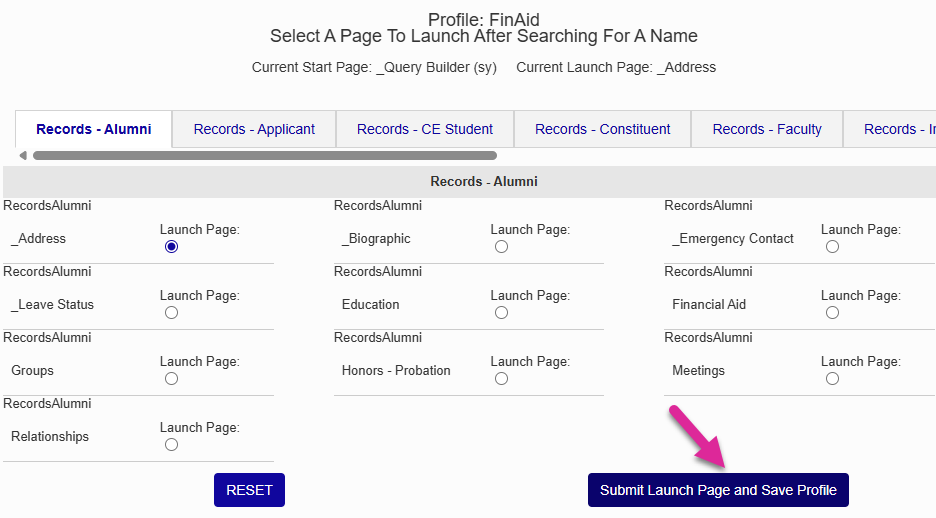
After selecting a Start Page, you will be asked to select a Launch Page. The Launch Page is the first page that appears when a user pulls up a profile using the Name Search function. If you picked a Users page as your Start Page, you will simply be asked to confirm this choice. If you picked a page from another hub, select a Launch Page from the presented options and click Submit Launch Page and Save Profile. This is the final step in creating a profile.
Editing an Existing Profile
The Profile Utility also allows administrators to edit existing profiles.
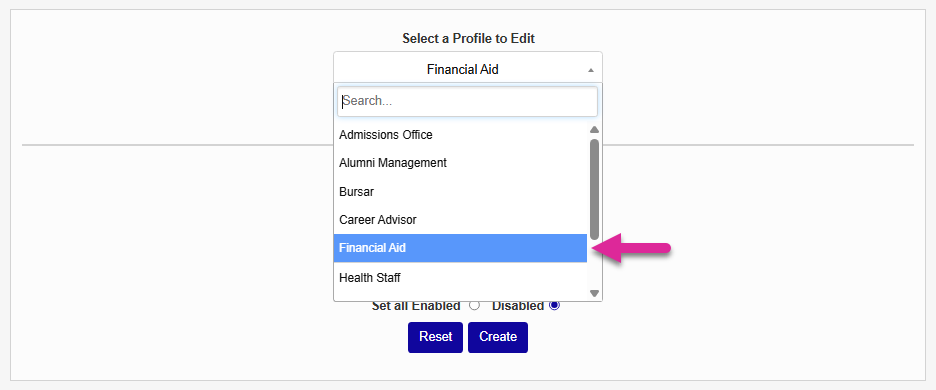
To begin the process, navigate to the Profile Utility homepage under the Systems hub and choose the profile to be edited with the dropdown menu. Click the Edit button to begin editing.
The page list is organized into tabs that make it easier to navigate. Each tab corresponds to a different SONIS hub and user type. Select another tab to locate additional pages.
Note
When you've selected a tab with a long list, you can use the search box on the right to narrow down the list and find the page you're looking for more quickly.
Check and uncheck the Disabled boxes to add and remove pages.
Some pages offer a display-only version. This means that the user can view everything on the page but they can't make any changes. To grant display-only access, ensure that the Disabled box is unchecked and the Display Only box is checked.
Once the proper boxes have been checked and unchecked, scroll down to the bottom of the page to save the changes to the profile using the Save Changes and Continue to Start and Launch Page Changes button. The system also provides the option to Reset the profile to the state it was in before the edit began if access to boxes were checked or unchecked inadvertently.
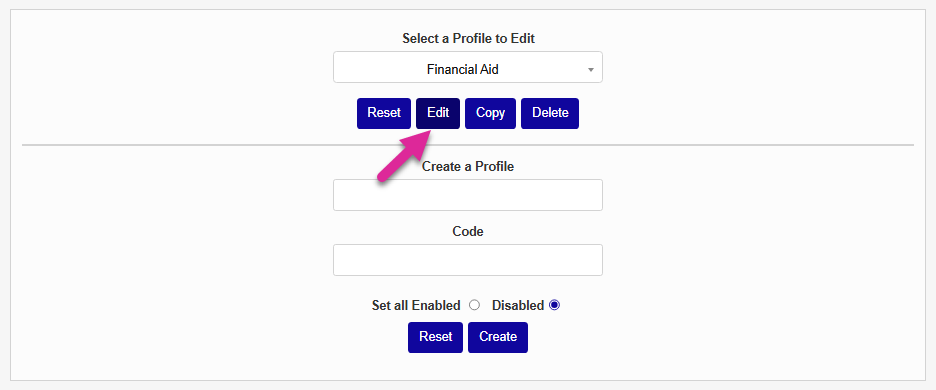
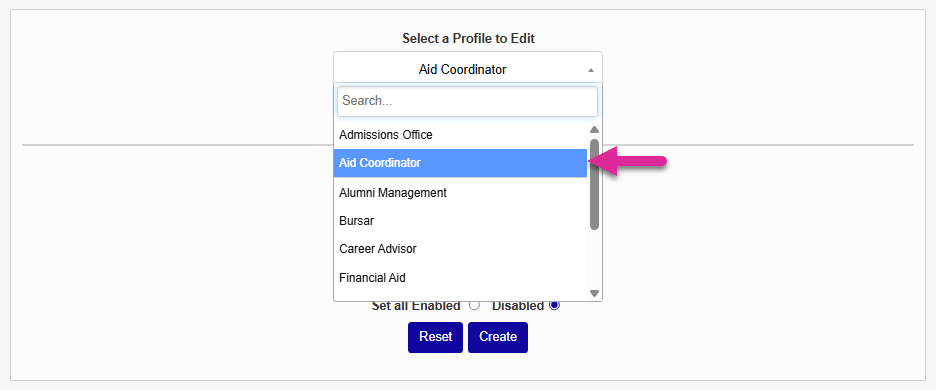
Choosing a Profile to Edit
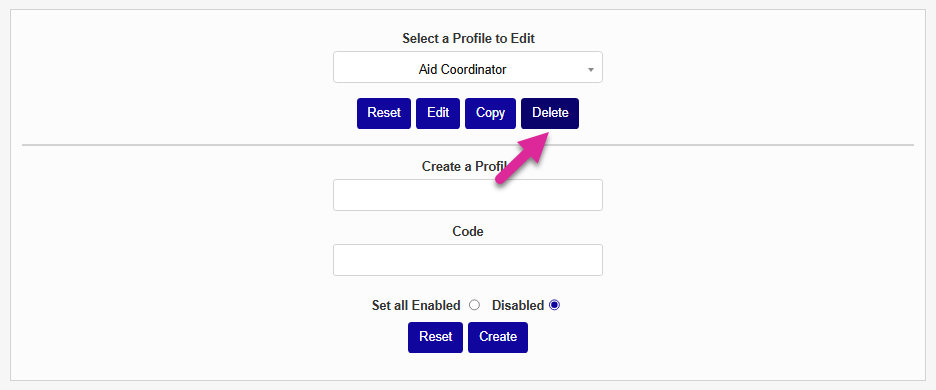
This process is begun by navigating to the Profile Utility homepage under the Systems tab and choosing the profile to be edited with the dropdown menu towards the left of the page. Once the profile to be edited has been selected, administrators can choose to Edit, Copy, or Delete the profile by using the buttons to the right. Click the Edit button to begin editing.
Viewing Added SONIS Applications
If new features have been added to SONIS since the profile was last edited, they will be displayed at the top of the page and added to the list of available options below. This list can serve as a useful reminder of potential access areas that need to be added. They will be disabled by default.
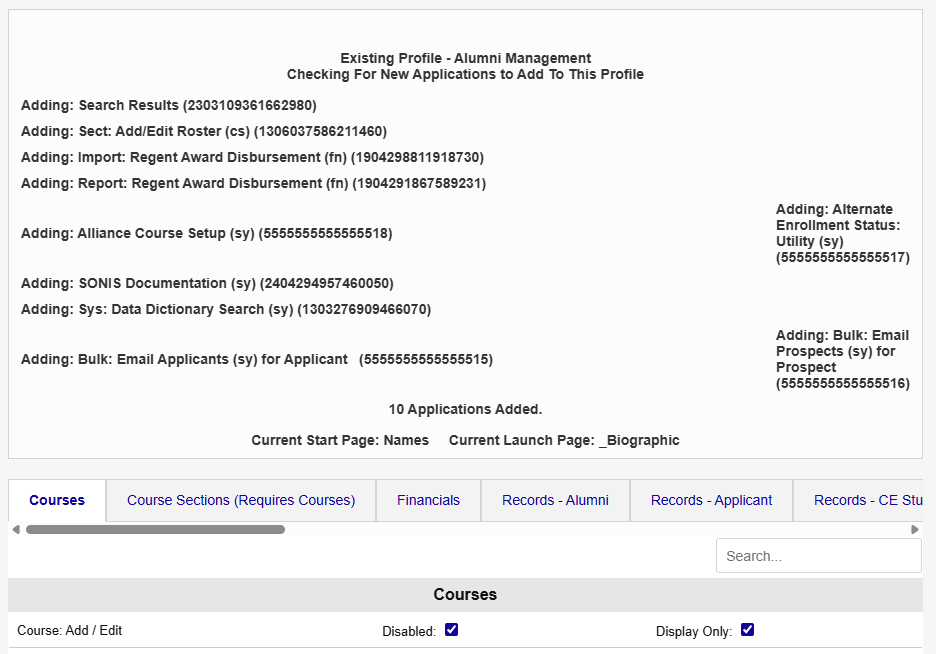
Changing Application Access
Below the list of added applications is the list of all applications. Some of these will say Disabled and/or Display Only in red and others will say Disabled and/or Display Only in black depending on the decisions made when setting up the profile. Check and uncheck the boxes to add or take away access to SONIS programs and features.
Once the appropriate changes have been made, scroll down and click the Save and Continue to Start and Launch Page Changes button to submit. A Reset button is available for inadvertent changes that need to be undone.
Editing the Start Page
Next, the administrator will be give the option to change which page the profile's users will see as their Start Page. Every page that the profile has been granted access to will be listed as an option. The Start Page is the first page the user will see when logging into the SONIS system. The chosen page should be the one that will likely be used the most frequently for users under this profile. Only one page may be chosen. If no changes need to be made, the Start Page can be left as-is. Choose a Start Page and then scroll down and click the Submit Start Page and Continue to Launch Page button to save changes and continue. As on the last page, a Reset button is provided to undo inadvertent changes.
Editing the Launch Page
After submitting Start Page changes, the SONIS system will ask the administrator to edit the Launch Page. The Launch Page is the first page that appears when a user pulls up a profile using the Name Search function. Select a Launch Page from the presented options and scroll down to either Submit Launch Page and Save Profile or Reset and make changes. As in the previous step, the Launch Page can be left as-is if no changes are needed. This is the final step in editing a profile.
In some cases, the Launch Page may be locked in to a specific option based on the Start Page chosen on the previous page. The only option given will be to set Launch Start Page and save the profile.
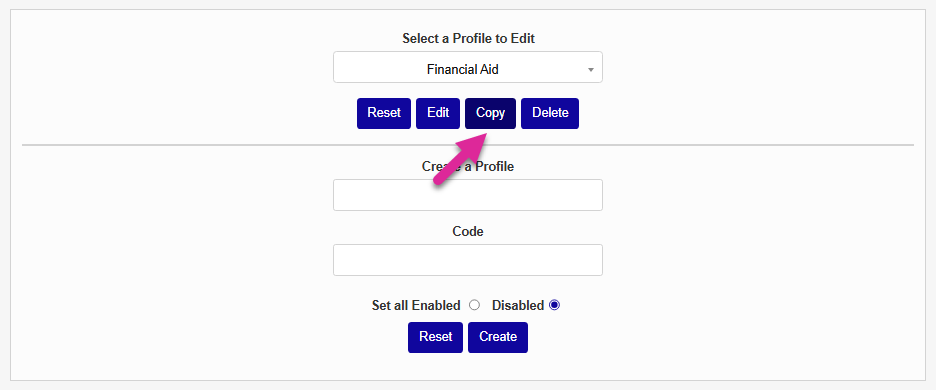
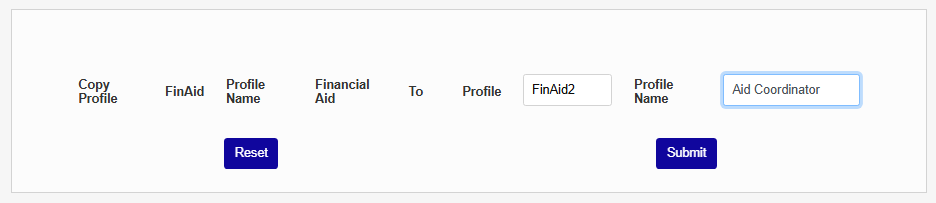
Copying an Existing Profile
In addition to creating and editing profiles, the Profile Utility also allows administrators to copy an existing profile. Copied profiles can be used as a starting point for a needed profile that will be similar. Select a profile from the drop-down menu and click the Copy button.
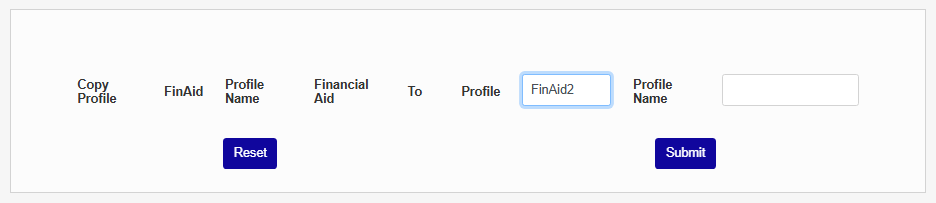
On the next page, the system will ask for the profile to be copied to. Enter both the Profile, the 10 character or less code used to identify the profile in the system, and the Profile Name, which can be up to 20 characters and include spaces. This must be a new profile that is being created by this process. Existing profiles can not be edited in this manner. Once both boxes are filled in, click Submit.
You'll be returned to the Profile Utility homepage. From here, you can make changes to the profile to tailor it to its new use.
Deleting an Existing Profile
Another option provided by the Profile Utility is to delete profiles that are no longer being used. Select the profile to be deleted from the dropdown menu and click the Delete button to submit.
On the following page, click Confirm Delete to complete the process.
