Degree Audit
Overview
The Jenzabar SONIS degree audit functionality allows institutions to create requirements for completing a degree in a specific program and then check a student's progress towards completing those requirements. The degree audit for each student is based on the program that they've been assigned. Each program can have its own requirements and sub-requirements as well as courses that must be completed to earn the degree. The audit can be run by an administrator using the DA: Report utility in Systems or by the student using the Degree Audit function under their Academics menu.
Setup
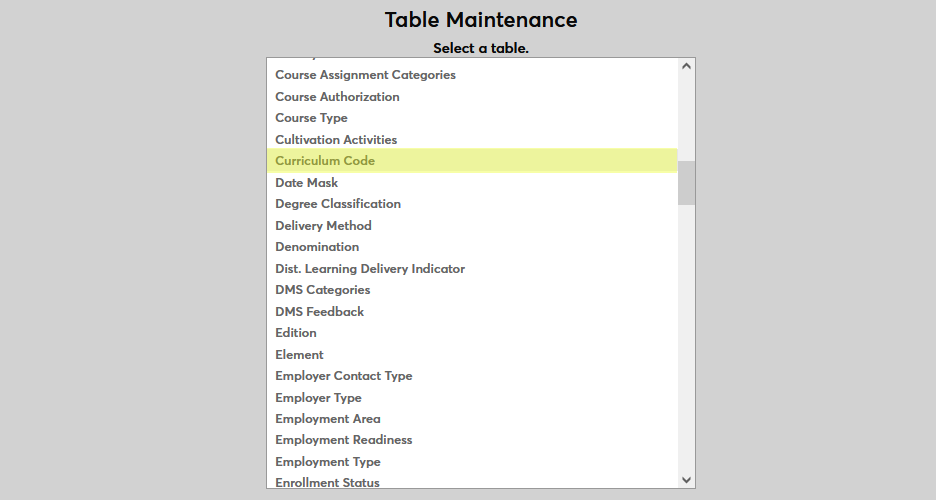
Table Maintenance
Curriculum Code
Before curricula can be set up for degree audit purposes, they must first be created using the Table Maintenance functions in the Systems hub. Select Curriculum Code to begin.
Click Add New Record to begin.
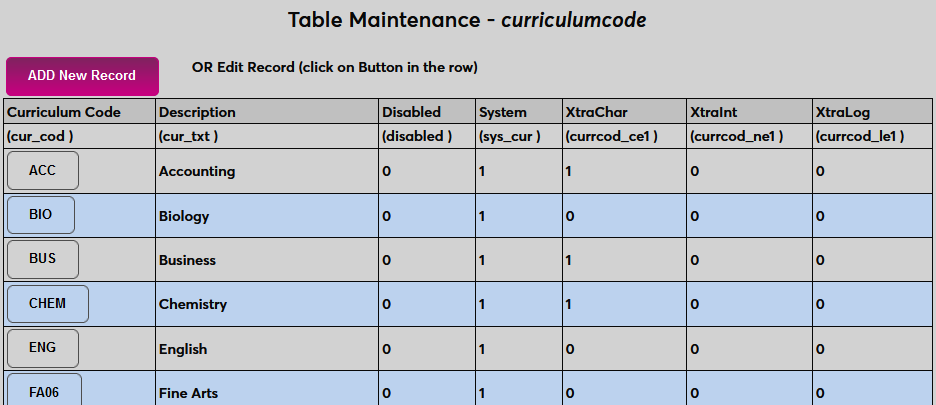
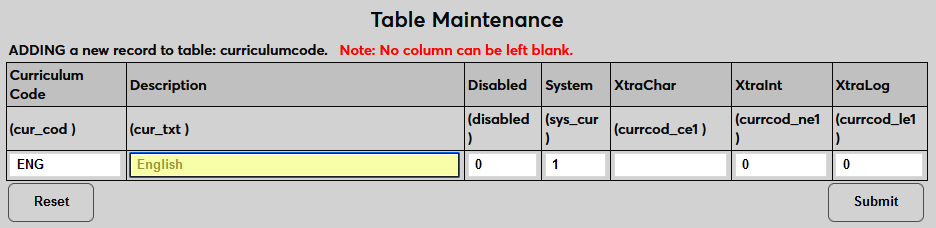
On the following page, name the code using the Description field and set the code itself using the Curriculum Code field, which is usually a shorter version of the description. The Description field has a 40-character limit and the Curriculum Code field has a 10-character limit.
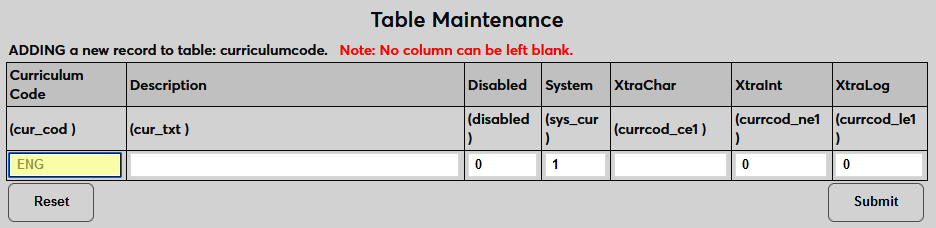
Enter a 1 in the Systems field to allow users to assign the curriculum to any student through their Education record. Leave a 0 in the field to prevent this. Curricula that are not marked as "system" offerings can only be assigned through the Degree Audit: Curriculum Overview page.

Place a 1 in the Disabled field to disable the curriculum and prevent it from being used anywhere in the system or leave the 0 to keep the code enabled. The XtraChar, Xtraint, and XtraLog fields are extra fields that can be relabeled using the Captions utility and then used to store custom data on this page. These fields cannot be left empty. The XtraChar field accepts alphanumeric characters and can be saved with a space if it's not being used. The Xtraint and XtraLog fields are binary and will accept only a one or a zero.
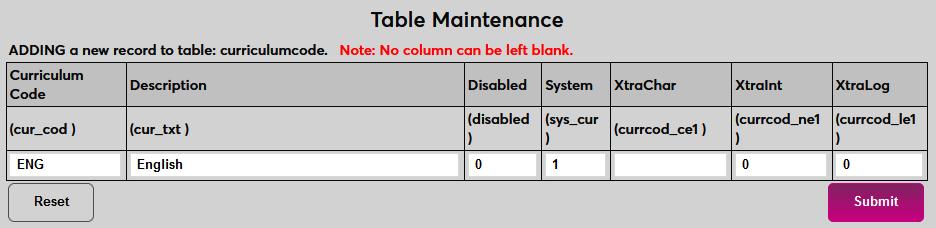
Once all data has been entered, click Submit to save the changes and create the curriculum.
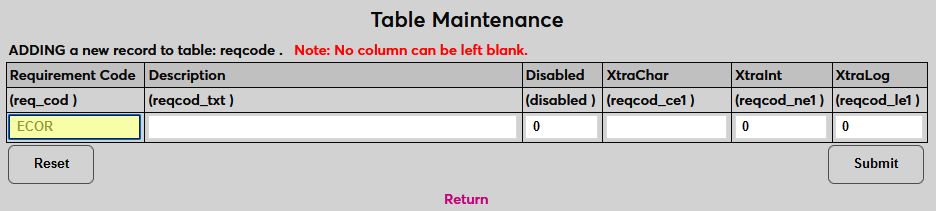
Requirement Code
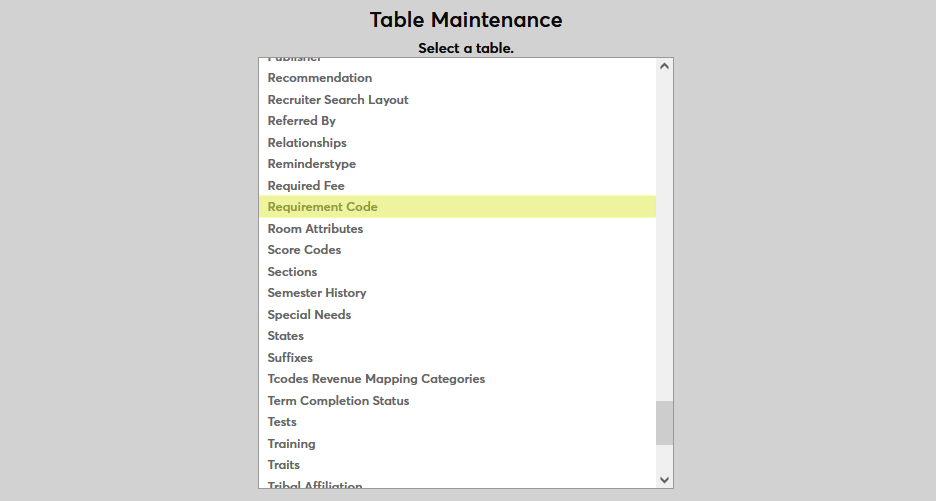
Each degree audit curriculum is made up of individual requirements. These requirements must also be created in Table Maintenance before the curricula can be set up. Select Requirement Code to begin.
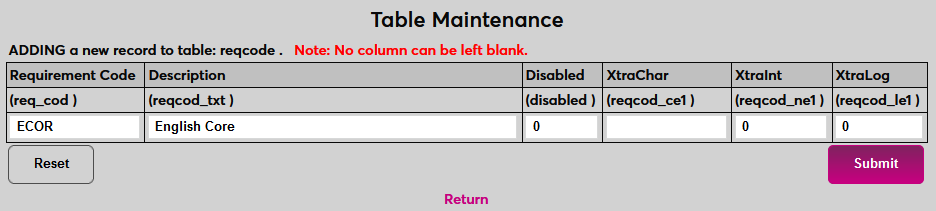
On the following page, enter a Description for the code that will appear for selection in SONIS and the Requirement Code itself, a shortened version that will be used to identify for code behind the scenes. The Description field has a 40-character limit and the Requirement Code field has a 4-character limit.
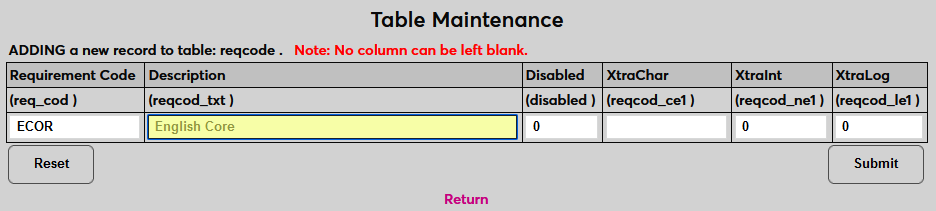
Place a 1 in the Disabled field to disable the curriculum and prevent it from being used anywhere in the system or leave the 0 to keep the code enabled. The XtraChar, Xtraint, and XtraLog fields are extra fields that can be relabeled using the Captions utility and then used to store custom data on this page. These fields cannot be left empty. The XtraChar field accepts alphanumeric characters and can be saved with a space if it's not being used. The Xtraint and XtraLog fields are binary and will accept only a one or a zero.
Once all data has been entered, click Submit to save the changes and create the requirement code.
Creating Requirements
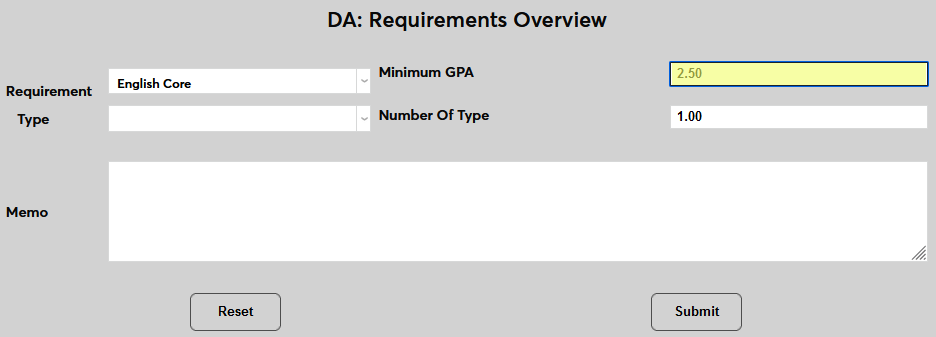
As previously noted, degree audits are created based on associated curricula, which are themselves made up of various requirements. A degree audit is therefore a list of curricula requirements, or tasks, that a student must fulfill. To create a requirement, navigate Requirements Overview page in the Systems hub. Click Add to begin.

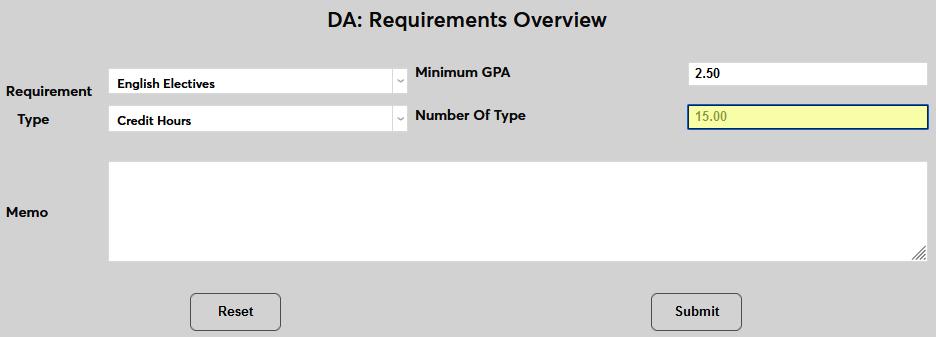
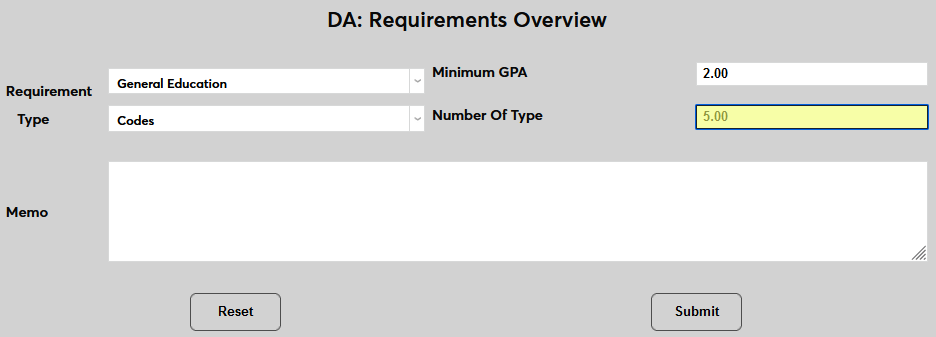
Select a requirement from the Requirement dropdown menu. These requirements must first be created in Table Maintenance as detailed above.

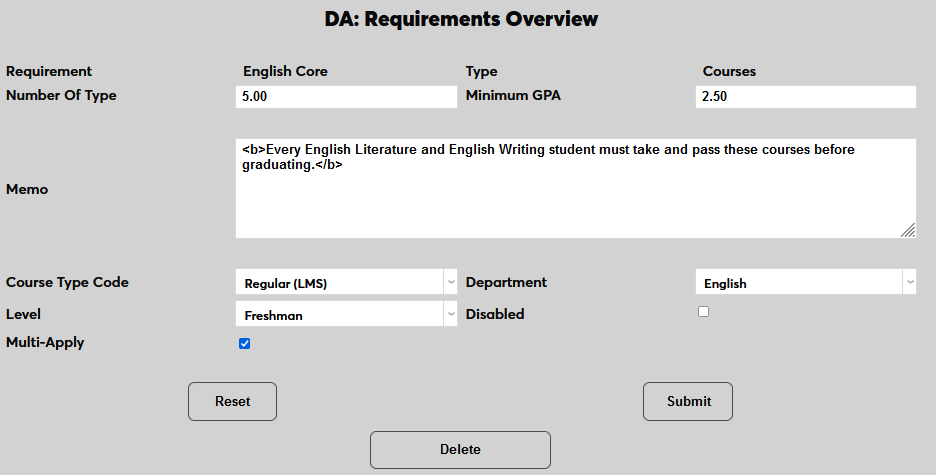
Enter the minimum GPA that a student must achieve to pass this requirement. This field is optional and some requirements may not have a minimum GPA.
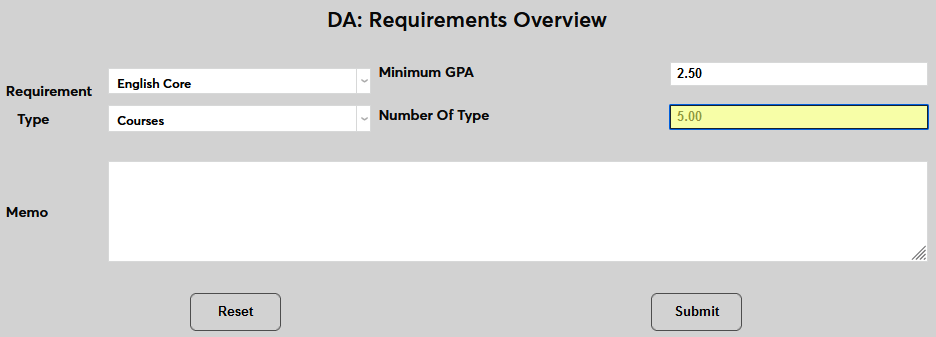
Select a Type for the requirements. A type of Codes is used to enter sub-requirements that must be fulfilled to complete the top-level requirement. A type of Courses will allow administrators to set specific courses that must be passed to complete the requirement. Courses can be required on an individual level or electives that allow a student to choose one among a set. A code of Credit Hours is used to set a number of hours that must be completed.
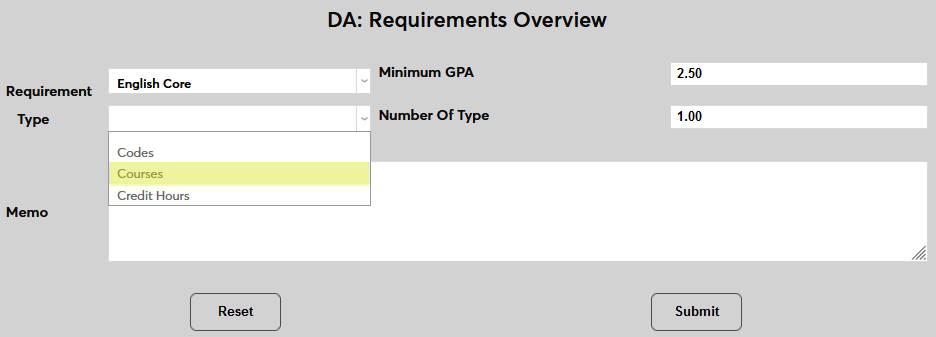
Enter a number in the the Number of Type field. This is the number of courses or the number of credit hours or the number of sub-requirements needed to satisfy this requirement.
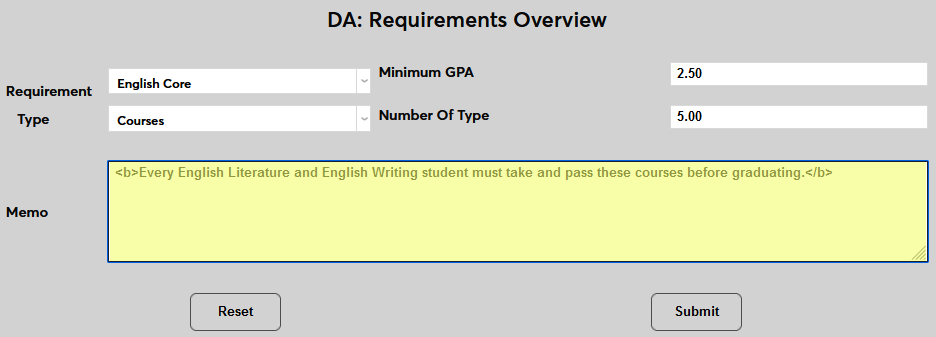
An optional Memo field is included for any notes that may be needed to help interpret this requirement when looking at a degree audit report. This field allows basic HTML tags.
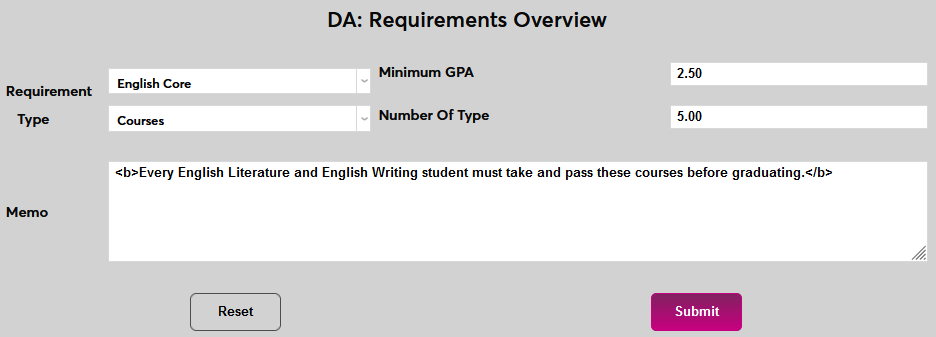
Click Submit to save the page and continue. The following page will look different depending on the Type that was selected.
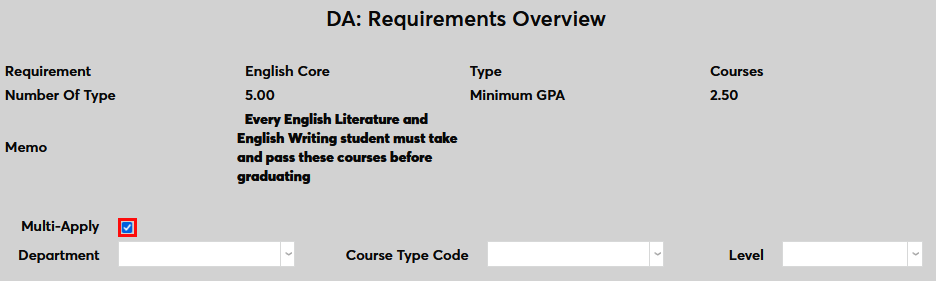
Courses
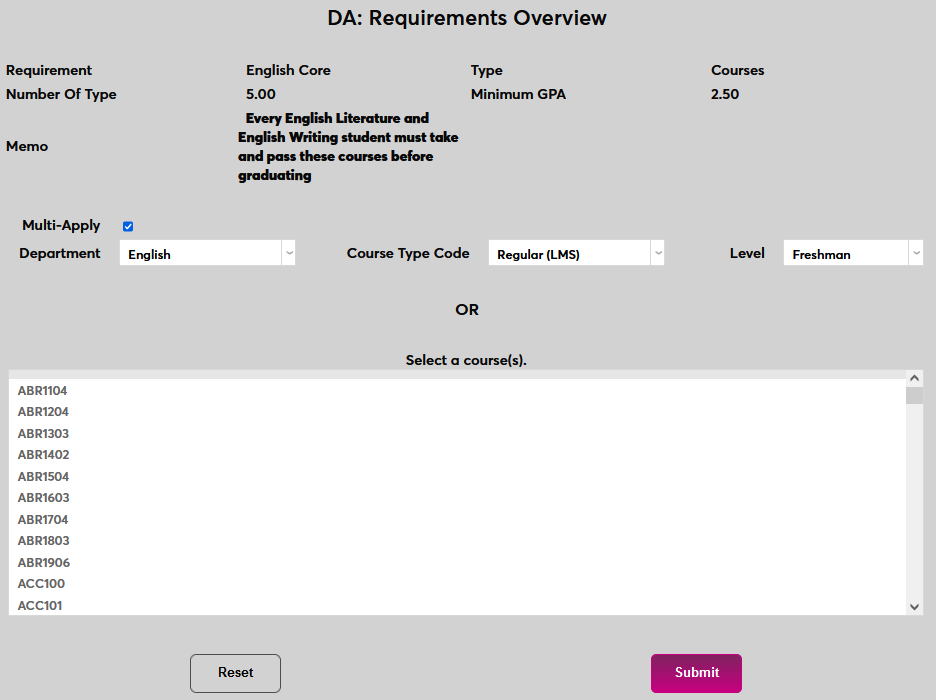
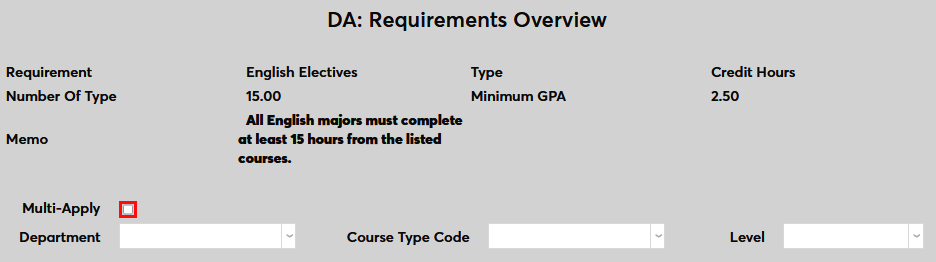
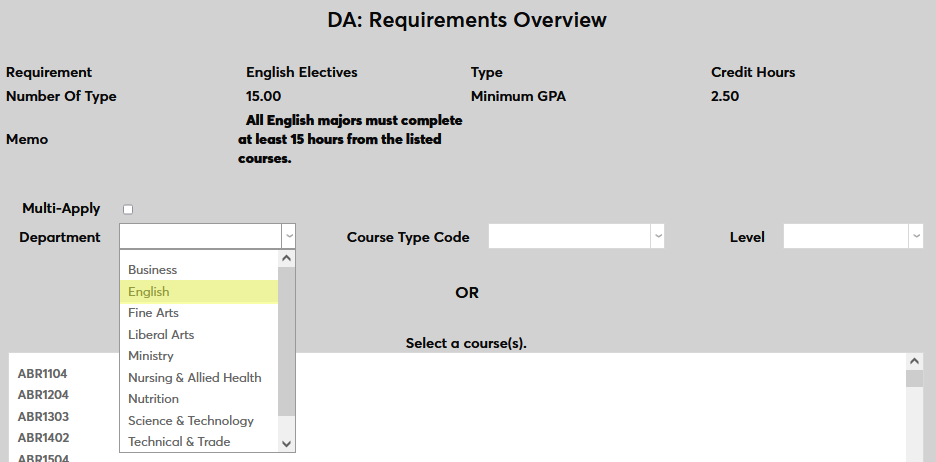
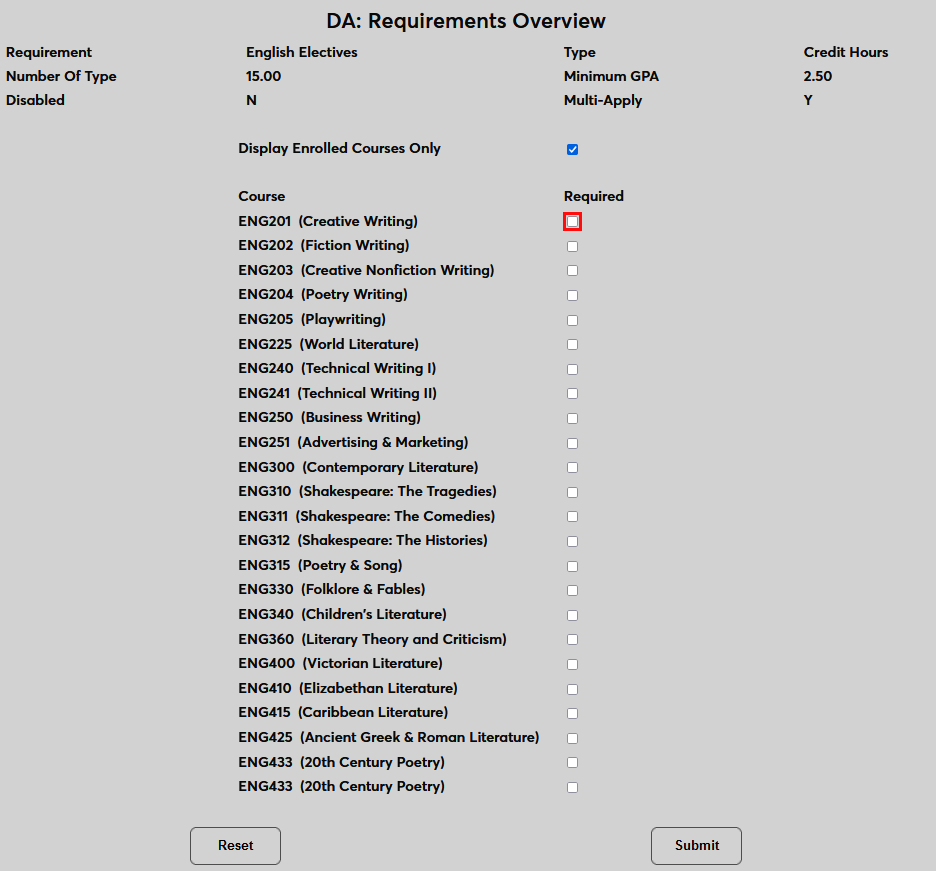
If the Courses Type is selected, check the Multi-Apply box to allow a single course to apply to more than one requirement or leave it unchecked if a single course should only apply for a single requirement.
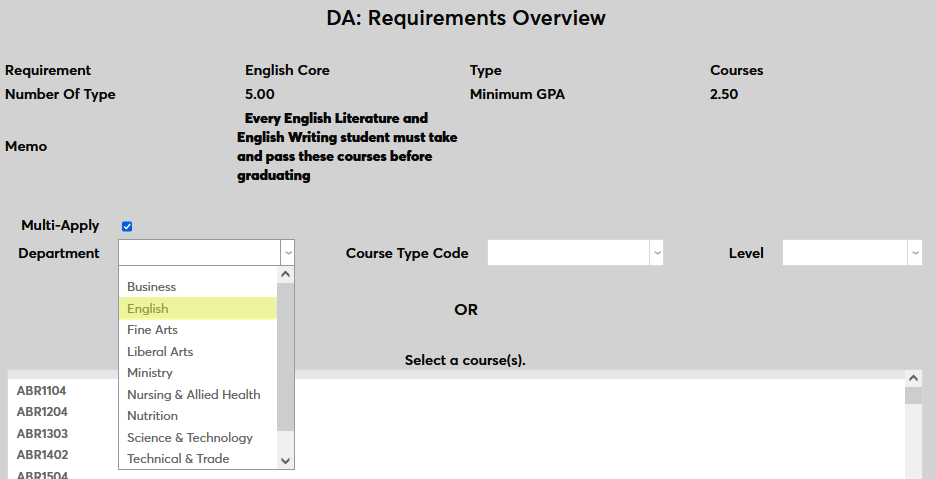
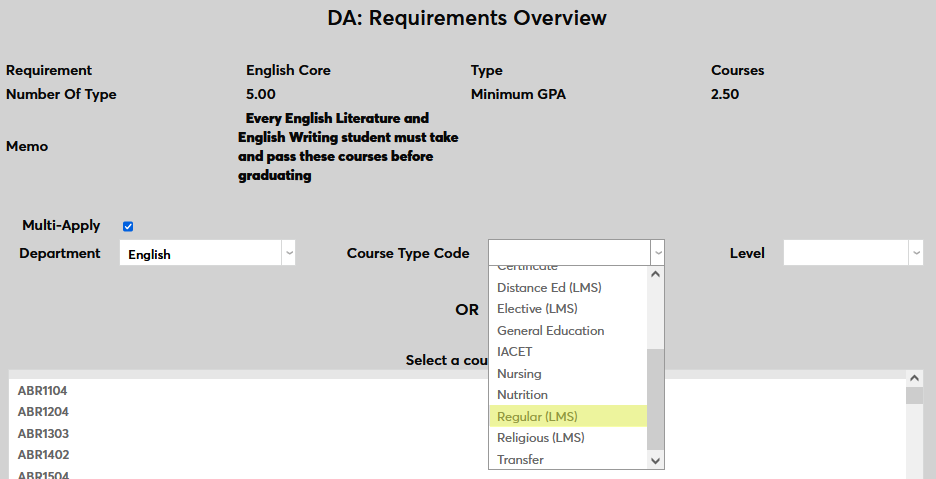
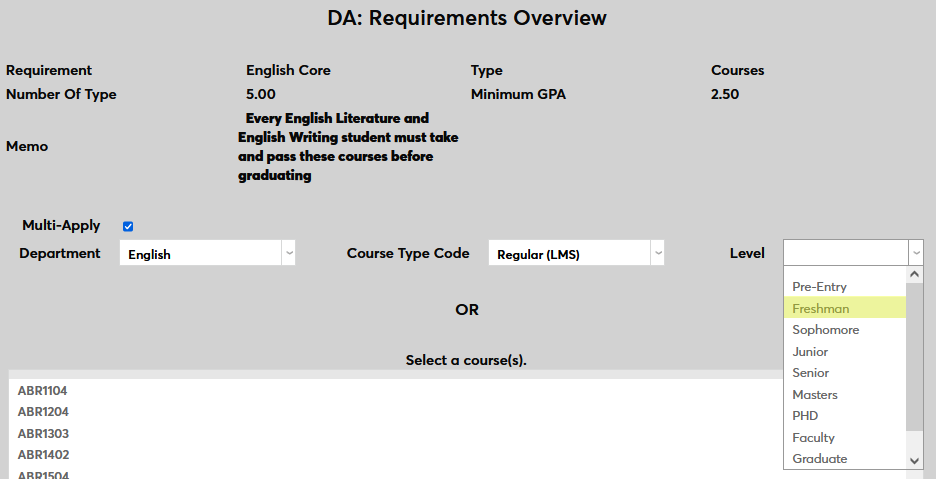
Courses can be selected in bulk or individually. To select courses in bulk, choose a Department, a Course Type Code, and/or a Level. All courses that match the selections will be included in the requirement as electives. This option could be used in a variety of ways. For example, all graduating seniors could be required to take at least four senior-level courses or a student could be required to take a certain number of courses within their department with no set number of hours required.
Once the appropriate selections have been made, click Submit to save the changes.
When editing a Courses requirement using category selection, the categories can be changed and some of the other fields can be altered, but the type cannot be changed and individual courses cannot be selected. Delete the requirement and start over to make larger changes.
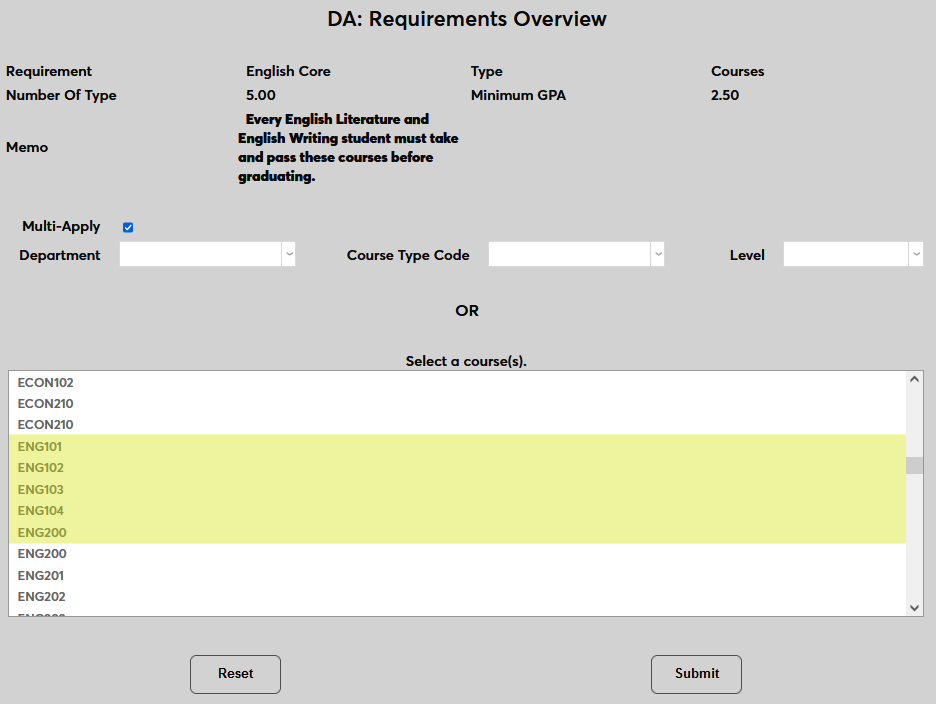
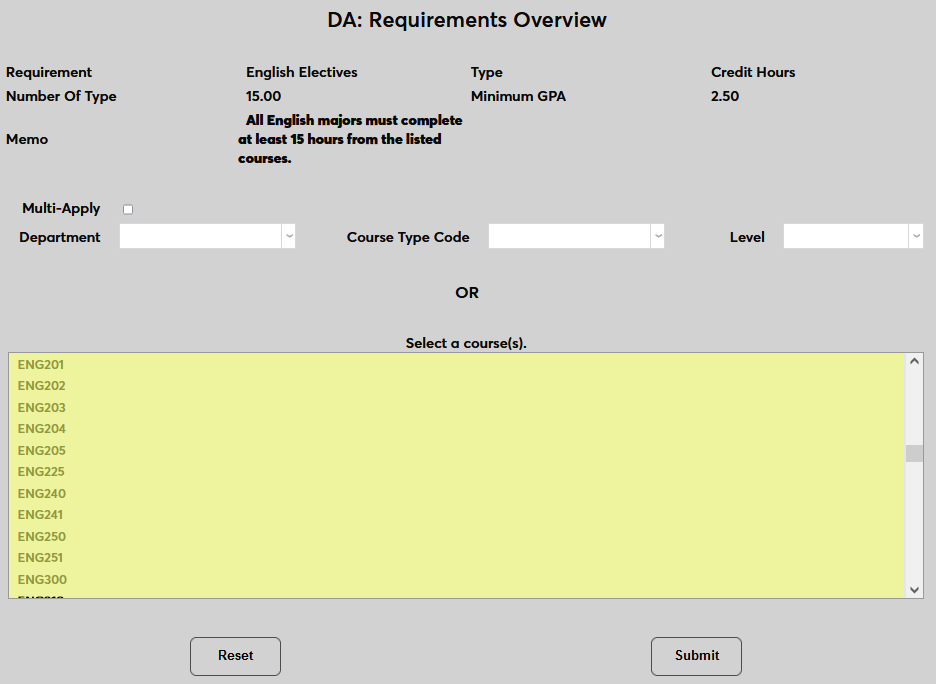
The other Courses option is to select individual courses that the student may or must take in order to satisfy the requirement. Select one or more course(s) and click Submit to save the selection.

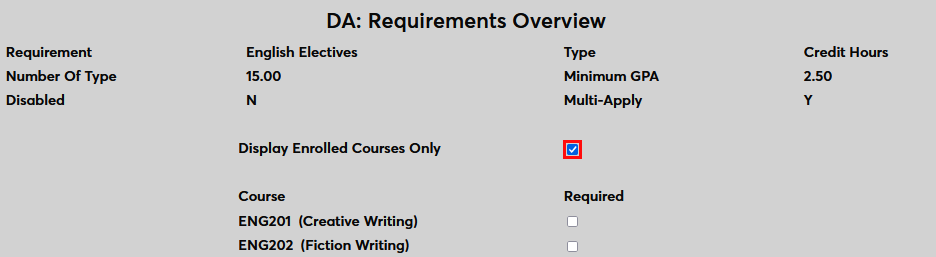
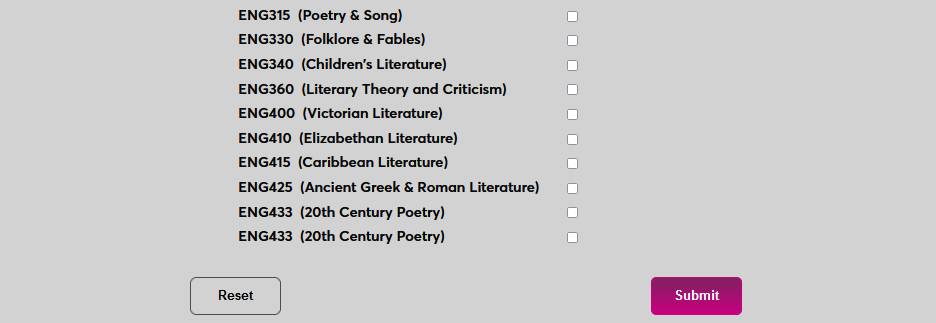
The next page offers additional options. If the Display Enrolled Courses Only box is checked, courses will only appear on the degree audit report when the student has been enrolled in the course either presently or in the past. When to check this box or not should be considered carefully. For example, if the requirement features a small set of courses that are all required, it would probably make sense to uncheck the Display box. On the other hand, if the requirement is a large list of electives, it may make more sense to check the box and show only the courses that the student has enrolled in.
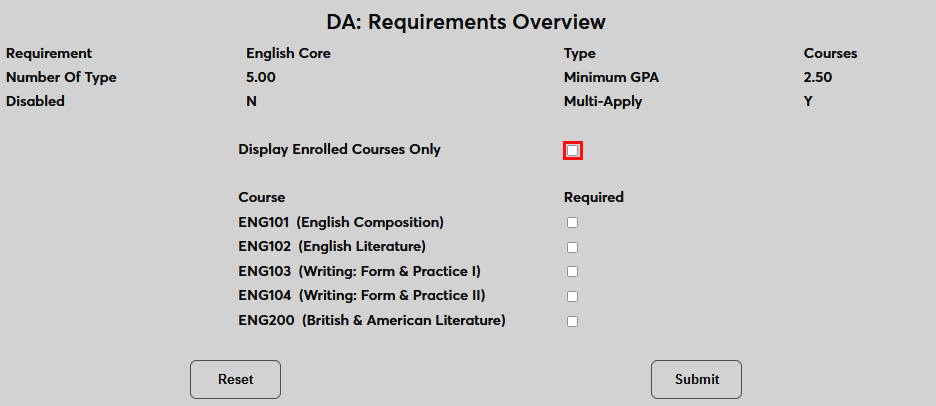
Check the Required box next to each course that should be required and leave the box unchecked for any selected courses that are optional.
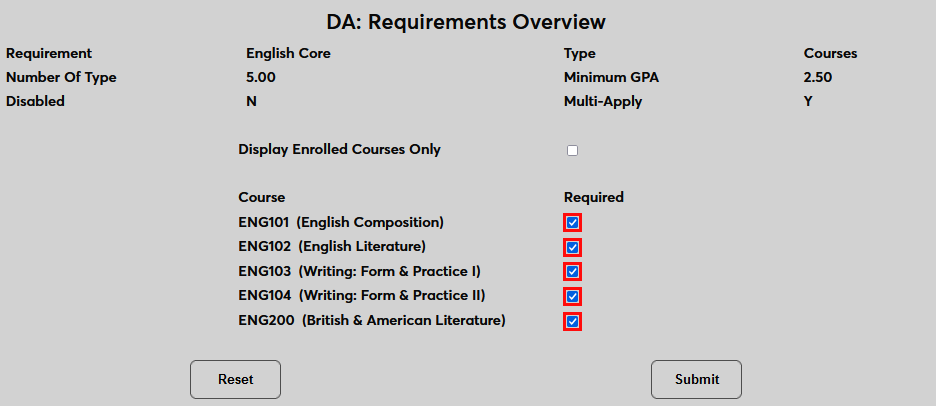
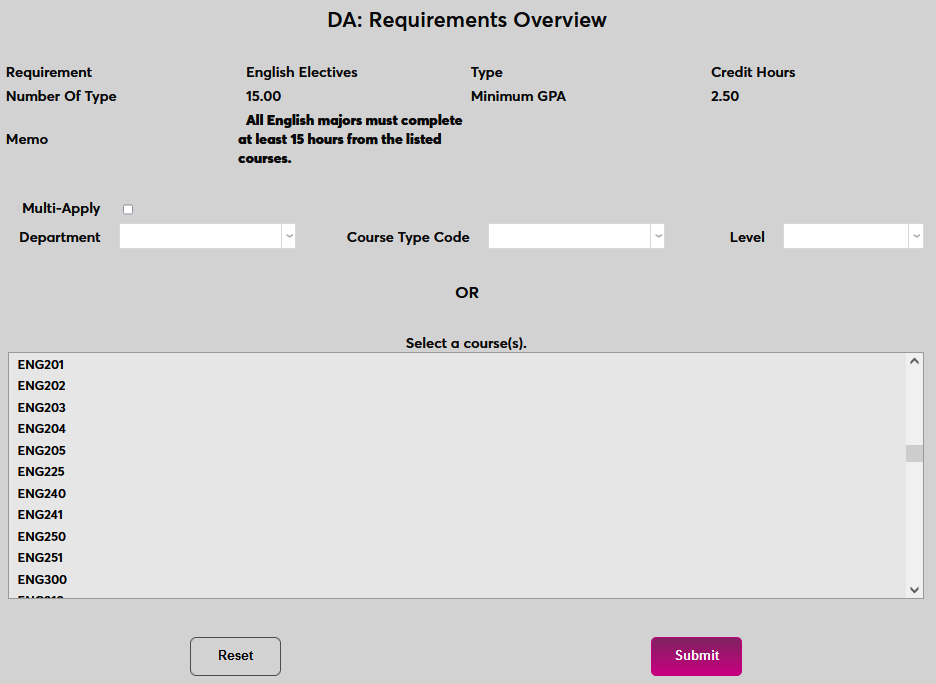
Click Submit to save the changes and create the requirement.
Credit Hours
The Credit Hours type works very similarly to the Courses type. The major difference in the initial setup is that the Number of Type field here refers to hours rather than courses.
The Multi-Apply box on the following page works the same as well. If the box is checked, the courses can be used to fulfill more than one requirement.
Courses that must be taken to fulfill the hours requirement can be selected using the Department, Course Type Code, and Level dropdowns or individually using the course selector.
Click Submit to save the changes and move on to the next step.
On the following page, checking the Display Enrolled Courses Only will ensure that only the courses that the student is currently enrolled in or has taken in the past will be shown in this section of the degree audit. As previously noted, this may be wise if the list of courses is long and non-specific.
Check the Required box next to each course that should be required and leave the box unchecked for any selected courses that are optional. Note that requirements can have a mix of required and not required courses.
Click Submit to save the changes and create the requirement.
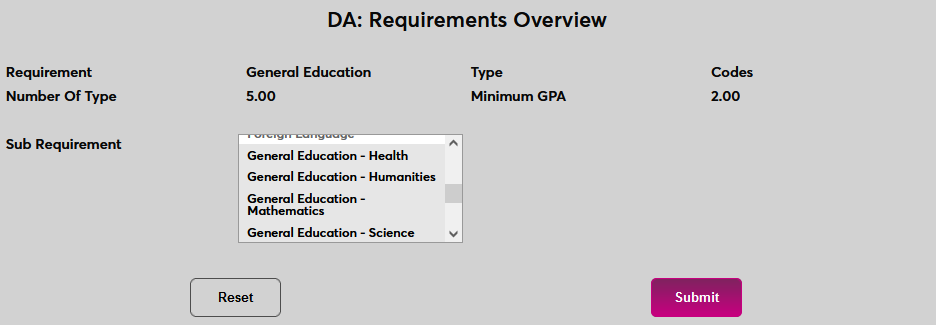
Codes
The Codes type allows administrators to create a requirement made up of other requirements. The Number of Type field here refers to the number of sub-requirements that must be completed to satisfy the requirement.
On the following page, select one or more sub-requirements from the menu and click Submit.
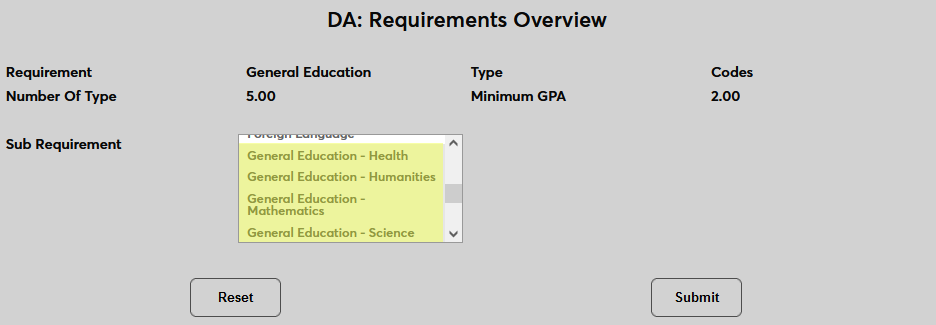
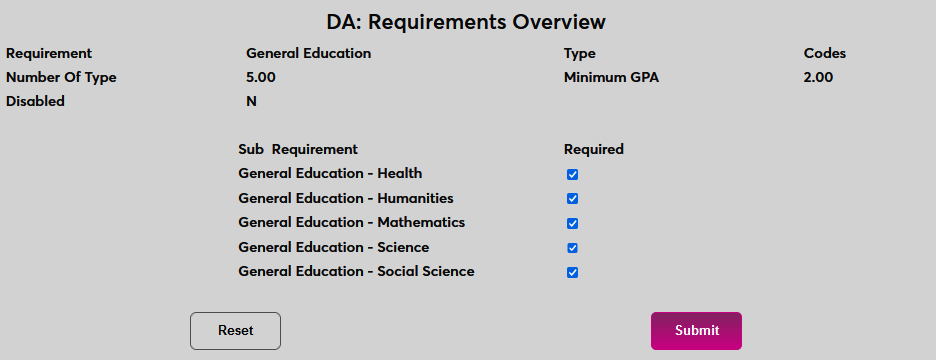
Once sub-requirements have been added, they can be marked as Required or left as optional.
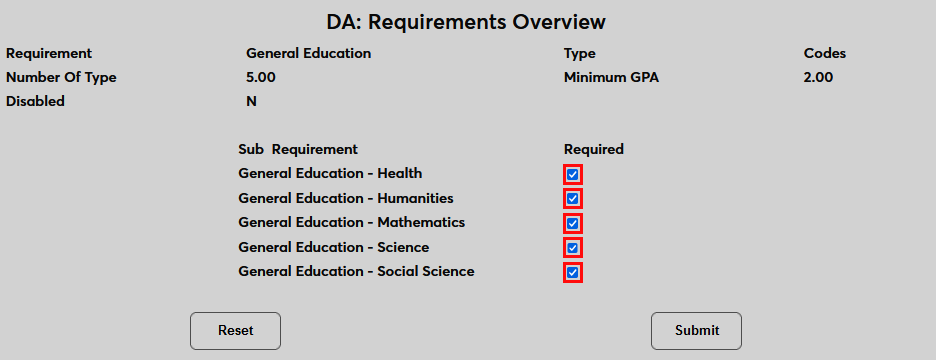
Click Submit to save the changes and create the requirement.
Creating Curriculum Plans
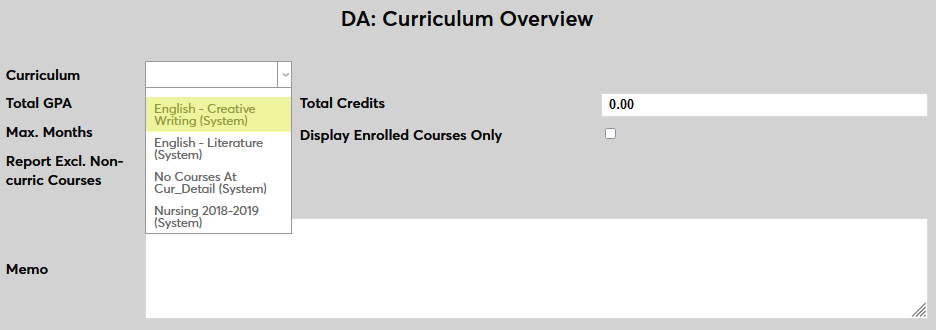
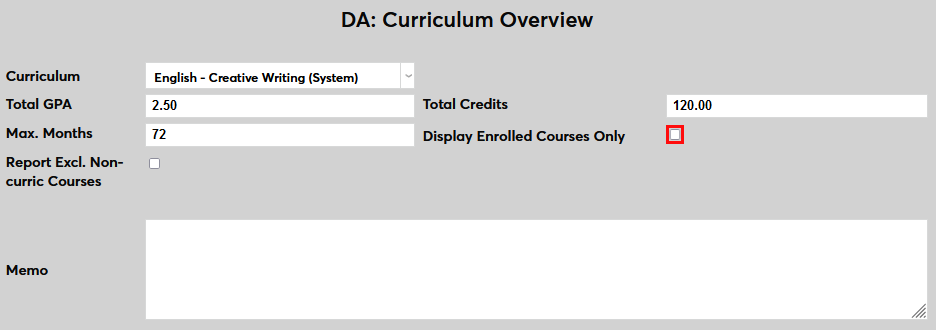
A curriculum is made up of various requirements that must be completed. The degree audit is built based on the curriculum assigned to the student. To create a new curriculum, navigate to Curriculum Overview under the Systems menu and click Add.
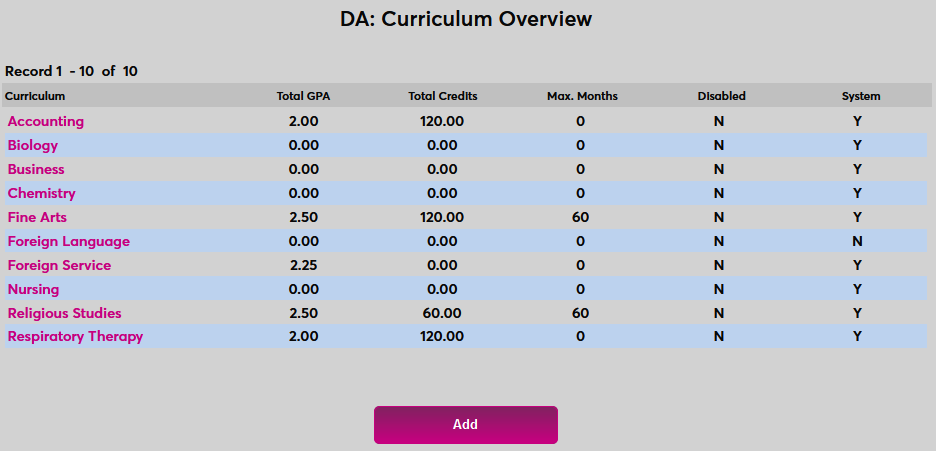
On the following page, being by selecting a Curriculum. As previously noted, curriculums must be created in Table Maintenance in order for them to appear in this list. This field is optional.
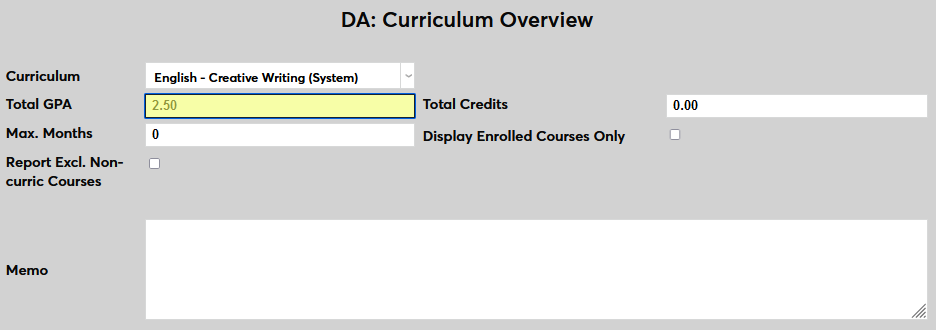
The Total GPA is the minimum grade point average that the student must maintain to complete the curriculum. This field is optional. Note that higher GPAs may be required for certain elements of the curriculum depending on what was defined when creating individual requirements.
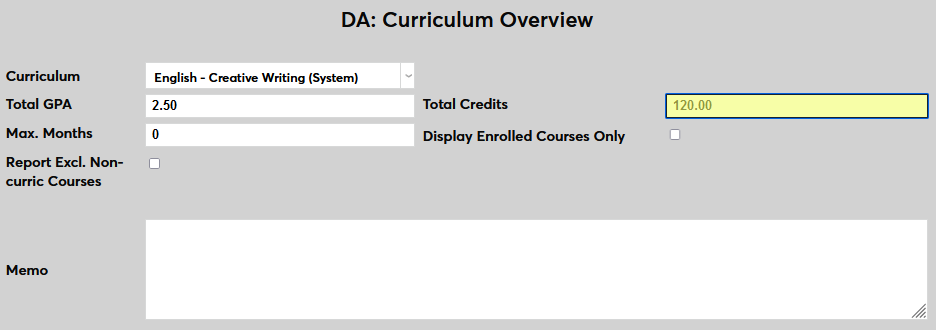
The Total Credits is the minimum number of credits that a student must attain to complete the curriculum. This field is optional. Note that some course choices and electives have their own minimum credit requirements.
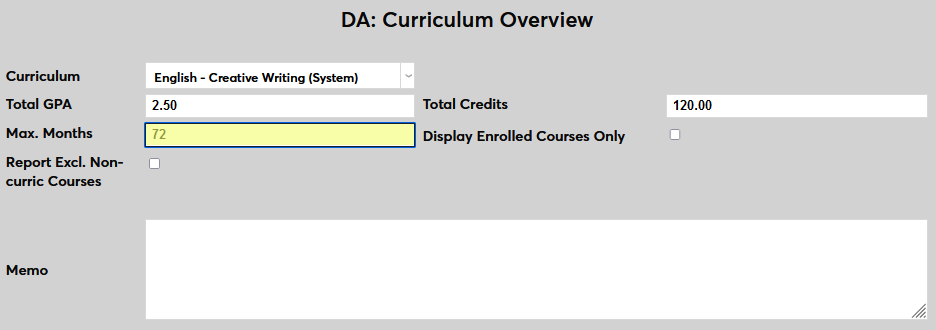
The Maximum Months is the maximum amount of time that a student can spend in the program before graduating. This field is optional.
If the Display Enrolled Courses Only box is checked, only the courses that the student is currently taken or has taken previously will appear on the degree audit. If the box is let unchecked, courses will either display or not display based on the choices made when creating requirements.
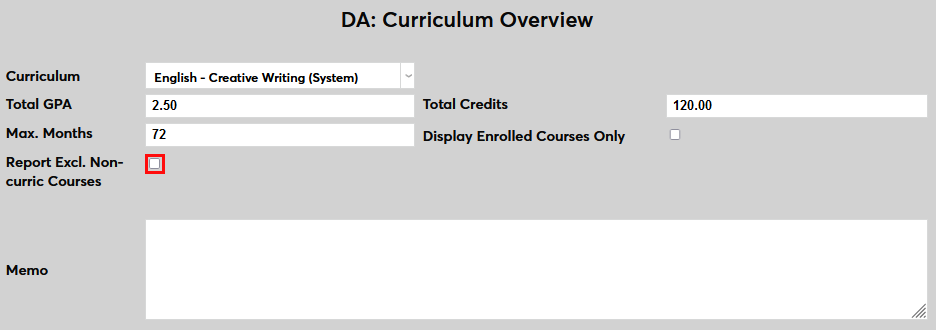
Check the Report Exclude Non-Curriculum Courses box to display only enrolled courses from the student that fit into the curriculum plan. Leave it unchecked to display all enrolled courses even if they do not slot into the plan at all.
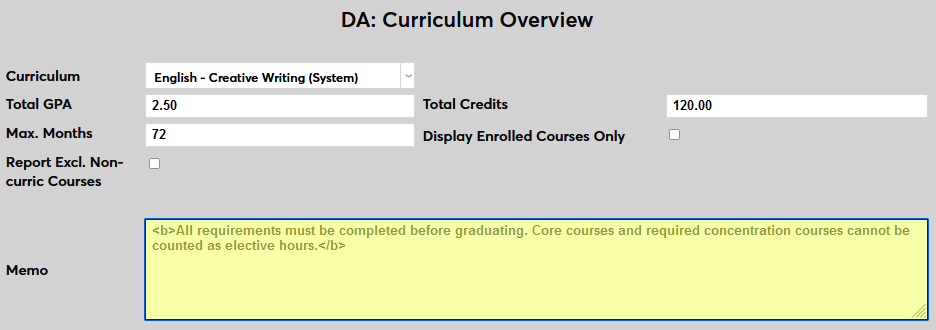
The optional Memo field allows for additional notes that may be helpful in interpreting the audit. The field allows basic HTML codes.
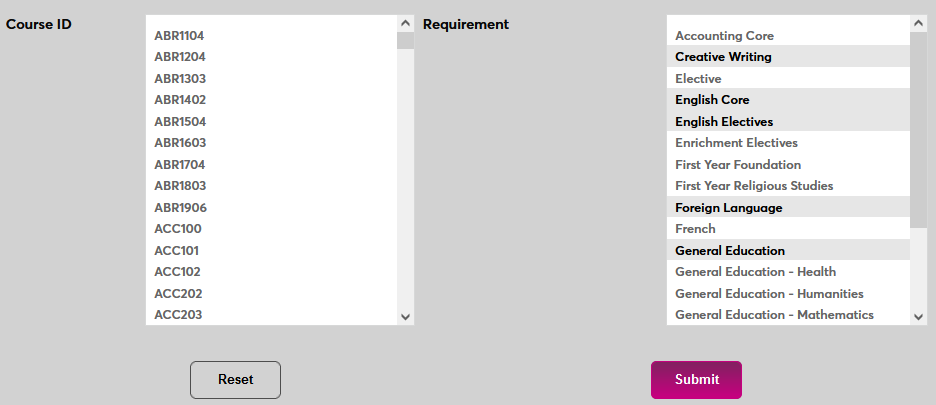
Select courses from the Course ID field, requirements from the Requirements field, or both. Unless the degree is very simple and only requires a few courses, it's generally better to use the requirements to specify courses that must be taken as this function includes more options like the ability to make some courses required and designate others as electives.
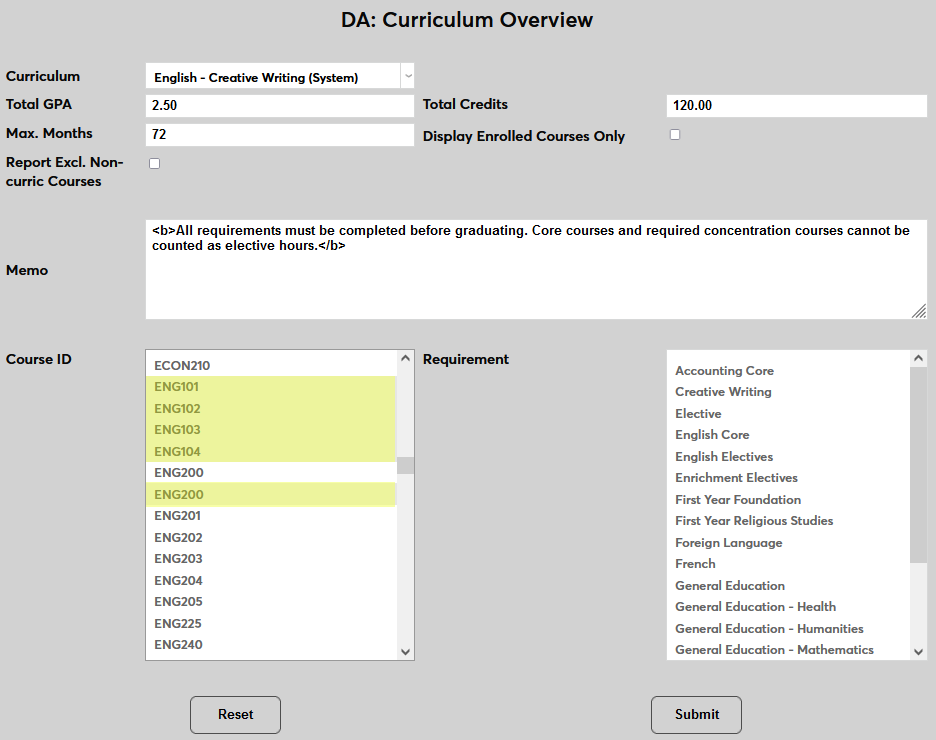
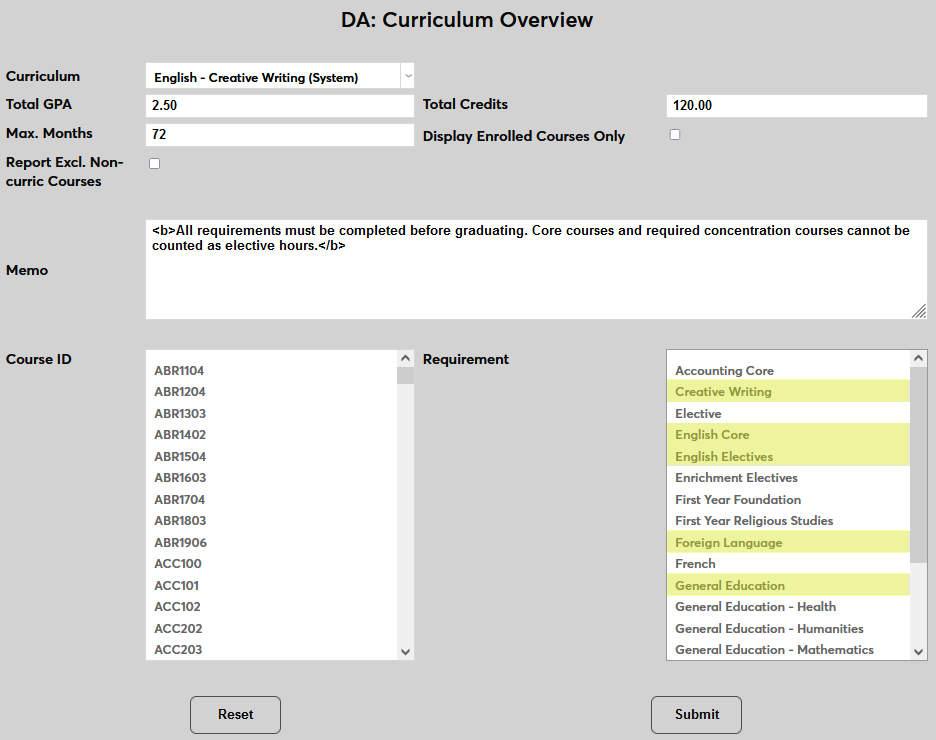
Click Submit to save the changes and create the curriculum.
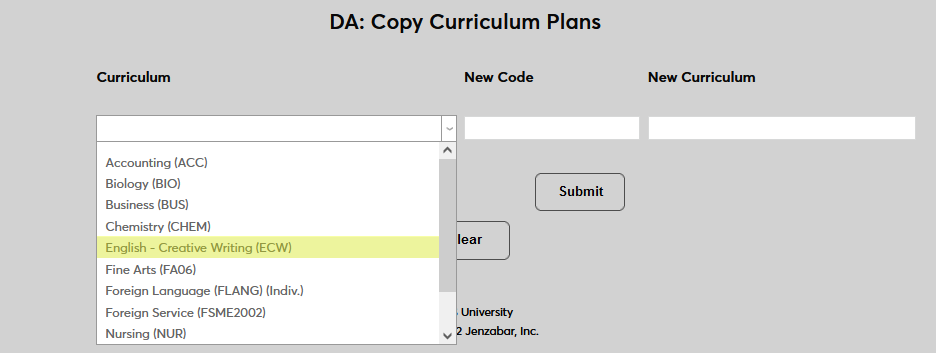
Copying Curriculum Plan
Once a curriculum has been created, it can be copied as a shortcut to build a new curriculum with similar requirements. To copy a curriculum plan, navigate to the Copy Curriculum Plans utility under the Systems menu. Select an existing Curriculum from the dropdown menu.
Next, name the new curriculum that will be created by entering a New Code and a New Curriculum. The New Curriculum field has a 40-character limit and the New Code field has a 10-character limit.
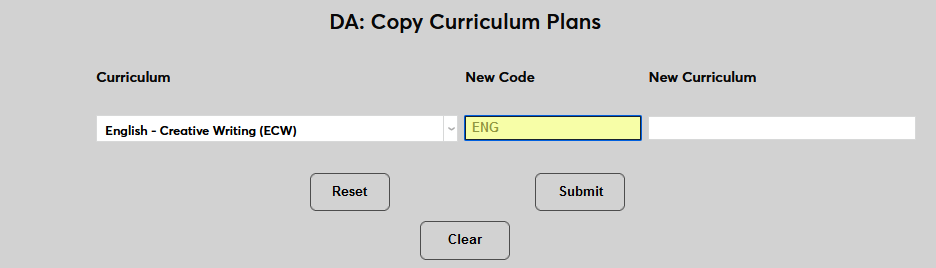
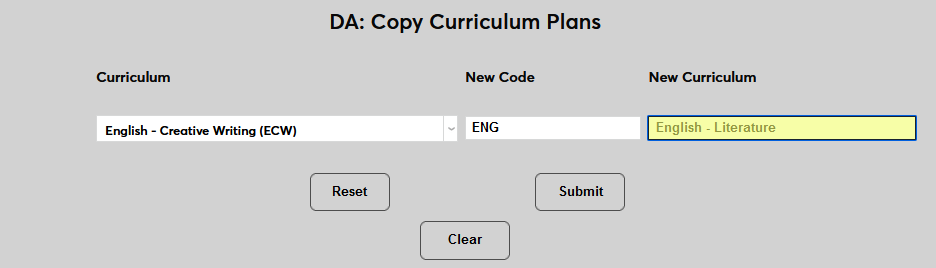
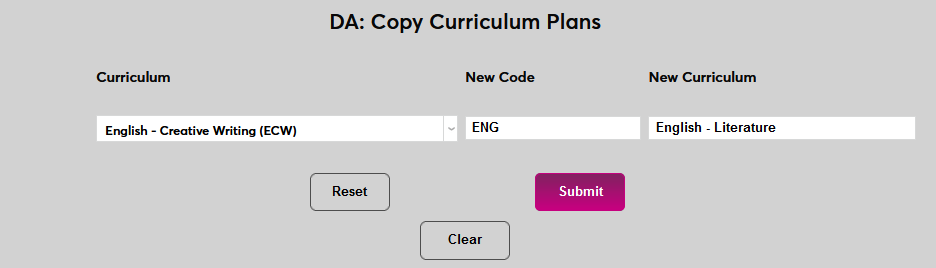
Click Submit to save the changes and continue.
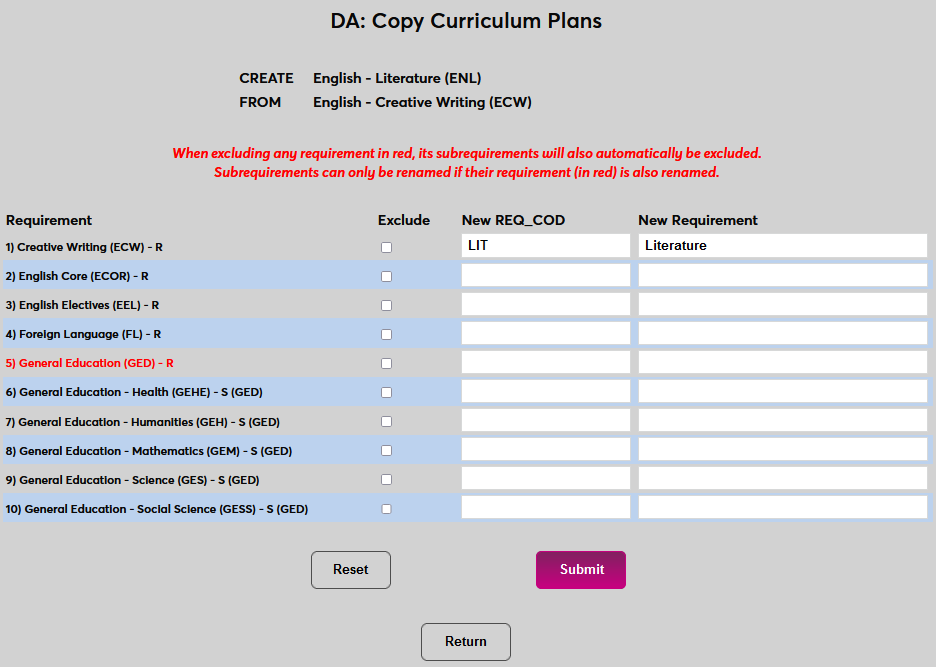
The following page allows changes to be made to the requirements that are included in the new curriculum plan. Curricula of the Codes type, which are made up of sub-requirements, are marked in red. The sub-requirements are listed underneath and marked with an S.
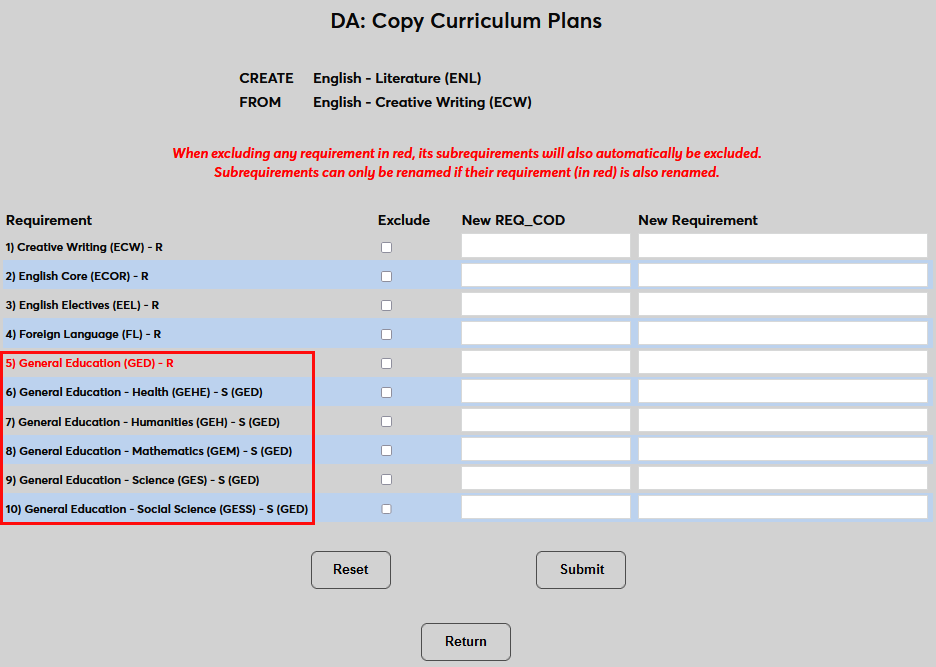
To remove a requirement, check the Exclude box.

To copy an existing requirement and give it a new name, enter the code for the new requirement in the New Requirement Code field and the name of the new requirement in the New Requirement field.

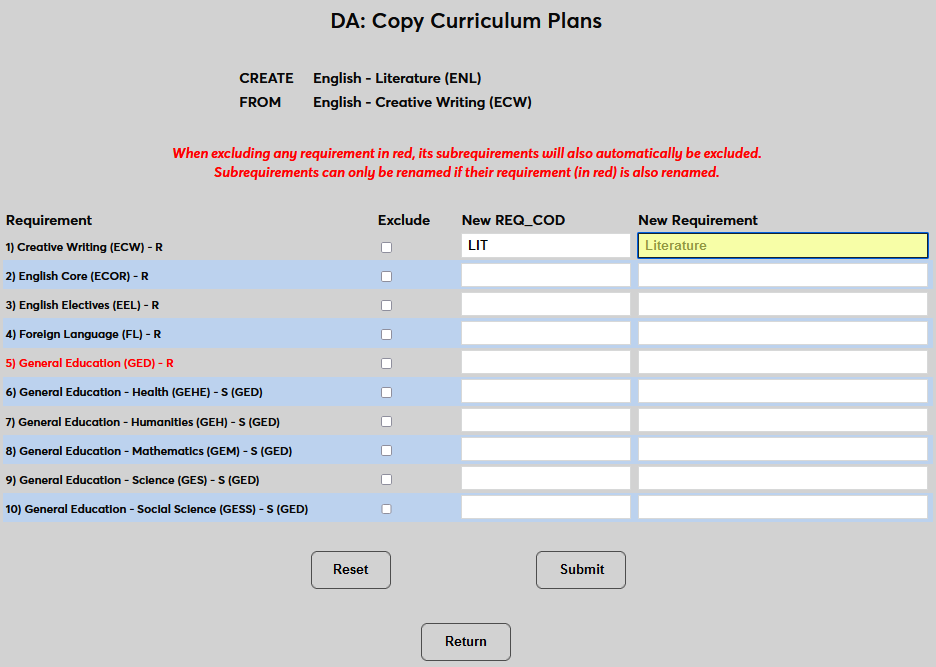
Click Submit to save the changes and move on to the next step.
The Confirmation page lists each requirement that is being copied. If a requirement is being copied under a new name, both the new name and the original requirement are listed.
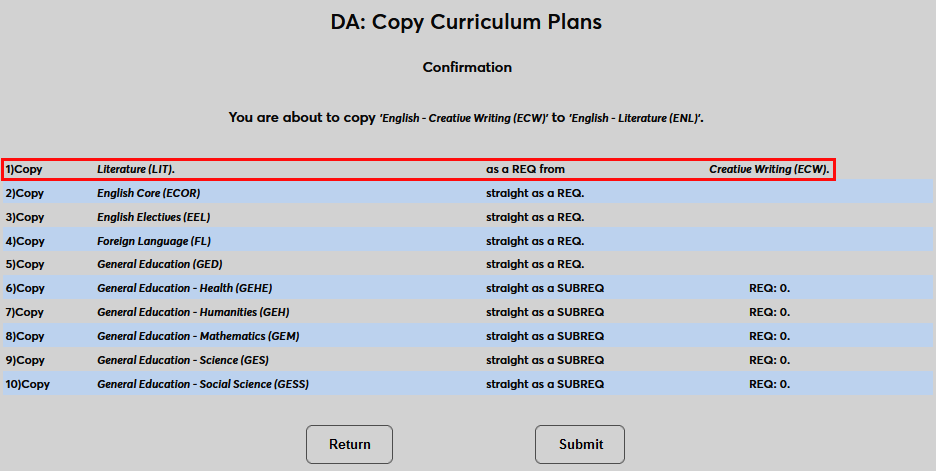
Click Submit to save the changes and create the new curriculum.

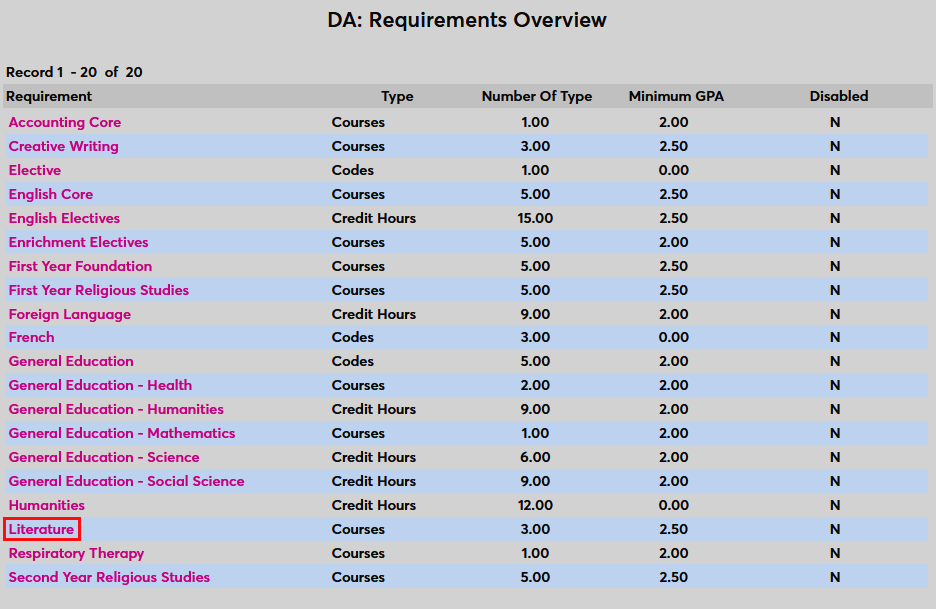
Once requirements have been copied, they can be edited from the Degree Audits Requirements Overview page.
Assigning Curriculum Plans
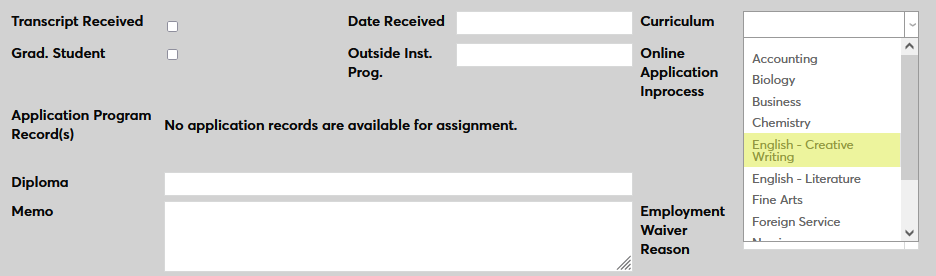
Once curricula have been created, they must be assigned to students. Each student's degree audit is built based on their assigned curriculum. To assign a curriculum, navigate to the student's Education record. Select the appropriate option from the Curriculum menu on the right side of the page and click Submit to save the change.
Running Degree Audit Report
Search
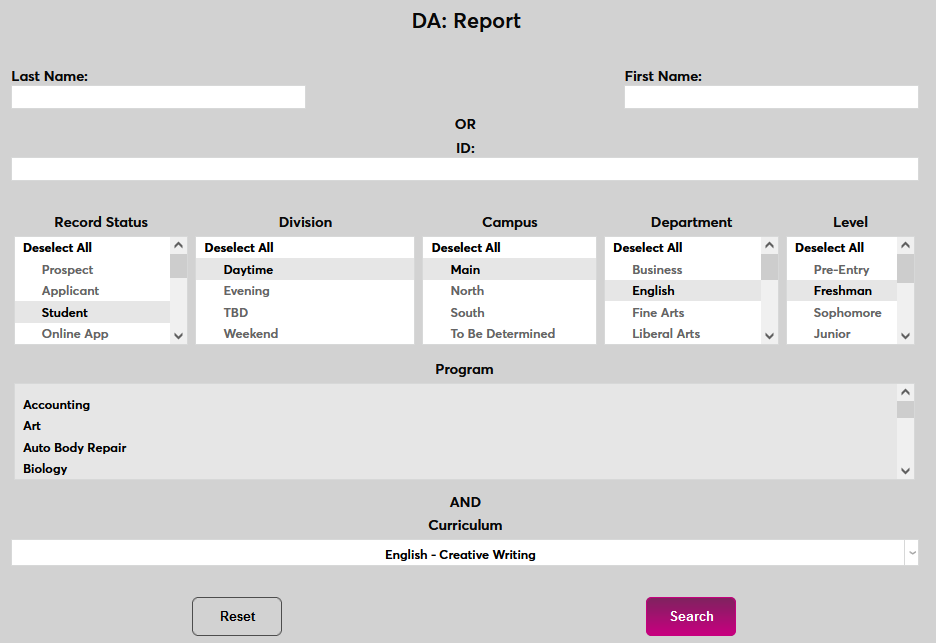
To run a degree audit report, navigate to the Degree Audit Report utility under the Systems menu. If a student has been selected previously using Name Search, the page will recognize this selection.
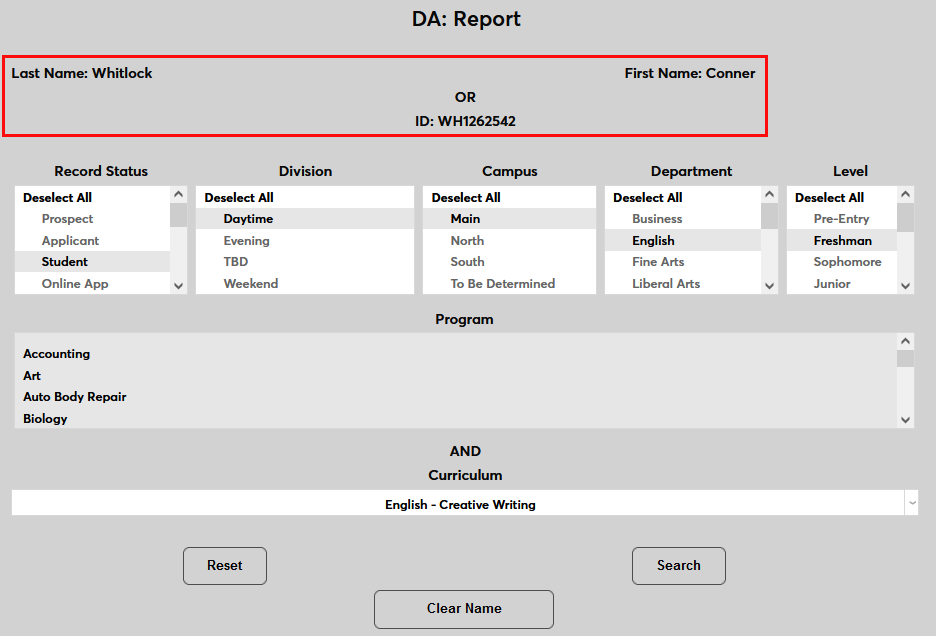
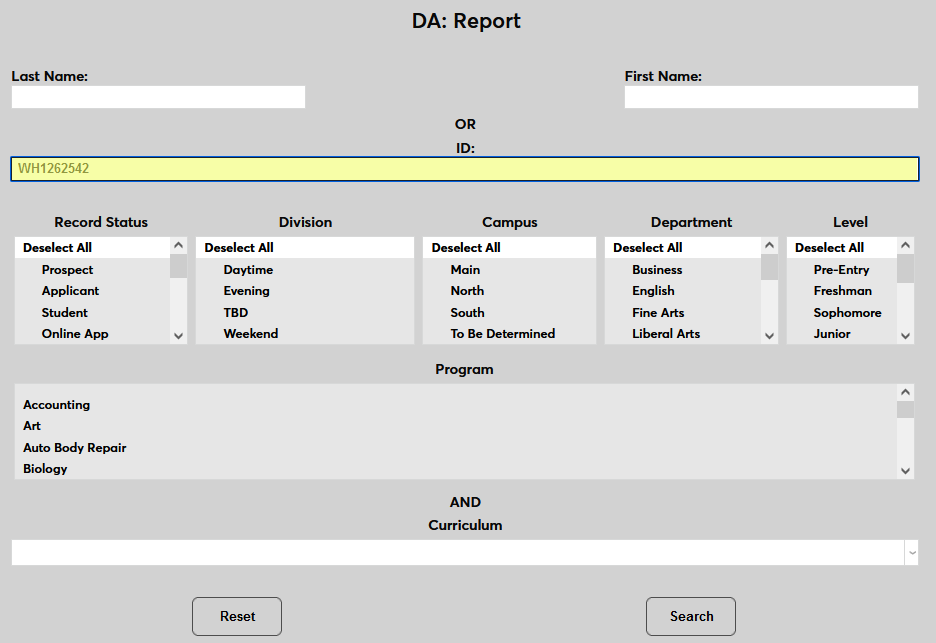
If a student has not been preselected, administrators can search for a specific student by that student's First Name and Last Name or by their SONIS ID.
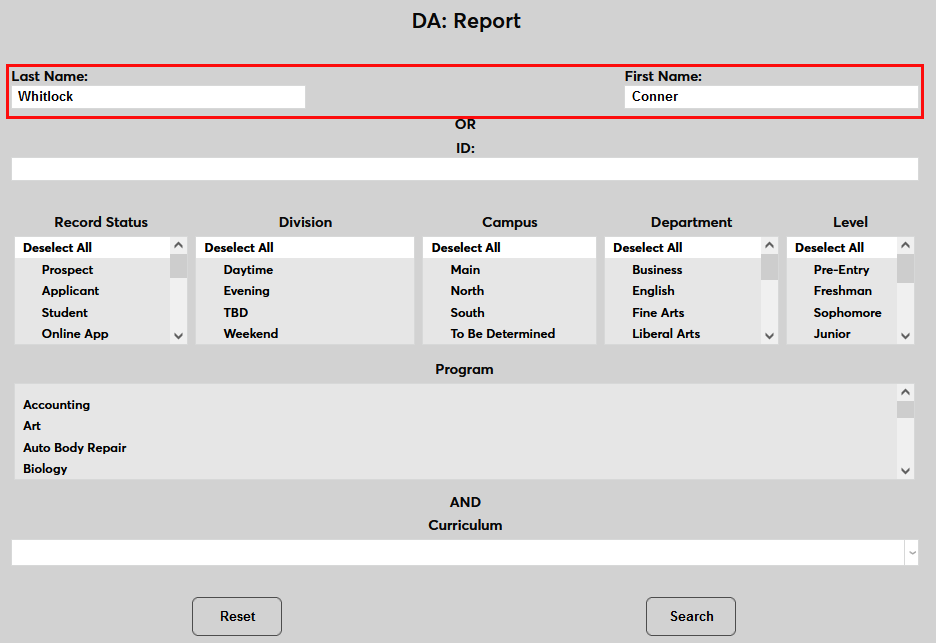
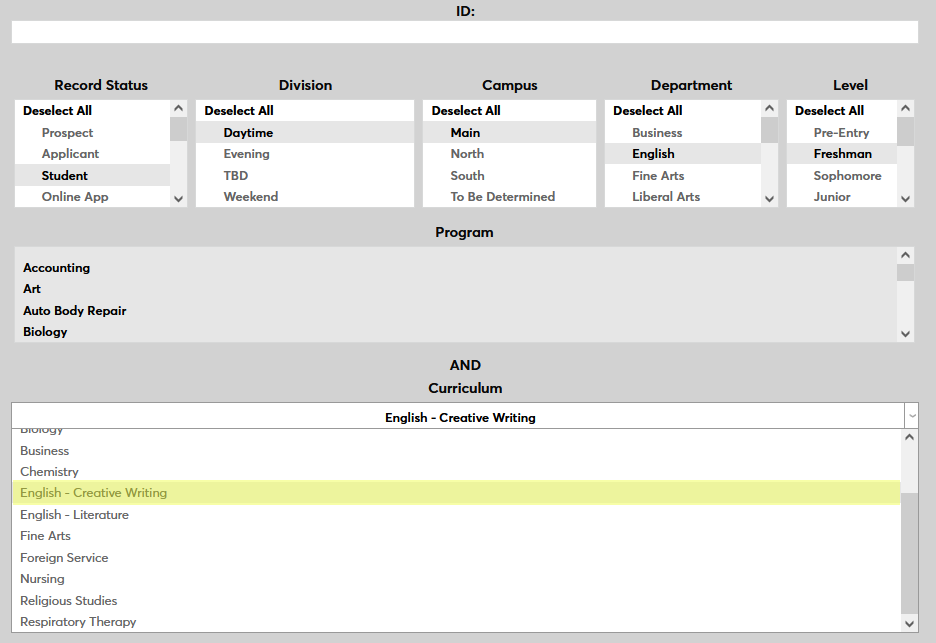
Alternately, a student can be located using the Record Status, Division, Campus, Department, Level, and/or Program fields.
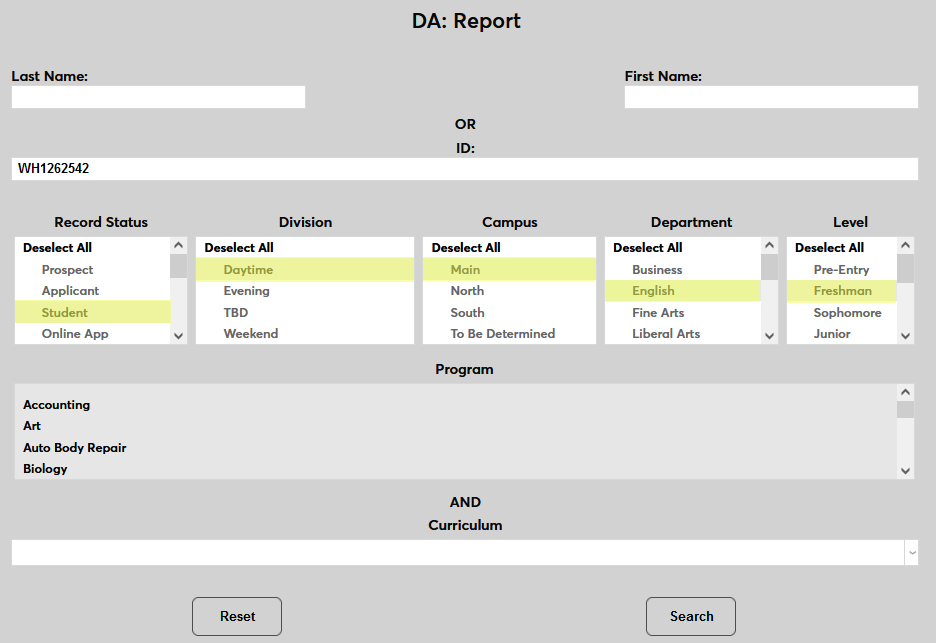
However a student is selected, a Curriculum for the audit must be selected.
Click Search to continue.
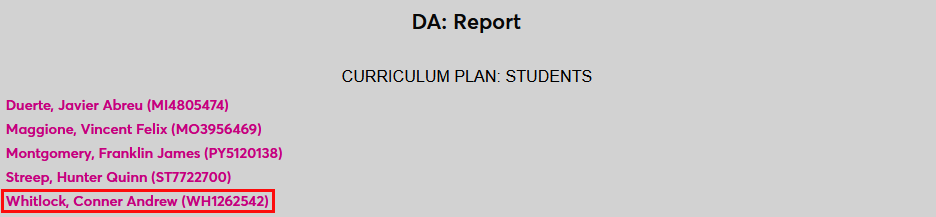
If the search criteria could pertain to more than one student, a list of these students will appear on the following page. Click the name of the student to be audited to continue to the report.
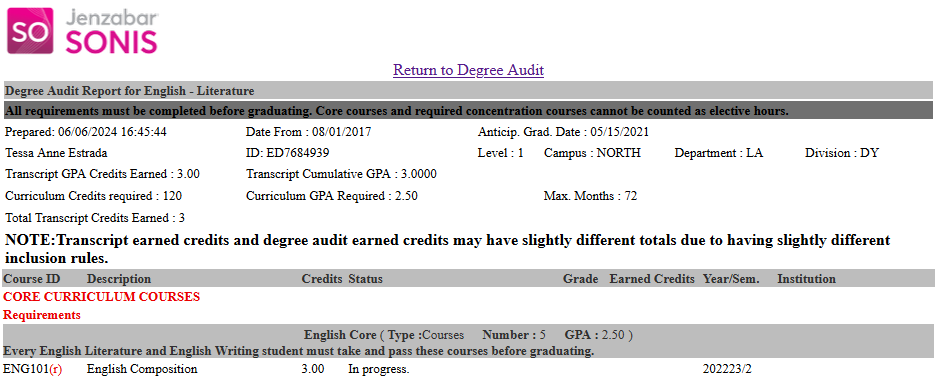
The Report
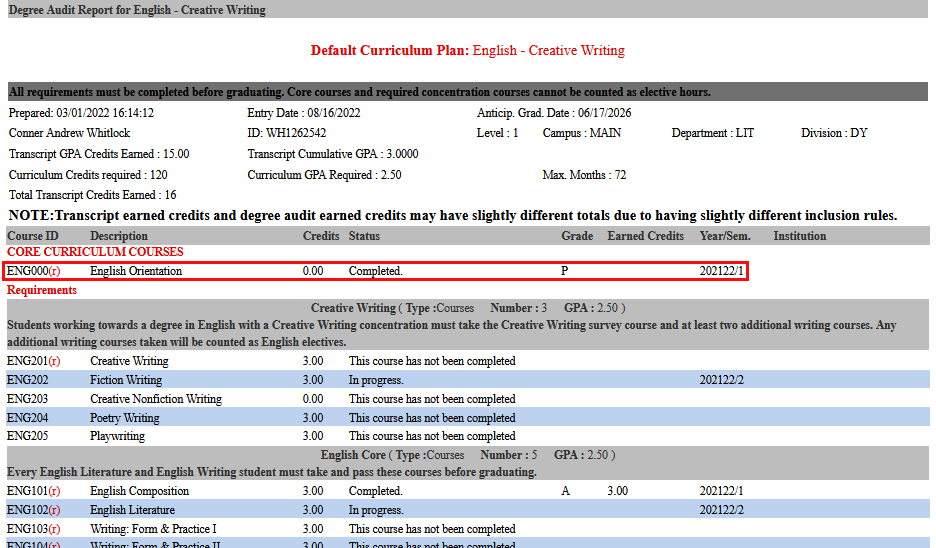
The first section on the report provides the student's basic academic information and the overall requirements of the curriculum.
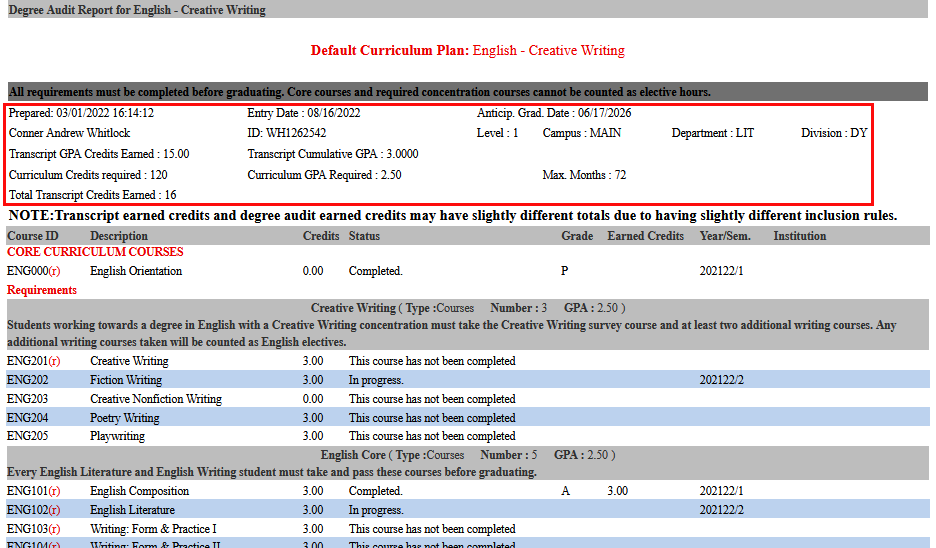
If there are any individual courses attached to the curriculum, they're listed in the next section under the Core Curriculum Courses header.
Next, the report lists the individual Requirements with the Type, Number, and GPA at the top of each section. If the Display Enrolled Courses only box was checked when setting up the requirement, only those courses will display. If it was left unchecked, all courses in the requirement will be displayed.
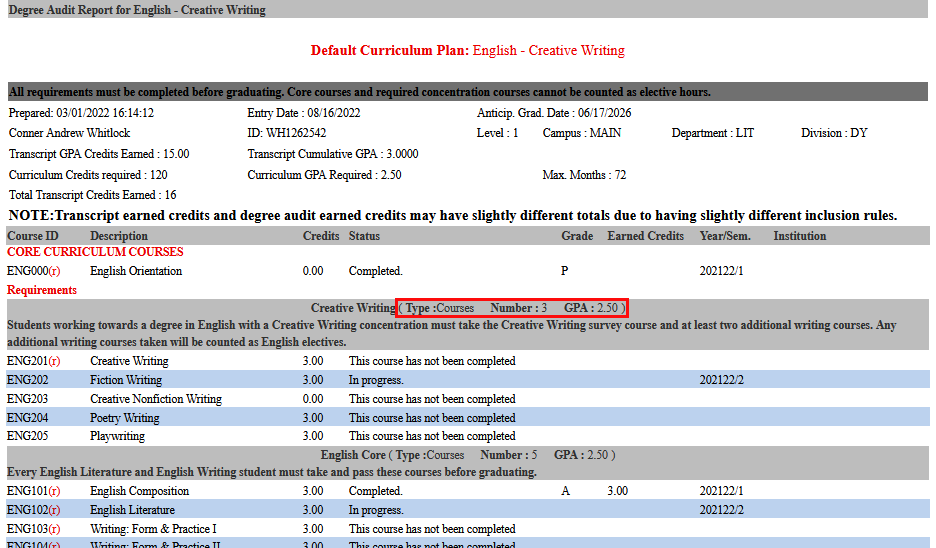
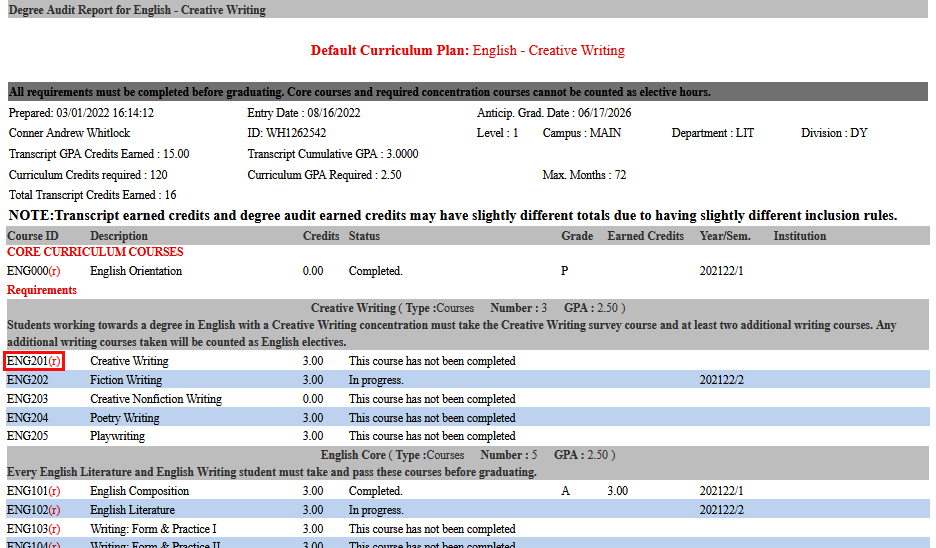
Required courses are marked with a red (r). Optional courses do not have this designation. Note that courses are designated as either not completed, completed, or in progress with the school year and semester displayed for in progress courses.
The text that displays when a student has not completed and is not currently enrolled in a course can be edited using the DA Not Enrolled Status Web Option.


If Codes type requirements are part of the curriculum, each Sub-Requirement displays separately on the report.
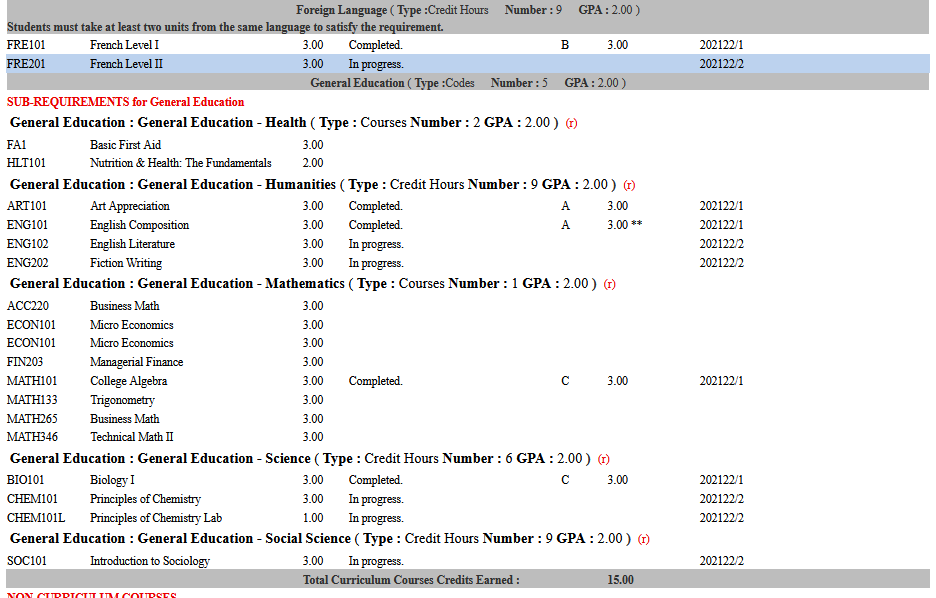
The second to last section on the report displays any Non-Curriculum courses that the student has taken, meaning courses that are not included in any of the requirements or sub-requirements. The last section displays the student's Competency Courses and their completion dates if relevant. The student's total earned credits displays at the bottom of the report.

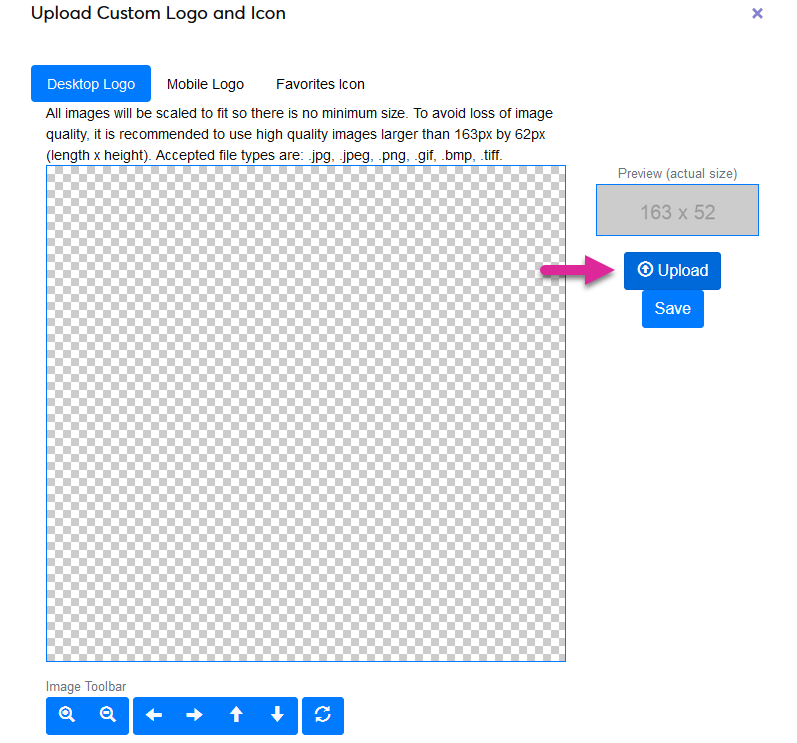
Custom Logo
To add a custom logo to all degree audit reports, use the logo upload tool in System Variables.