Salesforce Integration
Overview
Jenzabar SONIS allows clients to utilize a prebuilt Salesforce interface to create a process for importing application data to the Jenzabar SONIS system. Once the applicant reaches a defined point in the application process, their information is pushed to SONIS. This is accomplished using a mapping tool. The process is set up to import the student's name, address, module status, education record, program record, cohort, and employment record (if applicable).
SONIS Setup
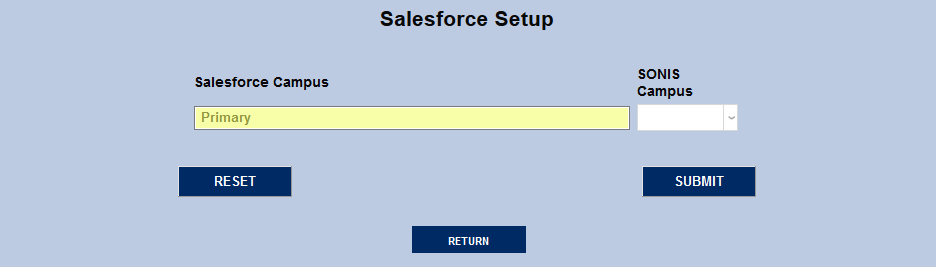
To begin the setup process, navigate to the Salesforce Setup utility under the Systems menu. Enter the Salesforce Shared Key and Salesforce Shared IV. These values are provided by Salesforce.
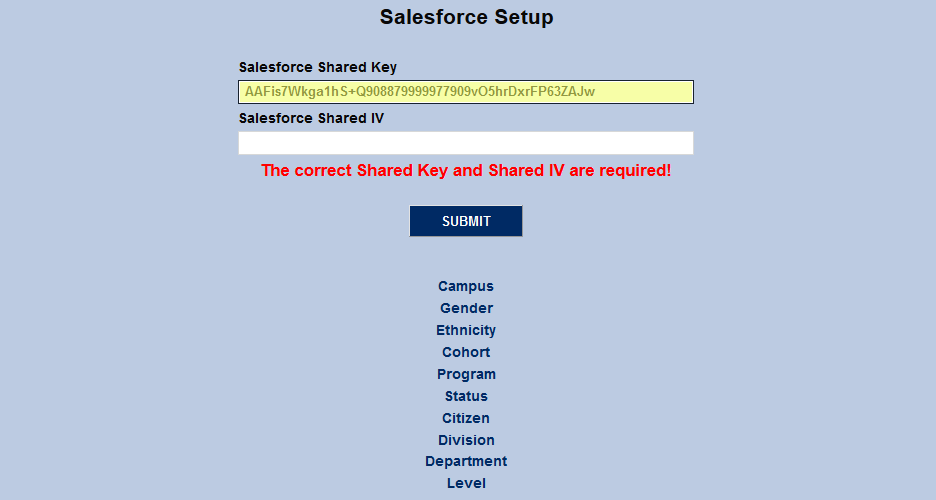
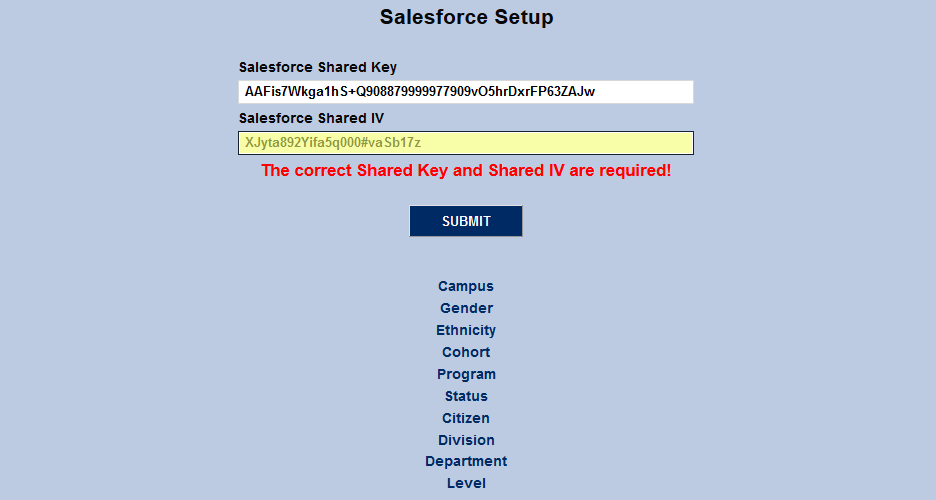
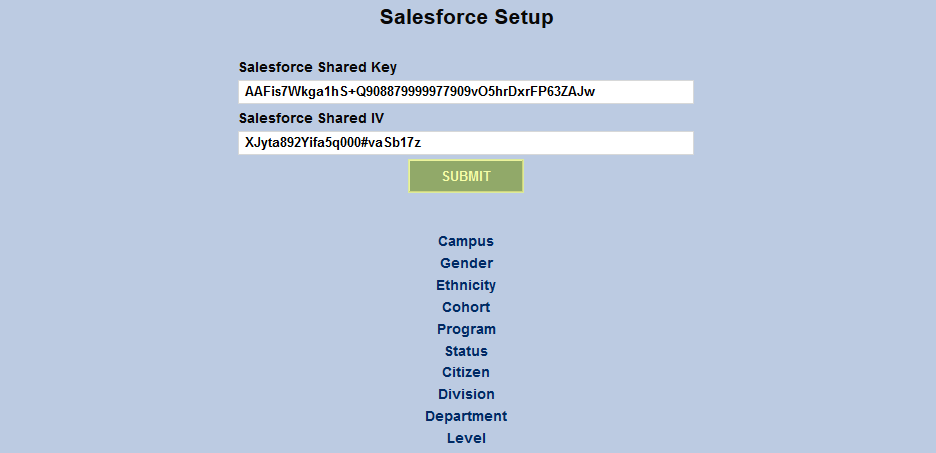
Click Submit to save the values entered.
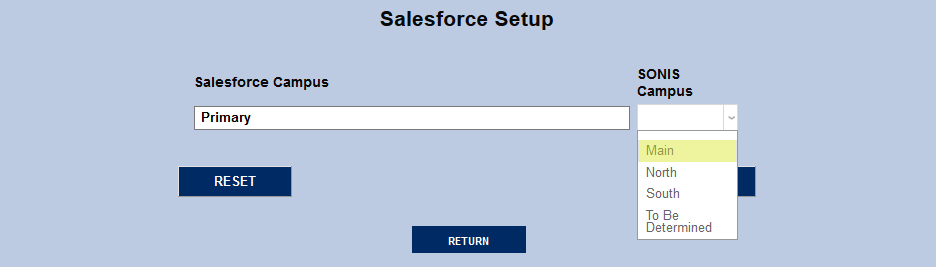
To begin the mapping process, click on a category link.
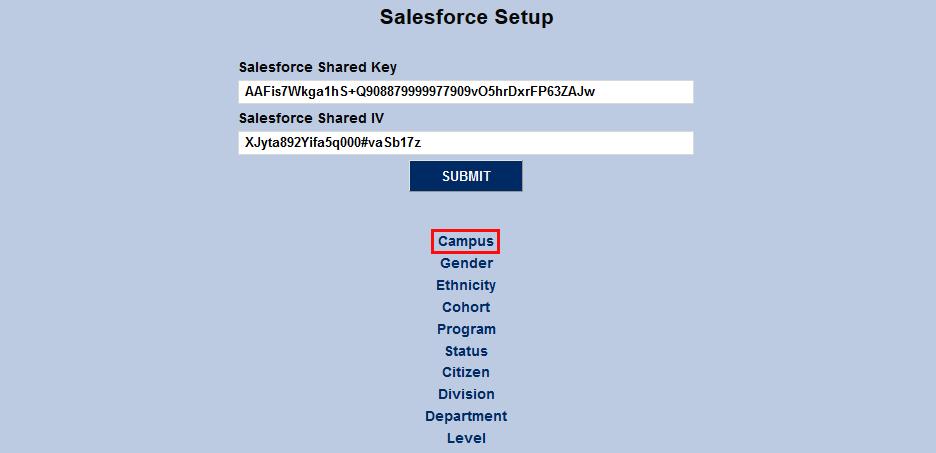
On the following page, click Add to add a new value.

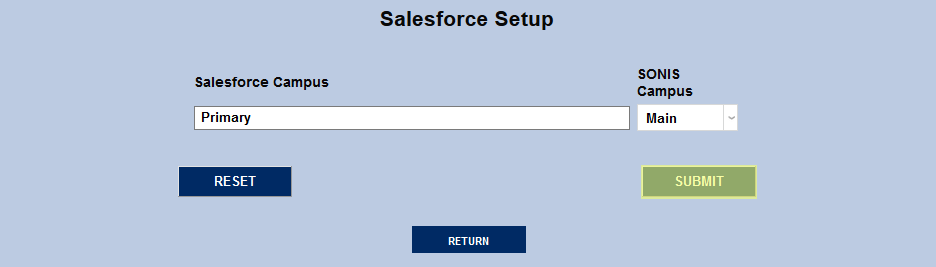
Type the terminology used in Salesforce into the Salesforce field, select the correct corresponding value from the SONIS dropdown, and click Submit.
Repeat the process until all Salesforce values are assigned to a corresponding SONIS value.
Terminology
SONIS and Salesforce use different terminology to describe the same data. This listing provides both terms and the Salesforce location so administrators can find the Salesforce data for mapping.
When entering a Salesforce value for any of the translations, it is imperative that it match exactly with what is found in Salesforce or the translation will fail.
When Salesforce posts to SONIS, the following values must exist and cannot be null:
• Contact Id: This is the person’s Salesforce ID.
• Last Name
• First Name
• Program
• Stage Name: This is the Salesforce status used to determine the SONIS status.
If values for other fields required to create SONIS records are missing the default SONIS value will be assigned. Default values for the following columns should be defined in Default Values in the Columns utility under the Systems menu:
• Campus
• Birthdate
• Country
• Type (address type)
Campus
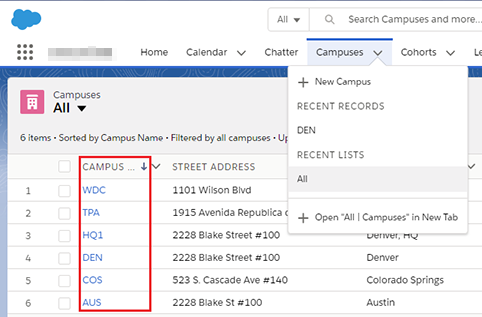
To find the campuses listed in Salesforce, click the dropdown arrow on the Campus tab and select All to show a list of all the Salesforce campuses. A translation must be created in Salesforce Setup for every campus in Salesforce. If an appropriate SONIS campus doesn’t exist, it must be added in the Campus table in the Systems hub.
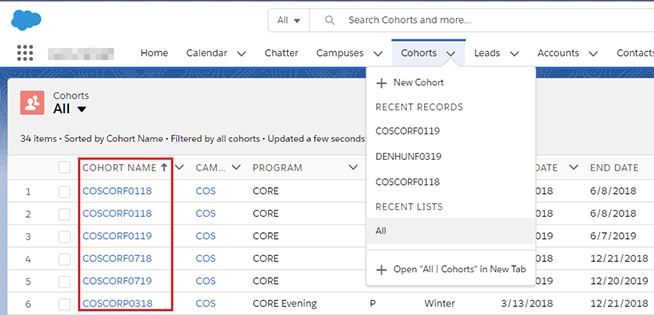
Cohort
The Salesforce values for cohorts can be found in the Cohort Name column under the Cohorts tab. Again, there must be a SONIS cohort to map to each Salesforce cohort.
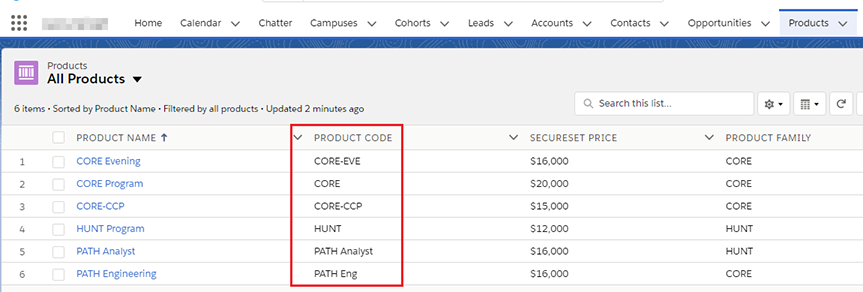
Program
The program can be found under the Products tab. The values that need to be translated are in the Product Code column.
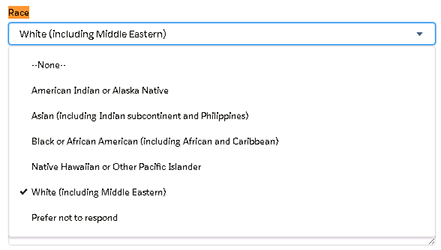
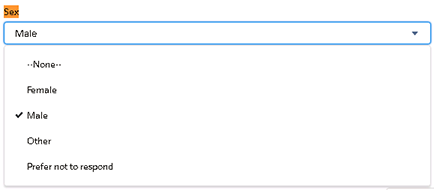
Race/Gender
To determine the possible Salesforce values for name and gender the utility, navigate to the Opportunities section, click on a name in the list, click on the Application link above the person’s name, then click on an application for that person to display the application detail. Ethnicity attributes are listed under Race while Gender is listed under Sex.
Status
The SONIS Status value is used to identify which module to place the user in, usually either Applicant or Student. SONIS status relates to the person’s Stage in Salesforce. Salesforce will to post to SONIS when the person has reached the Enrolled Stage. The default SONIS status assigned will be Student. The Salesforce Setup utility still requires setting up a translation so that if, in the future, applicant information is sent to SONIS for a different Salesforce Stage the system is ready to handle it.

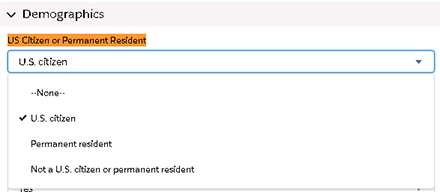
Citizen
Navigate to the US Citizen or Permanent Resident attribute on the application detail page.
Division/Department
The SONIS Division and Department are based on the Salesforce Program/Product.
Level
The SONIS Level is based on the Salesforce Status/Stage.