Document Management System
Overview
The Jenzabar SONIS Document Management System allows users to upload files and attach them to pages within the SONIS system. The ability to upload can be granted to users of the administration, student, faculty, applicant, alumni and employer portals. Only users with Edit access to a page as set in the Profile Utility can upload files. Users with View Only access can download files, but they are unable to upload new files.
Note
Self-hosted clients must set a DMS File Destination Directory in Web Options before they can use the Document Management System. Hosted clients should have this location already set by the Jenzabar Cloud Services team.
Setup
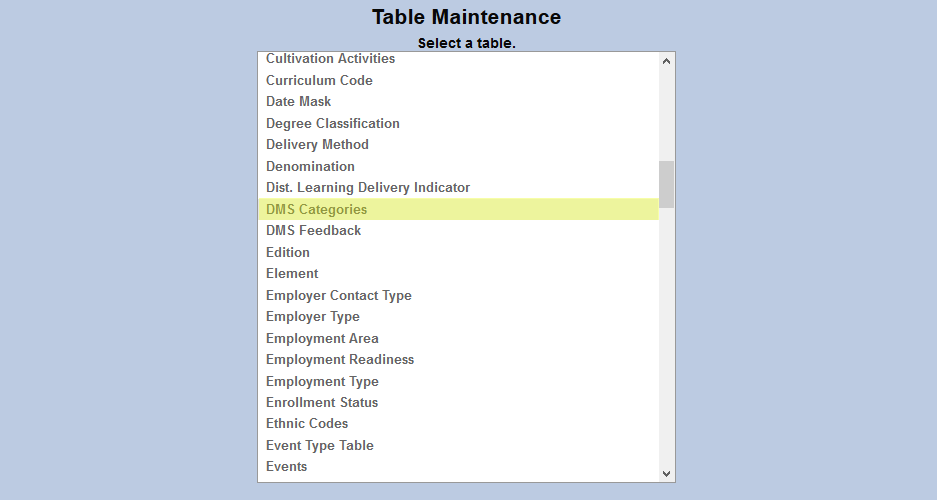
DMS Categories
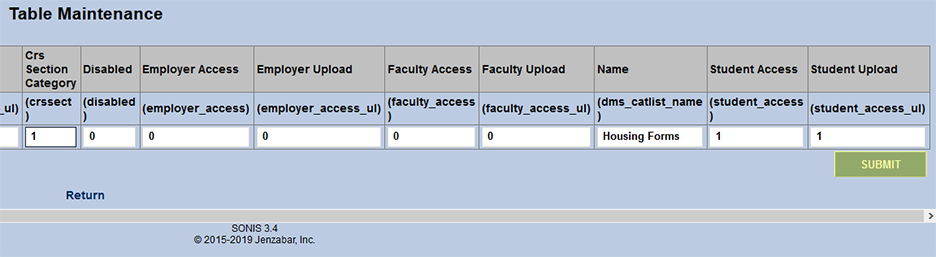
Files uploaded to the Jenzabar SONIS DMS must be categorized for organizational purposes. To create and edit these categories, navigate to the Table Maintenance utility and select DMS Categories.
Click Add New Record to create a new DMS category or click on the DMS Category Code to edit an existing category.
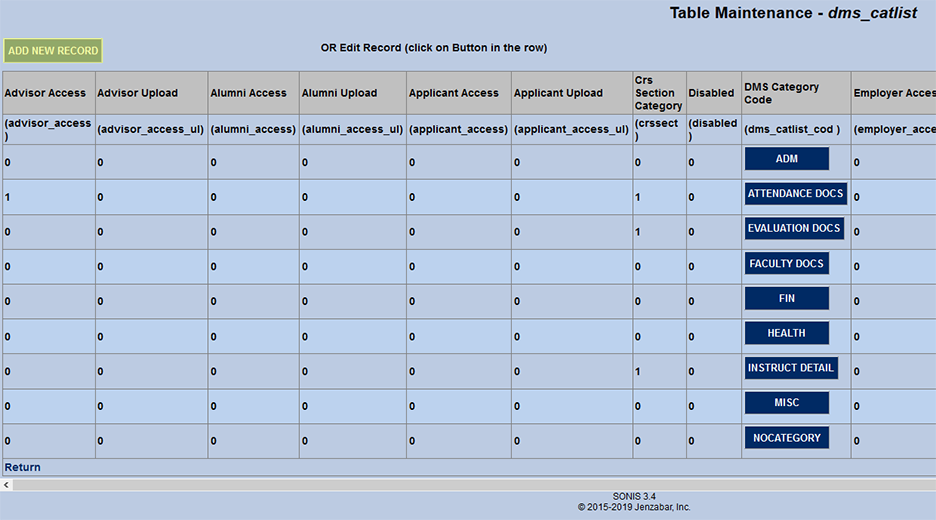
When creating a new record, begin by filling out the Name field with a full-length description of what the category encompasses. The field holds up to 25 characters.
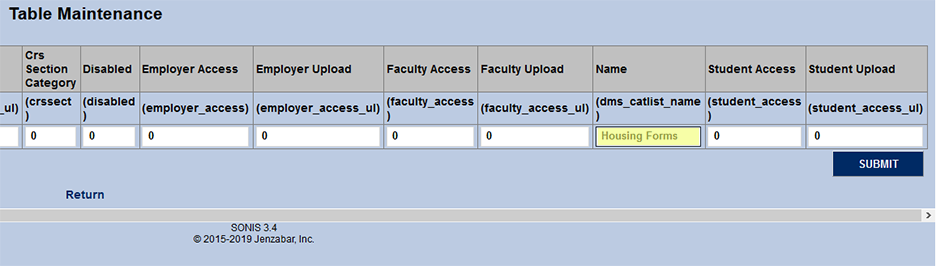
Next create a shortened version of the name as a DMS Category Code. This field holds 16 characters. The value code can not be changed once the category has been created.
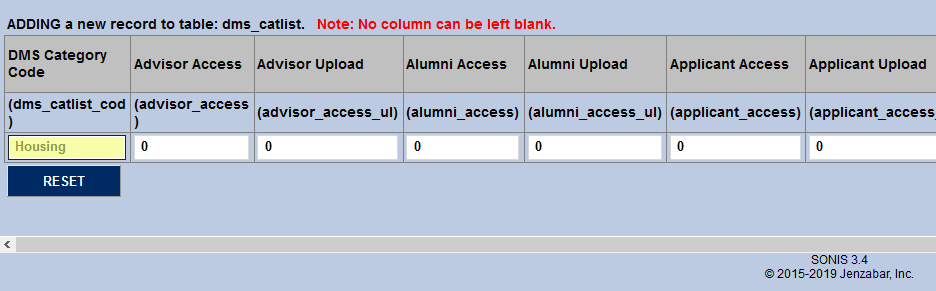
The last step in creating a new category is to choose which portals should have access to view and/or upload files that belong to that category. All categories are turned on for the Administration portal unless they're disabled. SONIS administrators can also choose to make them available for the advisor portal, the alumni portal, the applicant portal, and employer portal, the faculty portal, and/or the student portal.
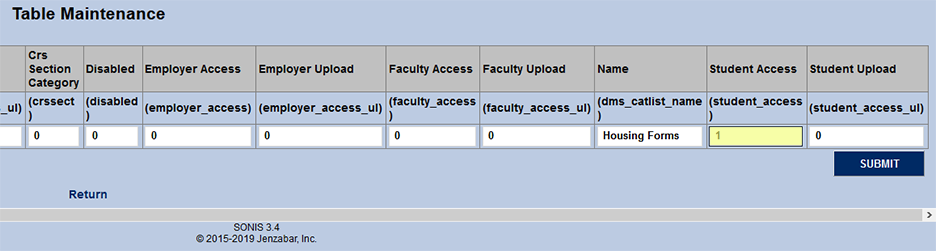
To allow users to access files, meaning they'll be able to view files, put a 1 in the Access Field. To allow users to upload files themselves, put a 1 in the Upload field. Note that turning on upload capability gives the portal user access to the files as well. The Student, Faculty, Applicant, Alumni, and Employer portals provide access to files pertaining to the users themselves. The Advisor option provides faculty members and sponsors with access to files associated with their advisees.

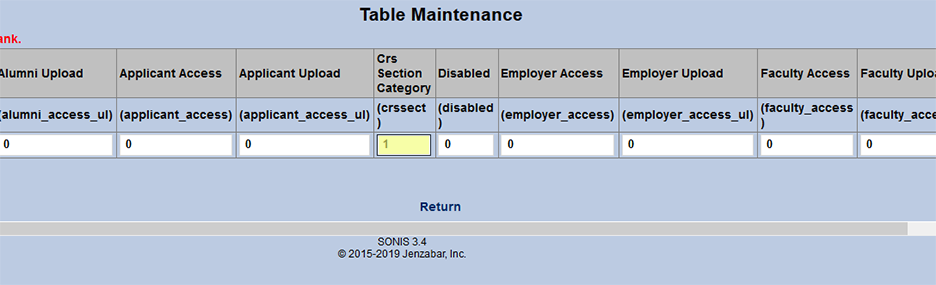
To allow faculty to access files in the category from the students they're currently teaching, place a 1 in the Course Section Category field.
Warning
If portal access is turned on based on the category, but an area is not assigned, users of that portal will not be able to upload a file.
Click the Submit button to save all changes and finalize the creation or edit of the category.
Document Areas
Document areas are another way to categorize uploaded files. They control where in the system certain types of files are stored and accessed. To put it simply, DMS Categories are labels that describe the file whereas DMS Areas are essentially folders where the files are stored. To create areas and control where in the administration portal they appear, navigate to the Document Management System utility in the Systems hub.
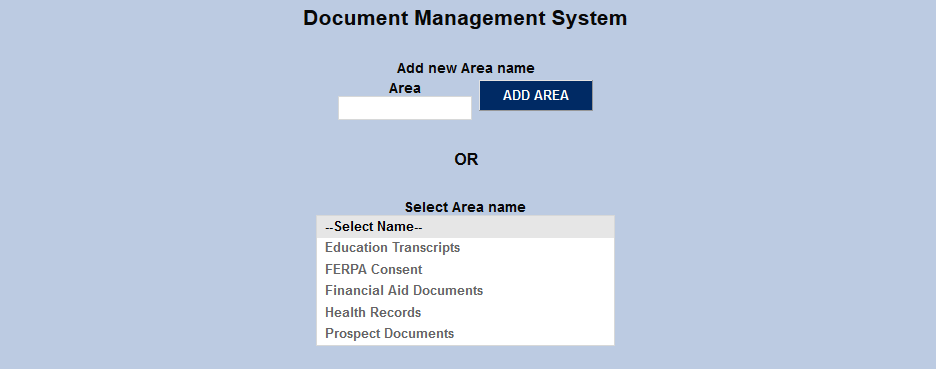
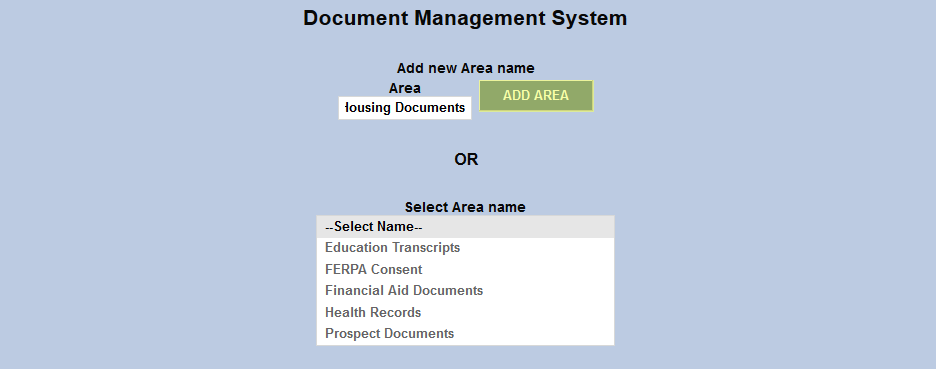
Administrators can add a new area by typing a name for the area in the Area field and the top and clicking the Add Area button.

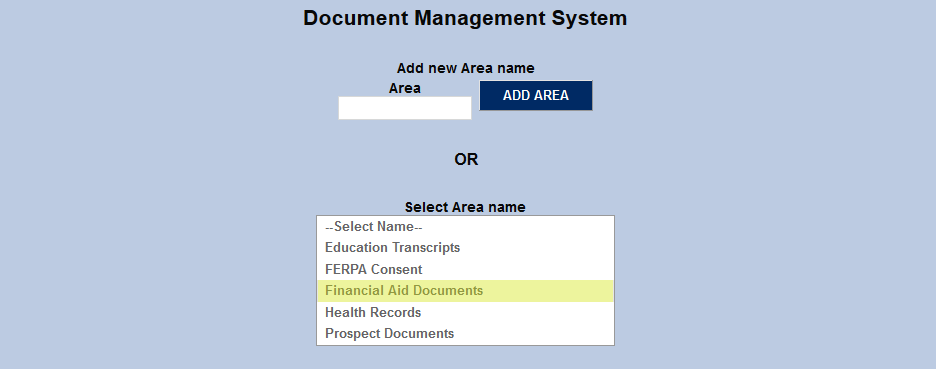
Alternately, administrators can edit existing areas by clicking on an area name in the Select Area Name menu.
On the following page, select Assigned Pages where the document area will be stored and accessed by administrators. These pages are all under the Records menu and the documents must be tied to a specific SONIS user.
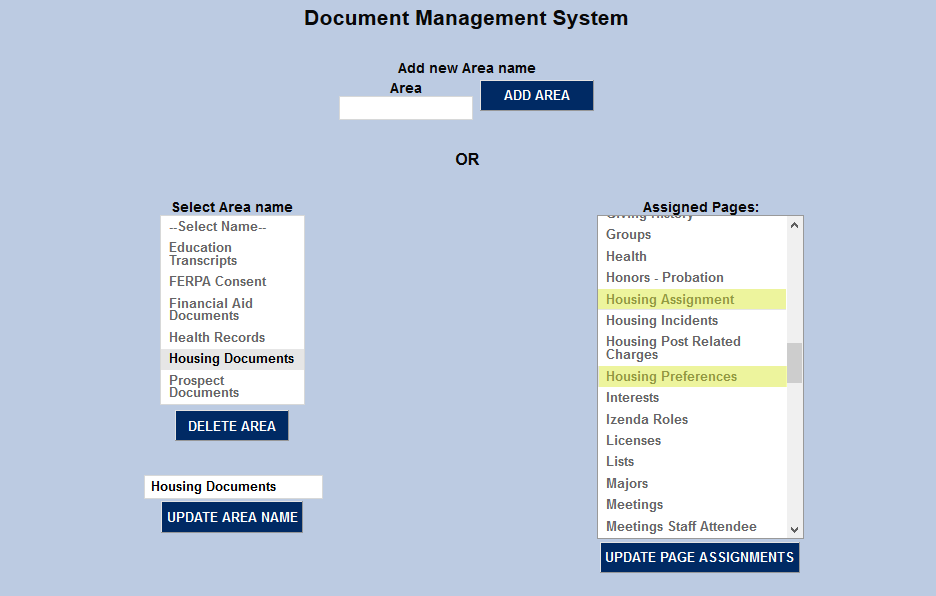
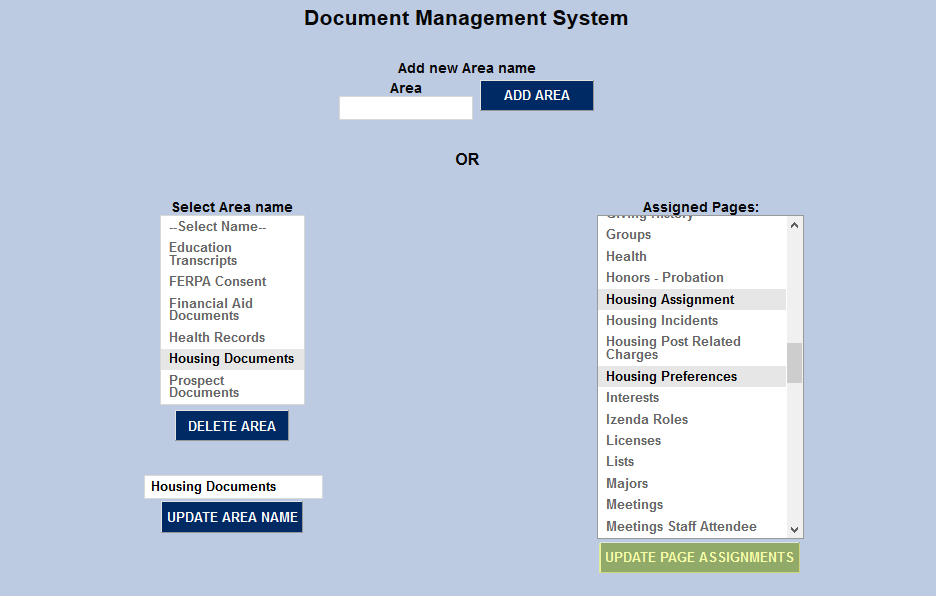
Click the Update Page Assignments button to save the assignments.
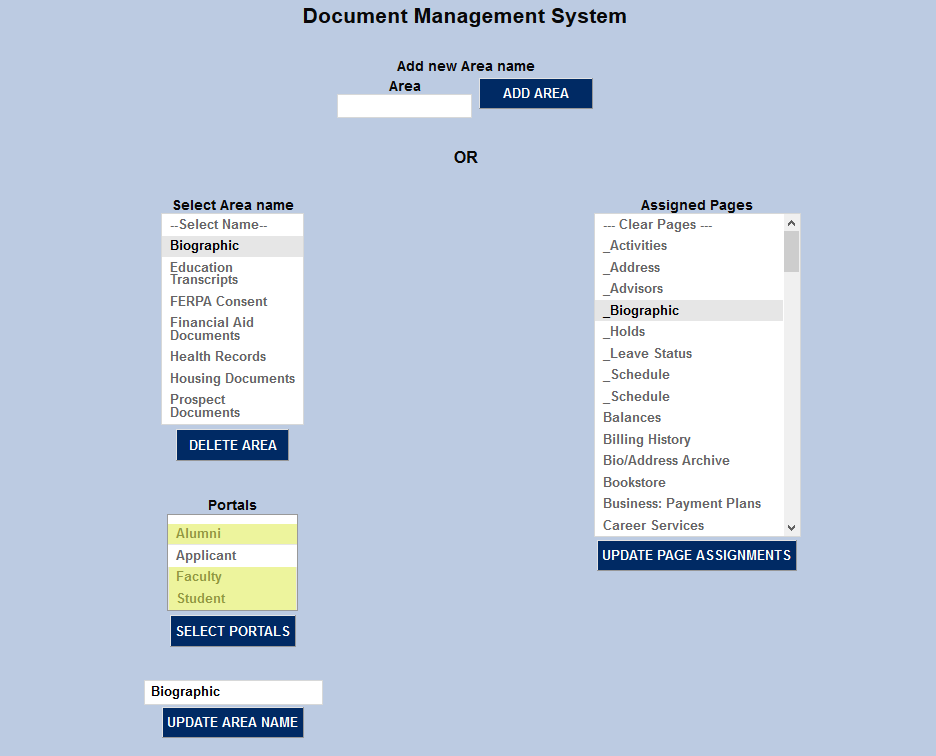
Portal Access
The Document Management System page is also used to control where documents are stored and located in the various portals. Unlike the administrative portal, which allows access from multiple areas, the alumni, applicant, faculty, and student portals only allow access to one area per portal. Once an area has pages assigned, the list of available portals will appear.
Keep in mind that the pages listed correspond with the admin portal, not the other portals. The alumnus, applicant, faculty member, and student will access and/or upload files through their personal Bio page regardless of the area setup. If more than one page is assigned to the area that these portals are associated with, any files uploaded through them will be stored in multiple places on the admin side. For this reason, it is recommended that institutions create an area specifically for alumni, applicant, faculty, and student files and assign the admin Biographic page to that area only for the sake of simplicity.
Warning
If portal access is turned on based on the category, but an area is not assigned, users of that portal will not be able to upload a file.
Select the portal or portals to be assigned to this area from the Portals menu and click Select Portals to assign them.

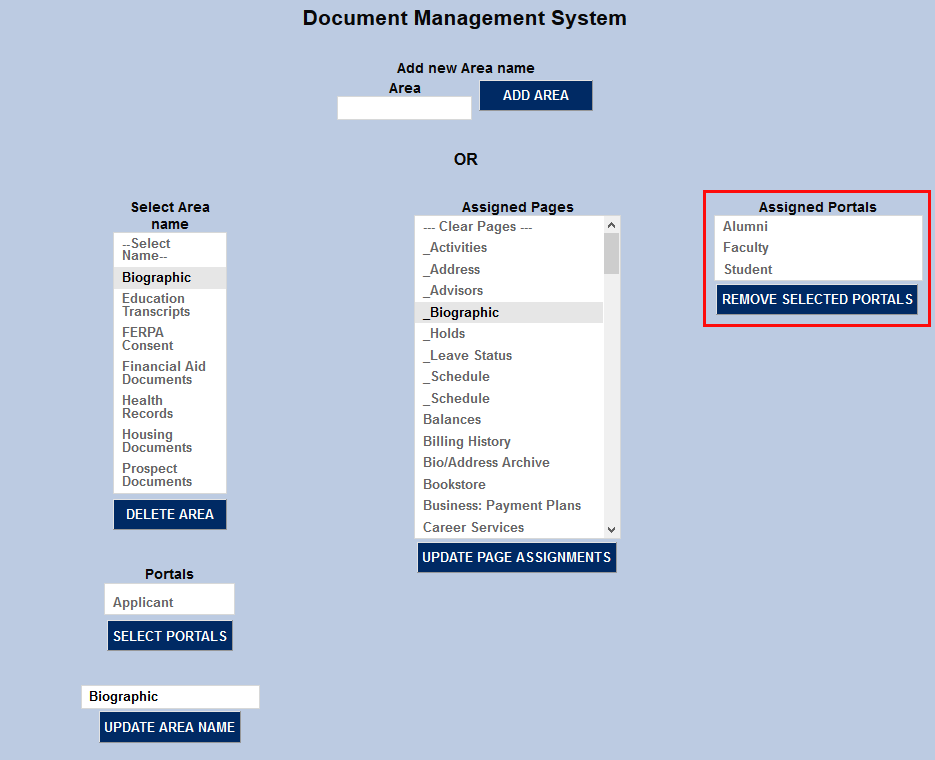
Once a portal has been assigned to an area, it will move to a new menu called Assigned Portals. It can be unassigned by selecting the portal again and clicking the Remove Selected Portals button.
Access/Upload
Administration
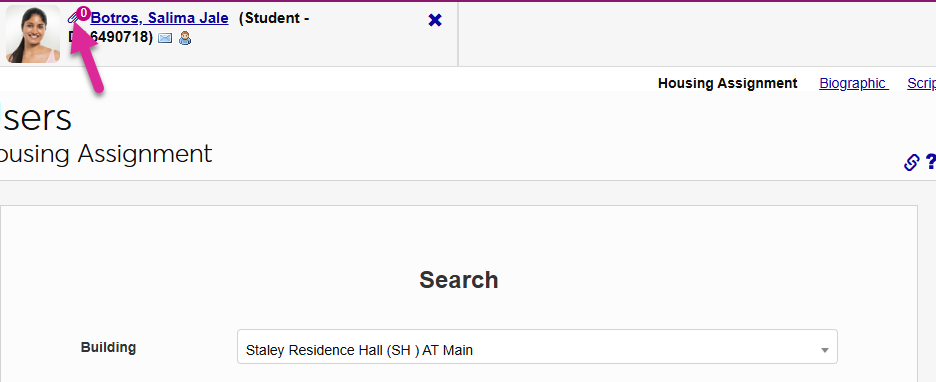
To upload and access student files via DMS, navigate to a Users hub page with an active DMS Area. Click the paperclip in the top left corner next to the student's name to begin uploading a file.
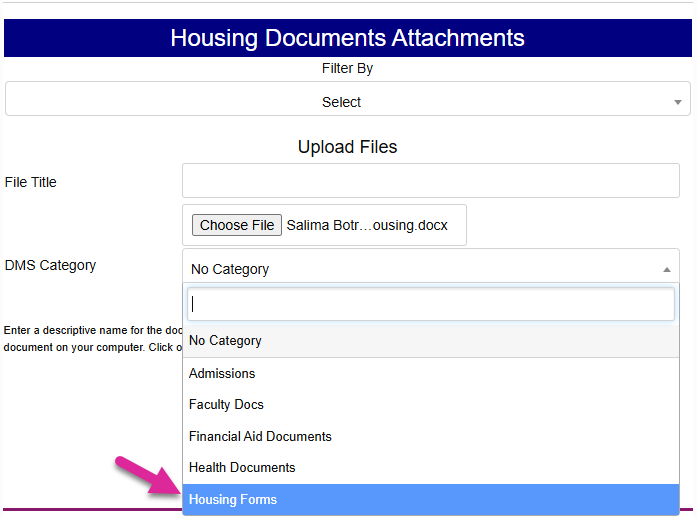
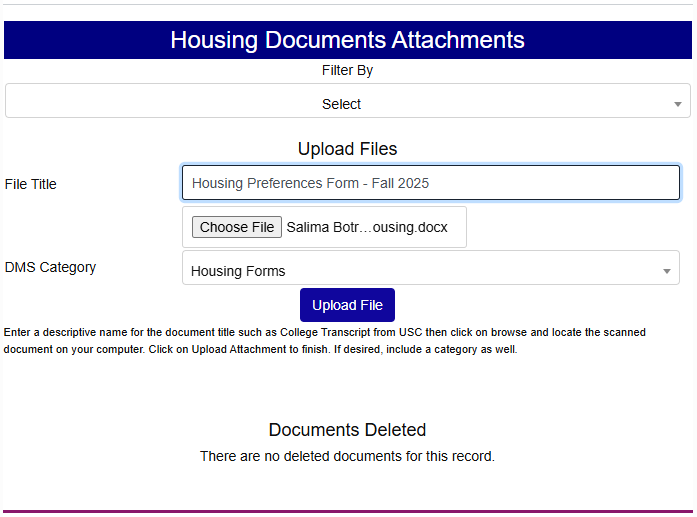
A new window will open. Click the Browse button and locate the file to be uploaded.
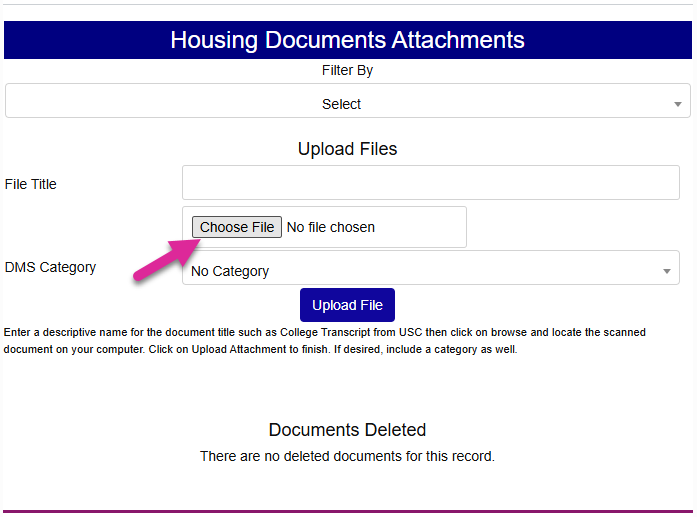
Select a DMS Category label for the file and give it an Image Title that will make the file easily identifiable to other users. Click Upload Image to complete the process.
Once a file has been uploaded, the number in the top left corner will update to reflect the change. Click on the number or the paperclip icon to access the uploaded file or files.
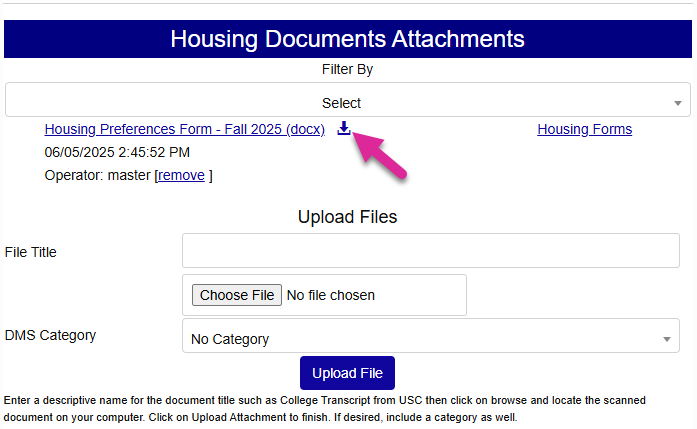
Any files that have been uploaded to the page are shown at the top by category along with the file format, the date and time it was uploaded, and the user who uploaded the file. Click on the download icon to download it or click Remove to delete it. Deleted files will be listed at the bottom of the page, but of course will not be available to view.
Tip
When accessing existing files, use the download button rather than the view button. If you attempt to view a file that is not an image, it will download with a generic name that may make the file hard to locate.
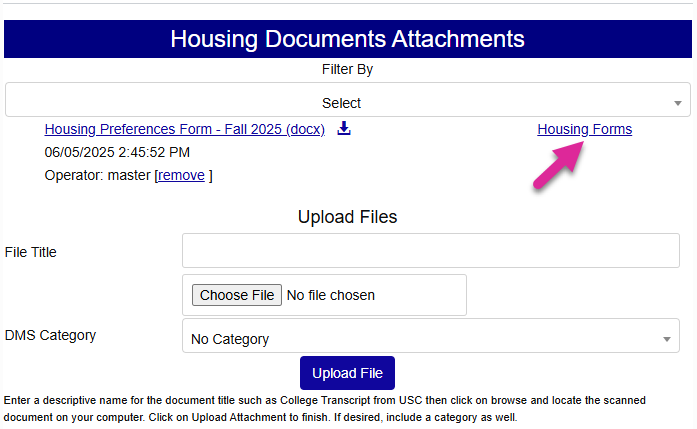
To edit the Category label of the file and the Area where it's stored, click on the category name to the right of the page. Access to this feature must be granted by a User Security privilege.
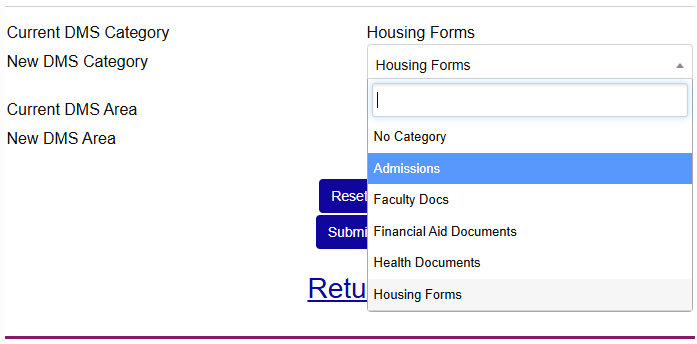
On the following page, select a new Category and/or Area from the dropdown menus.
Warning
If you move a file that a student or faculty member had access to to an area without student or faculty access, the student or faculty member will lose access to the file.
Click the Submit button to save the category and/or area changes.
Personal File Access/Upload
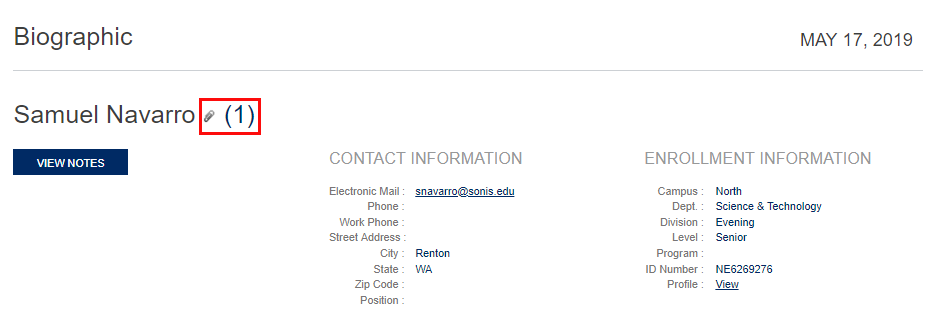
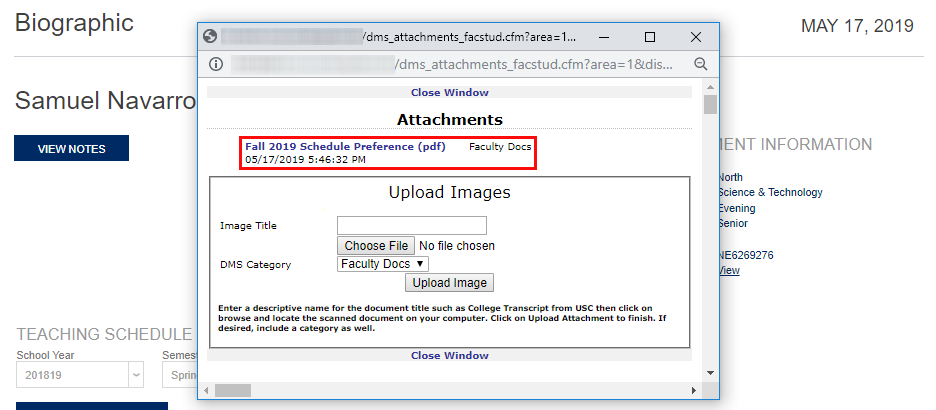
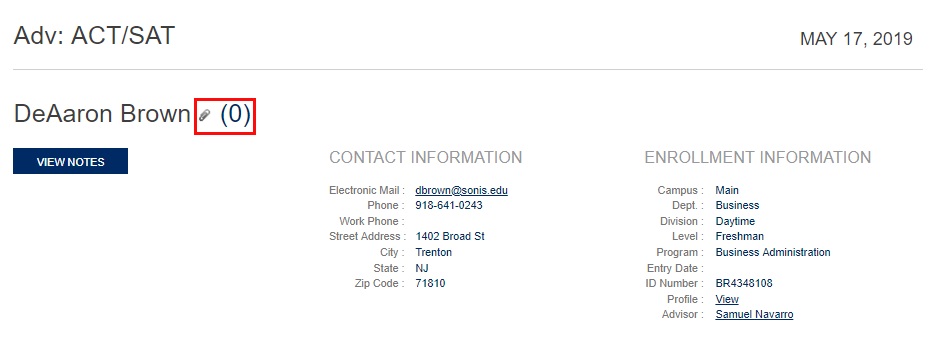
Personal files are accessed and uploaded through the Biographic page. The process is essentially the same as in the administrative portal. Click the paperclip/number next to the user's name to upload a file.

When the Attachments window opens, click Choose File and locate the file to be uploaded.
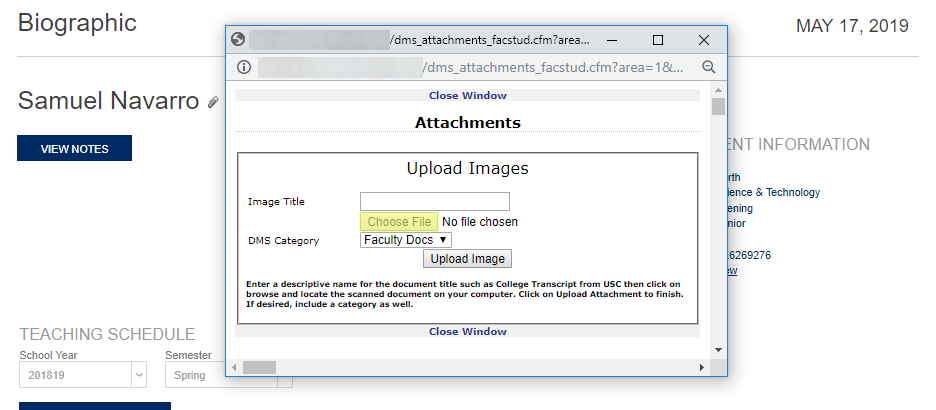
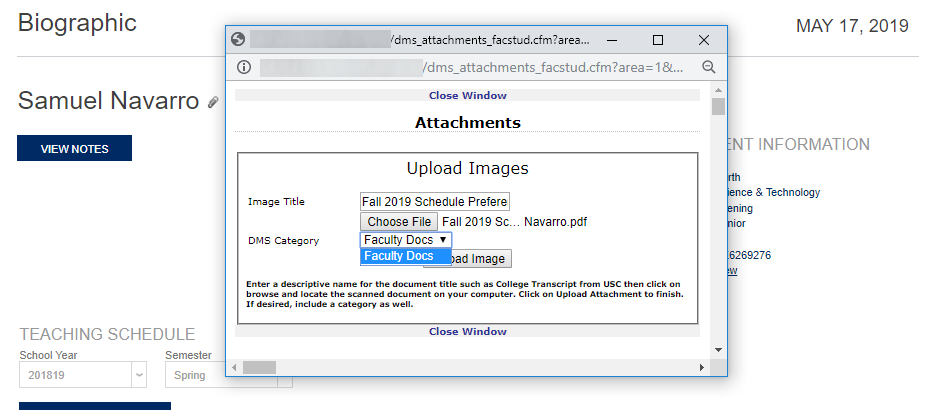
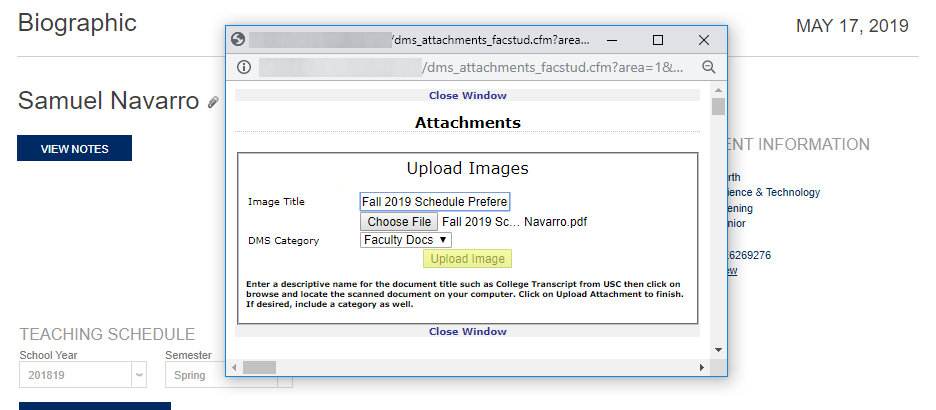
Provide a descriptive Image Title for the file and select a DMS Category.
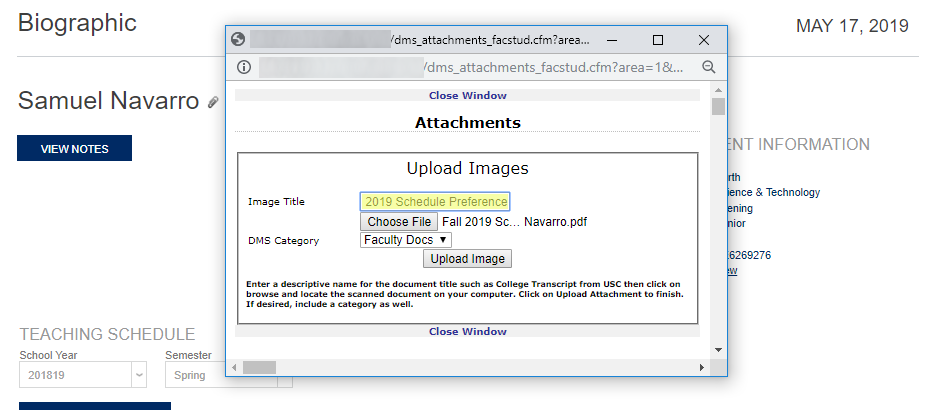
Click Upload Image to complete the upload process.
Once a file has been uploaded, the number will update to reflect the change. Click it to view previously uploaded files. The title will be listed along with the category and the date and time it was uploaded.
Advisor Access/Upload
To view advisee files, select the student from the Advisee Listing page under the Advising menu and click View Records
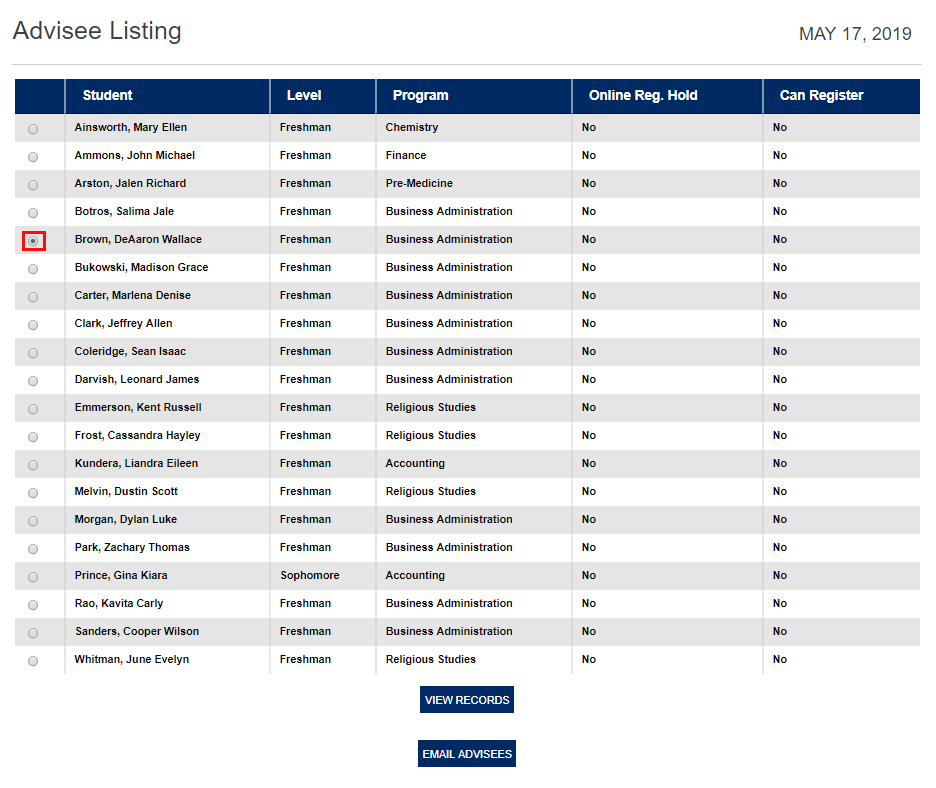
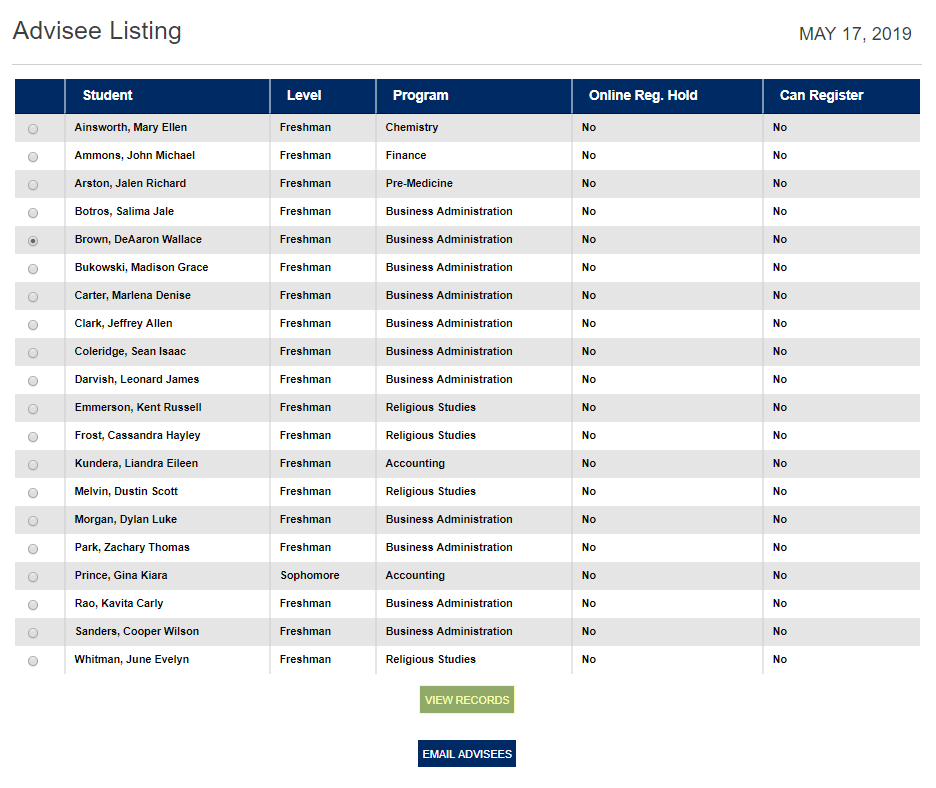
From this point, the process is the same as for personal files. Click the paperclip/number to access files and follow the same steps to upload them.
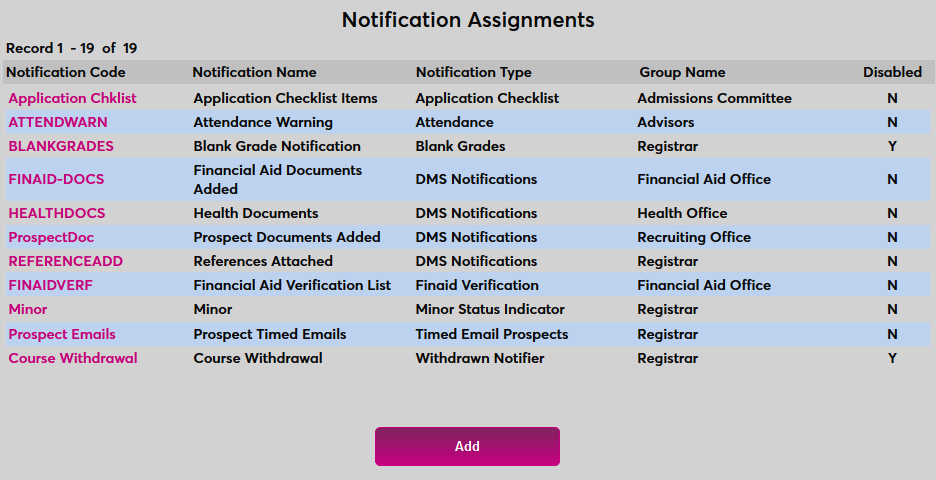
Notification Assignment
SONIS also offers a notifier that will alert administrators when a new document is uploaded. It will notify of all documents uploaded since the last time the instance was run or the start time has been updated. The notifier can be filtered by Module Status, Division, Campus, Department, and Level as well as by the DMS Category.
To begin, navigate to the Notification Assignments page under the Systems hub and click Add to create a new notifier.
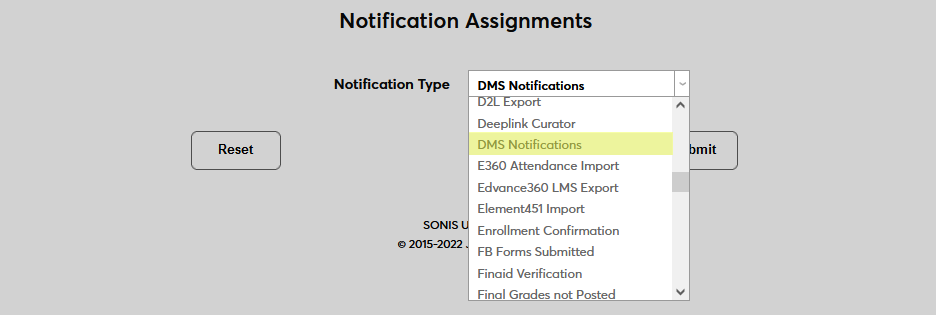
Select DMS Notifications from the Notification Type dropdown menu and click Submit.

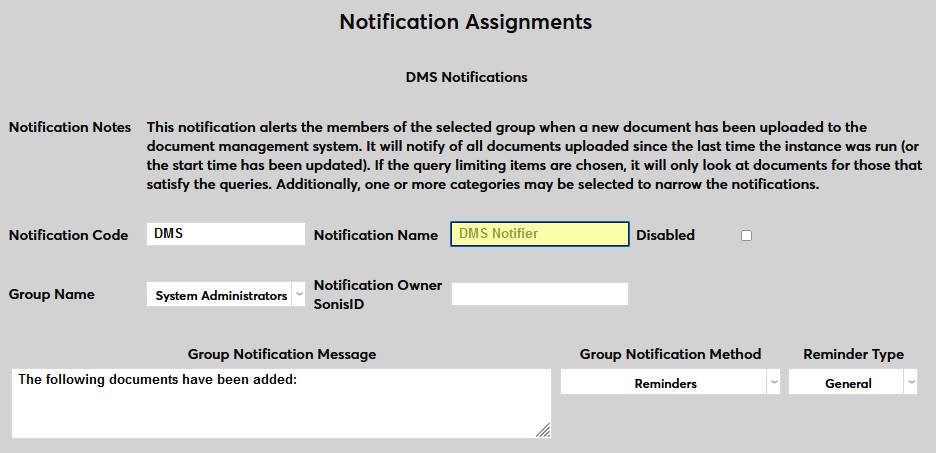
Next, create a Notification Name, a descriptor of the notifier's purpose with a 50 character limit, and a Notification Code, a shorter version of this name with a 20 character limit that the SONIS system will use internally to identify the notifier.
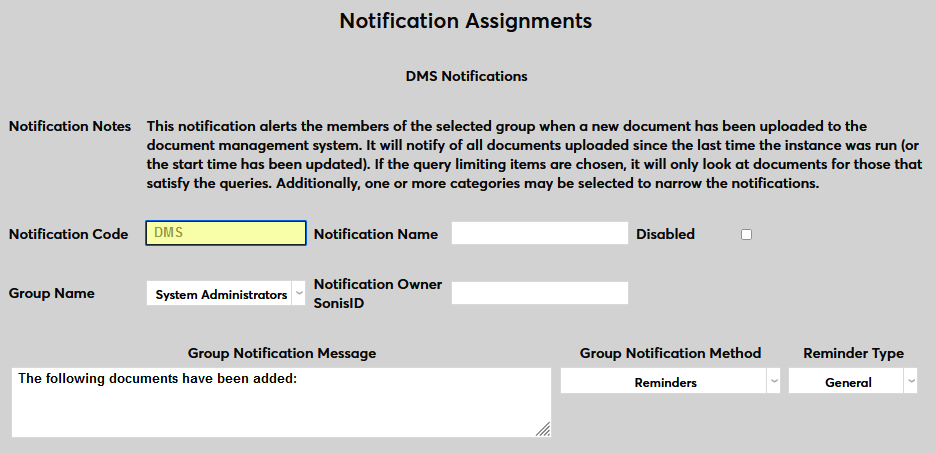
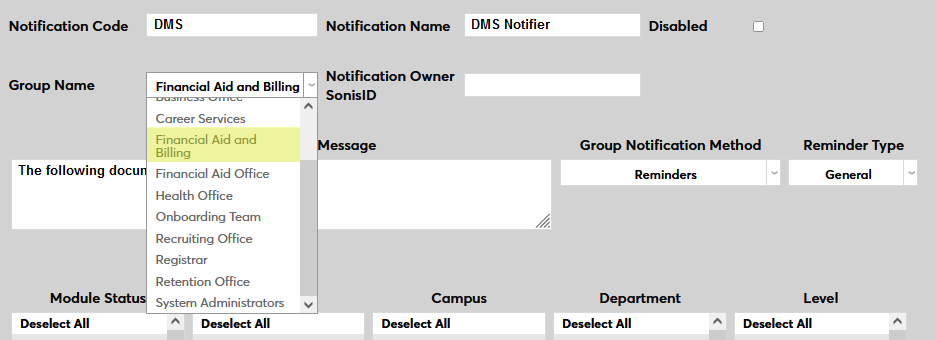
Select a group of staff members to receive the notification from the Group Name dropdown menu. Groups can be added and edited through the Table Maintenance utility.
Enter the ID of the staff or faculty member who will be managing this notification in the Notification Owner SONIS ID field.
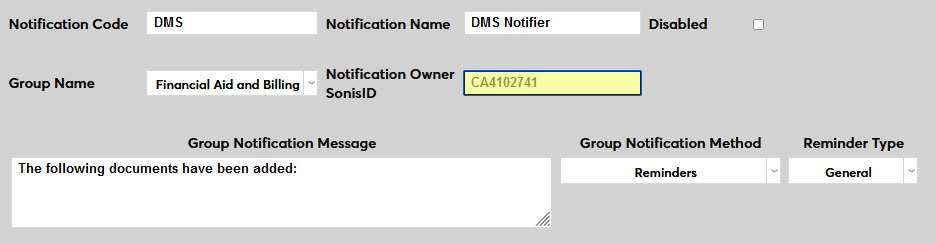
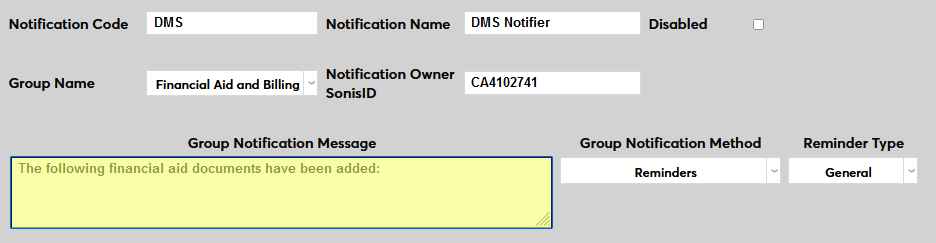
Create a Group Notification Message that will be sent to the group members when the task takes place.
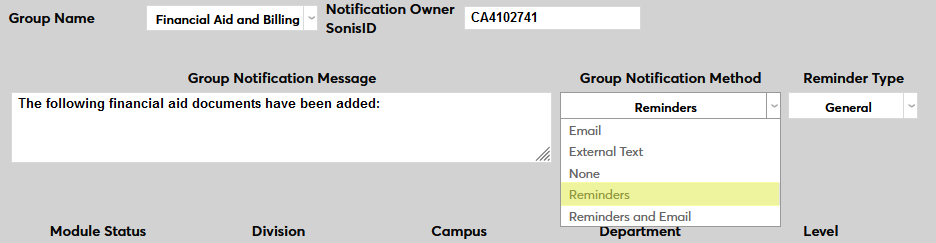
The Group Notification Method dropdown menu designates whether the group and individual users will receive an in-system reminder, an email, a text, or no notification when the process is triggered. The Reminder Type dropdown can change how the in-system reminder displays. This list can be created and edited via the Table Maintenance utility.
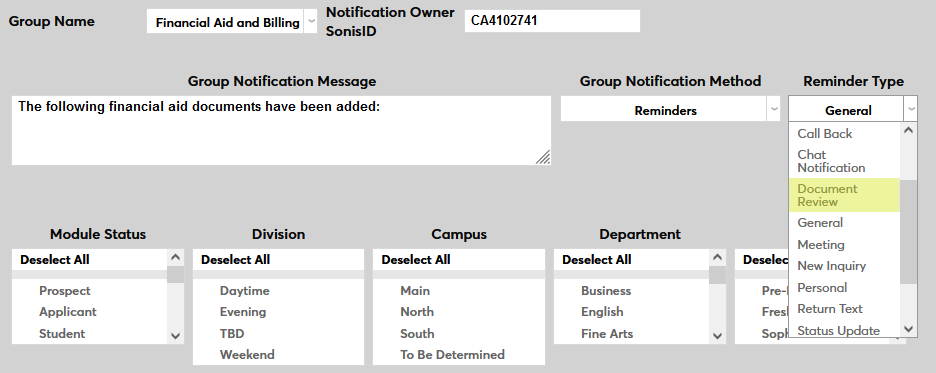
The Module Status, Division, Campus, Department, and Level menus can be used to narrow down the list of users whose status change will be included in the alert or Select All to include all users.
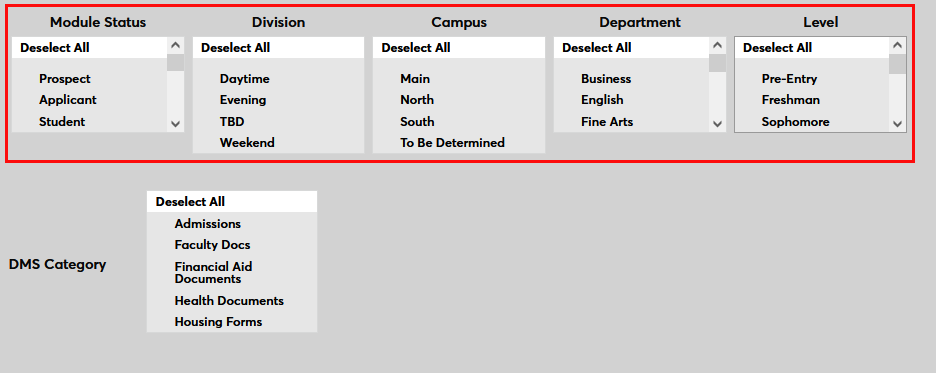
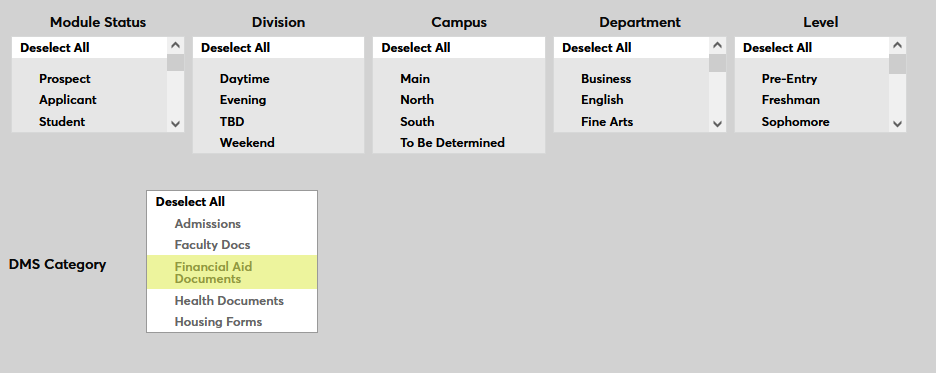
The notification can also be limited by the DMS Category. Only documents uploaded with the selected category or categories will trigger the notifier.
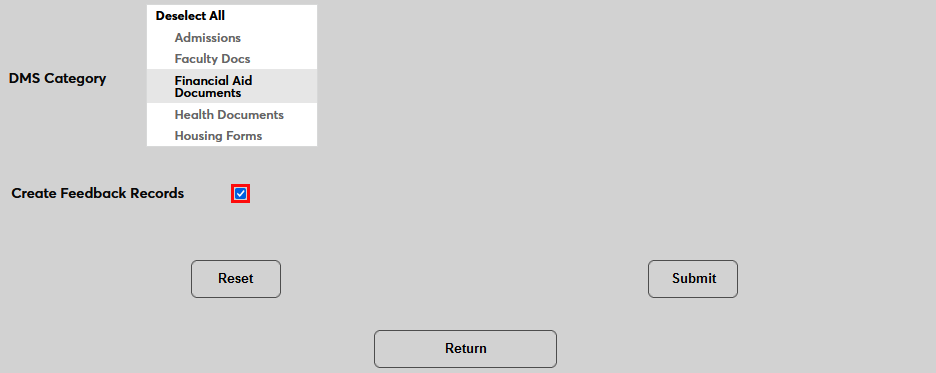
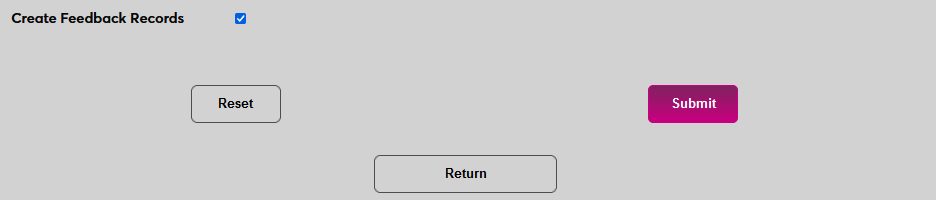
Check Create Feedback Records to turn on the option to prodive in-system feedback for uploaded documents of this category. If this option is selected, administrators will be able to set a review status and leave feedback notes for every document that is uploaded.
Click Submit to save the changes and create the notifier.
Timed Task
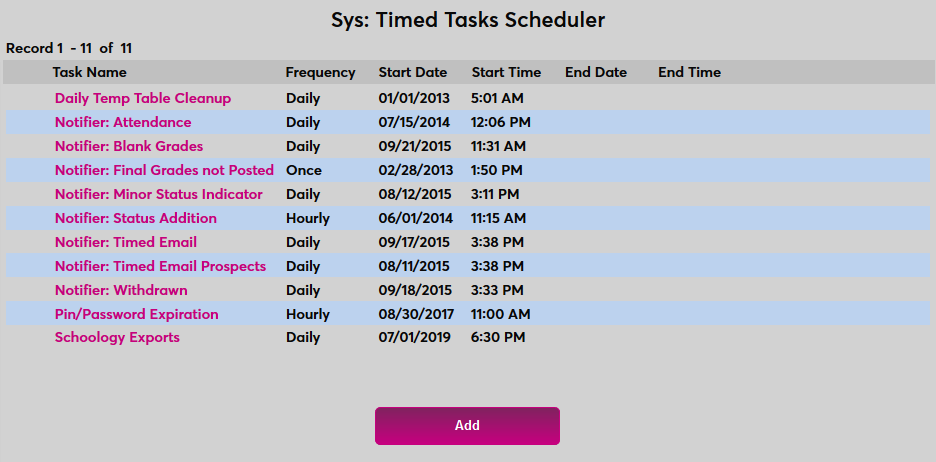
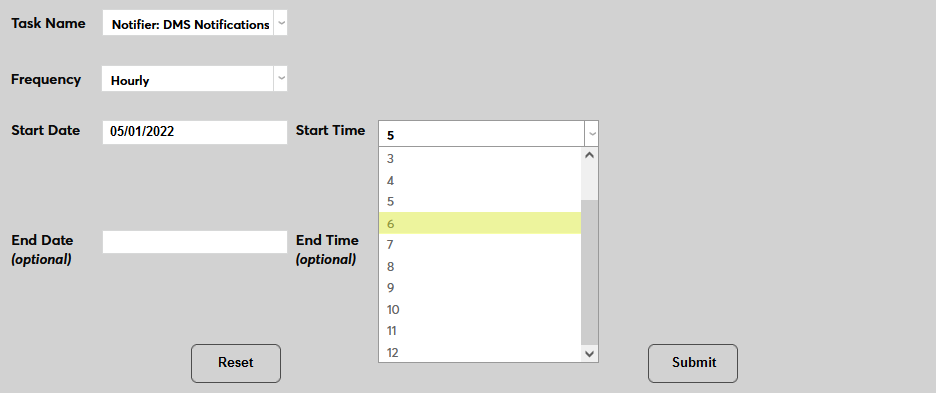
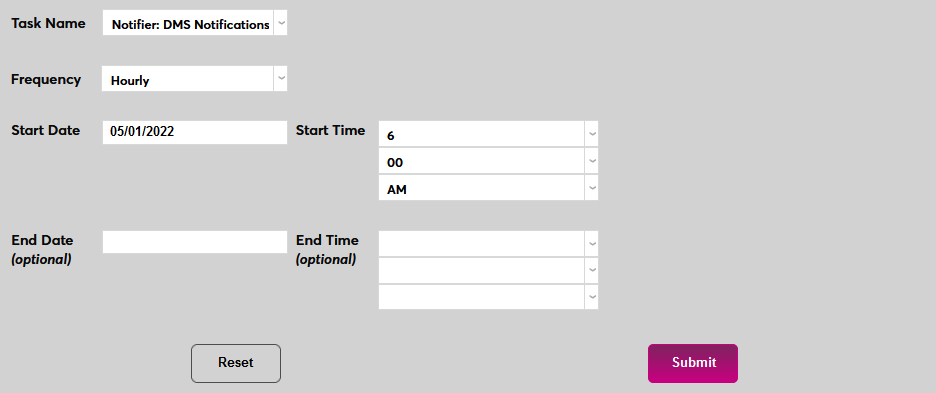
In order for the notifier to run, a timed task must be created. Navigate to the Timed Task Scheduler in the Systems hub and click Add to create a new task.
Select Notifier: DMS Notifications from the Task Name dropdown menu.

Select how often the task should occur with the Frequency dropdown. It's recommended that this notifier be run hourly.
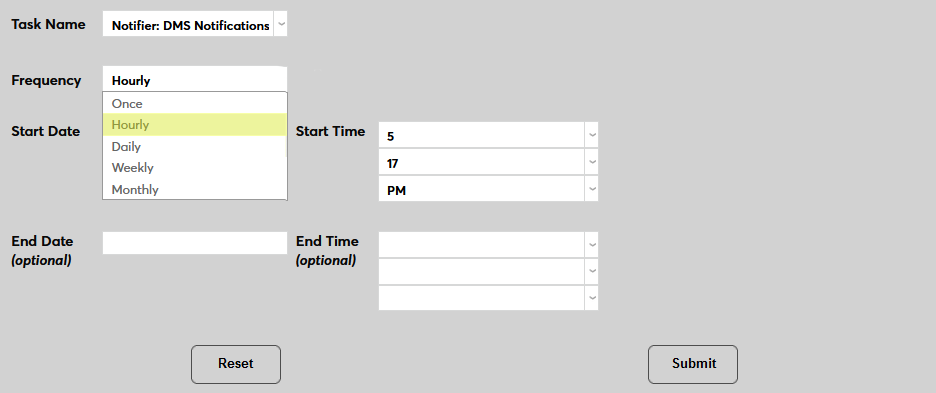
The Start Date and Start Time will automatically be set to the current date and time but can be changed to suit individual preferences. The End Date and End Time are optional.
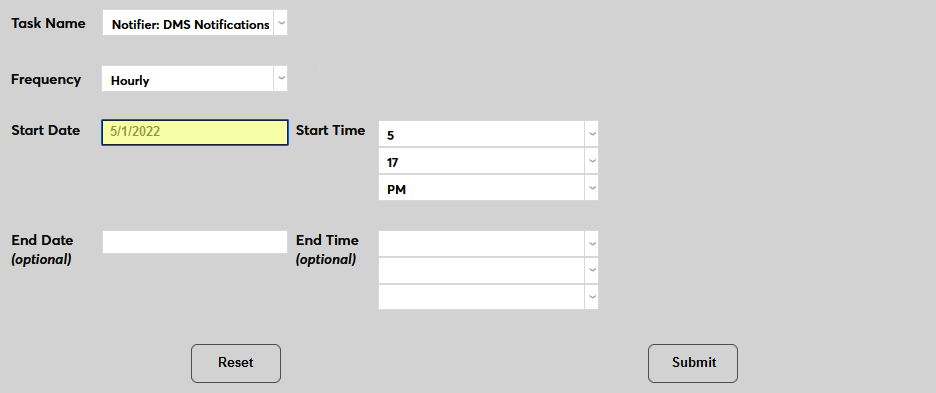
Click Submit to save the changes and activate the timed task.
Feedback
Some institutions may wish to allow their administrators to provide feedback in response to documents that are uploaded. To activate this option, check the Create Feedback Records box when creating a DMS notification assignment. When the notifier runs, it will alert each member of the selected group that a new document has been uploaded and give them each the opportunity to add feedback.
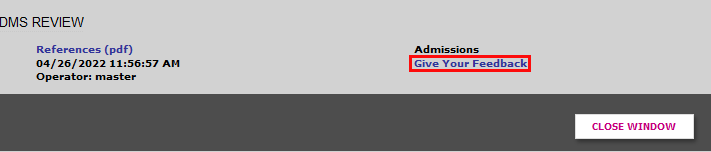
There are two ways for a staff member to add feedback. The first way is to access the document through the Reminder that's sent. Click Give Your Feedback to provide feedback.
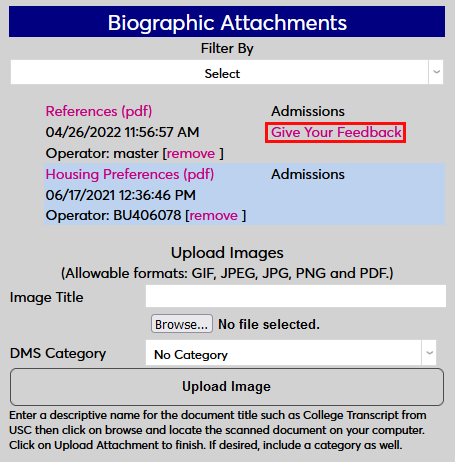
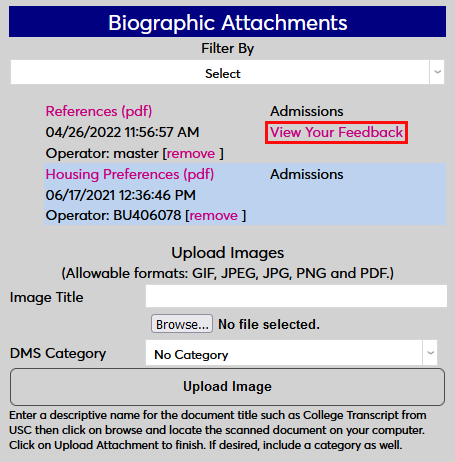
The feedback form is also available from the folder where the document is stored on the user's page. Again, click Give Your Feedback to provide feedback.
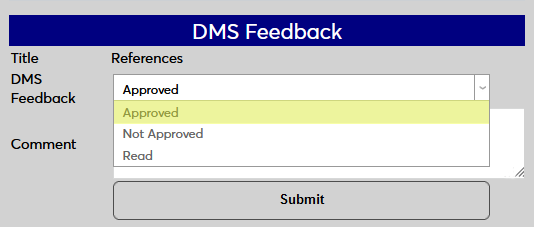
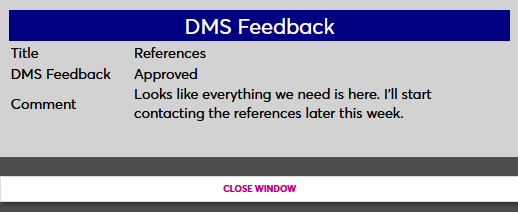
On the following page, select a review status for the document, either Approved, Not Approved, or simply Read.
Note
These review statuses are predelivered. If they do not meet institutional business needs, they can be added to, updated, or changed in the DMS Feedback table.
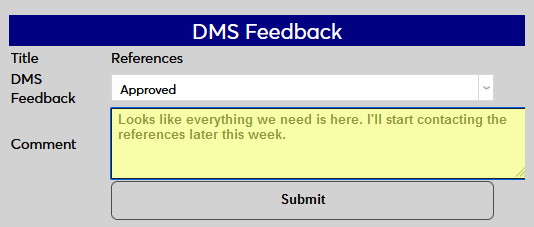
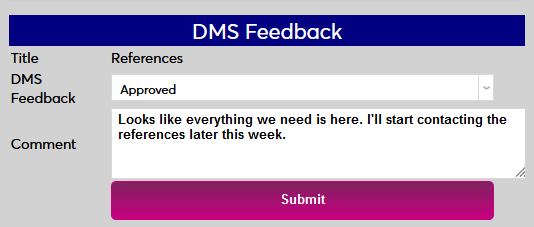
Next, type any needed feedback in the Comment field and click Submit to save the comment.
Next, type any needed feedback in the Comment field and click Submit to save the comment.
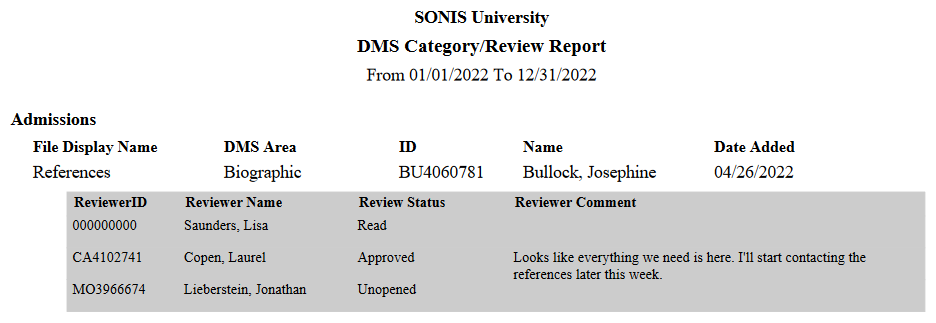
When feedback has been added, it can be accessed again by clicking the View Feedback link. Feedback can also be viewed in the DMS Category/Review report.
DMS Category/Review Report
The DMS Category/Review report allows administrators to review a list of the documents that have been uploaded sorted or filtered by category. Navigate to DMS Category/Review under the Reports hub to begin. Use the Campus, Division, Department, Module Status, Program, and Level filters to narrow down the list or leave them all selected to see documents associated with users in any of those demographic categories.
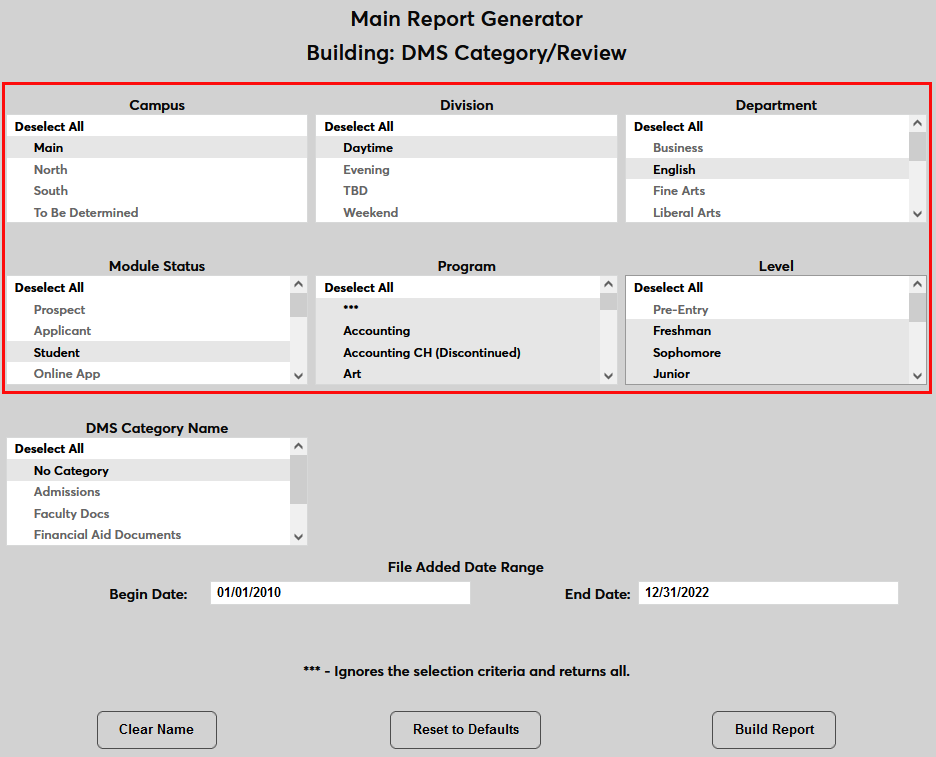
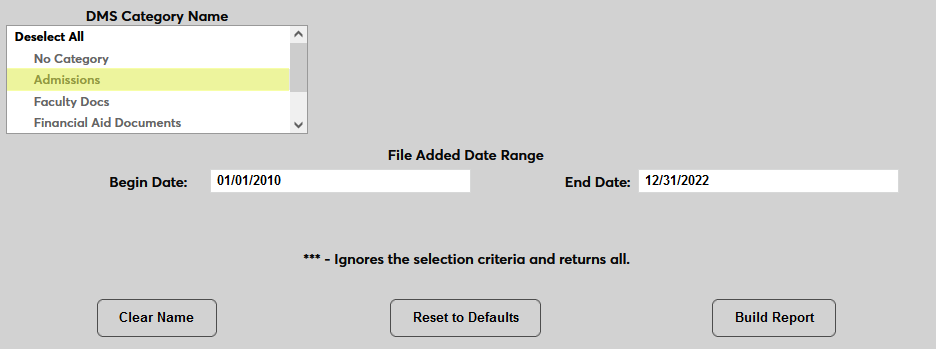
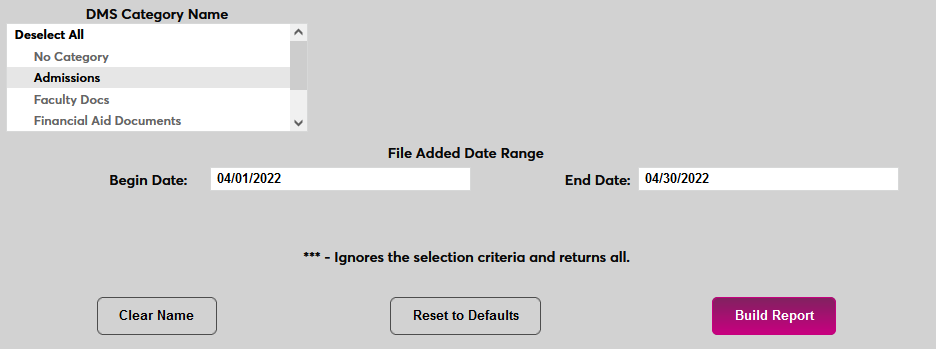
Select one or more categories from the DMS Category Name menu. Only files uploaded with the selected category names will be included in the report. Select No Category to include documents that were uploaded without a category.
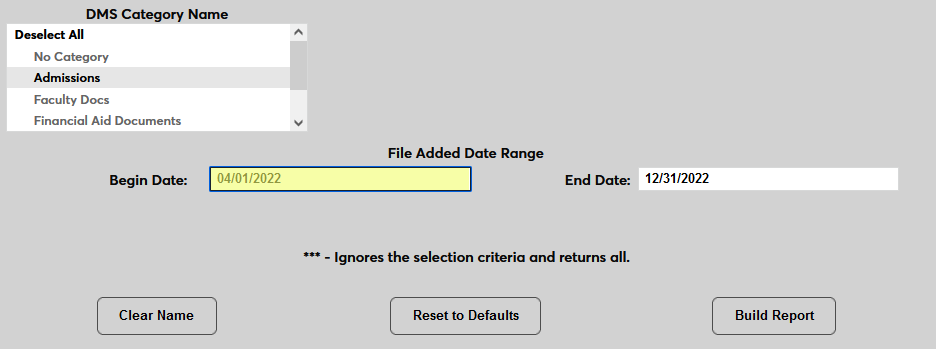
Use the File Date Added Range fields to set a date range. Only files uploaded within the date range will be included.
Click Build Report to continue. On the next page, click Preview Report to open the PDF.

Documents are sorted by category, if more than one are included, and then by the name of the user the file is associated with. If the feedback option was active for the category when the file was uploaded, all users in the group associated with the notification will be listed along with their review status and any comments they may have left.