Providers Account Setup
Overview
Jenzabar SONIS member institutions that use a provider for credit card processing will use Providers Account Setup, available in the Systems hub, to enter the account information needed to process credit card payments. To complete the page, the provider account number, password, passthrough token URL, and other details are needed. Multiple providers can be entered.
Note that Authorize.Net, Heartland ECSI, Paya, and TrustCommerce all have wiki pages detailing the full integration with each product, including additional setup steps that are not included on this page.
Not all Jenzabar SONIS payment gateways use the Providers Account Setup page as part of the setup process. PayPal and Transact both have their own setup pages. Also, in addition to the Paya setup detailed below, other accounts may also use the Custom option. Click here for a complete list of the payment gateways that Jenzabar SONIS supports.
AmeriaBank
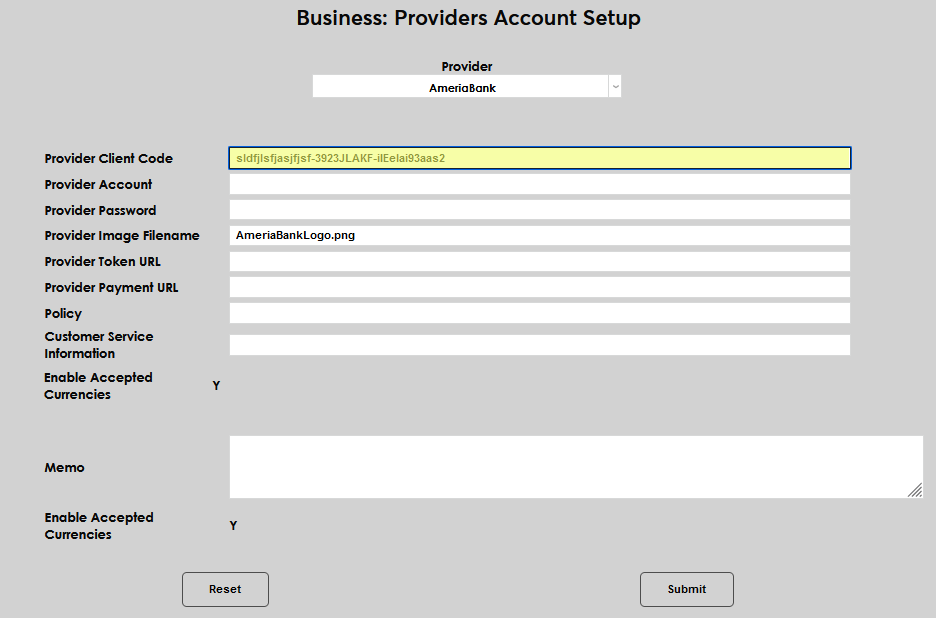
Like other online payment providers, AmeriaBank requires that its clients submit specific information for use in online payment processing. Before beginning setup, the SONIS member institution must get the client code, account, and password as assigned to the institution by AmeriaBank. This information is generally provided by the AmeriaBank representative assigned to the institution.
After enabling AmeriaBank payments, the currency type that will be used must be set up on the Locale table. To begin setting up the payment gateway, enter Providers Account Setup in the Systems hub. Select AmeriaBank from the Provider menu. Enter the Client Code as provided by AmeriaBank.

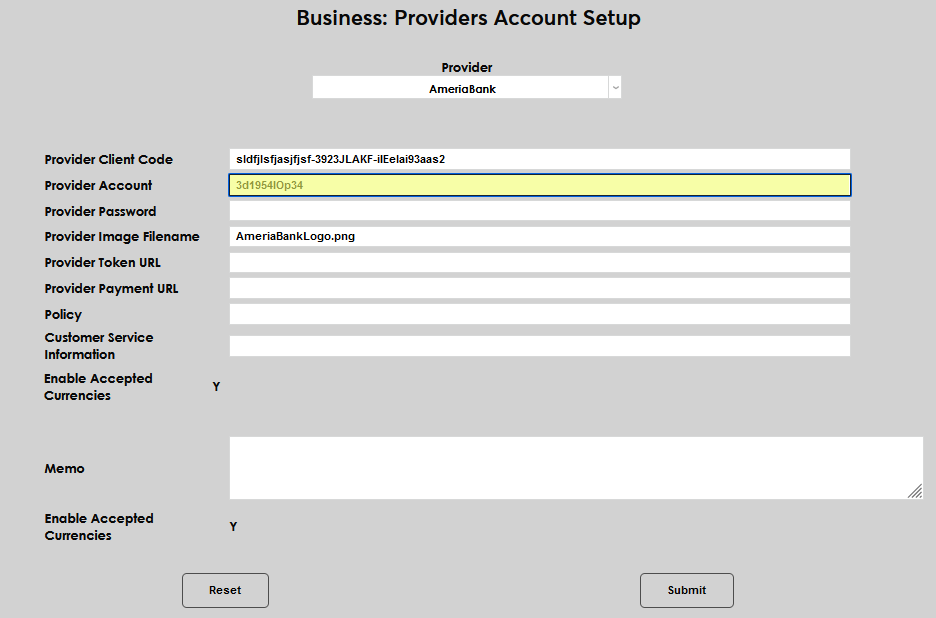
Enter the Provider Account number and Provider Password as provided by AmeriaBank.

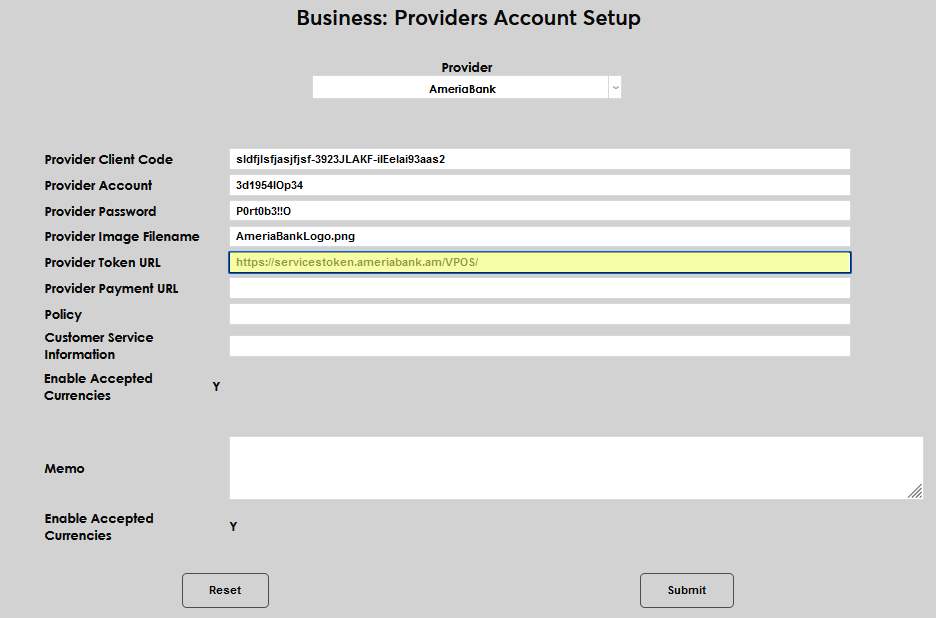
Enter the Provider Token URL and Provider Payment URL as provided by AmeriaBank.
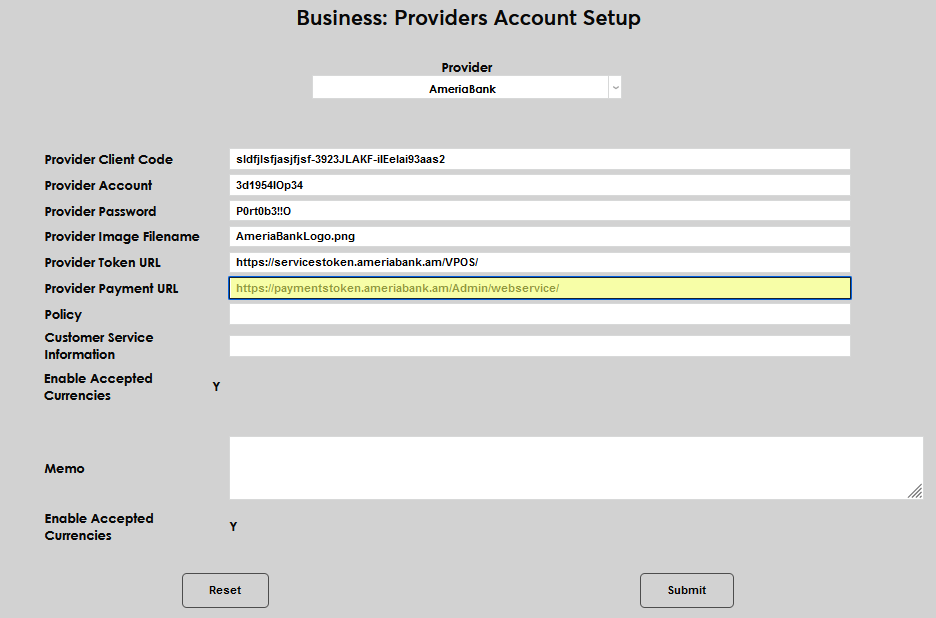
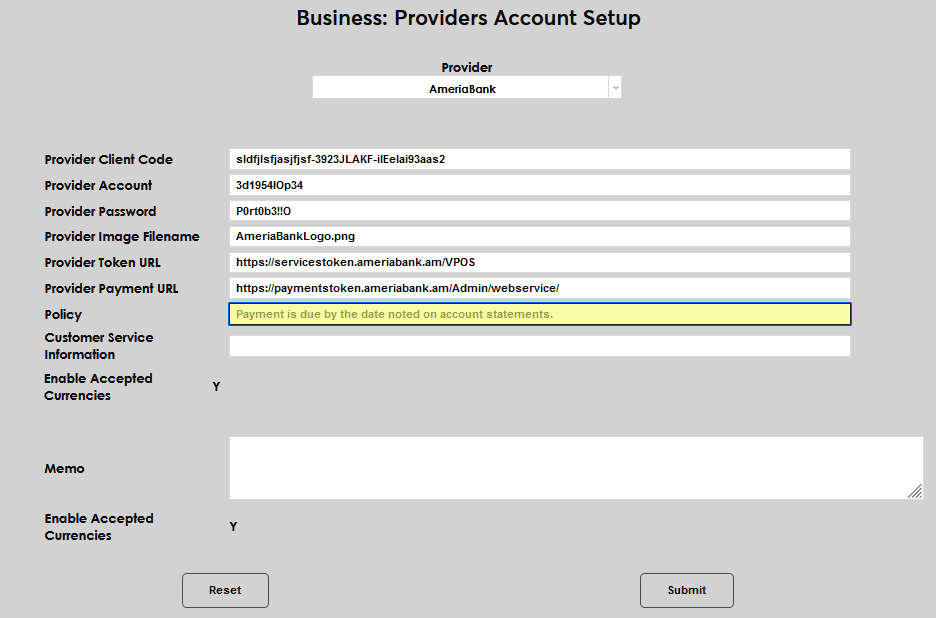
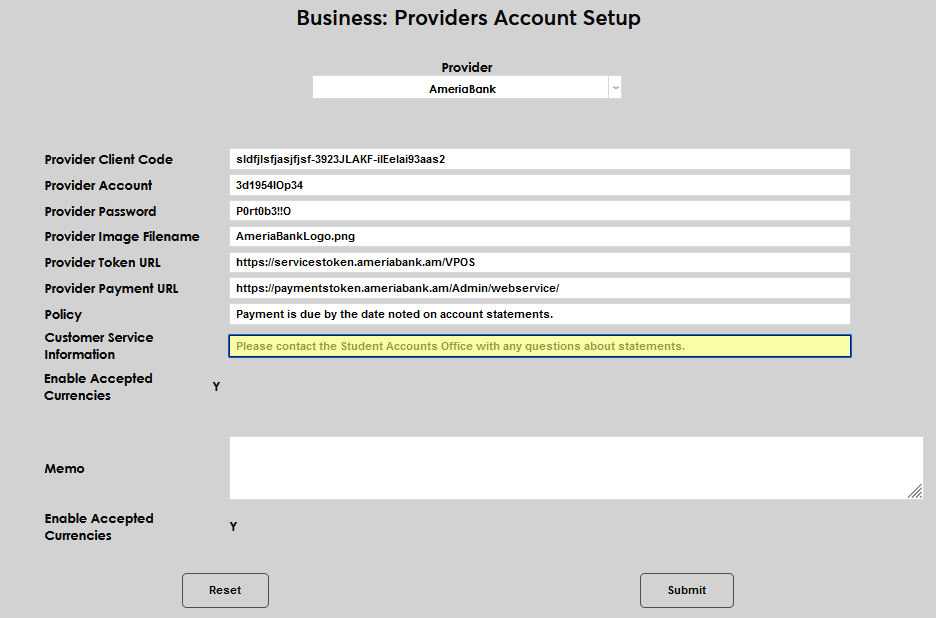
The Policy field is provided to display instructions to those who are making a payment. This field accepts up to 165 alphanumeric characters. Enter a policy statement and then enter a Customer Service Information statement directing users how to proceed if assistance is needed. This field accepts up to 165 alphanumeric characters and symbols.
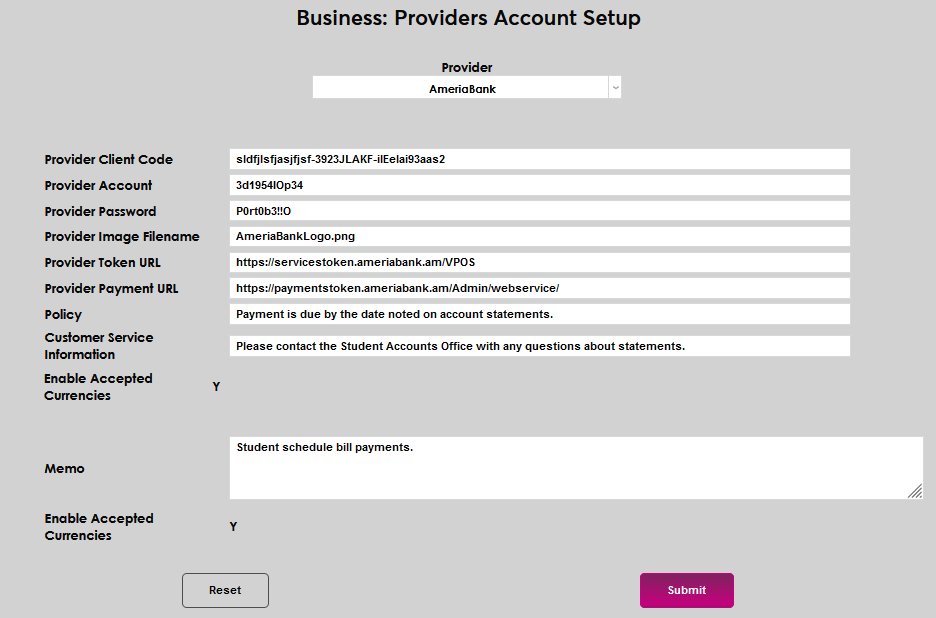
Enter any other details desired in the Memo field. This field is for instructions and will be displayed to users. Click Submit to save the entered information.

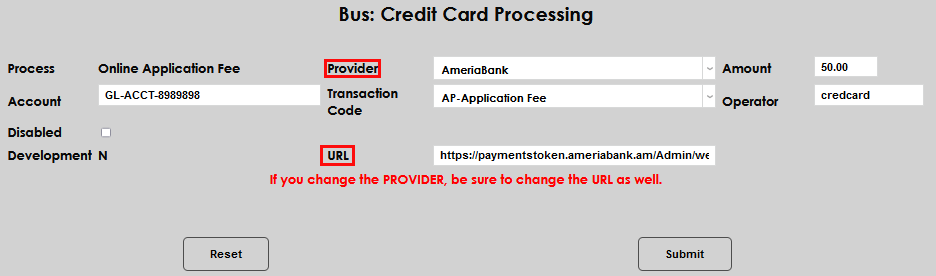
Next, got to the Locale table to add any appropriate currency types. Then, visit Credit Card Processing in the Systems hub and ensure all payment process types that will be accepted through AmeriaBank have been set up appropriately. As an example, the Online Application Fee and Student and Alumni Payments have been configured to allow AmeriaBank payments via the Provider Payment URL as provided by AmeriaBank and entered in Business: Provider Accounts Setup. Full setup details for this page are available here.

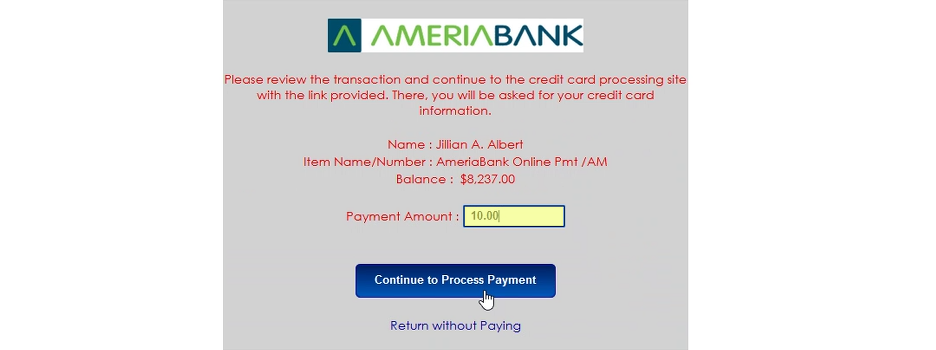
When a user follows the URL to make a payment, via the payment link within SONIS on a student's Billing History or via a link provided through the portal or an email, a confirmation page will display, showing the AmeriaBank connection is loading. Then, an AmeriaBank payment screen will display, with details about the student and the account balance. A payment amount must be entered, then the user will click Continue to Process Payment.

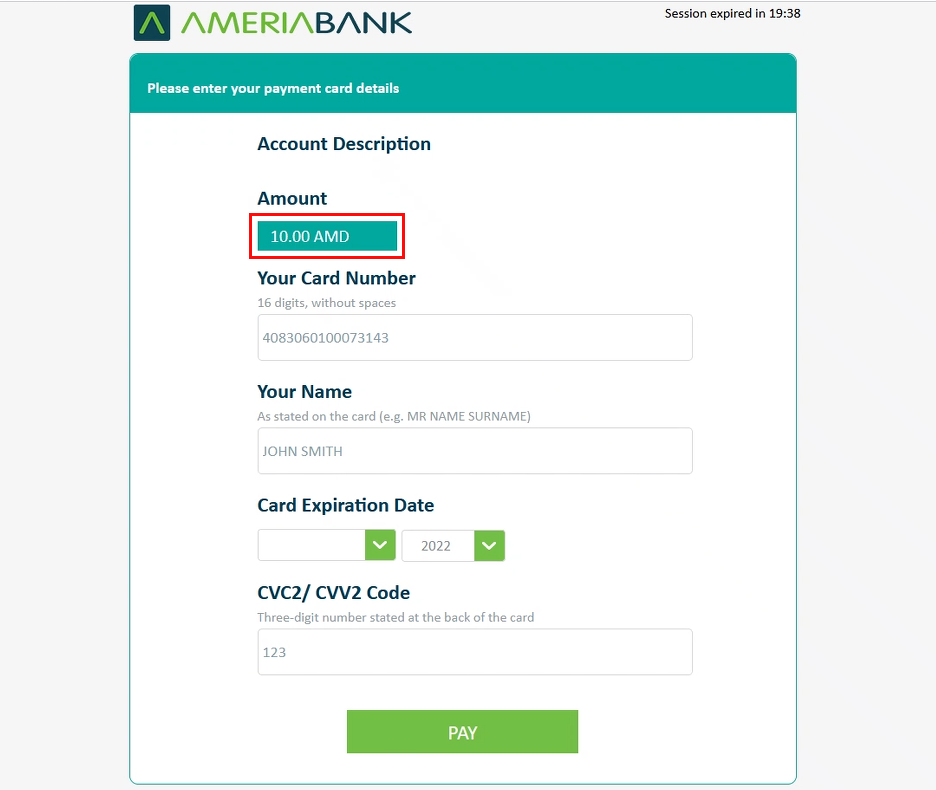
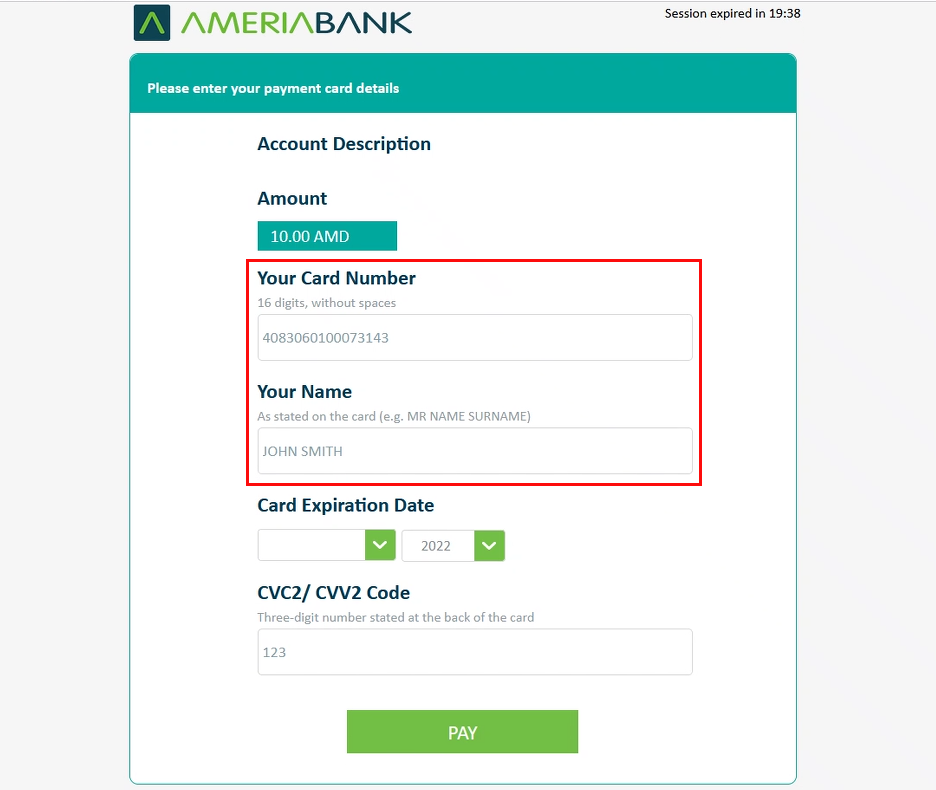
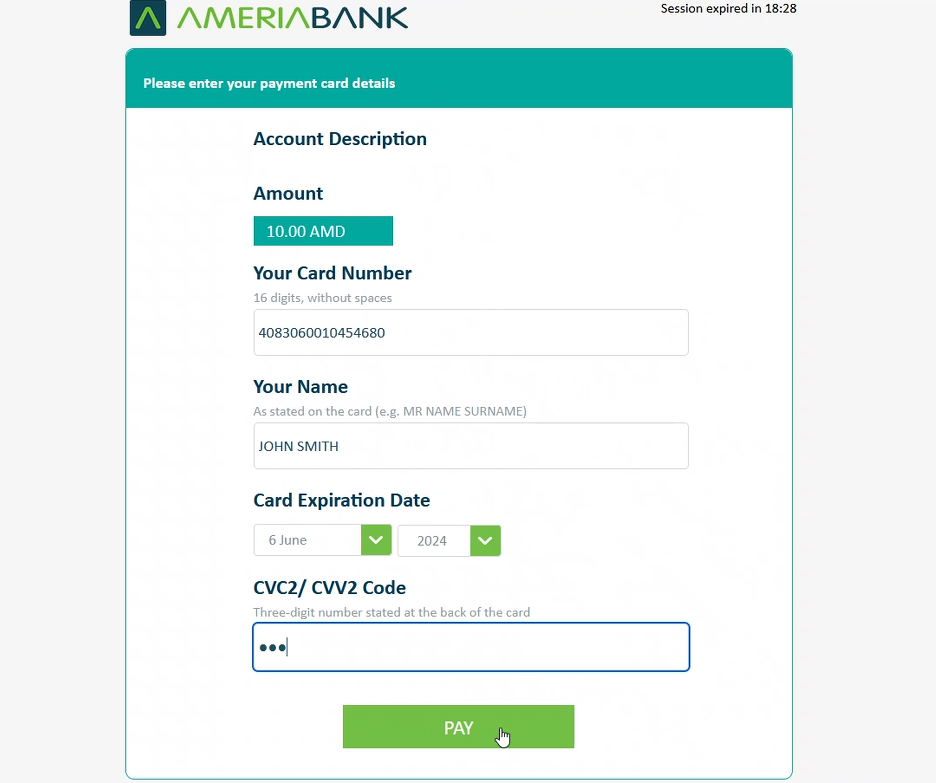
After continuing, the payment screen displays the amount being paid and automatically populates any credit card number and name previously used by the payee.
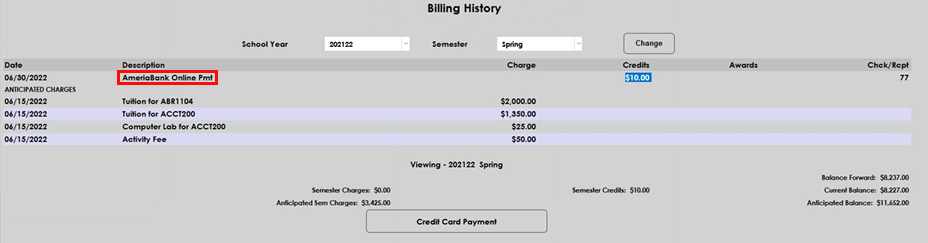
The Billing History page will display the amount paid, source, and date.
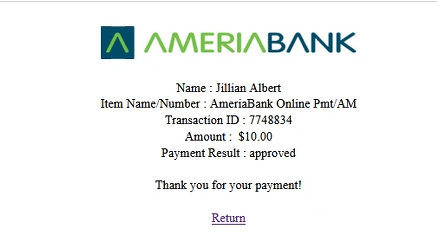
The credit card expiration date and CVV2 code must be entered, then click pay. After clicking pay, a confirmation screen is displayed with a transaction ID confirmation number.
Authorize.Net
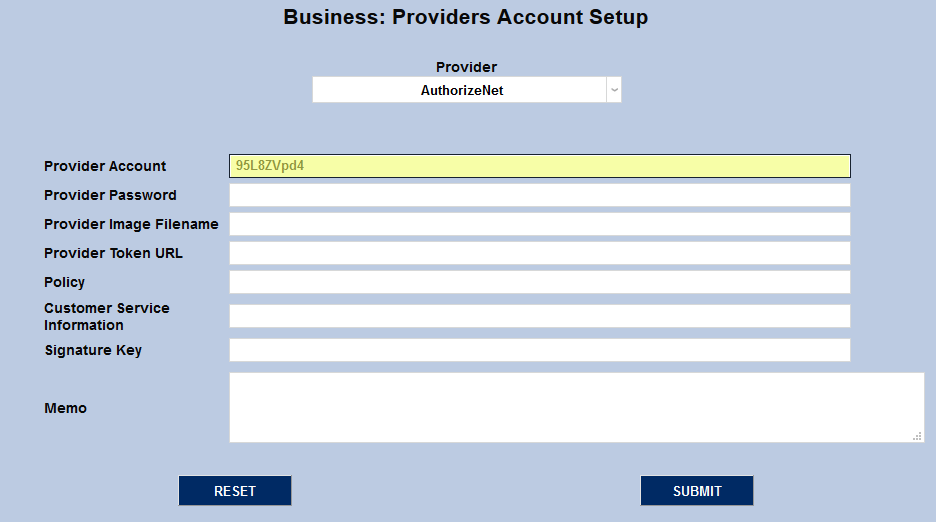
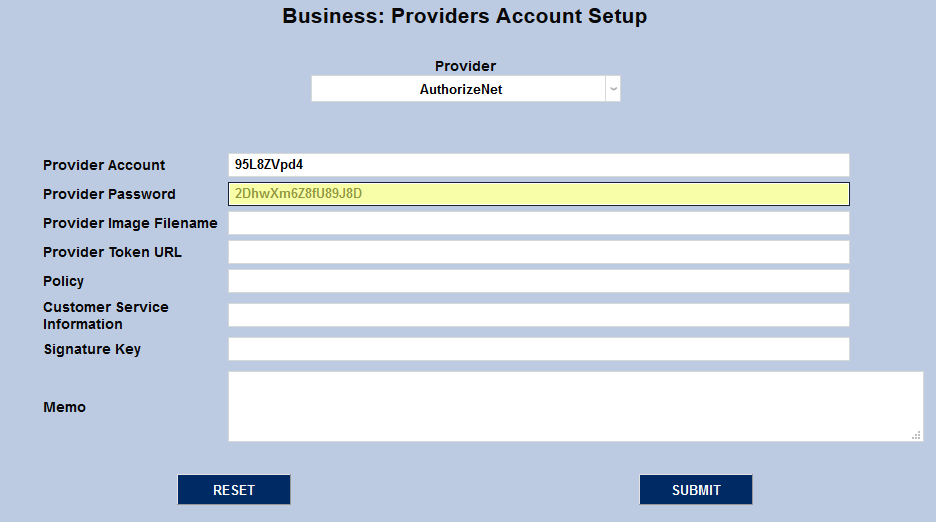
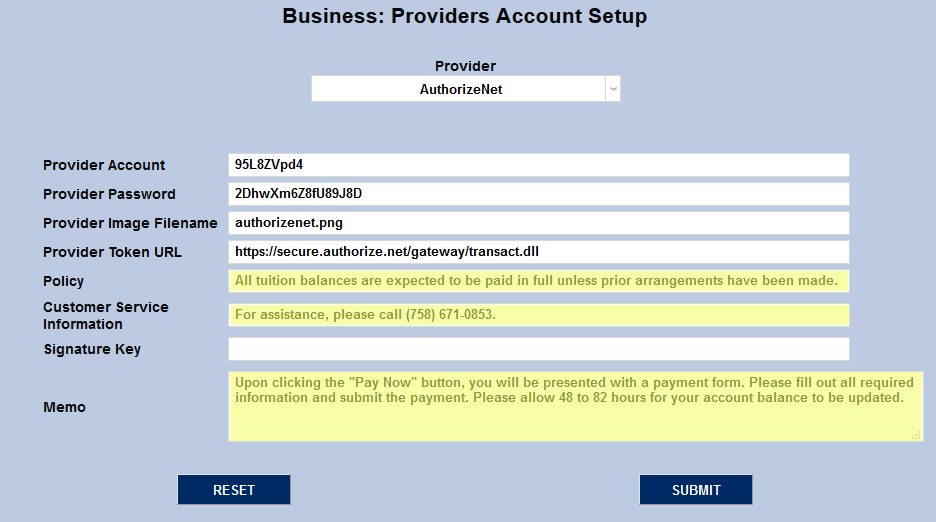
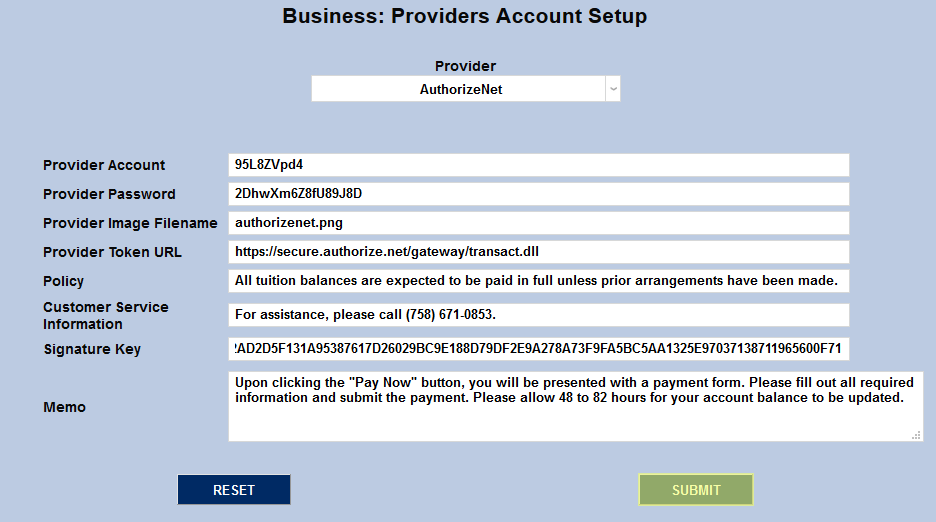
To set up the Authorize.Net account, navigate to the Providers Account Setup page under the Systems menu. Select AuthorizeNet from the Provider dropdown menu.

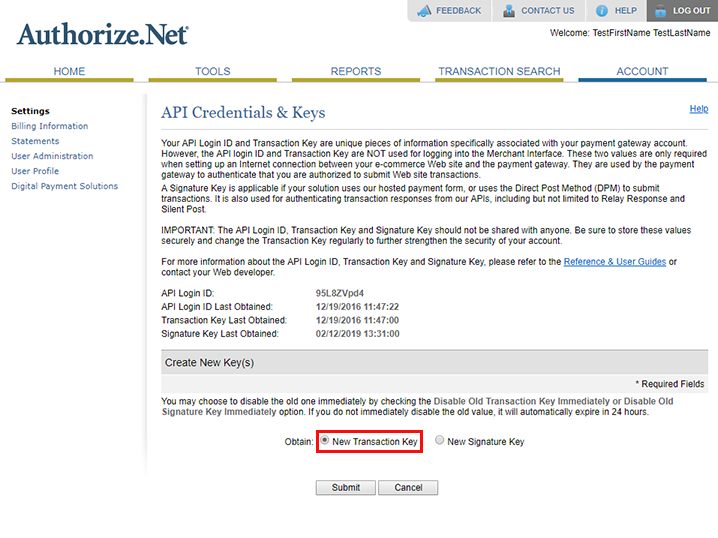
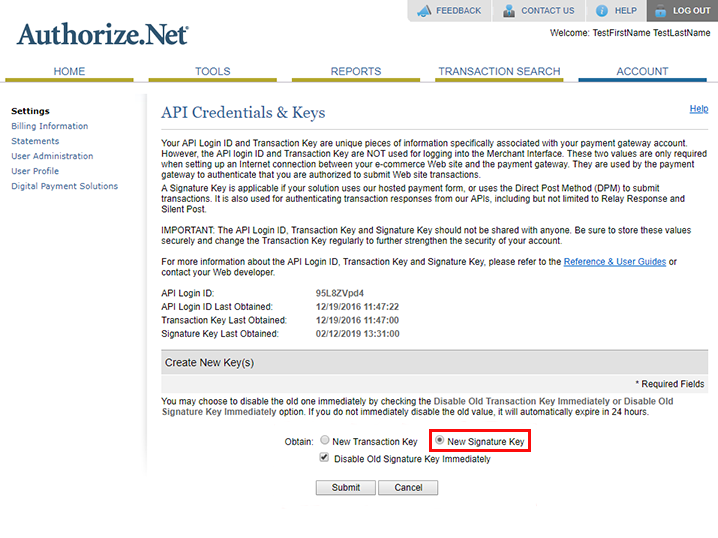
When the account setup fields appear, begin by filling in the Provider Account field. This value is found in Authorize.Net on the API Credentials & Keys page under the account tab. It's listed there as the API Login ID.
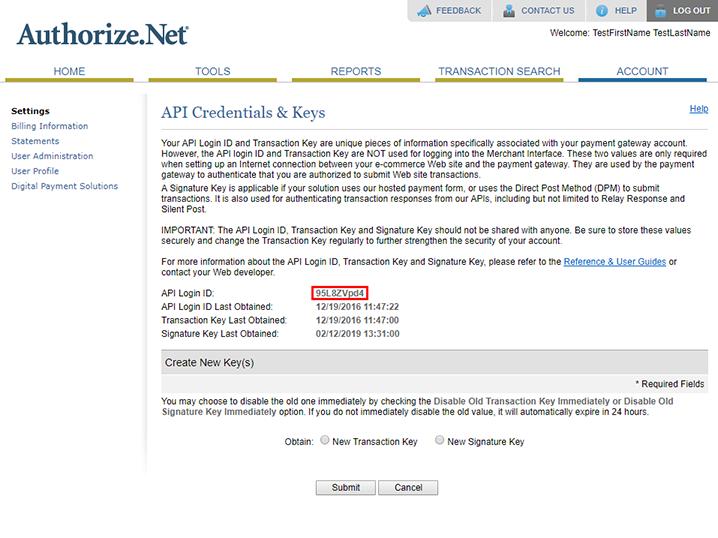
The Provider Password is called the Transaction Key within the Authorize.Net developer site. Click the New Transaction Key button followed by the Submit button to obtain this value.
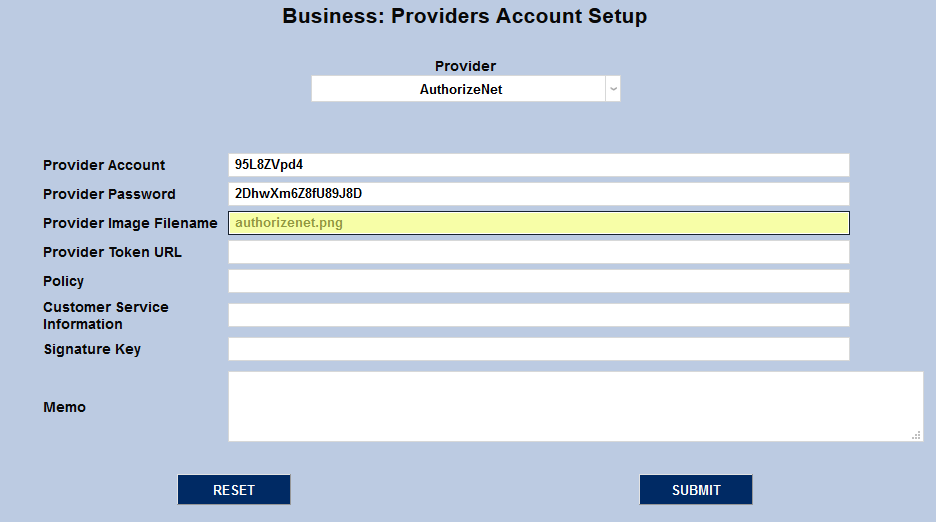
Each customer's SONIS Images folder should already contain an Authorize.Net logo file. If this file is missing or an administrator wishes to use a different logo, they can place the new file in their Images folder. Place the filename in the Provider Image Filename field to create a link to the logo.
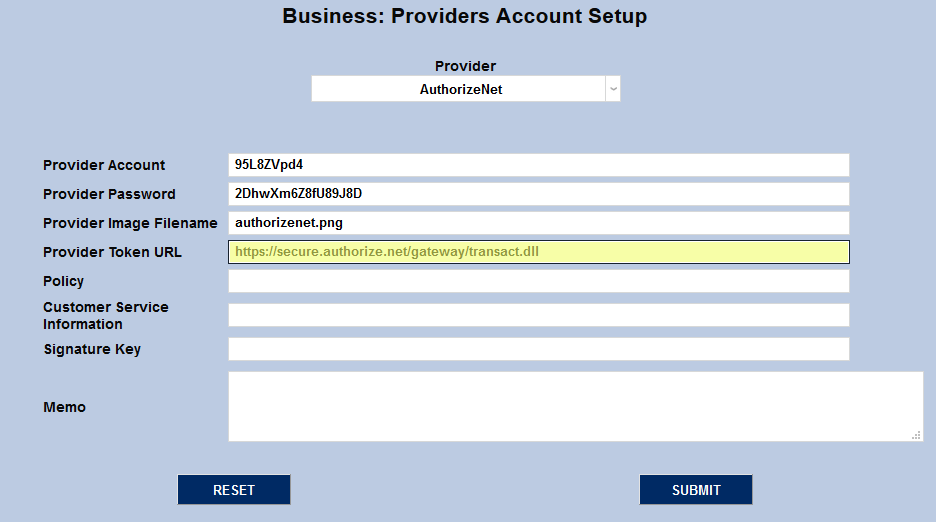
The Provider Token URL is the same for every institution. Based on the current Authorize.Net setup, the URL for testing is https://test.authorize.net/gateway/transact.dll while the URL for production is https://secure.authorize.net/gateway/transact.dll.
Policy, Customer Service Information, and Memo are all fields that display on the initial page before going to the Authorize.Net site and can be tailored to the needs of the customer.
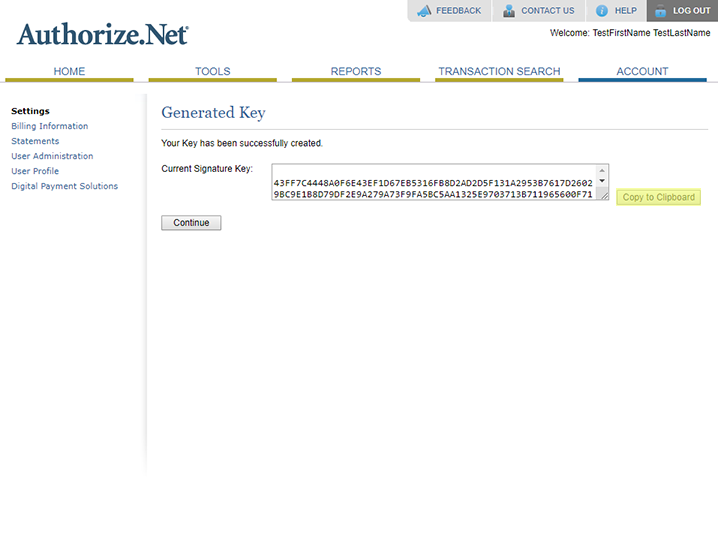
The Signature Key is another value obtained from the Authorize.Net developer site. On the API Credentials & Keys page, click the New Signature Key button and then Submit.
Users may be asked to create a new pin before viewing the new signature key. Once the new pin process has been completed, the new signature key will be displayed and can be copied to the Signature Key field.
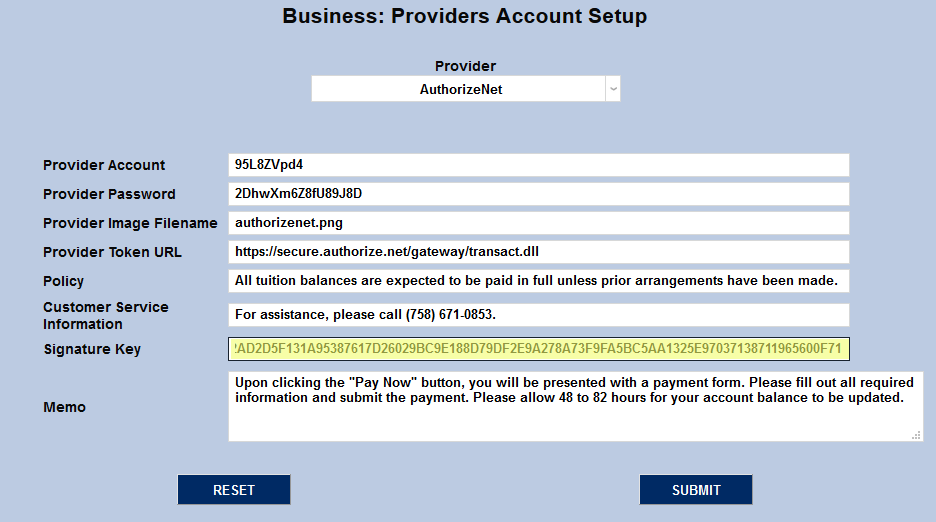
Once every field has been completed, click Submit to save the account setup data.
For more on the Authorize.Net setup process, visit the Authorize.Net Integration page.
Heartland ECSI
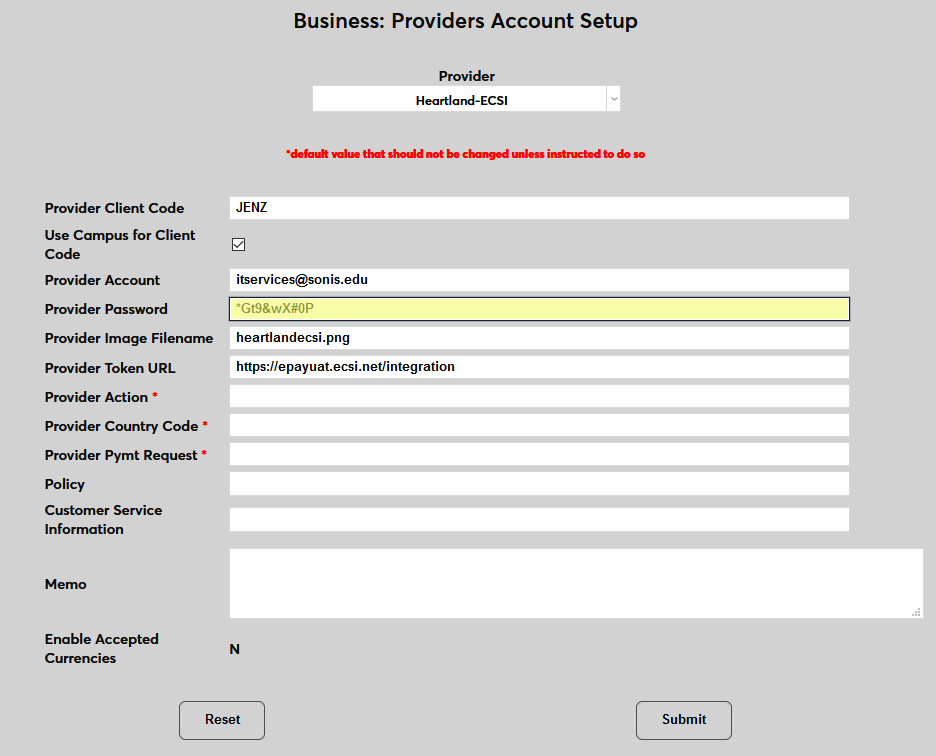
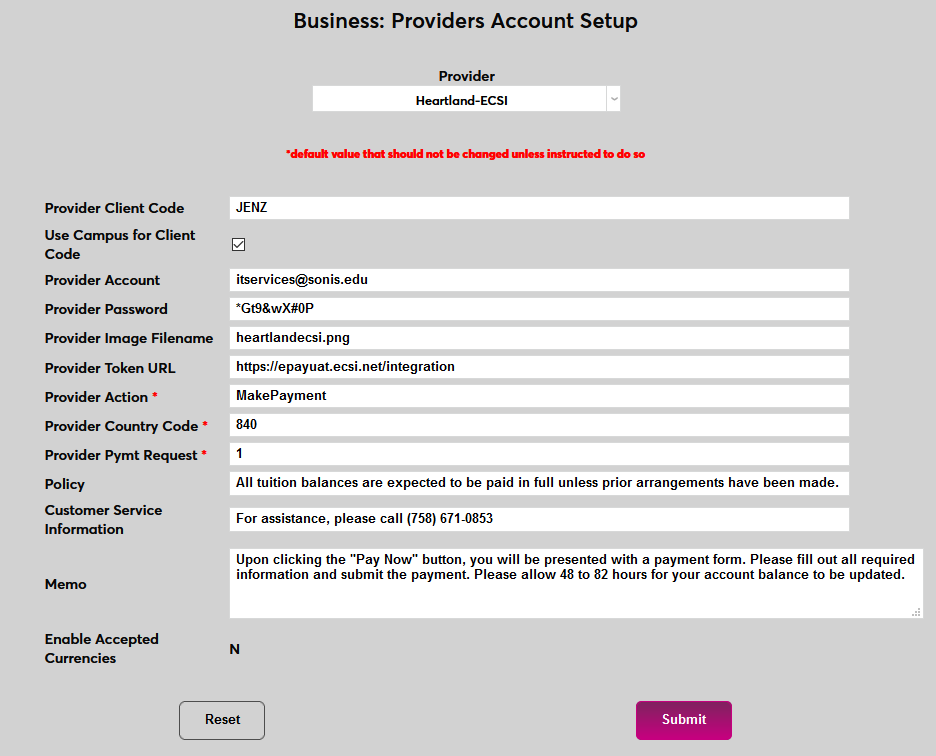
To set up the Heartland account in SONIS, navigate to the Providers Account Setup page under the Systems menu. Select Heartland-ECSI from the Provider dropdown menu.

When the account setup fields appear, begin by filling in the Provider Client Code. This value comes from the Heartland ECSI website and is specific to each individual account.
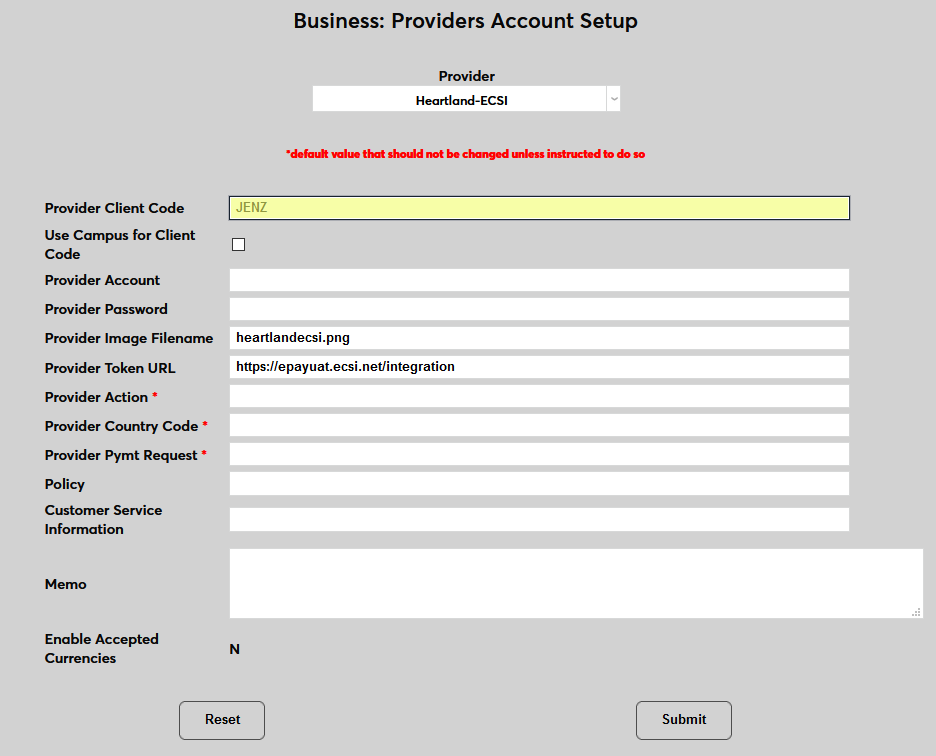
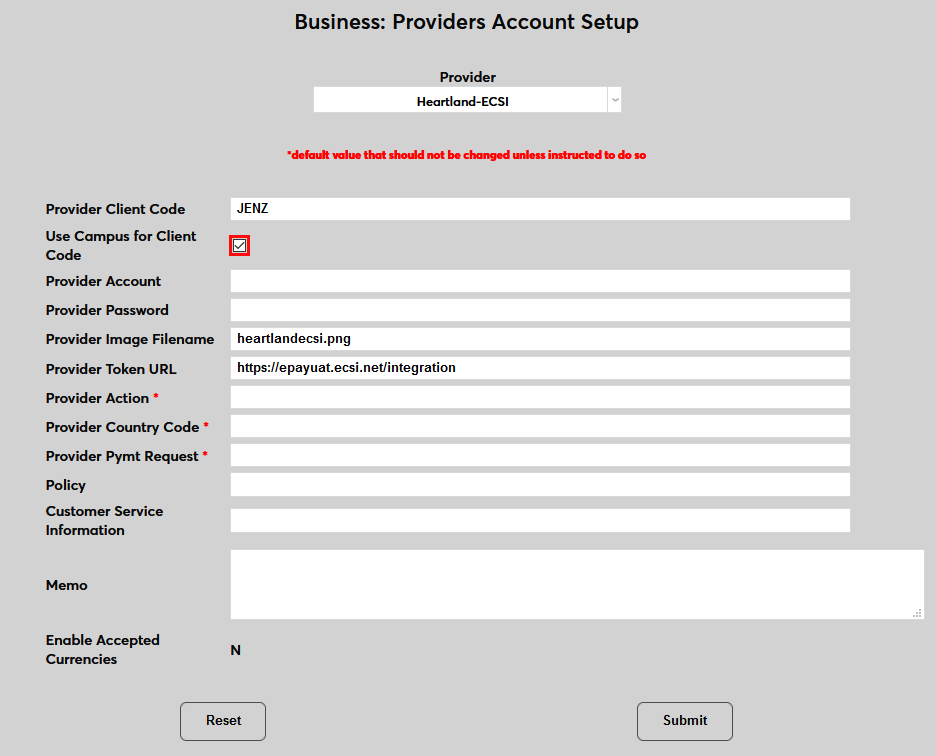
Check the Use Campus Code for Client Code box to send the ECSI campus code that matches the user's designated campus instead of the Provider Client Code. Leave this box unchecked to send the Provider Client Code.
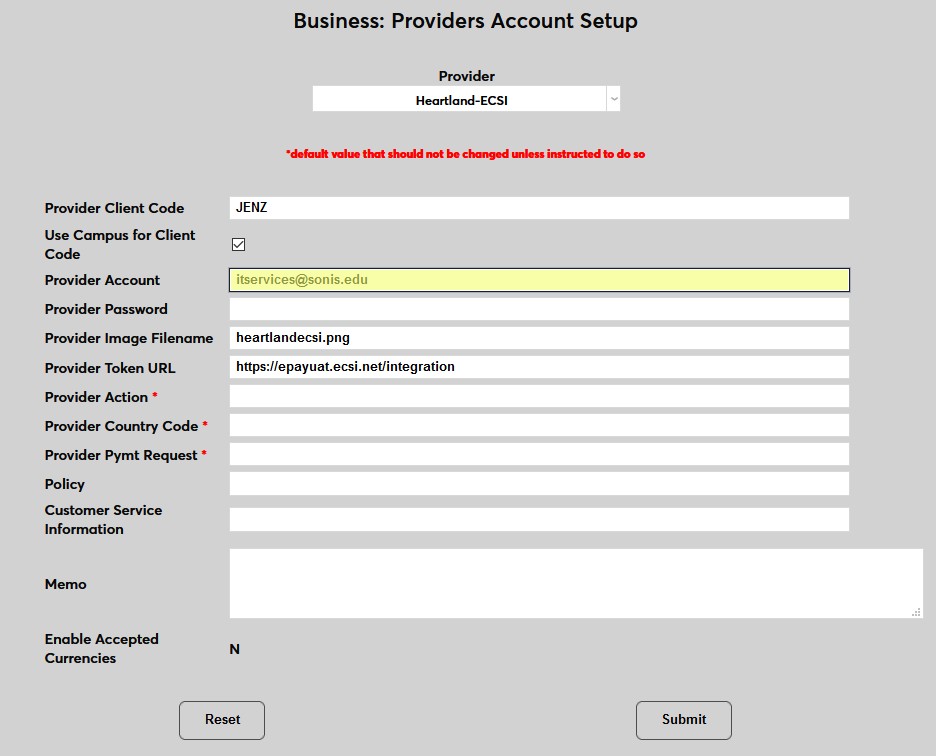
Fill in the Provider Account name and Provider Password. These values come from the Heartland ECSI website and are specific to each individual account.
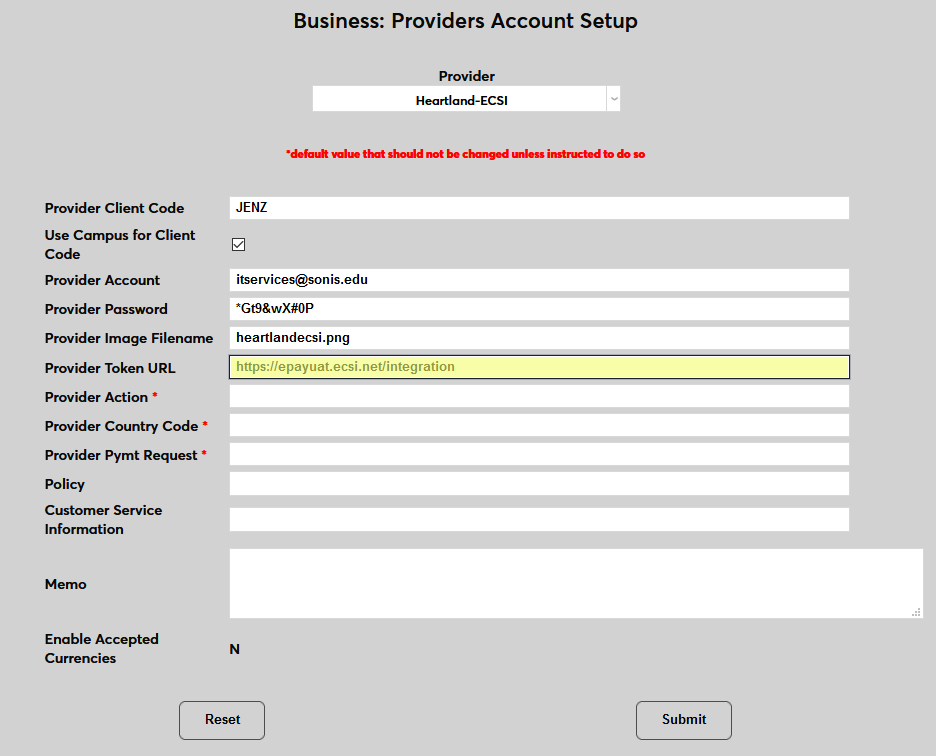
The Provider Image Filename is predefined based on the default image stored in the Jenzabar SONIS Images folder. This value can be updated if the Heartland logo is replaced, but should be left as predefined otherwise.

The Provider Token URL is predefined as well and should be universal for all Jenzabar SONIS clients. Based on the current Heartland ECSI setup, the token URL is https://epayuat.ecsi.net/integration Do not change this value unless instructed to do so in the future by Heartland or SONIS support.
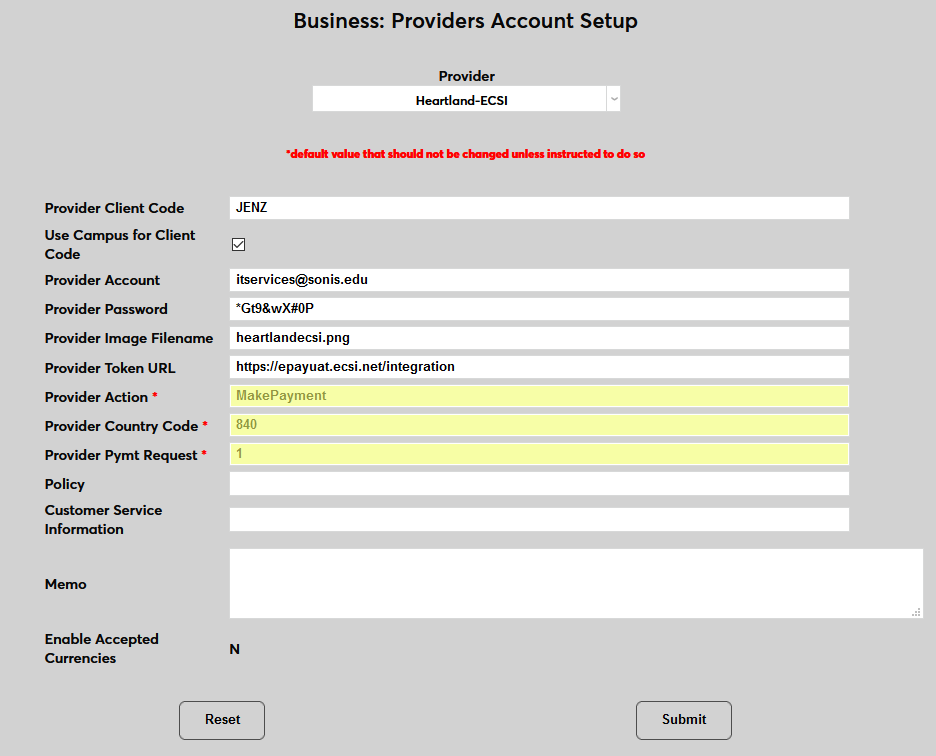
The Provider Action, Provider Country Code, and Provider Payment Request fields are all populated based on individual settings. These values should be provided by Heartland customer support.
Policy, Customer Service Information, and Memo are all fields that display on the initial page before going to the Heartland ECSI site and can be tailored to the needs of the customer.
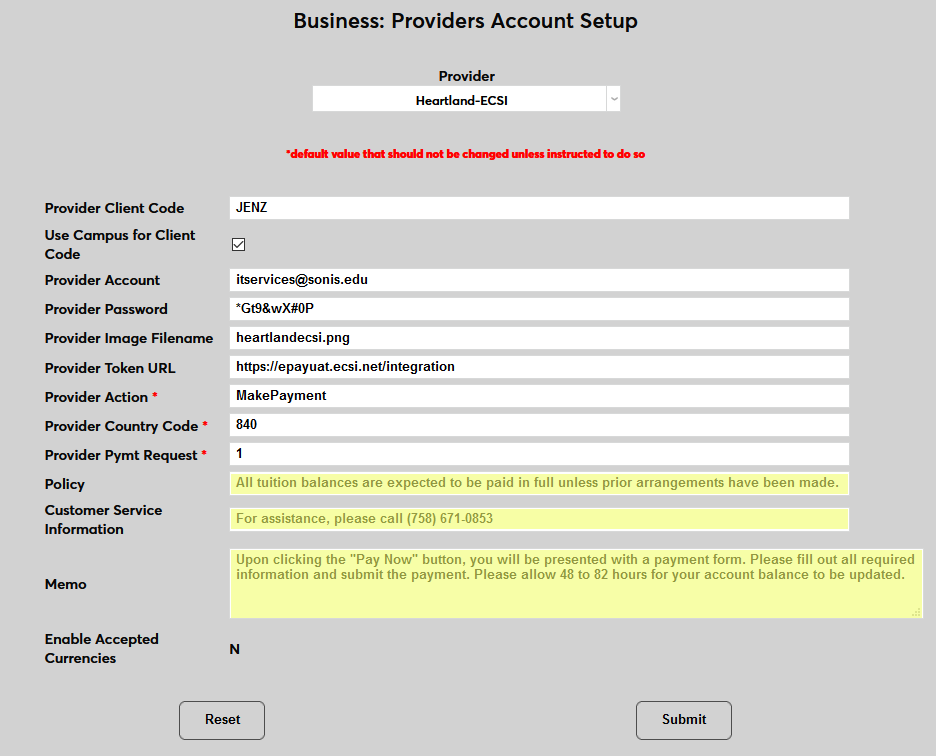
The Enable Accepted Currencies field defaults to N, designating that only American dollars are accepted. Currency conversion is only available through PayPal at this time.
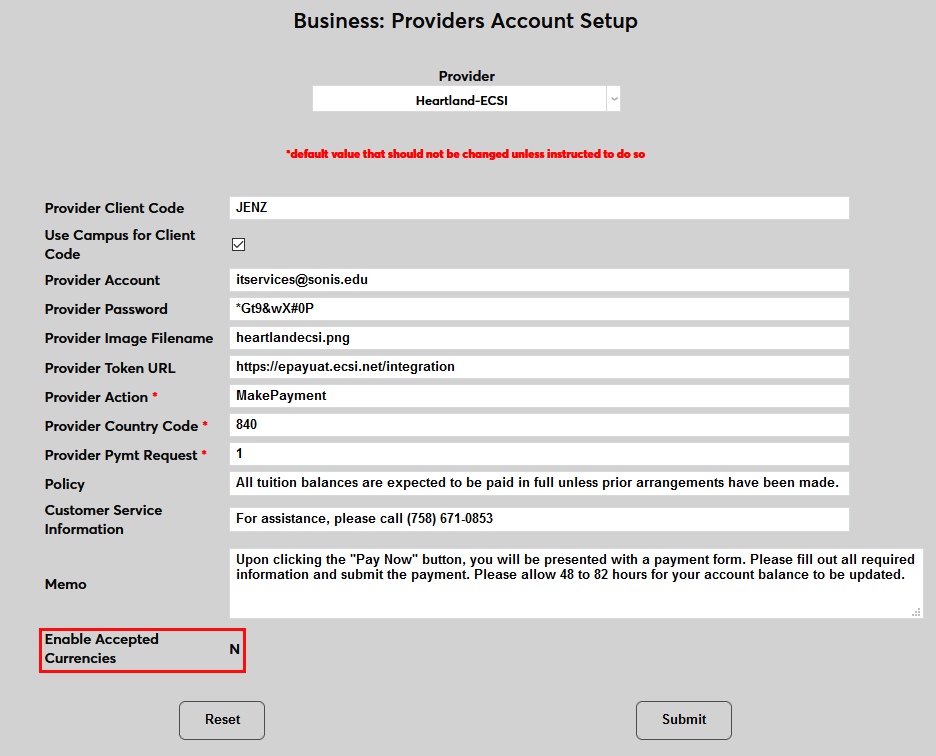
Click Submit to complete the Account Setup.
For more on the Heartland ECSI setup process, visit Heartland ECSI Integration page.
Paya
To set up a Paya provider account, first navigate to the Providers Account Setup page in the Systems hub. Select Custom from the Provider dropdown menu.

The Policy, Customer Service Information, and Memo fields are used to add additional information to the payment gateway page. The Provider Account and Provider Password fields must not be left blank, but can hold dummy data.
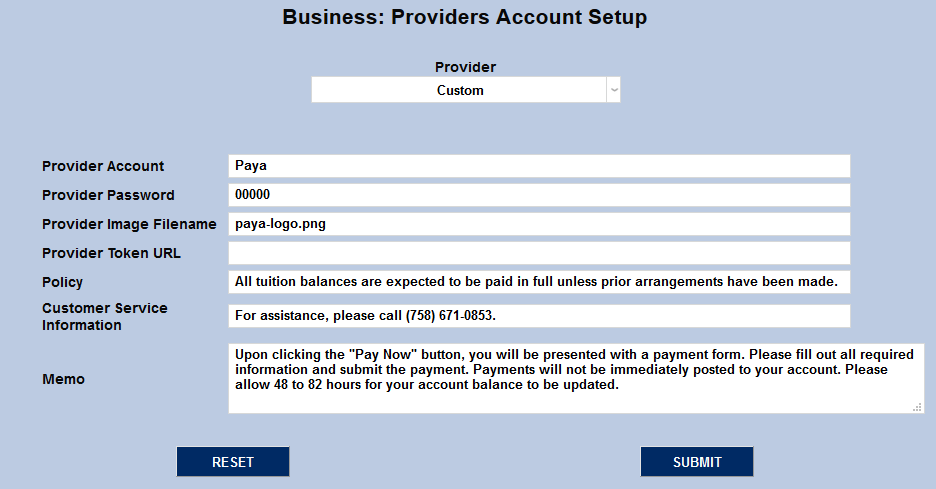
The Provider Image Filename field allows institutions to choose an image that will appear when making payments. Most schools will want to use a Paya logo, but a school logo would also work. Self-hosted customer should place this image in their Jenzabar SONIS Images folder. Hosted customers should send this image to Jenzabar SONIS support to place in their Images folder. Place the corresponding file name in the Provider Image Filename field and submit the page to save the changes.

Note that this information only applies to the Paya account integration. Other payment gateways may use the Custom option differently. For more on the Paya setup process, visit the Paya Integration page.
TrustCommerce
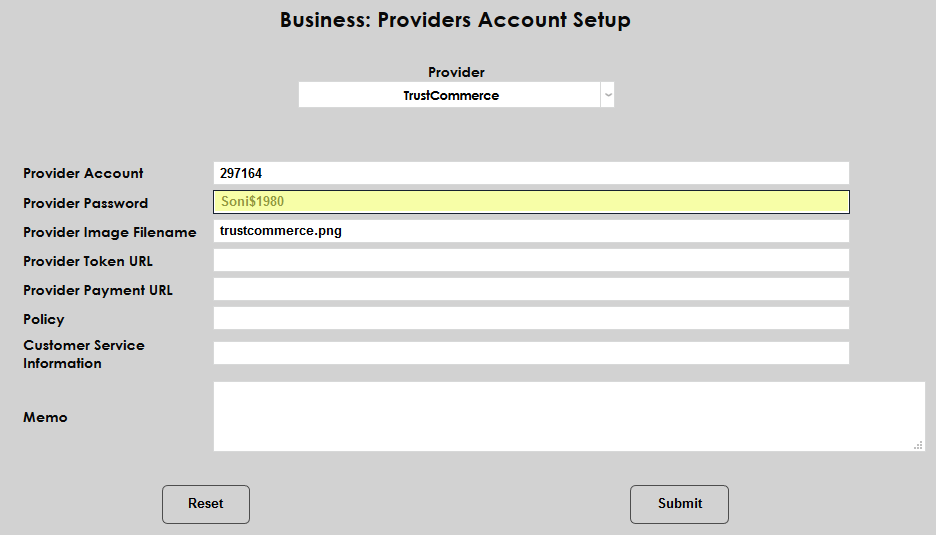
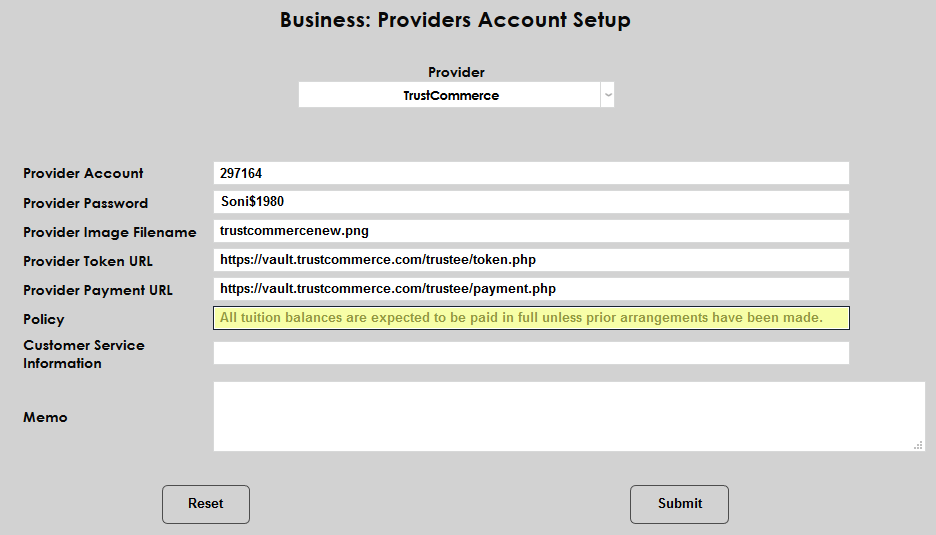
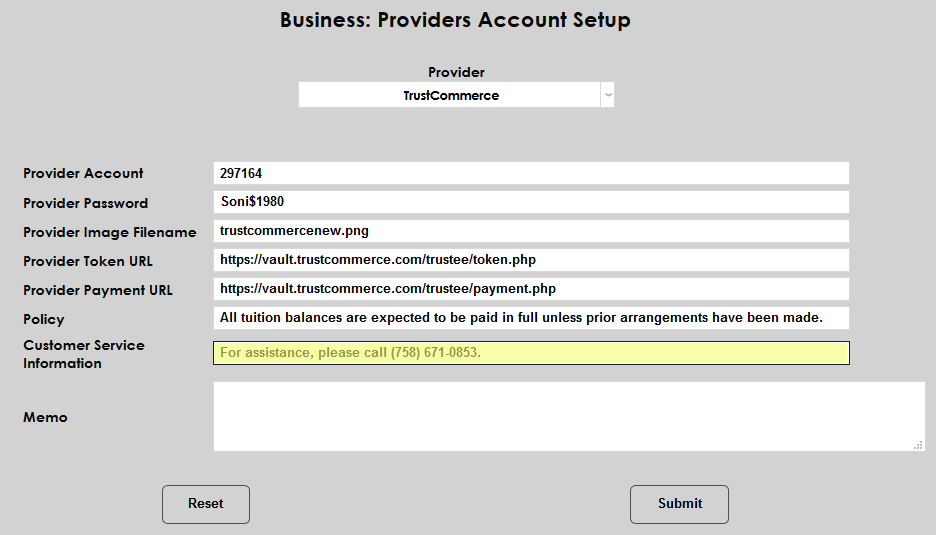
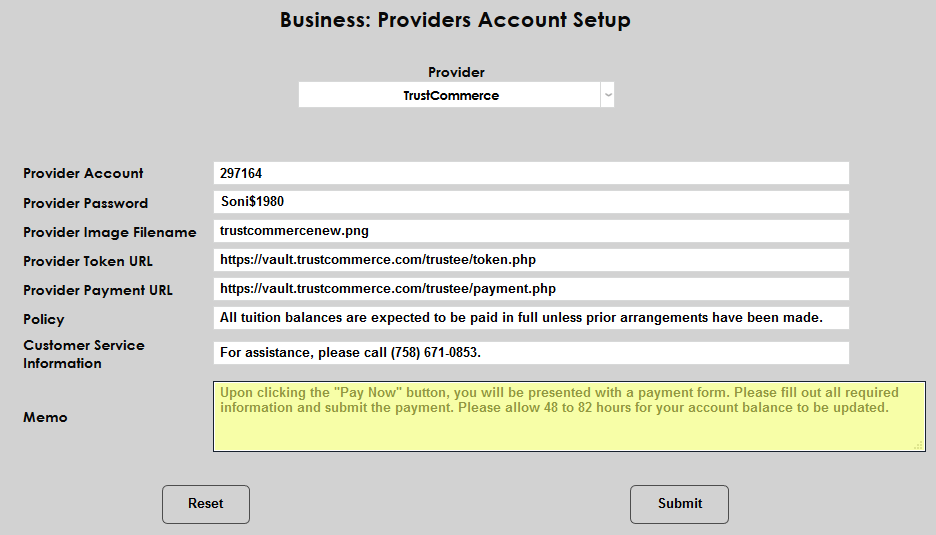
To set up the TrustCommerce account in SONIS, navigate to the Providers Account Setup page in the Systems hub. Select TrustCommerce from the Provider dropdown menu.

On the following page, begin by entering the school's TrustCommerce account number and password in the Provider Account and Provider Password fields.
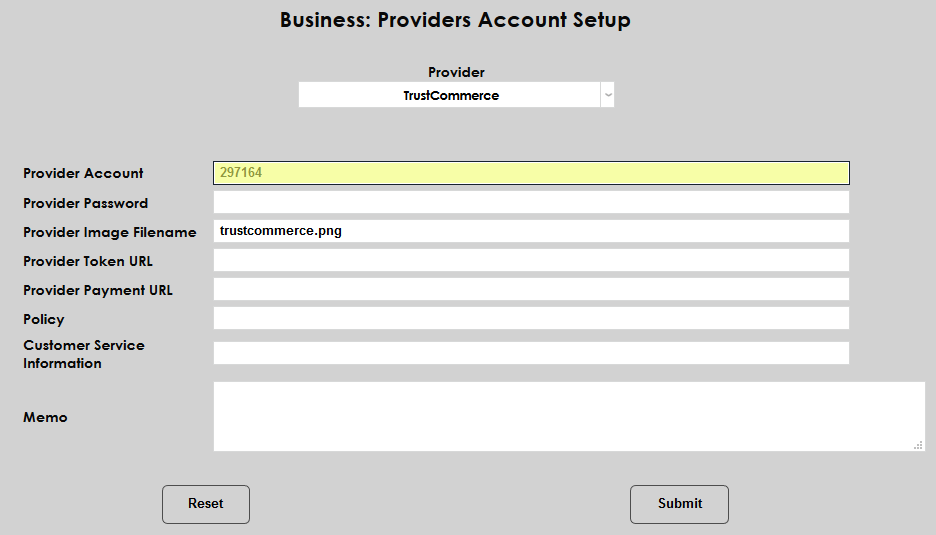
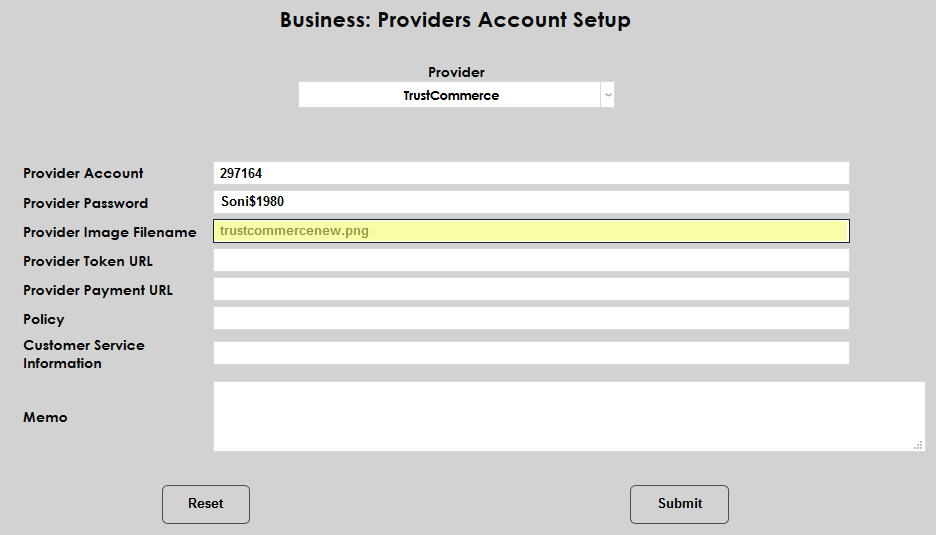
The Provider Image Filename links to a file in the SONIS Images folder. To change this display image, simply copy a new JPG or PNG file into the school's images folder and update the filename.
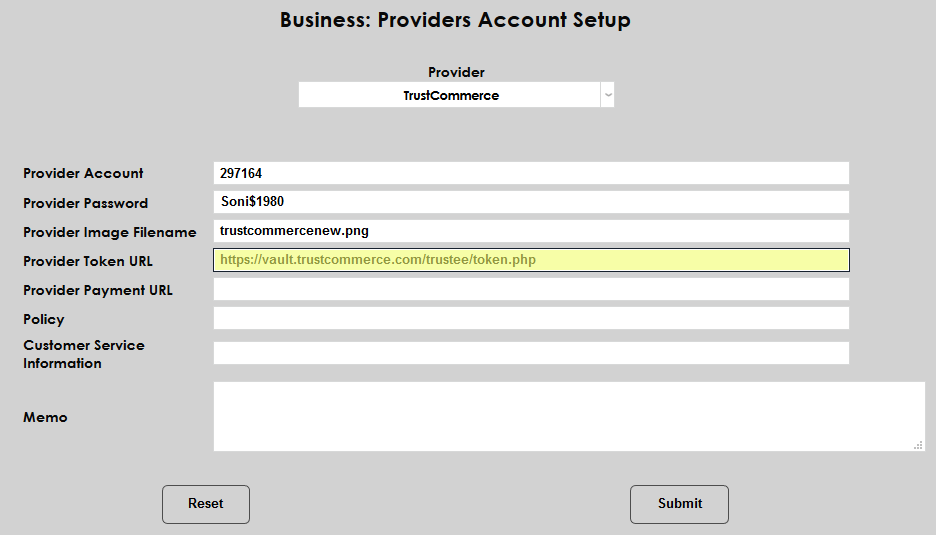
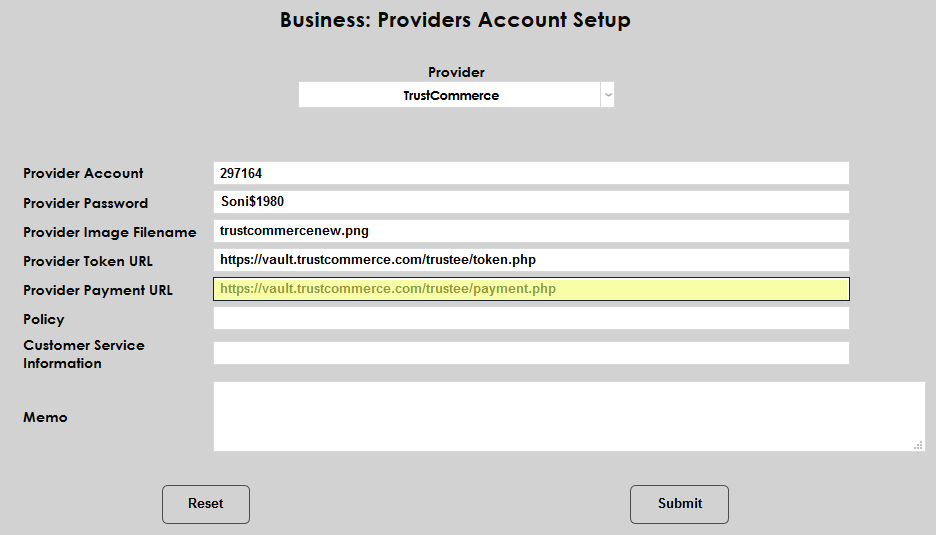
The Provider Token URL should be set as https://vault.trustcommerce.com/trustee/token.php. The Provider Payment URL should be set as https://vault.trustcommerce.com/trustee/payment.php.
Policy, Customer Service Information, and Memo are all fields that display on the initial page before going to the Authorize.Net site and can be tailored to the needs of the customer.
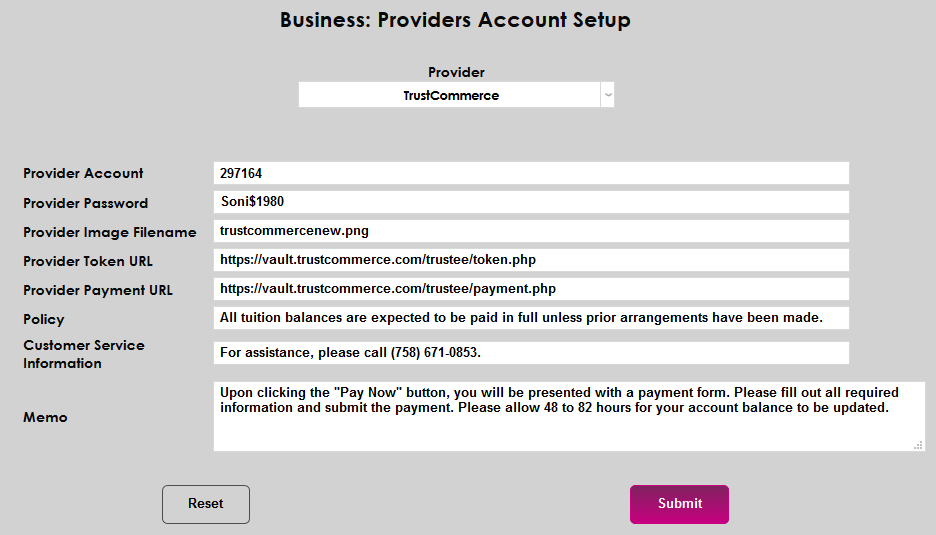
Click the Submit button to save the changes.
For more on the TrustCommerce setup process, visit the TrustCommerce Integration page.