Table Maintenance
Overview
Table Maintenance is a Systems hub utility where administrators define values that are primarily used in selection lists and menus. Every field must have a value. However, it's possible that a given school will not use all the fields, and therefore, they may not have values for them. In such a case, depending on the data type (alpha, integer, special character, etc.), either a 0 or space must be entered.
In tables where Codes are being defined, it is important not to use special characters, even if the field allows the entry, as special characters can cause challenges in data reporting and third-party integrations. For example, it is acceptable to have a Department named Art & Design but the corresponding Code should be a short descriptor that does not include the ampersand (&).
The Table Maintenance function is used instead of having a separate utility for data entry when such a utility is deemed unnecessary.
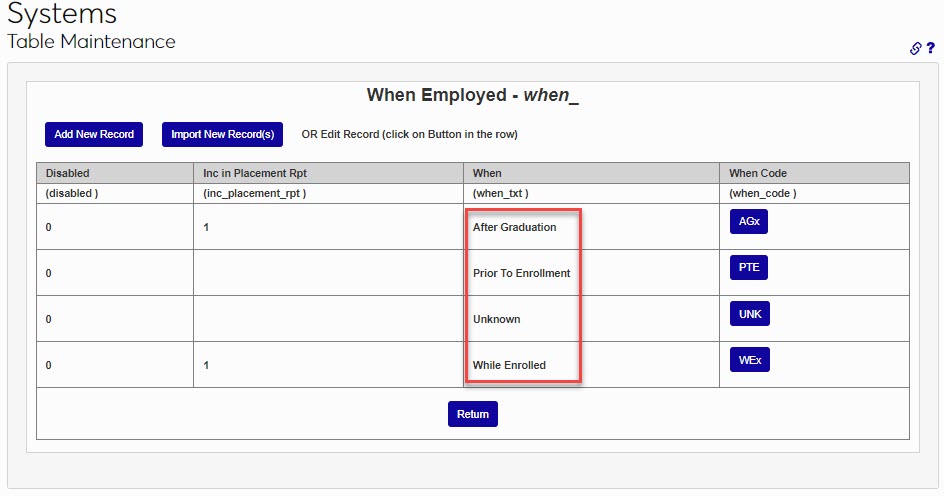
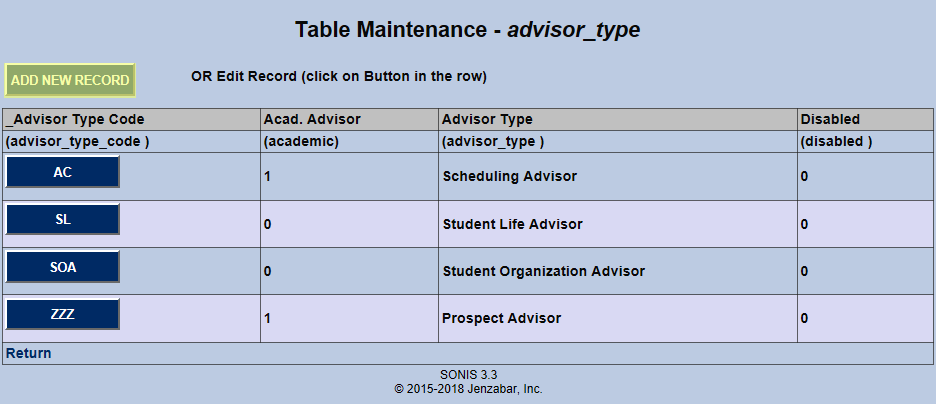
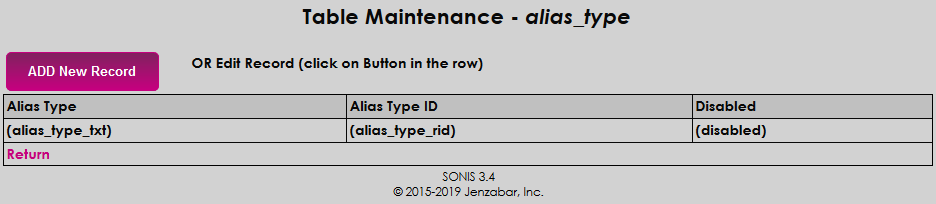
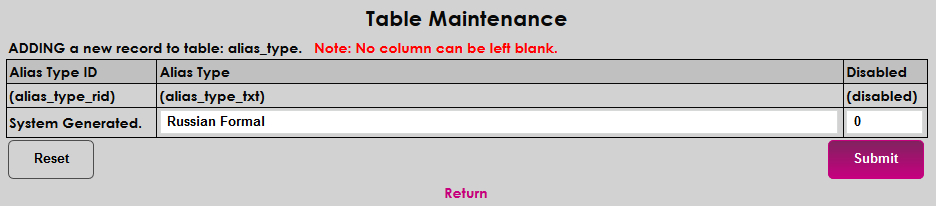
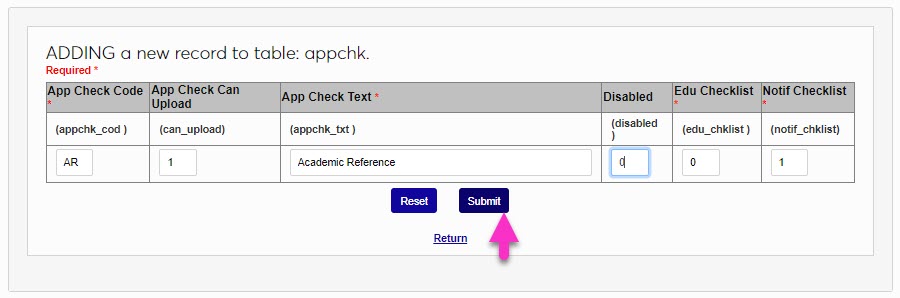
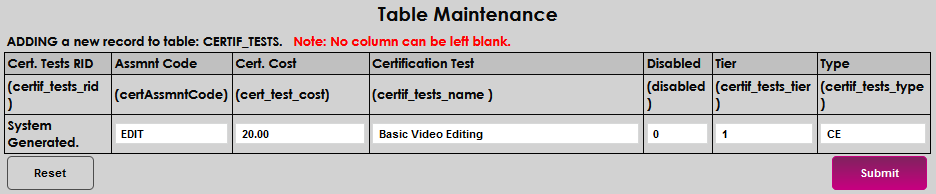
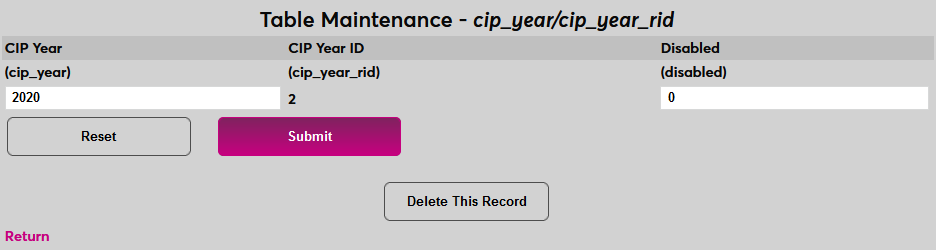
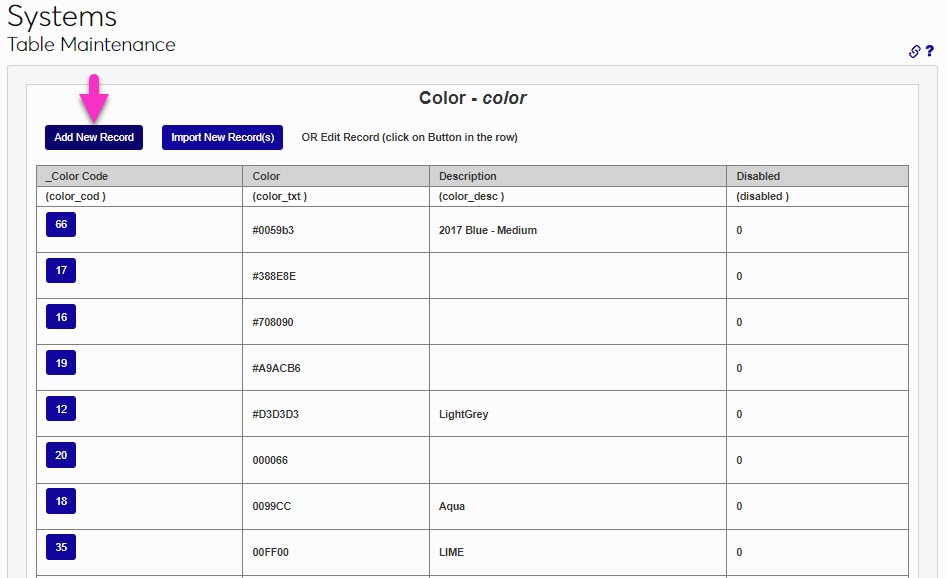
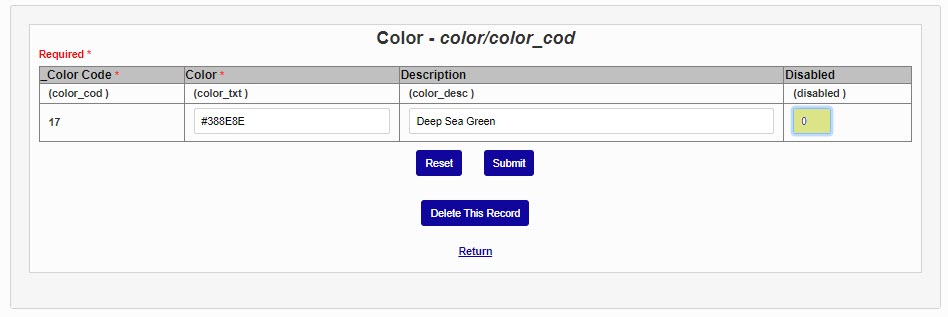
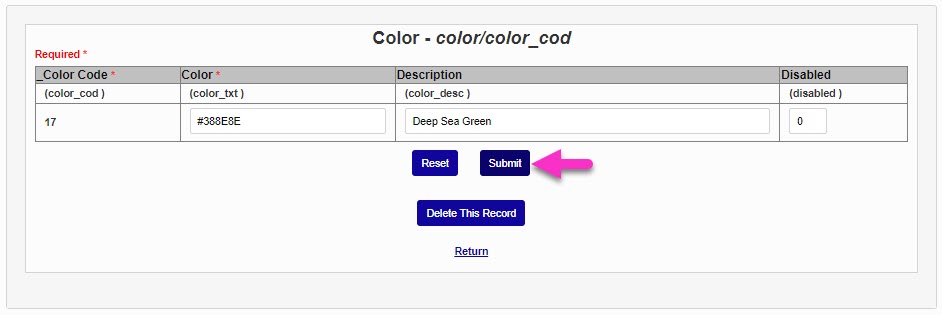
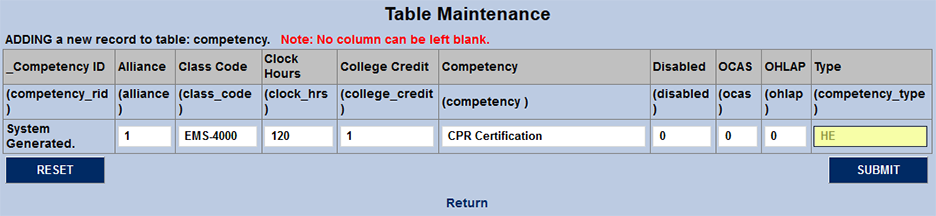
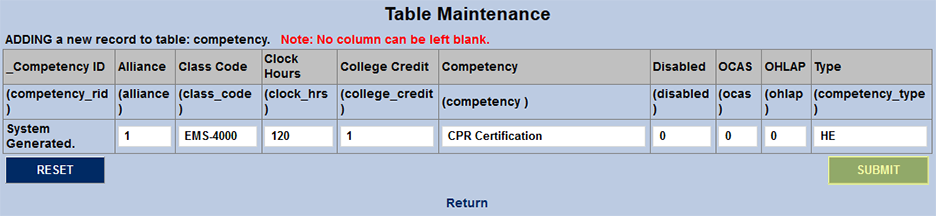
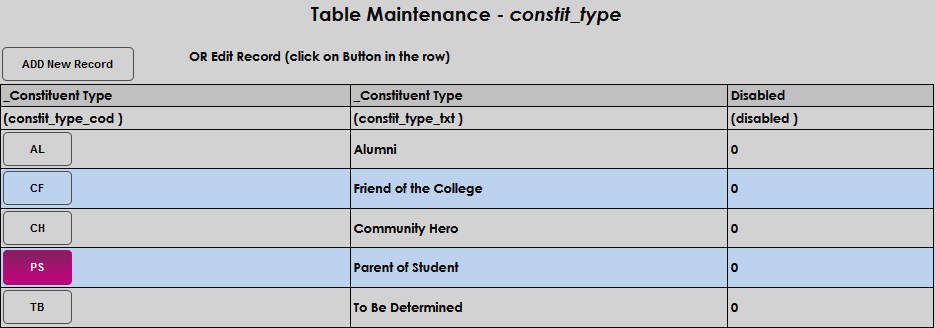
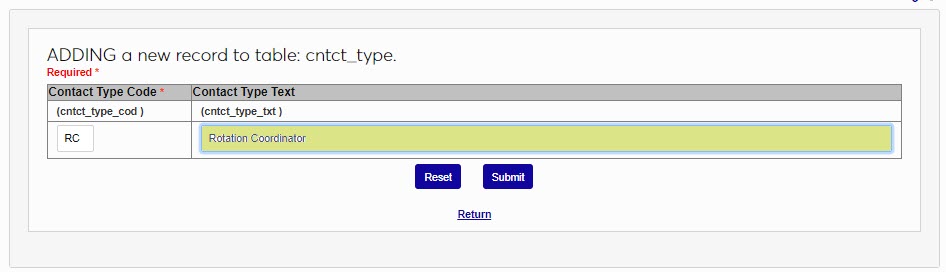
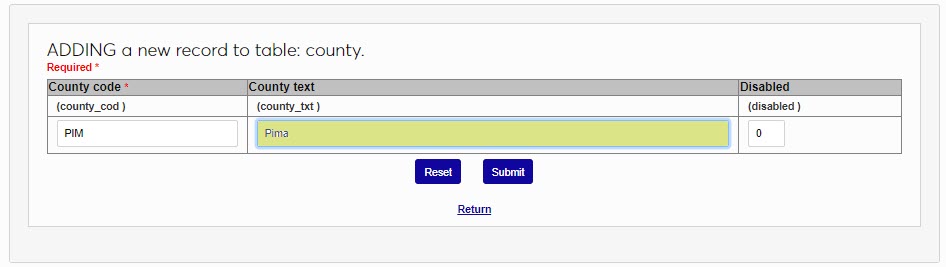
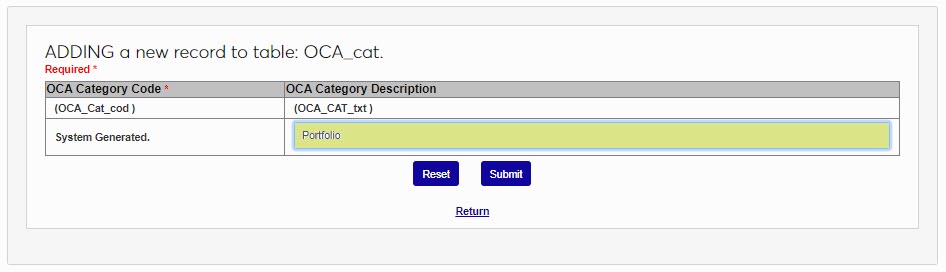
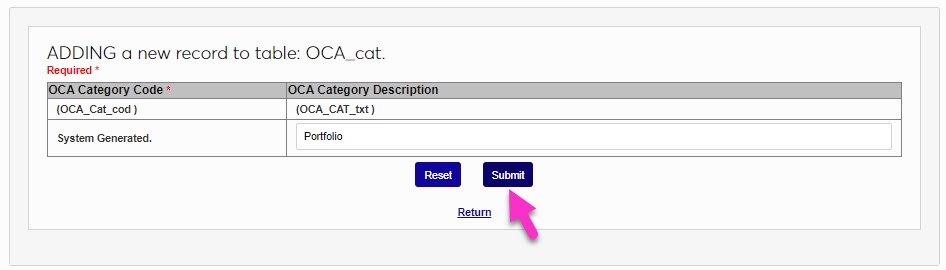
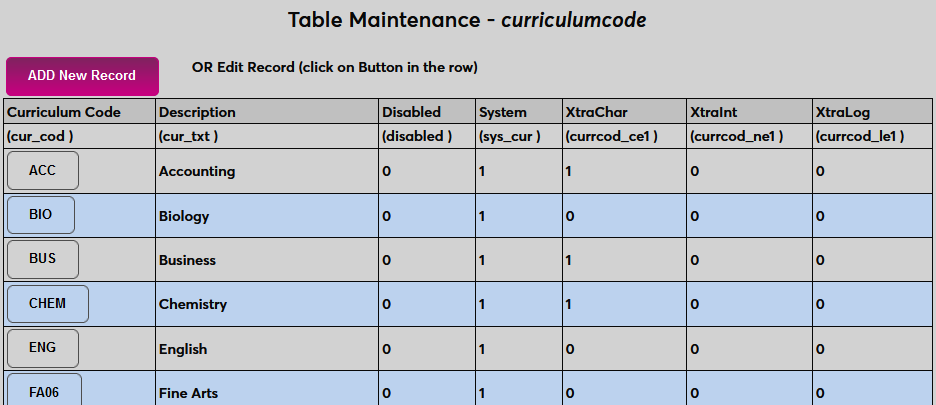
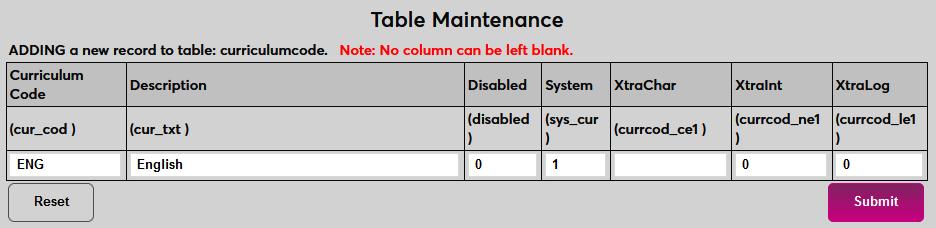
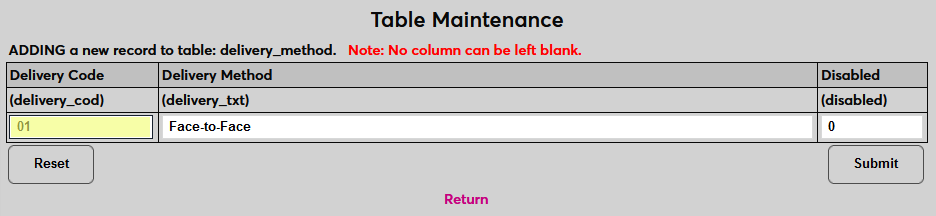
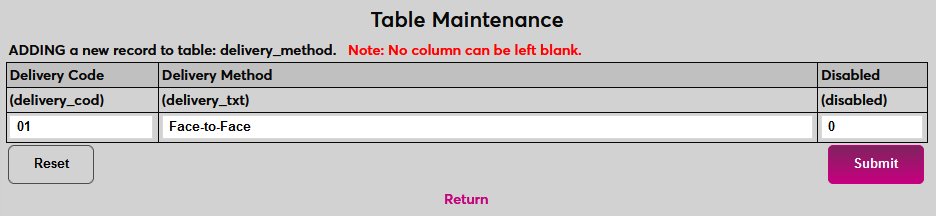
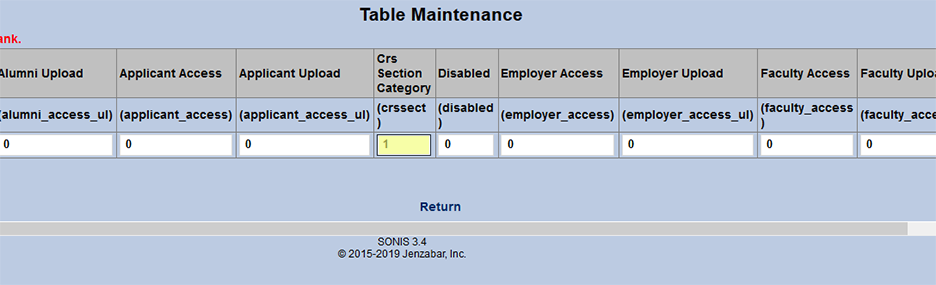
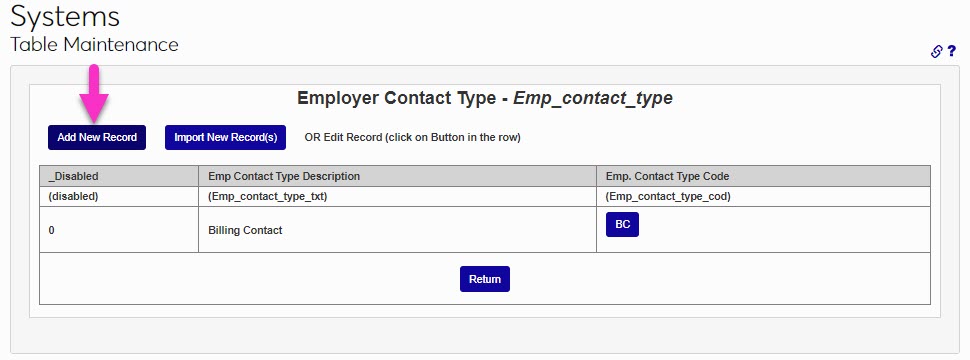
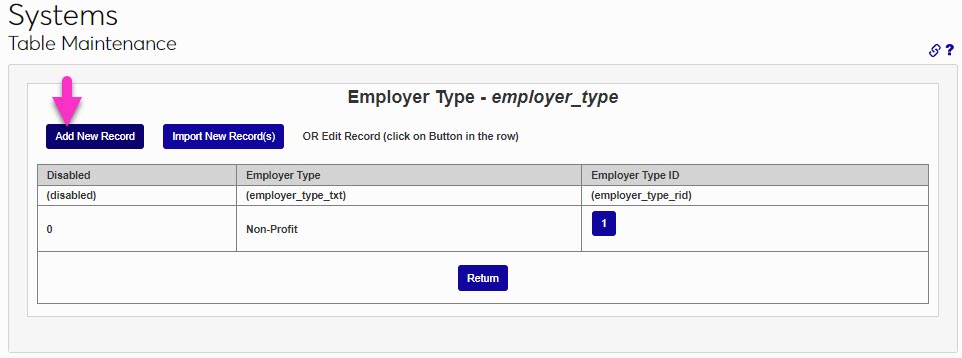
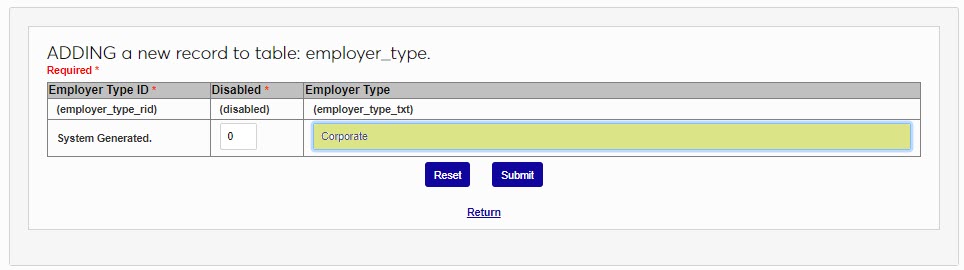
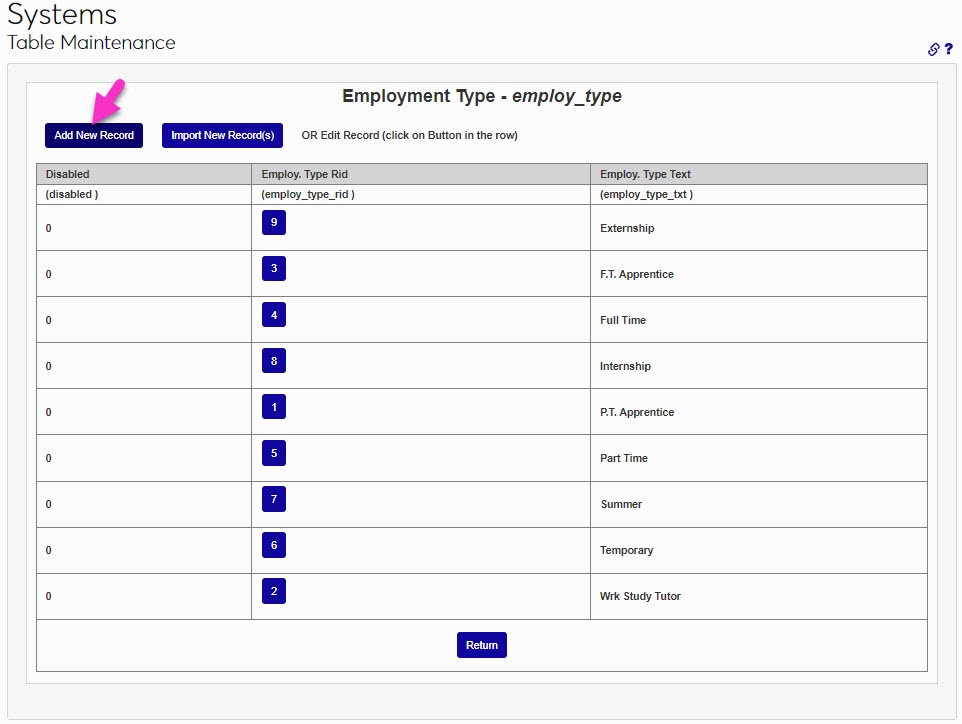
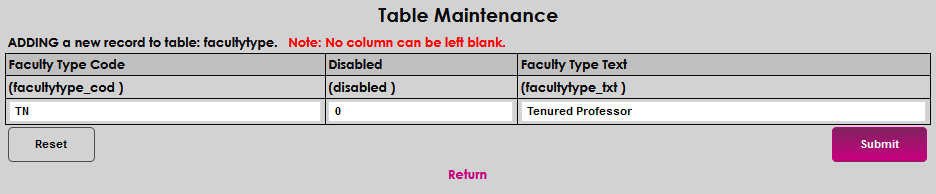
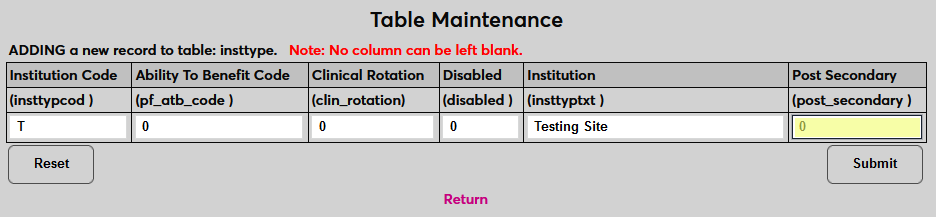
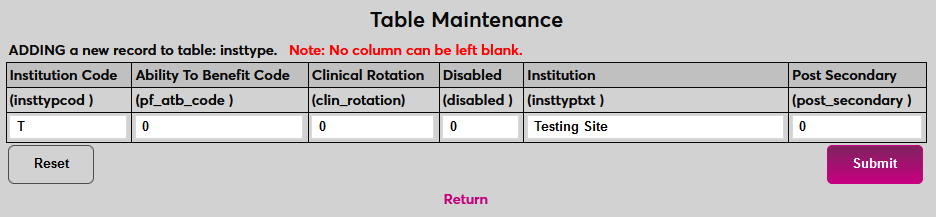
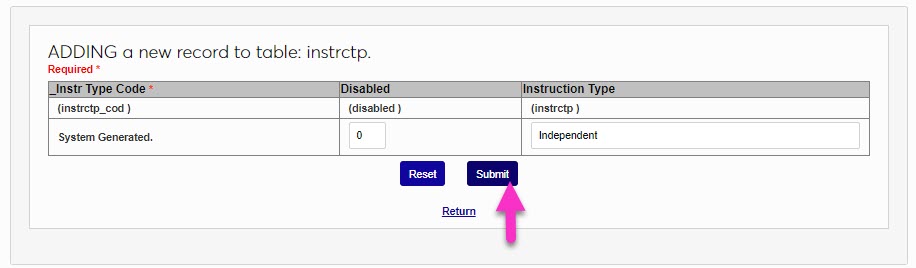
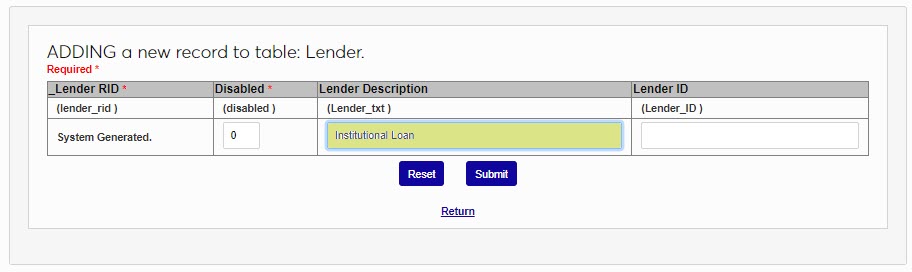
The example below shows a typical entry in Table Maintenance. Generally, every entry includes a code, a description (text), and the ability to disable the record so it will not appear in the drop.
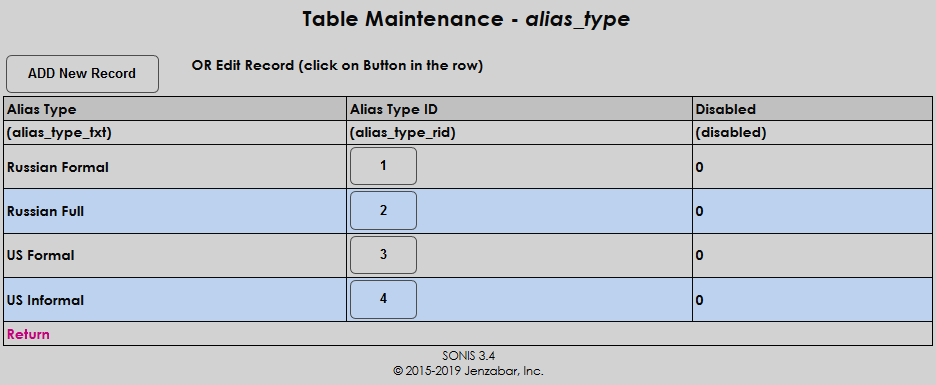
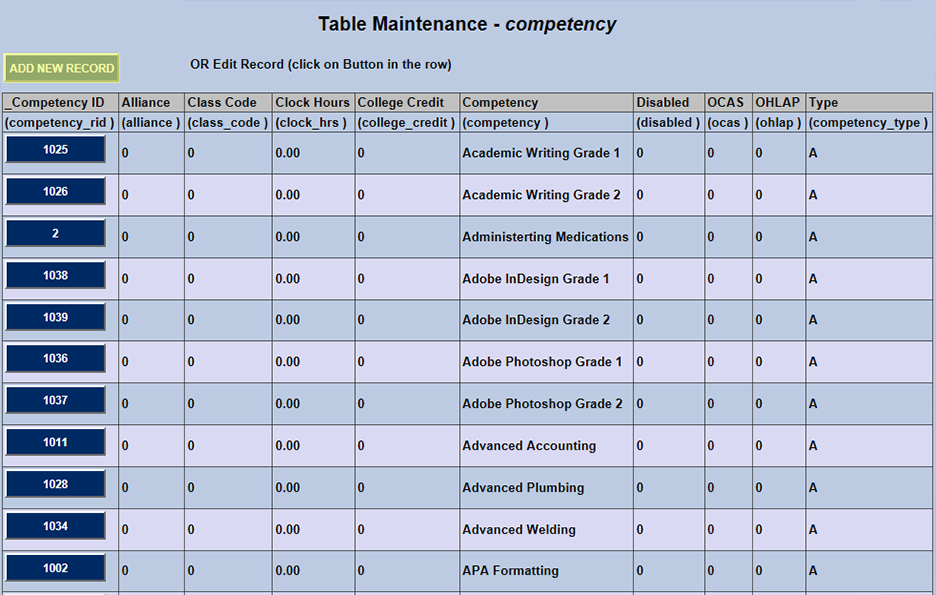
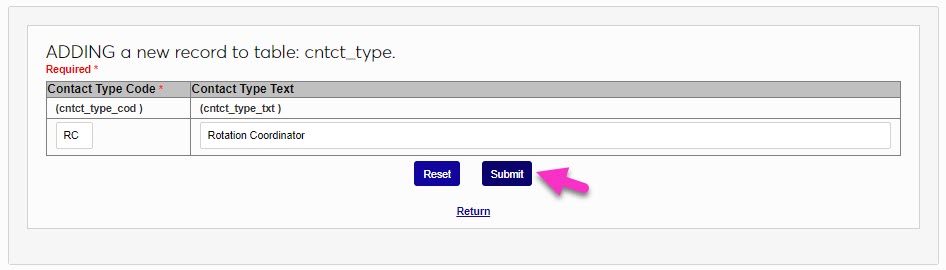
Once added. the code typically appears as a button for the purposed of editing. In some cases the code is NOT the primary key. When the primary key is an integer (i.e. a "rid" (Row Identification Number)), the integer is auto-generated, and that value is used for the button. Keep in mind when creating codes, it is important not to use special characters, even if the field allows the entry, as special characters can cause challenges in data reporting and third-party integrations. For example, it is acceptable to have a Department named Art & Design but the corresponding Code should be a short descriptor that does not include the ampersand (&).

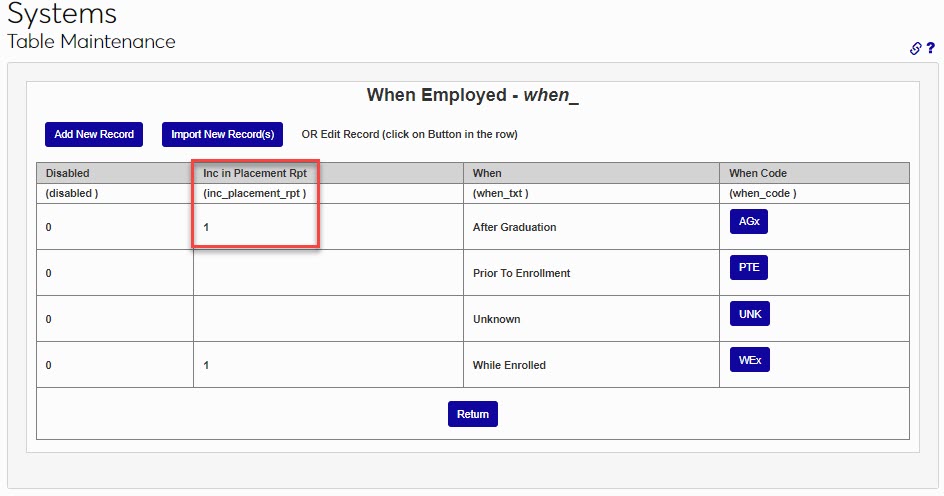
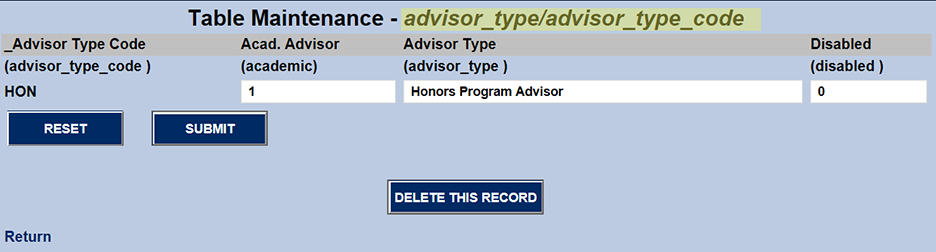
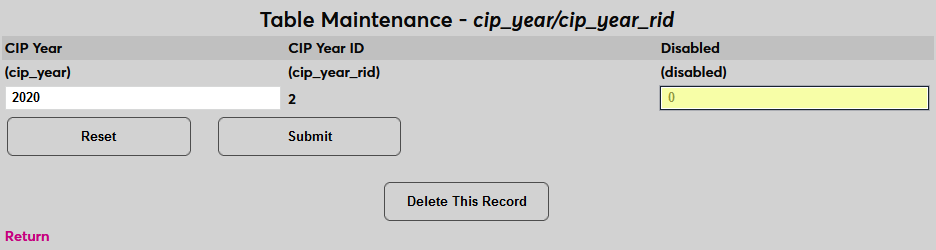
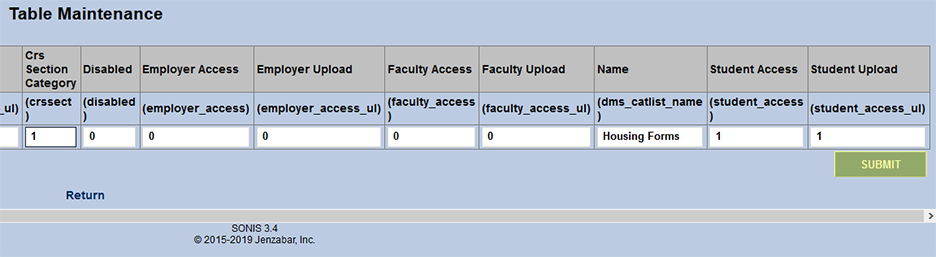
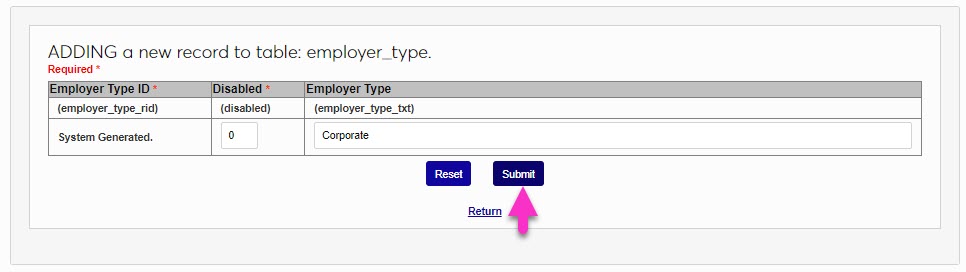
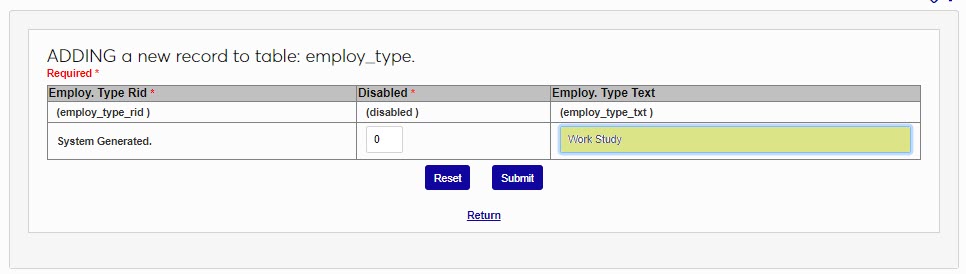
The edit page below shows what appears when the above button is clicked. Note that the code (primary key) cannot be changed.
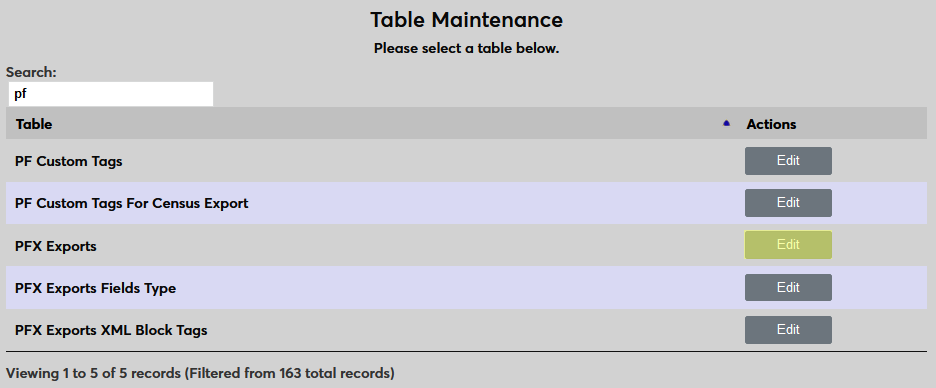
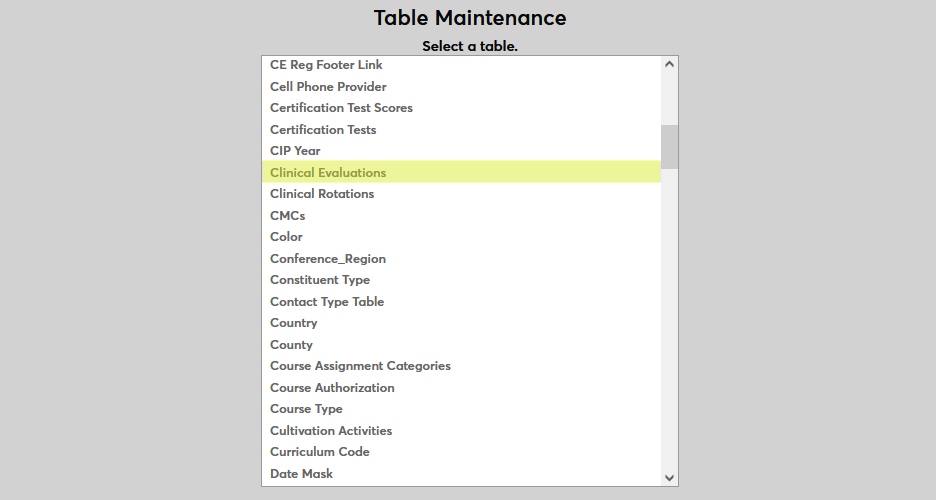
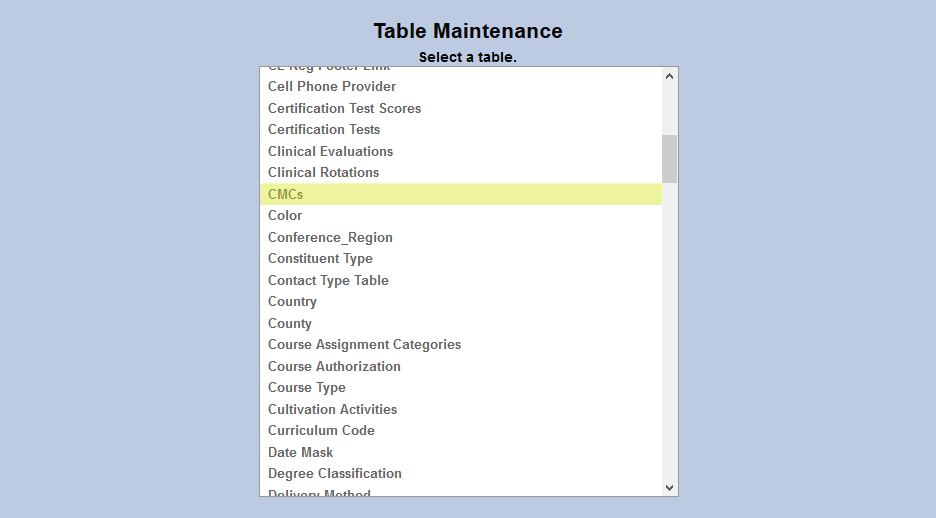
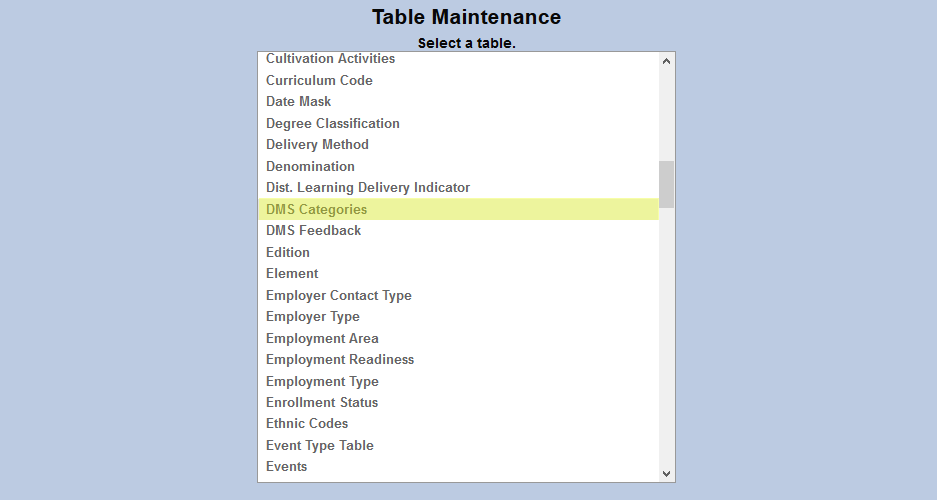
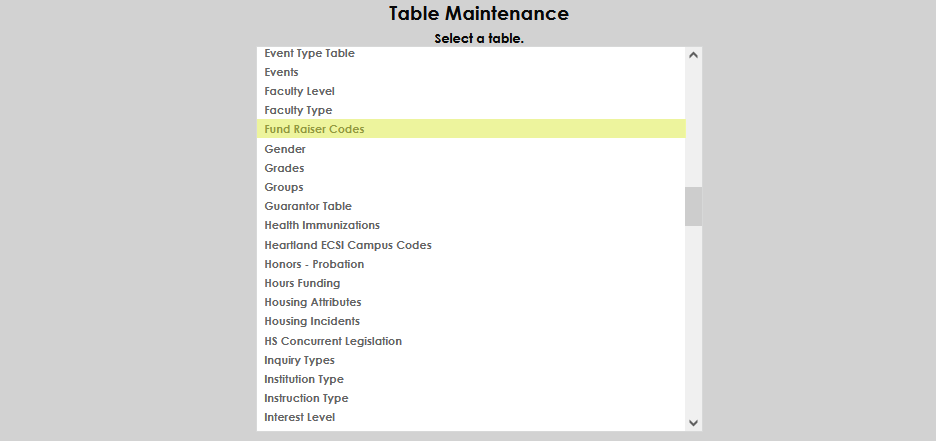
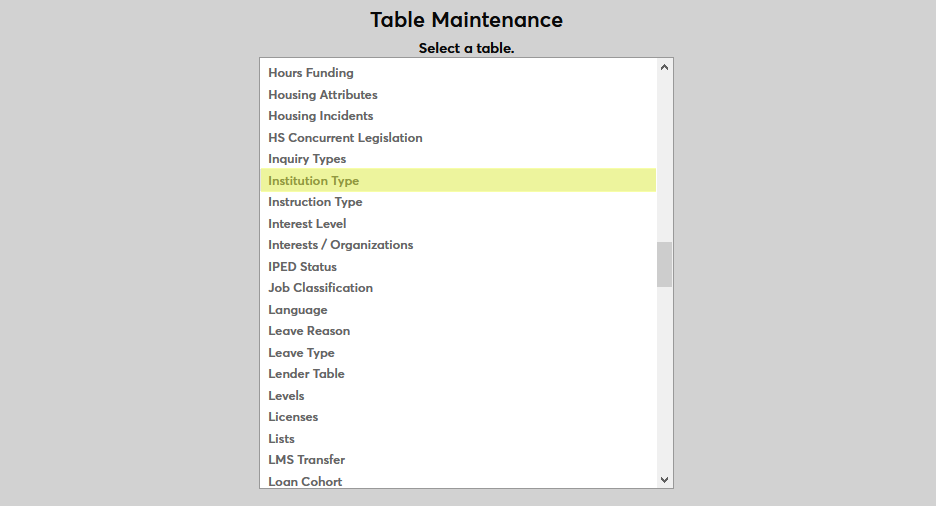
Search Function
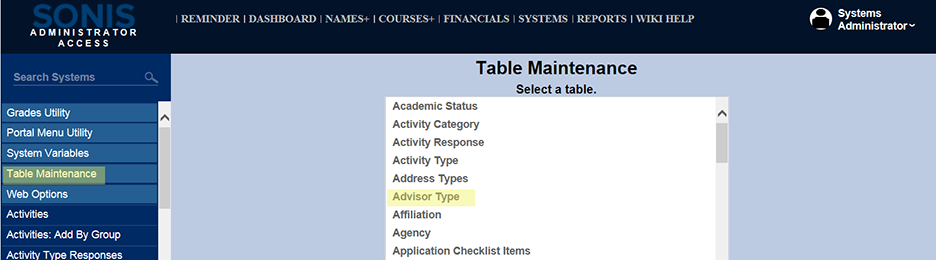
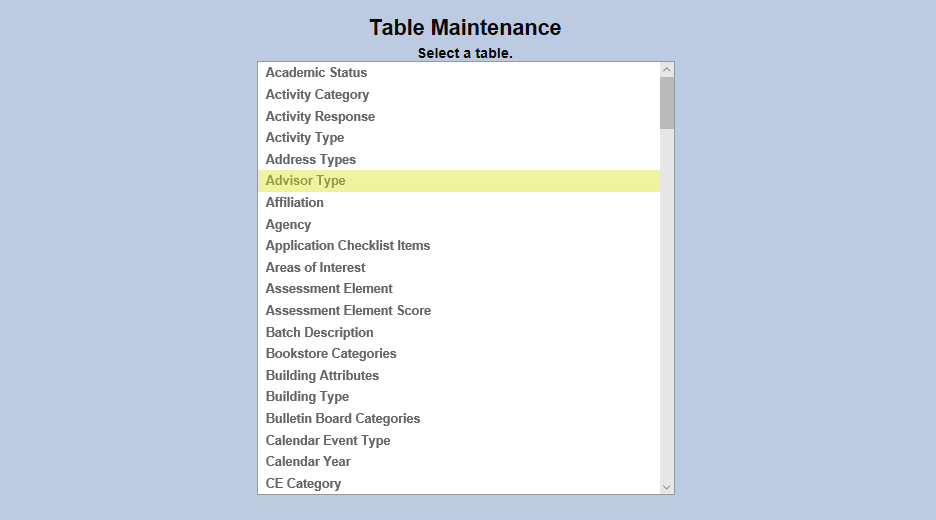
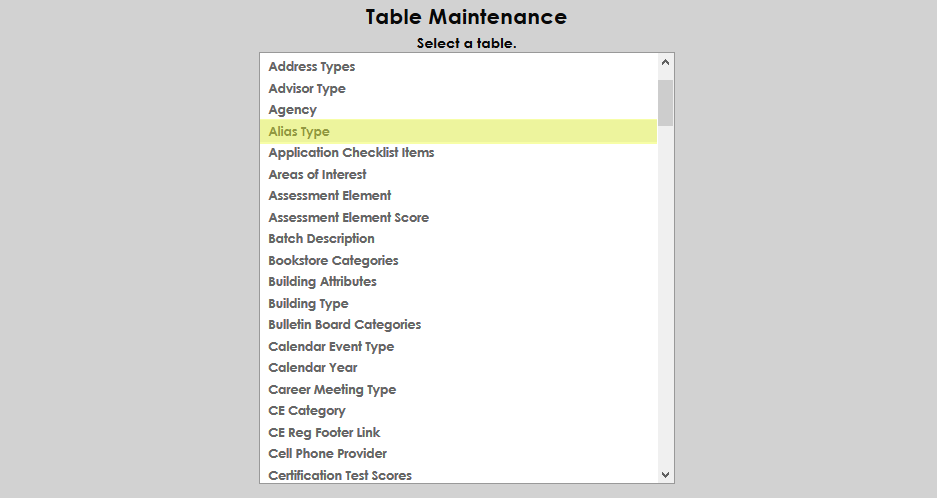
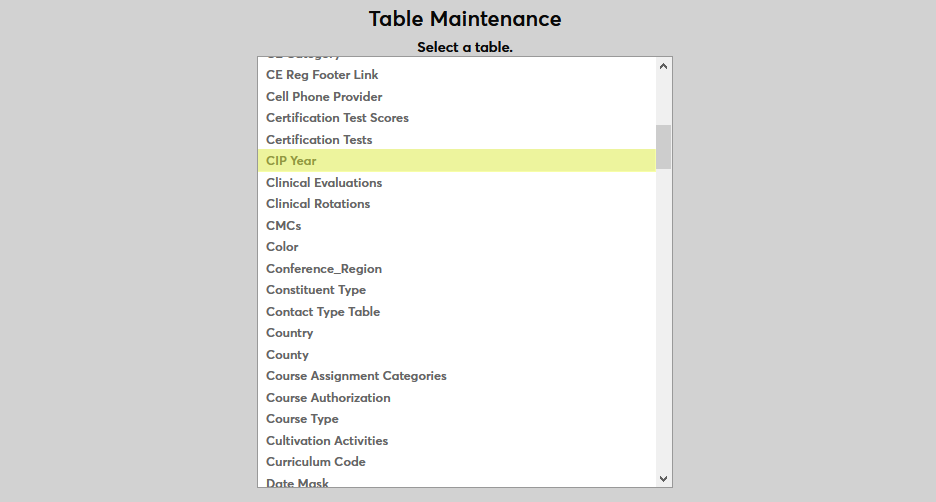
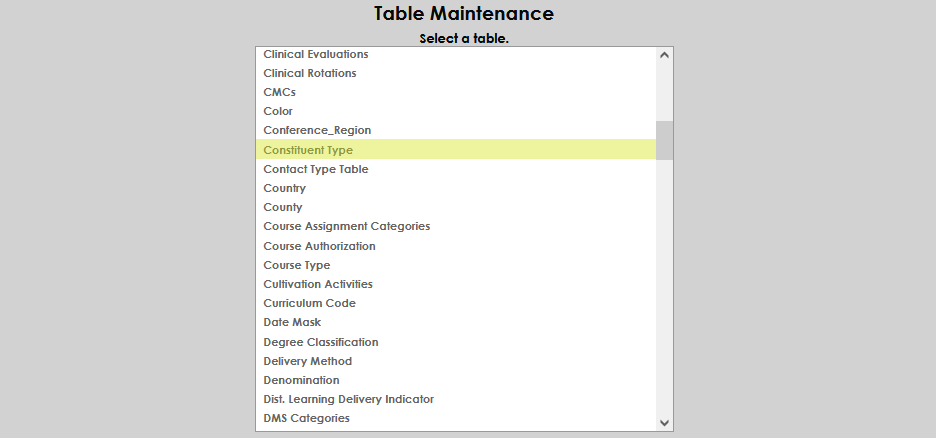
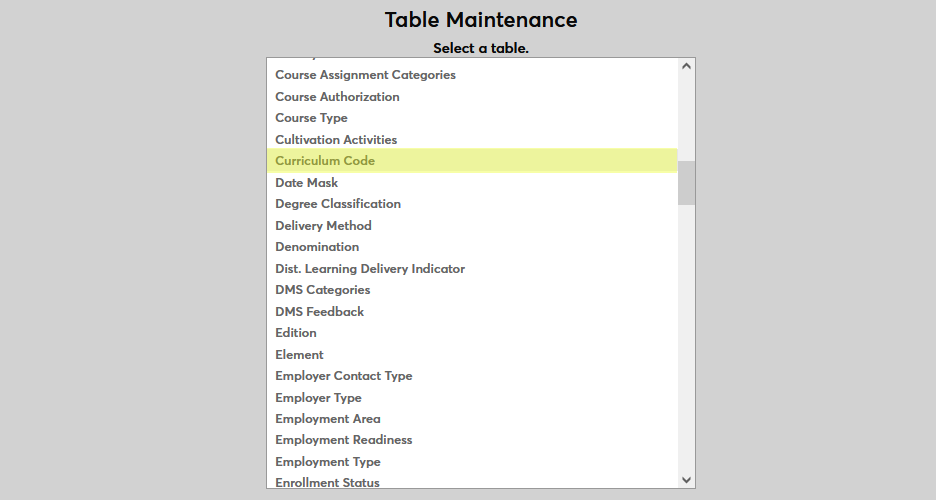
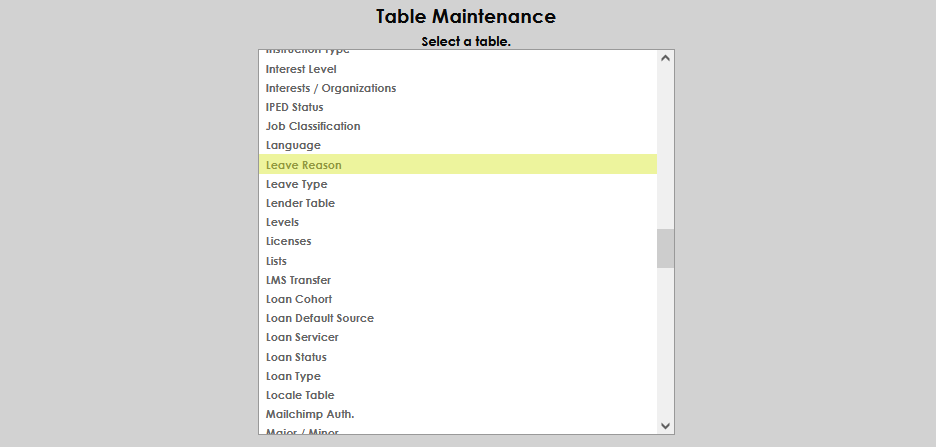
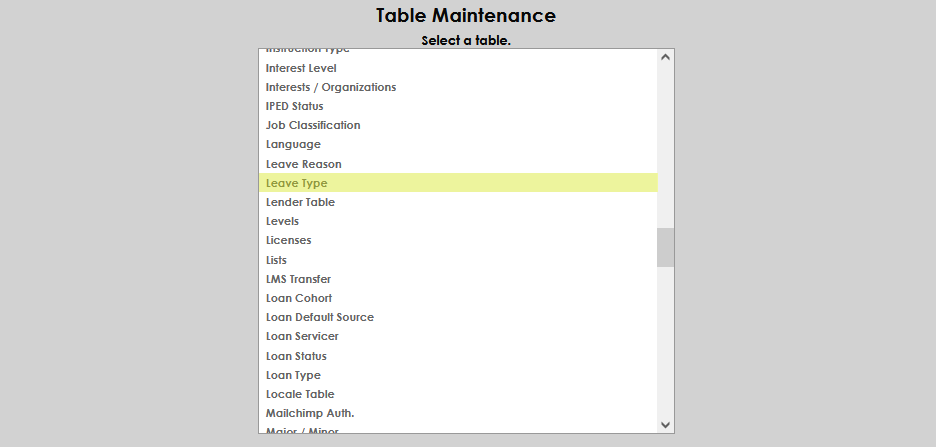
To locate a table, simply type all or part of the table name into the Search box at the top of the page. The search narrows the results instantly as the characters are typed.
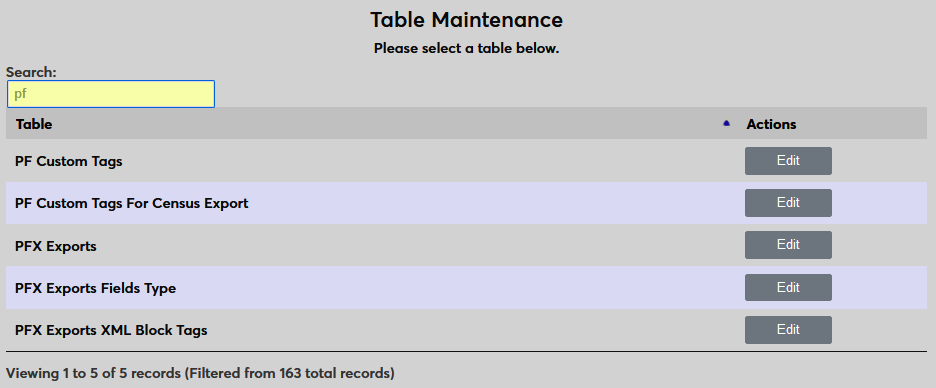
Once the correct table has been located, click Edit to add or edit entries in the table.
Tables
Academic Status
The Academic Status table is used to define the different categories a student may be in when their Satisfactory Academic Progress status is assessed. These statuses may be used in institutional academic standing and/or federal academic standing processes and reviews. To add a new status, click Add New Record. Enter up to 8 alphanumeric characters that represent the academic status being created in the Academic Status COD field.
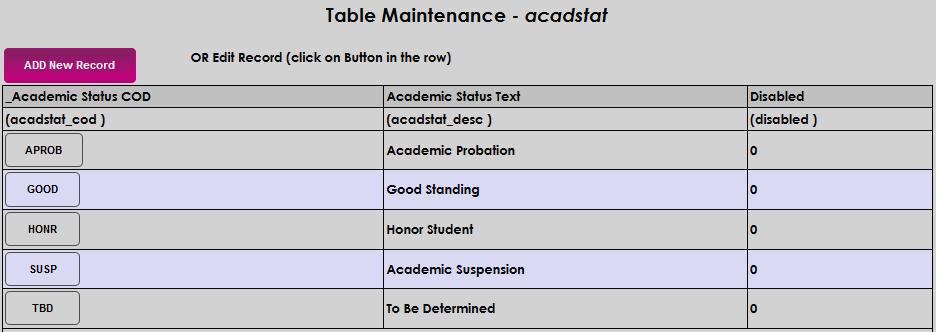

Enter the name of the academic status in the Academic Status Text field. This field accepts up to 25 alphanumeric characters. Click Submit to save the entries and create the new status.


Activity Category
The Activity Category table allows administrators to define the different categories of Activities that are available throughout SONIS. For example, a member institution may want a category for Communications that includes email and text activities, or may want to group activities by area, such as Admissions or Development. To add a new activity category, select the Activity Category table, then click Add New Record.

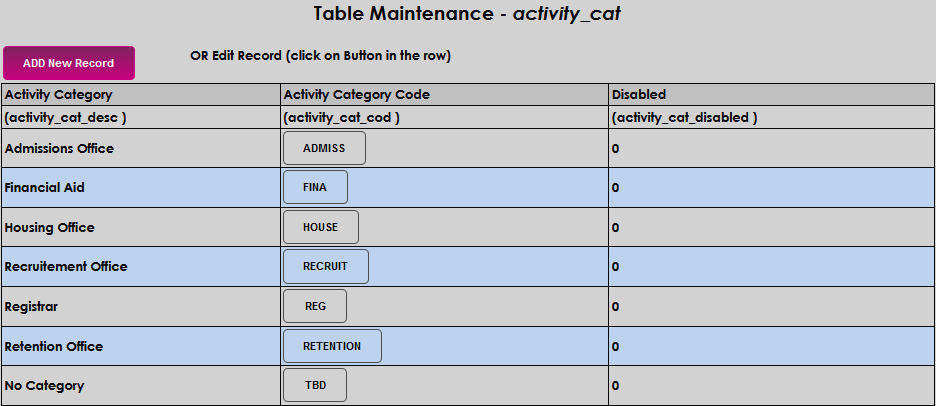
Create and enter an Activity Category Code that corresponds with the type of categories that will be used by the institution. The code may be up to 10 alphanumeric characters and will be displayed in activity-related areas throughout SONIS.

Enter an Activity Category that describes the Activity Category Code. This can be up to 30 alphanumeric characters and/or symbols.

Click Submit to save the entries.

Activity Responses
The Activity Response table works in conjunction with the Activity Type table values and the Systems menu page Activity Type Responses to allow the recording of the outcome of a given activity.
To add activity responses, click Add New Record. In the Activity Response Code field, enter up to eight alphanumeric characters that will represent the response and become the code.
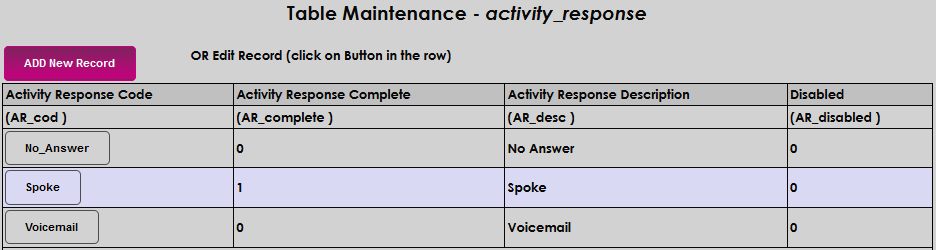

Enter a 1 in the Activity Response Complete field if this response will indicate that the activity is complete. In the Activity Response Description field, enter a description or the name of the activity response being created. This field accepts up to 30 alphanumeric characters.


Click Submit to save the entered information and create the response.

Activity Type
The Activity Type table allows administrators to define the different type of Activities that are available throughout SONIS. For example, a member institution may have an Activity Category for Communications and would therefore create Activity Types such as email and text activities, types by area, such as tours for Admissions or pledge campaigns for Development.
To add a new activity type, select the Activity Type table, and click Add New Record. Create and enter an Activity Type that corresponds with the types that will be used. The code may be up to 10 alphanumeric characters and will be displayed in activity-related areas throughout SONIS.

Enter an Activity Type that describes the Activity Type Code. This can be up to 30 alphanumeric characters and/or symbols. Click Submit to save the entries.


Address Types
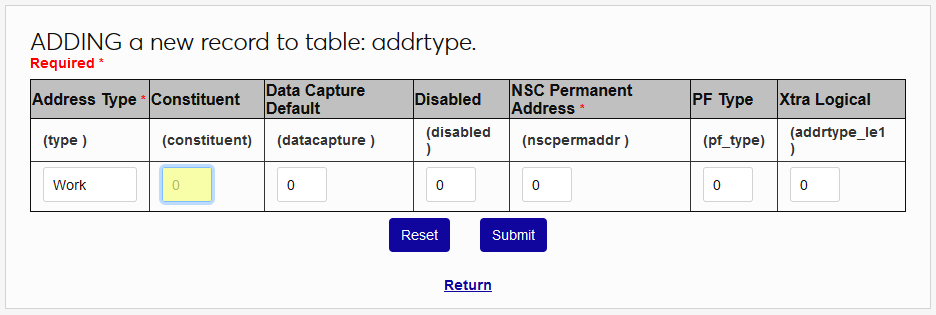
The Address Types table is used to define and categorize the different addresses associated with an institution and it's users. Types can include any desired categories, including but not limited to, Permanent, Primary, Last Known, IPEDS, and Billing. One address type must be assigned as the default for National Student Clearinghouse and Enrollment Data Collection reports.
To add a new record, click Add New Record.
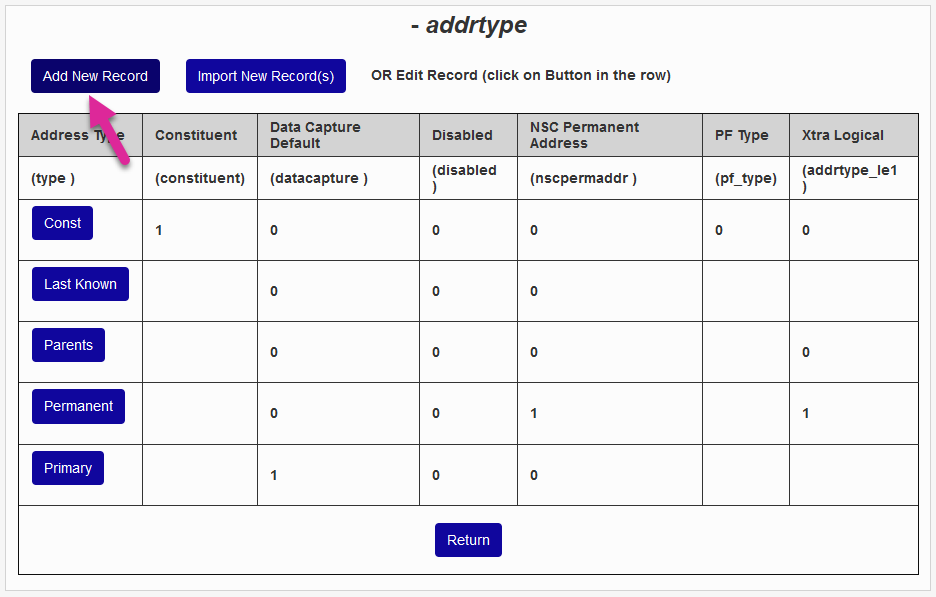
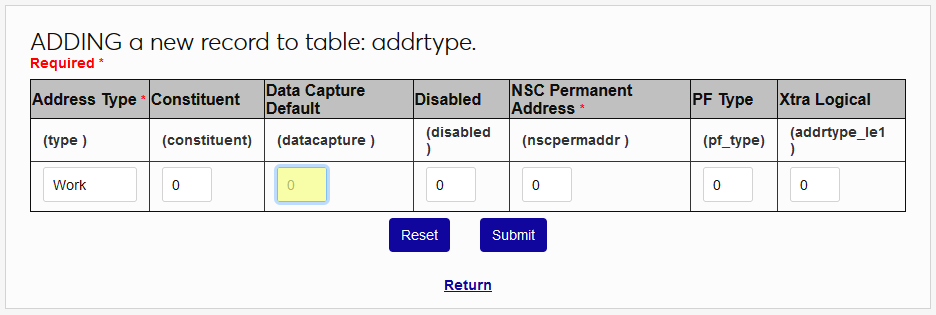
Enter up to ten alphanumeric characters that will become the name of the Address Type . If this address will be used for Enrollment Data Collection , enter a 1 in the Data Capture Default field.
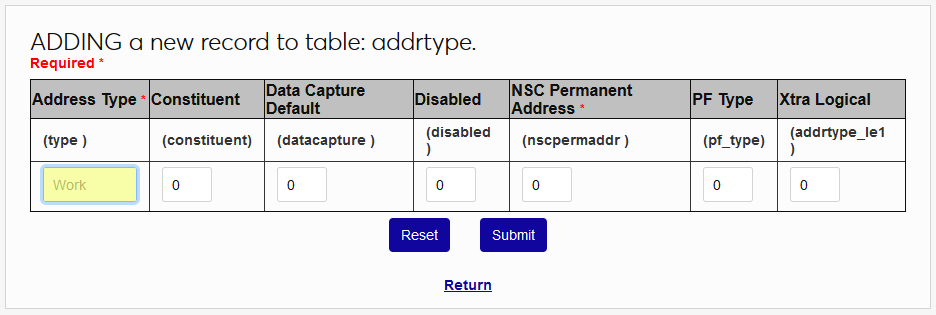
If this address should be designated for use with constituents, enter a 1 in the Constituent field. Only one address type can be designated as the constituent address type. See Constituent Contact for more information on this designation.
If this address will be used for Enrollment Data Collection , enter a 1 in the Data Capture Default field. If this address will be used for Clearinghouse reporting, enter a 1 in the NSC Permanent Address field.
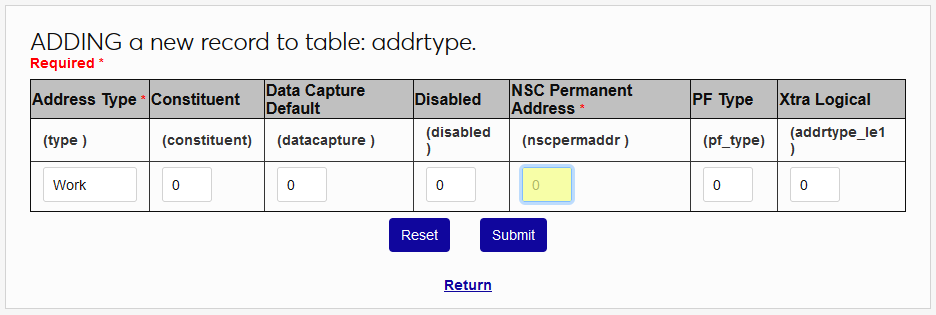
Leave a 0 in the Disabled field to make the address type active. To disable it later, replace the zero with a 1. Click Submit to create the address type.
Advisor Type
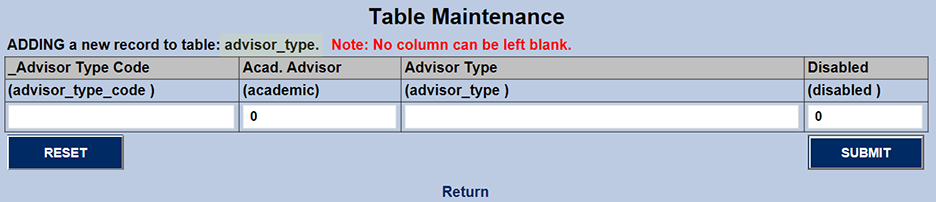
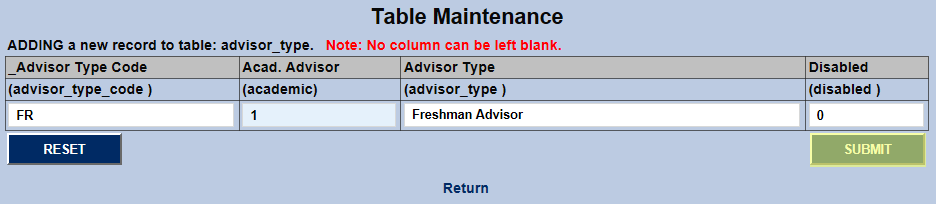
The Advisor Type table is used to define categories of Advisors. Click Add New Record to create a new advisor type or click on an Advisor Type Code button to edit an existing type.
If creating a new type, fill the Advisor Type Code field. This field has a three character limit. Pre-existing advisor type codes cannot be changed. Provide a full-length name for the Advisor Type . This field has a 35 character limit.
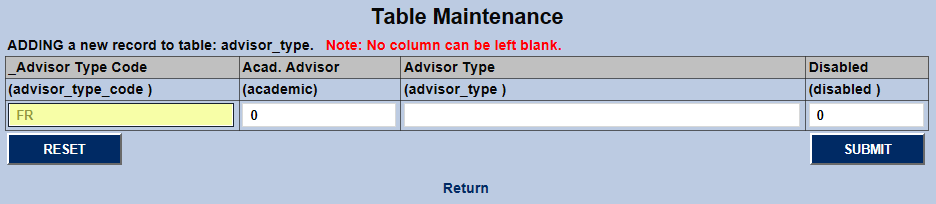

If the advisor is an Academic Advisor , change the 0 in this field to a 1 to turn it on. If the advisor type is a non-academic role such as a student life advisor or an organizational advisor, leave this set to 0 . Click Submit to save the changes and complete the process.

Agency
Many schools use recruiters, generally either individuals working for the school or outside recruiting agencies, to obtain prospective students and get them interested in attending the school. SONIS can track the recruiter or agency who first contacted the prospect and/or will be following up with the prospect in the future. The Recruiter/Agency Assignment utility allows SONIS administrators to assign recruiters and/or recruiting agencies to students in bulk. To designate an agency as a recruiter, link it with the SONIS ID of a user.
To add a new agency or recruiter, click Add New Record. Enter up to 8 alphanumeric characters in the Agency Code field to represent the agency or recruiter being created.
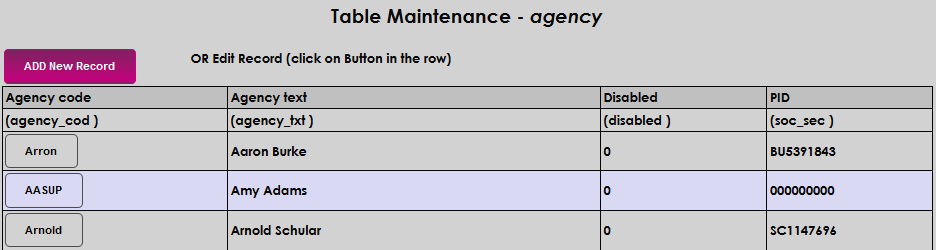

Enter the name of the agency or recruiter in the Agency Text field. This field accepts up to 60 alphanumeric characters. If an existing user is being created as a recruiter and should be linked to an agency, enter the user's SONIS ID in the PID field.


Click Submit to save the entered information and create the agency or recruiter.

Alias Type
Some students may have other names that they go by in addition to their official first, last, and middle names. To accommodate this, SONIS offers Preferred Name and Other Name fields on each student's Biographic page. However, in some cultures and unique circumstances, a student may have more names that can be accommodated by these fields. For this reason, SONIS also offers an Aliases table where additional names can be stored. This table can be queried in Izenda, but does not output anywhere else in the SONIS system. Institutions can request to have the aliases displayed on each student's transcript for an additional fee. Before an alias can be assigned to a student, the institution must create a list of alias types that describe the alias being added. Navigate to Table Maintenance under the Systems menu and click on Alias Type to begin.
Click Add New Record to create an alias type or click on the name of an existing type to edit that type if types have been previously created.
On the following page, enter a name for the alias type in the Alias Type field. This field has a 75 character limit. Leave the 0 in the Disabled column to enable the alias type or replace it with a 1 to disable it.
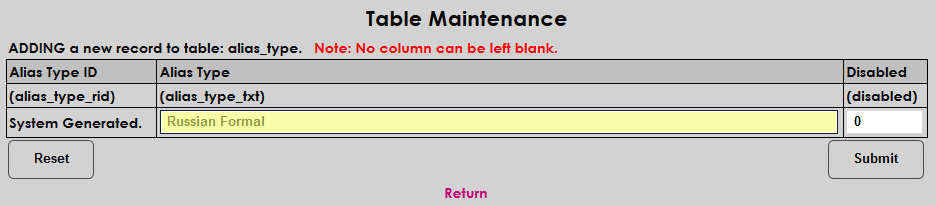
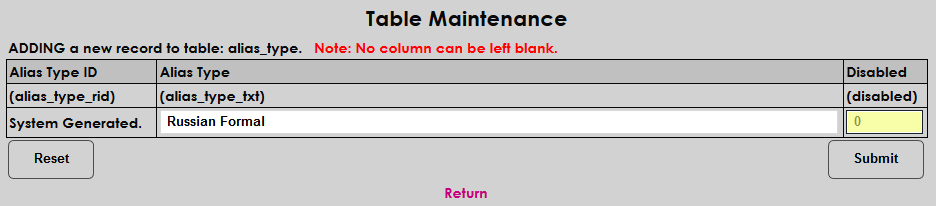
The Alias Type ID column displays the abbreviation that's automatically created by the system as each alias type is created. Click the Submit button to save the changes and create the alias type. Repeat the process until all the needed types are created.
Application Checklist Items
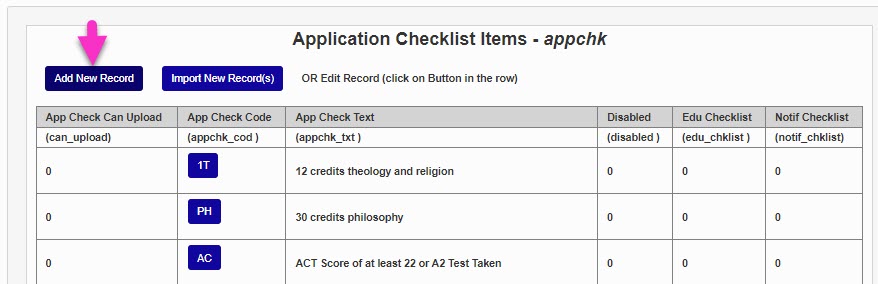
Checklist items are tasks that must be completed before an applicant can be accepted to the institution. They may include things like sending the school a transcript or a portfolio, paying an application fee, giving an admissions interview, or anything else that the institution deems necessary for admittance. The Checklist Users page allows administrators to access a user's application checklist items and see the progress that has been made. Some checklist items may apply to all applicants while others may be program-specific. Checklist items are assigned to programs through the Application Checklist page under the Systems hub. A report called App Checklists (Missing Items) is offered to track checklist completion.
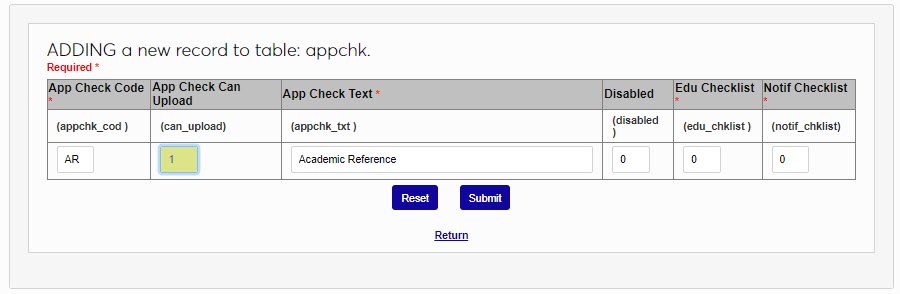
Before checklist items can be assigned, they must be created. Click Add New Record to add a new checklist item or click on the App Check Code of an existing checklist item to edit it.
Create a name for the checklist item that describes what is required to fulfill it. This field has a 55-character limit.
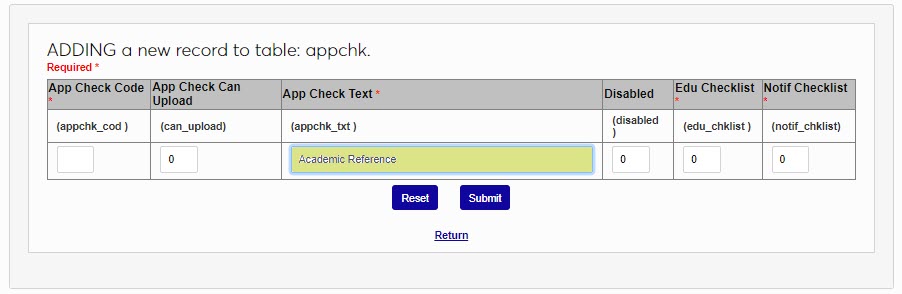
Next, create a two-character code that the system will use to identify the checklist item.

If the checklist item can be satisfied by the student uploading a document of some kind, place a 1 in the App Check Can Upload field. If this field is active, the applicant will have the ability to upload an item through the Applicant portal. If it is inactive (0), then the applicant will not have this option.
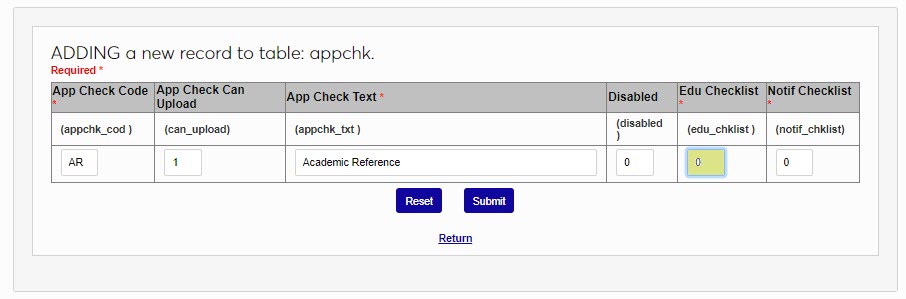
Some checklist items are tied directly to an applicant's prior educational institution. To append the name of this institution to the checklist item, place a 1 in the Education Checklist field. For example, a transcript checklist item might be listed as Transcript - Mount Airy High School if this field is active. Most checklist items will not use this field.
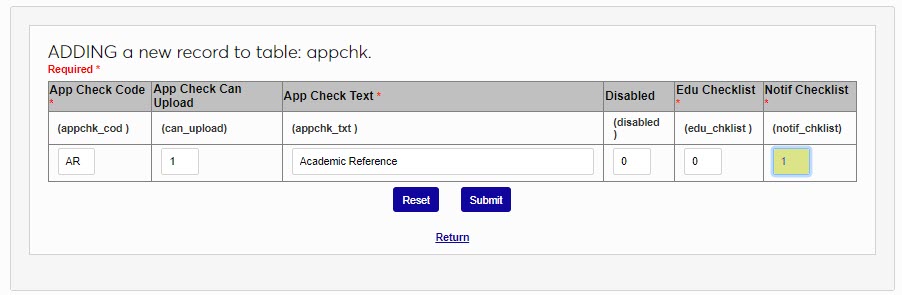
The Notification Checklist field is used to create notifiers for a checklist item. Administrators can receive notifications when a checklist activity is completed. Place a 1 in the field to list it among the options for the Activity Notifier. Leave a 0 in the field if a notification assignment for the checklist item will not be needed.
Leave a 0 in the Disabled field to keep the notifier active or place a 1 in the field to prevent it from being used.
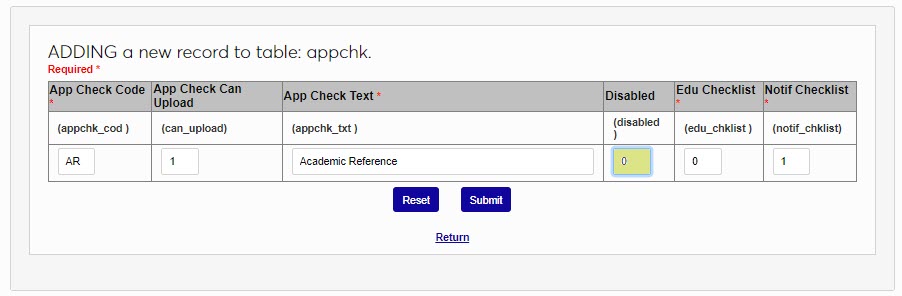
Click Submit to save the changes and create the checklist item.
Assessment Element
The Systems hub page Assessment Courses provides the ability to select specific courses for assessment. Administrators define the questions that will be asked, or the assessment elements, on the Assessment Element table.
To add an assessment element, enter the Assessment Element table and click Add New Record.
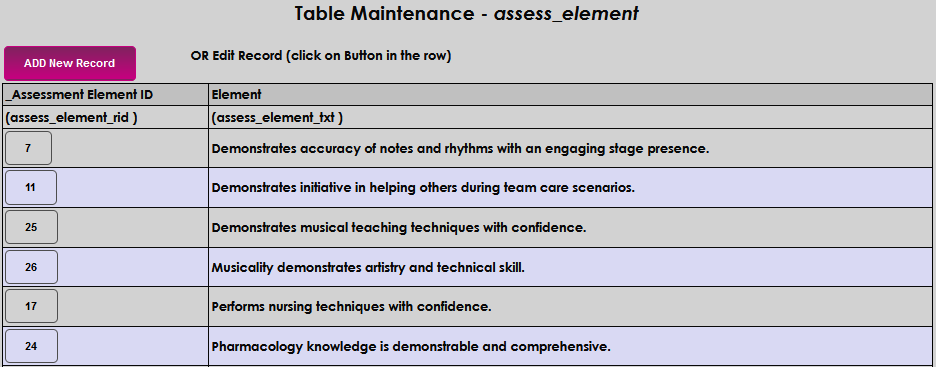
The Assessment Element ID is system-generated. Enter the question or assessment statement in the Element field. This field accepts up to 85 alphanumeric characters and symbols. Click Submit to save the entry and create the new assessment element.


Assessment Element Score
The Assessment Element Score, is used in conjunction with the Assessment Elements above, to rate or grade how well the student has met the element, as associated with an Assessment Courses. To add a new Score, enter the Assessment Element Score table and click Add.
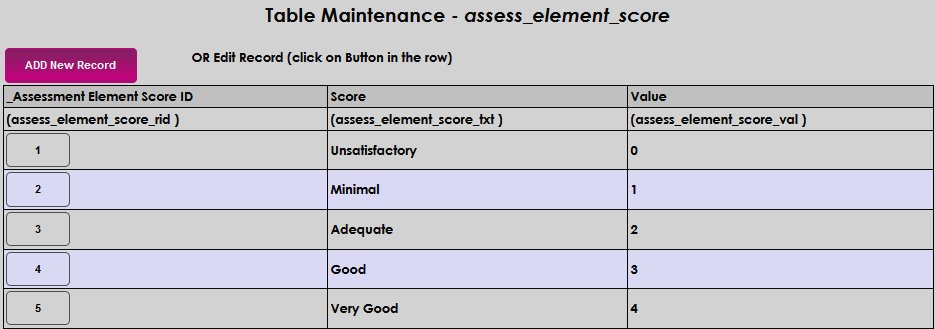
The Assessment Element Score ID is system generated. Enter up to 15 alphanumeric characters that describe the score in the Score field.

Enter the Value of the score. The value may be up to four digits. Assigned and scored assessment elements will be used to create the overall score in the course being assessed. Click Submit to save the entered information and create the element score.


Batch Description
The Batch Description table provides the ability to define the various types of batches that the institution may process. For example, in Financials Post to Accounting processes, the Batch Description dropdown is populated. To begin adding a batch description type, click Add New Record.
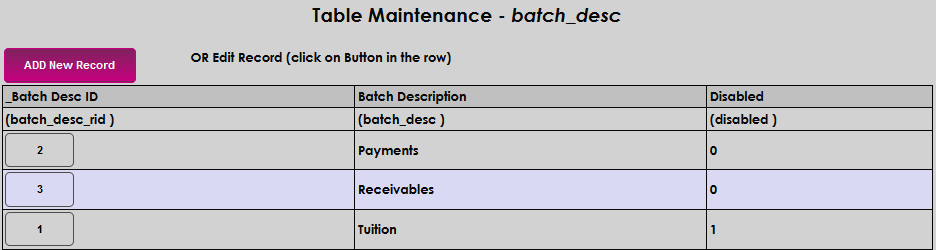
The Batch Description ID is system generated and cannot be entered or updated. Enter the name of the batch in the Batch Description field. This field accepts up to 25 alphanumeric characters. Click Submit to save the entered information and create the new batch description.


Bookstore Category
If the institution has an interest in defining the various types of merchandise sold in the campus bookstore, they may do so on the Bookstore Category table. If they assess and collect different tax rates for different categories, these categories will display and can be selected on Bookstore Campus Tax Systems page.
To add a category, begin by clicking Add New Record. Enter up to 25 numeric characters that represent the category in the Category Code field.
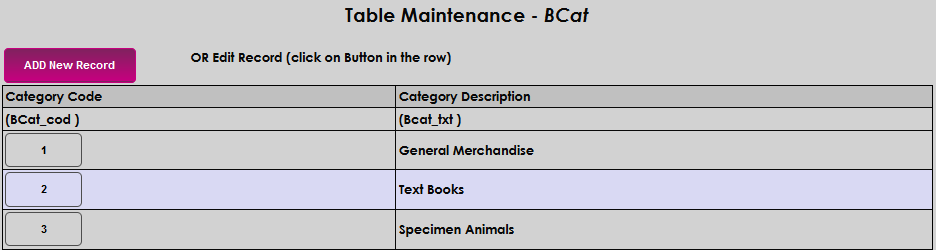

Enter up to 30 alphanumeric characters that describe the category in the Category Description field. Click Submit to save the entries and create the bookstore category.


Building Attributes
The Building Attributes table is used in conjunction with the Building Type table in the Rooms and Buildings utility to define and categorize the different buildings and rooms that make up an institution. These attributes can then be used as a filter in the Room Finder. Attributes are features and functions that describe the building. For example, if a building is created and assigned the type of lecture hall, it may also include an auditorium. The auditorium would be an attribute of the hall.
To add an attribute, enter the Building Attributes table and click Add New Record. Enter an Attribute Code composed of up to two alphanumeric characters.
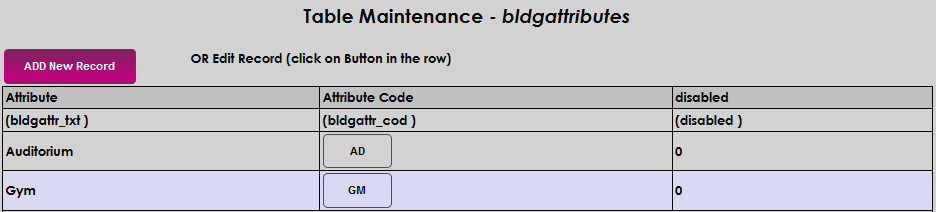

Enter the name or a description in the Attribute field. This field accepts up to 40 alphanumeric characters. Click Submit to save the entered information and create the building attribute.


Building Type
The Building Type table is used to define and categorize the different buildings and rooms that make up an institution. Types can include administrative buildings, dorms, labs, lecture halls, etc. For each of the Rooms and Buildings that are created a type will be assigned so that different functions can be associated with the room or building. For example, a building defined as a dorm will have different functions associated with it than a room defined as a classroom.
To add a building type, enter the Building Type table and click Add New. Enter a Building Type Code composed of up to two alphanumeric characters.
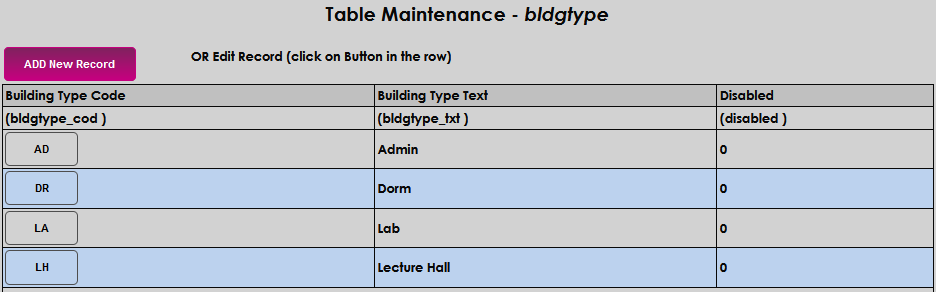

Enter a description of the code in the Building Type Text field. This field accepts up to 40 alphanumeric characters. Click Submit to save the entered information and create the building type.


Bulletin Board Categories
The Systems hub utility Bulletin Boards provides portal users the ability to post, view, and respond to items of interest, much like a traditional bulletin board. The categories are created and enabled in this table. To begin adding a category, click Add New Record. Enter up to 25 alphanumeric characters that describe the category being created in the in the Category field.
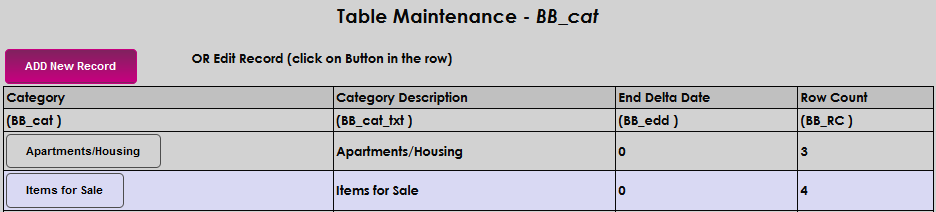

Enter a description of the category in the Category Description field. This field accepts up to 30 alphanumeric characters. In the End Delta Date field, enter the number of days a post should be viewable for. The limit is 9,999.


Enter the number of rows per category that may display in the Row Count field. 999 is the limit in this field. Click Submit to save the entry and create the category.


Calendar Event Type
The Systems menu page Set Event Types uses the calendar event types created in this table and allows users to create and maintain events that are used in SONIS calendars. To add a new calendar event type, enter the table and click Add.
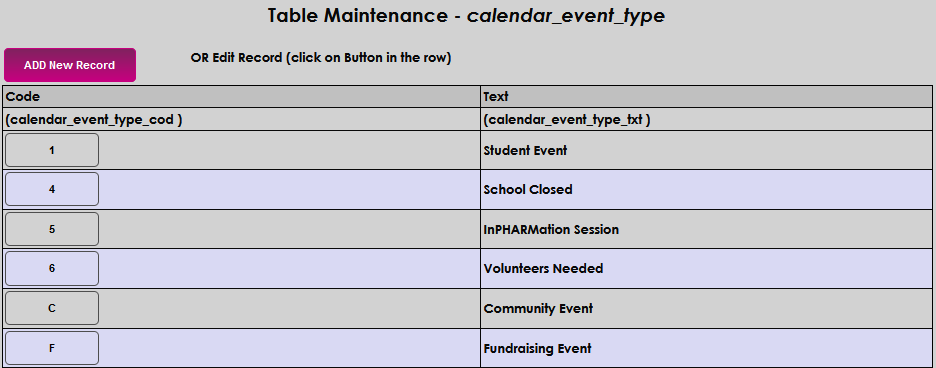
Enter one alphanumeric character that will become the Code for the event. Enter up to 25 alphanumeric characters that describe the event and will become the event type in the Text field.


Click Submit to save the entered information and create the event type.

Calendar Year
The Calendar Year table is used to define the Calendar and School years that will be used throughout SONIS. The years are associated with Semesters in this table. In the example below, the school's first semester each year is Fall, followed by Spring, Summer 1, and Summer 2. Therefore, Semesters 2, 3, and 4 of the 201718 school year would take place in 2018 with only semester 1 taking place in 2017. This setup is mirrored for the 2018 calendar year.
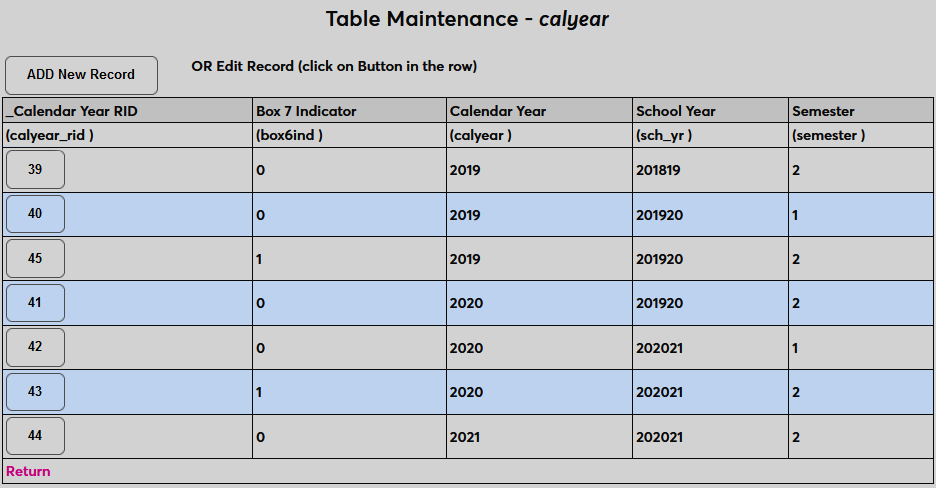
To add a new year, click Add New Record . The Calendar Year RID field is system generated. The Box 7 Indicator controls whether Box 7 on the 1098-T form should be checked for the calendar year and semester or not. Enter a 1 if the box is to be checked and a 0 if it should not checked.


Enter the four-digit calendar year and the six digit school year. A school year must include all four digits of the leading year and the last two of the trailing year. For example, the 2023-2024 school year would be written as "202324."


Enter the semester number and click Submit to save the entries and create the calendar year.


Career Meeting Type
The Career Services page allows institutions to record the type of meeting that occurred with a student. Before a career meeting type can be assigned to the meeting, career meeting types must be created. To create career meeting types, navigate to the Career Meeting Types table and click the Add New Record button to create a new career meeting type.

On the following page, the Record ID will be automatically generated by the system. Create a name for the Meeting Type . This field has a 20 alphanumeric character limit and must contain a unique value. Click Submit to create the meeting type.


CE Category
The CE Course Category table allows the creation of topic groups allowing similar course offerings to be displayed together in the CE Registration Utility. To add a new category, click Add New Record.
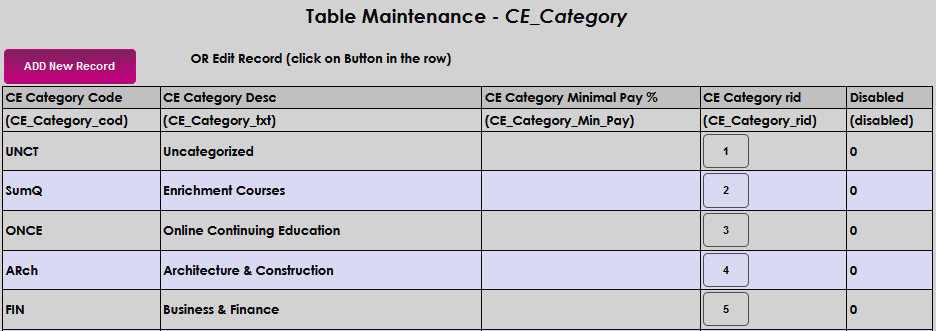
The CE Category rid is system generated. Enter up to four alphanumeric characters that will become the code for the category in the CE Category Code field. Enter up to 50 alphanumeric characters that explain the category in the CE Category Desc field. This is the value that will display to users who are viewing CE courses in the portal.


Schools can choose to allow students to pay for only a portion of the course when registering. This option is set on the Course Add/Edit page and the option is included on the Section List page as well, allowing individual sections to be set differently than the course itself.
Alternately, a minimum pay percentage can be set here based upon CE Category. When a percentage is entered in the CE Category Minimal Pay % field, all courses with that CE category will only require that percentage to be paid. The corresponding fields on the Course Add/Edit page and the Section List page do not need to be altered as the CE Category will override the percentages there. When this field is populated, a Minimum Due column is added during the CE Registration process and the default payment when completing registration mirrors that amount. If no discount percentage should be offered, simply leave a zero in this field. Click Submit to save the entered information and create the category.


Cell Phone Provider
If a Jenzabar SONIS member institution uses text messaging to communicate time-sensitive information to users, Cell Phone Provider must be populated in the Address page. The list of cell providers is populated with the most common providers and can be edited through this table, as needed. Click Add New Record to begin adding a new provider.
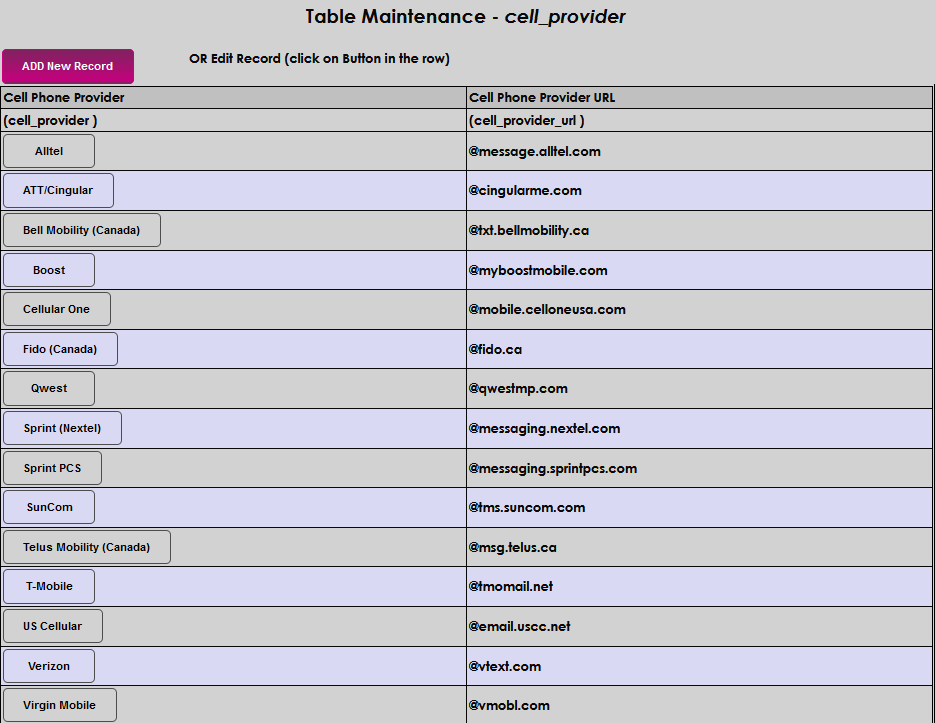
Enter the Cell Phone Provider name. This field accepts up to 35 alphanumeric characters. Enter the Cell Phone Provider URL beginning with the @ symbol. This field accepts up to 35 characters.


Click Submit to save the entered information and create the new provider.

Certification Test Scores
If Certification Tests are used for CE Courses, they must be scored. The scores are created and maintained on the Certification Test Scores table and display in the grade dropdown for the faculty to select. To create a new score, click Add New Record.
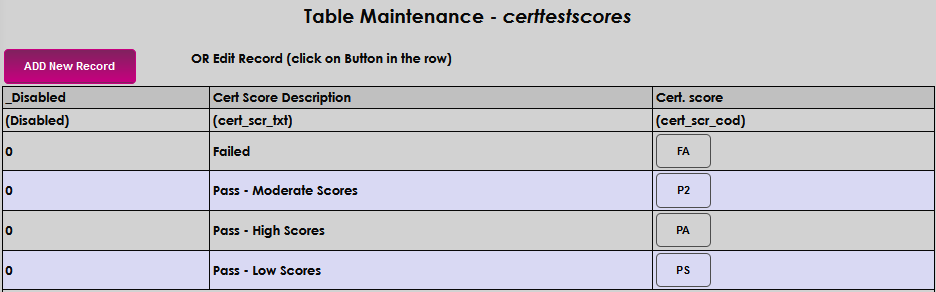
Enter up to three alphanumeric characters that represent the score and will become the code in the Cert. score field. A '0' in the Disabled field indicates that the score will be active and useable. A '1' indicates that the score is not active. It is important to note that if a score is assigned to a test and then disabled, the score will continue to display on the user's record and certificate as the grade for the certification test but will be grayed out and cannot be changed unless the score is activated again.


Enter up to 50 alphanumeric characters and/or symbols that describe the score in the Cert Score Description field. Click Submit to save the entered information and create the score.


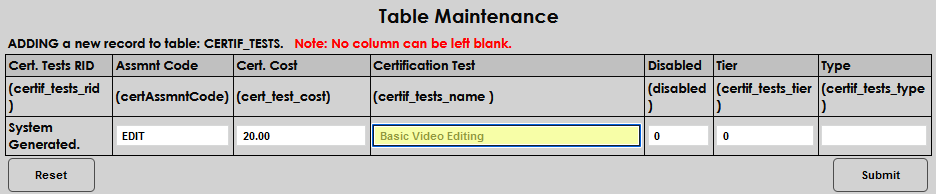
Certification Tests
If Certification Tests are used for CE Courses they must be defined and maintained on this table. To create a new test, click Add New Record.
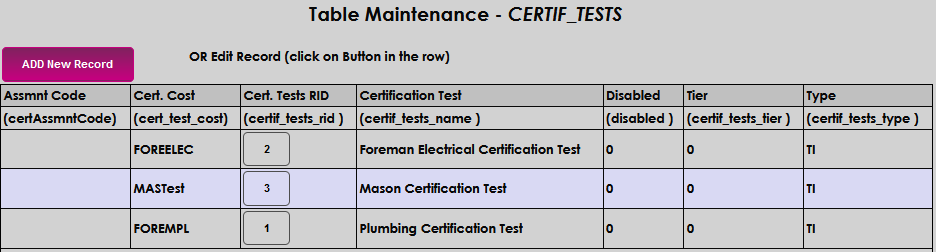
The Cert. Tests RID is system generated. Enter up to four alphanumeric characters that will become the assessment code for the test in the Assmnt Code field. If no code is needed, leave the field blank. If there is a cost to take the test, enter it in the Cert. Cost field. This field accepts up to 30 numeric characters and a decimal.
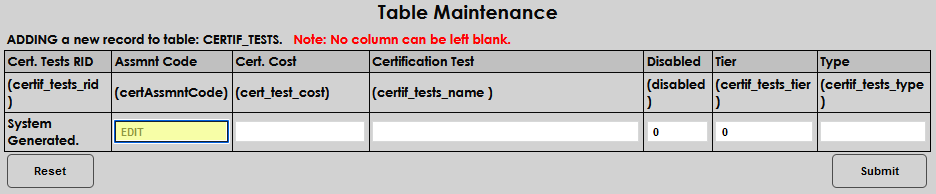
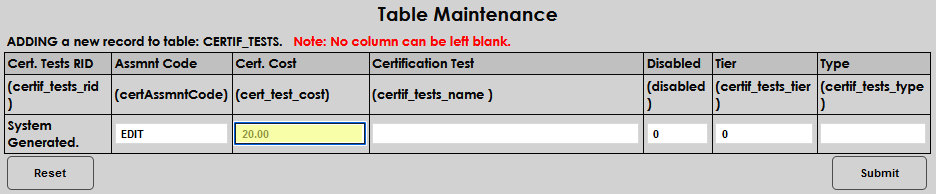
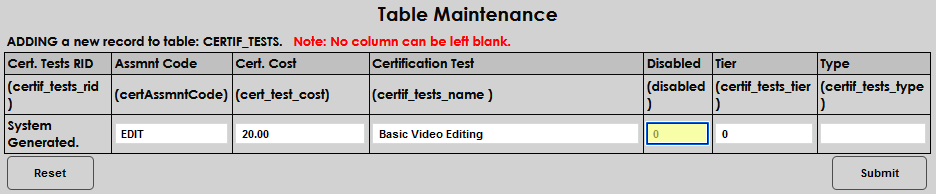
Enter the name of the test in the Certification Test field. This field accepts up to 80 alphanumeric characters and symbols. A '0' in the Disabled field indicates that the test will be active and useable. A '1' indicates that the test is not active. It is important to note that if a test is taken and scored, and then disabled, the test and score will continue to display on the user's record but will be grayed out and cannot be changed unless the test is activated again.
If the test is associated with others and is one of a set, or level, enter the rank in the Tier field. Leave it blank if no tier is associated. This field accepts up to four numeric characters. Enter two characters to represent the Type of test.
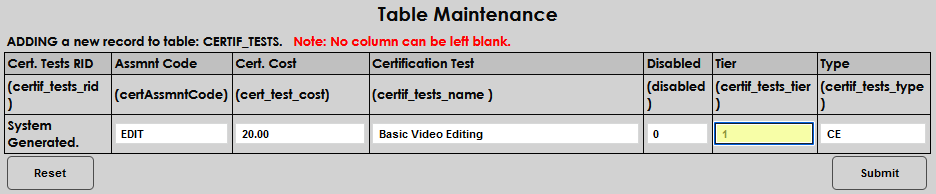
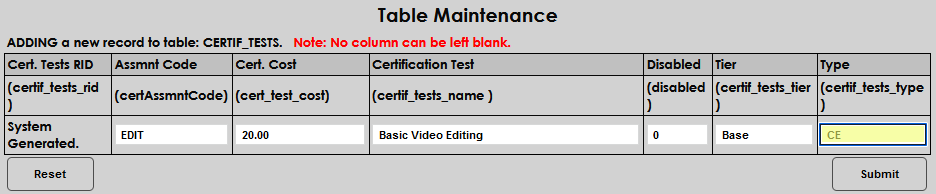
Click Submit to save the entries and create the test.
CIP Year
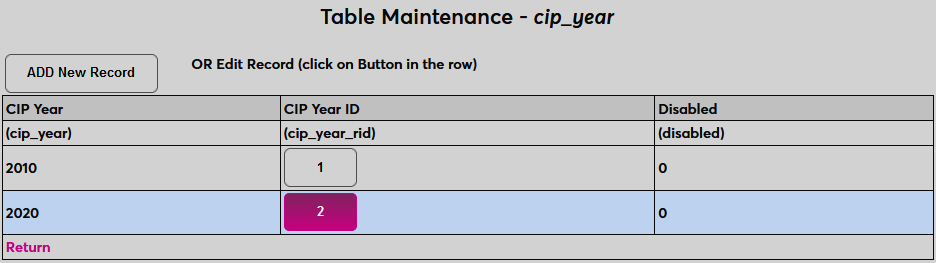
The U.S. Department of Education’s National Center for Education Statistics (NCES) updated the Classification of Instructional Programs (CIP) codes for 2020. Due to this update, SONIS clients needed the ability to specify whether they will use the 2010 or 2020 CIP Year designation for their Clearinghouse enrollment reporting. These values are stored in the CIP Year table under Table Maintenance. 2010 and 2020 are already included in the table, but it will be up to clients to maintain this data going forward.
To add a new CIP year or edit the data already in this table, navigate to the Table Maintenance utility under the Systems menu and select CIP Year.
The existing years are listed on the following page. Click Add New Record to add a new year or click on the CIP Year ID of an existing year to make changes.
On the following page, administrators can add or edit a CIP Year.
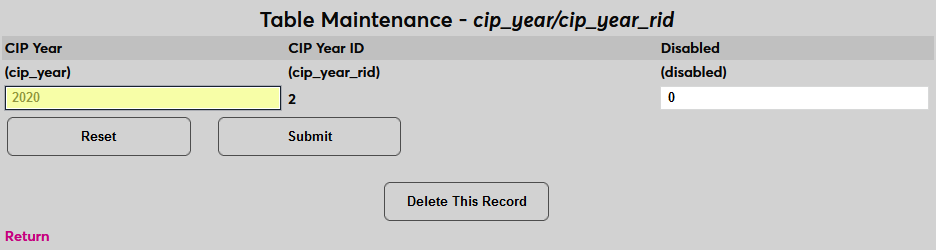
To disable to year and prevent it from being used, place a 1 in the Disabled field. Click Submit to save the changes.
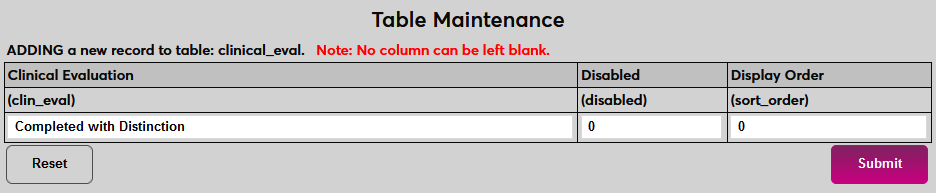
Clinical Evaluations
If students' rotations will be evaluated, the values assigned to them need to be created as well. Navigate to Table Maintenance in the Systems hub and select Clinical Evaluations.
Click Add New to create a new evaluation. Name the evaluation, essentially the grade that the student will be given, using the Clinical Evaluation field. This field has a 30-character limit.
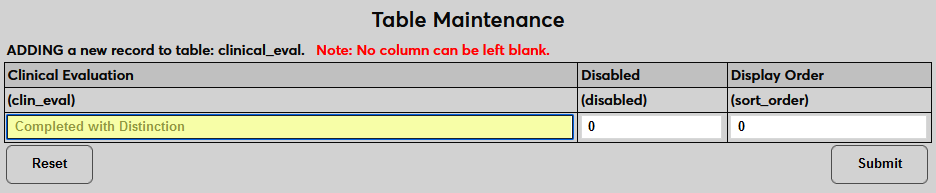
The Display Order can be altered to change the order in which the evaluations will appear. Otherwise, they will display alphabetically. Click Submit to save the changes and create the evaluation. Repeat this process as necessary until all evaluation responses that will be given out have been created.
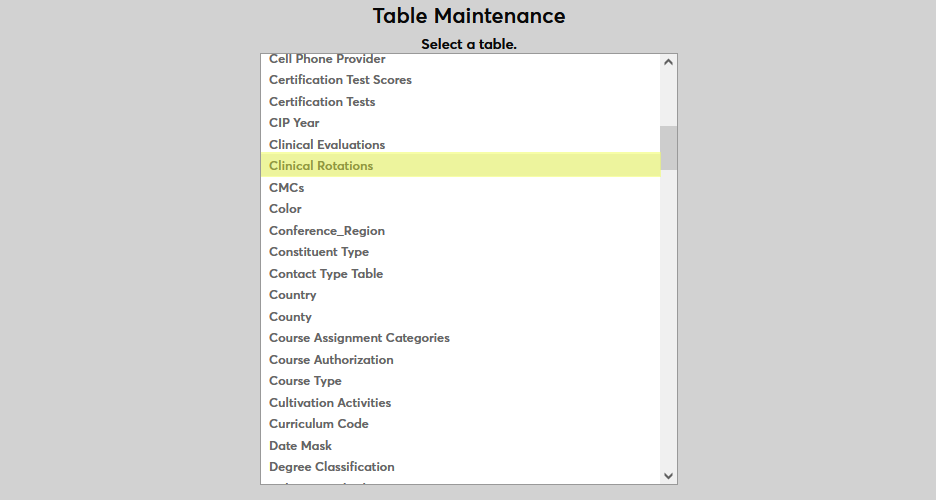
Clinical Rotations
Once institutions have been designated as clinical sites, each client must designate the kinds of clinical rotations that will be offered. Navigate to Table Maintenance in the Systems hub and select Clinical Rotations.
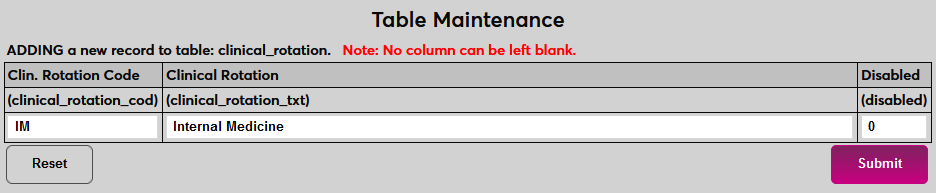
Click Add New to create a new rotation. On the following page, create a description of the clinical rotation type under the Clinical Rotation field. This field has a 100 character limit, so detailed descriptions can be used.

Create a two-character code that will be used to identify the rotation behind the scenes in the Clinical Rotation Code field.
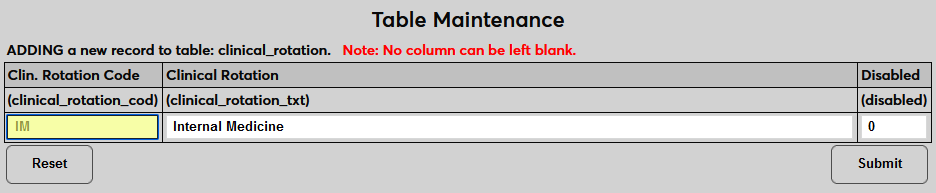
Click Submit to save the changes and create the clinical rotation. Repeat this process as necessary until all rotations that will be offered have been created.
Visit Clinical Rotations for more information on the entire clinical rotations process.
Color
The Color table is used to customize displays, such as in the Login Page Setup, and color code event types.
To add a new color, enter the table and click Add New Record. The Color Code is created automatically by the system when entries are submitted and cannot be modified after creation. Click in the Color field and enter the hexadecimal code for the color being created.
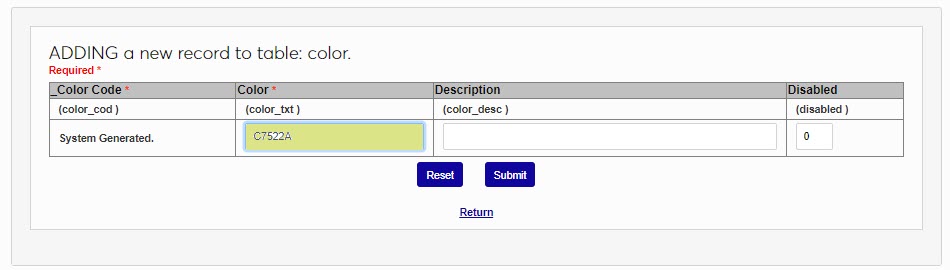
In the Description field, enter the common name of the color or a description of the color. It's important not to skip this step, as this is the opportunity to make it clear to those not familiar with the hexadecimal codes of colors what the color is. This field accepts up to 30 alphanumeric characters and symbols. Click Submit to save the entered information.

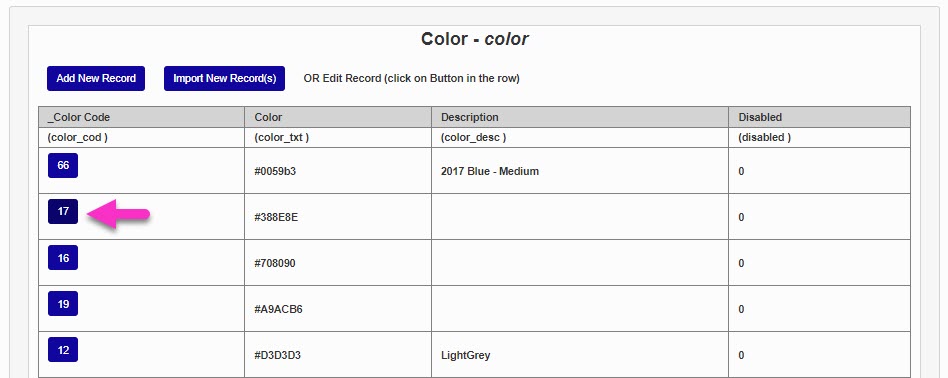
To edit an existing color, click the Color Code. The hexadecimal code of the Color and the Description can be updated.
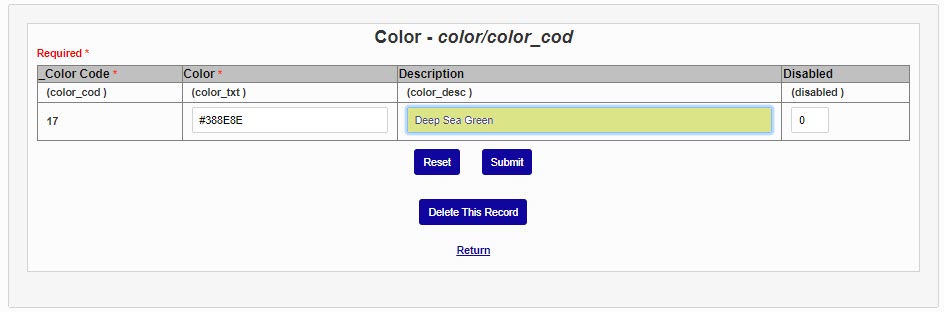
Set the Disabled field to 1 if this color should no longer be used. Click Submit to save any updates.
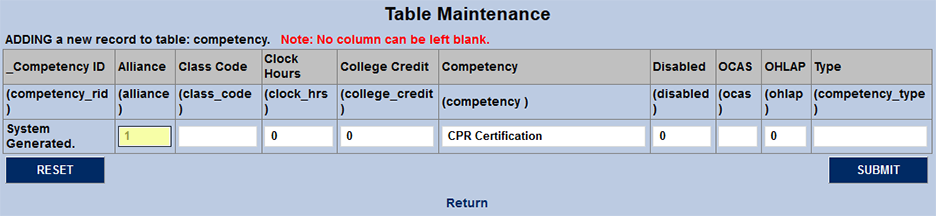
Competency
Career Major Competencies provide a way for schools to certify that a student is now competent in a particular skill or technique.
To create competencies, navigate to the Competency table.
If competencies have already been created, click the Competency ID to make changes. To add a new competency, click Add New Record at the top of the page.
On the following page, create a name for the competency in the Competency field (100-character limit).

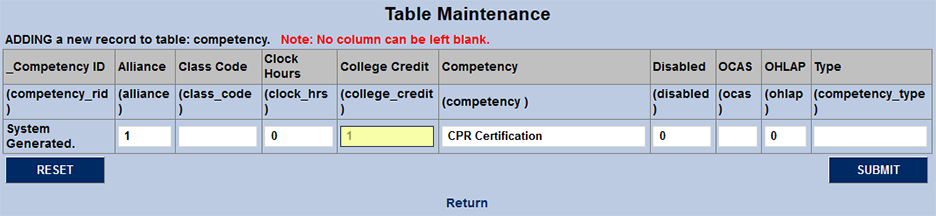
The Alliance column is used for competencies that can be fulfilled at an alliance institution. Place a 1 in this column if the competency fits this criterion. Otherwise, leave a 0 to turn the bit off. Place a 1 in the College Credit field if the competency is an alliance CMC that can be taken for credit. The number of credits the CMC is worth can be set in the Alliance utility.
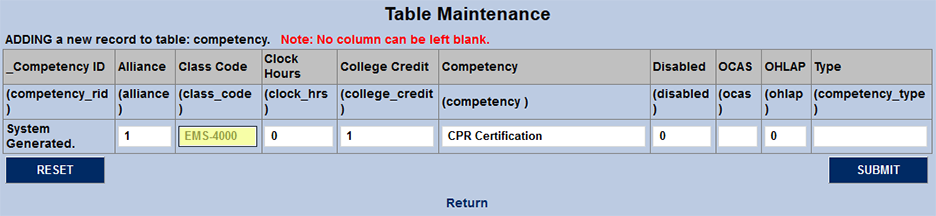
The Class Code field is used to designate the course code equivalence for state reporting. Type a space or a 0 in this field if it does not apply.
The OCAS and OHLAP fields are used by Oklahoma schools for Plan of Study state reporting. Schools that do not fill out these reports should place a 0 or a blank space in both fields.
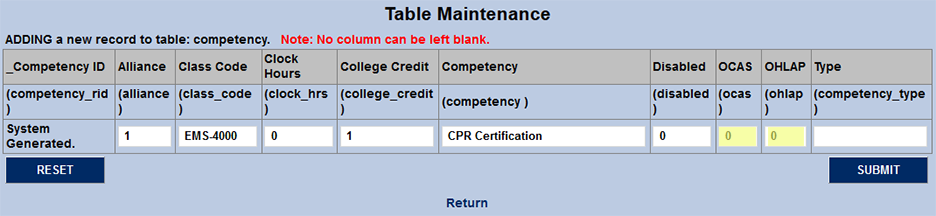
Enter the clock hours needed to acquire the CMC in the Clock Hours field. Leave the 0 if it's not applicable to this competency.

The competency Type is used to group competencies that have commonalities. For example, schools could create a type for codes related to Health Science courses or one for Business-related CMCs. The field holds two characters.
Click Submit to save the changes and create the competency.
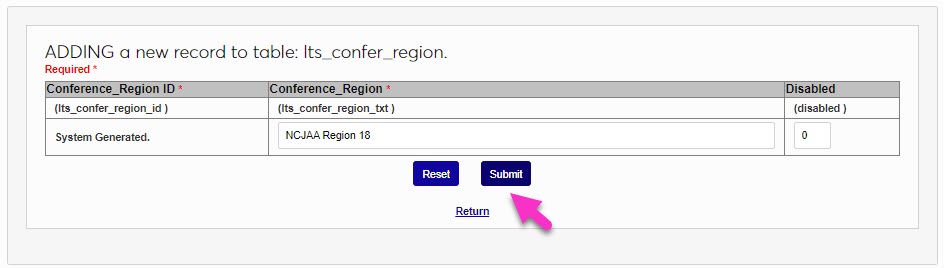
Conference Region
Regional conferences are a geographic area that is defined by an organization such as the ACUI or NCAA. Conference regions are used in different areas within SONIS, but most notably are used in the Online Application.
To add a new conference region, enter the table and click Add New Record. The Conference Region ID is system generated and cannot be modified after creation. Enter the name and/or description of the Conference Region. This field accepts up to 50 alphanumeric characters and symbols.
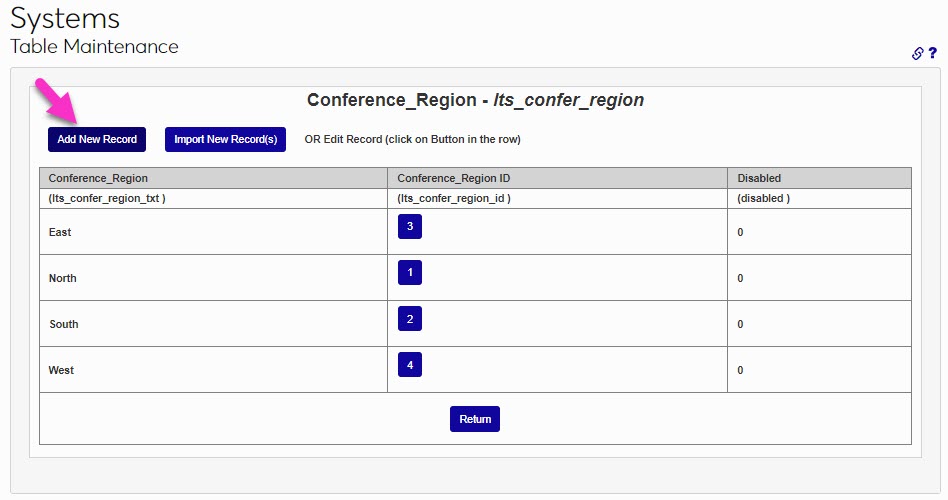

Click Submit to save the entered information and create the conference region.
Constituent Type
The Constituent Type table allows administrators to define the different categories of constituents that are available in pages and processes that use constituent information, such as Development and activities.
Upon entry, all previously defined constituent types are displayed. To create a new constituent type, select Add New Record .

Enter two alphanumeric characters that will become the displayed code in the Constituent Type field.

Enter up to 35 alphanumeric characters as the descriptor of the code in the Constituent Type text field. Click Submit to save the entered information.


To edit an existing constituent type, click on the constituent type code.
The code cannot be changed. Make any desired edits simply by clicking in the Constituent Type text field and updating the displayed information. Click Submit to save the updates.


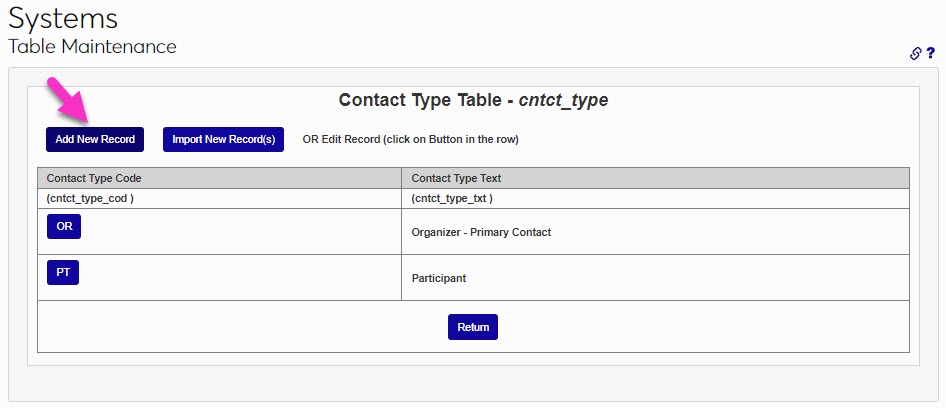
Contact Type
The Contact Type table is used to designate how a contact for a clinical rotation is labeled. It may be used in other areas to classify contacts, as well. For example, there could be a primary contact and lesser designations who are fallback options if the primary contact is unavailable. Click Add New Record to create a new contact type. Create and enter a two-character code that will be used to identify the rotation behind the scenes in the Contact Type Code field. This value must be unique.
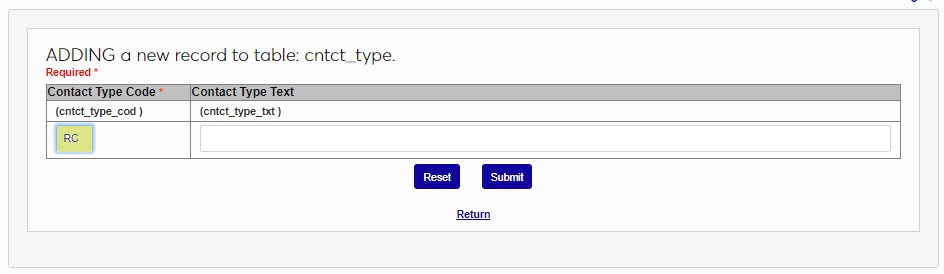
Enter the name for the contact type in the Contact Type Text field. This field has a 100 character limit, so detailed descriptions can be used. Click Submit to save the entries and create the contact type.
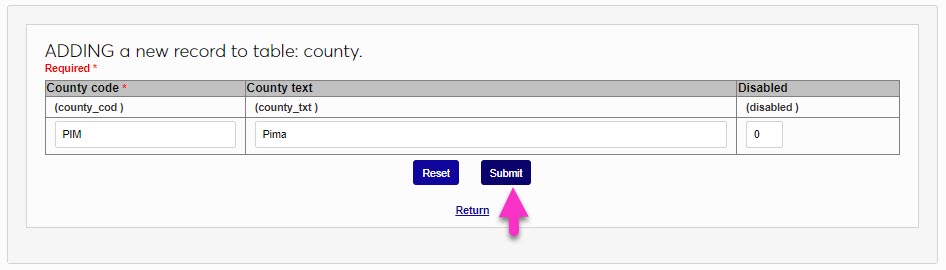
County
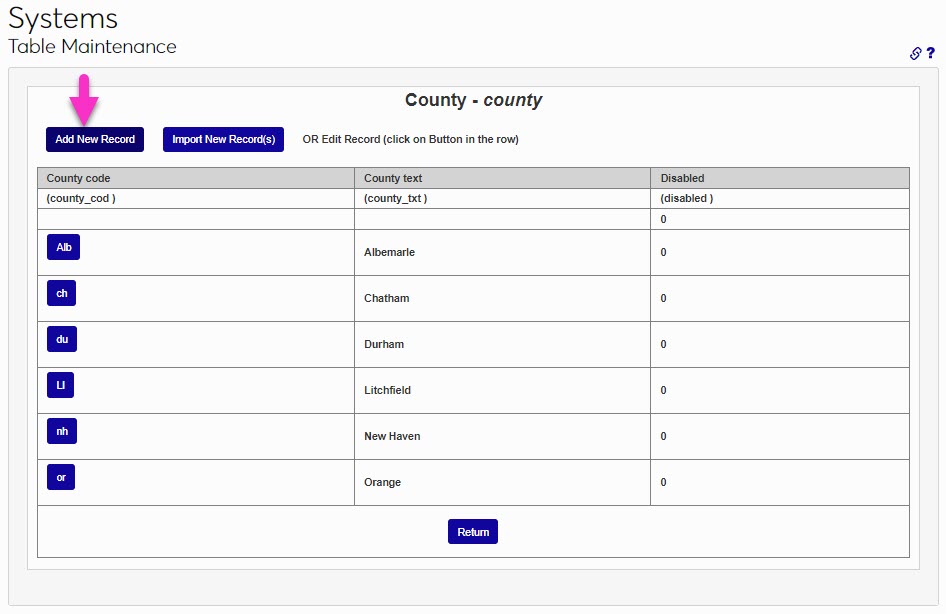
There are a number of places within SONIS where a county must be selected as part of a record. To add a county to SONIS, select the County table and click Add New Record. Enter a code that will represent the country name in the County Code field. This code can be up to 3 alphanumeric characters.
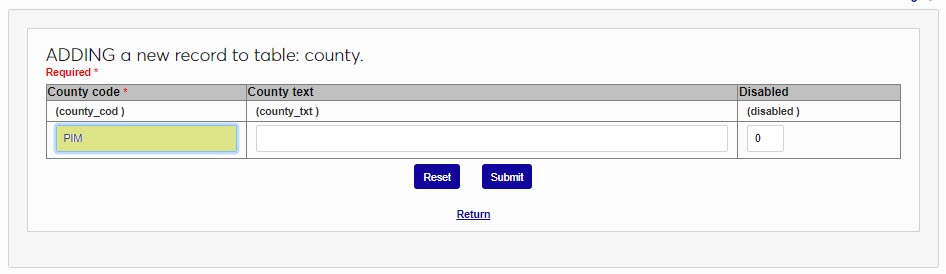
Enter the name of the country in the County Text field. This can be up to 30 alphanumeric characters and/or symbols. Click Submit to save the entered information and create the county.
Country
There are many areas within SONIS where the opportunity to add a country to a record is available. To add a country, select the Country table and click Add New Record.
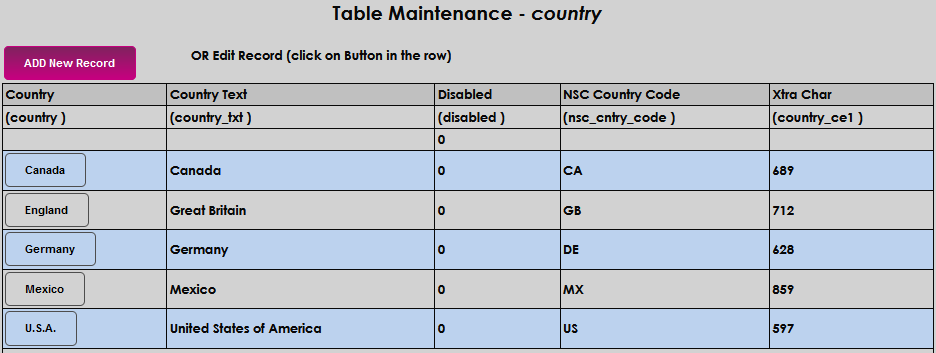
Enter a code that will represent the country name in the Country field. This code can be up to 25 alphanumeric characters.

Enter the name of the country in the Country Text field. This can be up to 60 alphanumeric characters and/or symbols.

Enter the two-letter NSC country code. The codes can be found in the Clearinghouse Enrollment Reporting Guide .

The ISO Country Code field, which is not pictured here, is used by the Canadian Revenue Service functions. Schools that need these values should fill them out based on the three character ISO-3166 Alpha-3 country codes.
The Xtra Char field is provided for schools that have practices that require additional information at the country level. The field allows up to ten alphanumeric characters and is required. If not used by the institution, it is acceptable to enter zeroes.


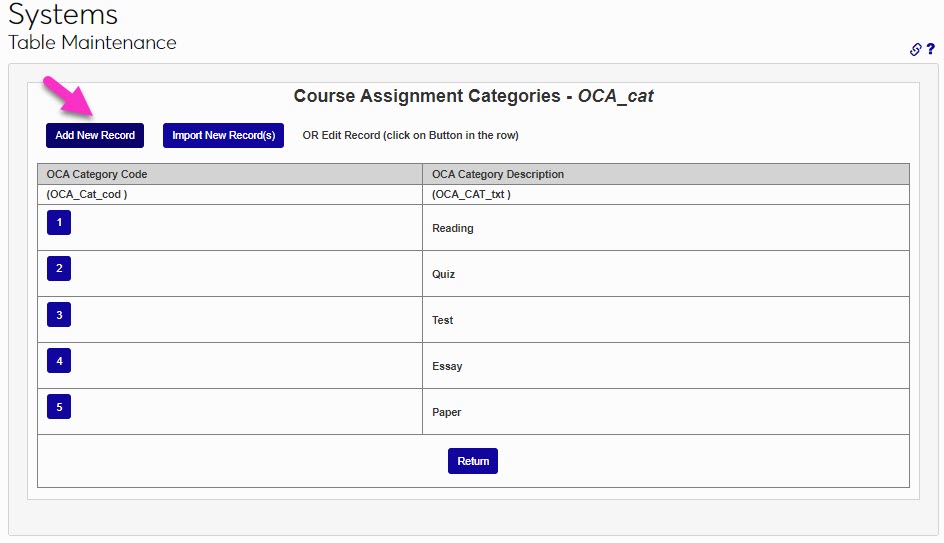
Course Assignment Categories
The Course Assignment Categories table provides the opportunity to define groups of like assignment types. These categories are utilized in various academic and faculty functions throughout SONIS. To add a new category, click Add New Record. The Category Code is system generated and cannot be modified after it is created. Enter the name and/or description of the course assignment category in the OCA Category Description field. This field accepts up to 50 alphanumeric characters and/or symbols. Click Submit to save the entered information and create the category for use.
Course Authorization
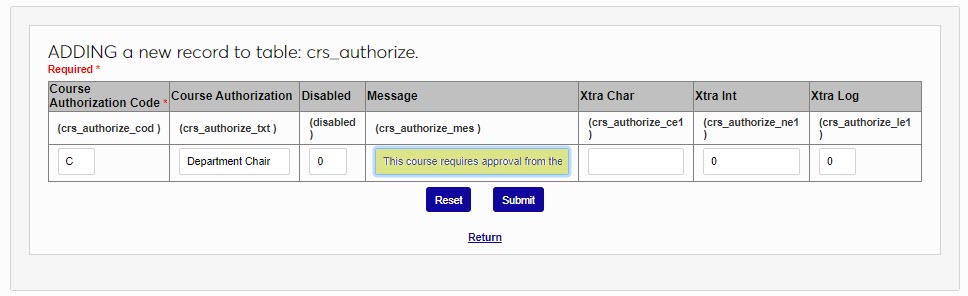
If a course requires authorization for registration, the necessary codes are created and maintained on the Course Authorization table. To create a new course authorization code, click Add New Record. Enter a single character to represent the course authorization type in the Course Authorization Code field.
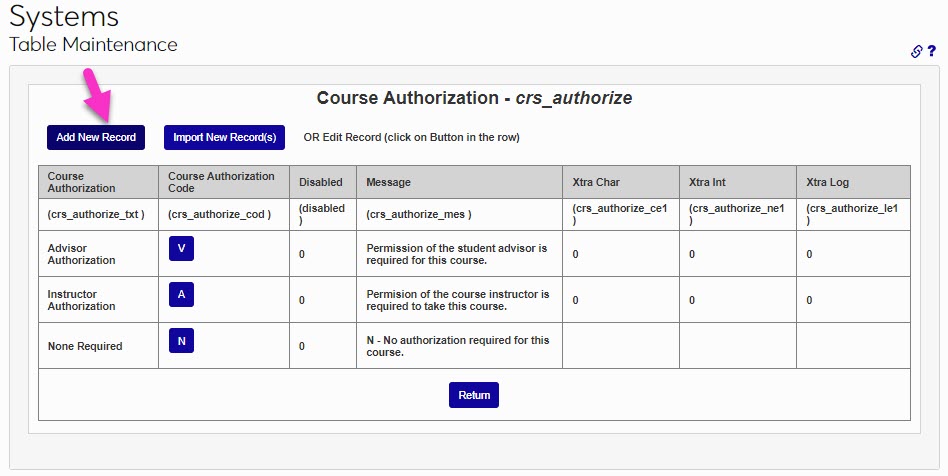
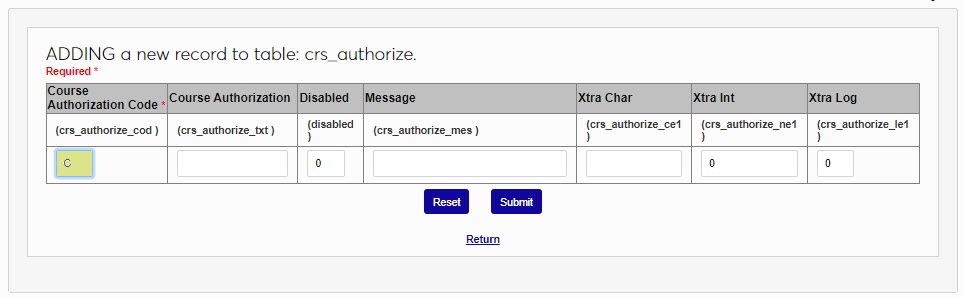
Enter a descriptive name of the course authorization in the Course Authorization field. This field accepts up to 40 alphanumeric characters and/or digits. In the Message field, enter a description of the authorization that will display to those registering themselves or others for the course. This field accepts up to 150 alphanumeric characters and/or symbols. Click Submit to save the entered information and create the authorization.


Course Type
The Course Type table allows the creation and configuration of different course types, including certificate programs that will award a certificate. It may help to think of Course Types as synonymous with a credential or program type. Course Types may not be used by all SONIS institutions. They are generally used for generating transcripts in schools that have multiple levels of programs (i.e., Bachelor’s, Master’s, Ph.D., etc.). Navigate to the Course Type table and click Add New Record to create a new course type or click on an existing Course Type Code name to edit it.
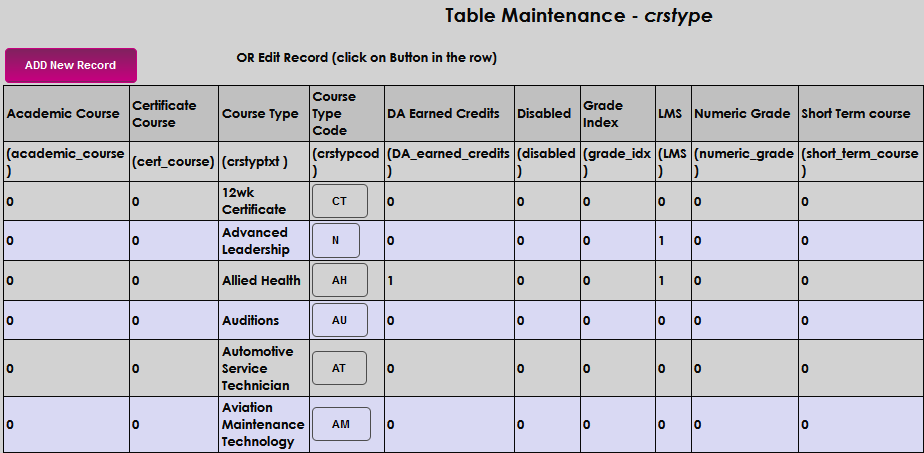
When creating a new Course Type enter a two-character abbreviation to represent the course type being created in the Course Type Code box.

Enter the name of the course type in the Course Type field. This field accepts up to 30 alphanumeric characters.

The Academic Course field is used by a custom report and should be skipped. Whether creating or editing, replace the 0 in the Certificate Course box with a 1 if the course type being created is associated with the awarding of a certificate.

When DA Earned Credits is set to 1 , the Degree Audit Report sums credits from the name class table and displays each course type name as an individual heading of Earned Credits. Basically, it provides a way to quickly display the sum of credits taken within different course types. This is not required but may be a desirable additional data point, depending on the member institution's processes and procedures. If no course types are marked as such, the field doesn't display on the report.

The Grade Index column controls how the associated Course Type can be graded. When assigning grades for a course, the Course Type code and Grade Index will be compared to the setup for the Course Type on the Grades Table. If a 1 is in this field, only the appropriate grade values will be displayed and selectable for grading.

The LMS column is only used by custom reports. This should always be set to 0 unless Jenzabar Support or SONIS Product Development instructs otherwise.

Setting Numeric Grade to 1 instructs SONIS that this is a time period-based grade and should not be calculated in standard grade processing functionality, as well as allows for sorting in grade reports by a numeric value. Member institutions using letter grades only will always set this to 0 .

A custom report uses the Short Term Course field. This should always be set to 0 unless Jenzabar Support or SONIS Product Development instructs otherwise.

Click Submit to save the entered information.
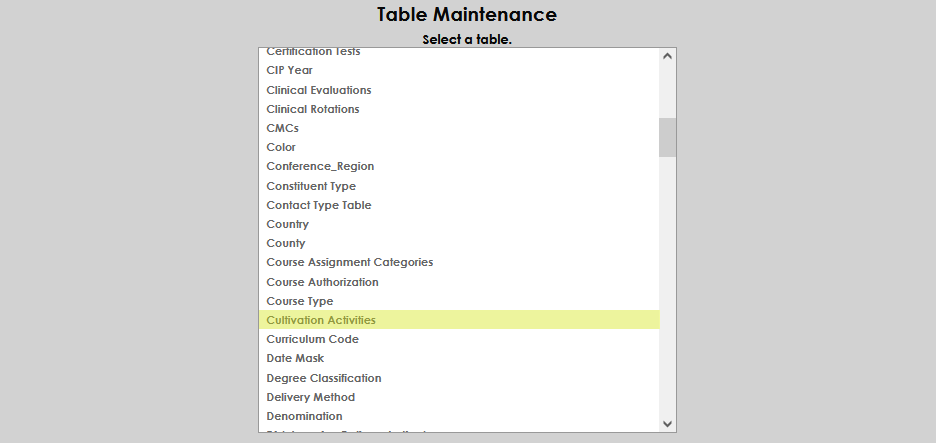
Cultivation Activities
This table is unique to development and fundraising. Unlike Activities, these are dated activities that generally define a development goal with start and end dates. To add a new cultivation activity, click the Add New Record button.
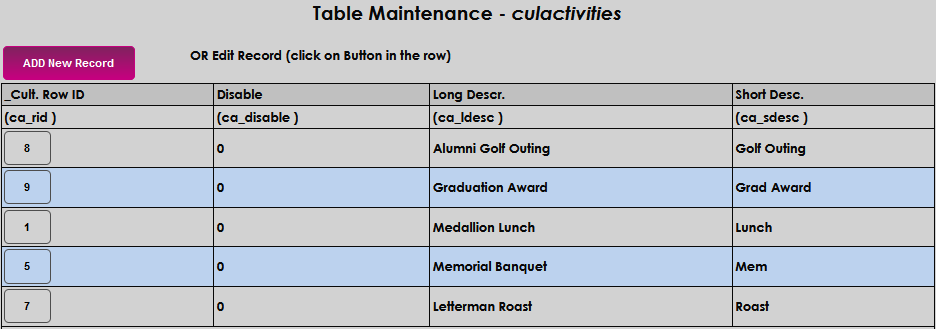
The Cult. Row ID is autogenerated and cannot be edited. Enter a Long Description that describes the activity. This field accepts up to 100 alphanumeric characters and symbols.

Enter a Short Description that briefly describes the activity. This field accepts up to 30 alphanumeric characters and symbols.

Click Submit to save the entered information.

Curriculum Code
Before curricula can be set up for degree audit purposes, they must first be created using the Table Maintenance function in the Systems hub. Select Curriculum Code to begin.
Click Add New Record to begin.
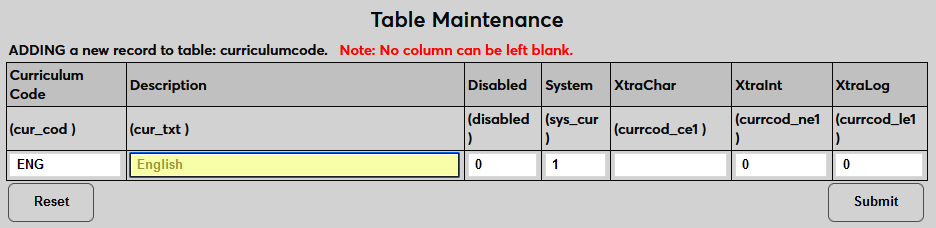
On the following page, name the code using the Description field and set the code itself using the Curriculum Code field, which is usually a shorter version of the description. The Description field has a 40-character limit and the Curriculum Code field has a 10-character limit.
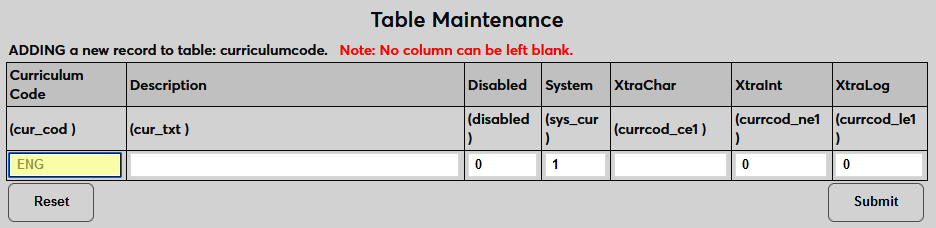
Enter a 1 in the Systems field to allow users to assign the curriculum to any student through their Education record. Leave a 0 in the field to prevent this. Curricula that are not marked as "system" offerings can only be assigned through the Degree Audit: Curriculum Overview page.

Place a 1 in the Disabled field to disable the curriculum and prevent it from being used anywhere in the system or leave the 0 to keep the code enabled. The XtraChar, Xtraint, and XtraLog fields are extra fields that can be relabeled using the Captions utility and then used to store custom data on this page. These fields cannot be left empty. The XtraChar field accepts alphanumeric characters and can be saved with a space if it's not being used. The Xtraint and XtraLog fields are binary and will accept only a one or a zero.
Once all data has been entered, click Submit to save the changes and create the curriculum.
Degree Classification
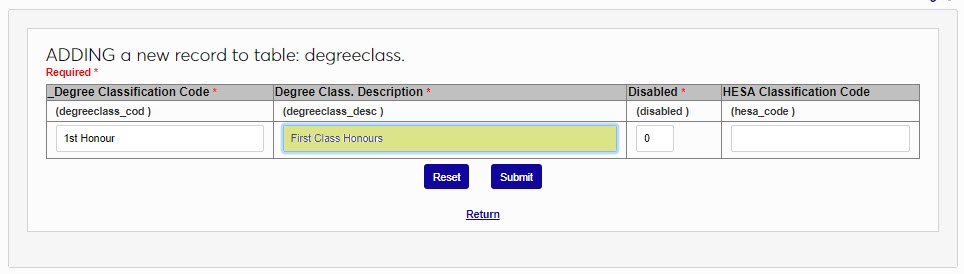
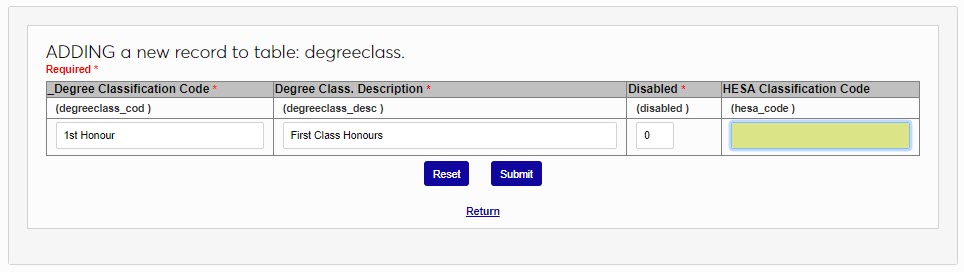
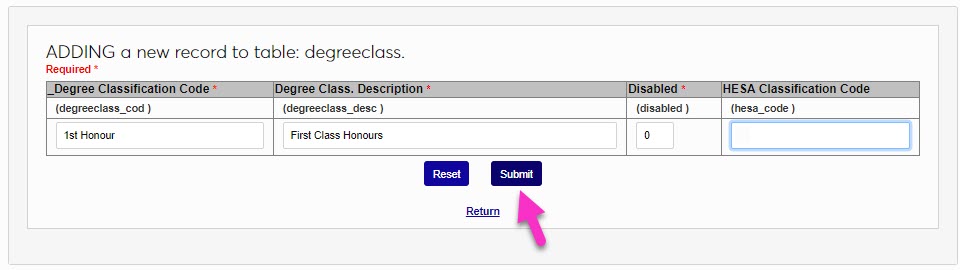
The Degree Classification table is provided to allow institutions to add an additional definition or typology to their custom transcript. Degree classification is commonly used in United Kingdom-based schools and serves to recognize academic achievement beyond examination performance. The Degree Classification field displays in SONIS on the Education record. To add a new Degree Classification, enter the table and click Add New Record. Enter a Degree Classification Code of up to 10 alphanumeric characters.
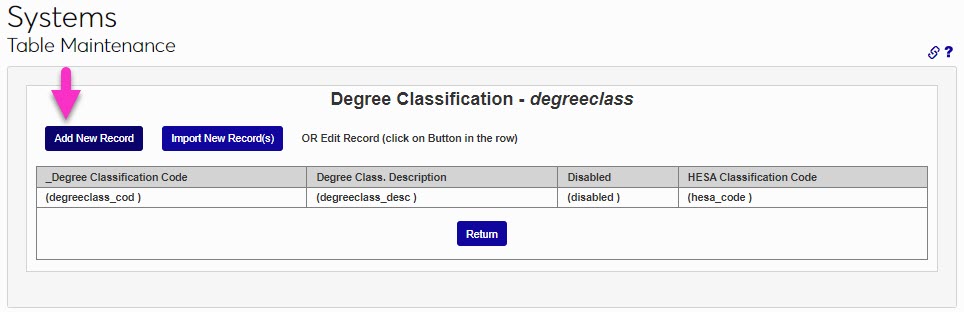
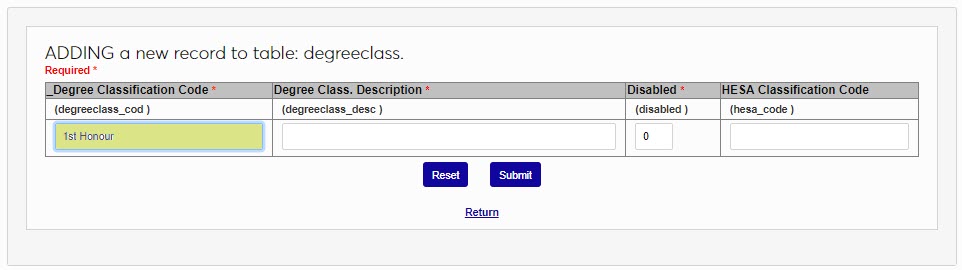
Enter a description of the code in the Degree Class. Description field. This is the value that will display in the Education record and on a custom transcript. The field accepts up to 40 alphanumeric characters and/or symbols. If appropriate, enter the HESA Classification Code, as defined by the HESA. Click Submit to save the entries and create the Degree Classification.
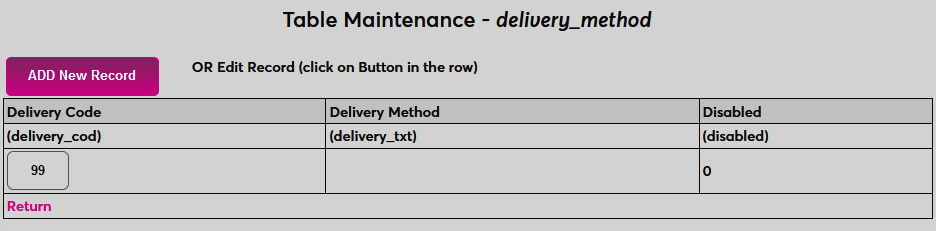
Delivery Method
The Delivery Method is used to describe how a course is provided to students. For example, in-person, hybrid, and web lecture are delivery methods. Before delivery methods can be assigned, they must be created here. Click Add New Record to begin.
On the following page, create a description of the delivery method in the Delivery Method field. This field has a 50-character limit.
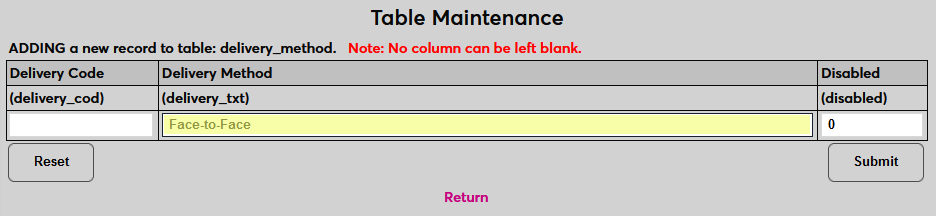
Next, create a two-character code to identify this delivery method in the database. This value will not appear in the SONIS system.
Click Submit to save the changes. Repeat the process until all needed values have been created.
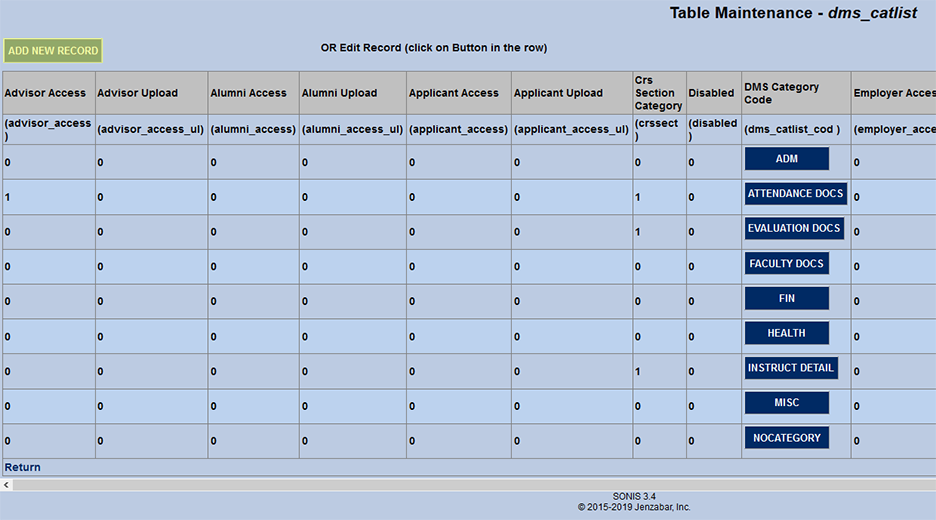
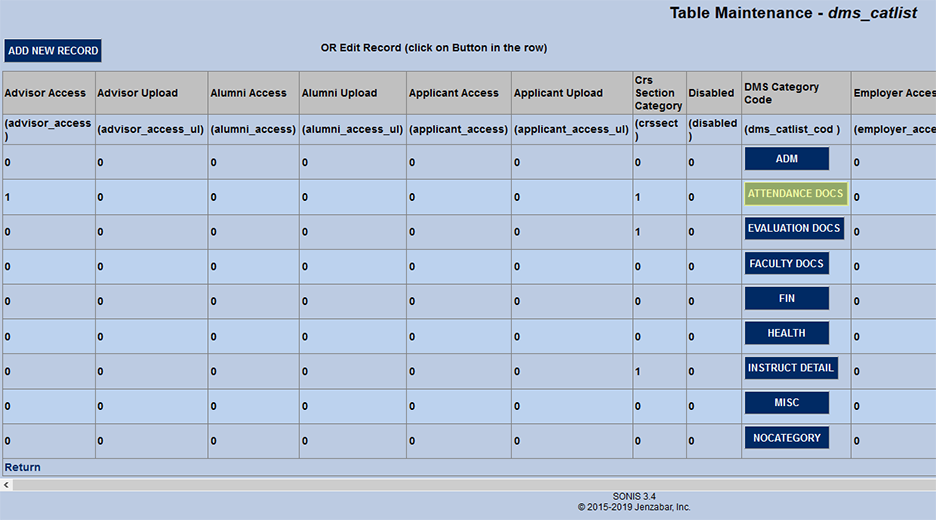
DMS Categories
Files uploaded to the Jenzabar SONIS Document Management System must be categorized for organizational purposes. To create and edit these categories, select DMS Categories.
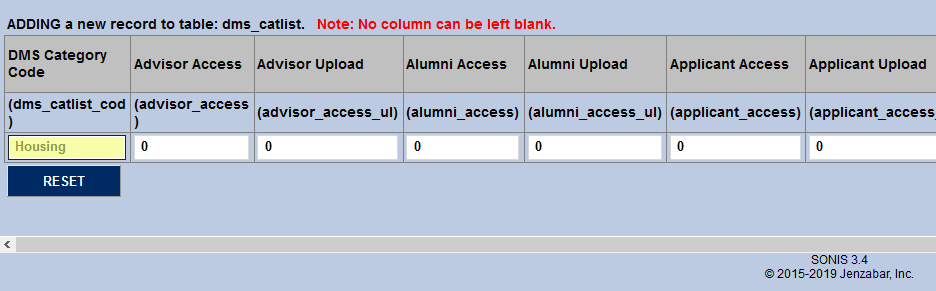
Click Add New Record to create a new DMS category or click on the DMS Category Code to edit an existing category.
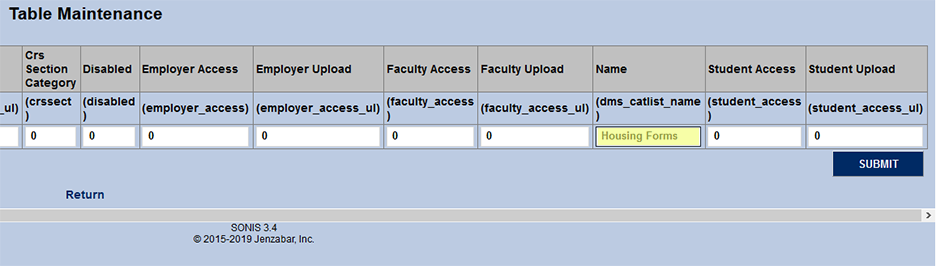
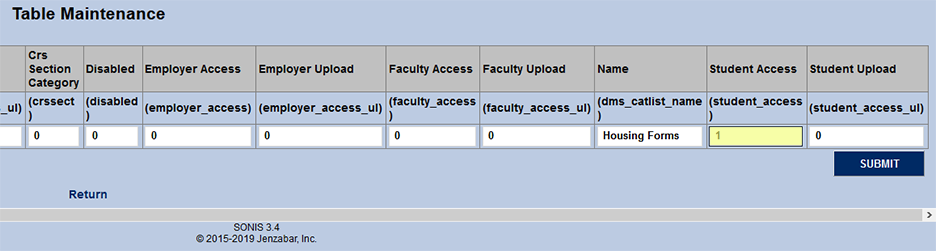
When creating a new record, begin by filling out the Name field with a full-length description of what the category encompasses. The field holds up to 25 characters.
Next create a shortened version of the name as a DMS Category Code. This field holds 16 characters. The value code can not be changed once the category has been created.
The last step in creating a new category is to choose which portals should have access to view and/or upload files that belong to that category. All categories are turned on for the Administration portal unless they're disabled. SONIS administrators can also choose to make them available for the advisor portal, the alumni portal, the applicant portal, and employer portal, the faculty portal, and/or the student portal.
To allow users to access files, meaning they'll be able to view files, put a 1 in the Access Field. To allow users to upload files themselves, put a 1 in the Upload field. Note that turning on upload capability gives the portal user access to the files as well. The Student, Faculty, Applicant, Alumni, and Employer portals provide access to files pertaining to the users themselves. The Advisor option provides faculty members and sponsors with access to files associated with their advisees.

To allow faculty to access files in the category from the students they're currently teaching, place a 1 in the Course Section Category field.
Click the Submit button to save all changes and finalize the creation or edit of the category.
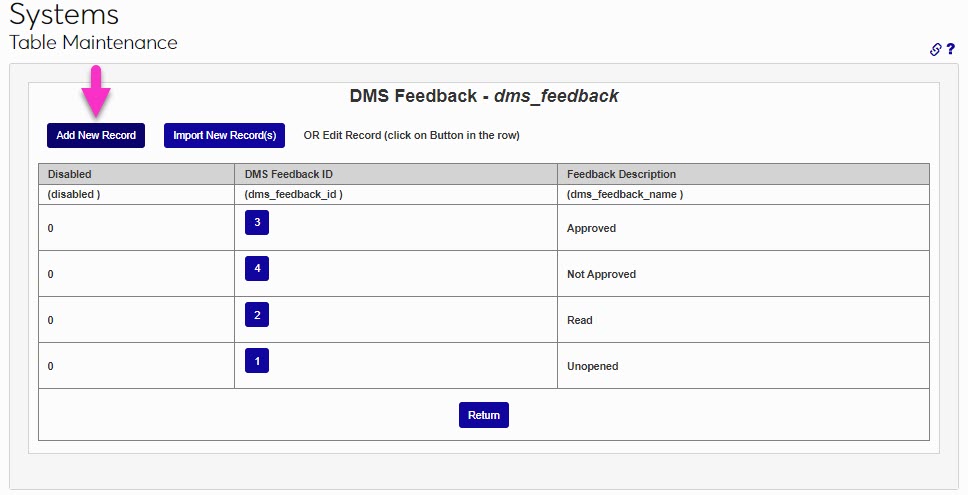
DMS Feedback
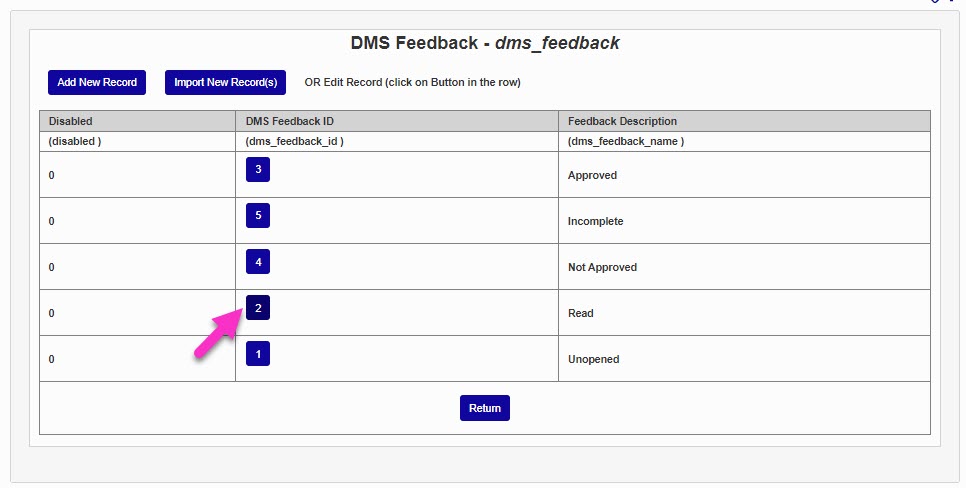
The values in the DMS Feedback table are used in Document Management System processes when users are asked to provide a subjective rating or conclusion about a given document. The values Approved, Not Approved, Read, and Unopened are prepopulated, but are not required. They can be changed and/or added to, as suits institutional business needs.
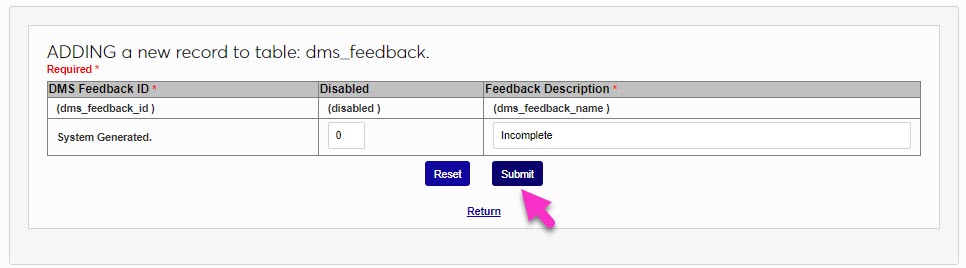
To add a new feedback rating, click Add New Record. The DMS Feedback ID is system generated and will be created automatically. It cannot be modified or edited after it is created. Enter the name of the new rating in the Feedback Description field. This field accepts up to 25 alphanumeric characters and/or symbols.
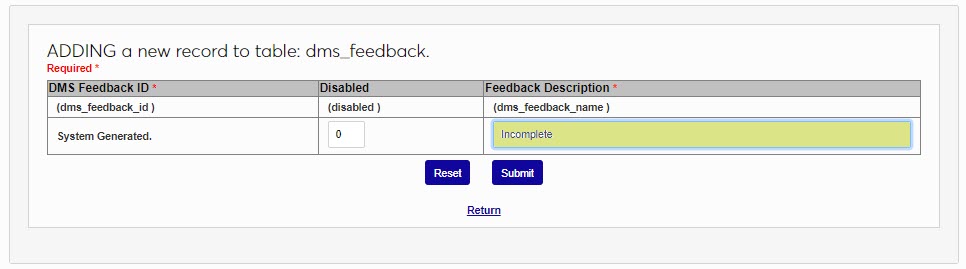
Click Submit to save the entries and create the new rating.
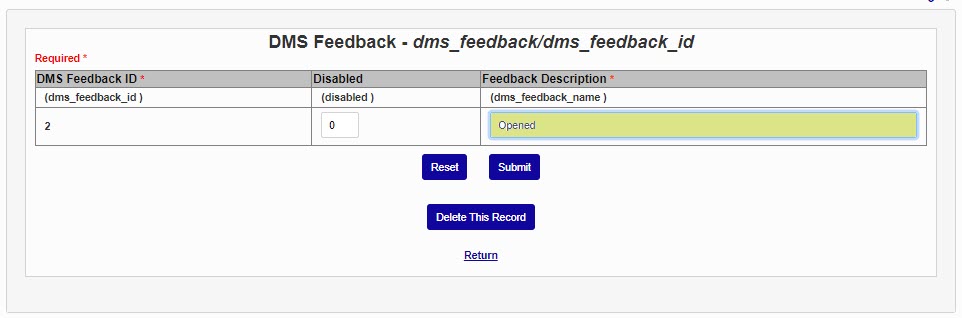
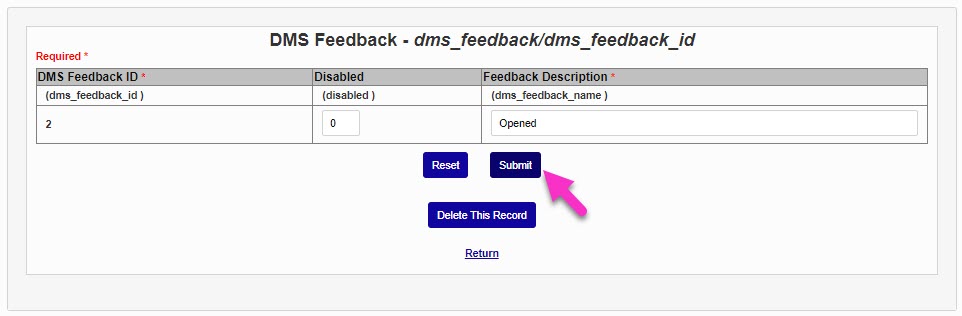
To update an existing rating, click the DMS Feedback ID. Make the desired updates to the Feedback Description and click Submit to save the change.
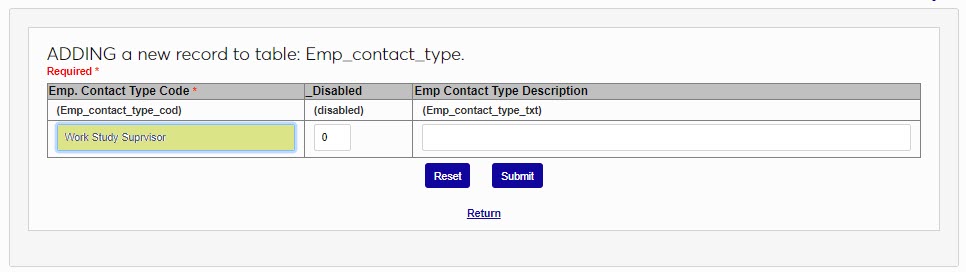
Employer Contact Type
The Employer Contact Types identify the type of contact at an employer and are used in Employment functions. Before adding Employers, Employer Contact Types must be created. To add and employer contact type, enter the table and click Add New Record. Create and enter an Employer Contact Type Code of up to 20 alphanumeric characters and/or symbols.
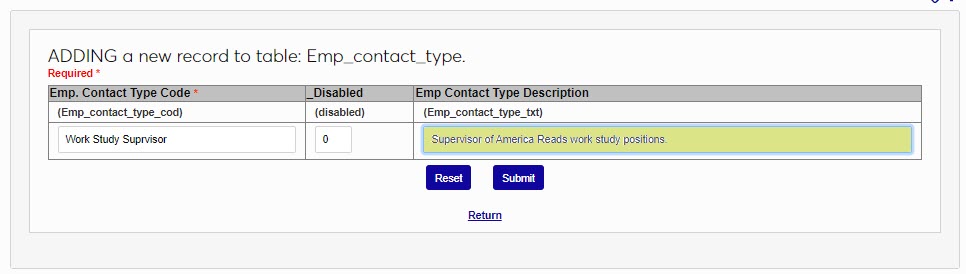
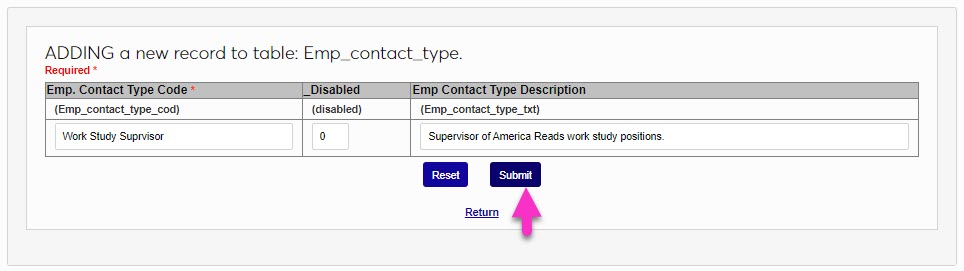
In the Employer Contact Type Description field, describe or define the code created in the previous step. This field accepts up to 50 alphanumeric characters and/or symbols. Click Submit to save the entered information and create the contact type.
Employer Type
The Employer Types table provides the ability to define categories of Employers. Before using the Employment functions or creating Employers, it's important to create these categories. To begin adding an Employer Type, click Add New Record. The Employer Type ID is system generated and cannot be modified.
Enter a descriptor of the Employer Type. This is the value that will be displayed in Employer Type selection areas. This field accepts up to 75 alphanumeric characters and/or symbols. Click Submit to save and create the new Employer Type.
Employment Readiness
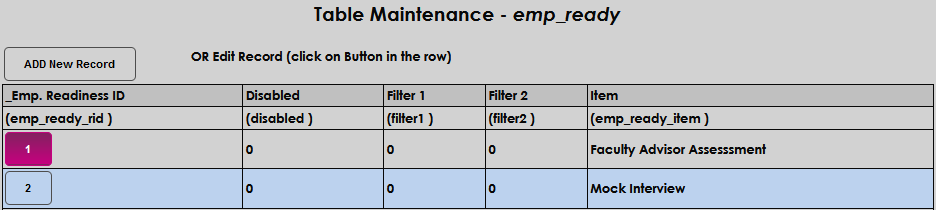
The Employment Readiness table allows administrators to define activities or tasks that will be used to determine a student or graduate's employability or progress towards employability. Adding an item to this table populates the item(s) on the user's Employment Readiness page.
Click Add New Record to enter a new readiness item.

Enter the name of the item in the Item field. Click Submit to save the entry.


To edit an existing record, click the Emp. Readiness ID , make the desired edits to the Item , and click Submit to save the update.
Employment Type
The Employment Type table provides an additional way to define employment. To add an employment type, click Add New Record. The Employment Type Rid is system generated and cannot be modified.
In the Employment Type Text field, enter a brief name of the type of employment. This field accepts up to 15 alphanumeric characters and/or symbols. Click Submit to save the entries and create the employment type.

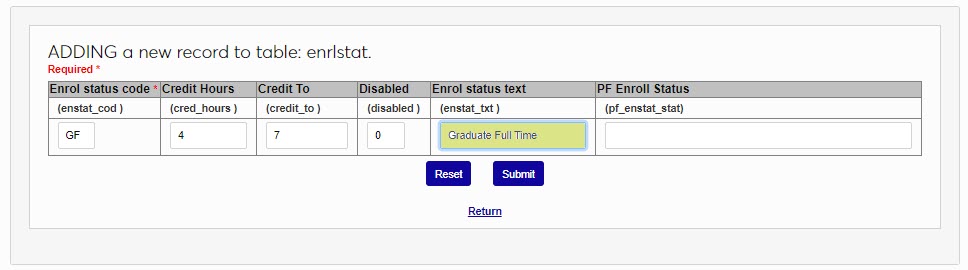
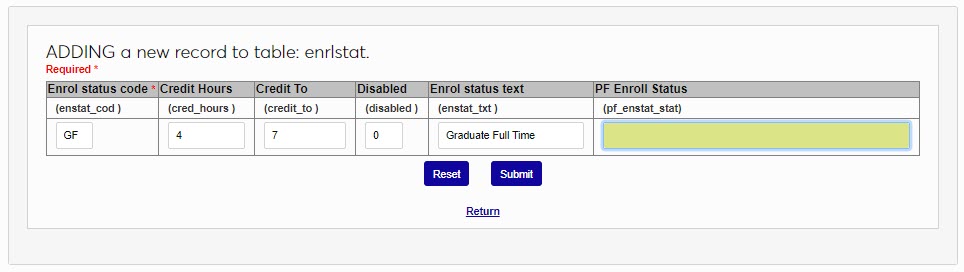
Enrollment Status
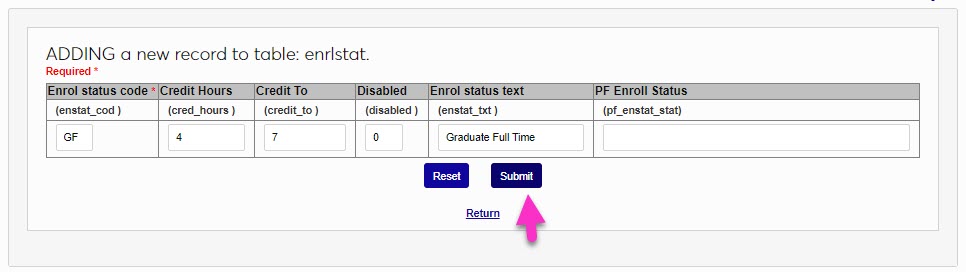
The Enrollment Status table is used to define the different categories associated with identifying the number of courses a student is enrolled in and making it equal to an amount of time, such as six credits equaling part-time, 12 credits equaling full-time, 3 credits of graduate work equaling half-time, or 0 credits equaling not enrolled. These values will depend largely on institutional definitions and processes and will be used in many functions such as Satisfactory Academic Progress, Clearinghouse Reporting, and Financial Aid. To set values based on a specific degree type, first create the needed enrollment statuses here, and then use the Alternate Enrollment Status Utility to associate the statuses with degrees. To add a new Enrollment Status, click Add New Record. Enter a two character Enrollment Status Code.
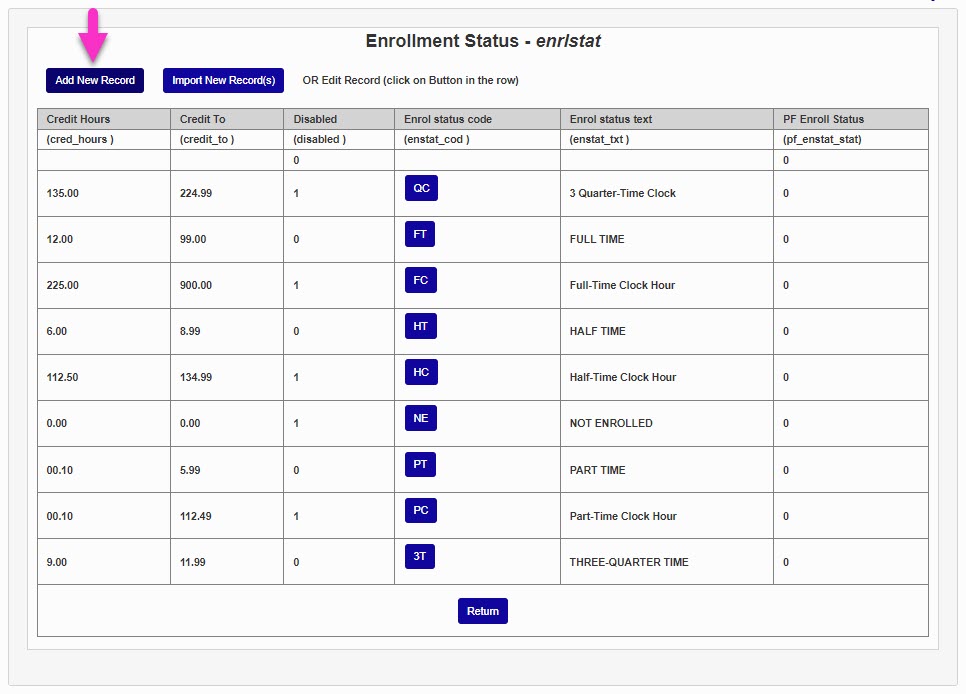
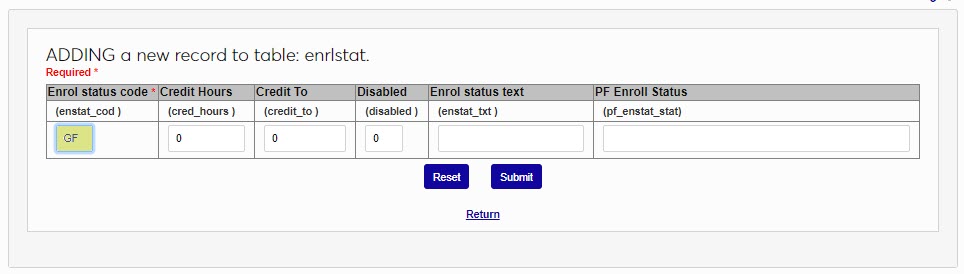
Enter the low range of the hours in the Credit Hours field and the high range of the hours in the Credit To field.
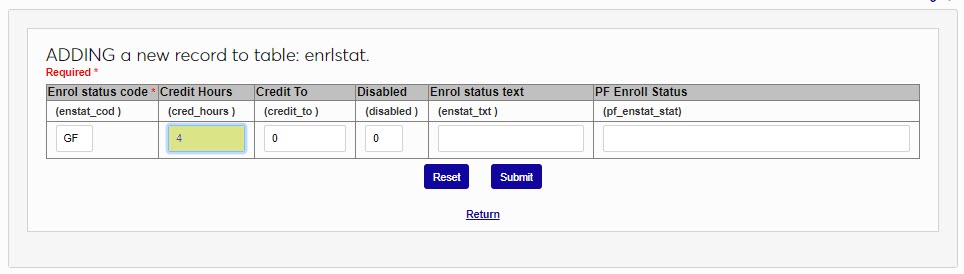
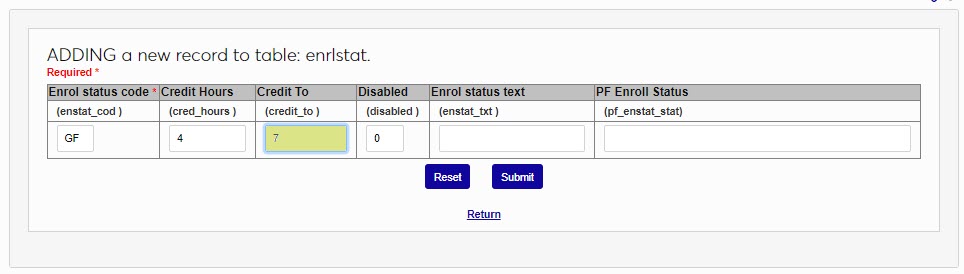
In the Enrollment Status Text field, enter the name of the enrollment status. This field accepts up to 20 alphanumeric characters and/or symbols. If PowerFAIDS is used by the institution and this enrollment status will be considered in PowerFAIDS processing, enter the equivalent enrollment status from PowerFAIDS in the PF Enroll Status field. These values can be obtained from PowerFAIDS. Click Submit to save the entered information and create the enrollment status.
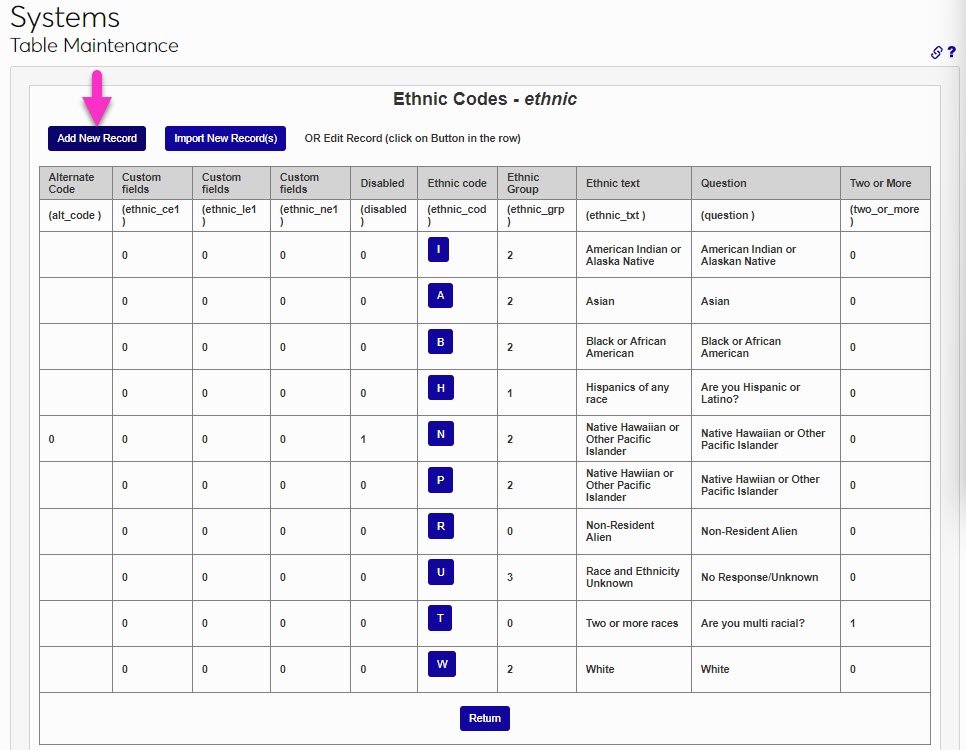
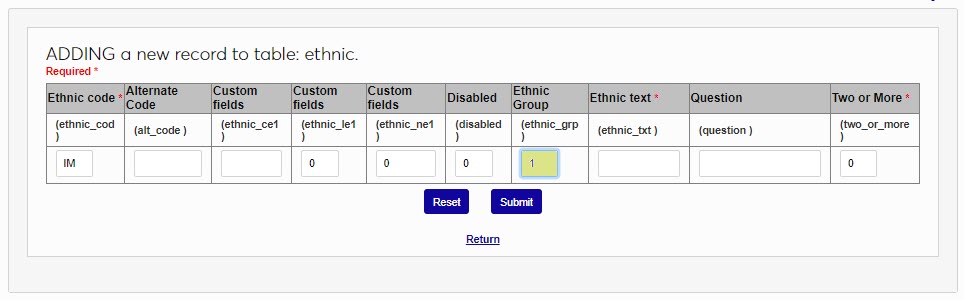
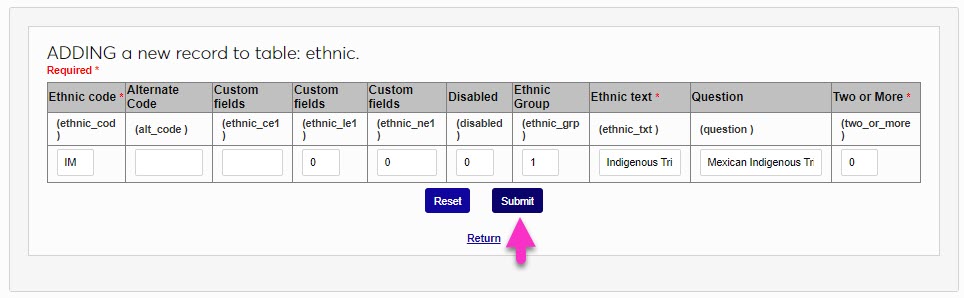
Ethnic Codes
There are different areas in SONIS that utilize ethnicity codes for allowing users to enter their ethnicity, such as the Online Application, and for institutional reporting purposes, such as in IPEDS Reporting. Some values are defined by government organizations. It's important to become familiar with these requirements before populating or modifying any values in the Ethnic Codes table. To add a new value, click the Add New Record button. Enter a 2 character Ethnic Code.
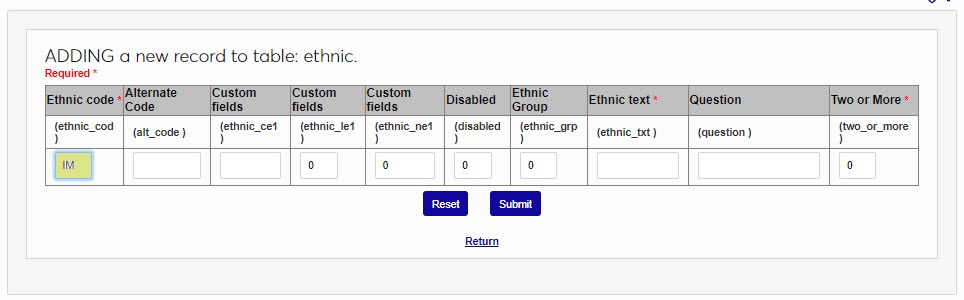
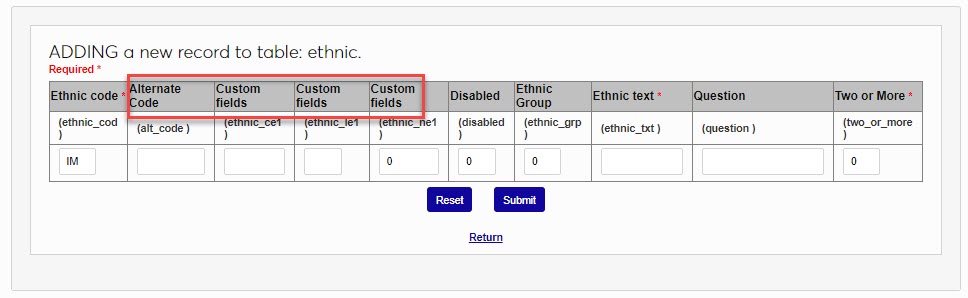
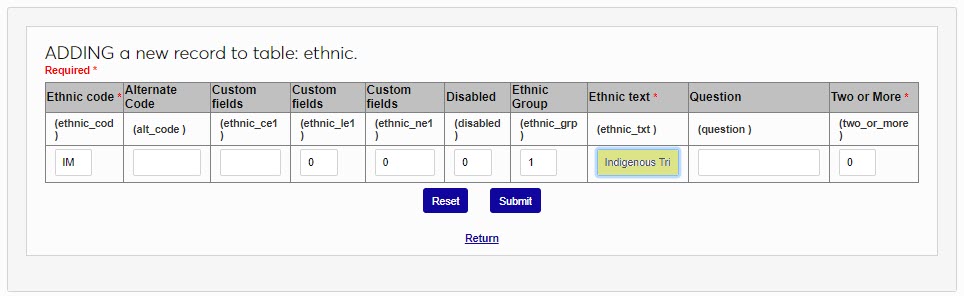
Enter an Alternate Code or Custom Fields if used in institutional business practices; if not used, skip. The Alternate Code allows up to 10 alphanumeric characters and/or symbols. The Custom Field lengths are set by the institution and may not display for all institutions.
Enter a 1 if this is not a government-defined Ethnic Group. If this is, leave the default 0. Describe the group in the Ethnic Text field. This field accepts up to 60 alphanumeric characters and/or symbols.
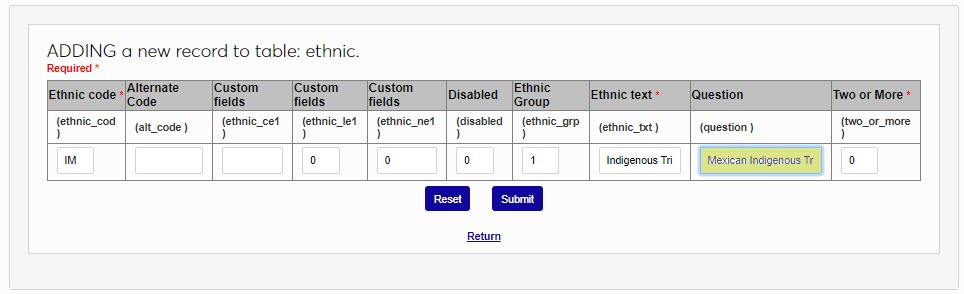
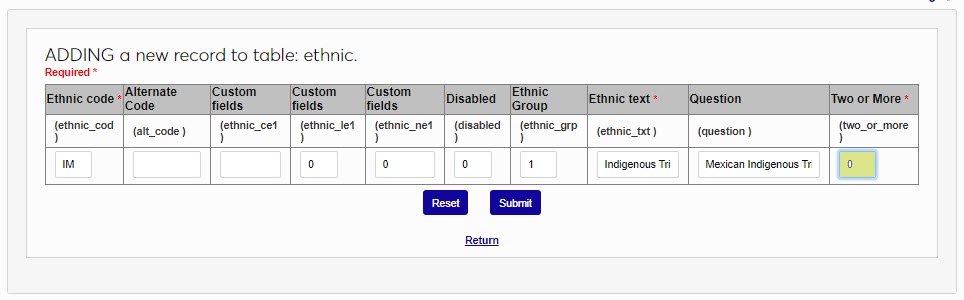
Enter the phrasing that will be presented to the user in the Question field. The Two or More field is set at 0 to allow users to select two or more ethnic codes. Change to 1 if users selecting this ethnic code should not be able to select any other ethnic code with this one. Click Submit to save the entered information.
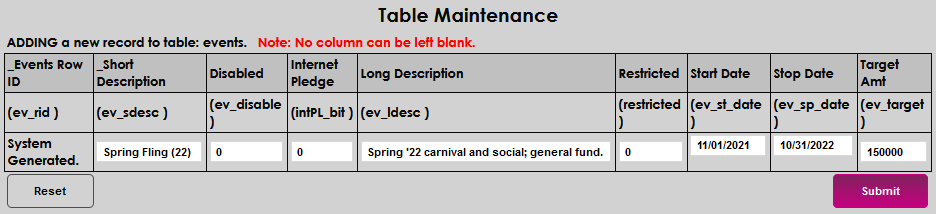
Events
The Events table is used only for development and fundraising pages and processes. An Event is a campaign that can be pledged to, have gifts made toward, or volunteered for. For example, an alumni golf fundraiser. They can be specific to a fund or a building, such as a Nursing Scholarship or a new gymnasium. To add a new event, click Add New Record.
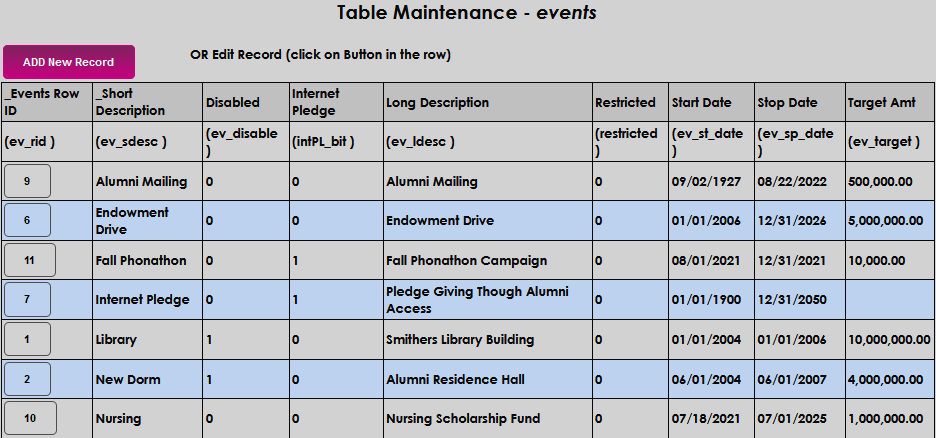
Enter a Short Description that describes the event in brief. It may be up to 20 alphanumeric characters and symbols.

If constituents should have the opportunity to make a pledge toward the event via the internet, set the Internet Pledge field to 0 (zero).

Enter a longer description of the event in the Long Description field. This field accepts up to 45 alphanumeric characters and symbols.

Enter the date the event is scheduled to begin in the Start Date field and the date it is scheduled to end in the Stop Date .


Enter the events fundraising goal amount in the Target Amount field. Click Submit to save the entries.

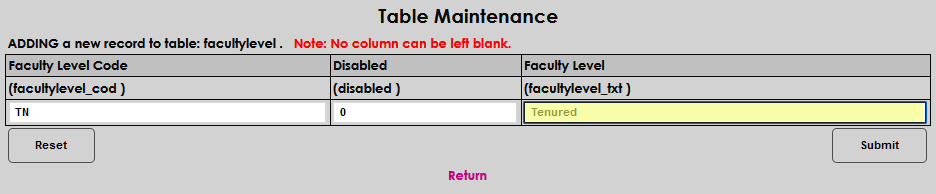
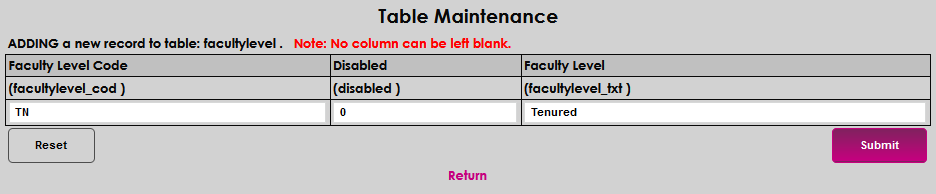
Faculty Level
The Faculty Level table provides the ability to distinguish between different types, grades, and/or seniority levels of faculty. The created levels populate a menu on the Salary, Faculty Users hub page. Click Add New Record to begin adding a new faculty level.
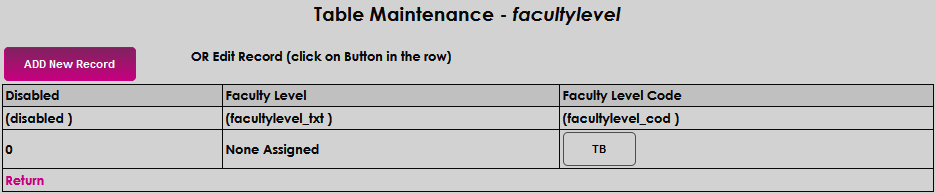
Enter up to two alphanumeric characters that will be the Faculty Level Code .
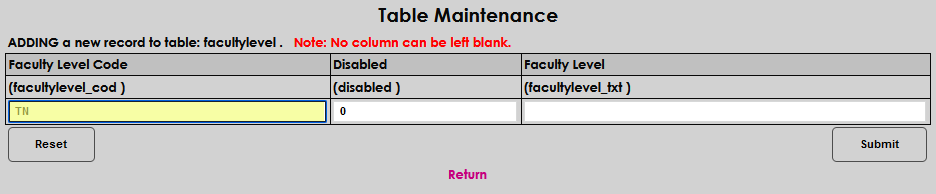
Enter up to 20 characters that will become the Faculty Level . Click Submit to save the entries.
Faculty Type
The Faculty Type table provides the ability to distinguish between different types of faculty. The created types populate a menu on the Salary, Faculty Users hub page. Click Add New Record to begin adding a new faculty type.
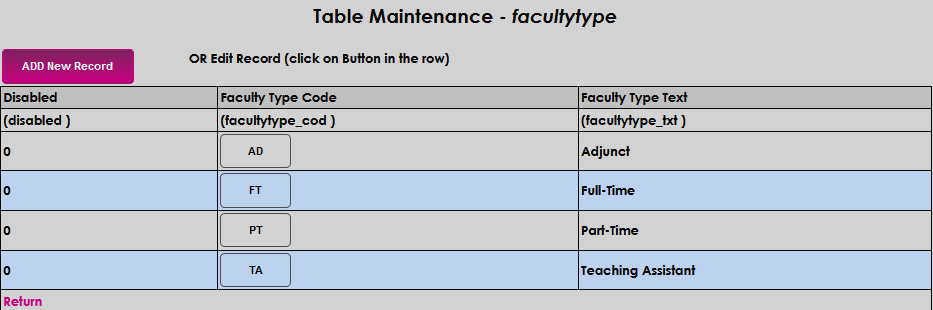
Enter up to two alphanumeric characters that will be the Faculty Type Code .

Enter up to 20 characters that will become the Faculty Type descriptor. Click Submit to save the entries.

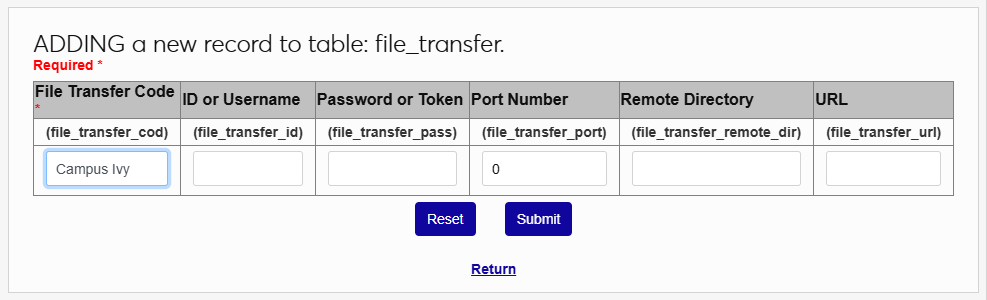
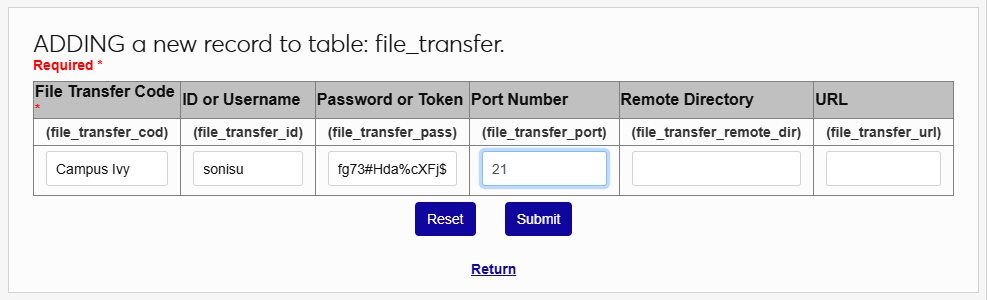
File Transfer
The File Transfer table, formerly known as the LMS Transfer table, is used to define the settings needed to enable a file transfer from a learning management system or other third party product.
Note
In this example, Campus Ivy is being set up. Some file transfers may not require every field.
Select File Transfer and click Add New Record to begin.
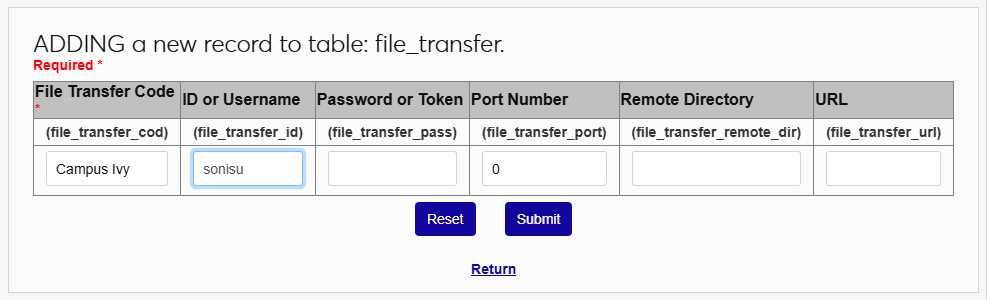
On the following page, give the entry a descriptive name using the File Transfer Code field.
Next, enter the administrative username and password used to access the LMS in the ID or Username and Password or Token fields.
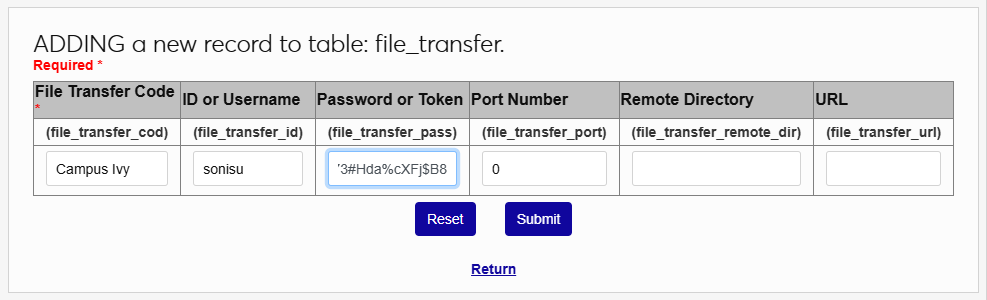
Enter the Port Number for the port that is used for SFTP transfer.
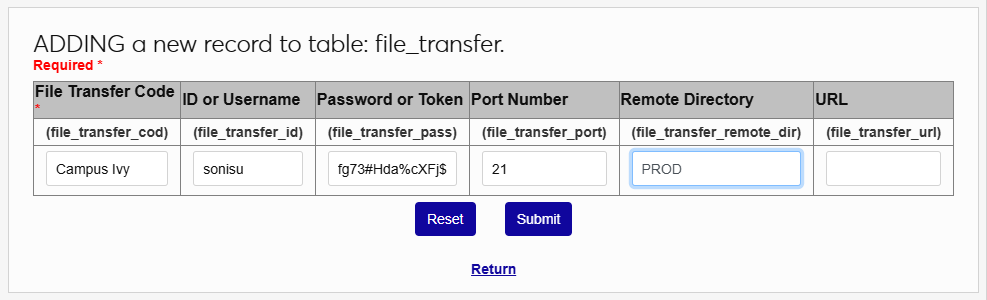
The Remote Directory field is used to designate the folder where the files are located. This will be PROD for most users, but may be QA for clients running a test account.
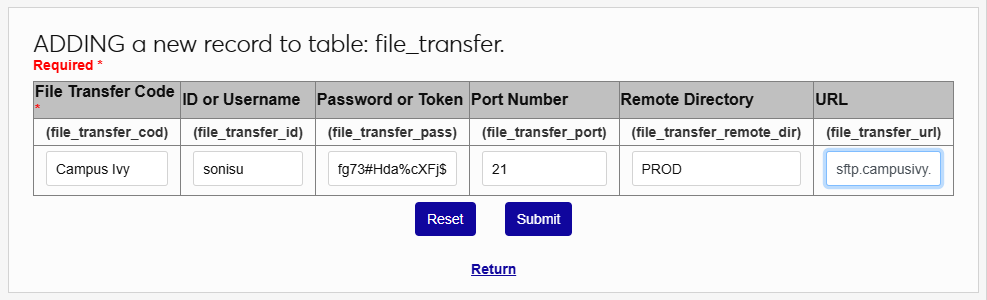
Finally, enter the URL that SONIS will use to communicate with the product. Click Submit to save the changes.
Note
The URL for Canvas must be all lowercase or an error will occur.
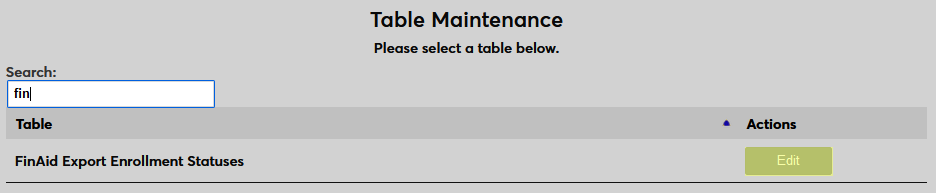
Financial Aid Export Enrollment Status
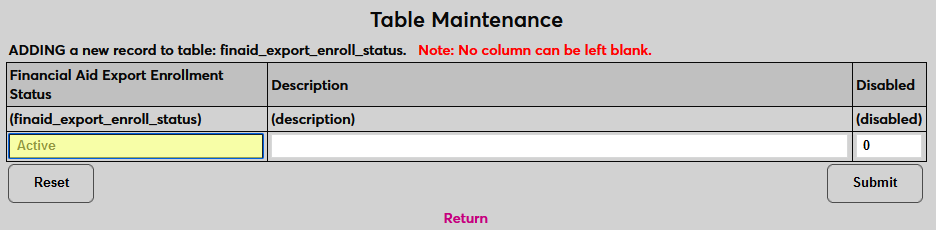
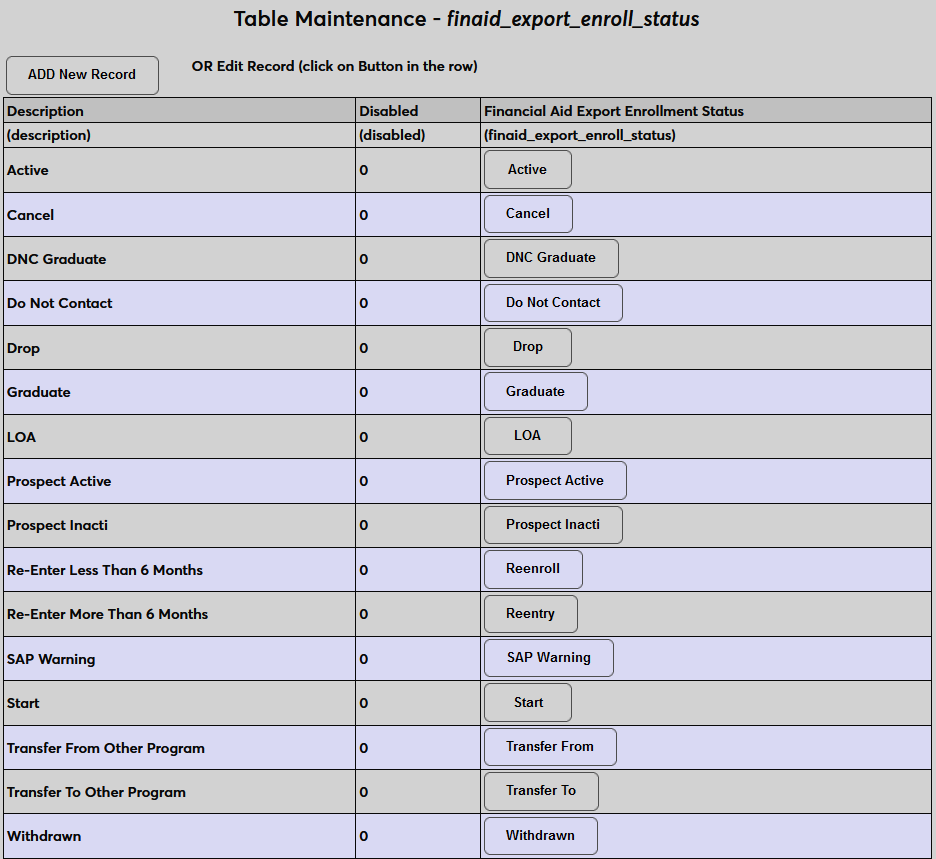
When exporting financial aid recipients to a third-party processing or reporting system, up-to-date enrollment statuses are generally required. In the example below, enrollment status is defined for the Campus Ivy export. To create enrollment statuses, find the Financial Aid Enrollment Status table and click Edit. Then click Add New Record to begin.

Create a name for the status using the Financial Aid Export Enrollment Status. This is how the status will be identified in the table and is the value that will be exported to Campus Ivy. The field has a 50-character limit.
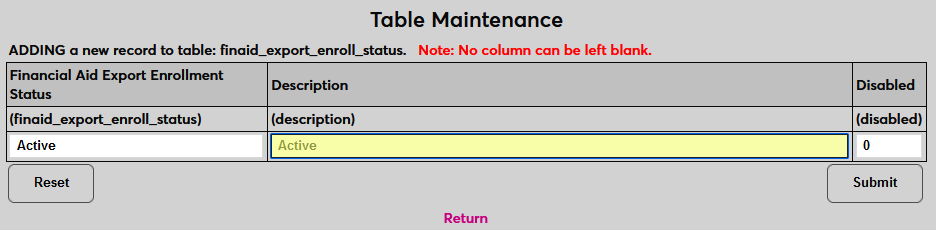
Next, create a Description of the status. This is how the status will be identified in the SONIS system and can contain additional details. The field has a 250-character limit.
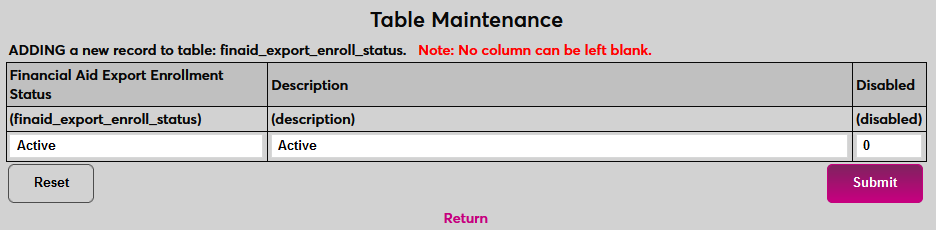
Click Submit to save the new status. Repeat the process until all statuses used in Campus Ivy have been created.
Fund Raiser Codes
Fund Raiser Codes are used when recording a pledge or development payment on a constituent's record.
Select Add a New Record .
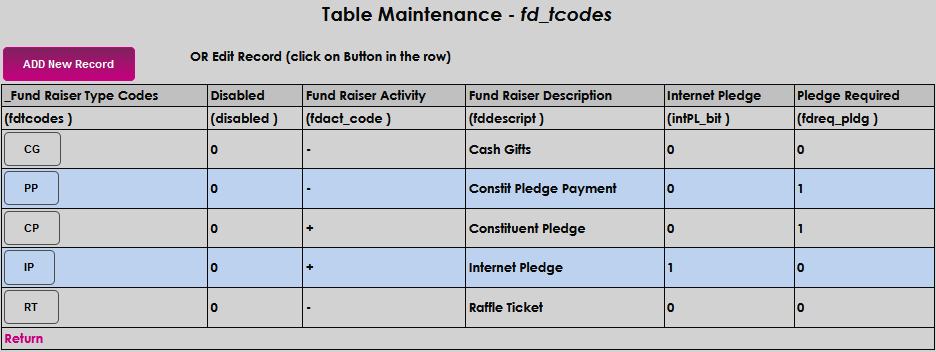
Create and enter a two-character alphanumeric code for the type of fundraiser in the Fund Raiser Type Codes field.

In the Fund Raiser Activity field, enter a + if this activity should act as a credit or a - if this activity should act as a debit when applied.

Enter the name that should display in selection menus in the Fund Raiser Description field. The field accepts up to 22 alpha-numeric characters.

If an donor can make a pledge to this fundraiser on the internet, enter a 1 in the Internet Pledge field.

The Pledge Required field controls what kind of payments can be accepted toward this fundraiser. With a 1 , a pledge must be selected when entering the payment. A 0 allows this code to be used for one-time payments.

Click Submit to save the entered information.

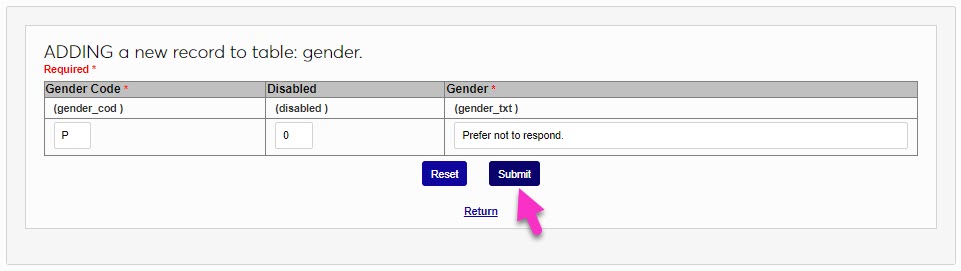
Gender
The values on the Gender table are used throughout SONIS, in a wide variety of places, from the Online Application and the Biographic page, to IPEDS and institutional reports. To add a new gender, click the Add New Record button. Enter a single alphanumeric character that will be the Gender Code.
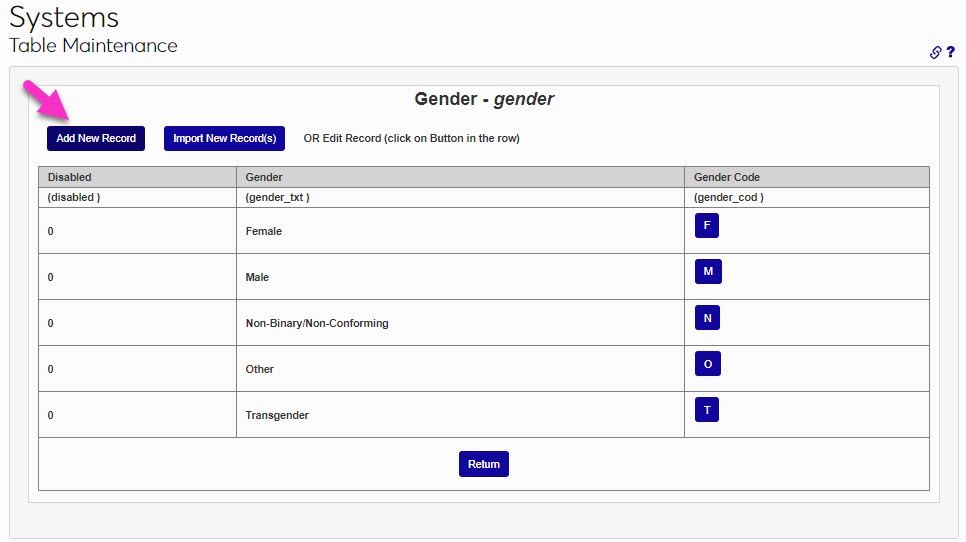
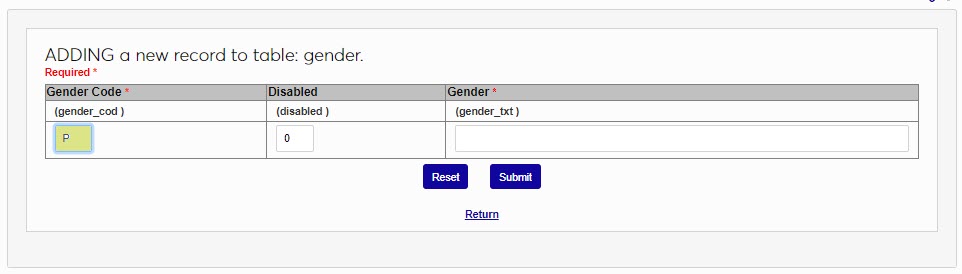
In the Gender field, enter the name of the gender being created. This field accepts up to 25 alphanumeric characters. Click Submit to save the entered information and create the gender.

Grades
The Grades table is used to create new grades and edit existing grades. The grades can be all on the same scale or can be given different weights by placing them on separate grade indexes. The same functionality is available in the Grade Utility in a different format.
To add a new grade, navigate to the Grades table and click the Add New Record button.

On the following page, enter the Grade , which will be the displayed value for administrators. Then enter the Display Grade ; the value that students and faculty will see. If the display grade is identical to the grade itself, then this field can be left blank, but it may be wise to enter a grade either way for consistency.


Next, select a Grade Index . If the institution only uses one index or the grade is part of the standard index, leave the default 0 . If additional grade indexes are in use already, enter a 1 . To have an additional grade index created, contact SONIS Support.

Enter a 1 in the Pass-Fail box if the grade will be used for grading Pass/Fail courses. If it will not, leave the 0 .

Enter a 1 in the Passing Grade box if the grade will indicate that the student has passed the course. Leave it a 0 if a student who is assigned this grade will receive no credit.

Set the numeric score range for the grade using the High and Low fields. Students who score within this range will be assigned the grade. Values up to two decimal points should be used where applicable.


Enter the numeric value of the grade in the Points field. This field will be used when calculating GPAs.

If this grade will indicate that the student did not complete the course, enter a 1 in the Incomplete Grade field.

If the Not in GPA field has a 1 , the grade will not be used when calculating student GPAs. Such grades are typically used for Continuing Education or required-but-not-for-credit courses.

If the Uncounted Credits field has a 1 , the grade won't affect the student's GPA and they won't get credit for having taken the course. This can affect SAP, graduation, financial aid, repeats, etc. Audit course grades should generally utilize this option.

If the No Repeat Grade field is 1 , the student cannot replace the grade, and each repetition of the course will be graded separately.

Setting the Exclude Faculty field to 1 prevents faculty from having access to assign the grade. Grades with this option activated can only be assigned by administrators.

Grades with a 1 in the Note Required field can only be entered with a note explaining the grade assignment. When a faculty member selects a grade with the Note Required option active, a memo box appears for the accompanying note. The grade cannot be submitted if a note is not entered. The requirement to enter a note does not apply to administrators.

Enter a 1 in the CMC Grade box if the grade can be used to fulfill CMC requirements.

Click Submit to save the changes and create the grade.

Groups
At times, it may be appropriate to associate a user with an institutional group. The desired groups must be defined on the table, and administrators can then assign users to groups on the corresponding Users page, as well as maintain the association.
To add a new group, click Add New Record. Enter a name for the group in the Group Name field. This field accepts up to 25 alphanumeric characters.
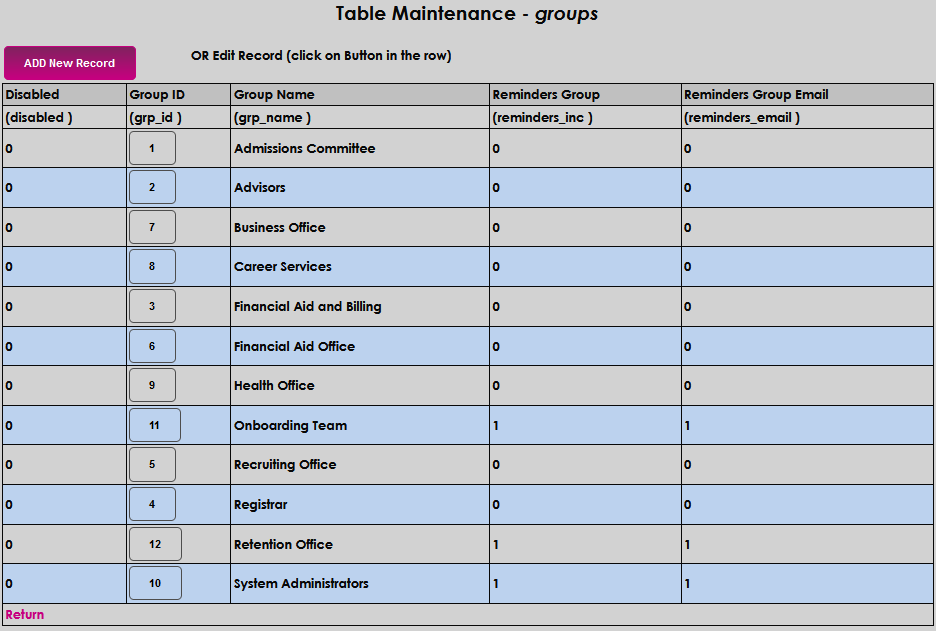

If the group will also be a part of a Reminders Group enter the number 1 . If it should also be a part of an email reminders group, enter a 1 in the Reminders Group Email field.


Click Submit to save the entry.

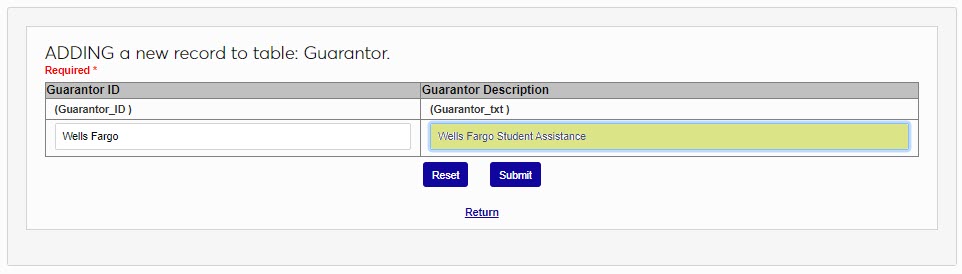
Guarantor
The Guarantor table is used in Financial Aid pages and processes associated with student loans. To add a new guarantor, click the Add New Record button. The Guarantor ID will display in various places and should be a short descriptor of the guarantor. This field accepts up to 20 alphanumeric characters and/or symbols.
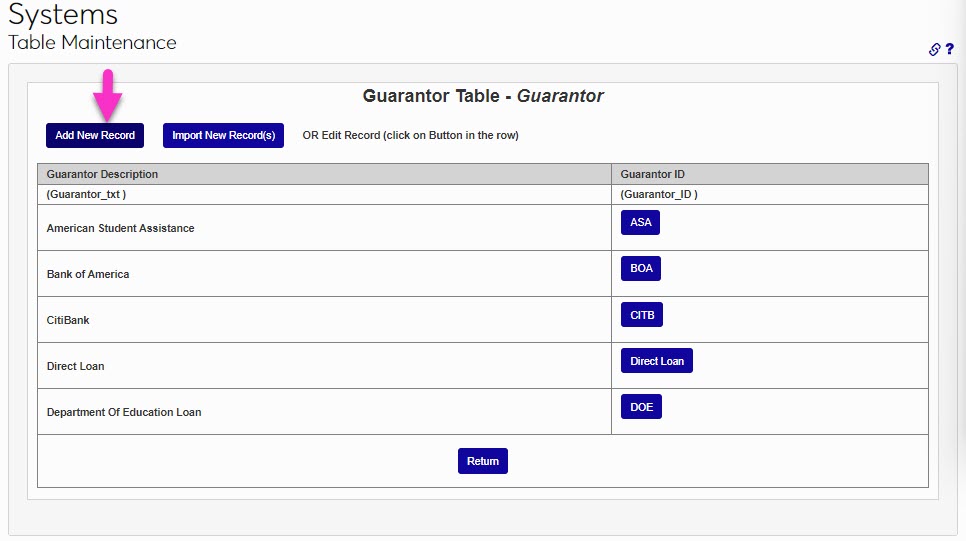
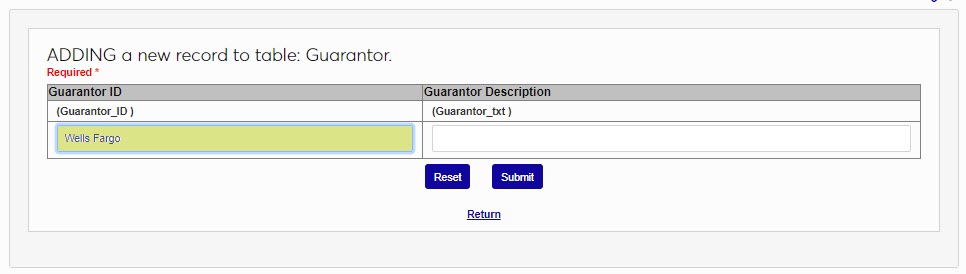
In the Guarantor Description field, enter a descriptive or more detailed name of the guarantor. This field accepts up to 30 alphanumeric characters and/or symbols. Click Submit to save the entered information and create the guarantor.

Health Immunizations
Health Immunizations is used to create health record options that will display on the Health Records menu item. Once immunization records have been created on the user, institutions can set up an Immunization Expiration Notifier that will alert users when their immunizations are expiring.
To add health records, click Add New Record and enter the name of the immunization type or health item in the Item field. This field accepts up to 30 alphanumeric characters.
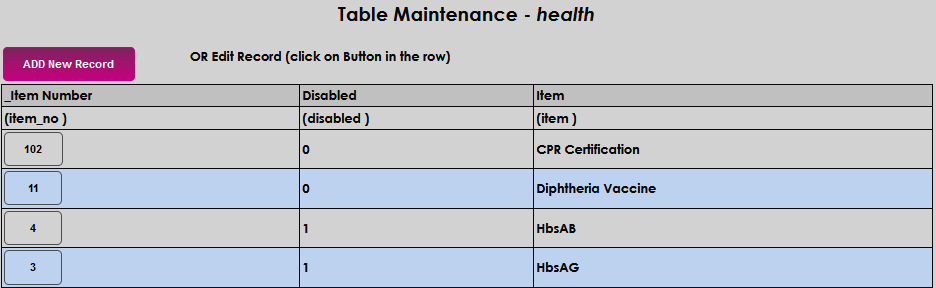

Click Submit to save the entry. To edit an existing entry, simply click on the Item Number , make the edit, and Submit .


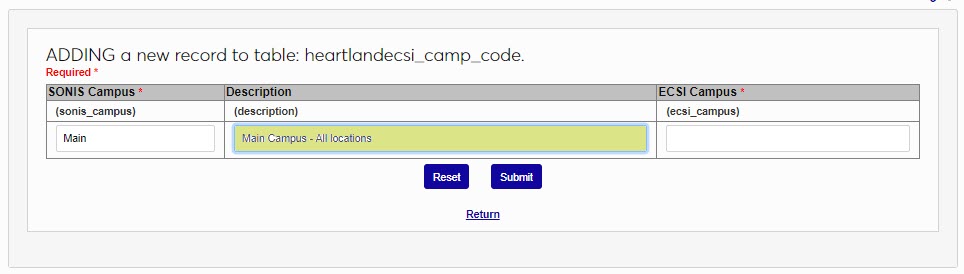
Heartland ECSI Campus Code
As part of the Heartland integration, campus codes can be sent to Heartland for the purposes of account delineation. To create the association between the campuses in SONIS and the Heartland campus codes, enter the Heartland ECSI Campus Codes table and click Add New Record. Enter the name of the SONIS campus being referenced. This value is known as the Campus Code in the database. This value cannot be edited once the campus has been created.
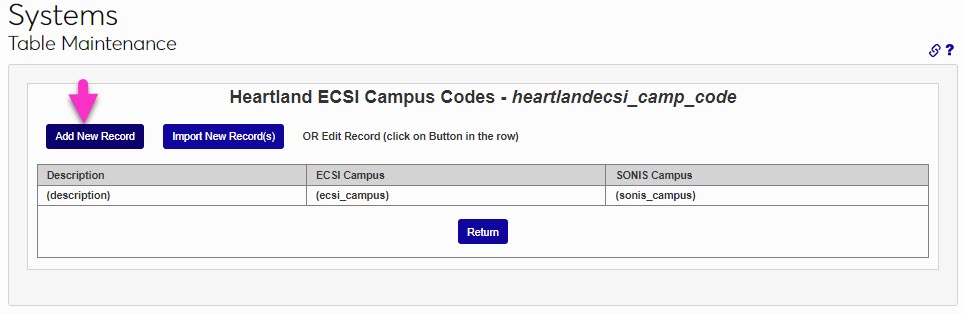
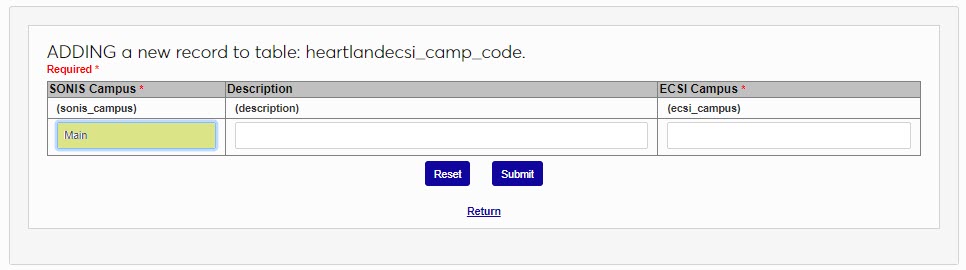
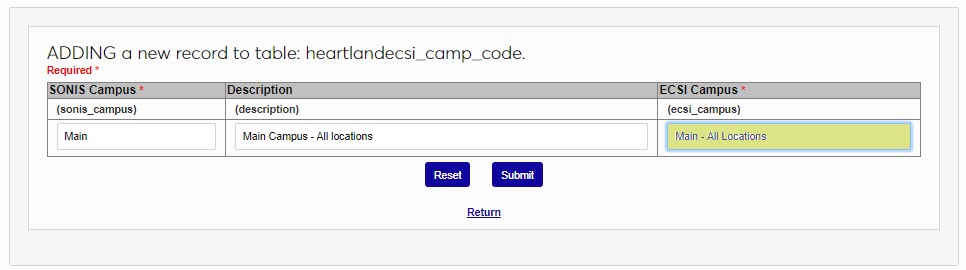
Next, enter a Description for the campus. This field will only display within this table and will not be sent to Heartland ECSI.
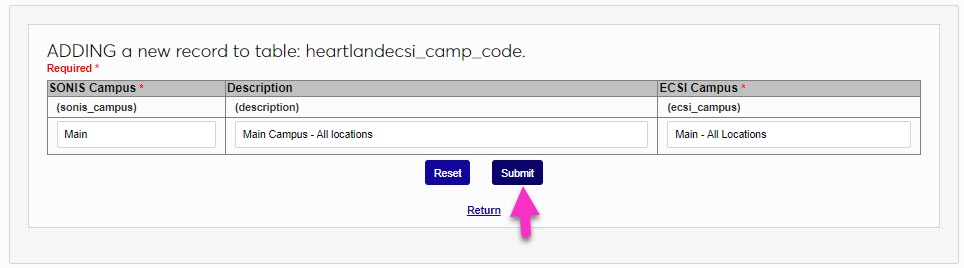
Enter the name that will be used to identify the account in the Heartland ECSI system in the ECSI Campus field. Click Submit to save the changes. Repeat the process until all SONIS campuses have corresponding ECSI values.
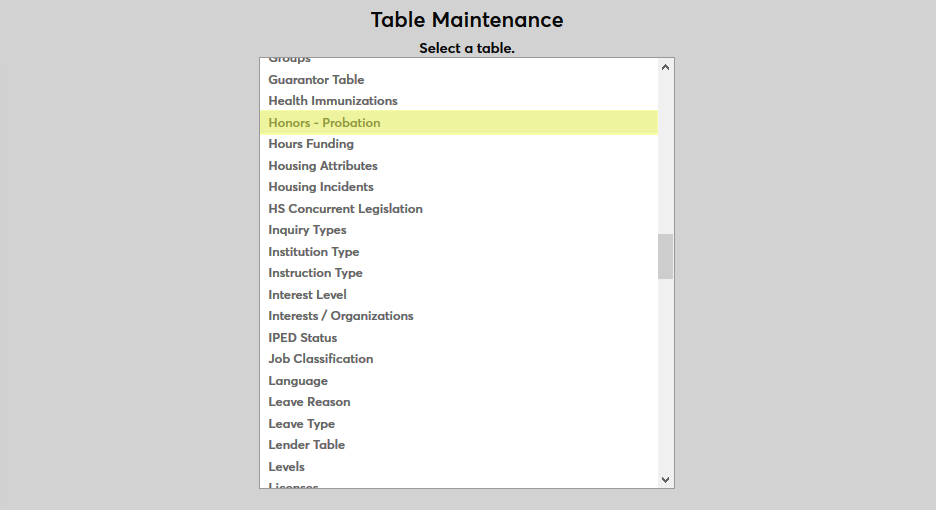
Honors - Probation
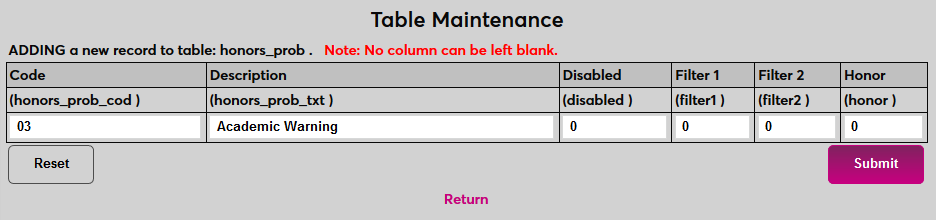
Before honors or probation statuses can be given to students, these statuses must be created using the Table Maintenance utility in the Systems hub. Select Honors - Probation from the list to begin.
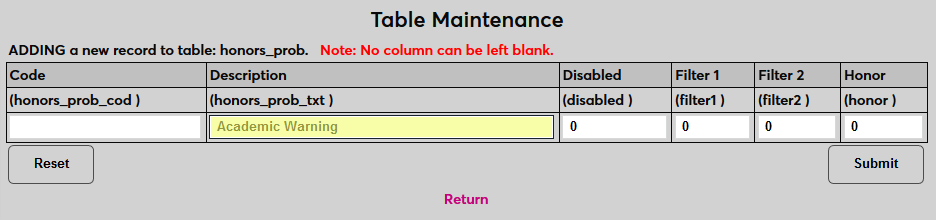
Click Add to create a new honors or probation type.
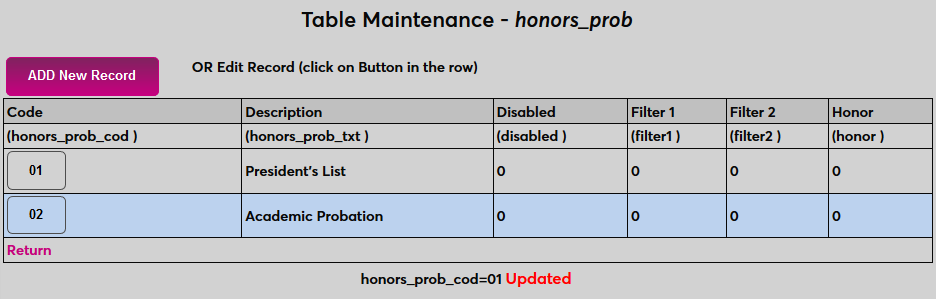
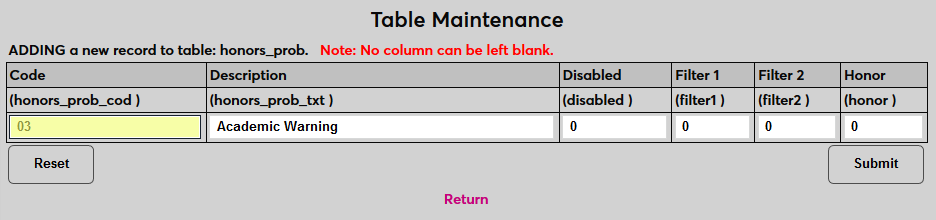
Create a name for the status in the Description field. The Description field has a 100-character limit. Then, create a shortened version of the description or numerical signifier to serve as the Code that will be used to identify it behind the scenes. The Code field has an 8-character limit.
If the status is an honor, put a 1 in the Honor field. If the status is a probation, leave a 0 in the field.
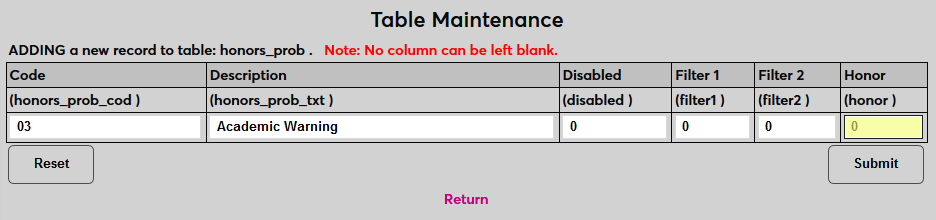
The Filter 1 and Filter 2 fields are only used by Oklahoma tech centers and can be ignored by other institutions.
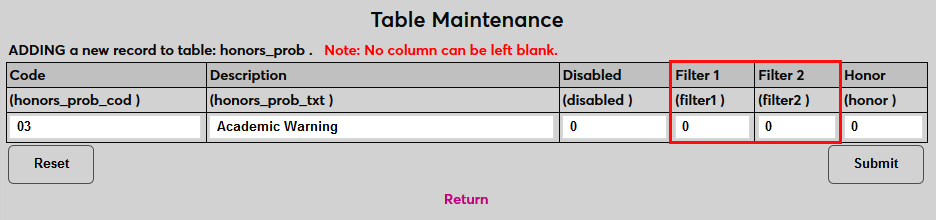
Click Submit to save the changes and create the status.
Housing Attributes
Housing attributes are both unique aspects of housing, such as being a coed building or having a shared kitchen, and roommate and style preferences, such as non-smoking or social oriented. Attributes are created and maintained on the Housing Attributes table. These are recorded and managed for individual students and residents using the Users hub page.
To add a new attribute, click Add New Record.
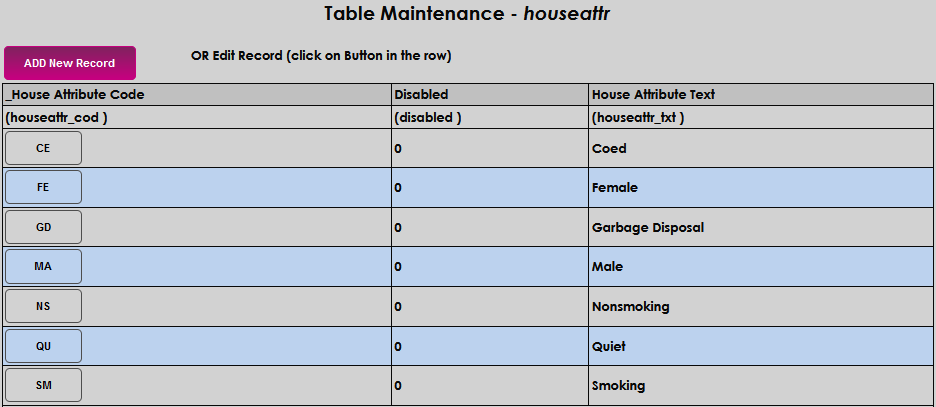
Enter up to 2 alphanumeric characters for the House Attribute Code .

Enter up to 40 alphanumeric characters that will display as the preference or characteristic in the House Attribute Text field. Click Submit to save the entry.


Housing Incidents
Housing incident types are created and maintained on the Housing Incidents table. These are recorded and managed for individual students using the Incidents dropdown on the Users hub page,.
To add a new incident, click Add New Record.
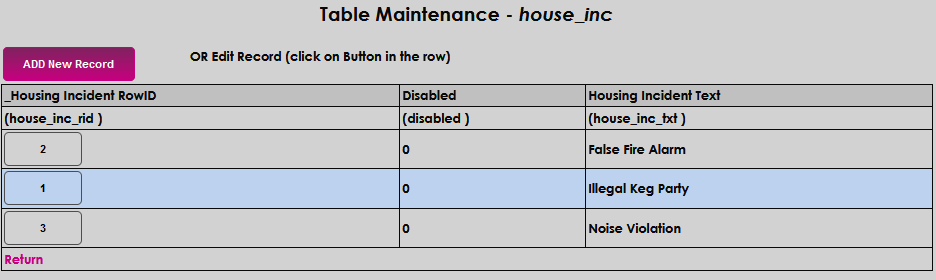
The incident code will be automatically generated as a Housing Incident Row ID when the name is saved. Enter the name of the incident in the Housing Incident Text field. This field accepts up to 40 alphanumeric characters.


Click Submit to save the entry.

Inquiry Type
The Inquiry Type table is used to define the ways that an individual inquiring about the institution may have done so. In other words, where the inquiry originated from. To begin adding a new inquiry type, click Add New Record. Enter up to 8 alphanumeric characters that will become the code of the type in the Inquiry Type Code field. Use care to ensure duplicate codes are not accidentally created, for example, do not create a 04 code if a 4 code already exists.
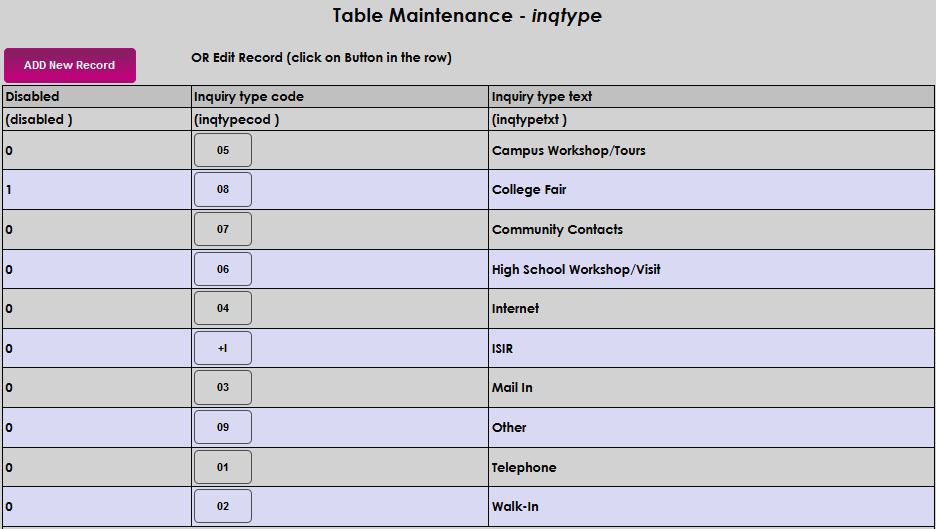

Enter up to 30 alphanumeric characters that describe the code created in the Inquiry Type Text field. Click Submit to save the entries and create the Inquiry Type .


Institution Type
Detailed information on managing institutions is available here. The Institution Add/Edit utility is used to edit the SONIS Institution table where clients can store identifying information for high schools, secondary schools, sponsors, and other organizations. The table is used for honoring transfer and equivalency courses and integrating sponsors among other functions. As the page name suggests, the utility allows administrators to create new institution records and to edit existing institution records. Before creating any institutions, institution types must be created using the Institution Type table in Table Maintenance. Institution types may included High School, College, Community College, Clinical Site, Third Party Sponsor, etc.
On the following page, click Add New Record to create a new institution type.
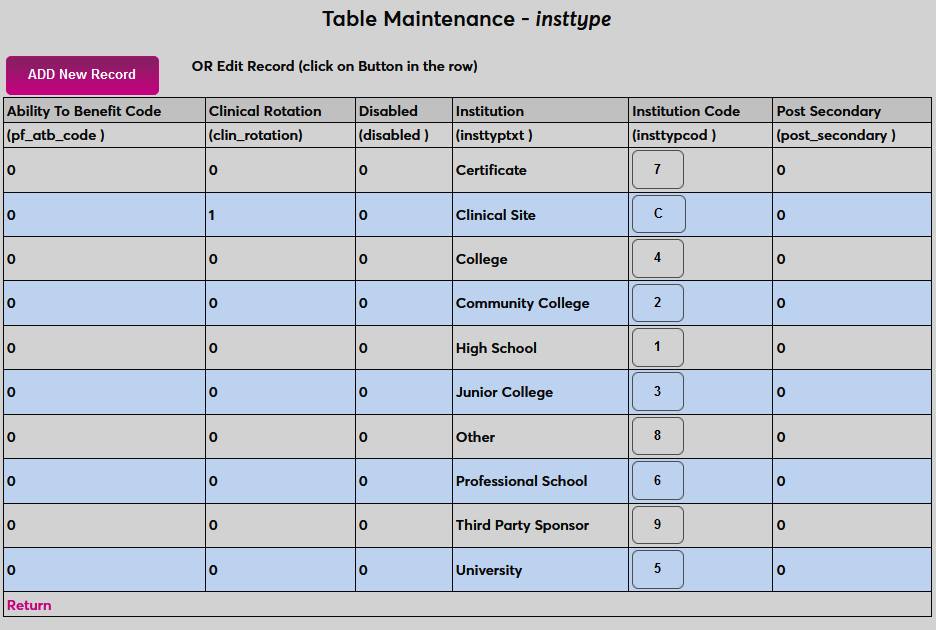
Begin by naming the institution type in the Institution field.
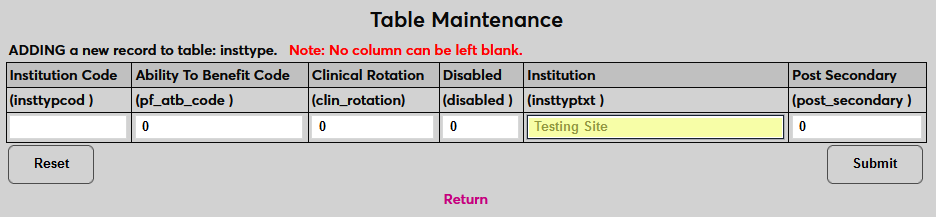
Next, create an Institution Code for the type. This field has a one-character limit.
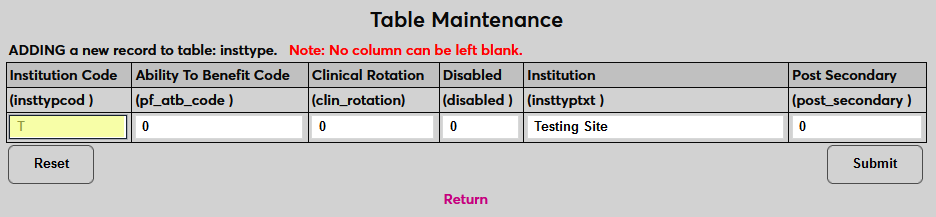
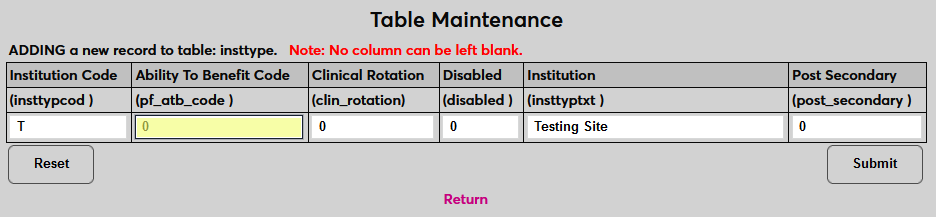
Ability to Benefit institutions are those that provide education to students who do not have a high school diploma or equivalent. If institutions of this type are Ability to Benefit institutions, place a 1 in the Ability to Benefit Code field. Otherwise, leave a zero. This field is primarily used to designate high schools and should not apply to most secondary and post-secondary schools.
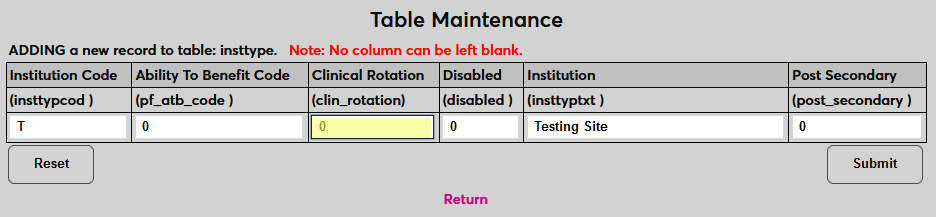
Place a 1 in the Clinical Rotation field if the type designates sites that will be used for clinical rotations. Otherwise, leave a zero.
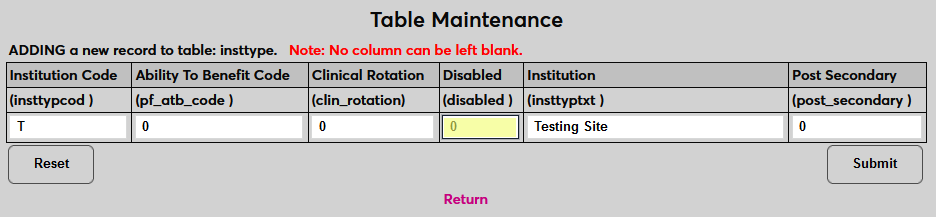
Place a 1 in the Disabled field to disable the type and prevent it from being used. Otherwise, leave a zero.
Place a 1 in the Post Secondary field if the type designates post-secondary schools. Otherwise, leave a zero.
Click Submit to save the changes and add the institution type. Repeat the process until all necessary institution types have been created.
Interests/Organizations
The Interests page allows entry of a user's interests or affiliation with an organization, for example, a sport or co-curricular activity. This could be used as a way to track a student's participation in a club or an alumni's support of a particular sport. Many institutions use this table as part of the application process to record information about applicants. The Interests are configured in Table Maintenance. Dates of participation, position held, and notes about the interest can be entered.
If the interest or organization relates to the activities of Constituents, such as those related to development or fund-raising, it is best practice to use the Cultivation Activities Table and/or the Events Table.
To create or manage interests, select Interests/Organizations from the menu.
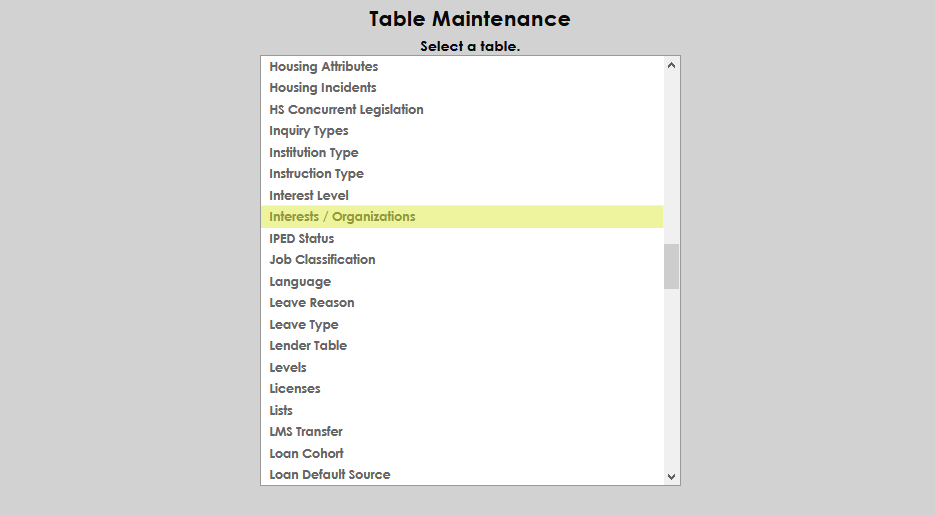
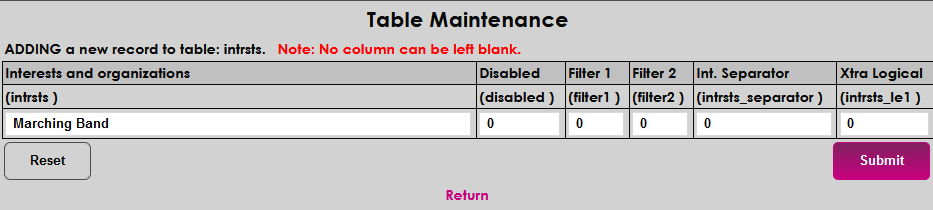
Click the Add a New Record button to add a new record.
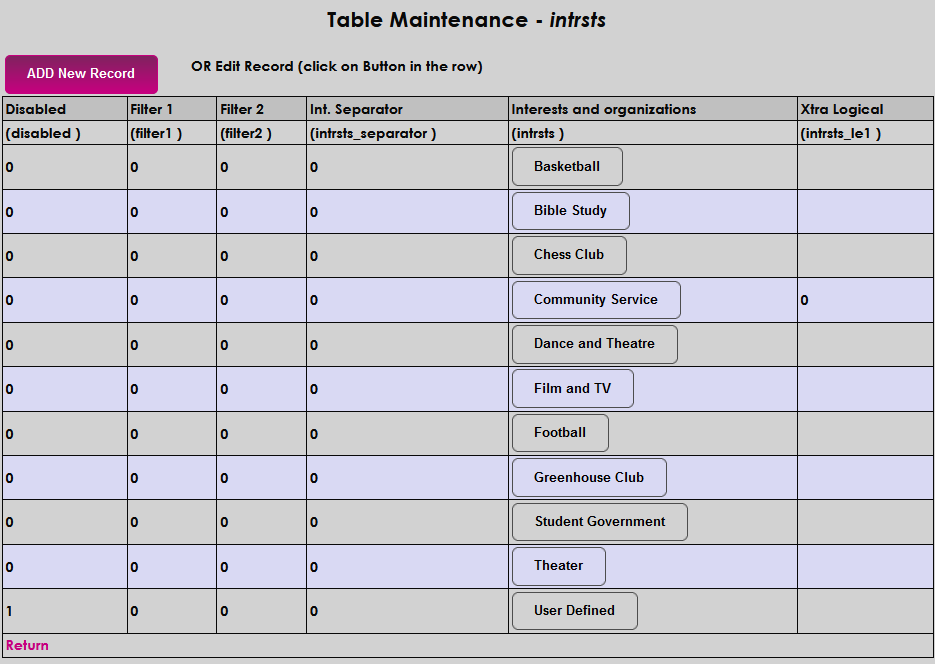
Create a name for the interest in the Interests and Organizations field. This field has a 50 character limit.
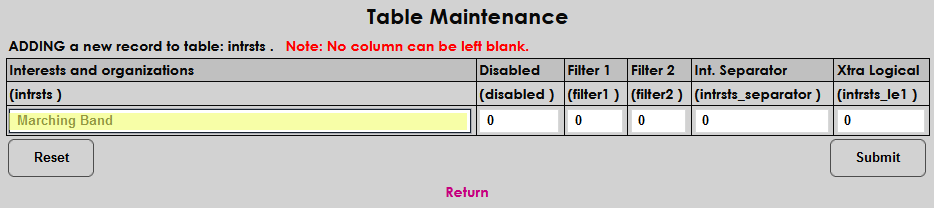
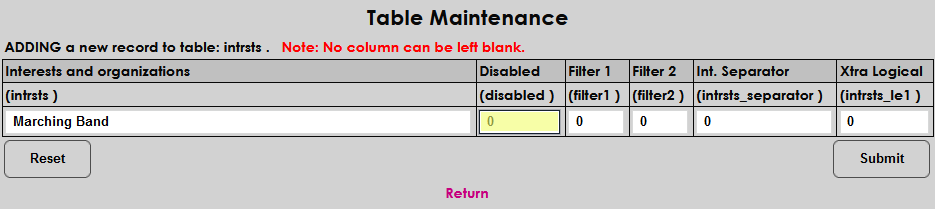
Leave a zero in the Disabled field to make the interest active. Place a one in the field to disable the interest. A disabled interest cannot be assigned.
Place a 1 in the Filter 1 field to activate filter one and allow the Position Held field to display in the Plan of Study report. Filter 2 is not used at this time.

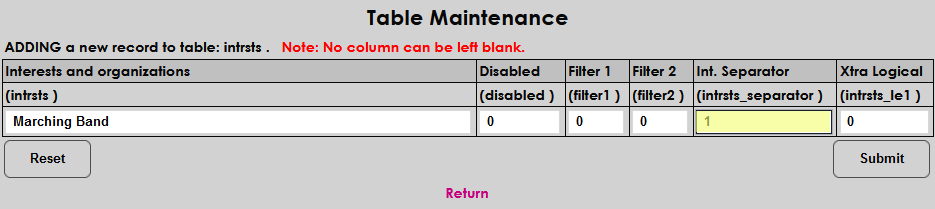
Additional Fields & Labels
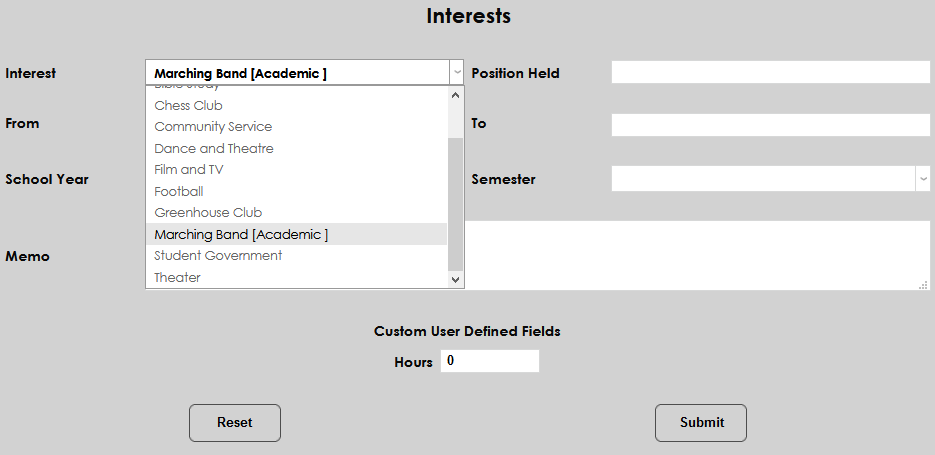
The Interests Separator field is used to categorize interests by type. Enter a one to turn the separator on.
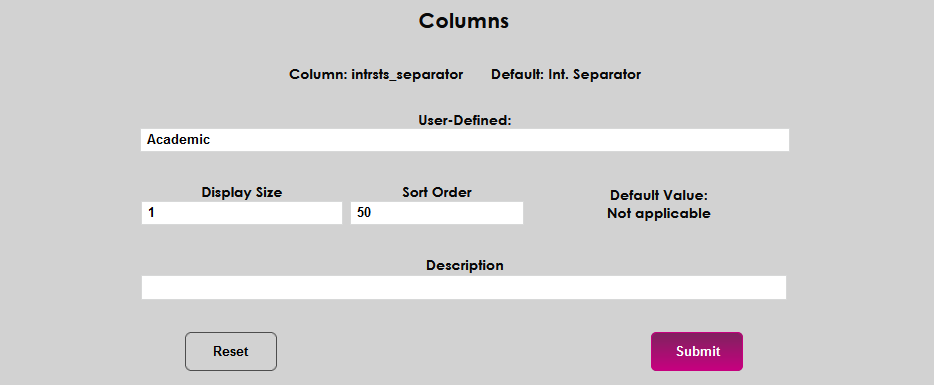
To create the text for the label, navigate to the Columns utility in the Systems menu.
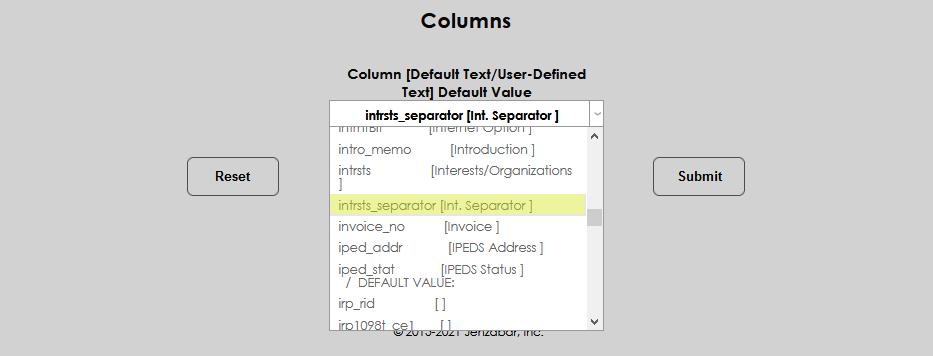
Enter the label name in the User-Defined field.
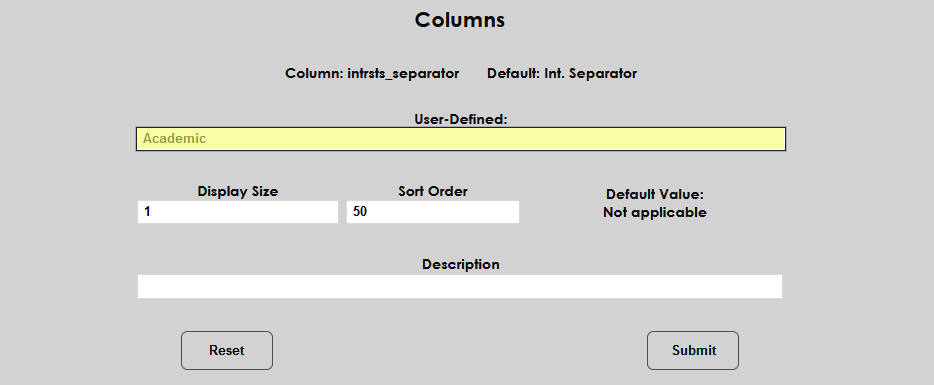
Click Submit to save the label.
The label will now display in the Interest menu within brackets.
The Extra Logical field is not used at this time.

Click Submit to save the new interest.
Interest Level
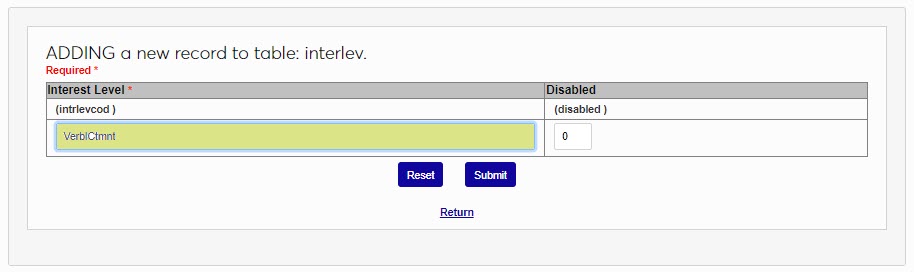
The values defined on the Interest Level table are used in working with prospective students to subjectively categorize the likelihood that the prospect will apply for admission. When an Interest Level is added on the Prospect Inquiry Details page the value will also display in the Prospective Students report. Because these values will be used subjectively, it's important to ensure the created codes are clear and unique. This will help decrease user confusion about which code to use in each circumstance. To add a new Interest Level, enter the table and click Add New Record.
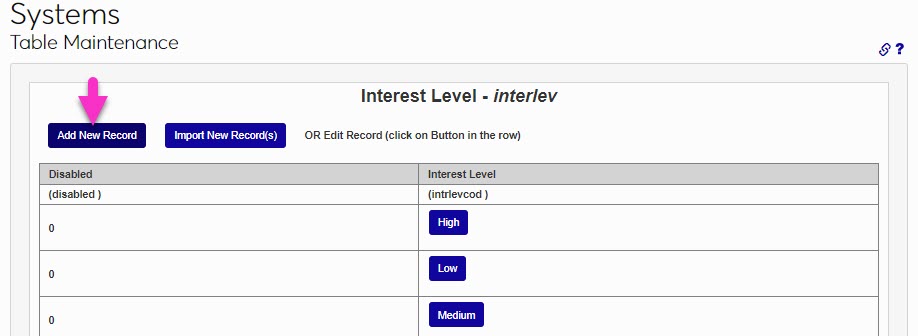
Enter the name of the code in the Interest Level field. This field accepts up to 10 alphanumeric characters and/or symbols. Click Submit to save the entered value.

Instruction Type
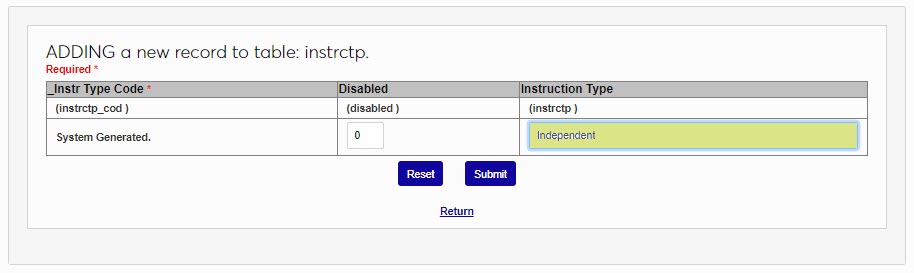
The Instruction Type table is used to define and communicate the type of teaching or instruction that will be used to deliver a particular course. The types created here will be displayed in the Schedule. To add an Instruction Type, enter the table and click Add New Record.
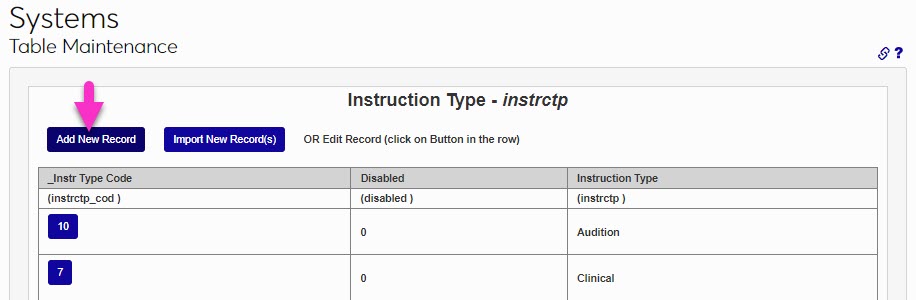
Enter up to 15 alphanumeric characters and/or symbols that will become the Instruction Type name. Keep in mind that this name will display to students in the Schedule. Click Submit to save the type.
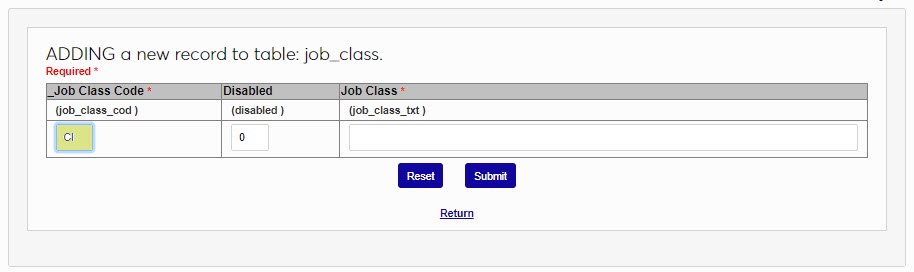
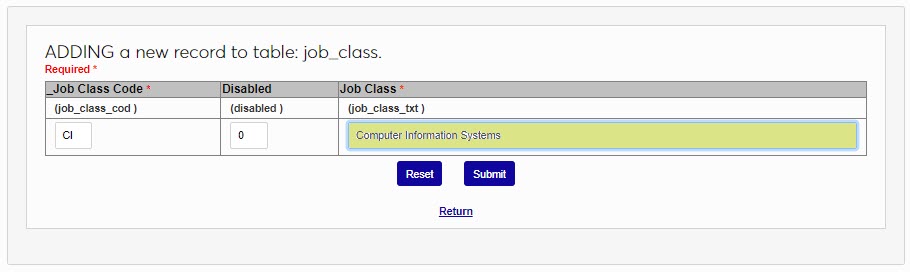
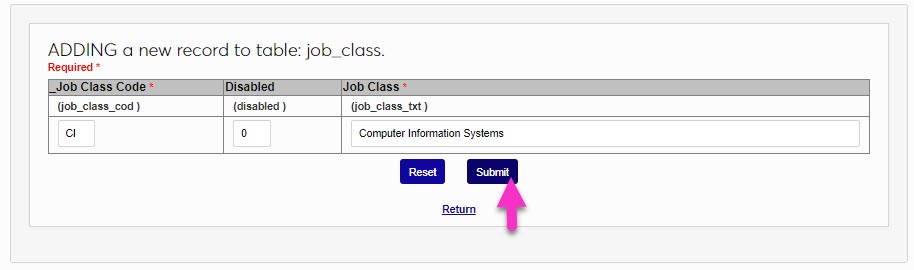
Job Classification
The values defined in the Job Classification table are used in the Employer portal to allow those posting jobs to set a category for the type of job that is being posted. To add a job classification, enter the table and click Add New Record.

Enter up to two alphanumeric characters that will become the Job Class Code. This will not be viewed by users when selecting classifications. In the Job Class field, enter the name of the classification. This field accepts up to 50 alphanumeric characters and/or symbols. Click Submit to save the entered values and create the classification code.
Languages
The Language table is used to define the language that SONIS pages and portals will display in. The default language is English. To change the display language, a number of steps beyond updating the table must be taken. For this reason, member institutions should engage with SONIS Support and/or consulting before making any table changes.
Leave Reason
The Leave Status page allows an institution to record the dates, reasons, and affected courses when a user is on an approved leave. Leave Reasons are created and managed on the Leave Reason table.
Click Add New Record .
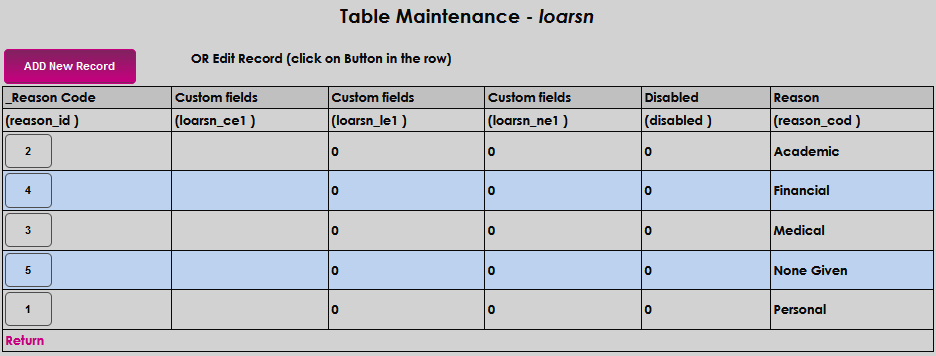
The Reason Code will be created by SONIS when the rest of the values are submitted.

Enter the Reason name in the Reason field. This is the text that will be displayed in any leave reason menu or an informational item.

Click Submit to save the entries.

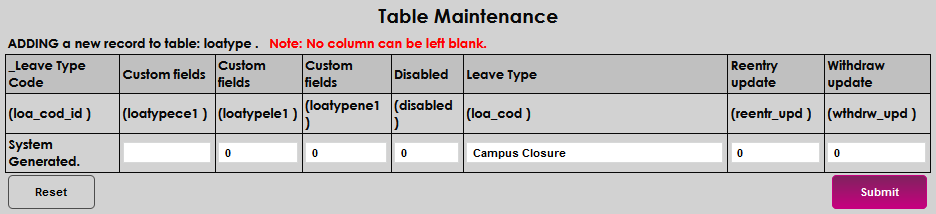
Leave Type
The Leave Status page allows an institution to record the dates, reasons, and affected courses when a user is on an approved leave. Leave Types are created and managed on the Leave Type table.
Click Add New Record .
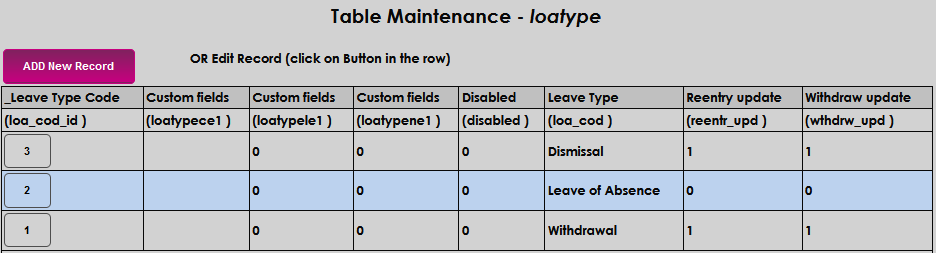
The Leave Type Code will be created by SONIS when the rest of the values are submitted.
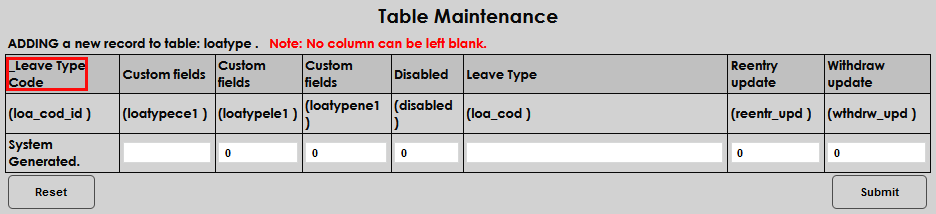
Enter the Leave Type name in the Leave Type field. This is the text that will be displayed in any leave reason menu or an informational item.
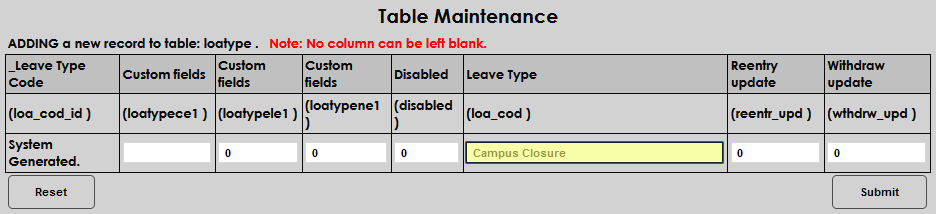
Click Submit to save the entries.
Lender
When loans are offered in Financial Aid, the lender(s) type must be defined in the Lender table. Guarantors are defined in the Guarantor table. To add a new lender type, enter the table and click Add New Record.
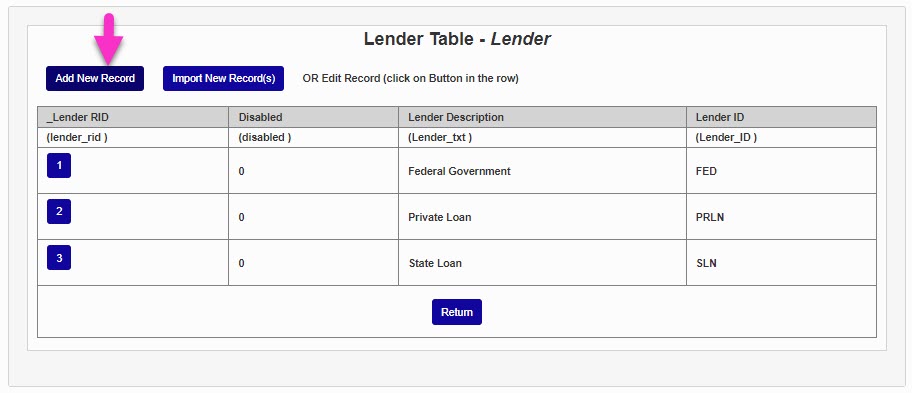
Enter the name of the lender type in the Lender Description field. This field accepts up to 30 alphanumeric characters and symbols. In the Lender ID field, assign a shorter name of the type. This field accepts up to 20 alphanumeric characters and/or symbols.
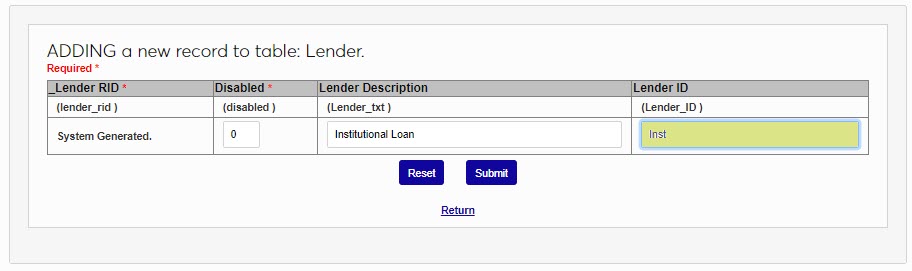
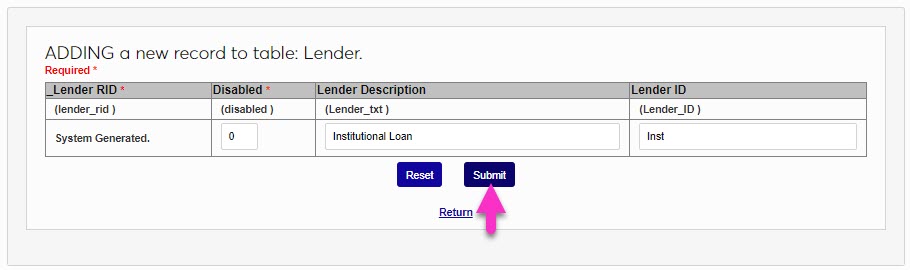
Click Submit to save the entry and create the lender.
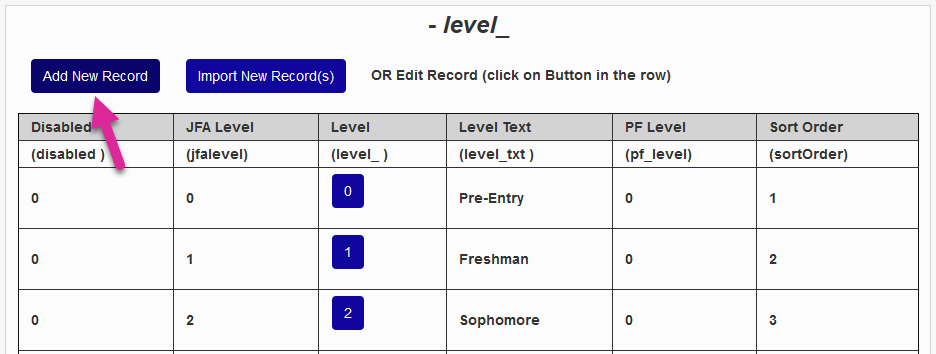
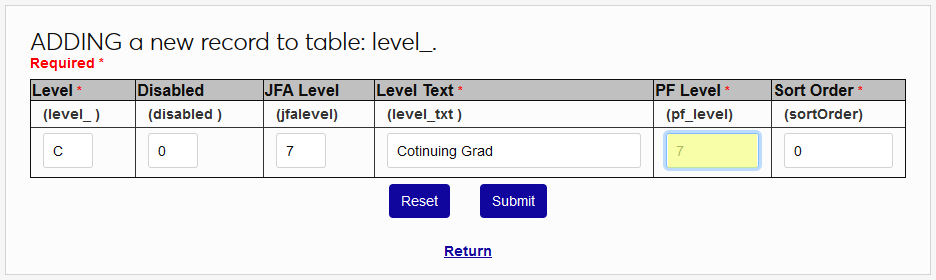
Levels
The Levels table formalizes a user's progress through their education or career journeys, such as a newly entering student or beginning freshman, second-year graduate student, or first-year educator. Additionally, it can define the type of student, such as health sciences undergraduate and health sciences graduate. Levels are used in financial aid processing and reporting, as well as many institutional reporting processes, such as IPEDs and National Student Clearinghouse. Third-Party Applications may require levels to be defined as part of the integration processes. Jenzabar Financial Aid integrations do not require levels to be defined but will accept them if they are sent.
To add a level, enter the table and click Add New Record. Enter a single alphanumeric character in the Level field that will represent the created level. This will be used in many display areas, so ensure that it is part of a logical progression.
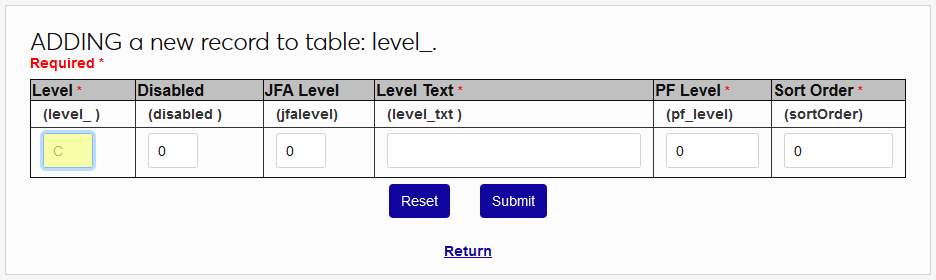
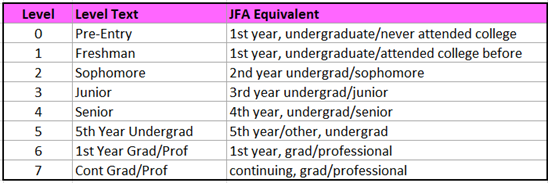
Enter a JFA Level if the level is used with the Jenzabar Financial Aid (JFA) integration. Otherwise, it can be left blank. The following chart offers a guide to ensuring that the values entered in the JFA Level Field comply with the Federal Student Aid level designations.
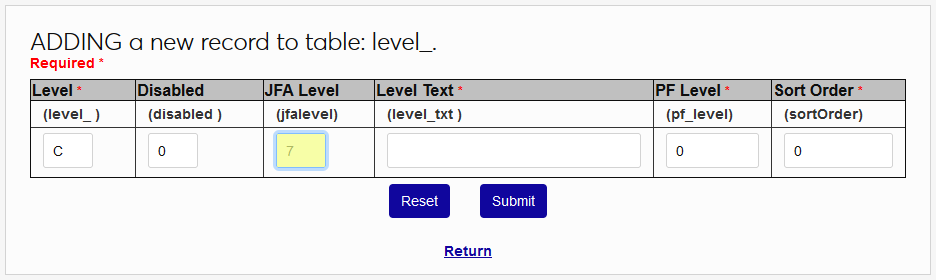
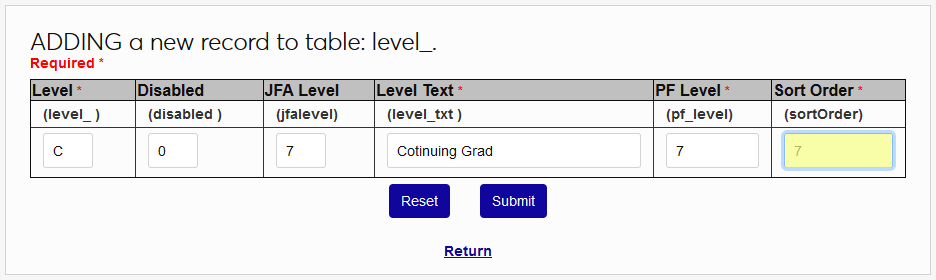
Enter the name of the level in the Level Text field. This field accepts up to 20 alphanumeric characters and symbols.
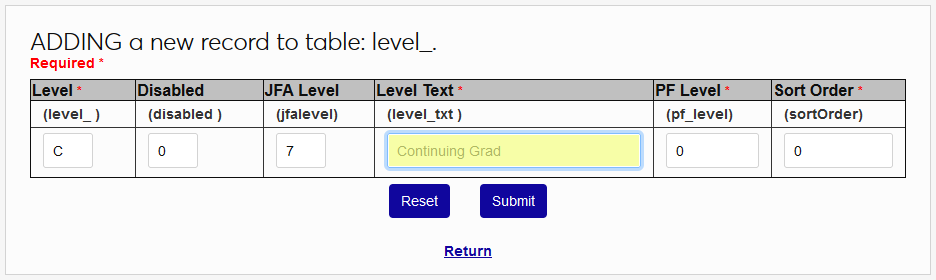
Enter a PowerFAIDS Level if the level should be exported to PowerFAIDS.
The Sort Order field is used to determine how each level appears in menus throughout the system. Click Submit to create the level.
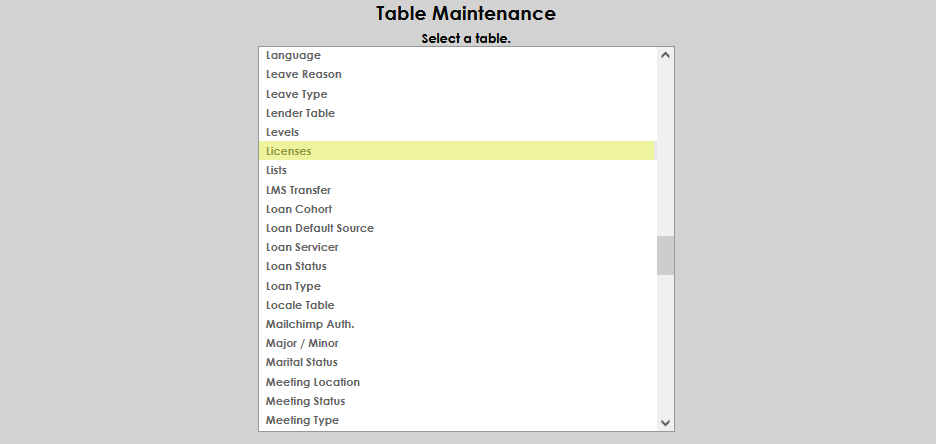
Licenses
There are times when it may be appropriate to request and record information about the licenses of an applicant, student, faculty member, or constituent. The information regarding the licensures can be recorded on the Licenses page after being set up on the Licenses table.
Click Add New Record .
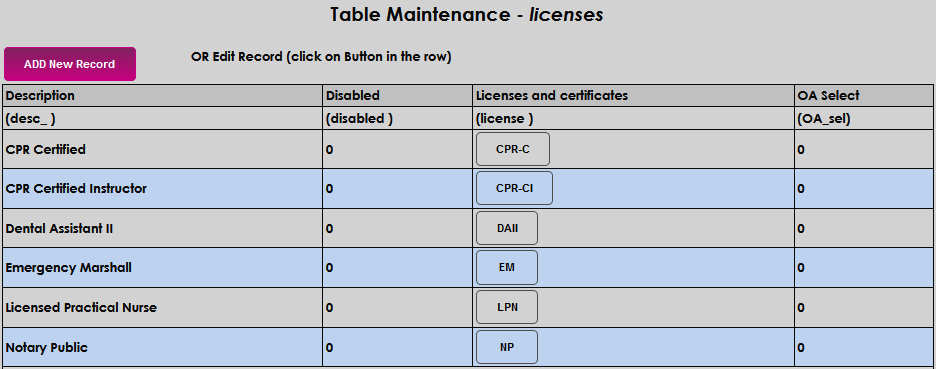
Enter a name for the license type, up to 20 characters, in the Licenses and certificates field. Enter a description of up to 25 characters in the Description field.
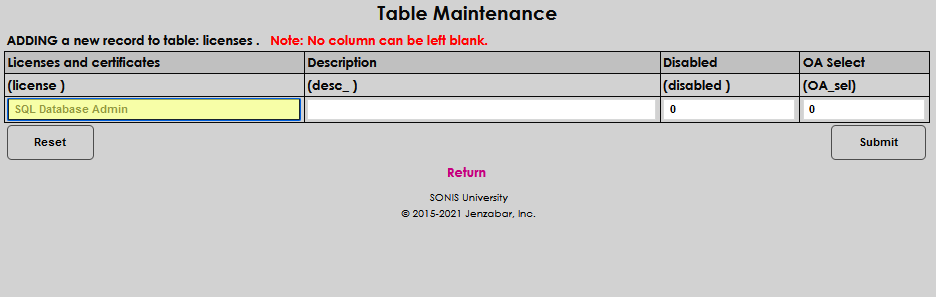
If the license type should be selectable on the Online Application , enter a 1 in the OA Select field. Click Submit to save the entry.


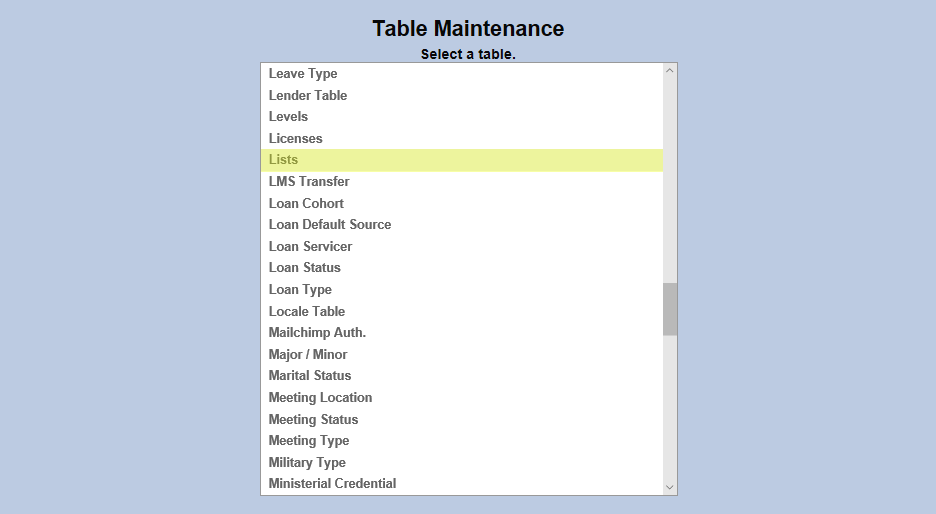
Lists
The Lists Management Utility allows Jenzabar SONIS administrators to group users based on a characteristic and use these lists to make bulk changes such as assigning Holds. The list must first be created in the Lists table.
To create and edit lists, navigate to the Lists table and click Add New Record. Click on the List ID to edit an existing list.
Click Add New Record to create a new list or click on the List ID to edit an existing list. As with other tables, placing 1 in a field turns that bit on while placing a 0 in the field turns the bit off.
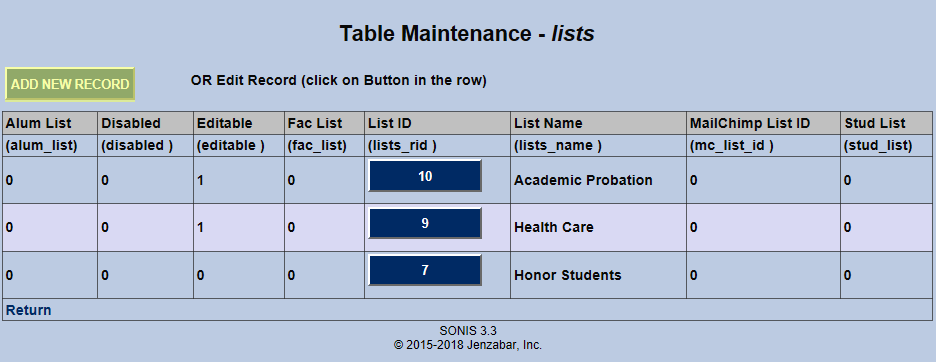
Placing a 1 in the Alumni List, Faculty List, or Student List boxes will make the list only available to those types of SONIS accounts.
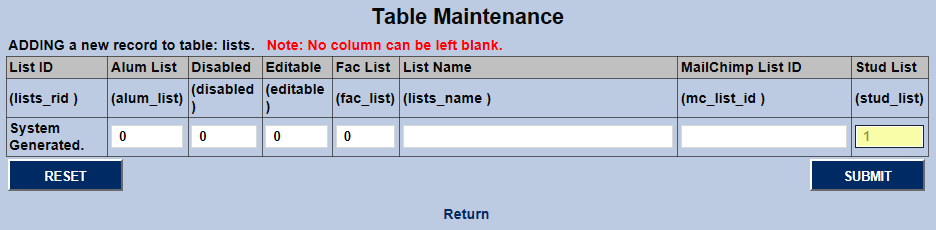
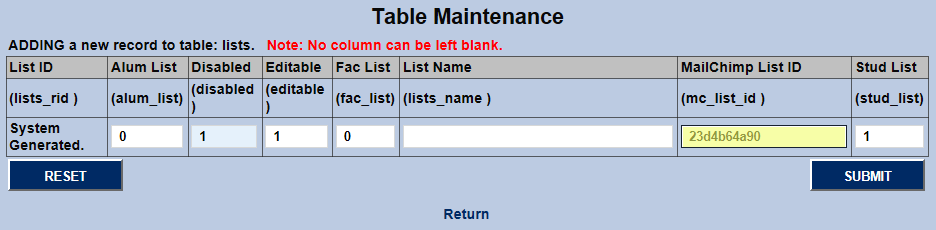
Put a 1 in the Editable field to allow other administrators to change which uses are part of the list. A 1 in the Disabled field will disable the list and prevent it from being used.
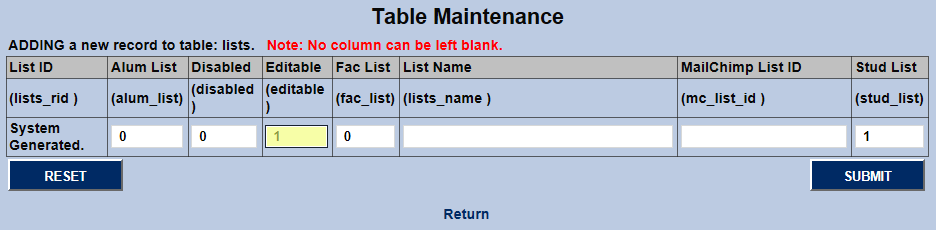

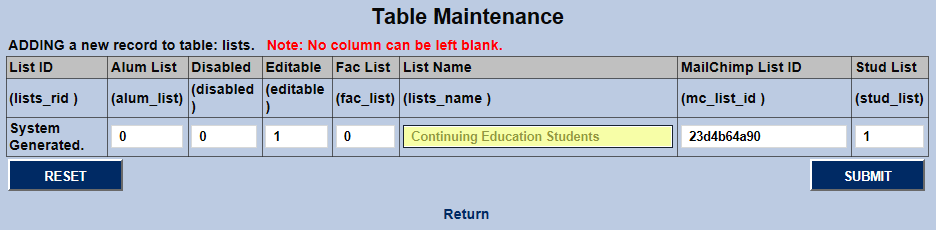
To integrate with MailChimp email marketing, place the MailChimp List ID for this group of SONIS users in the MailChimp List ID field.
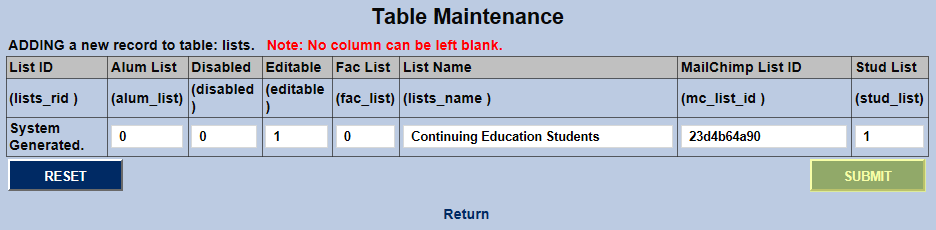
Create a brief description of the list in the List Name field. This field has a 100 character limit, so there's room to be specific.
Click Submit to save changes and create the list or finish the editing process.
Loan Cohort
The Loan Cohort table is used in Loan Default Management to categorize, or group, student loan borrowers. The year that the student's loans will, or did, enter repayment is used. Loan default management has to do with keeping track of both a student and any of the student's loans that were received while attending the institution, in an effort to keep the student from defaulting and negatively effecting the institution's Cohort Default Rate.
Caution
In each of the Loan Default Management tables, a blank record exists intentionally. This record should not be edited or disabled.
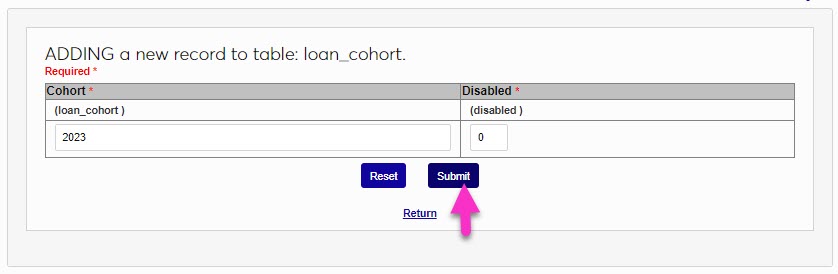
To add a new grouping, click Add New Record. Enter the Cohort name. This field accepts up to four digits.
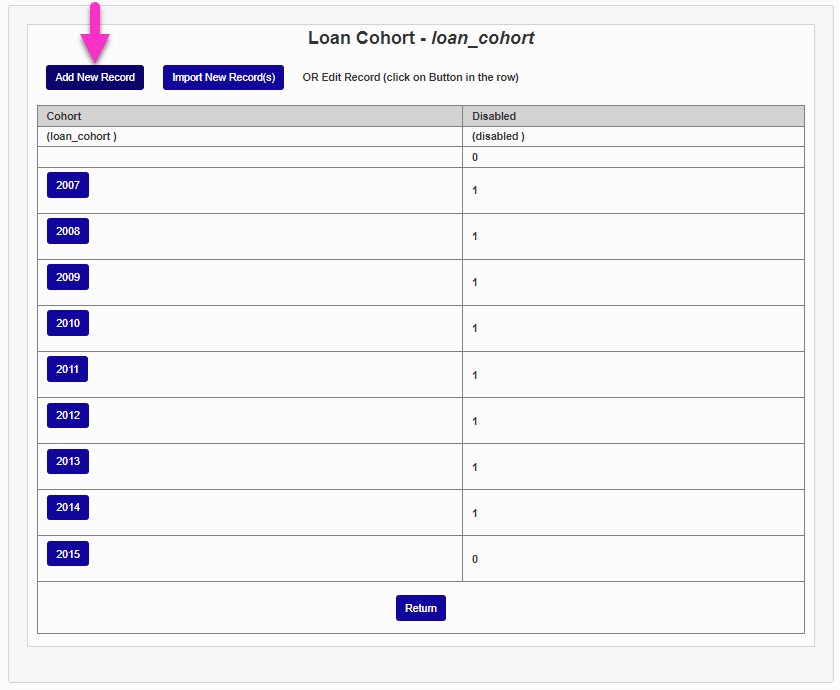
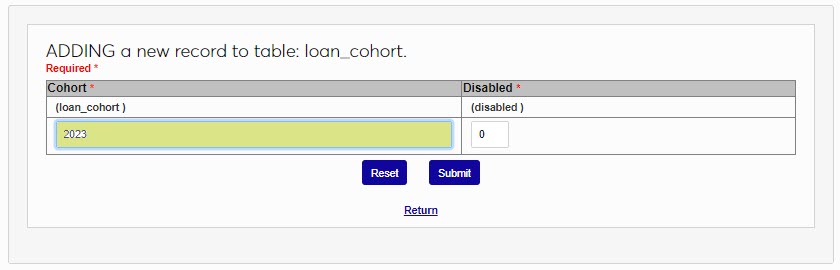
Click Submit to save the entered information and create the year grouping.
Loan Default Source
The Loan Default Source table is used in Loan Default Management to identify the source of the default status. Loan default management has to do with keeping track of both a student and any of the student's loans that were received while attending the institution, in an effort to keep the student from defaulting and negatively effecting the institution's Cohort Default Rate. The Loan Default Source is the loan servicer or loan management site where the institution confirmed the default status.
Warning
In each of the Loan Default Management tables, a blank record exists intentionally. This record should not be edited or disabled.
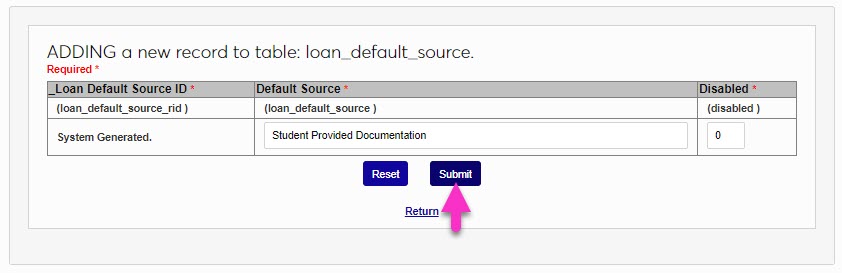
To add a new loan default source, click Add New Record. Enter the name of the new source in the Default Source field. This field accepts up to 50 alphanumeric characters and/or symbols.
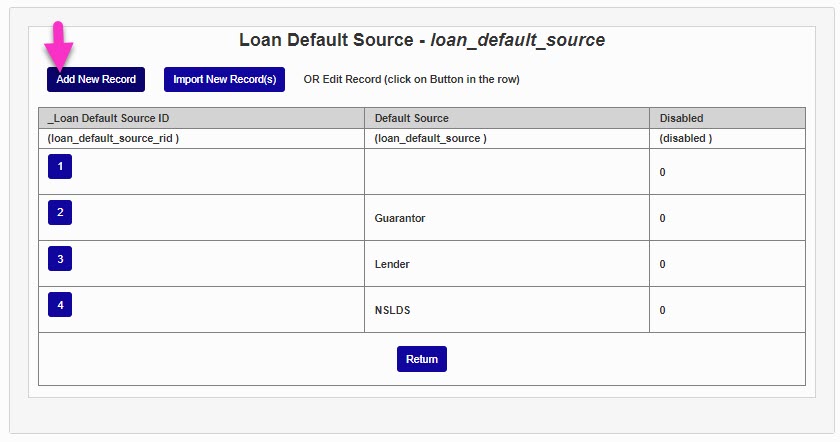
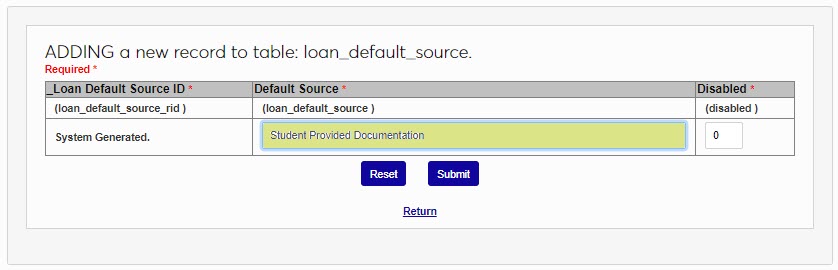
Click Submit to save the entered information and create the new source.
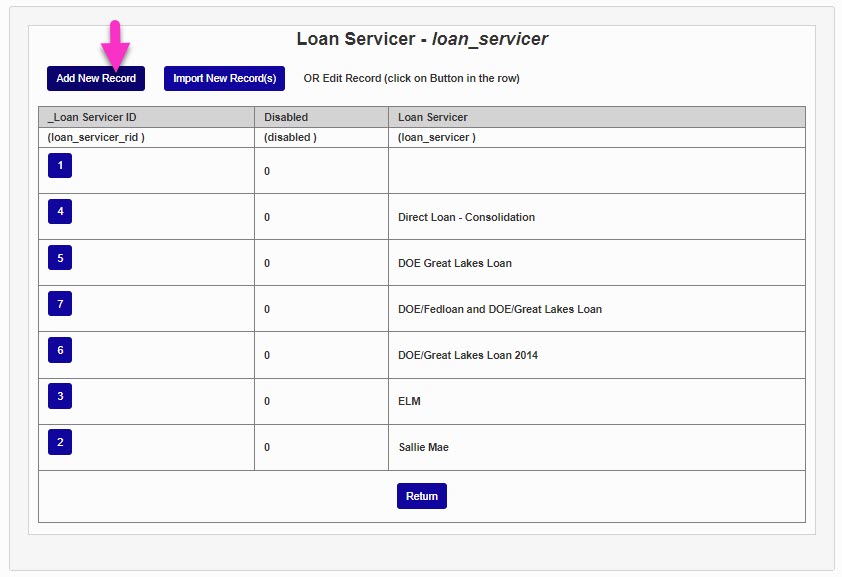
Loan Servicer
The Loan Servicer table is used in Loan Default Management to identify the company that is servicing the loan. Loan default management has to do with keeping track of both a student and any of the student's loans that were received while attending the institution, in an effort to keep the student from defaulting and negatively effecting the institution's Cohort Default Rate. The Loan Servicer is the company that is responsible for communicating with the student and collecting and recording payments on the loan.
Warning
In each of the Loan Default Management tables, a blank record exists intentionally. This record should not be edited or disabled.
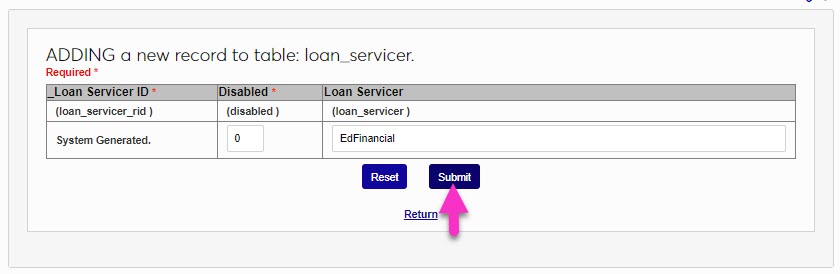
To add a new loan servicer, click Add New Record. Enter the name of the servicer in the Loan Servicer field. This field accepts up to 50 alphanumeric characters and/or symbols.
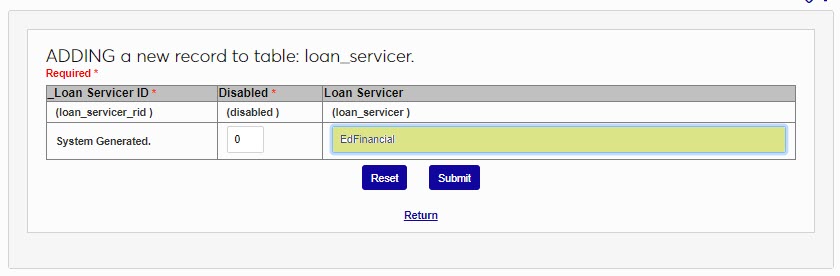
Click Submit to save the entries and create the new servicer.
Loan Status
The Loan Status table is used in Loan Default Management to identify the current status of a loan. Loan default management has to do with keeping track of both a student and any of the student's loans that were received while attending the institution, in an effort to keep the student from defaulting and negatively effecting the institution's Cohort Default Rate.
Warning
In each of the Loan Default Management tables, a blank record exists intentionally. This record should not be edited or disabled.
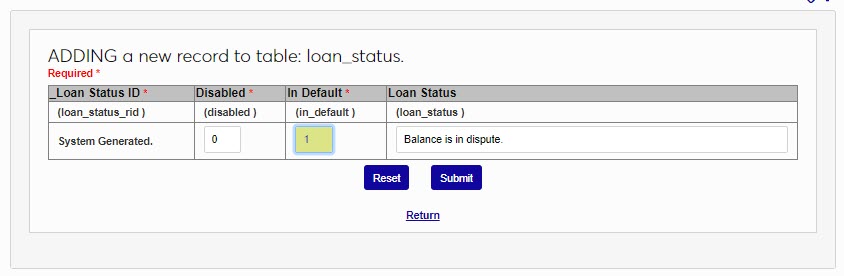
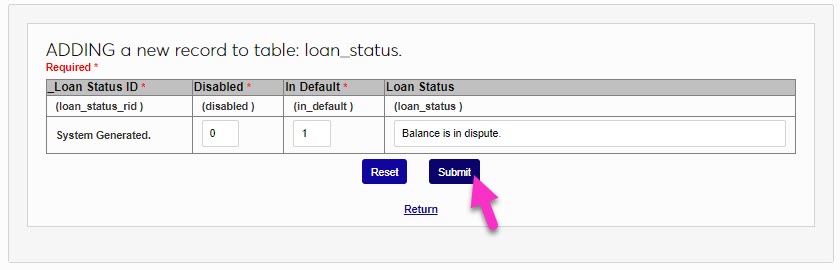
To add a new status, click Add New Record. In the Loan Status field, enter the name of the status. This field accepts up to 50 alphanumeric characters and/or symbols.
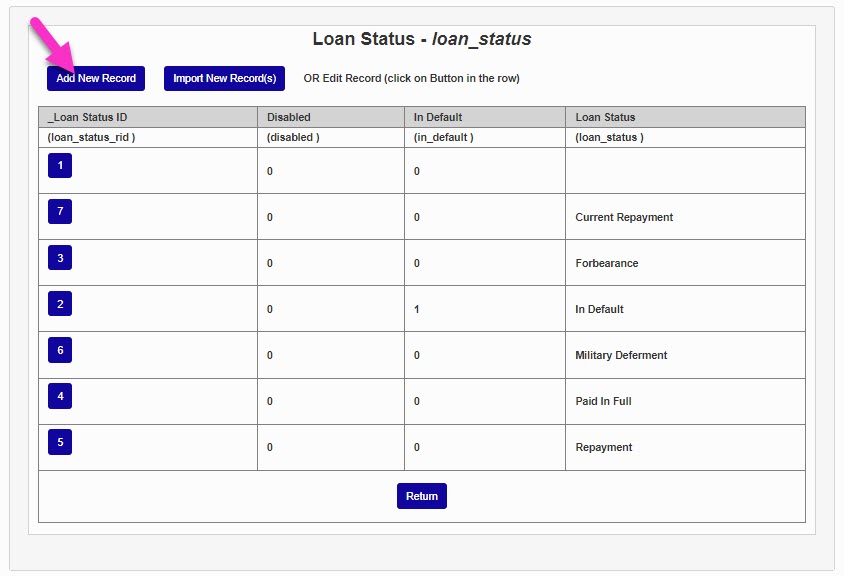
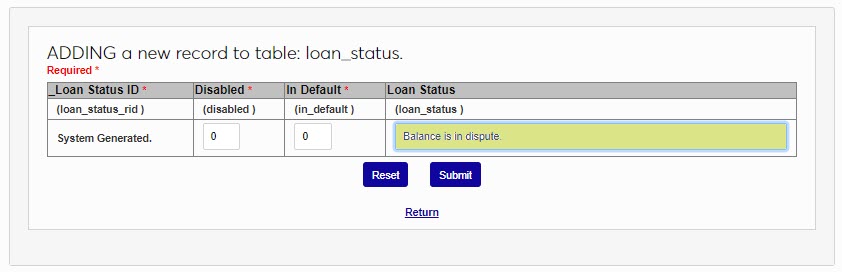
If the status is a default status, enter a 1 in the In Default field. If the status is not a default status, leave the 0. Click Submit to save the entries and create the new status.
Locale
The Locale table is used to define the settings needed to enable the use of different currency types. In this example, Armenian Drams are being added. Select Locale Table from the table menu and click Add New Record to begin. In the Locale field, enter up to 25 alphanumeric characters that represent the location that will be described in Locale Description.

Enter the type of Accepted Currencies . This is the full name of a single currency type.

Enter an abbreviation for the currency in the Currency Code field. The code can be up to 15 alphanumeric characters.

Enter the Locale Description that corresponds with the abbreviation entered in the Locale field. Up to 50 alphanumeric characters may be entered. Click Submit to save the entries.


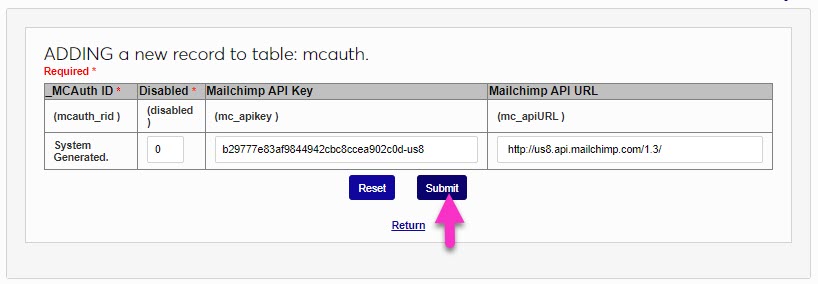
Mailchimp Authorization
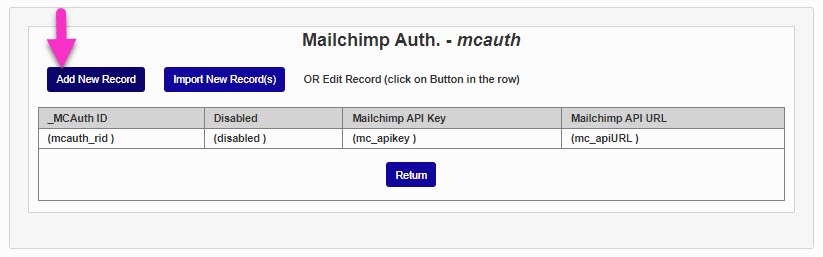
The Mailchimp Authorization table is used for the Mailchimp Integration. There should be only one entry in this table. Multiple entries will cause errors in linking and syncing SONIS with Mailchimp. If changes are needed to an existing entry, edit or disable it, instead of adding another record.
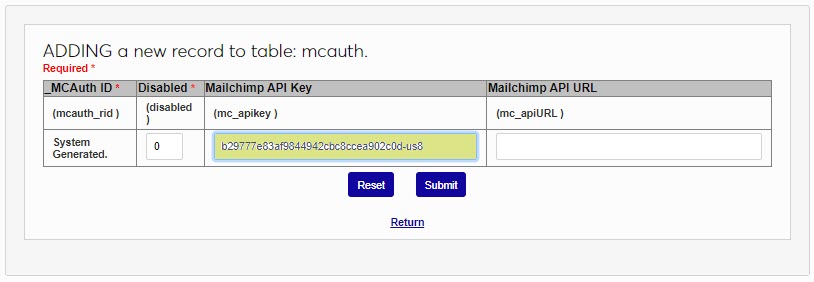
To add a record, enter the table and click Add New Record. Enter the Mailchimp API Key as provided by Mailchimp. It will be a lengthy string of alphanumeric characters and symbols.
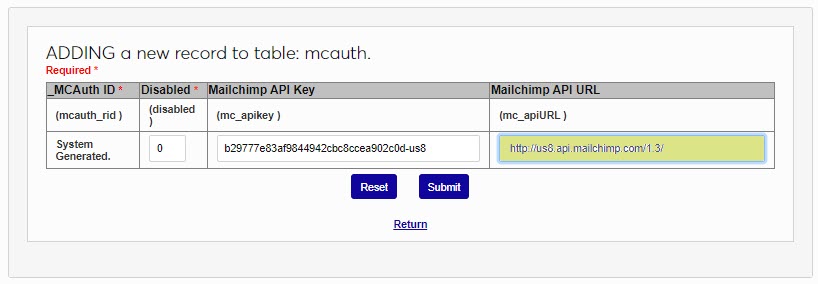
Enter the Mailchimp API URL provided by Mailchimp. Click Submit to save the entered information.
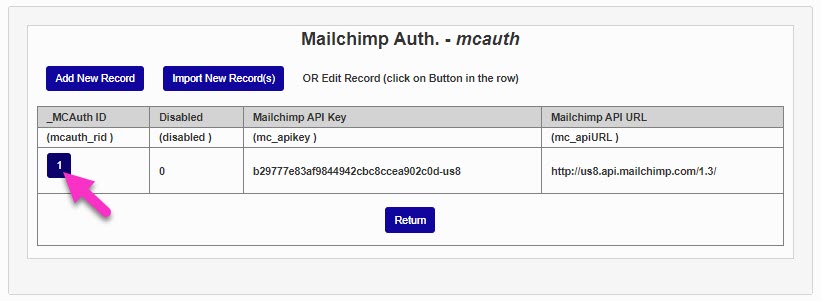
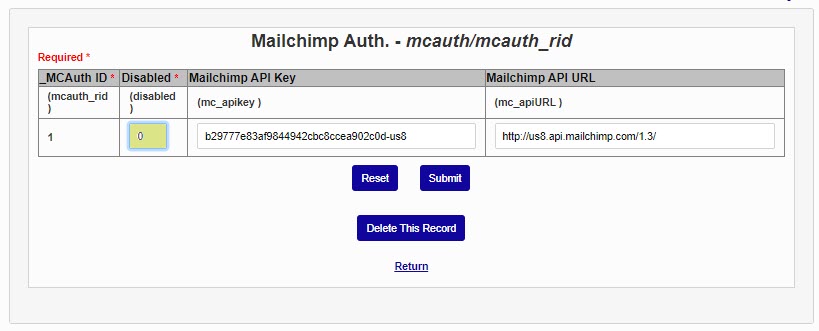
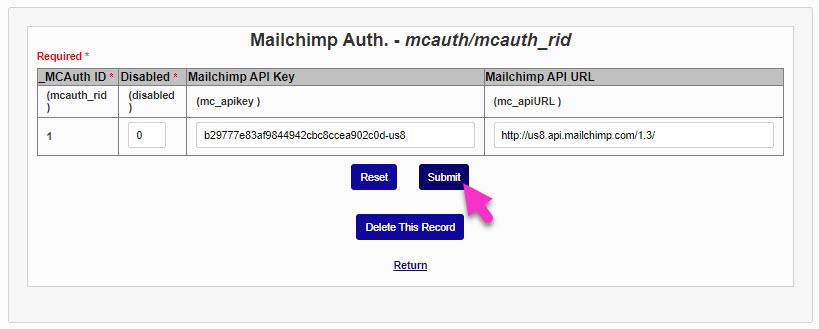
To edit or disable an entry, click the MCAuth ID code. To disable the entry, enter a 1 in the the Disabled field. To edit it, simply click in the desired field and make the needed change. Click Submit to save the update.
Majors/Minors
Major and Minor are ways to label a student's course of study. Typically, a major is a student's primary academic goal while their minor is a secondary and less intensive goal. Most institutions set up their majors so that each major falls under a particular program and require that students be enrolled in the program that matches their major and vice versa, but SONIS does not require any direct linkage between programs and majors. This provides SONIS member schools more flexibility and allows for students to have multiple majors and/or minors without a system conflict. Unlike programs, there is no default way to designate a set number of hours required to complete a major or minor within the SONIS system. However, institutions who wish to create specific requirements tied to their majors can create a Curriculum for each major and assign that curriculum to any student who enrolls in the major. A student's major and minor are directly linked the student's active Education record at the time when they were assigned. Majors and minors are stored in the same table. By default, all majors can be used as minors as well, but this feature can be turned off for any individual major per institutional preferences.
To create new majors, or edit existing majors, select Major/Minor from the list of tables. On the following page, click Add New Record to create a new major or click on the name of a major in the far right-hand column to edit an existing major.

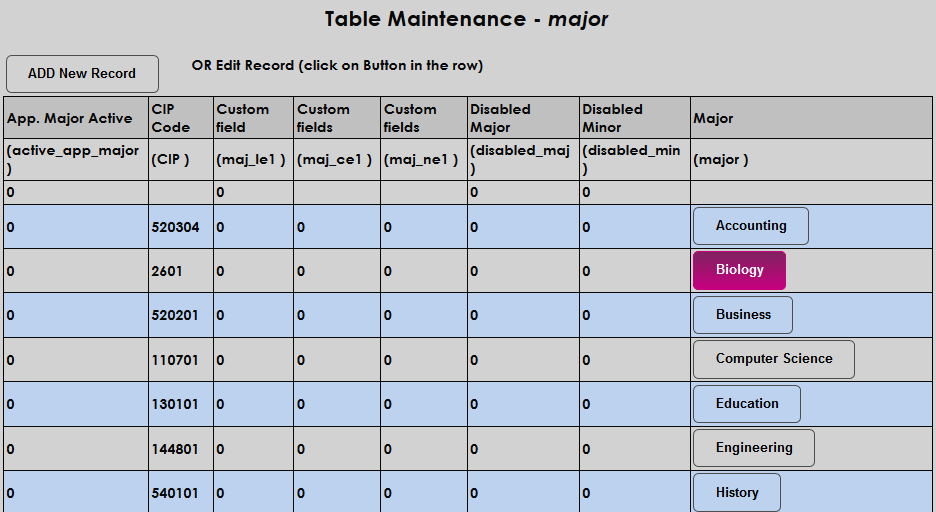
When creating a new major, begin by naming the major in the Major field. This field has a 60 character limit.
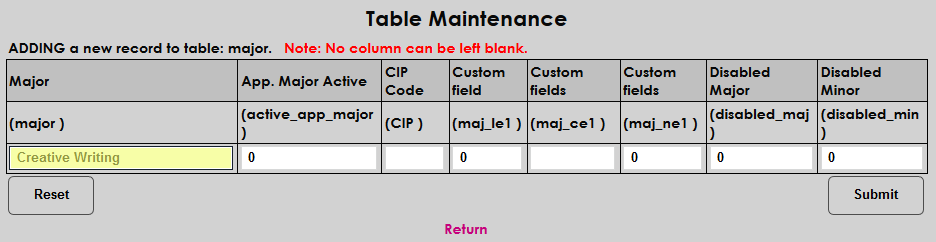
Place a one in the Application Major Active box if the major should be an available option for students applying to the institution. Otherwise, leave a zero in the field.
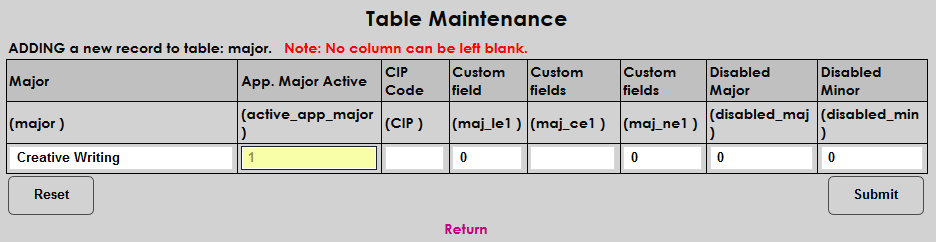
Next, fill in the CIP Code for the major. The CIP code is used by the National Student Clearinghouse to recognize the major when student data is exported. CIP codes can be obtained through the National Center for Education Statistics website. No punctuation should be included.
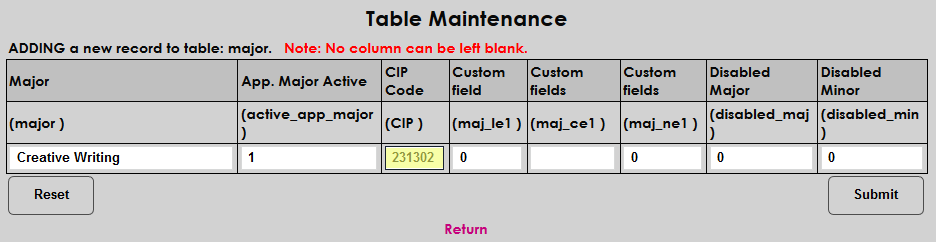
To the right of the CIP Code field are three custom fields. These fields can be used in certain exports, but are not used by most schools. The first and third fields are binary and can only contain a one or a zero. The second field is a free-form text field with a ten character limit. Even if these fields are not being used, every field in the table must have a value.
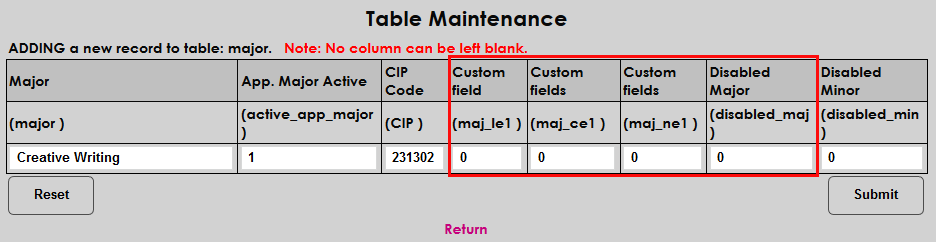
The final two columns allow the administrator to decide whether the label being created should be enabled for use as a major and/or a minor or neither. Place a one in either box to disable the label for that use. A value with a one in the minor field and a zero in the major field can only be used as a major and not a minor. The reverse is true as well. Major/Minor values can also be disabled altogether by placing a one in both fields. Most schools will want to allow the majority of their majors to be used as minors as well, but some schools may not have minors or may have specific majors that can not be taken as a minor.
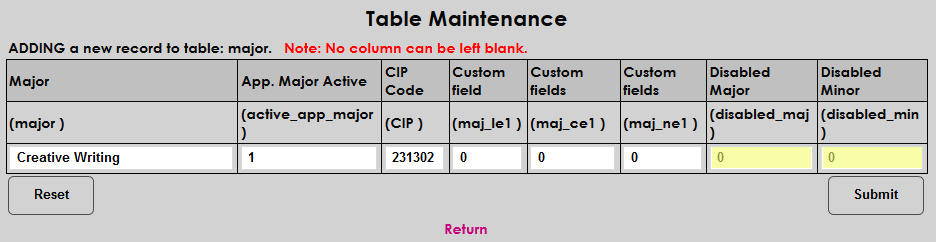
Click Submit to save the changes and create the major/minor.
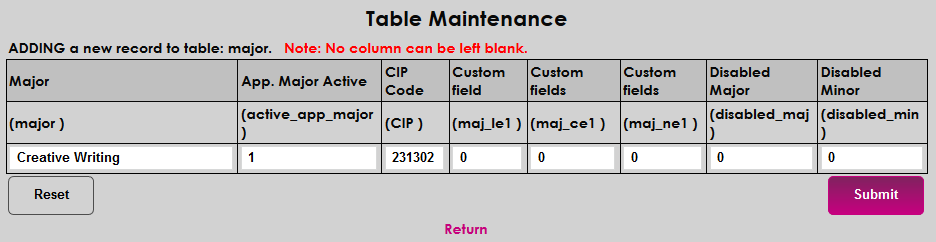
Once a major/minor has been created, the name can not be changed, but the other values can be altered. Additionally, the major can be deleted as long as it is not presently assigned to a student.
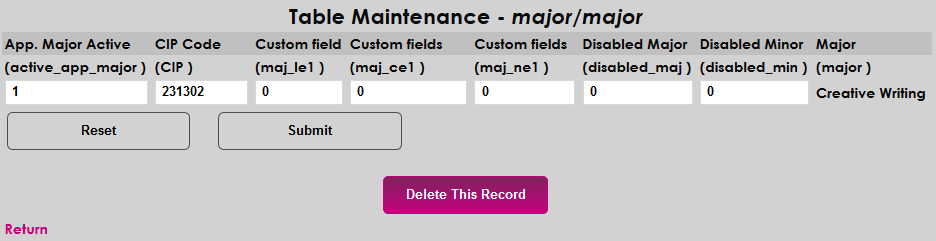
Marital Status
There are a variety of processes, reports, and integrations that use an individual's marital status as a needed piece of Biographic information, perhaps two of the most common are Recruiting/Admissions and Financial Aid.
To add a Marital Status, click the Add New Record button. Enter up to two alphanumeric characters that will represent the status in the Marital Code field.
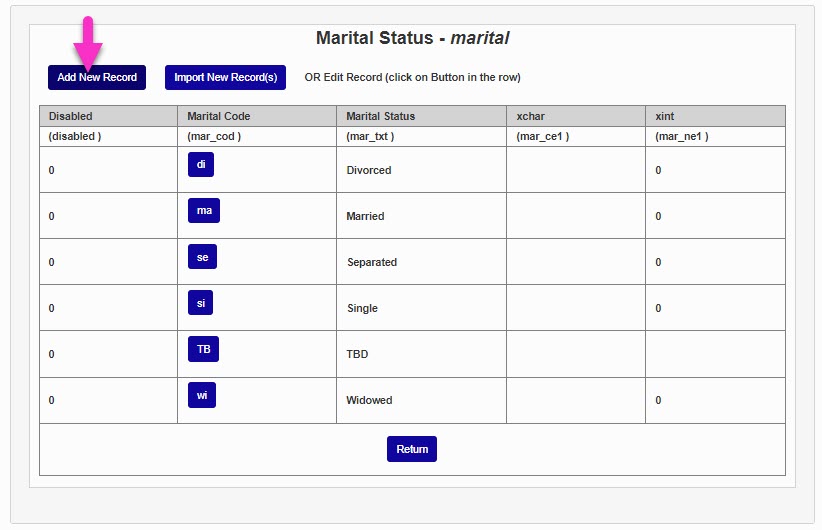
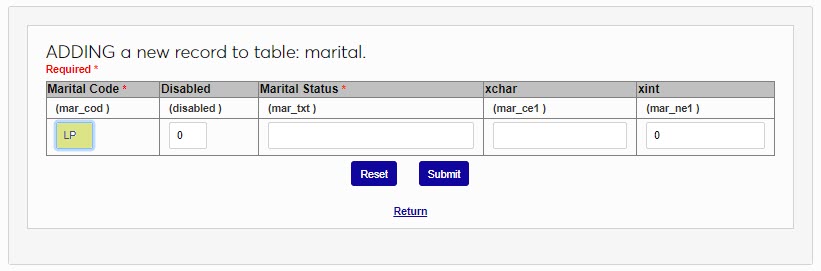
In the Marital Status field, enter the descriptive name of the status. This is what will display to users and applicants. This field accepts up to 20 alphanumeric characters and/or symbols. Click Submit to save the entered information and create the new status.
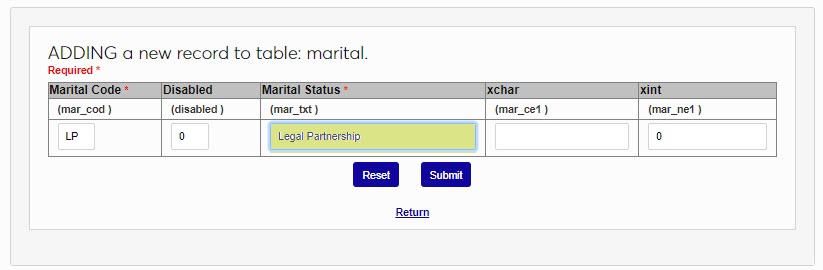
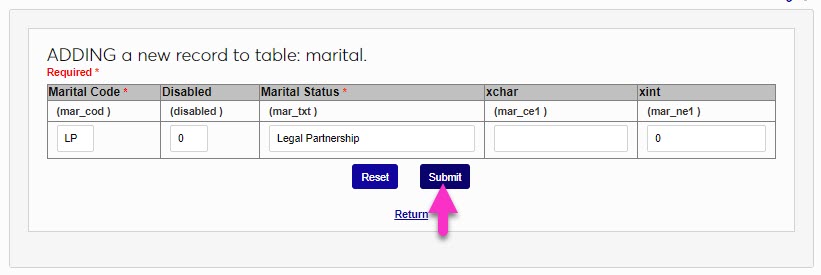
Meeting Locations
The Meetings functions in SONIS are enhanced by the ability to define and manage Meeting Locations. It does not interact with the Room Finder. To add a meeting location, click Add New Record.
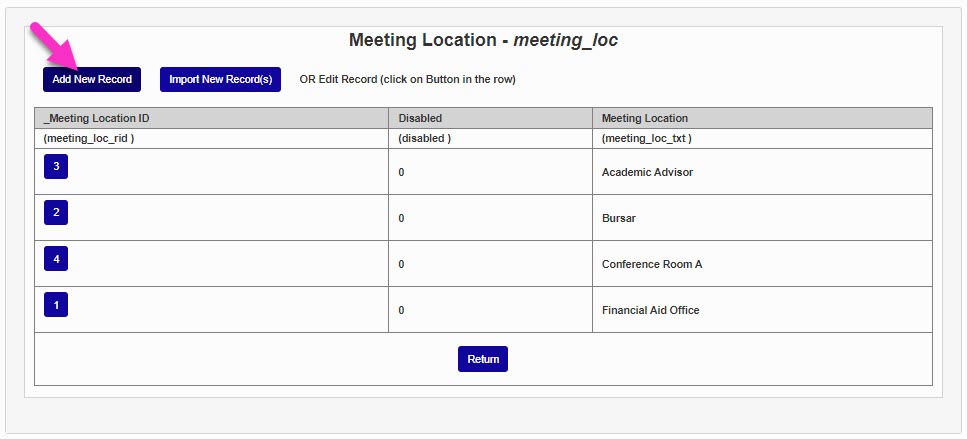
Enter a descriptive name in the Meeting Location field. This field will display to users when they are setting up, or receiving notification of, a meeting. This field accepts up to 100 alphanumeric characters and/or symbols. Click Submit to save the entries and create the location.
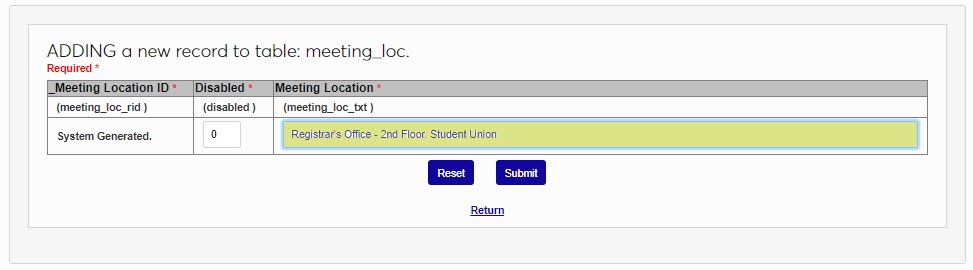
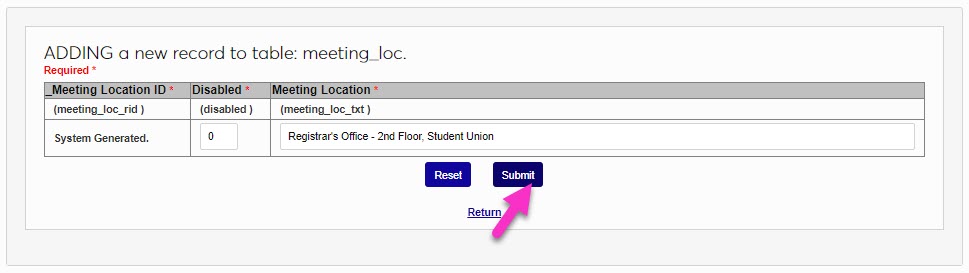
Meeting Status
The Meeting Status table works with the Meetings page and allows users to define and document the status of a meeting that is scheduled or occurred.
To add a meeting status, click Add New Record. In the Meeting Status field, enter a descriptive name that will display to users. This field accepts up to 50 alphanumeric characters and/or symbols. Click Submit to save the entered information and create the status.
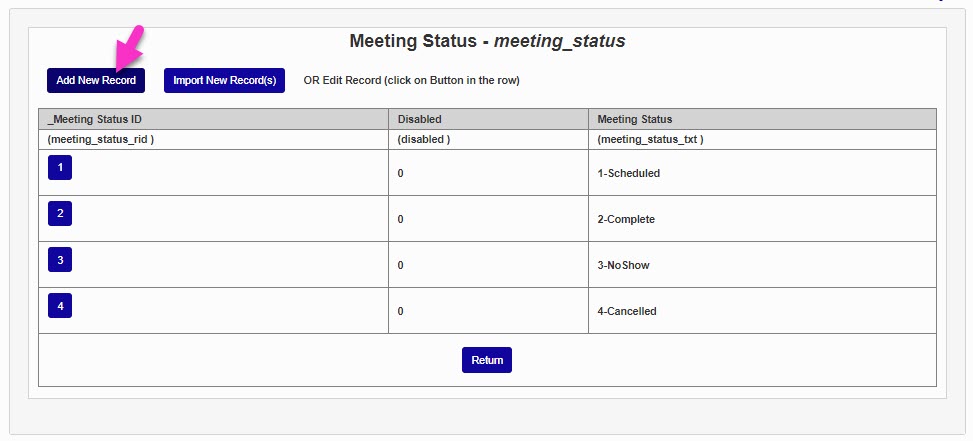
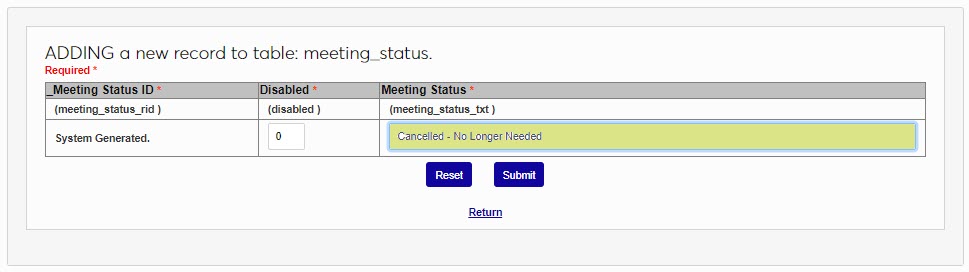
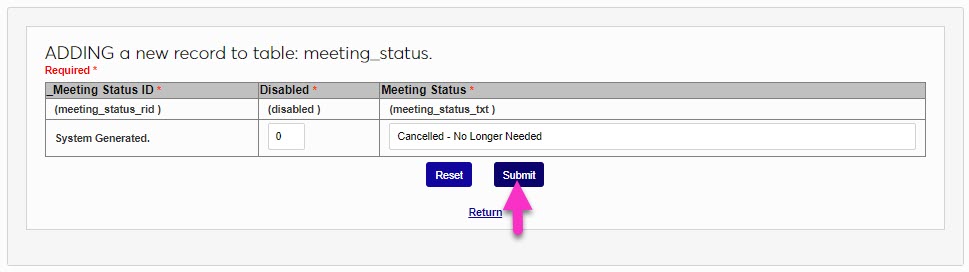
Meeting Type
The Meeting Type table is used in conjunction with Meetings functionality. Typically, values like Recruitment, Academic Status, or Financial Aid, are used to clarify the purpose of the meeting.
To add a new Meeting Type, click Add New Record. Enter a descriptive name for the meeting type in the Meeting Type field. This field accepts up to 50 alphanumeric characters and/or symbols and the value created will be shown to users. Click Submit to save the entered information and create the type.

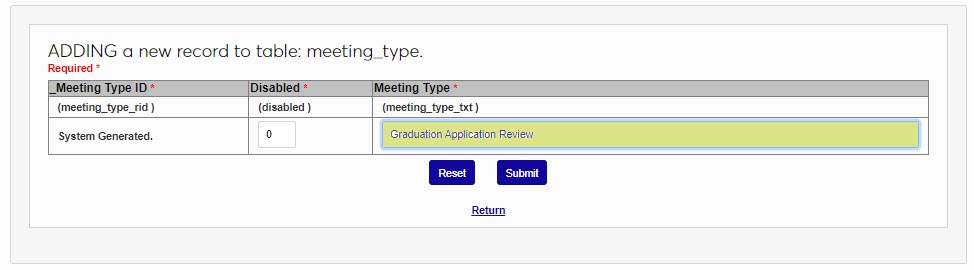
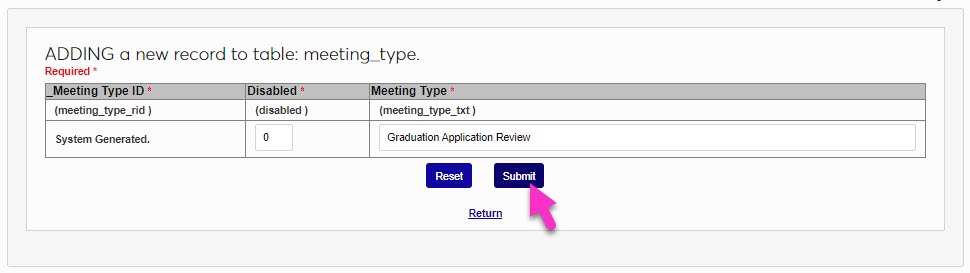
Military Type
The Military Type table is used for biographic and Clearinghouse processes, as well for Veteran's Education Benefit administration. It is important to use care when populating the table values if the values will be used in reporting and program administration processes. Specific use cases are covered throughout this guide.
To add a new military type, click Add New Record. In the Military Code field, enter up to two alphanumeric characters to represent the military type. This field will not be used in NSC reporting, but may be used in other reports or processes.
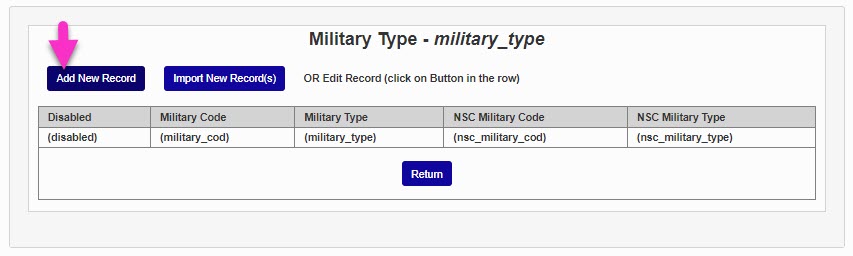
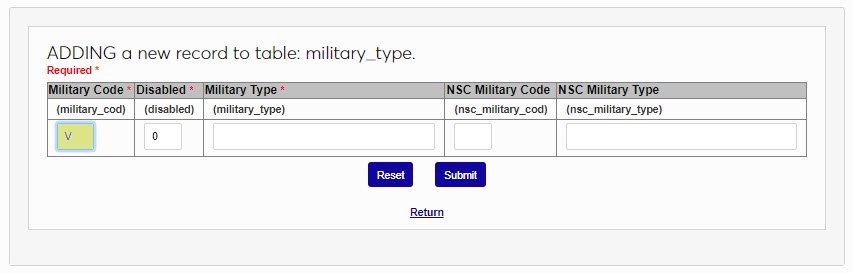
In the Military Type field, enter a descriptive term for the type. This type will display to users and will not be used in NSC reporting, but may be used in other reports or processes. This field accepts up to 50 alphanumeric characters and/or symbols. In the NSC Military Code field, enter the Clearinghouse reporting code that corresponds with the type being created.
Note
As of the creation of this guide, the NSC codes and types are: V = Veteran receiving benefits, N = Veteran receiving benefits, and D = Dependent receiving benefits.
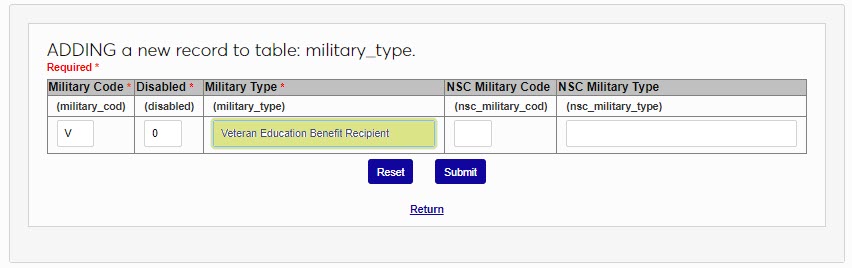
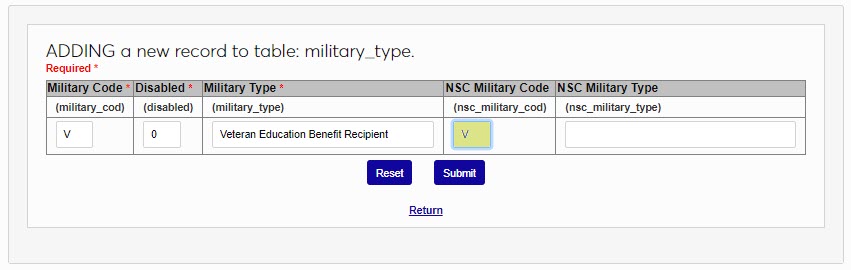
In the NSC Military Type field, enter the name used by Clearinghouse for the type being created. Click Submit to save the entered information and create the type.
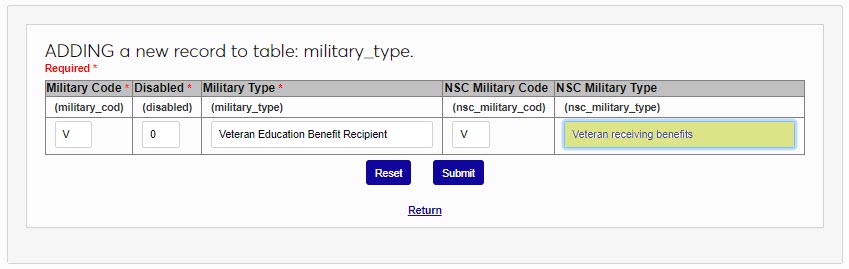
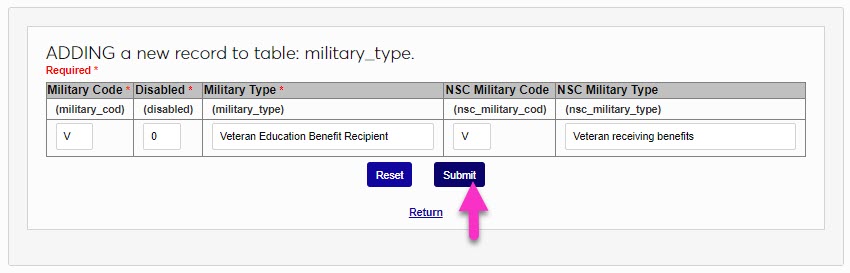
Ministerial Credential
If the SONIS member institution wishes to collect information about ministry licensure and/or affiliations of applicants or persons associated with the institution, the Ministerial Credential table must be completed.
To add a credential type, click Add New Record. The Ministerial Credential ID will be created by SONIS when the new type is saved. In the Ministerial Credential field, enter the name of the type being created. This field accepts up to 50 alphanumeric characters and/or symbols. Click Submit to save the entered information and create the type.
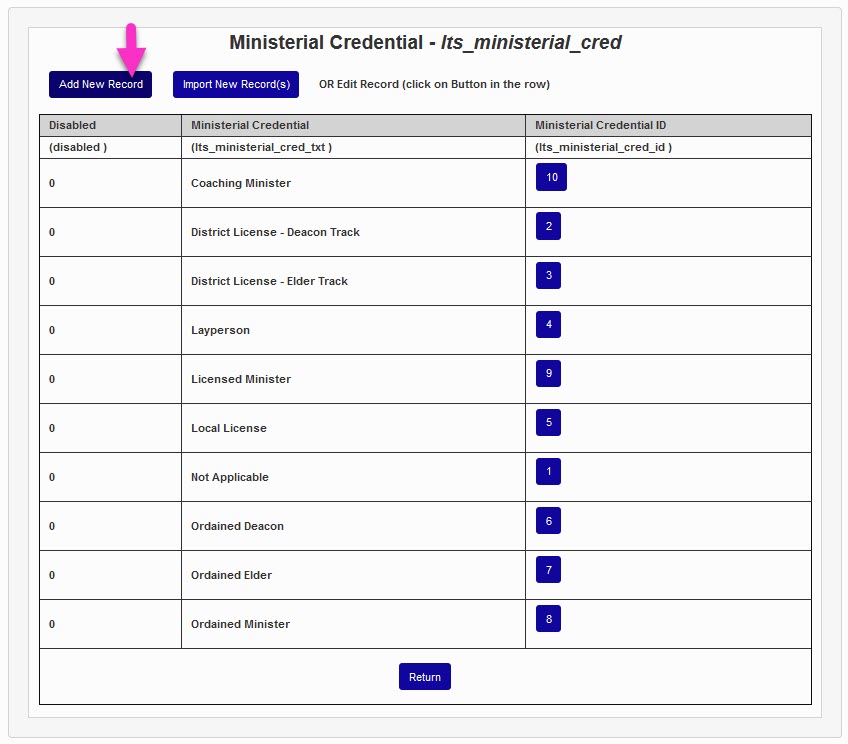
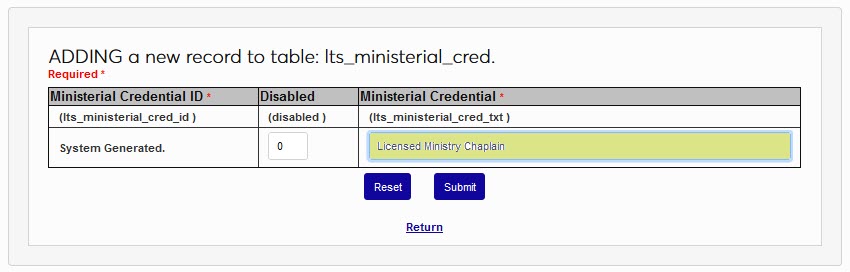
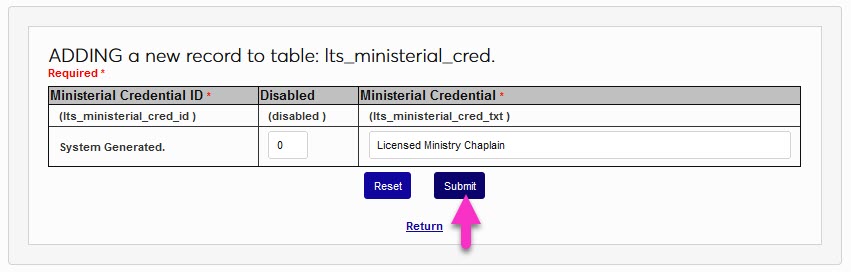
Ministerial Type
If the SONIS member institution wishes to collect information about ministry affiliations of applicants or persons associated with the institution, the Ministerial Type table must be completed. Generally, the values defined on this table are associated with they type of ministerial work performed.
To add a new type, click Add New Record. The Ministerial Type ID will be created by SONIS when the new type is saved. In the Ministerial Type field, enter the name of the type being created. This field accepts up to 25 alphanumeric characters and/or symbols. Click Submit to save the entered information and create the type.


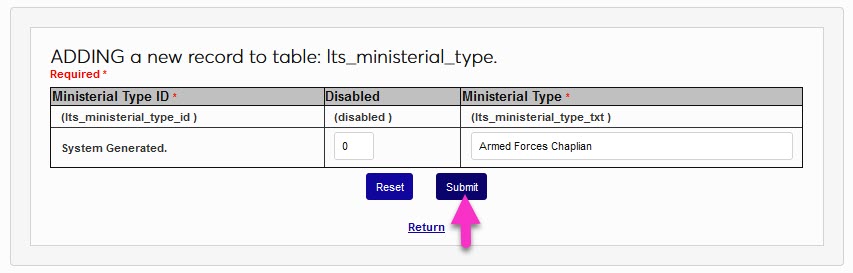
No Class Calendars
The Systems hub page, Set No Class Dates, allows administrators to mark days in the academic calendar year as dates on which there will be no classes. For example, winter and spring breaks, holidays, and in-service days. These dates are then automatically skipped when entering attendance through the Faculty portal and as an Administrator. These events are added automatically to the calendars in the Faculty and Student portals unless marked as internal display only. Multiple calendars with different no class dates can be created and associated with courses on the section level.
Click Add New Record. Enter a No Class Calendar Code that will be used to identify the calendar in the database. This field has a 10-character limit and cannot be edited once the calendar has been created.
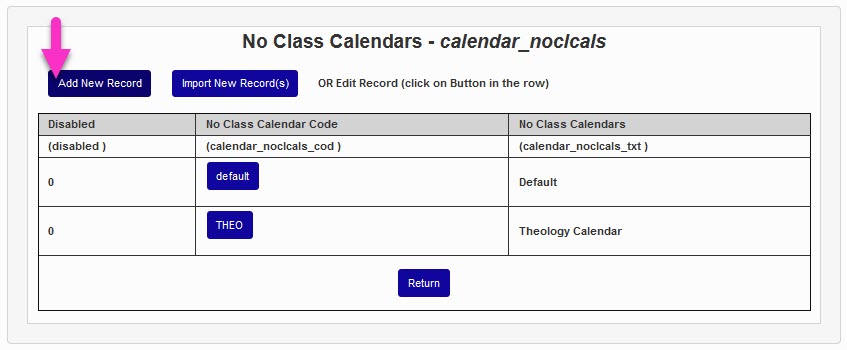
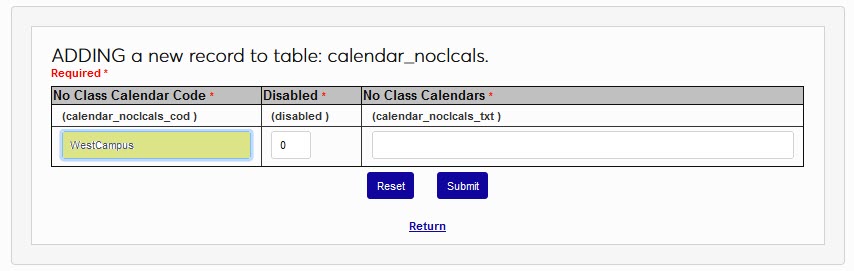
Enter an in-system display name for the calendar using the No Class Calendars field. This field has a 50-character limit and can be edited. Click Submit to save the changes and create the calendar.
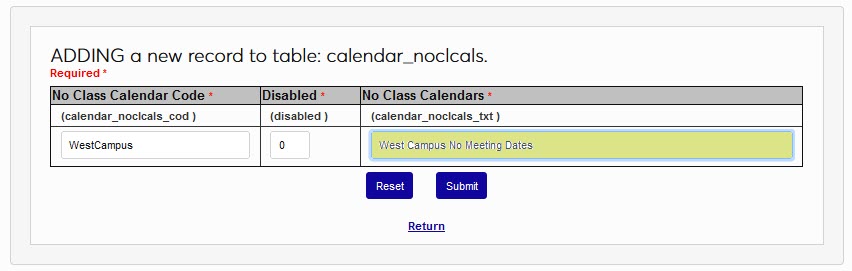
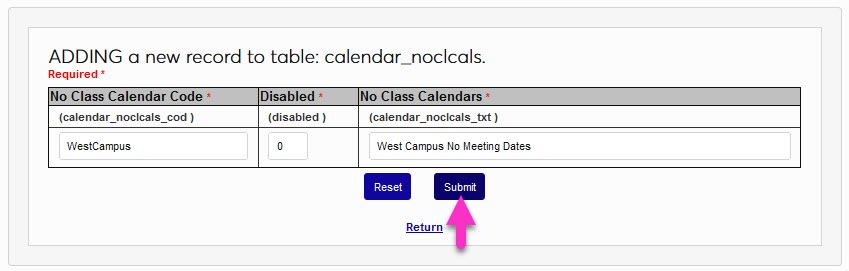
Online Application Sections
One of the features available in the Online Application Questions page is the ability to define sections and organize or group questions. To utilize this feature, section headings must be defined in the Online Application Sections table. By default, any defined questions will be grouped under the Default Section heading unless they are grouped under another heading. Each section has a section note that can be used as a page note or section instructions. If no section note is entered in the table, no explanatory note will appear in that section of questions.
To define a section, enter the Online Application Sections table and click Add New Record. In the Default field, enter a 1 if this section should not be the default section and a 0 if it should. In most circumstances, this would be a 1.
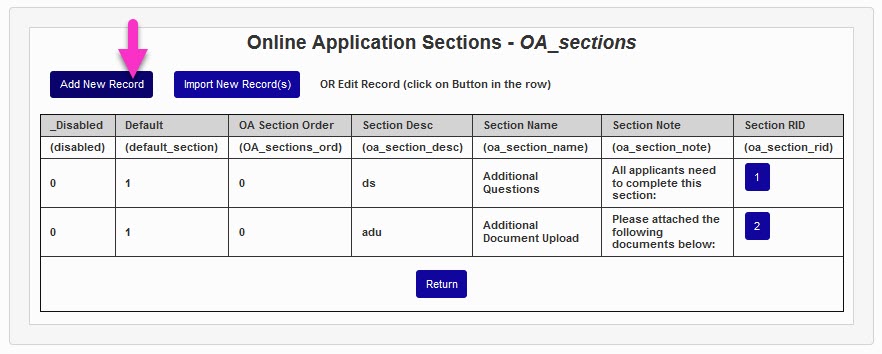
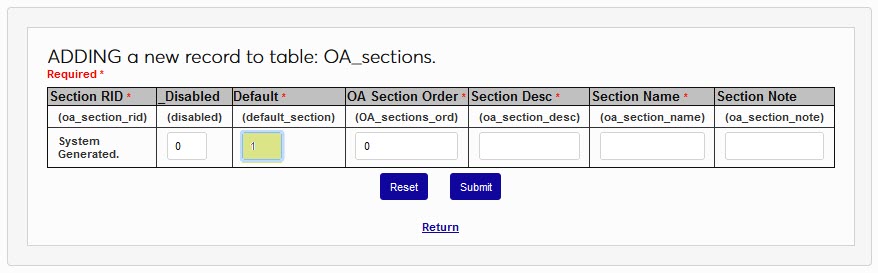
The OA Section Order field is used to determine the order sections should display in on the page. If no specific order is desired, leaving a 0 in all sections will order the sections alphabetically. In the Section Desc field, enter a descriptive name for the section. This field accepts up to 10 alphanumeric characters and/or symbols. It will not display in the Online Application, but will display to users in the OA Questions Setup page.
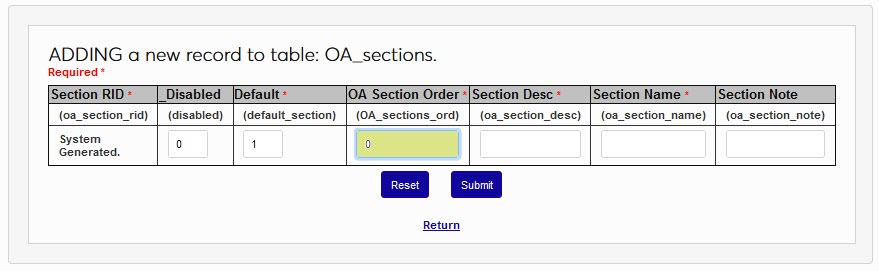
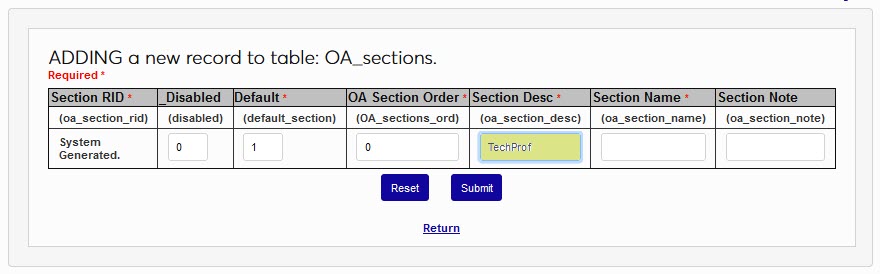
In the Section Name field, enter the display name of the section. This field accepts up to 40 alphanumeric characters and/or symbols. This is the name, or label, that will display to applicants as they are completing their application. If instructions or an explanation is desired, enter the text in the Section Note field. This field accepts up to 140 alphanumeric characters and/or symbols. Click Submit to save the entered information and create the section.
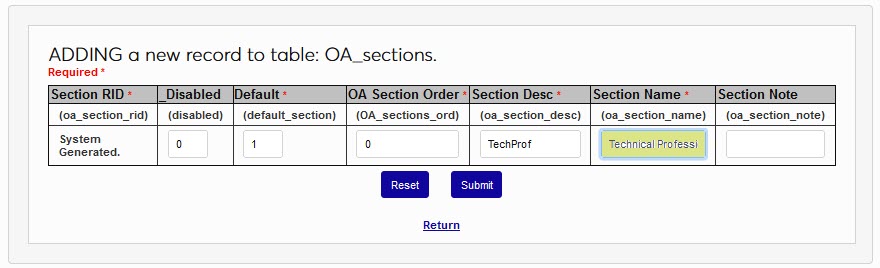
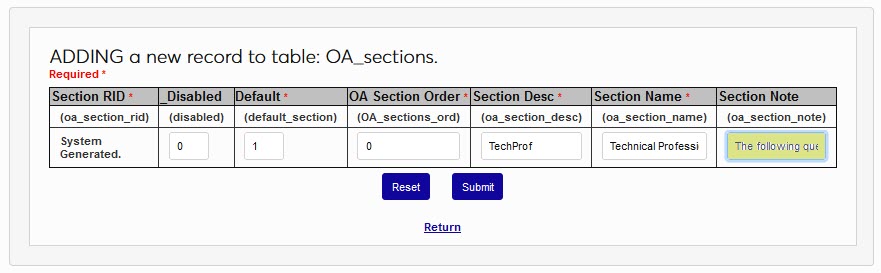
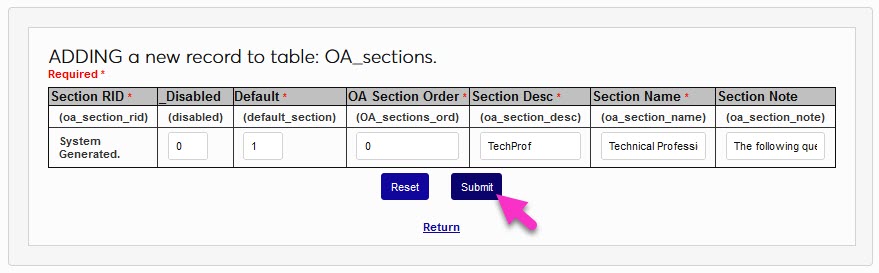
Order Type
Some SONIS member institutions refer to certain student activities as "orders." The SONIS Order Tracking utility gives these schools a way to record and manage student order records and the Order Tracking Import utility provides a means of adding orders in bulk. Orders can be labeled according to type, but these types must first be created in the Order Type table.
Click the Add New Record button to begin. First, create a descriptive name for the order type in the Order Type Description field that will display to users. The field has a 100-character limit.


Next, create an Order Type Code, a shorter version of the description that will be used to identify the type behind the scenes. The field has a two-character limit. Leave a 0 in the Disabled field to leave the order type active or replace it with a 1 to disable the type.
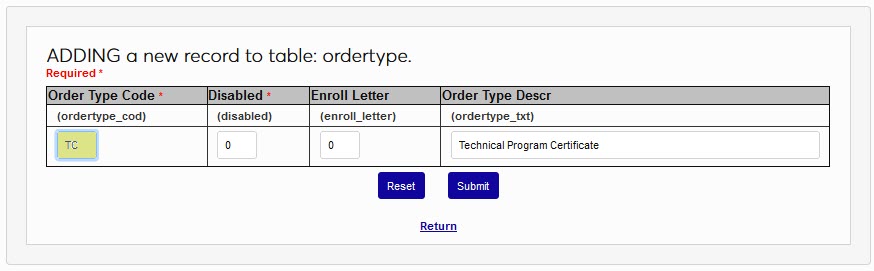
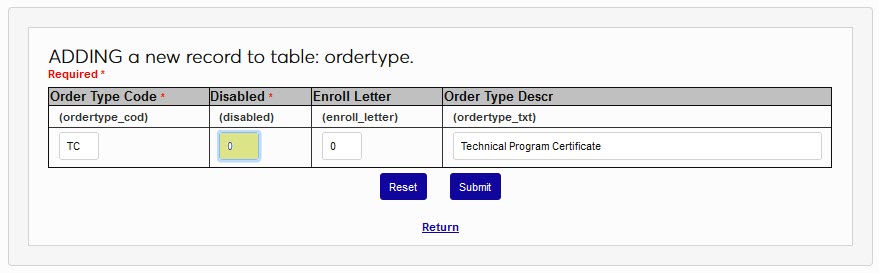
The Enroll Letter field is an example of an institutional-specific extra, or user defined, field. Click Submit to save the changes and create the order type. Repeat the process until all order types that will be used have been created.
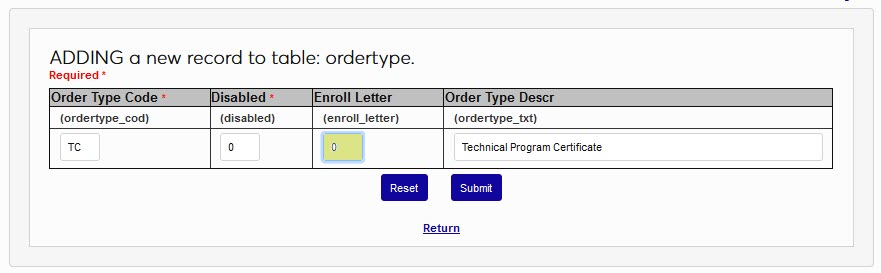

Parking Incidents
Enter the Parking Incidents table and click Add New Record.
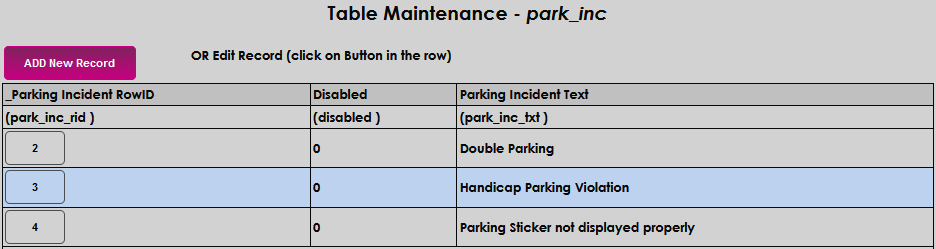
Enter the name of the violation in the Parking Incident Text field and click Submit to save the entry.


Parking Zones
To create a new Parking Zone, select Parking Zone from the menu.
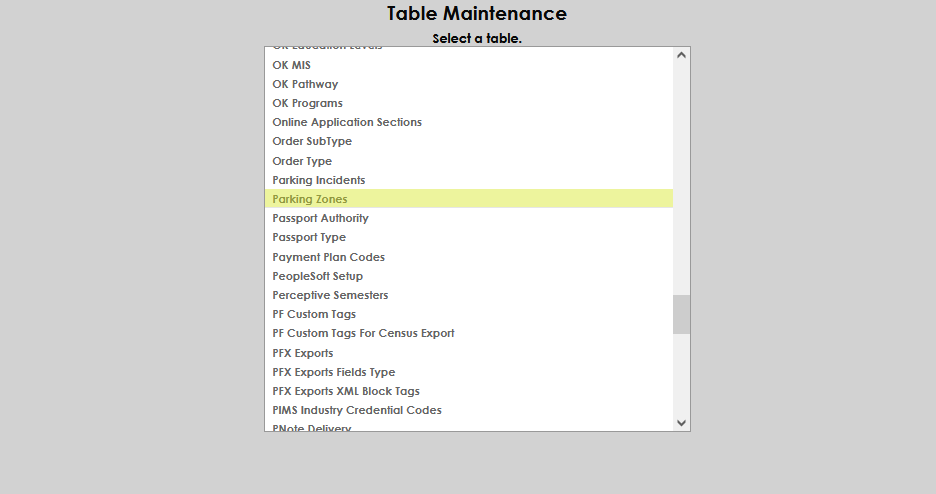
Click the Add New Record button.
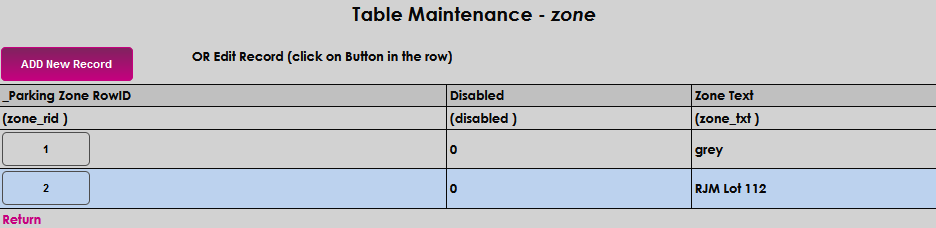
Type the name of the parking zone in the Zone Text field. This field allows 30 characters. Click Submit to save the entry.
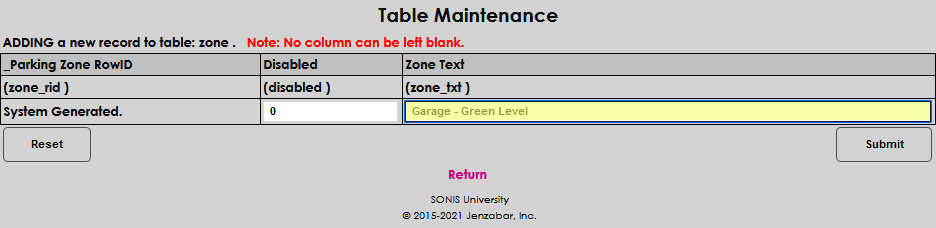

To edit an existing record, click on the Row ID number. Make the desired edits and click Submit to save your changes.

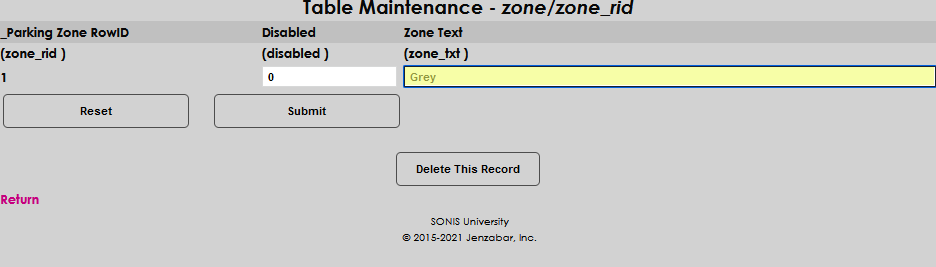
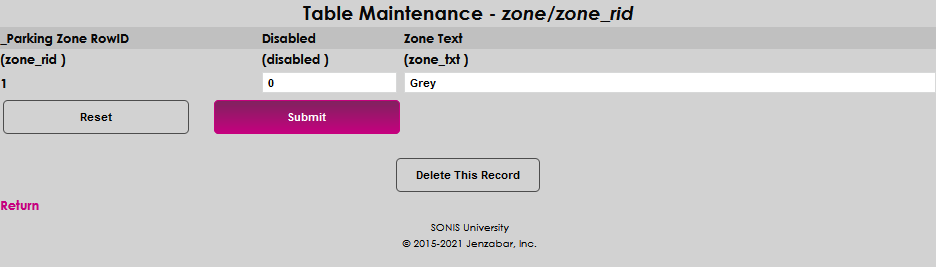
Passport Authority
Some institutions, particularly those outside of the United States or with international student programs, have a need to store and access their students' passport information. This can easily be accomplished through the Passport Tracking page, which has fields to store all passport information and allows multiple passports to be on file. Before using it, the Passport Authority and Passport Types tables must be set up.
To create passport authorities, select Passport Authority from the Table Maintenance menu. The passport authority is the governmental agency that issued the passport.
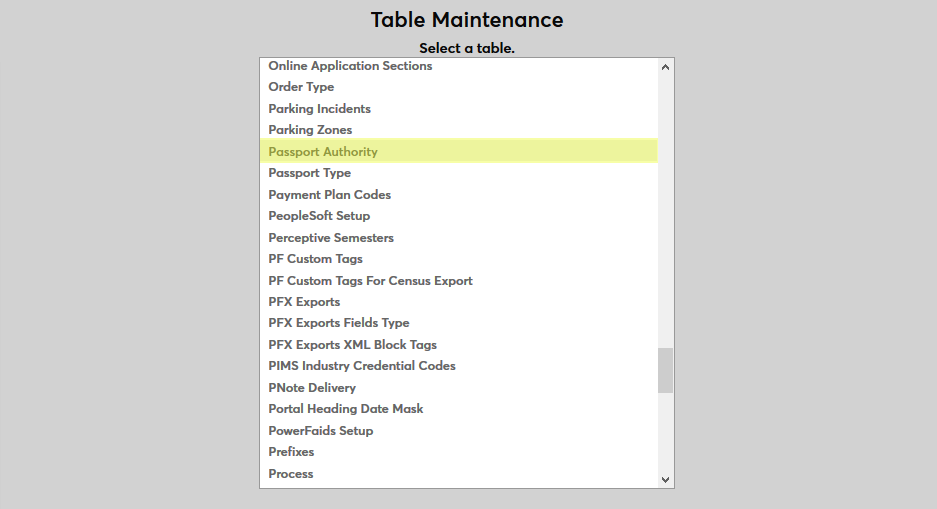
By default, a Manual Entry authority exists. This listing allows administrators to enter an authority when the appropriate passport authority isn't listed. This passport authority should not be deleted or otherwise altered.
Click the Add New Record button to create a new passport authority.
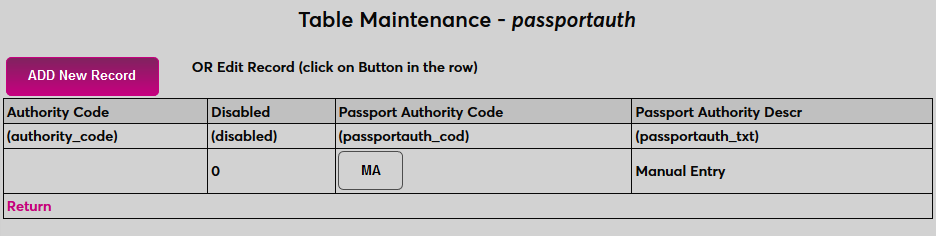
Create a descriptive name the passport authority in the Passport Authority Descr field that will be used to identify the the label in SONIS. The field has a 100-character limit.
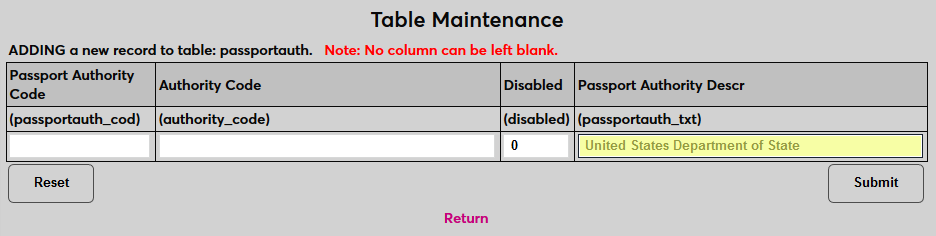
Next, create a Passport Authority Code, a shorter version of the description that will be used to identify the type behind the scenes. The field has a two-character limit.
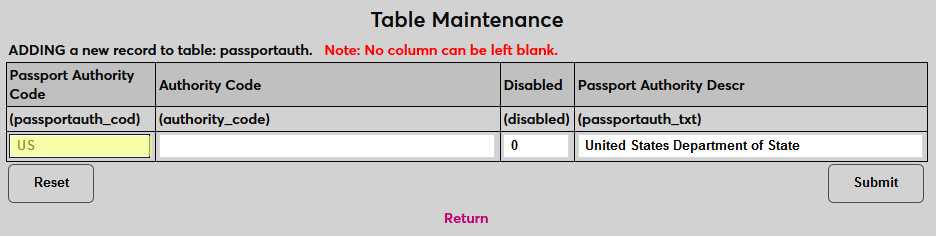
Then, create an Authority Code, the official abbreviation for this authority that appears on passports. The field has a 100-character limit.

Click Submit to save the changes and create the passport type.
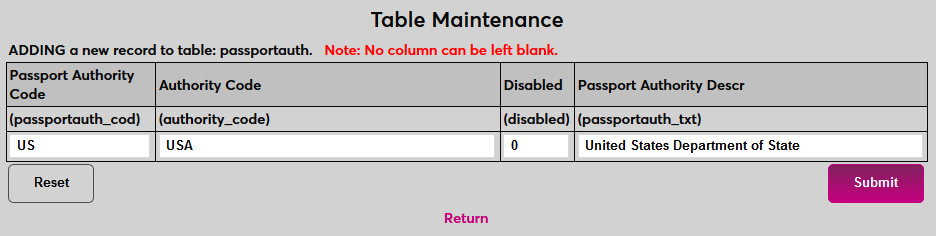
Passport Types
To create passport types, select Passport Type from the Table Maintenance menu.
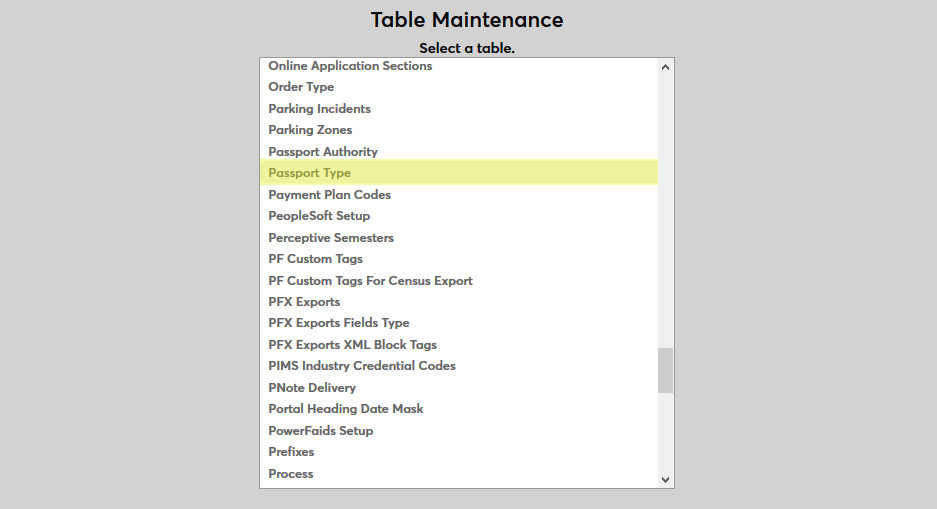
Click the Add New Record button to create a new passport type.
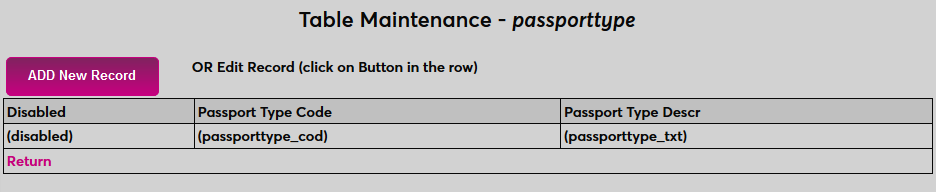
First, create a descriptive name the passport type in the Passport Type Descr field that will be used to identify the the label in SONIS. The field has a 100-character limit
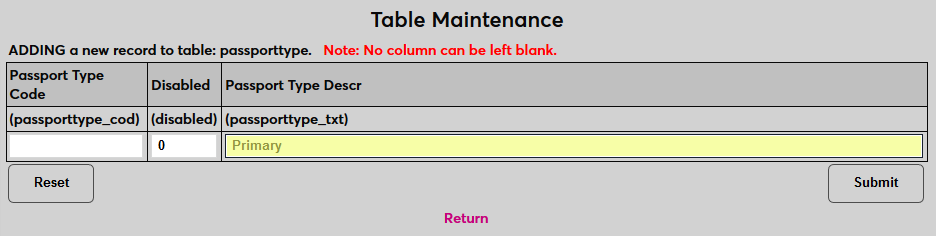
Next, create a Passport Type Code, a shorter version of the description that will be used to identify the type behind the scenes. The field has a two-character limit.
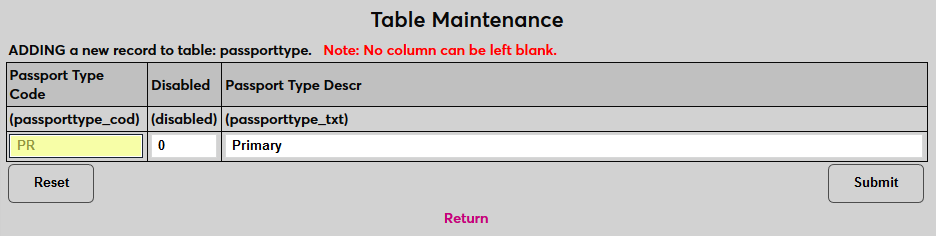
Leave a 0 in the Disabled field to leave the passport type active or replace it with a one to disable the type
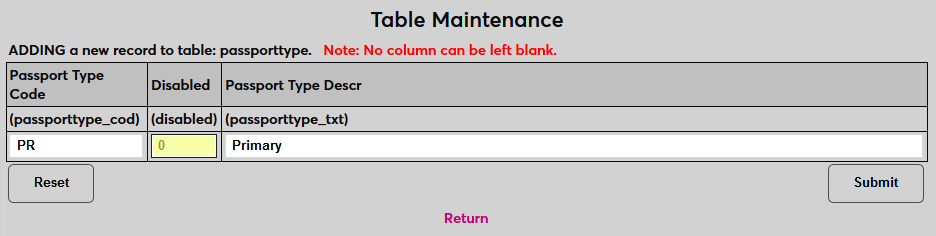
Click Submit to save the changes and create the passport type.
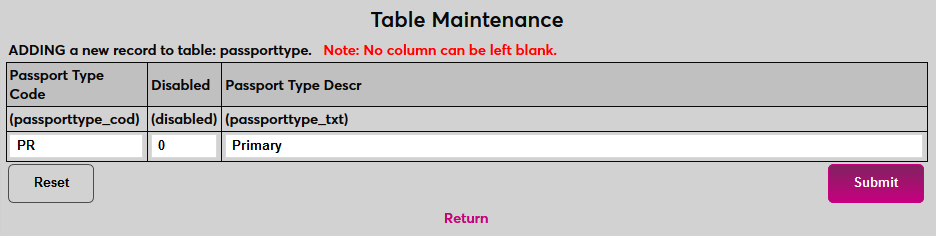
Repeat the process until all passport types that will be used have been created.
Payment Plan Codes
To create or edit a payment plan code, select Payment Plan Codes.
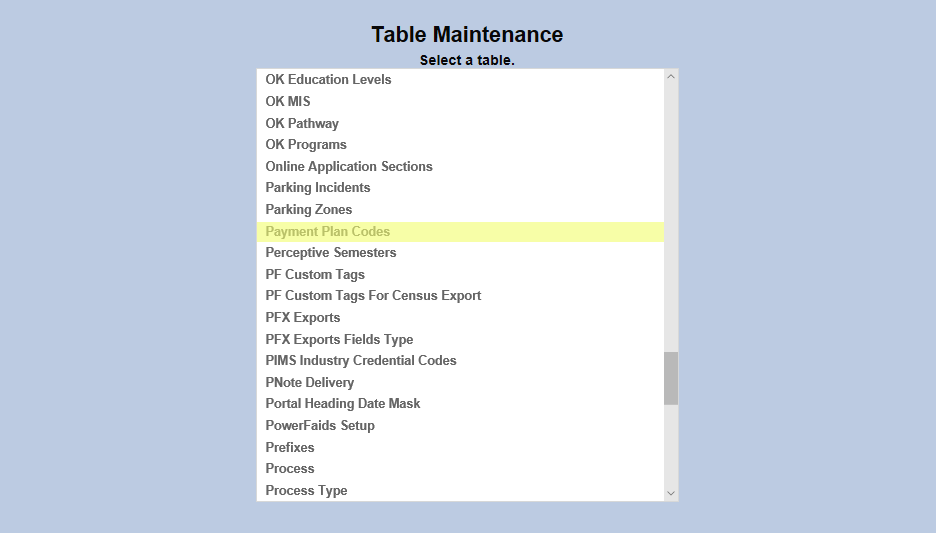
To add a new payment plan code, click on the Add New Record button or click on an existing code to edit it.
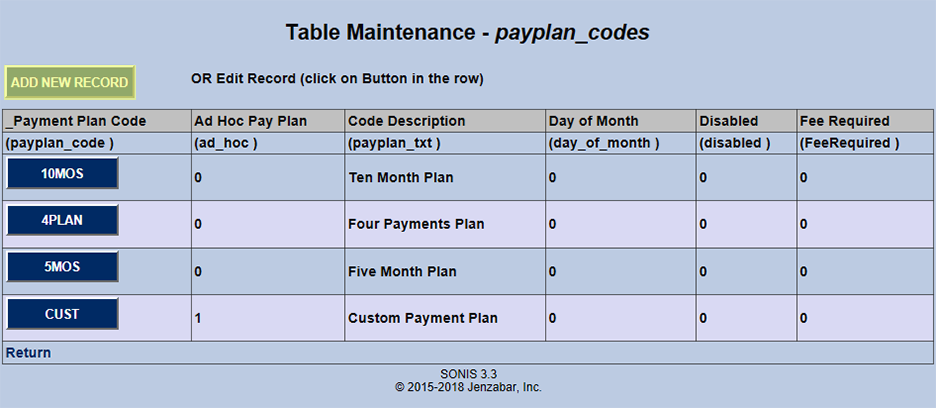
On the following page, enter a longform description of the code to be created in the Code Description field and an abbreviated version of the code in the Payment Plan Code field. The Code Description field has a 35 character limit and the Payment Plan Code has a five character limit.
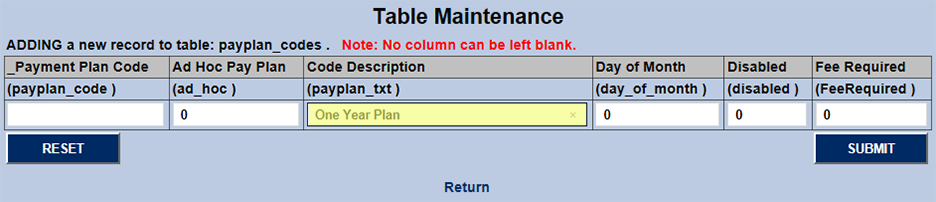
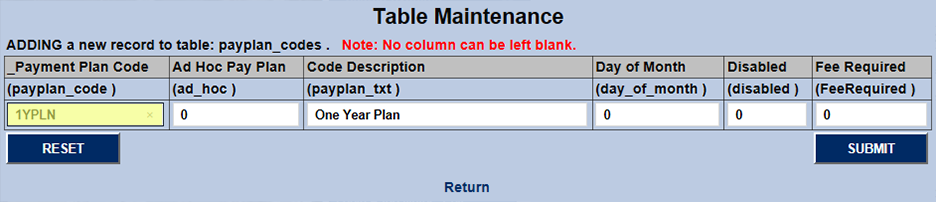
The Day of Month field controls whether the payment will be set to come in on a specific day of the month or not. If the Day of Month setting should be turned on, type a "1" in the field.
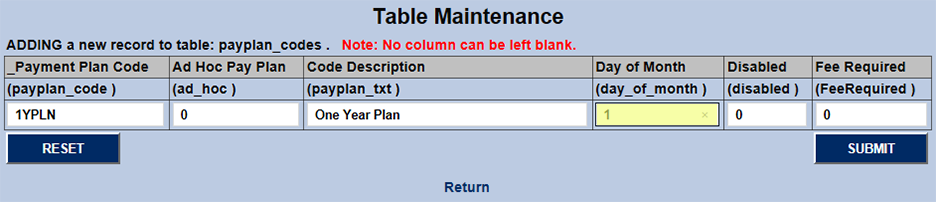
The Fee Required field is also an on/off bit. Place a "1" in the box if the payment will have a set fee attached. Leave a "0" if it should not.
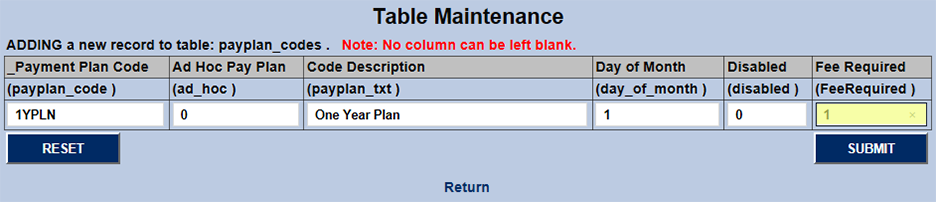
The Ad Hoc Pay Plan field controls whether the payment plan is customizable for each individual student or takes place over a set increment. Place a "1" in the field for custom/ad hoc plans or leave the "0" for fixed plans.
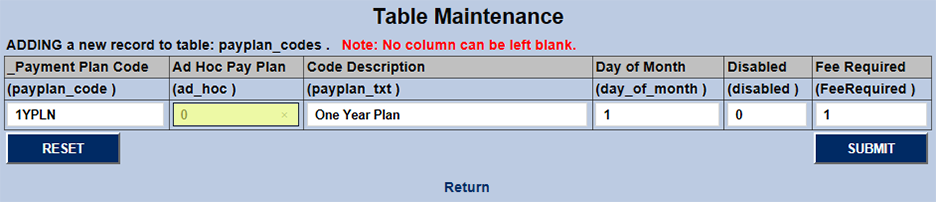
The final on/off bit field is the Disabled field. Place a "1" in this field to disable the plan code or leave a "0" to enable the field.
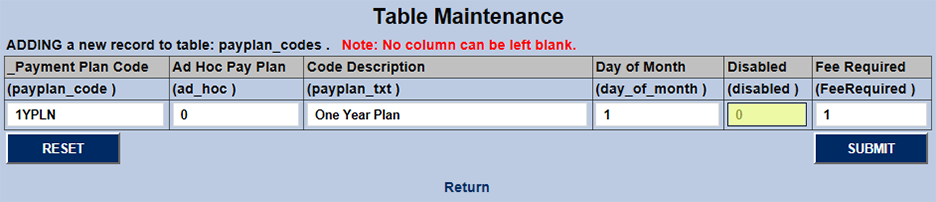
Once every field has been filled, click Submit to saves the changes and create the payment plan code.
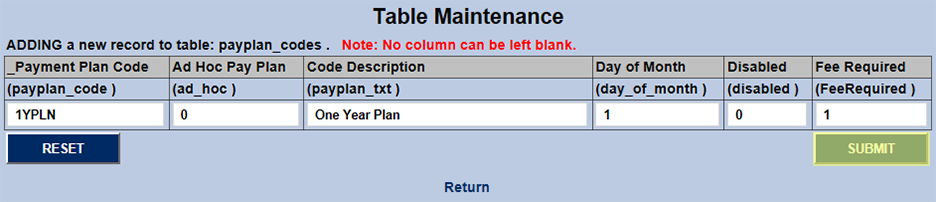
Perceptive Semesters
For successful import of transfer course data from Perceptive, SONIS must be linked at the year and semester level. To facilitate this process, the Perceptive Semesters table is provided.
To define a linking, click Add New Record. In the SONISWeb Year field, enter the 6 digit SONIS year code.
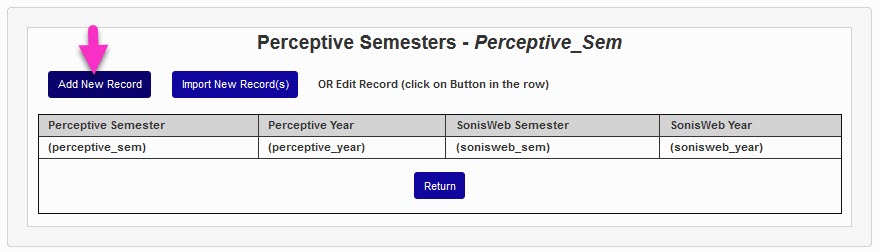
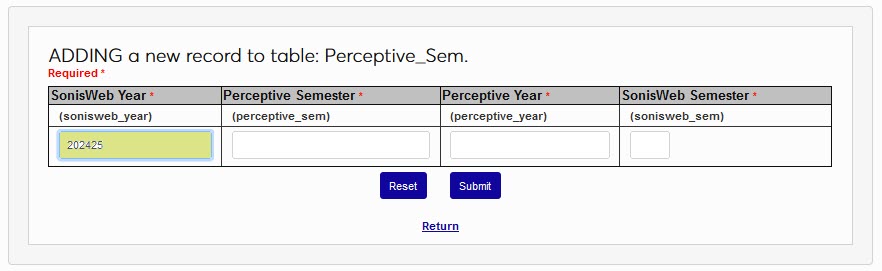
Enter the name of the semester to be linked, as used in Perceptive, in the Perceptive Semester field. Enter the name of the year in Perceptive in the Perceptive Year field.
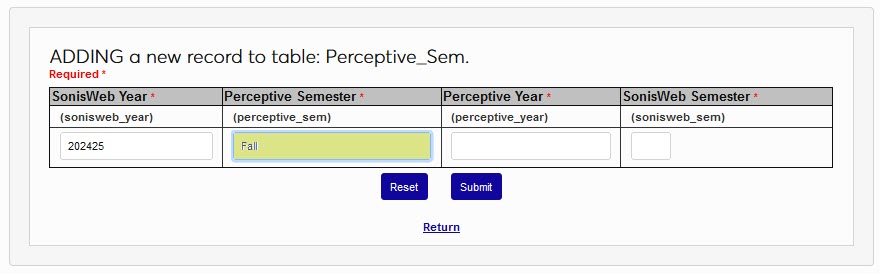
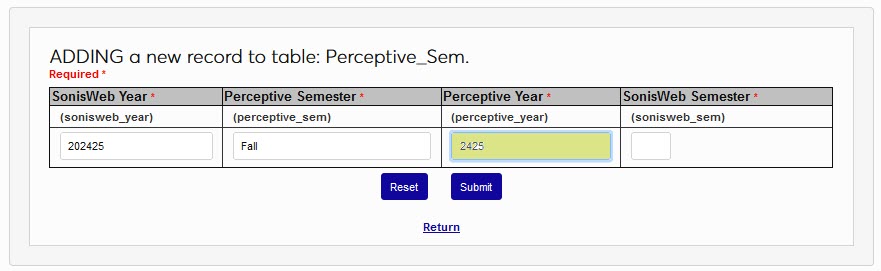
In the SONISWeb Semester field, enter the semester number used in SONIS to identify the term being linked. Click Submit save the entered information and created the linked year and semester.
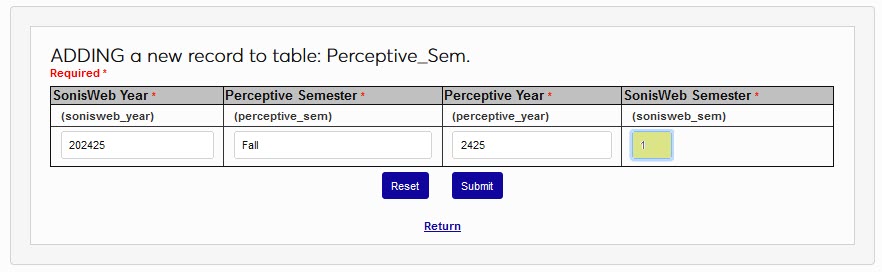
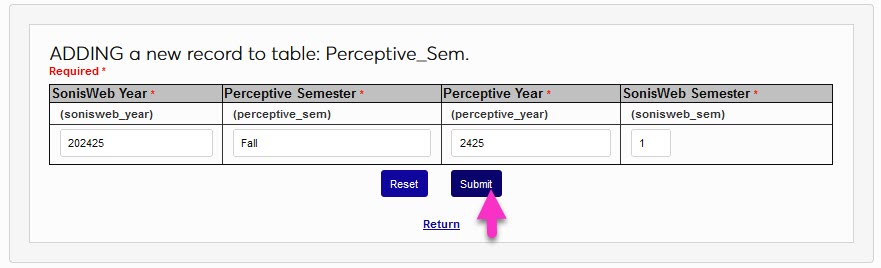
PIMS Industry Credential Codes
For institutions required to submit Pennsylvania Department of Education PIMS student-level data reports, the Systems hub page, PIMS Export process is provided. To utilize the functions, Support must enable the PIMS Industry Credential Codes table and PIMS Export. After these are enabled, the table can be populated with the institution's PIMS Industry Credential Codes. To add an industry code, enter the PIMS Industry Credential Codes table from the Table Maintenance option in the Systems menu. Click Add New Record.
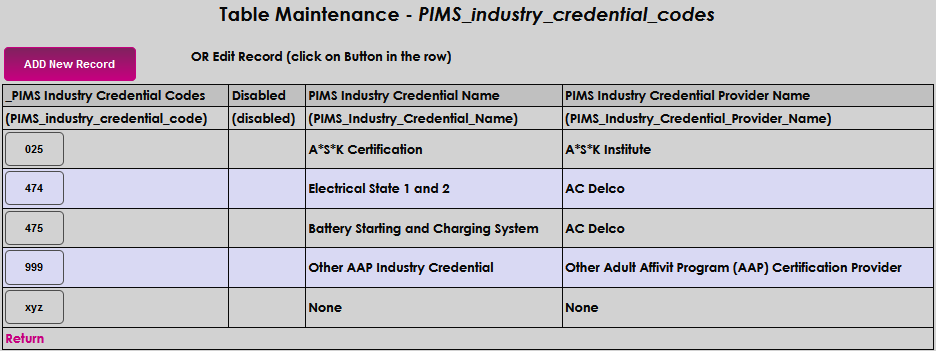
Enter a code made up of three alphanumeric characters that will represent the industry credential in the PIMS Industry Credential Codes field. This can be the state-assigned code or a code of the institution's choosing.

Enter the name of the credential in the PIMS Industry Credential Name field. This field accepts up to 70 alphanumeric characters.

Enter the name of the credential provider in the PIMS Industry Credential Provider Name field. This field accepts up to 70 characters. Click Submit to save the entries and create the code.


PowerFAIDS Cloud Setup Table
All columns on this table must be completed for each academic year and semester where data will be exported. Select PowerFAIDS Cloud Setup from the Table Maintenance menu and click Add New Record. Enter the POE Token used within PowerFAIDS for the term period being defined.

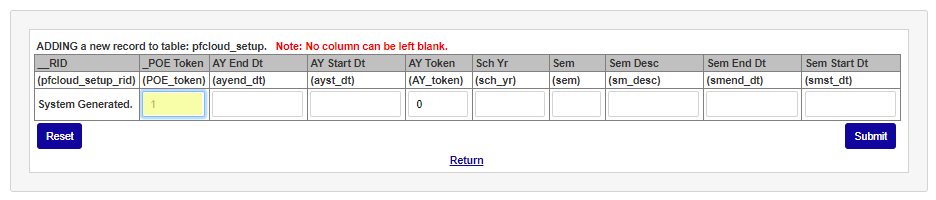
Enter the academic year start date in the AY Start Dt field and the academic year end date in the AY End Dt field.
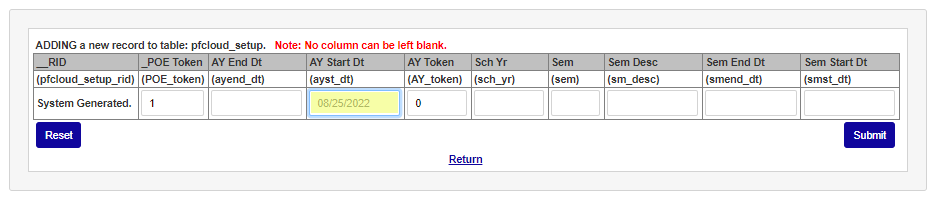
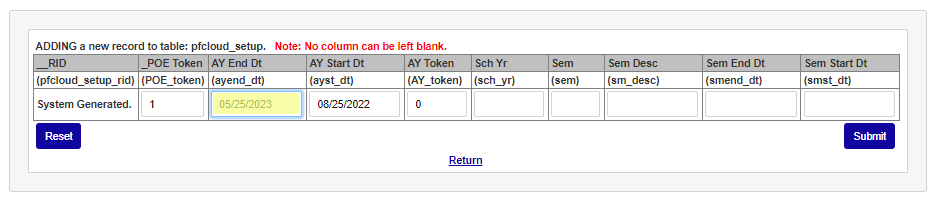
Enter the PowerFAIDS token for the academic year being setup in the AY Token field. Enter the school year code used in SONIS in the Sch Yr field.
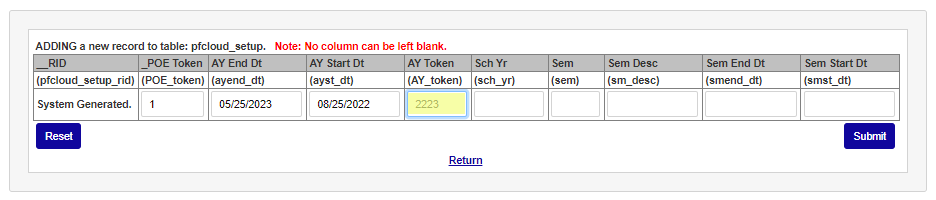
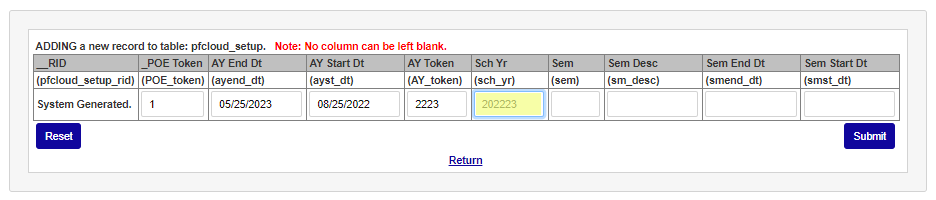
Enter the semester number used in SONIS for this POE in the Sem field. Enter the name of the semester in the Sem Desc field.
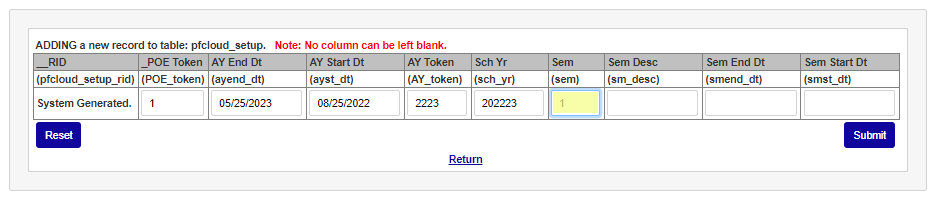
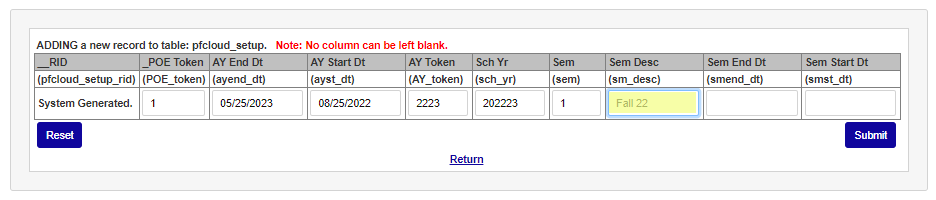
Enter the last day of the semester in the Sem End Dt field and the first day of the semester in the Sem Start Dt field.
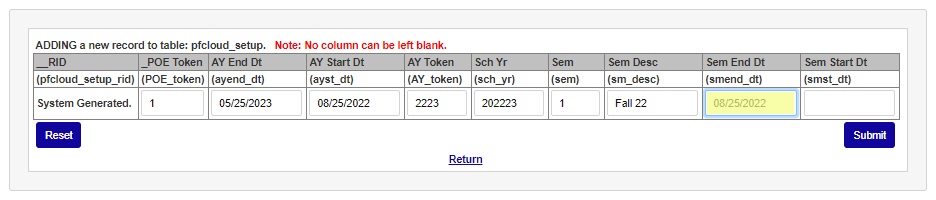
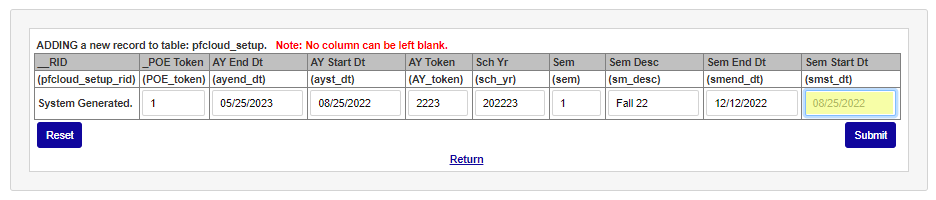
Click Submit to save the entry. Repeat these steps for any semester or term that information will be sent to PowerFAIDS.
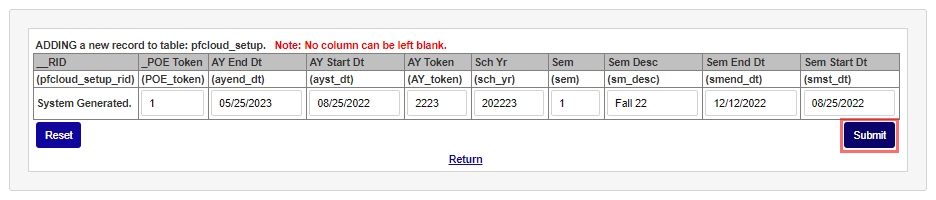
PowerFAIDS Cloud User Exports
The PowerFAIDS Cloud User Exports table is used in conjunction with the PowerFAIDS Cloud: Users Export page. After user export types are created, the names and activity status can be managed from this table. User Exports can be created by name on this table, but the setup and association of fields for the export must be completed on the PowerFAIDS Cloud: Users Export page. To add an export, click the Add New Record button.
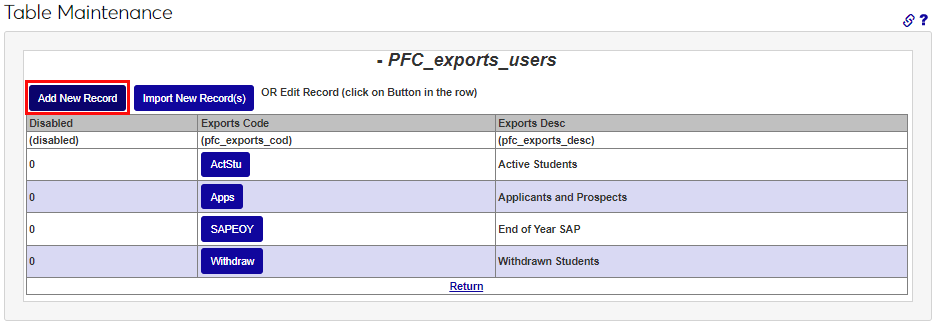
Enter up to eight alphanumeric characters that represent the export being created in the Exports Code field. Enter up to 35 alphanumeric characters in the Exports Desc field. This will become the name of the export and should be descriptive enough to make the purpose of the export clear.
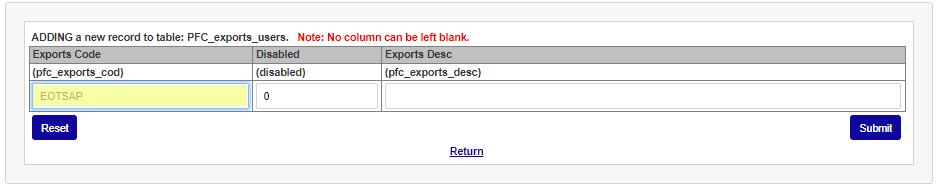
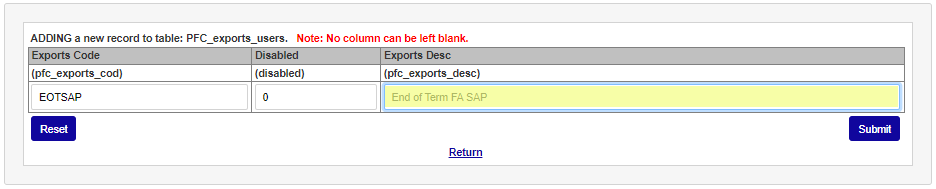
Click Submit to save the entry.
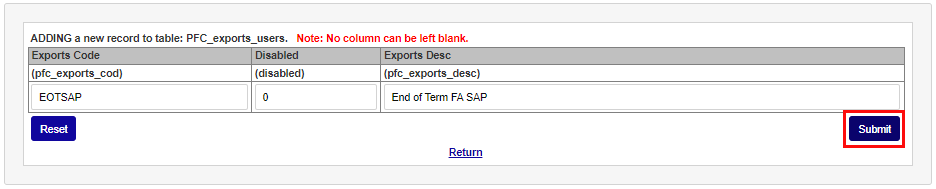
PowerFAIDS - Additional Tables
See PowerFAIDS for more information.
Programs
The Programs table is used to add programs of study to the Jenzabar SONIS system. Once programs are added, they appear all over the SONIS system in various menus, including but not limited to the Education and Programs pages and the Online Application. In addition to the name of the program, the table holds the Program Hours, the Program Type, the PowerFAIDS Program Code for institutions who utilize PowerFAIDS, and the CIP Code for National Student Clearinghouse reporting. Many other fields exist within this table as well, some of which are important to third party integrations.
Detailed information on configuring the Programs table is available here.
Promissory Note Delivery
The PNote Delivery table is used to define the ways that a promissory note may be delivered to and completed by a student and then received by an institution.
To add a delivery method, click Add New Record. Enter the format of the delivery in the PNote Delivery field.
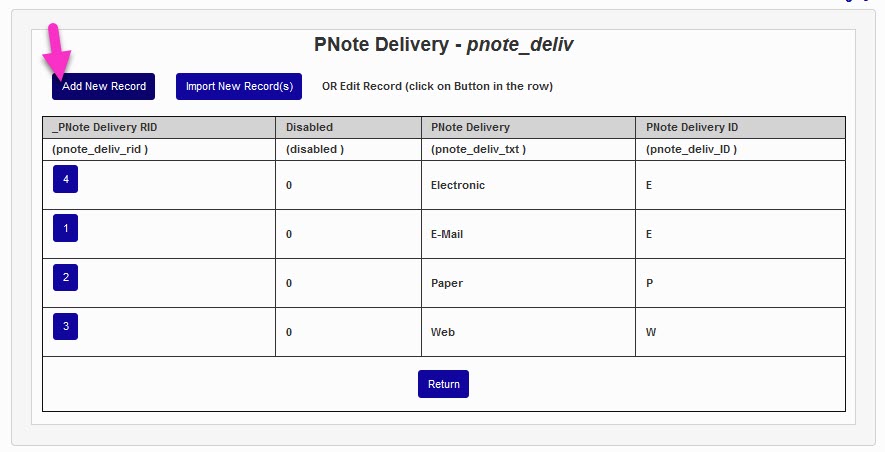
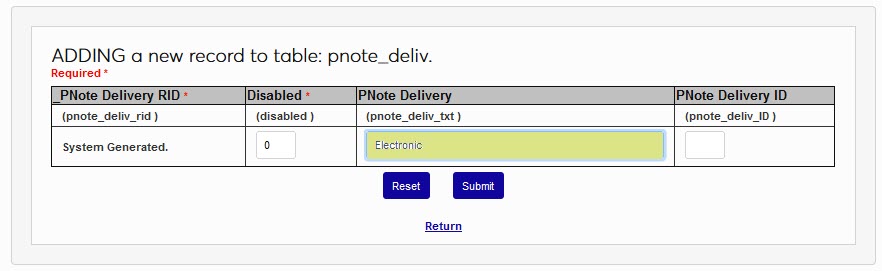
In the PNote Delivery ID field, enter an abbreviation for the promissory note delivery format. Click Submit to save the type and create it.
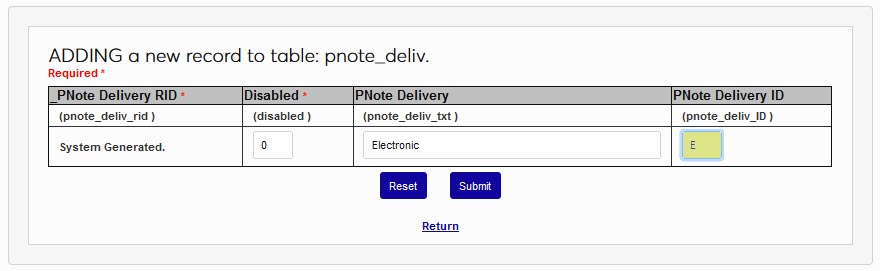
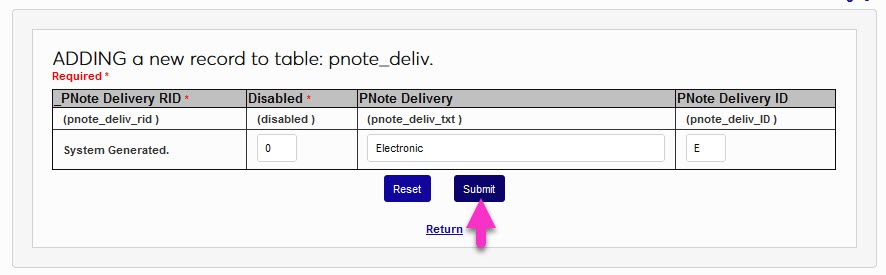
Pronouns
The Biographic page contains an optional Preferred Pronouns field where administrators can enter the pronoun(s) that the user prefers. Users can enter their own pronouns through the Prospect Web Inquiry page or when applying through the SONIS Online Application. By default, these pages include he/him, she/her, and they/them pronouns. To add additional pronouns, the Pronouns table is used.
Once the Pronouns table has been selected, click Add New Record to create a new set of pronouns. On the following page, enter the pronouns in the Pronouns field and enter a whole number for the Sort Order. The sort order determines how the pronouns display in menus. To automatically display all entries alphabetically, leave a 0 for all entries.
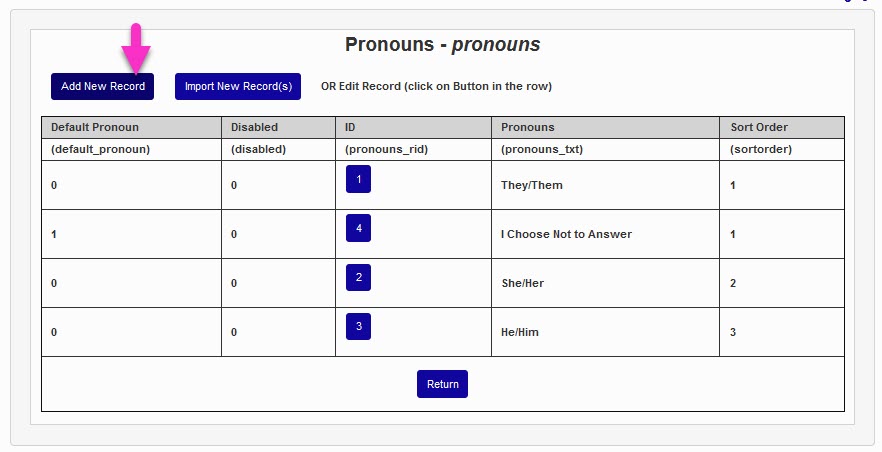
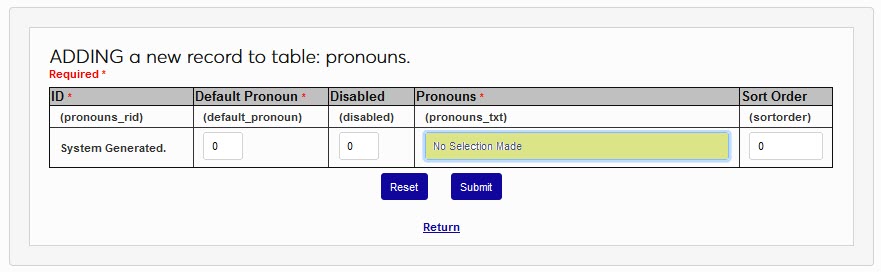
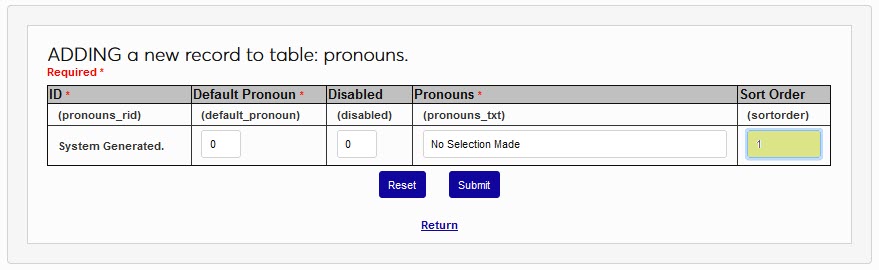
In the Default Pronoun field, enter a 1 to set this pronoun as the one that will be assigned to any user that has not selected a pronoun. Only one Default Pronoun can be set. Click Submit to save the entries and create the pronoun.
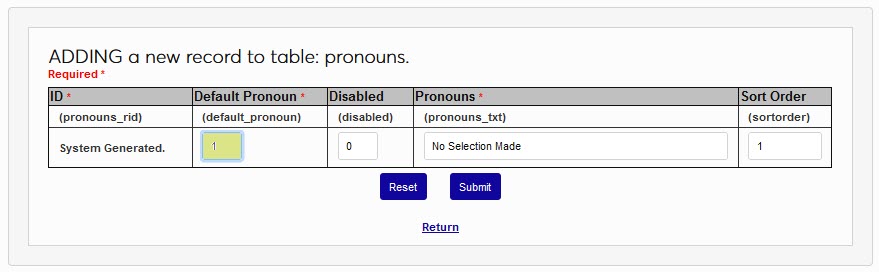
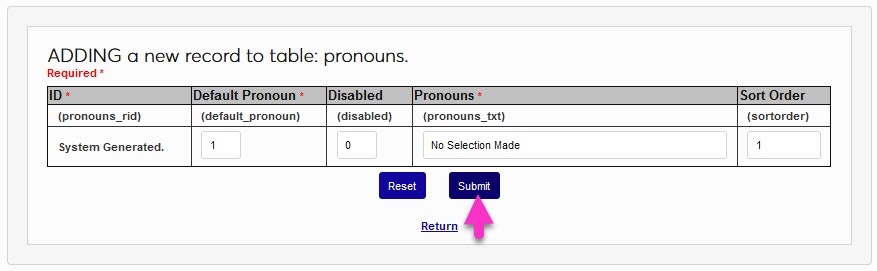
Recommendation
The Recommendation types defined on this table are used throughout SONIS and the the Online Application. anywhere References are requested or recorded.

Recruiter Search Groups
Recruiter Search Groups must first be created to which you later assign individual recruiter. Typically names are given to identify something the recruiters have in common. A 'NameSearch' search is available for recruiters called 'Recruiter Search'. It is added to the recruiter's profile using 'Records/User Security'.
Reminder Types
Reminders are used to notify users of activities that they need to respond to or take action on. The ID is automatically assigned by SONIS when the Reminder Type is created. The Reminder Type name can be up to 30 alphanumeric characters.
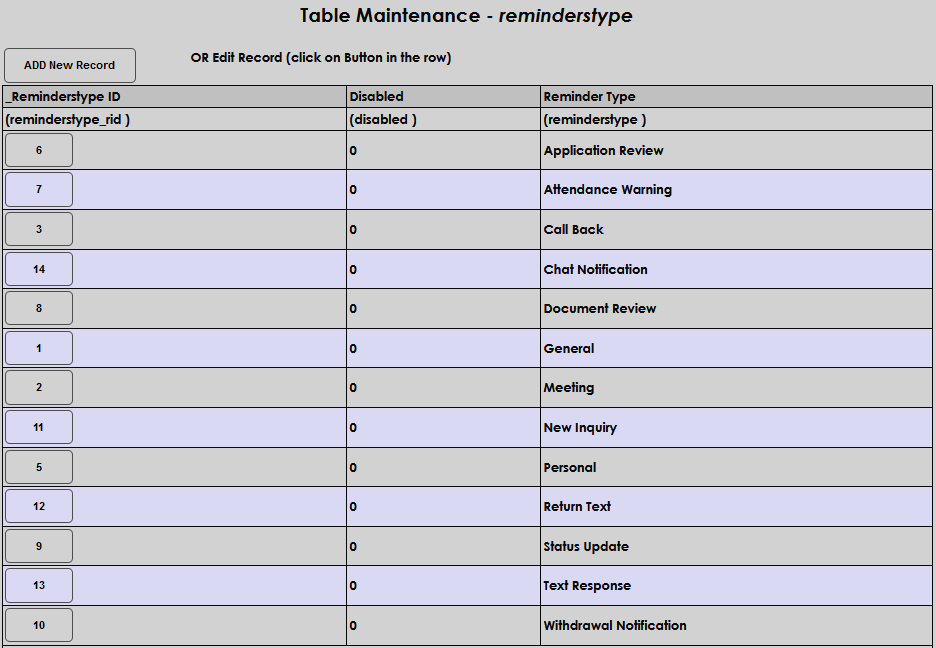
Requirement Type
Each degree audit curriculum is made up of individual requirements. These requirements must also be created in Table Maintenance before the curricula can be set up. Select Requirement Code to begin.
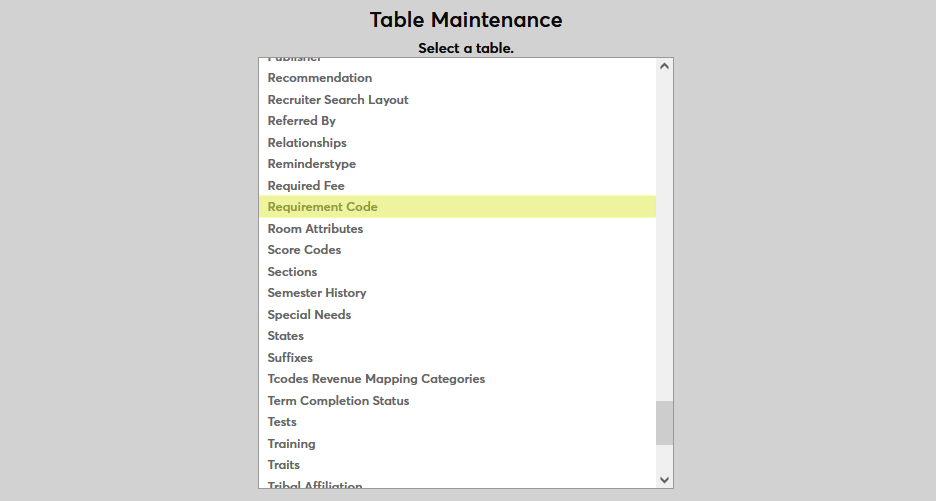
On the following page, enter a Description for the code that will appear for selection in SONIS and the Requirement Code itself, a shortened version that will be used to identify for code behind the scenes. The Description field has a 40-character limit and the Requirement Code field has a 4-character limit.
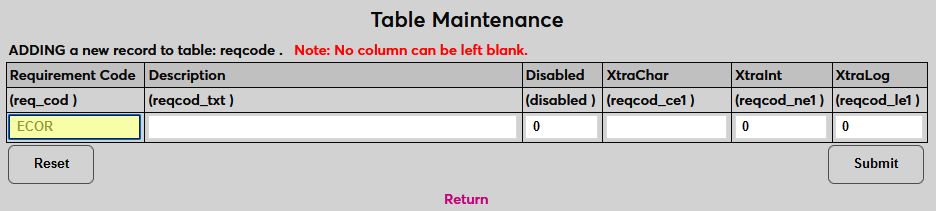
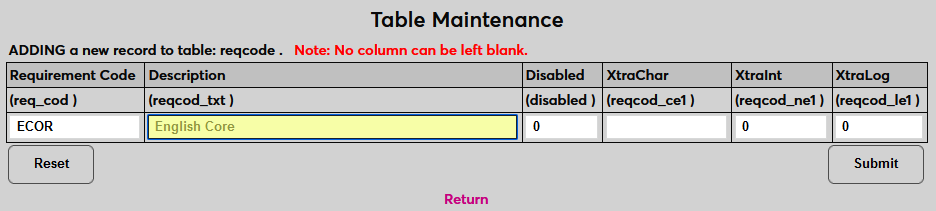
Place a 1 in the Disabled field to disable the curriculum and prevent it from being used anywhere in the system or leave the 0 to keep the code enabled. The XtraChar, Xtraint, and XtraLog fields are extra fields that can be relabeled using the Captions utility and then used to store custom data on this page. These fields cannot be left empty. The XtraChar field accepts alphanumeric characters and can be saved with a space if it's not being used. The Xtraint and XtraLog fields are binary and will accept only a one or a zero.
Once all data has been entered, click Submit to save the changes and create the requirement code.
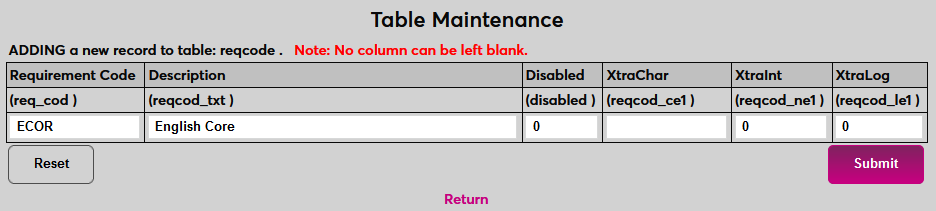
Semester History
The Semester History table stores start and end dates and other data related to semesters. This data can be used elsewhere in the SONIS system, but is primarily used for exporting user data to other software. The semesters created in this table should match the dates in the Application Entry Date, the Term of Interest table, and the Years table and be consistent with each other.
To add a new semester to the table, click Add New Record.
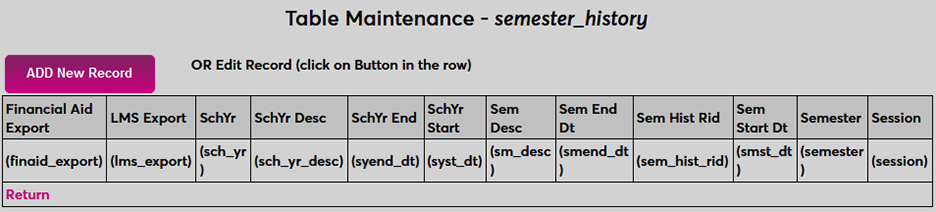
To begin, enter the school year in a six digit format with the four digits of the first school year first followed by the last two digits of the second school year. For example, 202324.
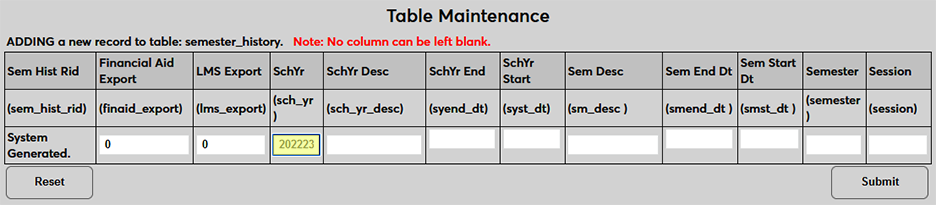
Next, enter the long description for the school year. This should generally just be the two years that the school year encompasses with a dash between them, but this field is for display purposes so it can vary based on institutional preference.
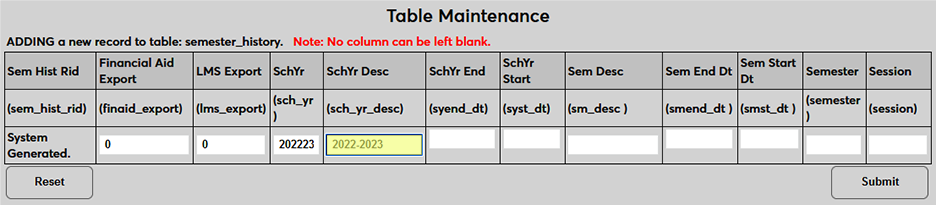
Enter the start and end dates for the school year using the standard regional date format. For example, MM/DD/YYYY for US schools.
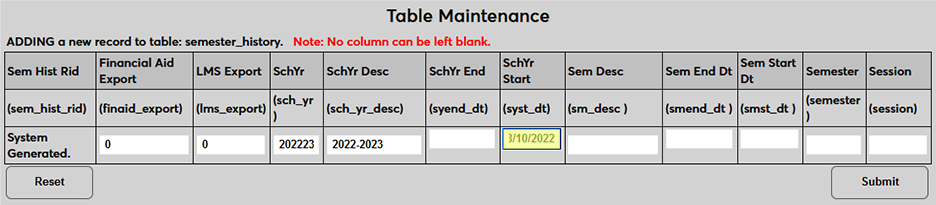
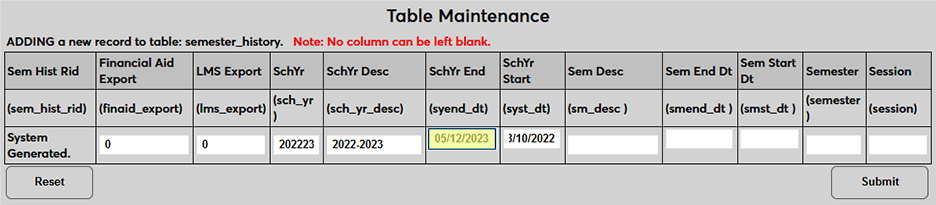
Enter the display name for the semester in the Semester Description field. Again, this is for display purposes and can vary according to institutional preferences.
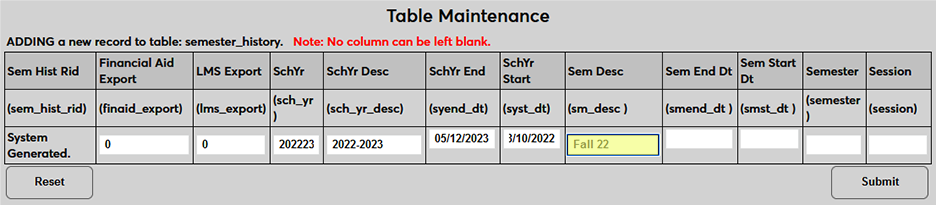
Enter the start and end dates for the semester using the standard regional date format. For example, MM/DD/YYYY for US schools.
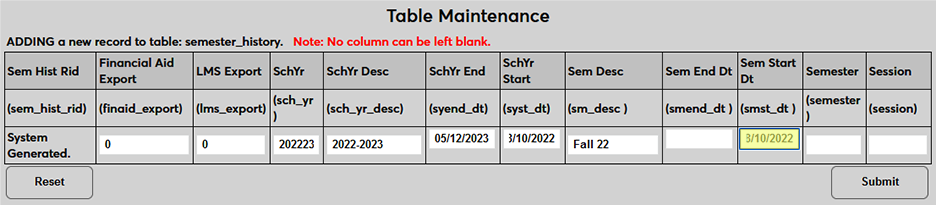
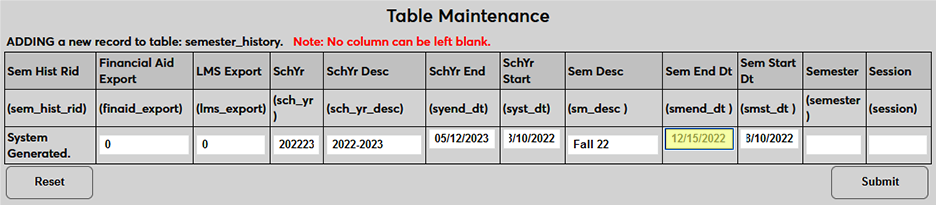
Enter the semester number in the Semester field. For example, if the school year starts in the Fall, the Fall semester would be labeled 1 and the Spring semester would be labeled 2 .
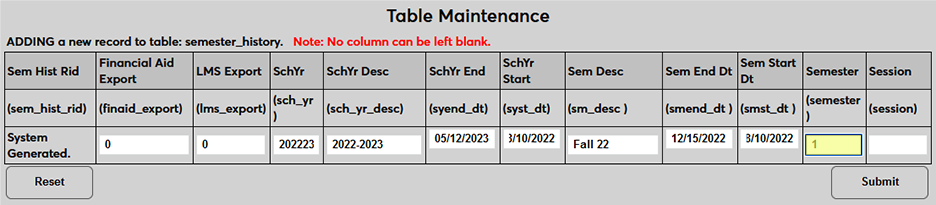
The Session field should contain the applicable session number for the semester. Schools that do not use sessions should place a zero, a blank space, or another placeholder text in this field since no field can be left blank.
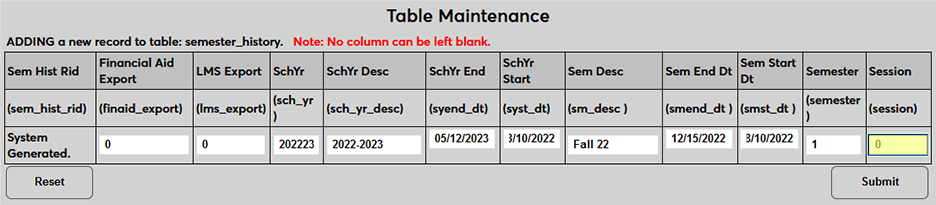
The Financial Aid Export field applies only to Jenzabar Financial Aid at this time, but it may be used for other financial aid exports in the future. Place a 1 in this field to turn the bit on and send this semester to JFA as part of the User Export. Leave a 0 in the field to prevent the semester data from being included in this export.
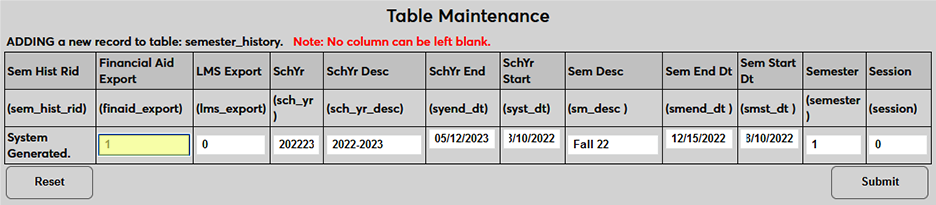
The Financial Aid Export field applies only to Canvas at this time, but it may be used for other financial aid exports in the future. Place a 1 in this field to turn the bit on and send this semester to Canvas as part of the Canvas Export file. Leave a 0 in the field to prevent the semester data from being included in this export.
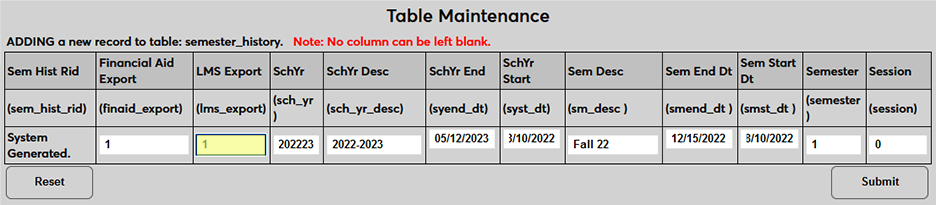
Click Submit to save the semester data. Repeat the process until all needed semesters have been created.

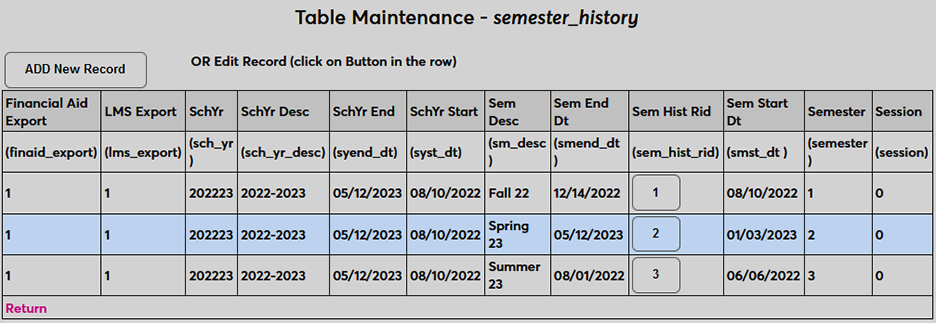
T-codes Revenue Mapping Categories
For-profit schools that administer Title IV funds must demonstrate annually that no more than 90% of the institution's revenue is from Title IV Federal Student Aid program funding. The 90/10 Revenue Report can be used to facilitate the reporting. The member institution is responsible for formatting the resulting data for submission to the requesting agency. Transaction Codes and Adjustment Codes must be correctly setup as required by the requesting agency. Each Transaction Code must have a T-Code Revenue Mapping Category added to indicate whether it is an Agency Payment, Federal Agency Payment, Subsidized Loan, Unsubsidized Loan, PLUS Loan, Pell Grant, SEOG, student payment, and/or cash payment. These payment categories are delivered by default with the table. To add a T-code mapping category, enter the table from the Systems hub and click Add New Record to create a new mapping, or click the T-codes Map Code to edit an existing code.
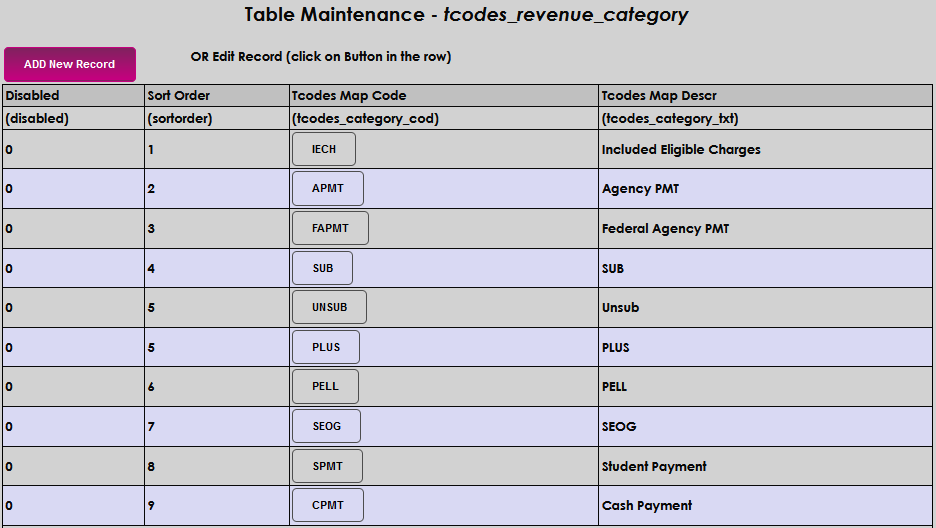
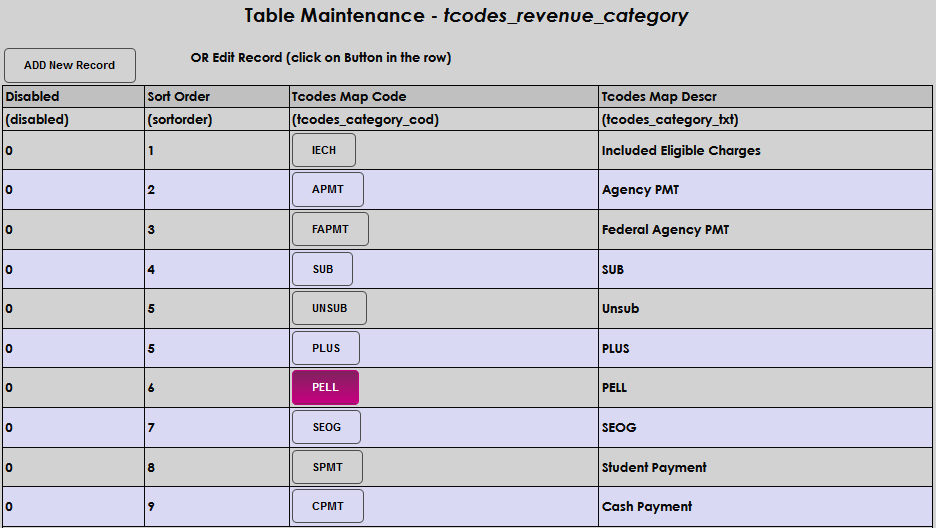
If editing an existing record, the T-codes Map Code can not be edited. If this code does not match the code name used elsewhere in SONIS or does not apply to institutional processes, simply place a 1 in the Disabled field to remove it from use in other SONIS areas.

The Sort Order and T-codes Mapping Description fields can be edited by clicking in them and updating the existing information. Sort Order determines the order of the columns in the 90/10 Revenue report from left to right. The T-codes Mapping Description displays throughout SONIS and on associated reports. The description may be up to 100 alphanumeric characters. Click Submit to save the edits.


When adding a new record, enter up to ten alphanumeric characters that will represent the T-codes Map Code . Enter a Sort Order . Sort Order determines the order the codes are displayed in menus.


The T-codes Mapping Description displays throughout Jenzabar SONIS and on associated reports. The description may be up to 100 alphanumeric characters. Click Submit to save the entries.


Training Table
To add training types, navigate to Table Maintenance in the Systems hub and select the Training table.
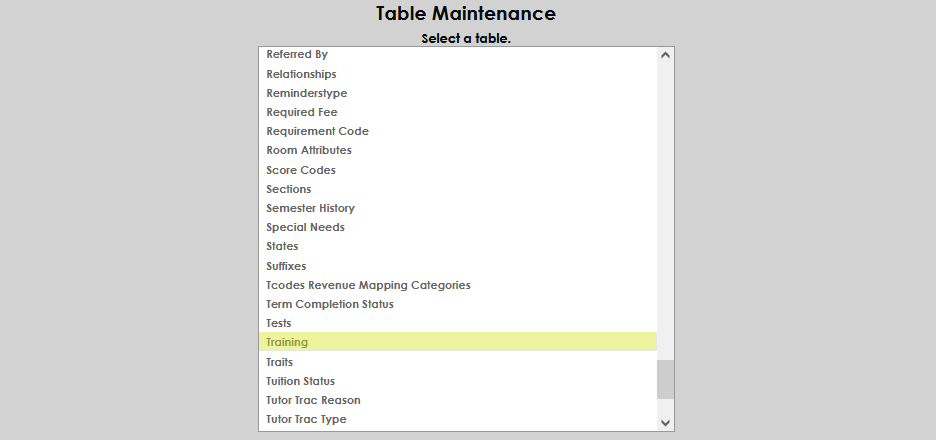
Select Add New Record.
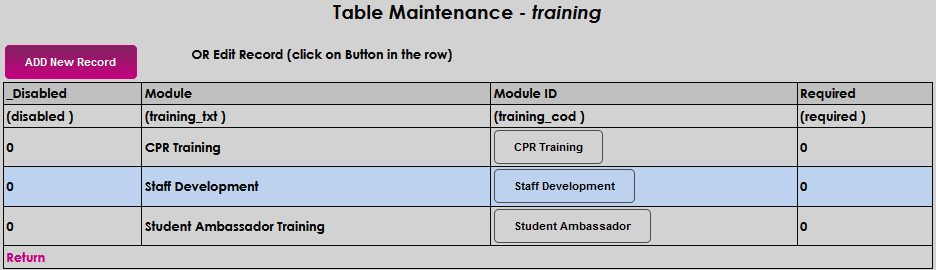
In the Module ID field, enter the name of the training.

In the Module field, enter a more detailed description of the training. The Module ID name can be repeated, if appropriate.

In the Required field, enter a 0 if the training is not required or a 1 if the training is required for those who are assigned it.

Select Submit to save the entries.

Training Table Editing
To edit an existing Training Type, click on the Module ID name of the training.
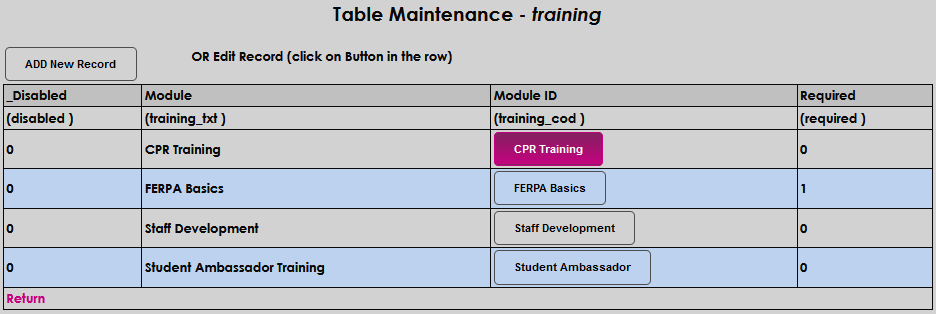
Make any desired edits. In this example, the Module name has been edited. Click Submit to save the changes.
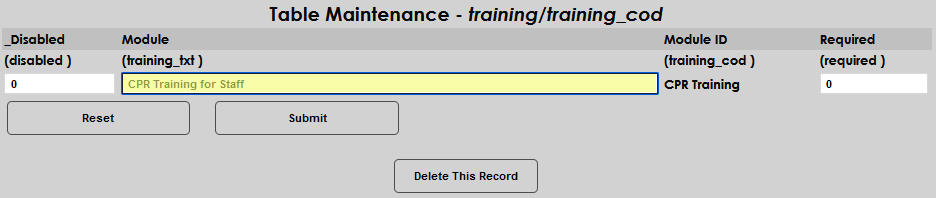
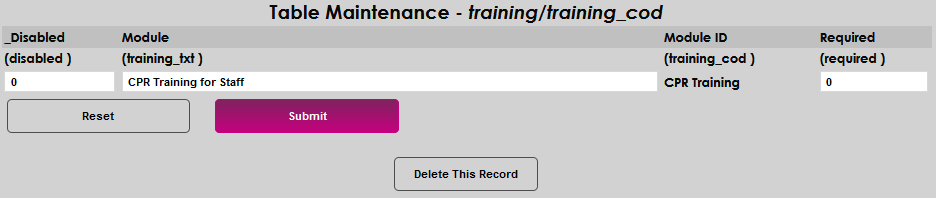
Removing a Training Type
If a Training Type has never been recorded for a user, and is no longer needed, it can be deleted by selecting the Module ID and then clicking Delete.
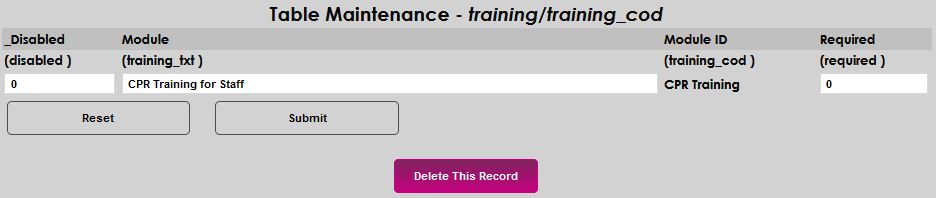
If a Training Type has been recorded for a user, and is no longer needed, it can be Disabled instead of deleted. Enter a 1 in the Disabled field and click Submit to save the change.


The disabled training will display on the Training table with a 1 indicating that it is disabled, and will no longer display for users to select.
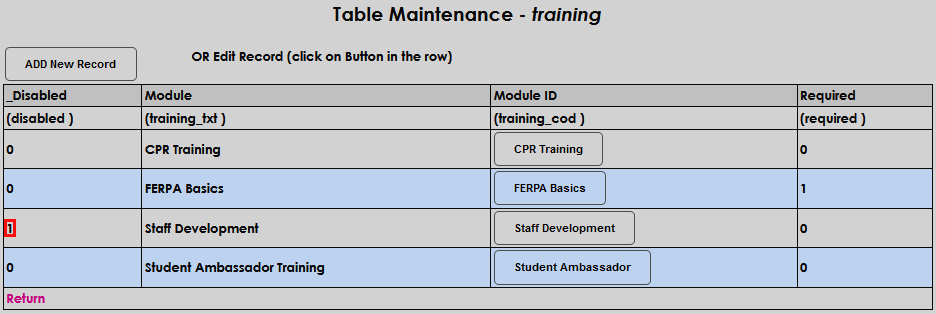

TutorTrac Reason
The Tutor Trac Reason table is used by both the Users page TutorTrac and the Systems hub utility TutorTrac Import. The reason can be categorized in any way desired by the institution. Only one reason can be selected on the TutorTrac page or used during the TutorTrac Import.
Enter a four-digit alphanumeric code that represents the reason in the TutorTrac Reason ID field.

Enter up to 40 alphanumeric characters and/or digits in the Tutor Trac Reason field. This will become the name of the reason and will display in the dropdown menu for manual entry of a tutoring record. Click Submit to save the entry.


TutorTrac Type
The Tutor Trac Type table is used by both the Records page TutorTrac and the Systems menu utility TutorTrac Import. The type can be categorized in any way desired by the institution. In this article two categorization types are shown: type of tutor and subject of tutoring. Only one type can be selected on the TutorTrac Users page or used during the TutorTrac Import.
The Tutor Trac Type ID is system generated and will display numerically on the table page. Clicking it opens the type of editing.
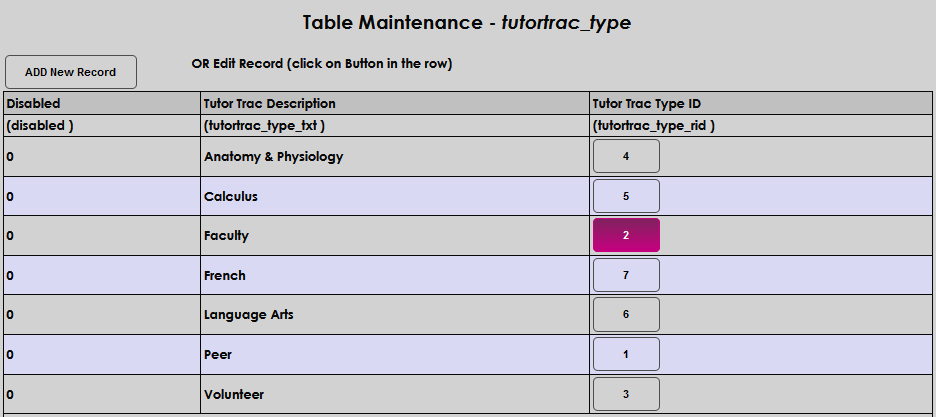
Enter the type of TutorTrac categorization desired in the Tutor Trac Description field. This field accepts up to 40 alphanumeric characters and/or symbols. Click Submit to save the entry.


When Employed
The When Employed table is used to assist with Career Services record-keeping and reporting. The created values are set on the Users hub Employment page and can be reviewed in the Graduate Placement and/or Graduate Placement by Grad Year report(s). There are four prepopulated values: After Graduation, Prior to Enrollment, Unknown, While Enrolled. To include any of these values in the graduate placement reports, set the Inc in Placement Rpt field to 1.